Learn how to make Simple String Art for Beginners with this easy craft tutorial for kids! Use the free patterns to turn some string and nails into a fun decorative design with just a few steps.

Cute Craft Alert: Easy String Art for Kids!
If you've never made string art before, you are in for a treat! String Art is a hammer-and-nail, make-some-noise, wind-it-up-with-string type of craft. It doesn't get much better than that!
String art is made with colored thread that’s wound between nails in a design to make geometric patterns. If you like the technique from this tutorial, you can make almost any design into string art!
Wouldn't it be so much fun to use this DIY string art project in an art class, for a birthday party, or to make as a gift? This may be the first of many projects you will want to create after seeing just how easy this is.
If you'd like to watch this tutorial step by step, check out the video on Youtube.

Craft Supplies
You don't need much to make thread art designs! You should be able to find them all at local craft stores.
- Wood Board- a hard surface for a background, plain wood, stained or painted a color of choice
- Nails- crafting nails about 1 inch long with a small head to hold the sting
- String- use your favorite string, such as Embroidery Floss or Crochet Thread. It needs to be heavier than sewing thread, but not heavy like yarn. I've seen people use regular String for an ivory colored design.
- String Art Patterns- or print picture online to the size desired
- Picture Hanging Hardware- to display your final artwork!
- Tools- Hammer, Needle Nose Pliers (optional)
- Paint or stain- (optional)
- Cardstock paper (optional)
Free Printable Patterns
While you don't need string art kits to make this craft fun, some help is always nice! I made some Simple String Art Patterns just for you - just download and print to use.
As you'll see, I created the two downloadable patterns to be easy for beginners. These patterns can be completed in a shorter amount of time, which is great for kids as they learn a new skill.
Once kids have done this project once, try creating your own pattern! Use what you've learned to make a design that is more difficult, or more specific to the child's interests.
Print off the paper pattern in the size you need for your piece of wood. The WTN patterns will print to fit a 5x7 inch piece of wood.

How to Create Your Own Pattern
If you are looking for different string art ideas, you can draw your own pattern if you'd like. Making anything from an intricate design to a simple shape can be fun! Create your simple outlines by drawing them on a piece of paper, just be sure to draw it to match the size of your board.
Or if you'd prefer, go online and find a design (or letters, like for your name or a saying). The design should be as symbolic as possible so that it is easy to make the design as string art. Print it in the size you need for your piece of wood.
Draw dots along the edge(s) of your pattern that are equal distance apart, about ¼ to ⅜ inch apart. There should be a dot at each corner point of the pattern where the design changes direction. Add this dot so the thread will form a corner once looped on the nail.

Steps to Make String Art
Prepare the board
The base of the project is a wood board of some sort to create your hard surface. Cut a piece from a board and sand it smooth, or use a finished piece of wood purchased from a craft store.
I purchased 5 x 7" wooden plaques and just left them the natural wood. You can use any size wood base you would like but I wouldn’t suggest going much smaller than this.
Hammer in the nails
First, before touching the any nails...put a towel under the wooden board to protect the countertop or table and to muffle noise. Believe me, this makes a huge difference!
Tape the pattern to the board. Hammer the wire nails into the board through the pattern. Hammer them firmly in place, part way into the board, all about the same level. Check out the tips below to make the process easier, since the nails are small and hard to hold with your fingers.
After hammering all the nails into the wood, gently tear the pattern off the board.
Add the string
You will use string of your choice to make this easy project. I would recommend starting with embroidery thread, choosing different colors to fill out your design how you'd like.
Tie the end of the string you are using to a nail on the edge of the design. Twist the knot to the inside so it won’t be noticeable once the design is finished.

Outline the design first
The string is going to outline the design first.
Loop the string around each nail traveling all the way around the design. Guide the string around the outside the nail, then loop around the nail towards the inside of the design. This will make create a solid line border around the design.
If you have a design with a shape in the center that you do not want to fill with string, outline that shape as well. For example, if you are doing the letter “O” and want a hole in the center of the letter.
Fill in the design with string
Now we are getting to the best part! Loop the string back and forth across the design in straight lines from nail to nail. Fill the empty space of the design with crisscrossing string until you are satisfied with how you have filled in the design.
Be sure to leave any interior shapes in your pattern that are to be open without string crossing over it.
Kids can loop the string randomly, or choose a more intentional pattern. This is your choice of course, it's just a fun way to express yourself however you'd like!
For example, in the Welcome to Nana's house pattern there is a heart heart shape in the center of the house design. One way to decorate this pattern is to guide the string from the outside border the house into the heart. This would make it look as if the string radiates out of the heart to the outside border of the house.
You can tie off your string at any time and change colors or when you are at the end of your string and need to start a new piece of string. Tie these knots to the inside of the design so they aren’t as visible.
Tie off the string when done
For the final result, tie off your string when you are satisfied with your design.
Clip off the end of the string (but don’t clip it too short or the knot will come undone!). Tuck the cut ends into the string design so they are hidden.
Once you start with this craft, you may not want to quit! And I bet you'll come up with some amazing designs. I’ve seen city skylines, a name or word, a geometric pattern, and pictures of all sorts made into string art.
Craft Tips
- Add Picture Hanging Hardware- it is helpful to put your picture hanging hardware on the board before you do this project.
- Use a Soft Surface- A hard wooden surface is perfect for older kids who feel comfortable hammering a bit. However for younger children you could consider something like a cork board so it's a bit easier to get the nails into the surface. I haven't tried that method, but feel free to give it a try if you feel more comfortable with it.
- Holding the Nails- Use a needle nose pliers to hold the small nails as you hammer them in where you have drawn dots. -OR- Press the small nails by hand through the pattern placed over a piece of cardstock. This will hold the nails in place as you hammer. Place the pattern and cardstock on the piece of wood and hammer each nail into the board.
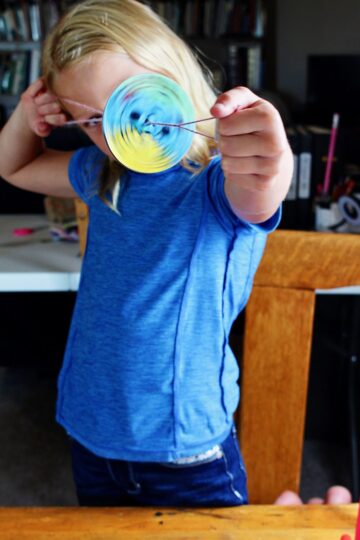
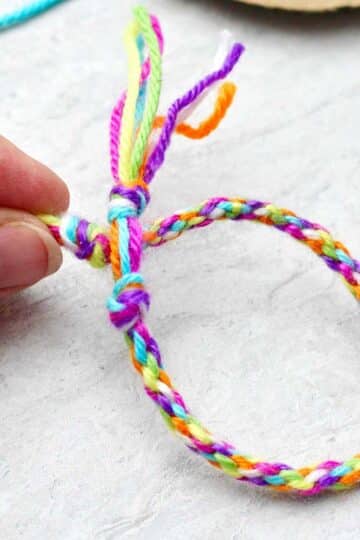
- Extra String Use- Find yourself with extra leftover string? Try some other fun string crafts, like this Round Friendship Bracelet, or this Chevron Friendship Bracelet!
Craft Variations
- Decorate the Wood- The wood base can remain as raw wood, be stained or painted the color of choice for a cleaner look. Of course, if you paint or stain it there needs to be time for it to dry before moving on to the next step.
- Make DIY String Art Kits- Why not create homemade string art craft kits for someone else to enjoy too? Check out the supplies list below for all the different materials needed!
FAQ
In order to make string art, you'll need a wooden board, nails and a hammer, and of course, colorful string! Check out the free printable patterns to create the design for some simple string art.
You can use your favorite string, such as embroidery floss or crochet thread. It needs to be heavier than sewing thread, but not heavy like yarn. I've seen people use regular string for an ivory colored design.
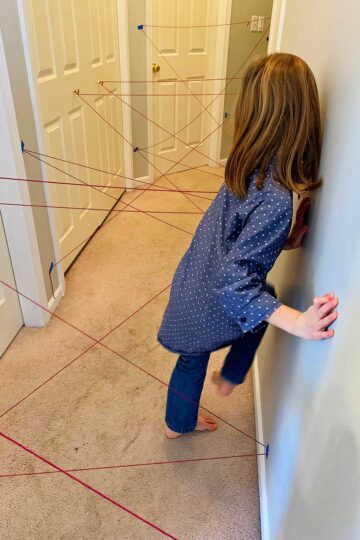
More Easy String Crafts and Activities for Kids!
Want to keep on crafting with the supplies you have on hand? Check out these other string crafts and activities for kids, from around the blog!
Enjoy!
If you try this craft, let me know! Leave a comment, rate it, and tag a photo with #WelcometoNanas wherever you post.
More Crafts!
Love getting crafts straight to your inbox? Sign up to receive a weekly email and get a free gift!

More from Welcome To Nana's

Simple String Art for Beginners
Equipment
- Hammer
- Cardstock paper (optional)
- Needle-nose pliers (optional)
Items Required
- WTN String Art Patterns
- 1 5 x 7" Wooden Plaque for background- plain wood, stained or painted a color of choice
- Paint or stain- (optional)
- String of choice such as Embroidery Floss or Crochet Thread
- Nails- crafting nails about 1 inch long with a small head to hold the sting
Instructions
- Prepare the board- it can remain as raw wood, be stained or painted the color of choice
- Download one of the designs that are available on WTN, print it in the size you need for your piece of wood. WTN String Art Patterns link
- Put a towel under the board to protect the countertop or table and to muffle noise.
- Hammer the nails into the board through the pattern.
- Gently tear the pattern off the board.
- The string is going to outline the design first. Tie the end of the string you are using to a nail on the edge of the design. Place the knot to the inside of the design so it won’t be noticeable once the design is made.
- Loop the string around each nail traveling all the way around the design. If you have a design with a shape in the center that you do not want to fill with string, outline that shape as well.
- Randomly loop the string back and forth across the design, looping around nails, back and forth filling the design with crisscrossing string until you are satisfied with how you have filled in the design.
- Tie off your string when you are satisfied with your design.
Video
This post was originally published in November 2021 and has been updated to add more relevant and detailed content


Kate Little says
How do I download the pattern? I do not see a link
Shelly says
Oh my goodness! I am so sorry- the link is gone to the pattern and you did not have it when you needed it. I am repairing those links right now. String art is so fun- hoping you drew your own patterns and enjoyed the process!!
Laura says
This was a fun craft, I'd definitely do it again!