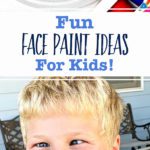
These Easy Face Paint Ideas for Kids are the perfect activity for parties, and a fun way to complete a Halloween costume! Follow the simple steps to create the ideas provided, then learn how to create your own designs as well!
Jump to:
- You'll love these Simple, Easy Face Paint Ideas for Kids!
- Face Painting Supplies
- How to Face Paint Small Designs
- How to Face Paint Large Designs
- Face Painting Tips
- Easy Face Paint Ideas and Variations
- How to remove Face Paint
- Face Painting FAQs
- More Fun Halloween Crafts and Activities
- Enjoy!
- More from Welcome To Nana's
- Quick and Easy Face Painting Ideas for Kids
You'll love these Simple, Easy Face Paint Ideas for Kids!
These quick and easy face painting ideas are just what you need to paint all kinds of fun pictures on your favorite kid’s faces this Halloween, Christmas, birthday party, or for any occasion! The free attached templates are small designs and patterns to get you started, but don't stop there - use the step-by-step instructions to paint your own ideas too!
I’ve done this activity for a “Welcome Back” night for our children’s program, as a money raiser for my club at school, for birthday parties, and to complete some of the best Halloween costumes. Face painting for kids (and adults) is always a popular choice as an activity! I promise that you will be the hit of the party or a hit with the kids when you pull out your face paint.


Easy face painting tattoos can be completed in just a few minutes so they are perfect as an activity at a party, or just to add a fun touch to a Halloween costume. In this post you'll find inspiration for face painting pictures like pumpkins, unicorns, spiders, ice cream, fish, flowers, and many more!
Face Painting Supplies
You don't need much to get started with face painting! Here are some essentials to get you going:
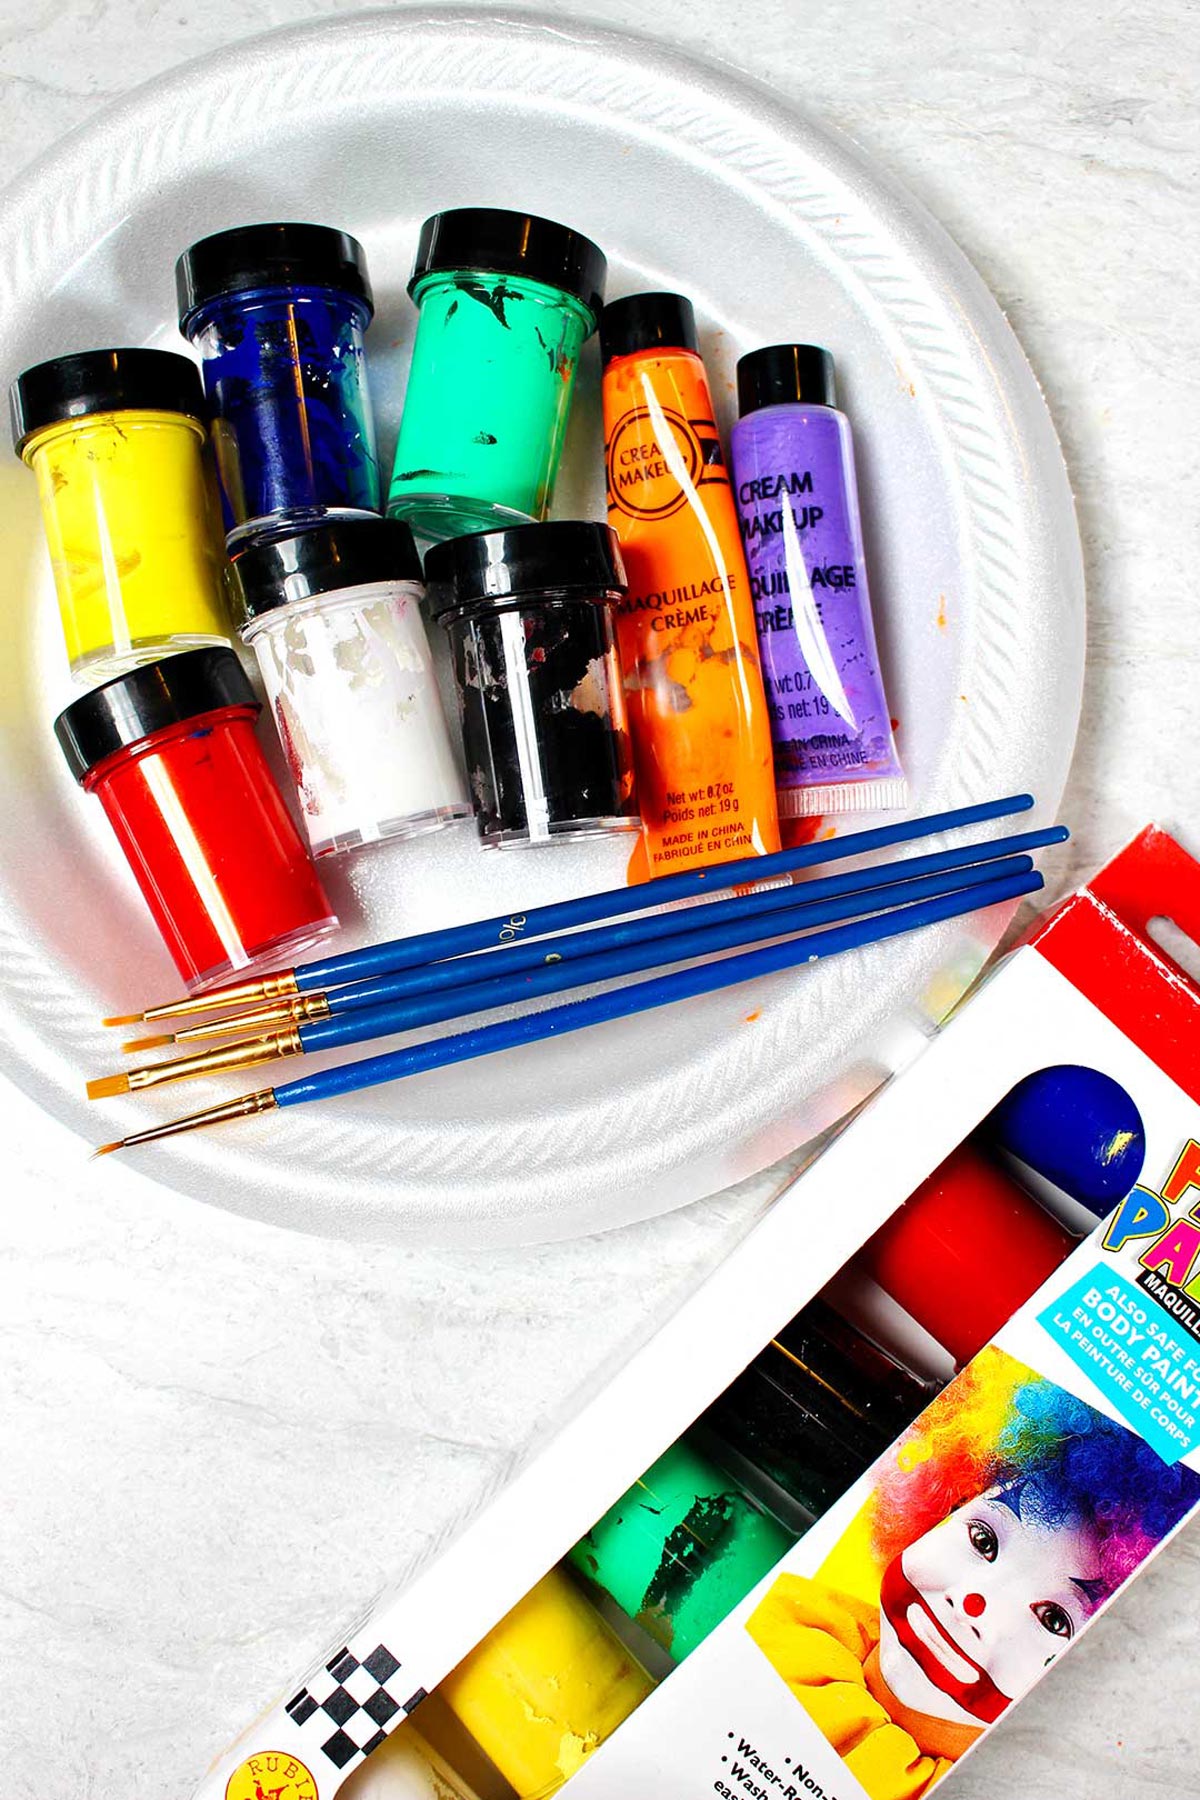
- Face Paint (6 Primary Color Set): Of course you will need some good face paint! I like this set, plenty of bright colors for a simple design.
- Face Paint (6 Secondary Color Set) (optional): If you want a few more colors for your palette, these secondary colors are a good option to add as well. Having a few extra colors on hand can be helpful to have you ready to create any popular design.
- Paint Brush Set: This simple set of paint brushes gives you lots of options for shape and design. Use the flat brush for large surface areas, for example if you are painting the whole face. Use smaller, fine pointed brushes for the little details in your cute design, like fine black lines, little white stars, or small dots of color.
- Kids Haircut Cape (optional): A cape is great for protecting clothes while you paint, totally optional!
- Glitter for the Face and Hair (optional): If you want to add a little extra fun, you could add some accents of glitter, or...
- Gems Stickers (optional): I have found these are especially a favorite for the little girls designs, like extra accents on a butterfly or unicorn! They are a little addition that have a huge impact.
What kind of face paint is best for kids?
The free tattoo designs I created can be made from a simple set of face paints, like you would purchase at a craft store. My set has six essential colors - red, yellow, green, blue, white, and black.
Technically you can mix these colors to get any other colors you need, but I purchased an additional set of colored face paint to make the painting process easier and faster. That way you are more likely to have the child's favourite colours when they choose their design.
Some children have skin that is sensitive to face paint, so you will want to make sure you check with the parents before painting. If they do have a sensitivity, try a small face tattoo like the designs I've provided, rather than a large face painting that covers the entire face. This allows you to stay away from their eyes, nose and mouth.
The paints linked in the supply list are described as safe for use on skin and body and are washable with soap and water. I've heard great things about Snazaroo face paints as well. There are lots of kinds out there though, so search for the best face paint brands and choose one that you think would fit your preferences!
How to Face Paint Small Designs
Whether you are a painting expert or a beginner face painter just starting out, don't worry! The key here is to not get too hung up on details (sorry my type 1 friends, this is challenging!).
You will get better and better at this as you practice. If the line is a bit wobbly or not exactly on the edge of the design, keep going.
Usually trying to erase the line by rubbing it or going over it again and again just muddies the picture and is frustrating. I’ve found that the overall look in the end is usually fine if left alone.
1. Choose the Perfect Design.
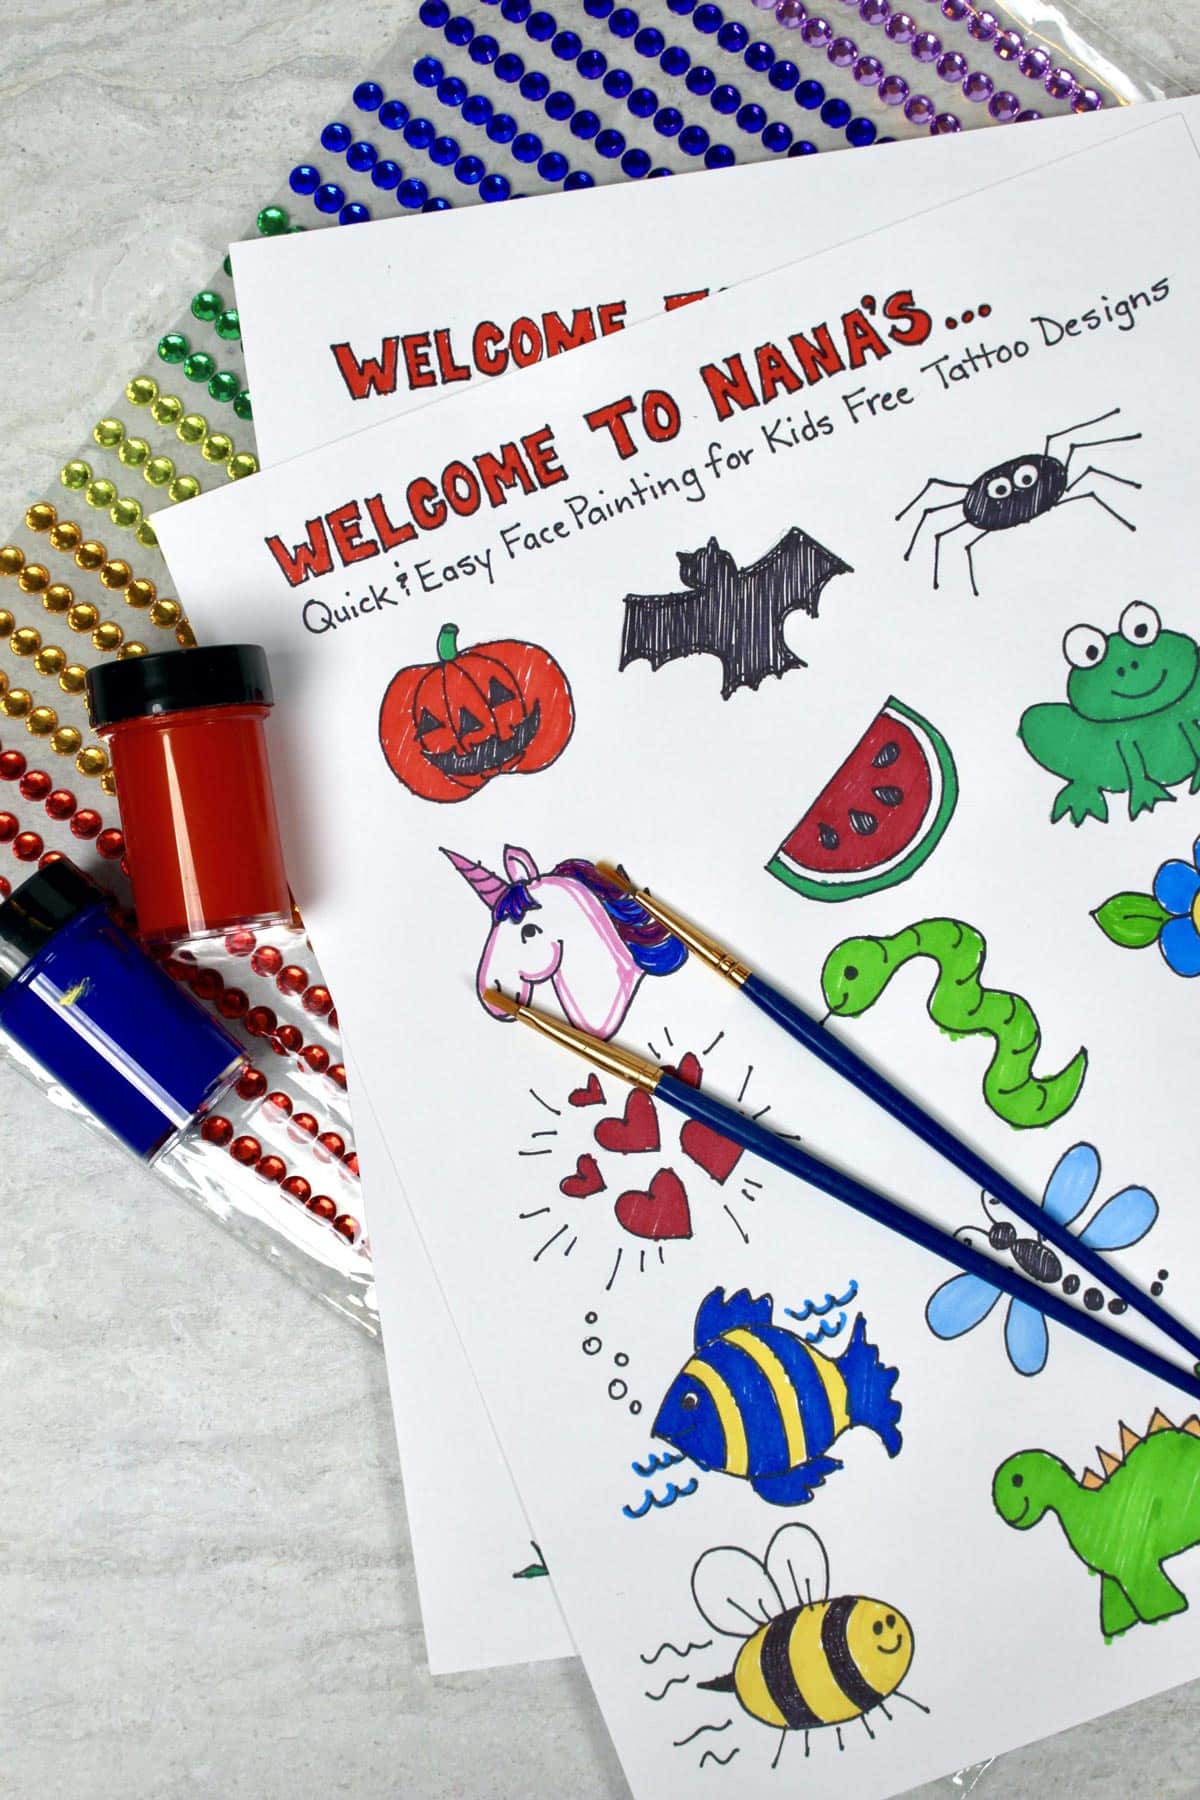
If you want some great ideas to start with, I created a sheet of easy drawings that include some of the most popular face paint ideas from requests from kids I've worked. This page will get you started - simply click the link here to get the download.
These ideas are small face painting patterns that fit on a cheek that you can print off and paint quickly. This is a great way to learn the process and decide what techniques you would like to learn to do next in face painting.
The small shapes are also great for young children, who have a harder time sitting still for a long time 🙂
Once you've got the method down, you can try branching out by coming up with your own ideas, painting larger designs, or taking requests!
2. Paint the Primary Shape.
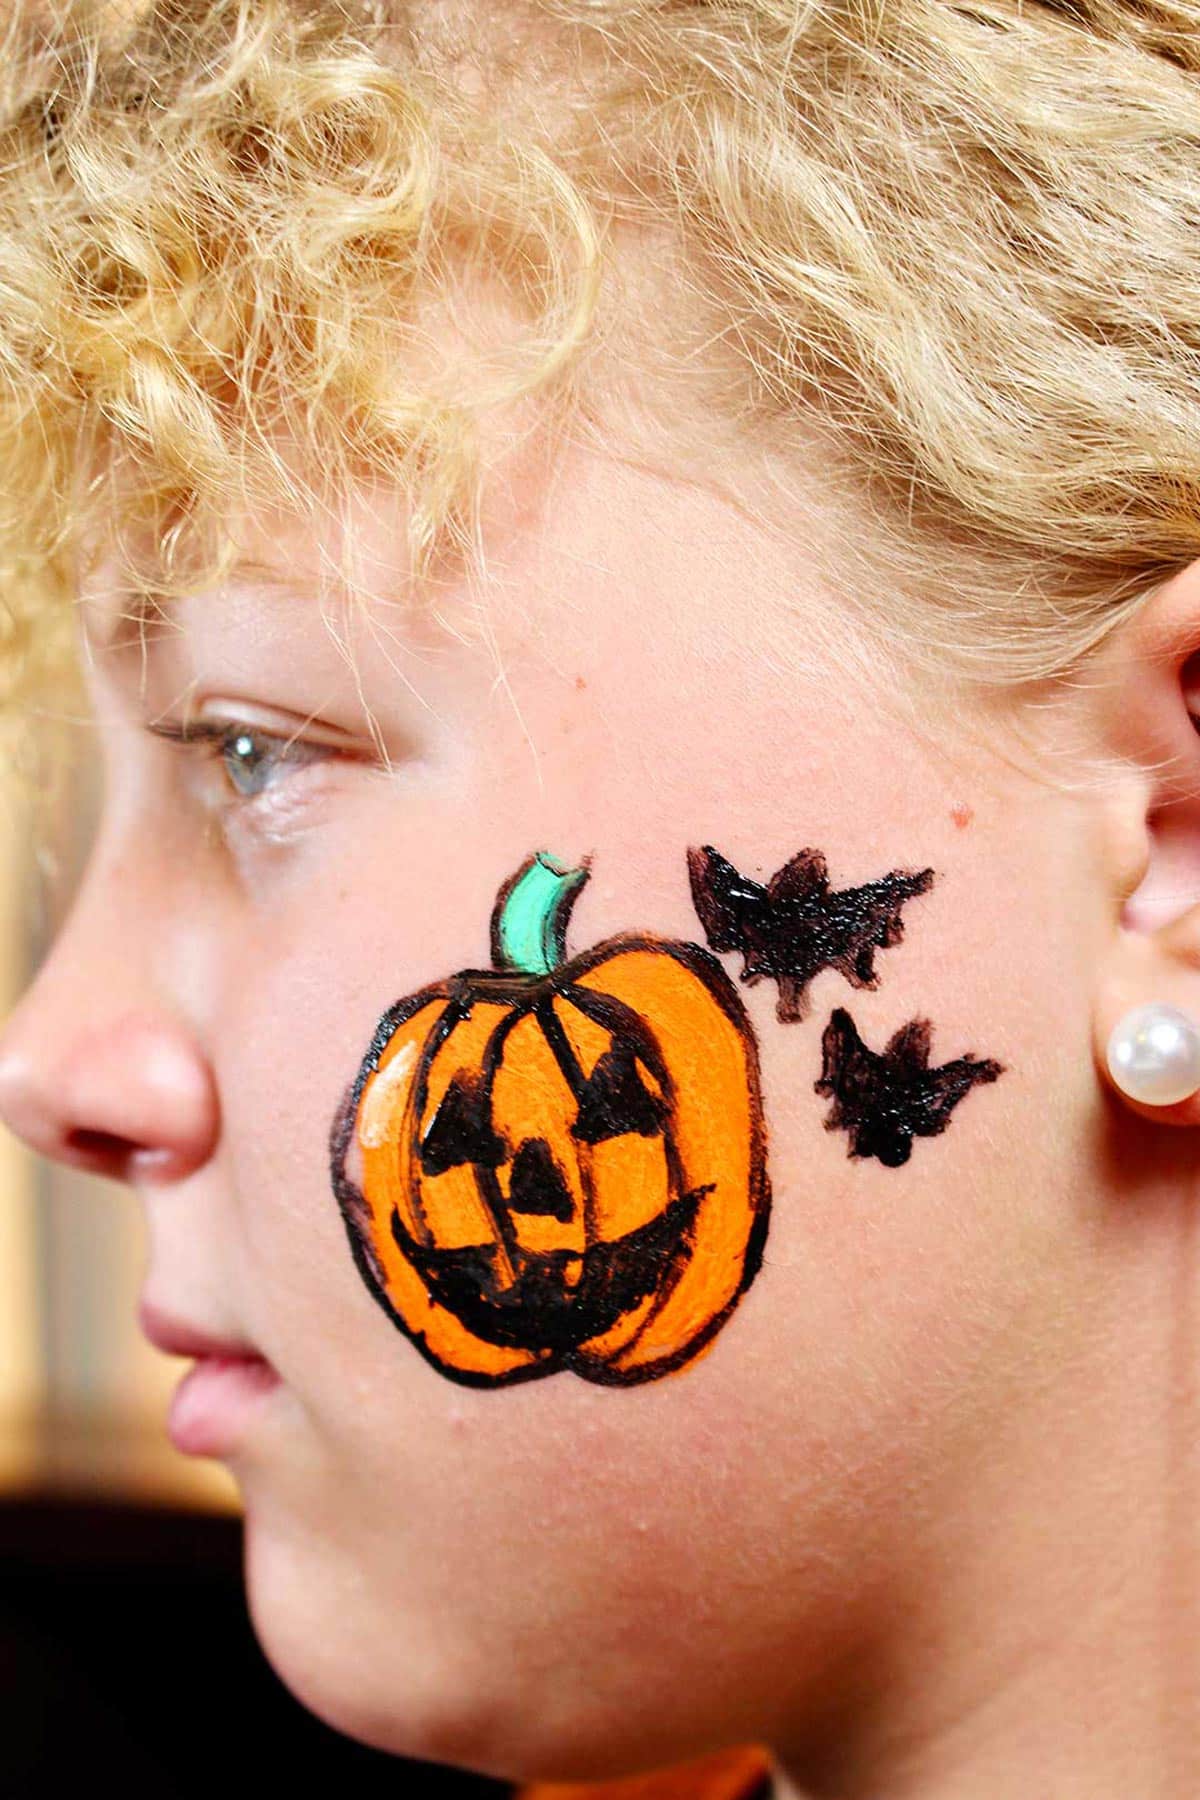
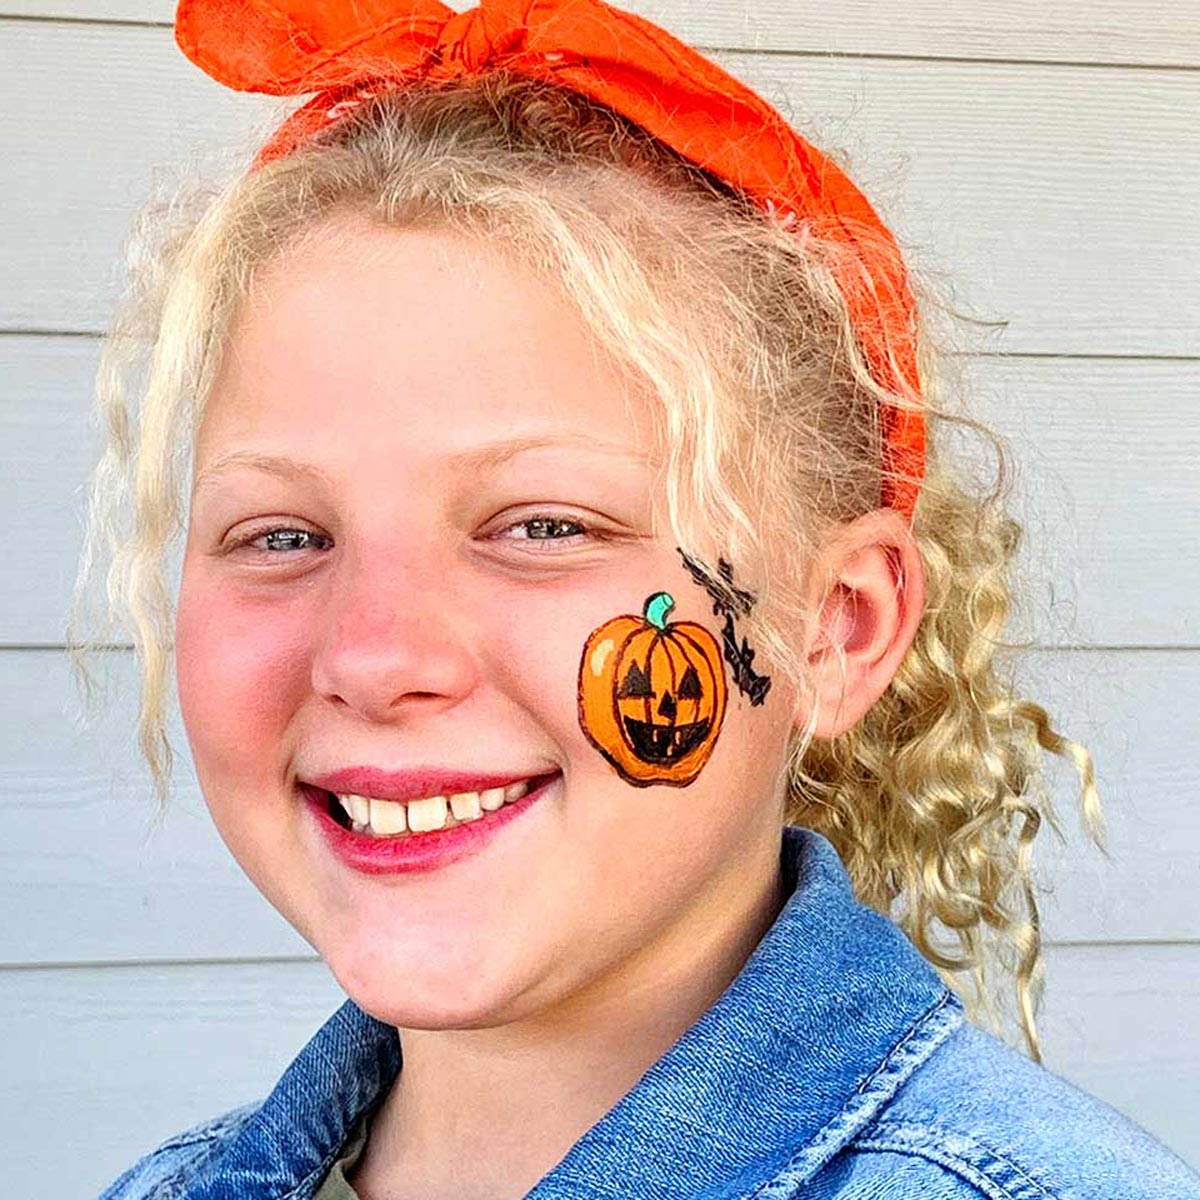
Study the easy face paint tattoo picture you are wanting to copy. Seek to find the main shape of the design. You want to keep the design to about the size of a golf ball or half dollar, depending on the age of the child.
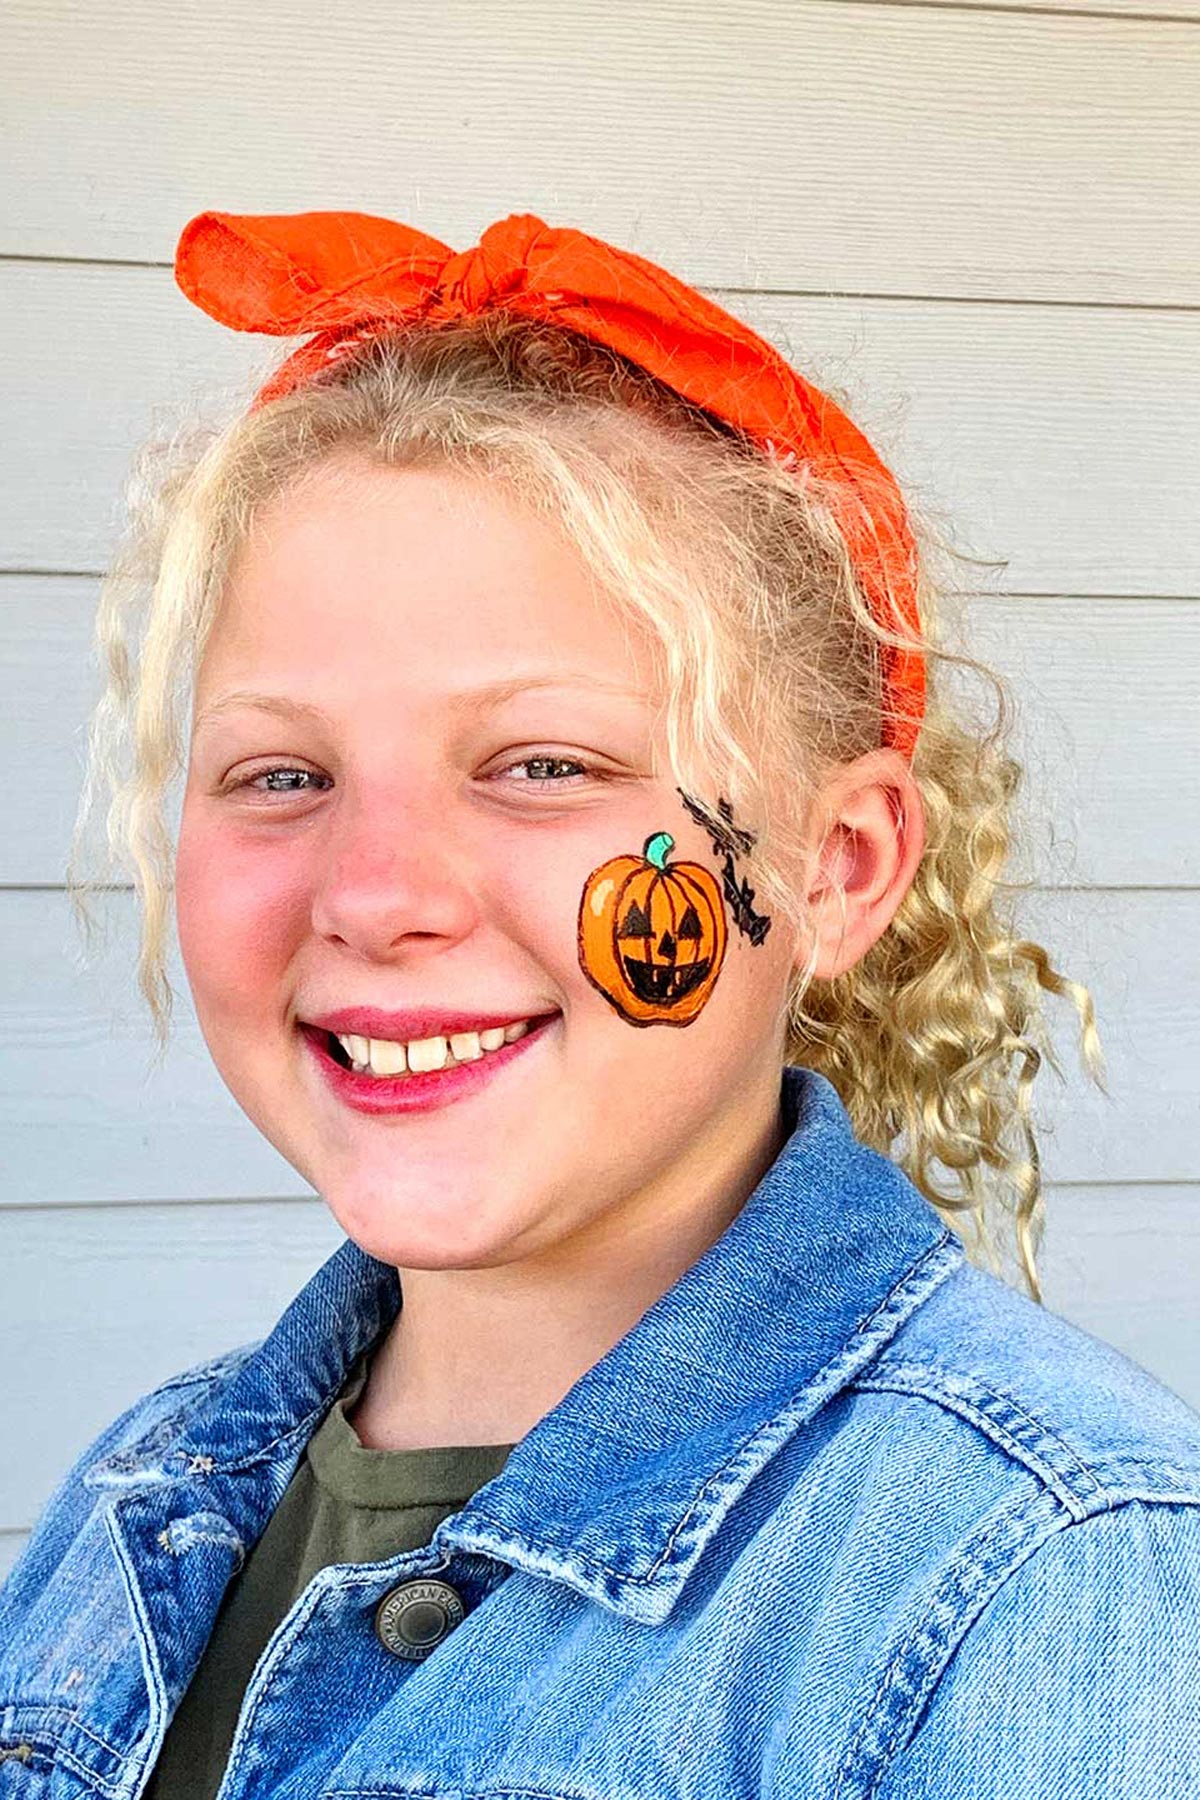
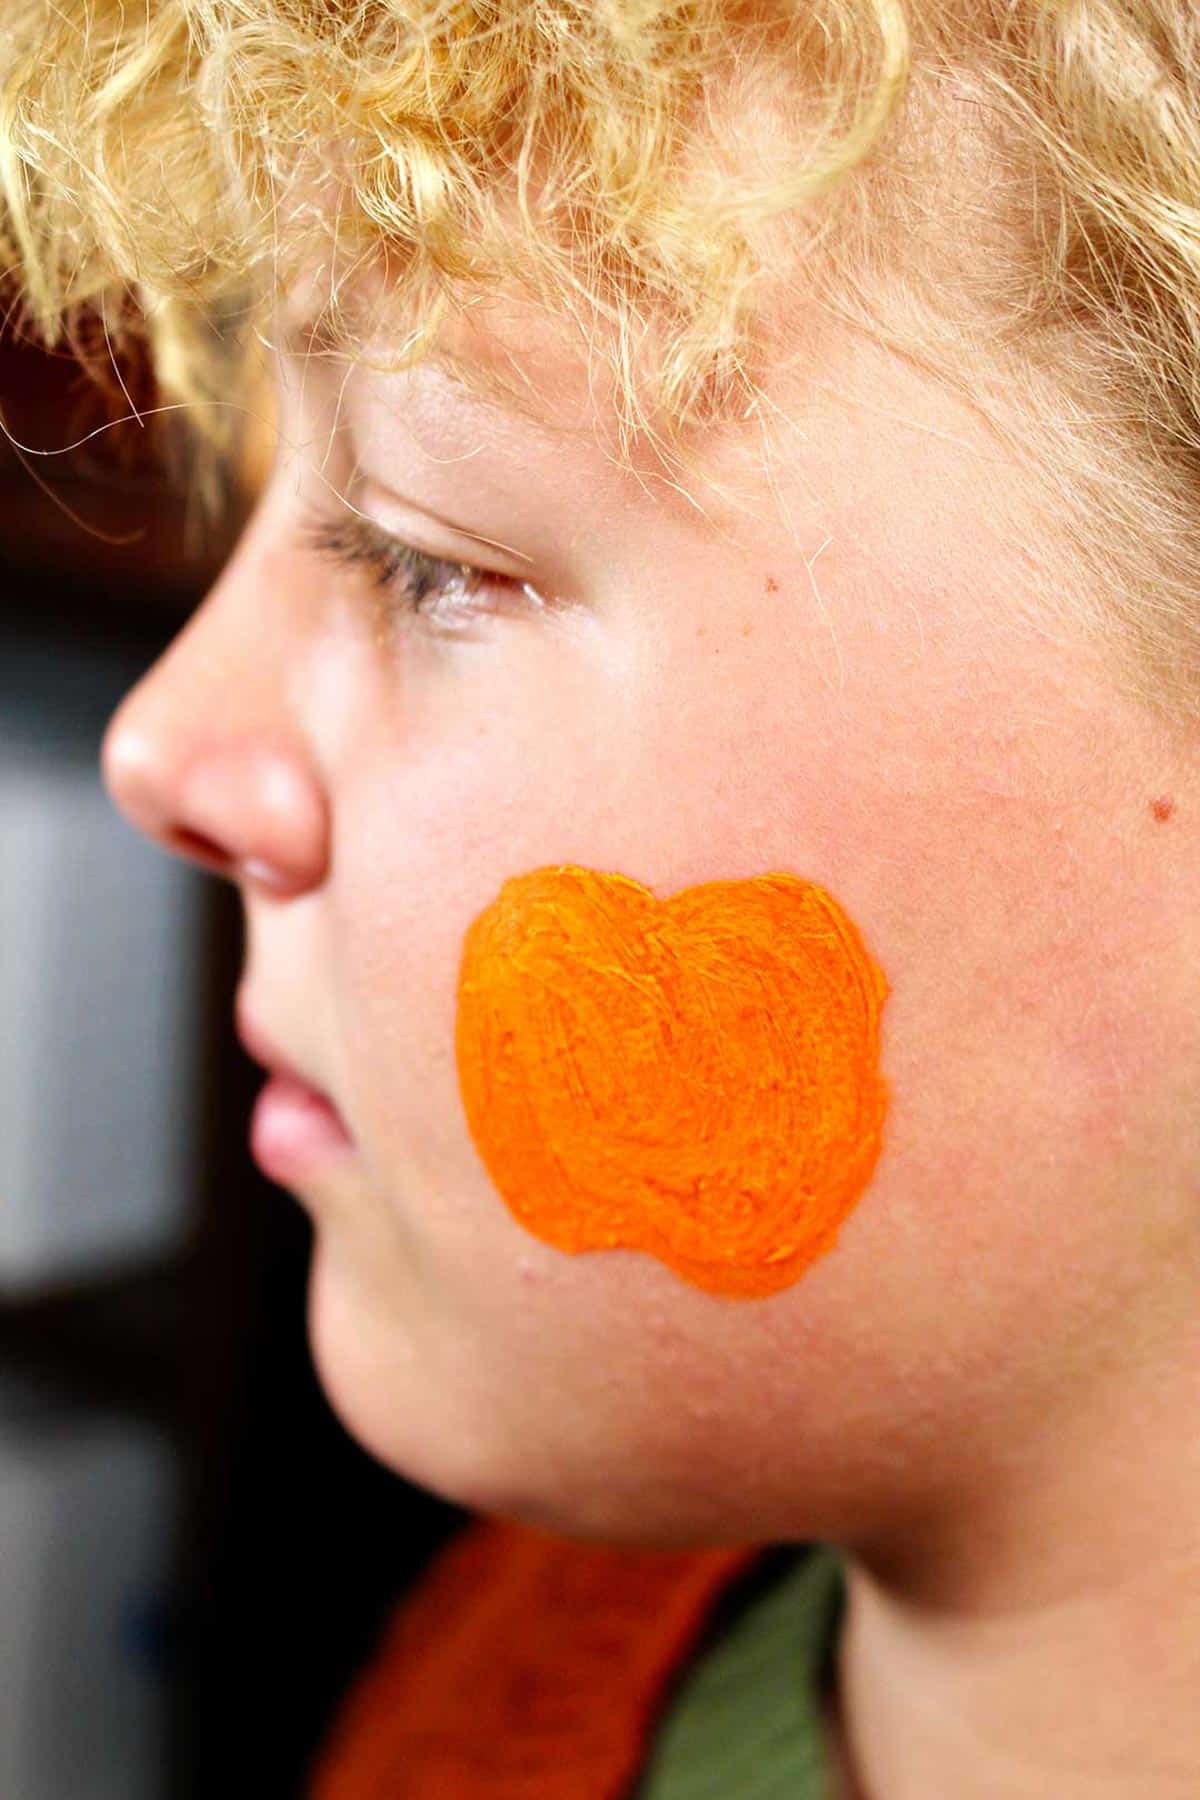
First paint the base color of the main shape of the face paint tattoo. For example, the orange surface of the pumpkin or the white paint of the Hello Kitty face.
Paint this on the cheek or down the side of the face where you want it placed.
A number 2 round water/acrylic/oil paint brush works well.
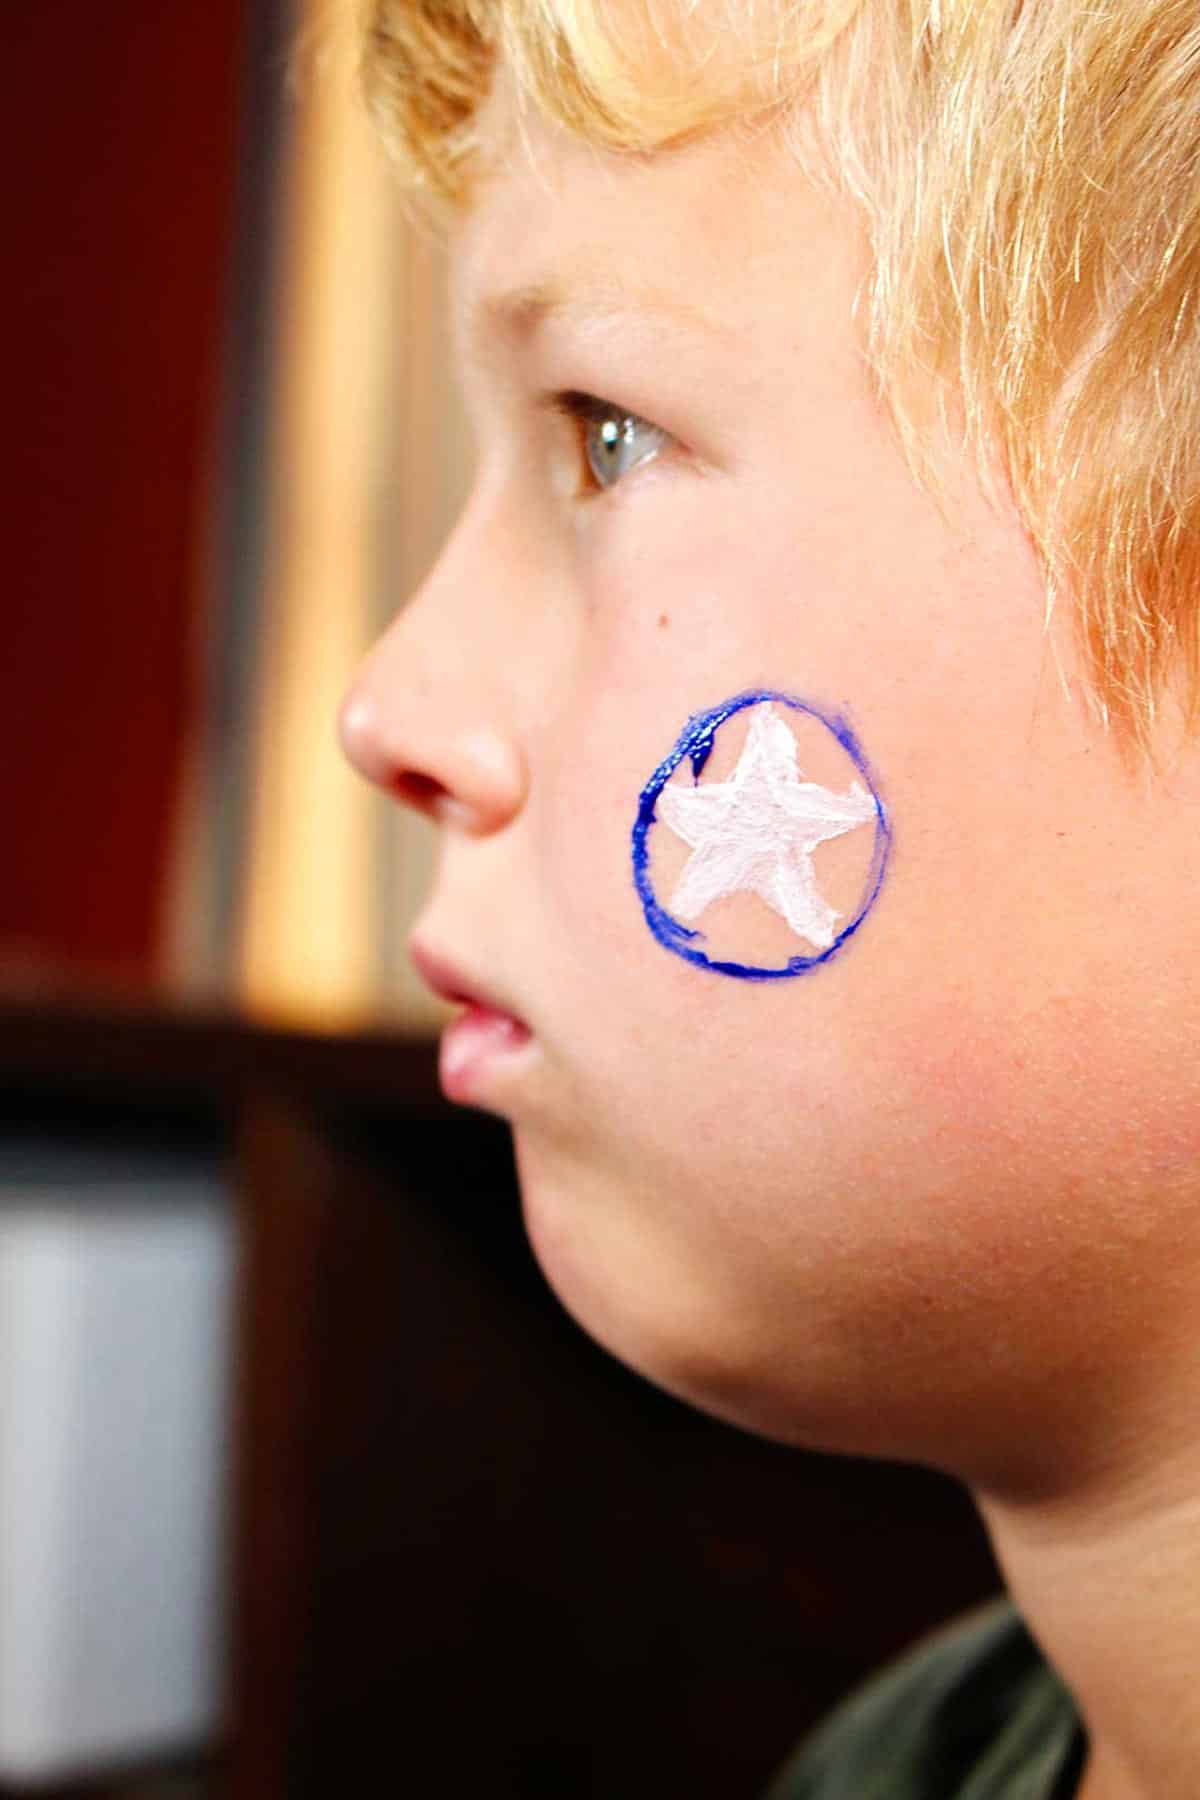
3. Add More Colors.
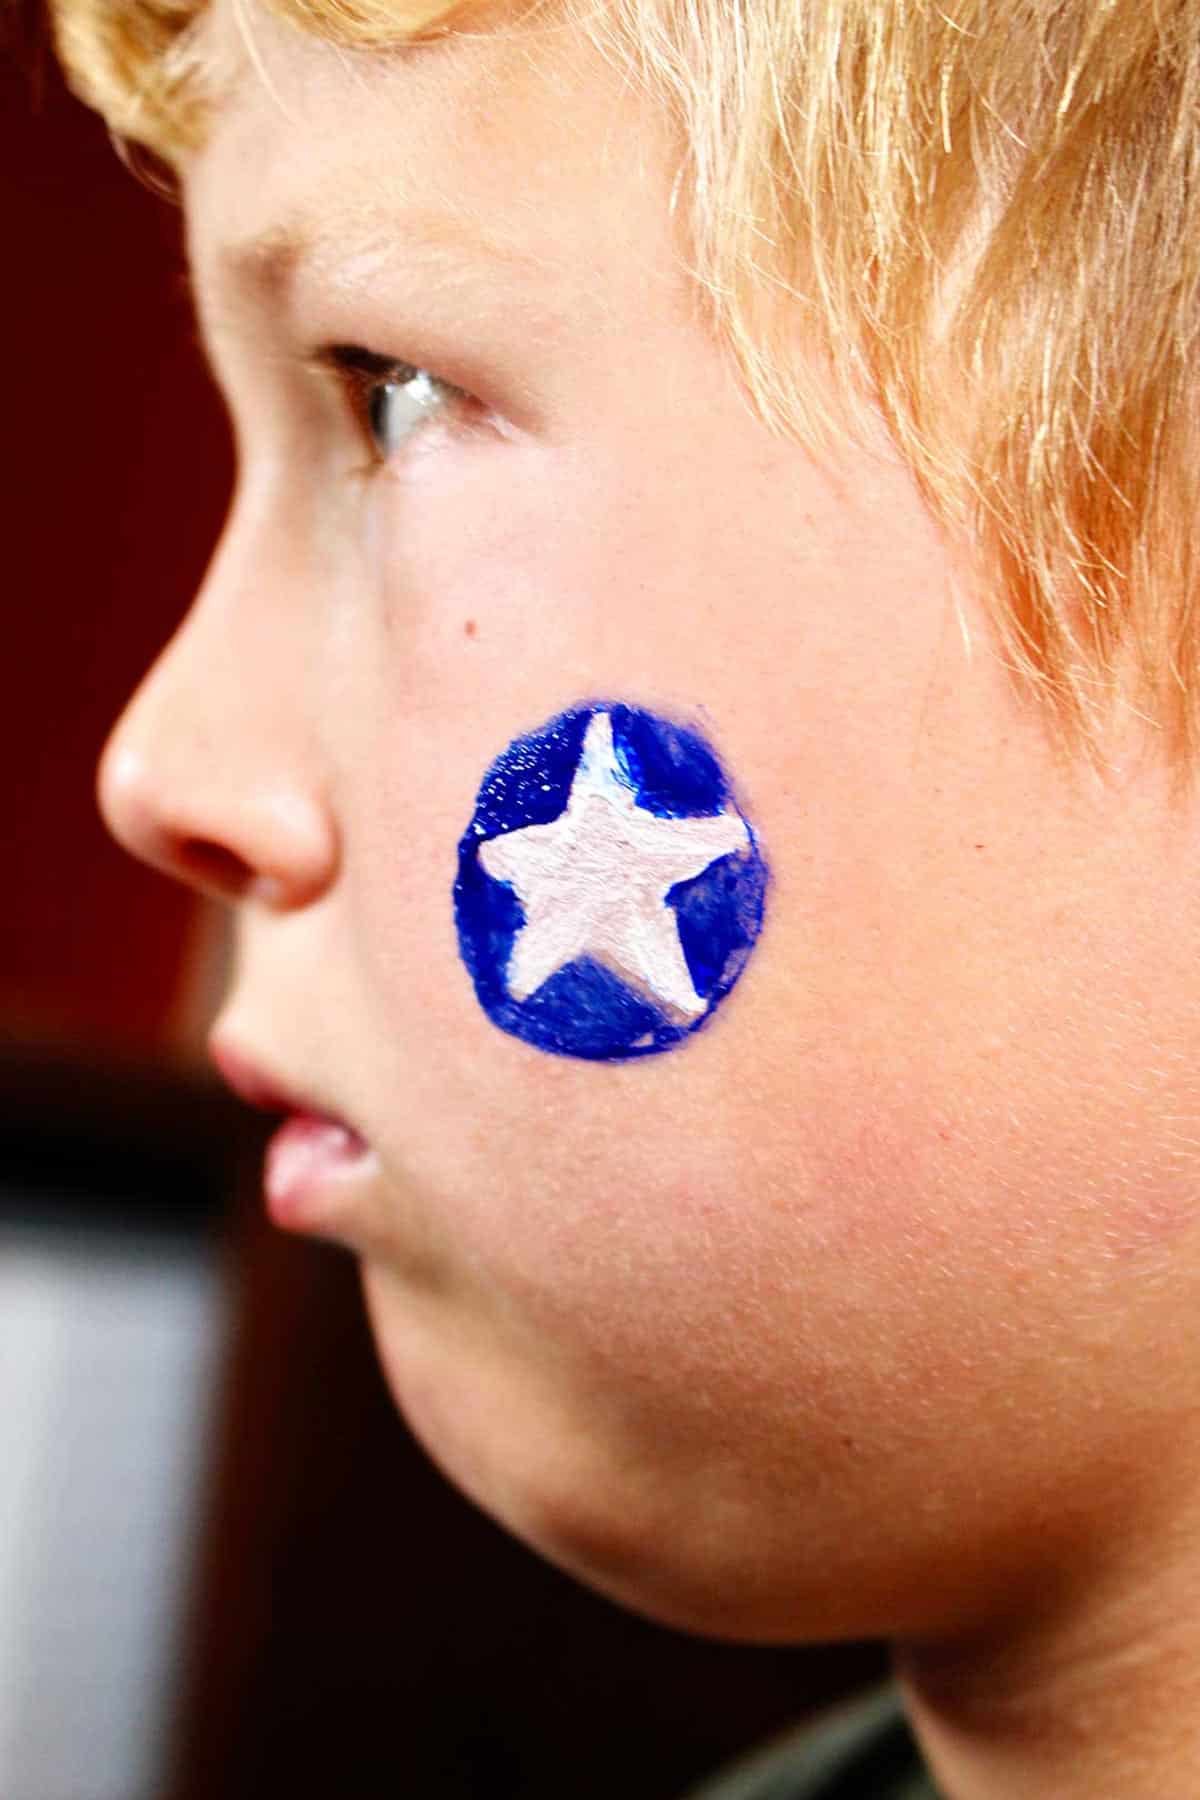
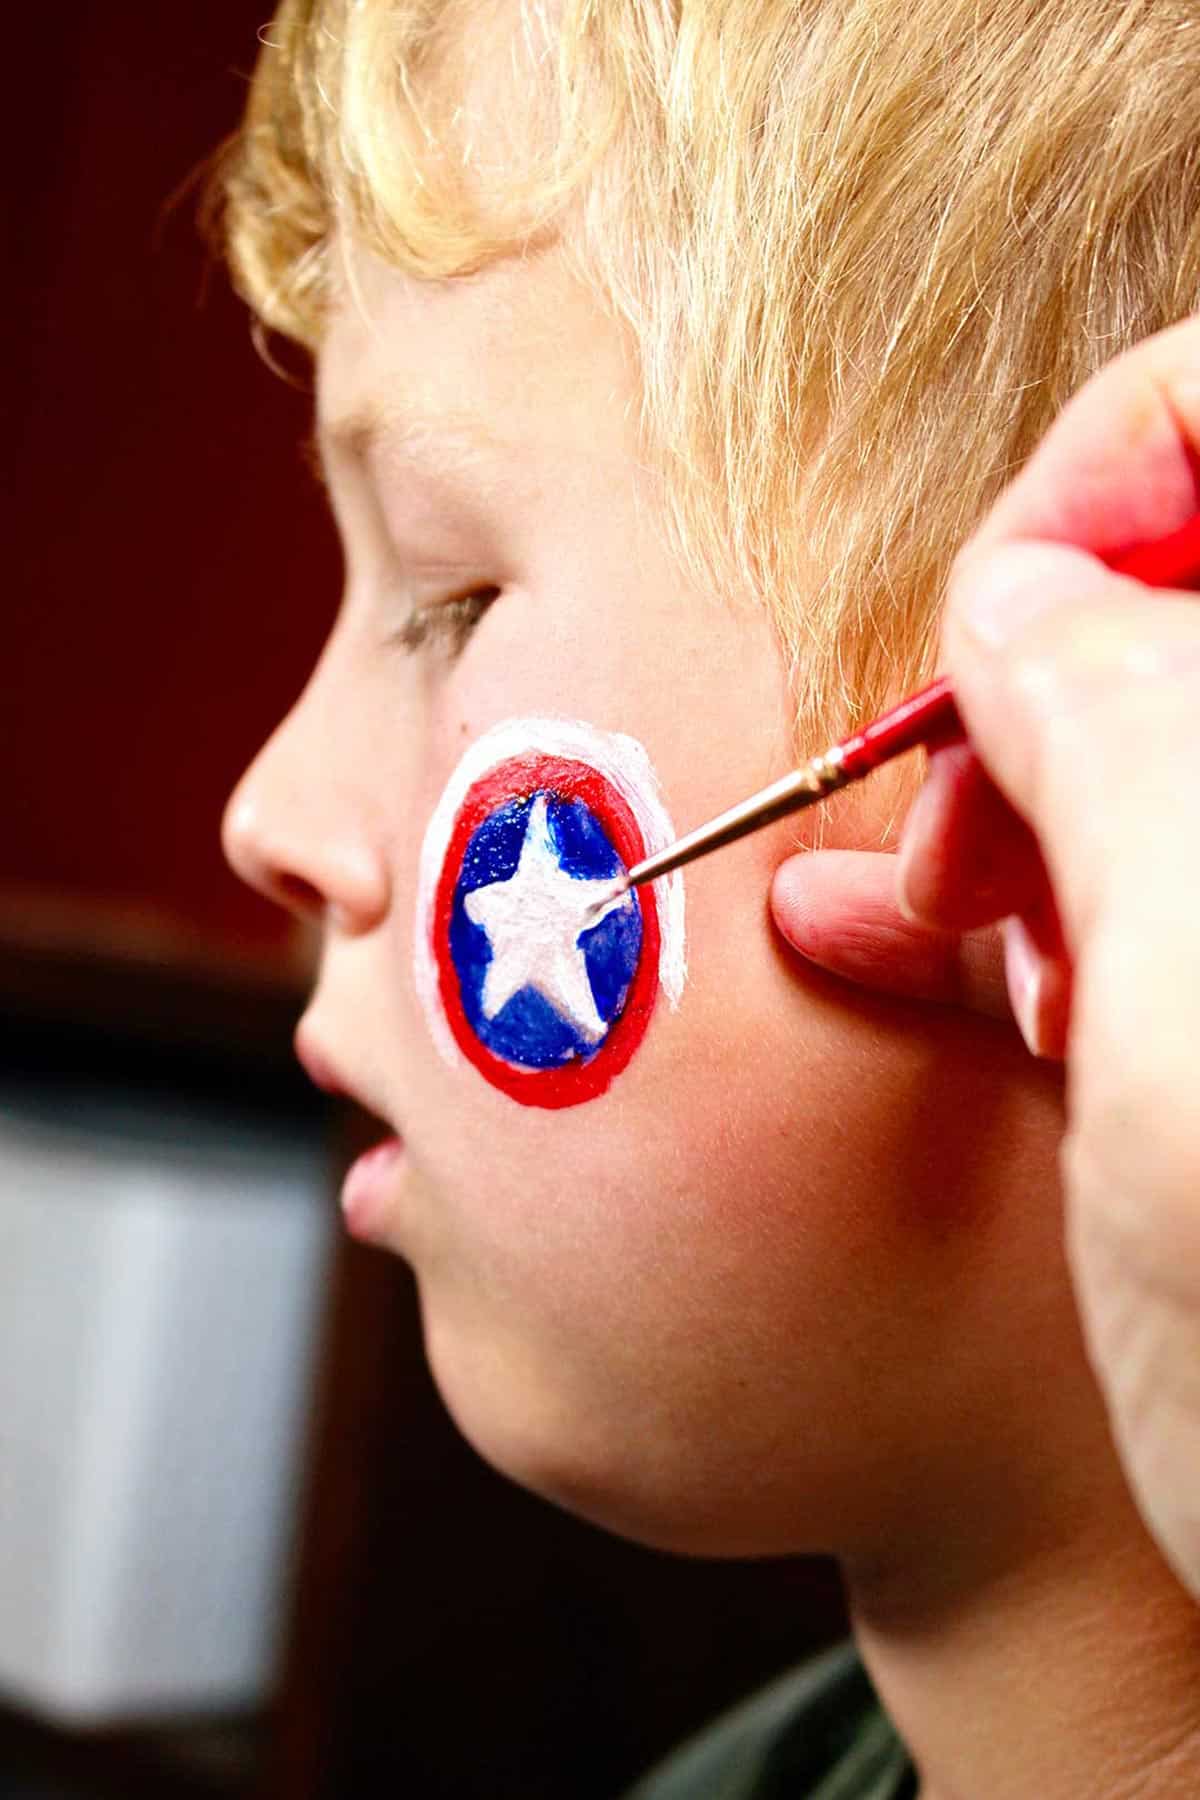
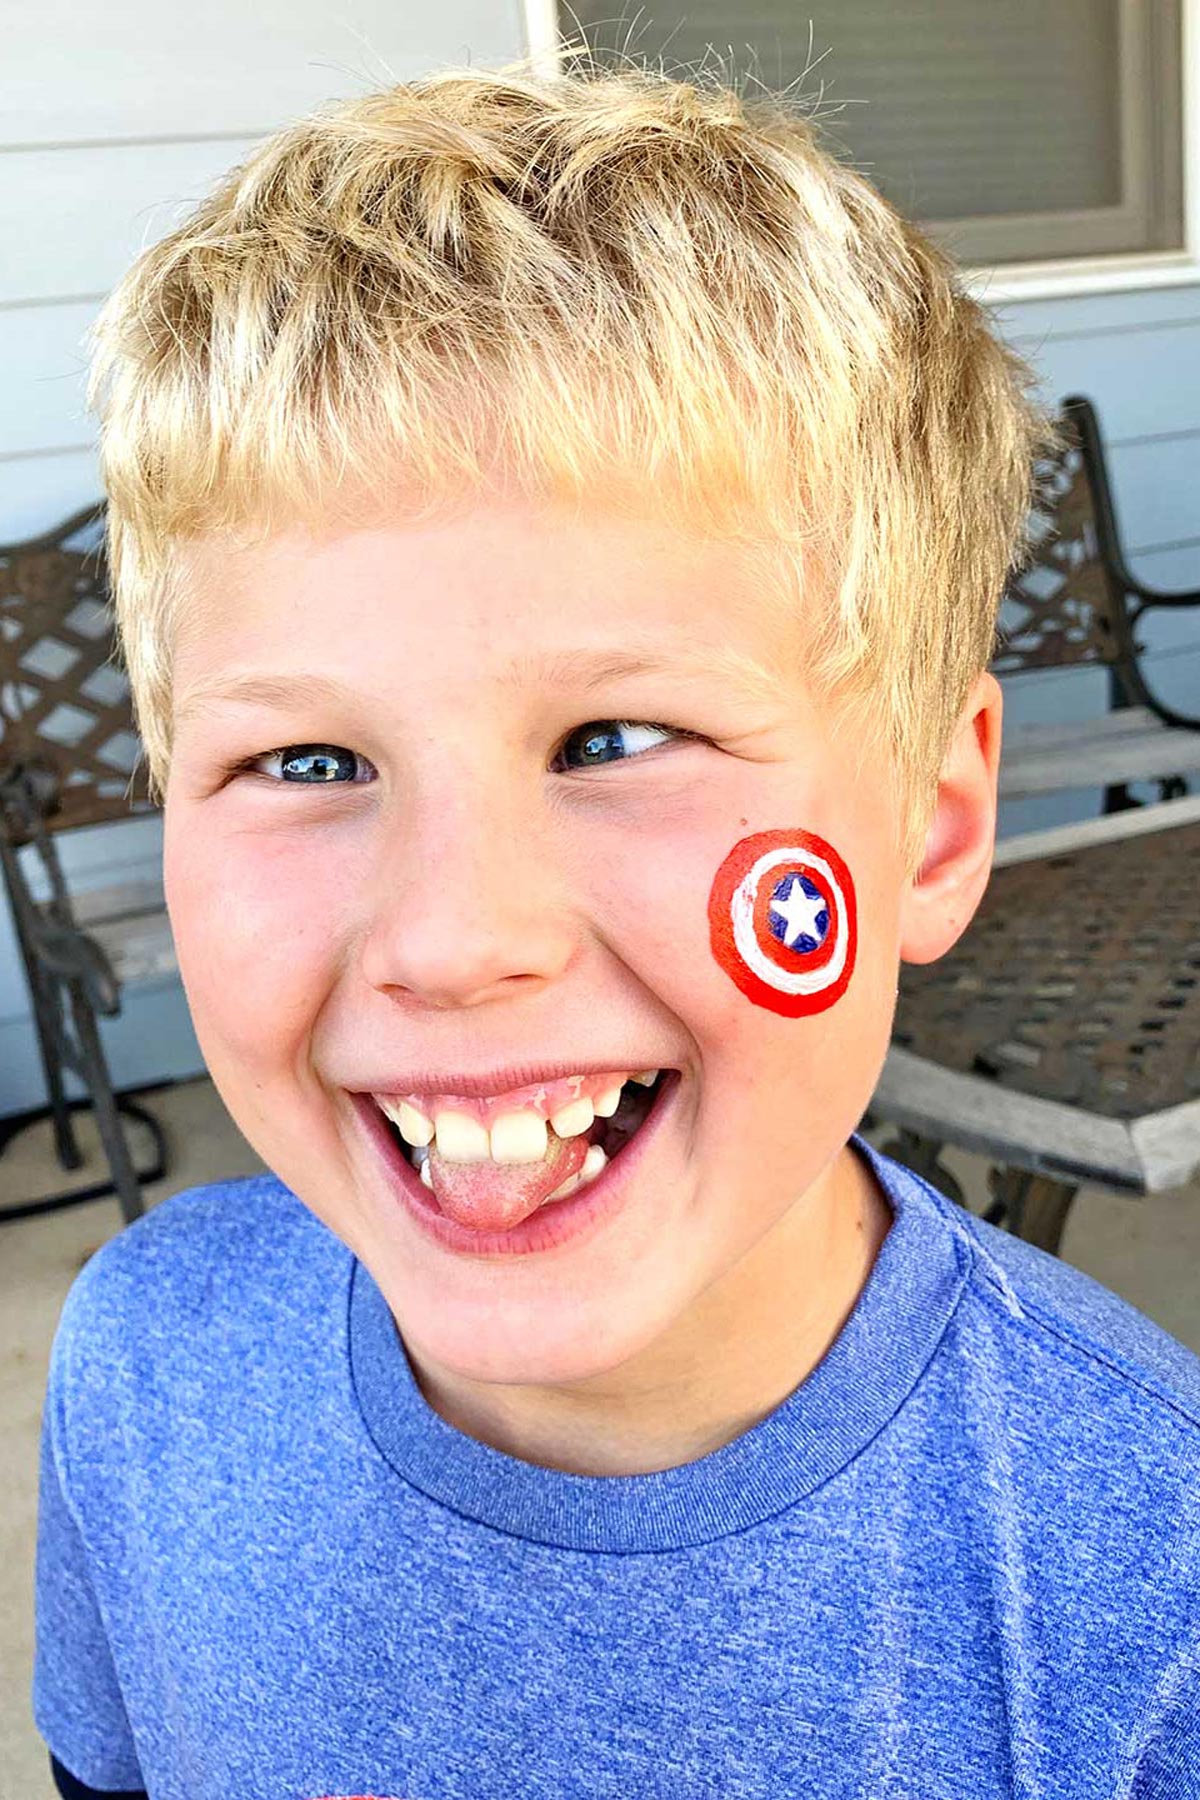
If doing a design with several colors, choose the one to start first that sets the design, like the white face paint star in the center of the Captain America symbol. Continue to add the other background colors around this first one you paint, like I added the blue then red concentric circles to the white base star.
Clean the brush well between colors in a glass of water. Be sure to wait just a bit for the paint to set if you are layering colors on top of each other.
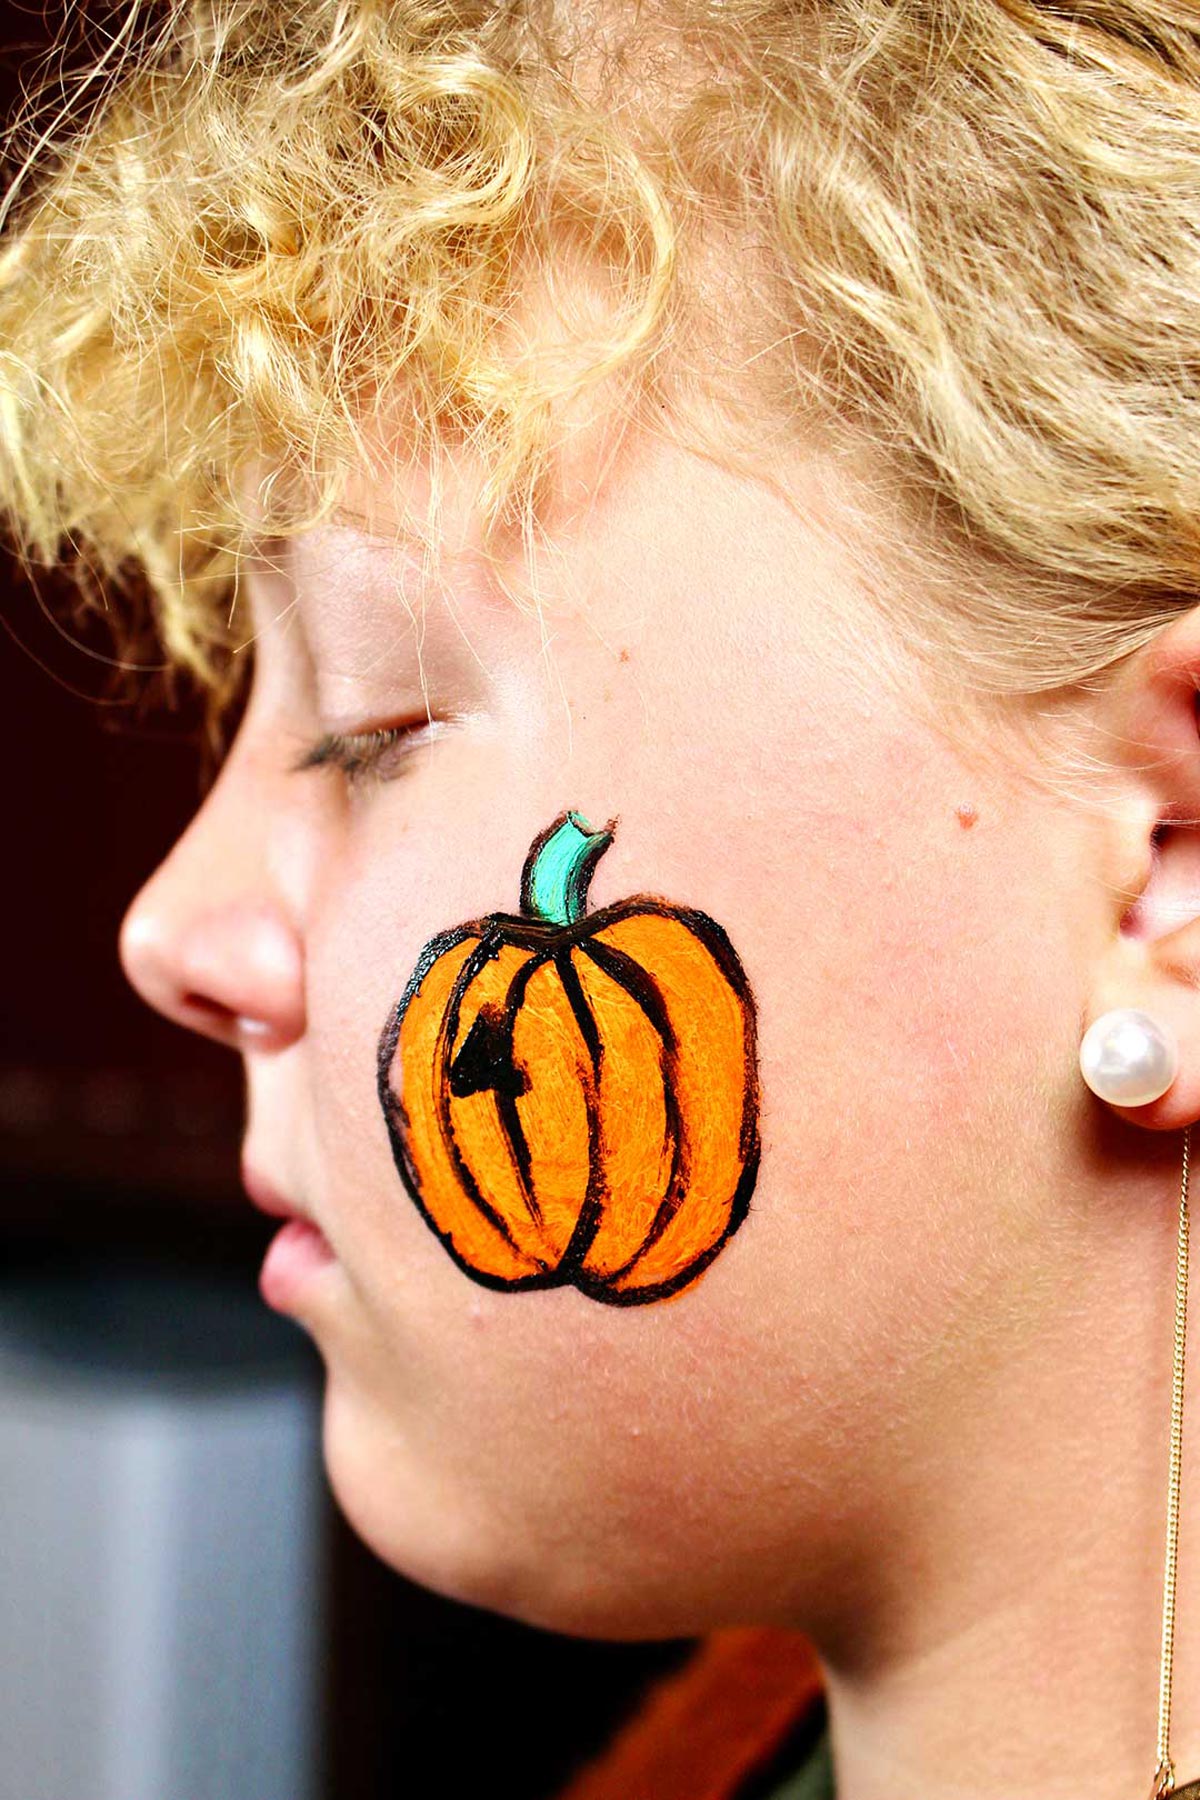
4. Outline the Main Design.
After the background is done, it often helps to outline the face paint tattoo with a black line, like a cartoon drawing (or outline in a darker color, like blue if you desire). You can outline while the background paint is still drying so don’t think you have to wait.
Many people want to start with the black outline and then fill it in with color. This sounds good in theory, but then the background lighter color picks up the black paint and gets muddy and smeared with black. Not good.
Use a small round brush, like a number 1 round water/acrylic/oil paint brush to do the outlining. You want as narrow a line as possible.
You can place a bit of black paint on a foam plate to dip into if you don’t want to get other colors in your original container of black face paint.
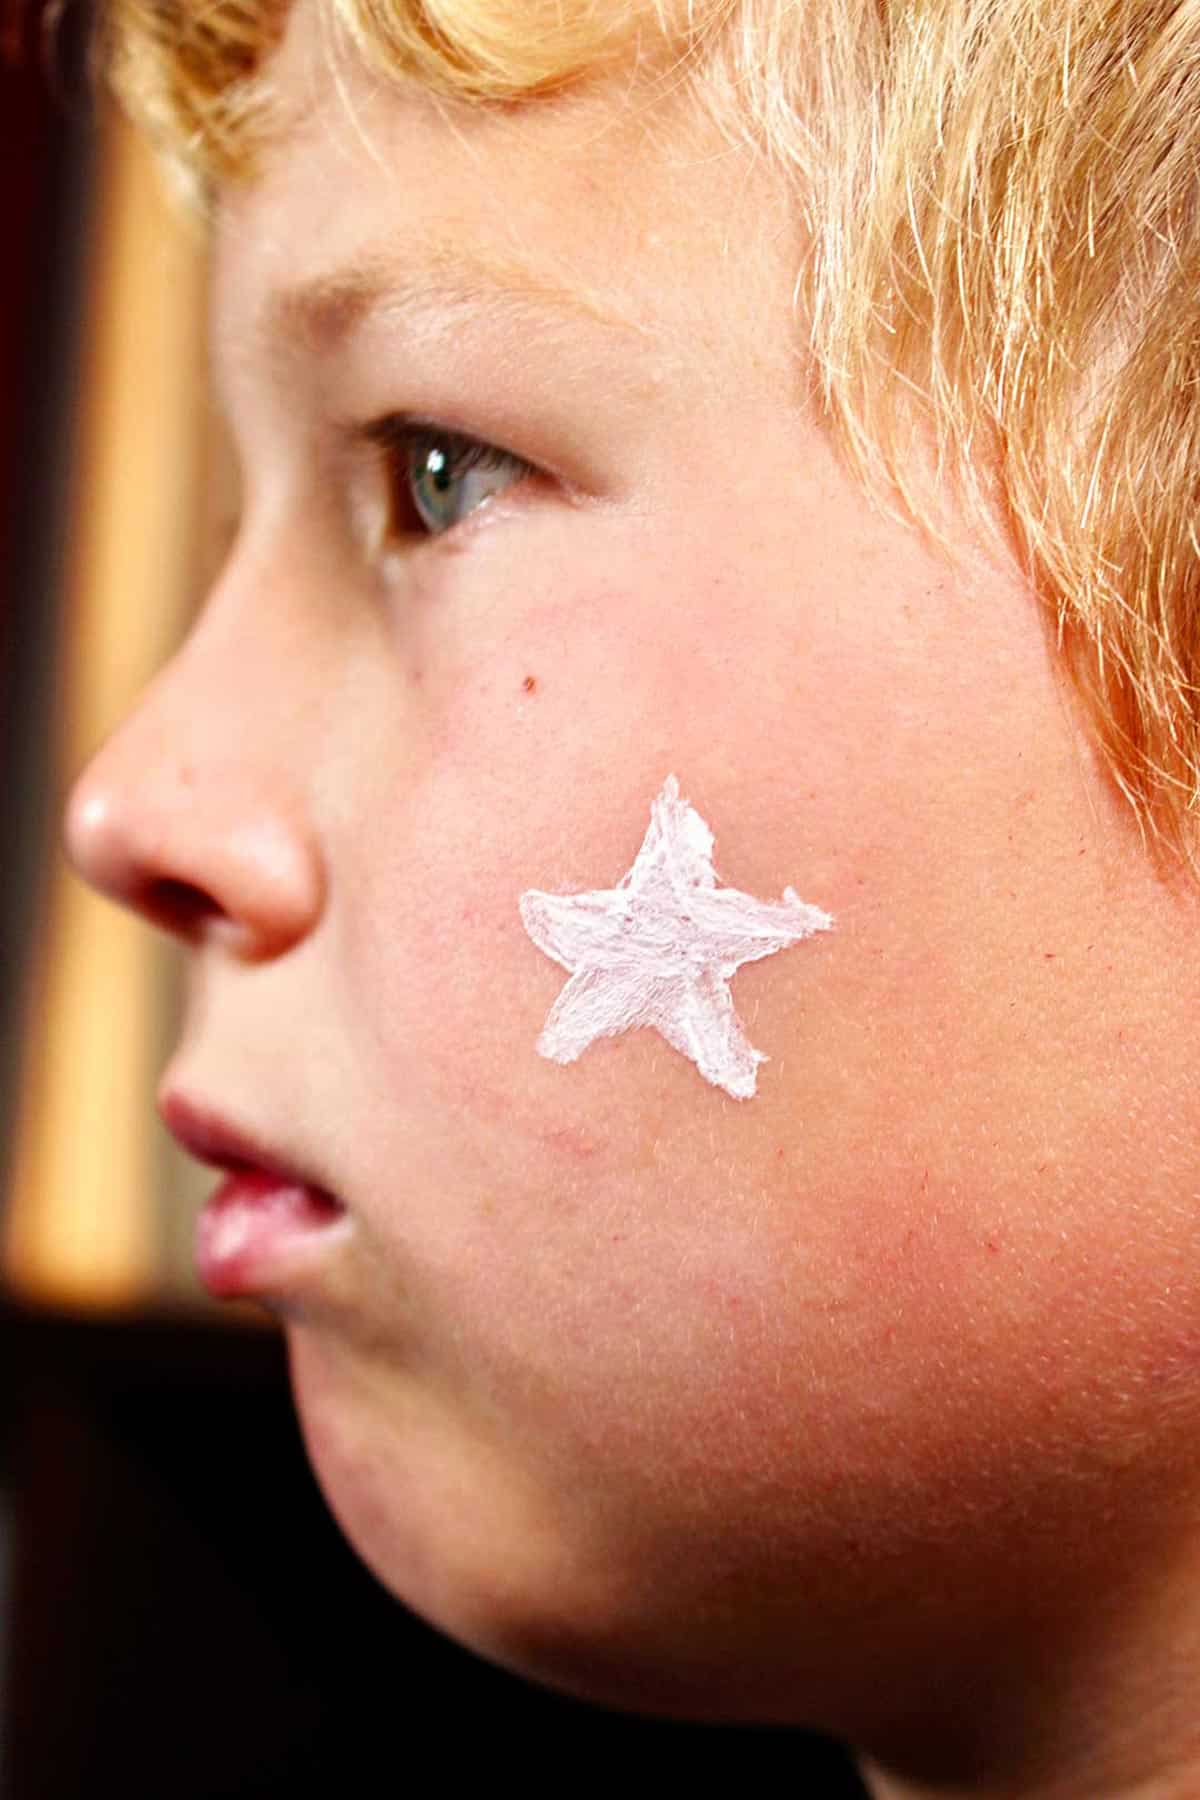
5. Finish with Extra Details.
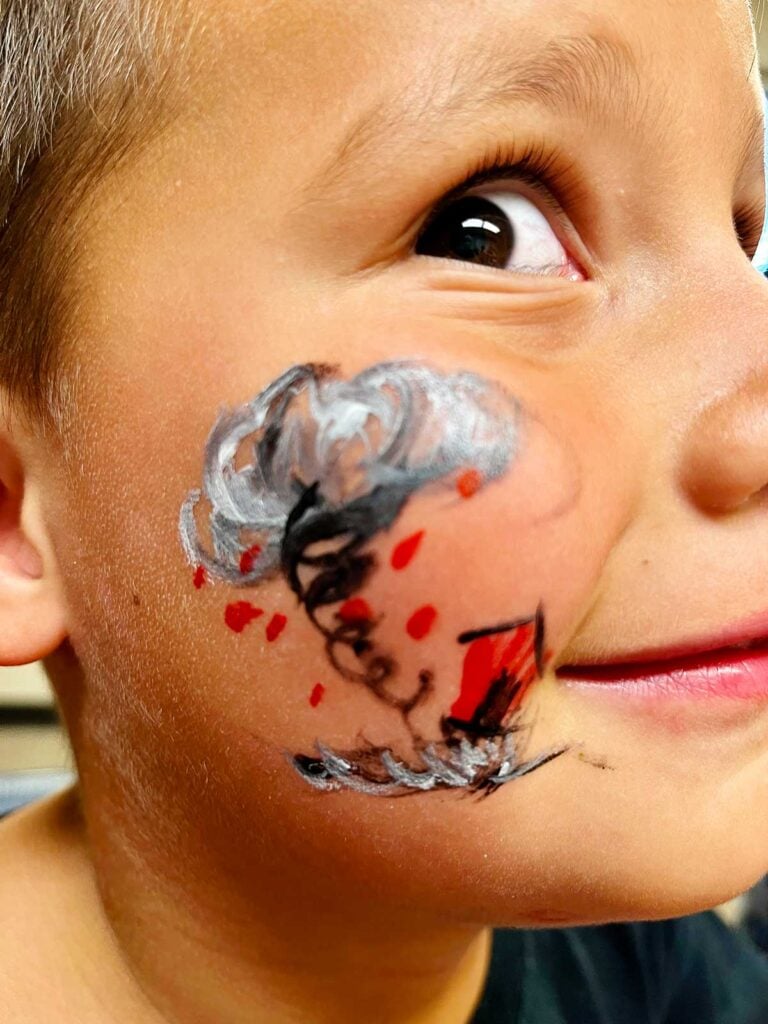
When finished with the design, it is fun to add white highlights, or squiggles, dots, stars, lightning strikes and circles in various colors around the design for decoration. This is a quick extra touch that adds some interest and makes even the simplest design look more complex.
For some extra fun, add some glitter or gem stones. They would be perfect for a pretty design like a fairy, or to complete a princess look!
How to Face Paint Large Designs
The smaller "tattoo" designs are a great place to start as you get into face painting, but how about those fun large designs that cover the whole face? Believe it or not, you can apply similar principles from the small designs to the large ones!
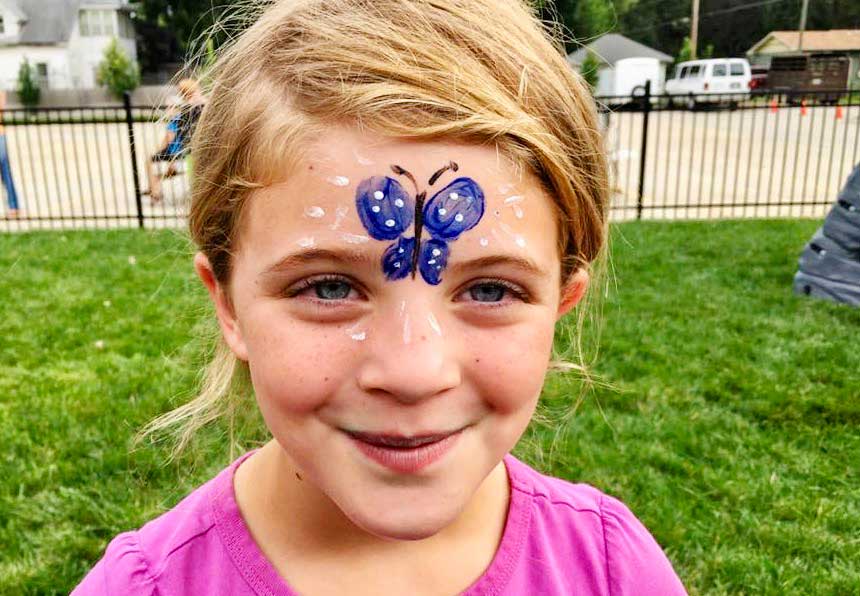
- Start by painting your background color to either cover the face or create your primary shape (for example - the shape of wings for butterfly face paint ideas).
- Now begin layering additional colors and shapes according to your desired design.
- Lastly, paint on any outlines and accents (for example - a black circle on the tip of the nose for a puppy or other animal face paint ideas) and add your final touches!
With these tools in hand, you can recreate any design you'd like! Why not try a cool face paint idea like a striped tiger design, a green wicked witch, a cute kitten with whiskers coming from the side of the nose, a zombie look, or Mickey or Minnie Mouse?
Face Painting Tips
Here are a few tips to help you along the way as you jump into face painting!
- Using Other Paint Options: I love working with the paints I suggested, but there are lots of other options! There are face drawing crayons available, but personally I don’t care for them much as they require more pressure on the face to show well and the children don’t like that. You could also try brush pens as a great alternative, or other body paints.
- Have A Poster for Selection: When painting easy face paint designs on multiple children, it is very helpful to provide a poster or printed sheet of face painting ideas for them to choose from rather than just asking what they would like. They can easily point to the picture of choice rather than trying to think things up. Trust me, it goes much faster that way! As you can see from my poster, it has been used many, many times. I need to make a new one! I'll be using these Welcome to Nanas Quick & Easy Face Painting for kids free tattoo designs next time!!
- How to Keep Your Hand Steady: Rest your pinky finger on the child’s cheek to give you a steadier hand (not on top of the design of course). Paint as confidently as you can with a single line, not going back over the line over and over. Dip the brush for more paint often so it stays a solid color.
- Protecting Clothing: I often use a Kids Haircut Cape over the child’s clothing to protect it from paint splatters. I rarely have any issues with that, but better safe than sorry.
- Asking for Permission: It is also good for children to have permission from parents before painting on their faces. Who knows, they may be going for family pictures after the party!! Ha!
- Adjusting for Mess Ups: As I mentioned before, I wouldn't worry too much about little mess ups. Often times trying to fix them actually make the painting more muddy or messy. However, I would recommend keeping some water and paper towels or a package of baby wipes on hand in case you need to make some adjustments.
Easy Face Paint Ideas and Variations
Want to switch things up? Here are a few ways you can customize and play with this craft.
- Come up with Your Own Ideas: Once you have some practice under your belt, you'll have all the tools you need to branch out! If the child wants a particular picture, I have found and easy way to create it is to first Google a simple drawing then work from the picture on your phone or computer.
- Don't Add the Outline: Not every design needs to be outlined in black. The more cartoon like drawings look best outlined since the black defines the picture so well. The Captain America symbol does not need to be outlined, for example.
- Add Extra Pizzazz!: There are wonderful face painting Glitter for Art Face Hair Body Nail and Gems Stickers that add a little bit of sparkle to the design. That is a great detail to add to your face painting collection now or next time! Honestly this might be the best part, adding that extra "pizzazz" to your design!
Face Paint Ideas for Girls
Girls choose all kinds of things from the printable sheet of ideas, but favorites are:
- Rainbow and cloud
- Hello Kitty
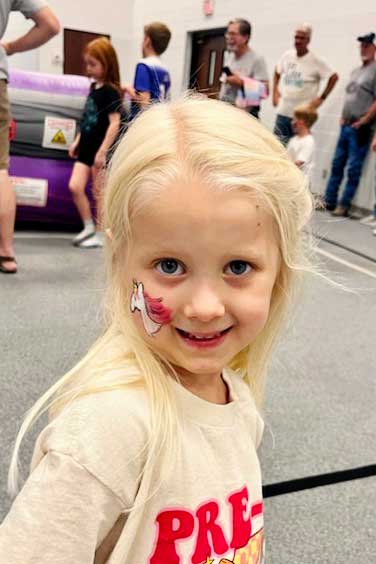
- Unicorn
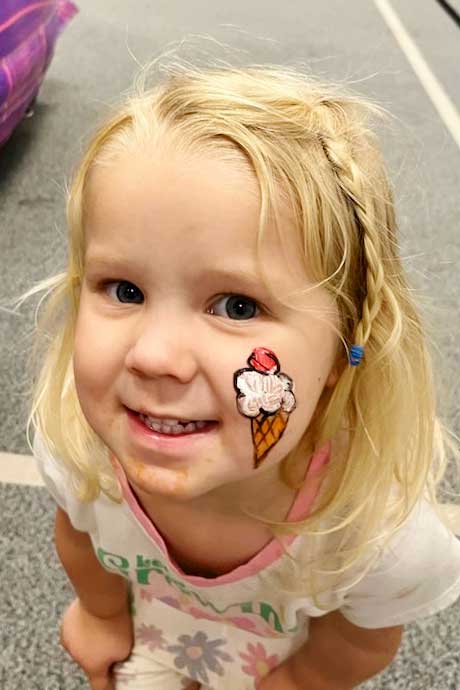
- Ice cream cone
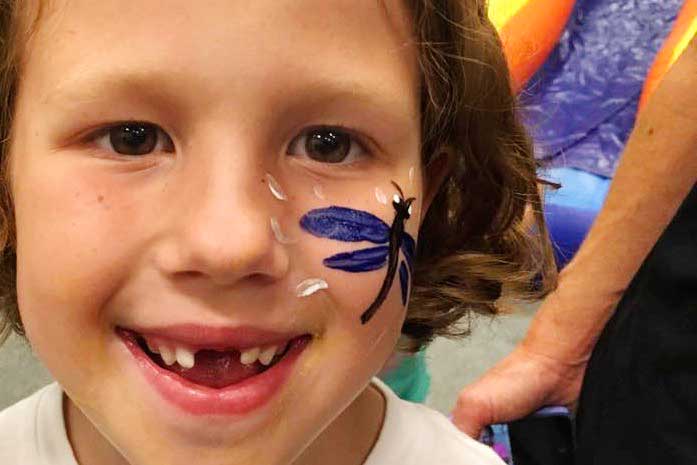
- Bumble bee, lady bug, or butterfly
- Swirling pattern around the eye, over the forehead and down the cheek
Face Paint Ideas for Boys
Boys choose all kinds of things from the_ face paint ideas printable_, but favorites are:
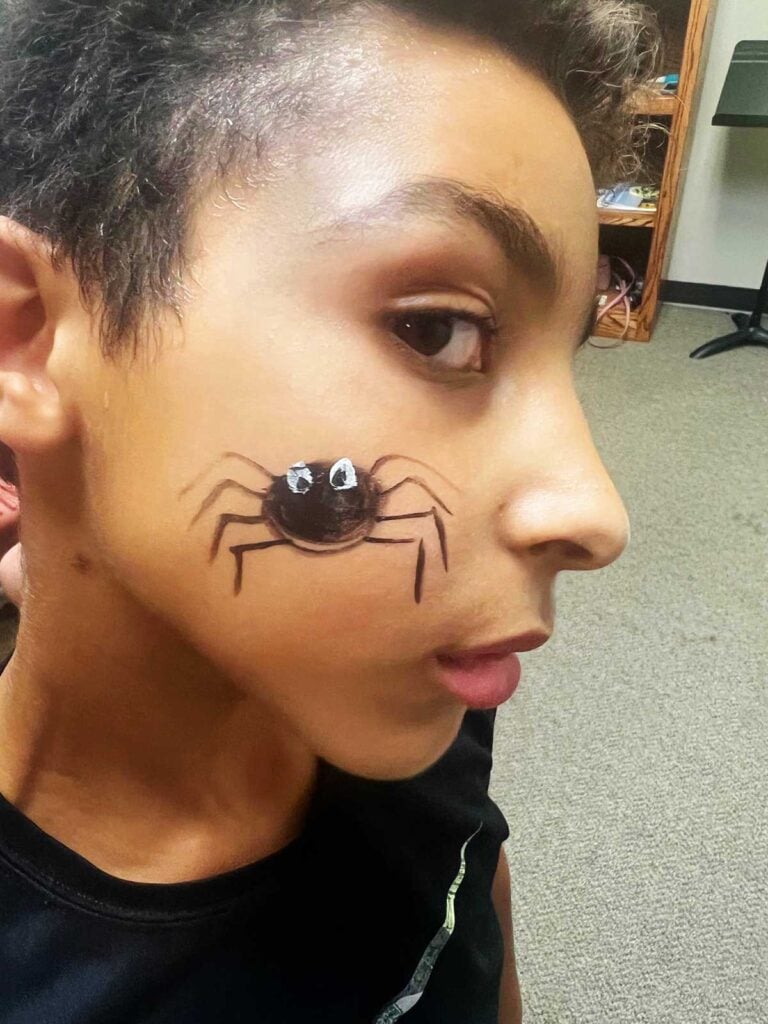
- Spider
- Snake
- Shark
- Dinosaur
- Football and goal post, basketball and net
- Number of favorite player or team logo or initials
- Mustache and beard
Easy Halloween Face Paint Ideas
Every holiday has favorite symbols that are easy to paint, but the Halloween favorites are:
- Bat with wings stretched
- Pumpkin
- Spider and web
- Ghost
- Black cat
- Crescent moon and bats
How to remove Face Paint
Use a wet, dark washcloth with a gentle soap like baby shampoo. Gently get off as much of the face paint as possible this way (don’t scrub). Stubborn spots can be taken off with a cotton ball and a bit of baby oil. Then use your hands to lather the face again with gentle soap and water. Moisturize your skin when done.
Read your face paint package for specific instructions for removing that specific paint.
Face Painting FAQs
No matter your skill level, you can follow these steps to create a fun and easy face painting! Choose from one of the ideas provided, or learn how to create your own beautiful design using the same steps. Some of the easiest small face paint ideas that are perfect for a party are a pumpkin, rainbow, or smiley face. If you are looking for easy Halloween face paint ideas for costumes, an easy place to start is a whiskered cat face paint design, or striped tiger face painting.
Creating some of the best Halloween face paint ideas can be so easy with this step-by-step tutorial! Choose from one of the cute designs provided and follow the steps to create cute face paintings for kids. The smaller size of the designs is the perfect way to start, no matter skill level. Practice your skills with these ideas, then use the same methods to come up with your own designs as well!
“Normal paint” such as house paint or craft paints are not made to use on skin and can cause allergic reactions or rashes. Even worse, some have toxic chemicals as ingredients and can be absorbed and harmful. Normal paint can also crack and be hard to wash off as it is made to adhere to surfaces for long periods of time. Harsher soaps or chemicals with scrubbing may be needed to get it off and that is hard on skin.
Always use paint that is specifically labeled as face paint. Check the label to make sure it is skin safe, cosmetic grade, and non-toxic. Personally I do not make face paint designs that get close to the eyes or eyelids even when using face paint.
More Fun Halloween Crafts and Activities
Looking to fill out your Halloween party craft and activity lineup? Check out these fun ideas from around the blog:
- Happy Halloween Free Coloring Page
- Halloween Scribble Monster Drawings
- Recycled Milk Jug Ghost Luminaries
- Mini Pumpkin Halloween Decorations
- Fun Apple Stamping Pumpkin Craft
- Halloween Trick or Treat Candy S'Mores
- Woodland Owl Pumpkin Carving Deluxe
Enjoy!
If you try this craft, let me know! Go ahead and leave a comment, rate it, and tag a photo with #WelcometoNanas wherever you post.
More from Welcome To Nana's
Quick and Easy Face Painting Ideas for Kids
Equipment
- Paint Brush Set (12) for Water, Oil or Acrylic Painting
- Kids Haircut Cape
Items Required
- Face Paint, 6 Secondary Color Set
- Face Paint, 6 Primary Color Set
Instructions
- Print off the Free Welcome To Nanas face painting tattoo patterns OR find ideas for simple patterns/pictures online.
- Study the face painting design the child chooses and paint the background color of the main shape of the design on the child's cheek (or down the side of the face). This would be the orange of a pumpkin for example.
- Add additional background color areas- like a stem on the pumpkin for example. Complete all of the background color areas.
- After the background is done, it often helps to outline and detail the face paint tattoo with a black line, like a cartoon drawing (or outline in a darker color, like blue if you desire). Not all designs need to be outlined. This would be the outline and face of the pumpkin jack-o-lantern for example.
- Finish with some fun extra stars, squiggles, lightning strikes around the design to give it some pizzazz. May also use some face paint glitter if you desire.
Video
This post was originally published in October 2021 and has been updated to add more relevant and detailed content.


face painting for kids near me , says
Awesome article.Really helpful tips.Thanks a lot for suggesting .
Laura says
Cute ideas! The glitter and gems would be a fun extra 🙂