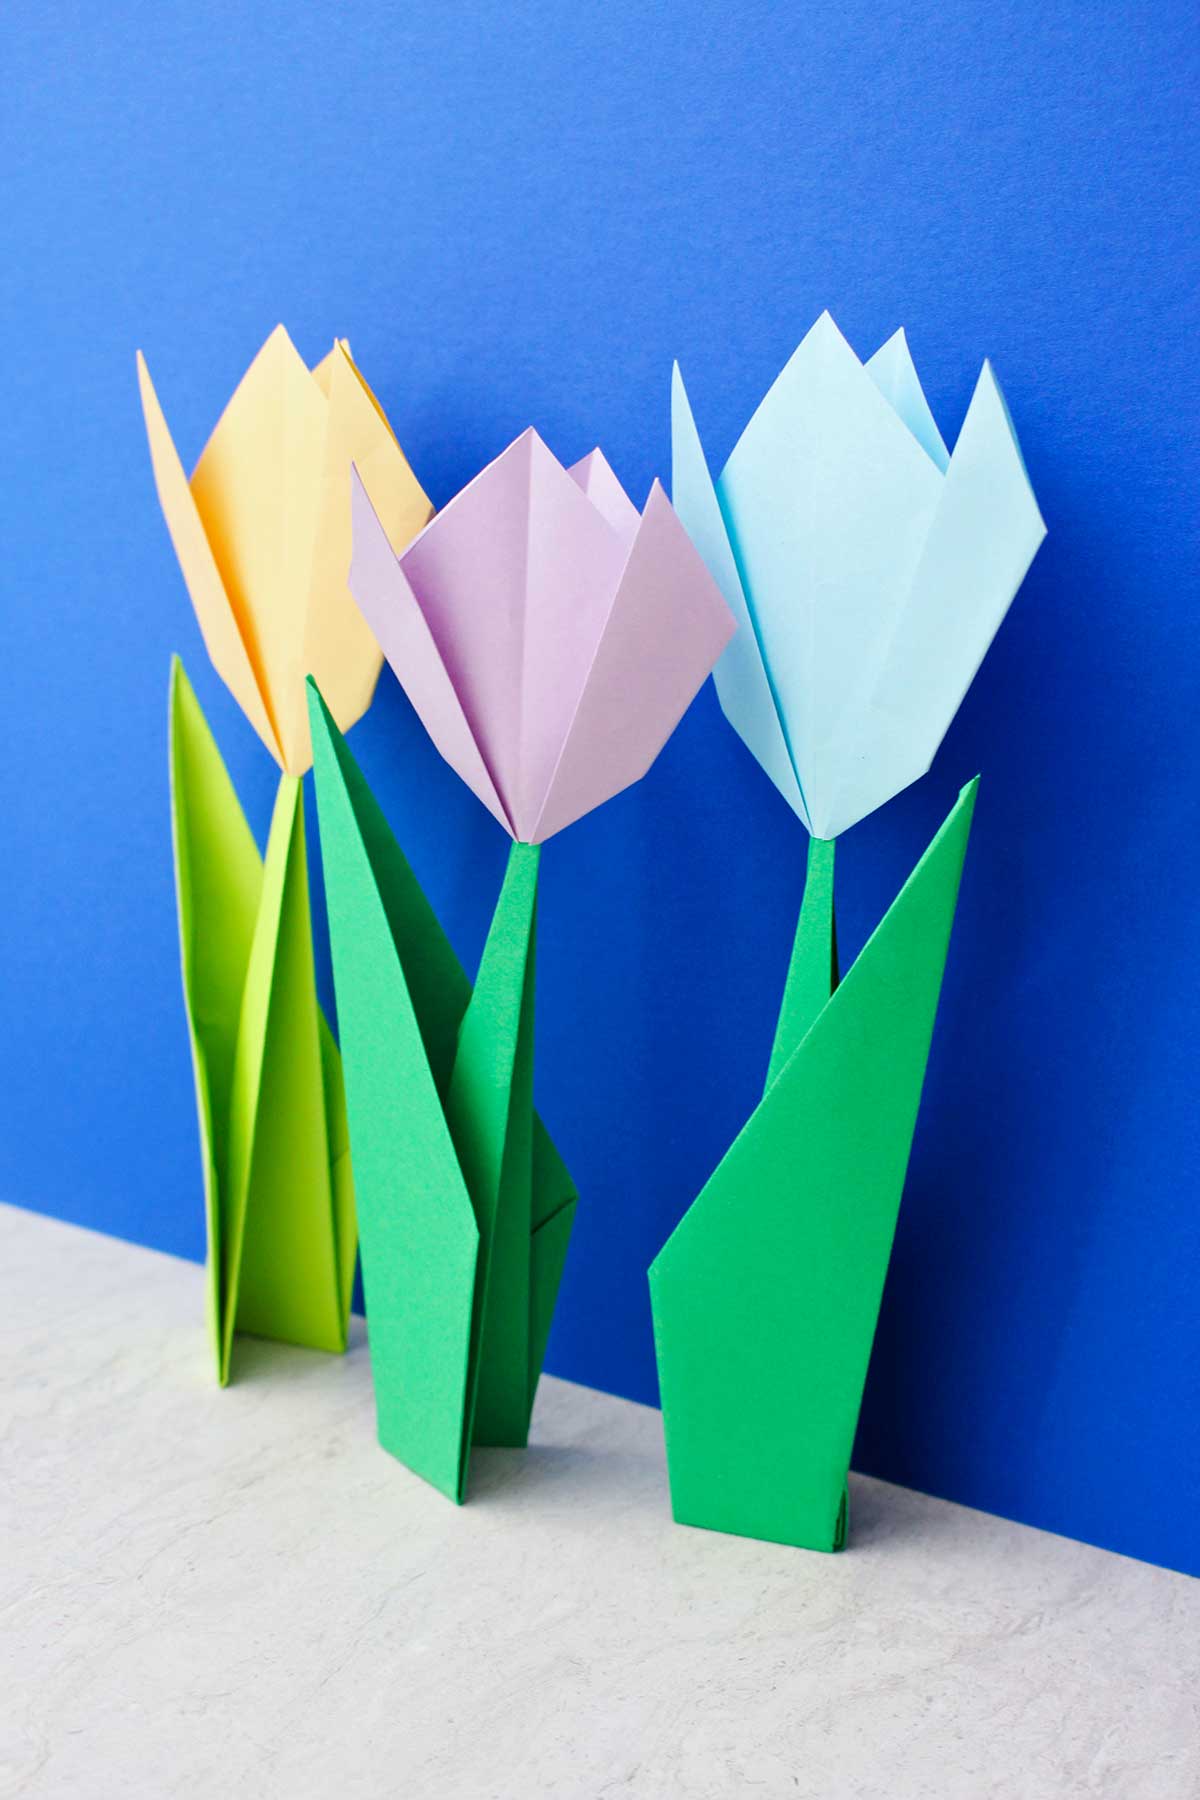
Learn how to make Origami Flowers with this step-by-step folding tutorial! You won't believe how easy it is to turn a piece of paper into a colorful, pretty tulip and stem.
Jump to:
- How to Make Origami Flowers
- Cute Craft Alert: Easy Origami Flower
- Why Origami Flowers are the Perfect Kid Craft
- Materials Needed for Flower Origami
- Origami Flower Step by Step: Folding the Bloom
- Nana's Easy Origami Flower Video Tutorial
- Nana's Professional Advice: Elevating Your Easy Origami Flower
- Nana's Flower Origami Top Tips
- Craft Variations-
- FAQ
- More DIY Crafts for Kids
- Come join the fun at WTN!
- More crafts, please!
- How to Make Easy Origami Flowers: A Tulip and Stem
How to Make Origami Flowers
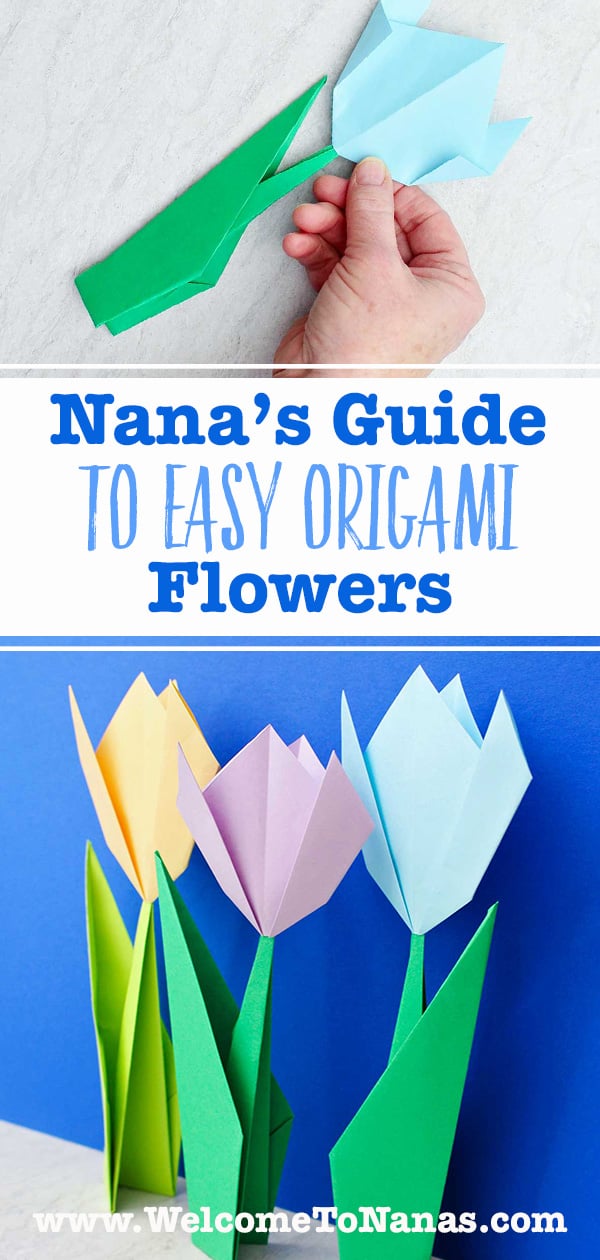
Welcome to Nana's Guide to Easy Origami Flowers! I just love how you can turn a piece of paper into a pretty origami flower tulip and stem.
In this tutorial you’ll learn how to make origami flowers with an easy origami flower step-by-step method. My 55 years of crafting experience will ensure that even beginners will have fun and find instant origami success!
Cute Craft Alert: Easy Origami Flower
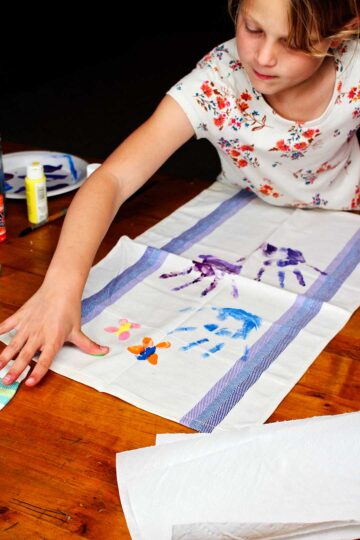
My mother always loved tulips in her garden next to the patio. She planted various tulip bulbs and enjoyed watching them come up and bloom. The trouble was that we lived in windy Kansas and the wind blew them apart in a day or two.
She always wished they would last longer. Well here is an origami tulip you can fold that will last all year long and they don’t need to be watered!
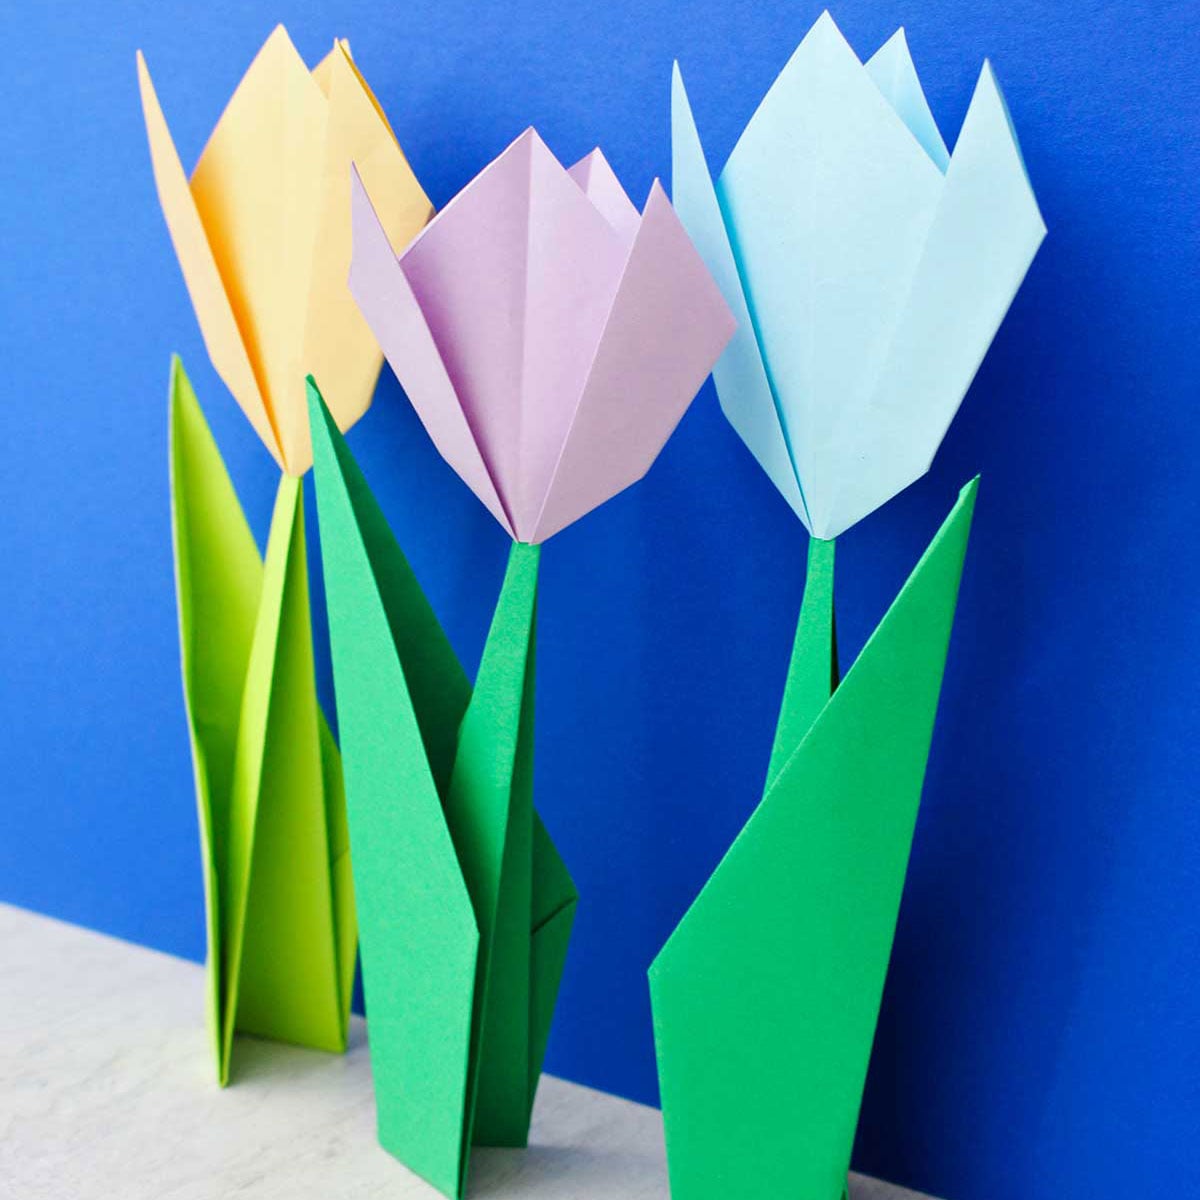
If you are wanting to have success making origami flowers in the first try this is the flower origami tutorial for you and your kids! This paper creation is a two part process starting with folding the tulip head and then the stem. They fit together easily and even stand up themselves by the way the stem is folded.
Your kids will love making a whole “garden” of tulips in all colors! This would make a wonderful gift for Mother’s Day or for teachers.

Why Origami Flowers are the Perfect Kid Craft
After 10 years of Welcome To Nana’s craft tutorial experience, this classic tulip origami design is the first flower origami project I recommend for kids. I’m hopeful it will also be a favorite for you and a confidence booster for your kids. There are more origami designs on the site I hope you’ll try. I’ll list some below!
Origami paper folding is such a peaceful craft, a slow and deliberate folding process step by step. It is a great one for reducing stress and is especially calming if an adult and child work together, step-by-step.
But origami is the perfect kid craft for many other reasons too. Kids will develop:
- Fine motor skills with the hands on manipulation of the paper
- Eye-hand coordination
- Focus
- An introduction to geometry with the angles and creation of shapes
- Confidence
Additional bonuses are that it’s a low cost activity with only the need for paper (which you probably already have) and the time together is priceless!
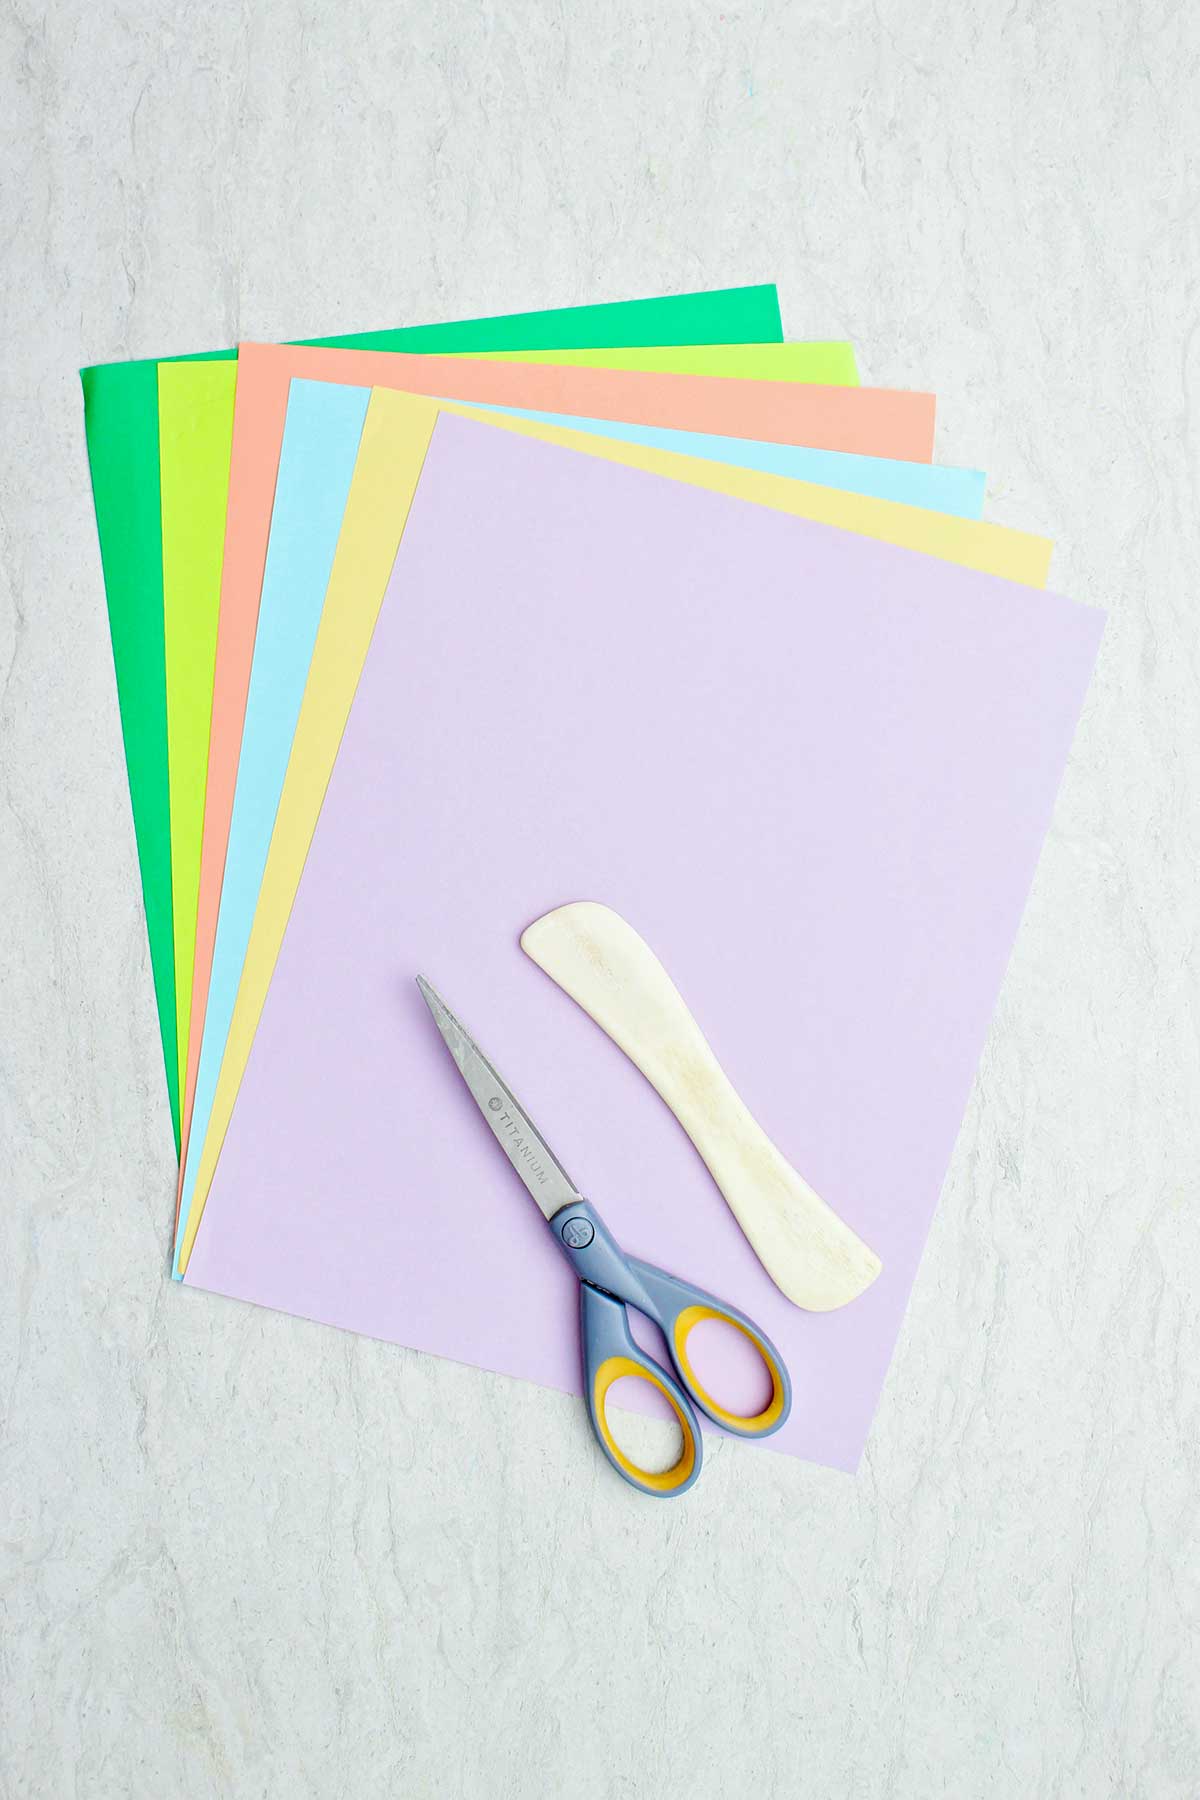
Materials Needed for Flower Origami
Here are a few quick notes about the supplies you will need to make this origami flower craft!
- Colored copy paper- Choose colored copy paper in colors you enjoy, I liked the pastels but bright colors would be pretty too!
- Colored copy paper in green- Green paper is used to fold the tulip stems.
- Scissors- Scissors are needed to cut rectangle paper into squares as directed.
- Origami paper squares (optional) – Pre-cut squares make things easier for beginners. Origami paper can be different colors or patterns on each side of the paper which makes a cool effect in your project!
- Bone folder (optional)- A bone folder is handy for making good creases/folds in the paper.
- Markers or crayons (optional)- Use colored markers or crayons if you want to decorate the petals.
Origami Flower Step by Step: Folding the Bloom
Follow these simple steps to create your easy origami flower:
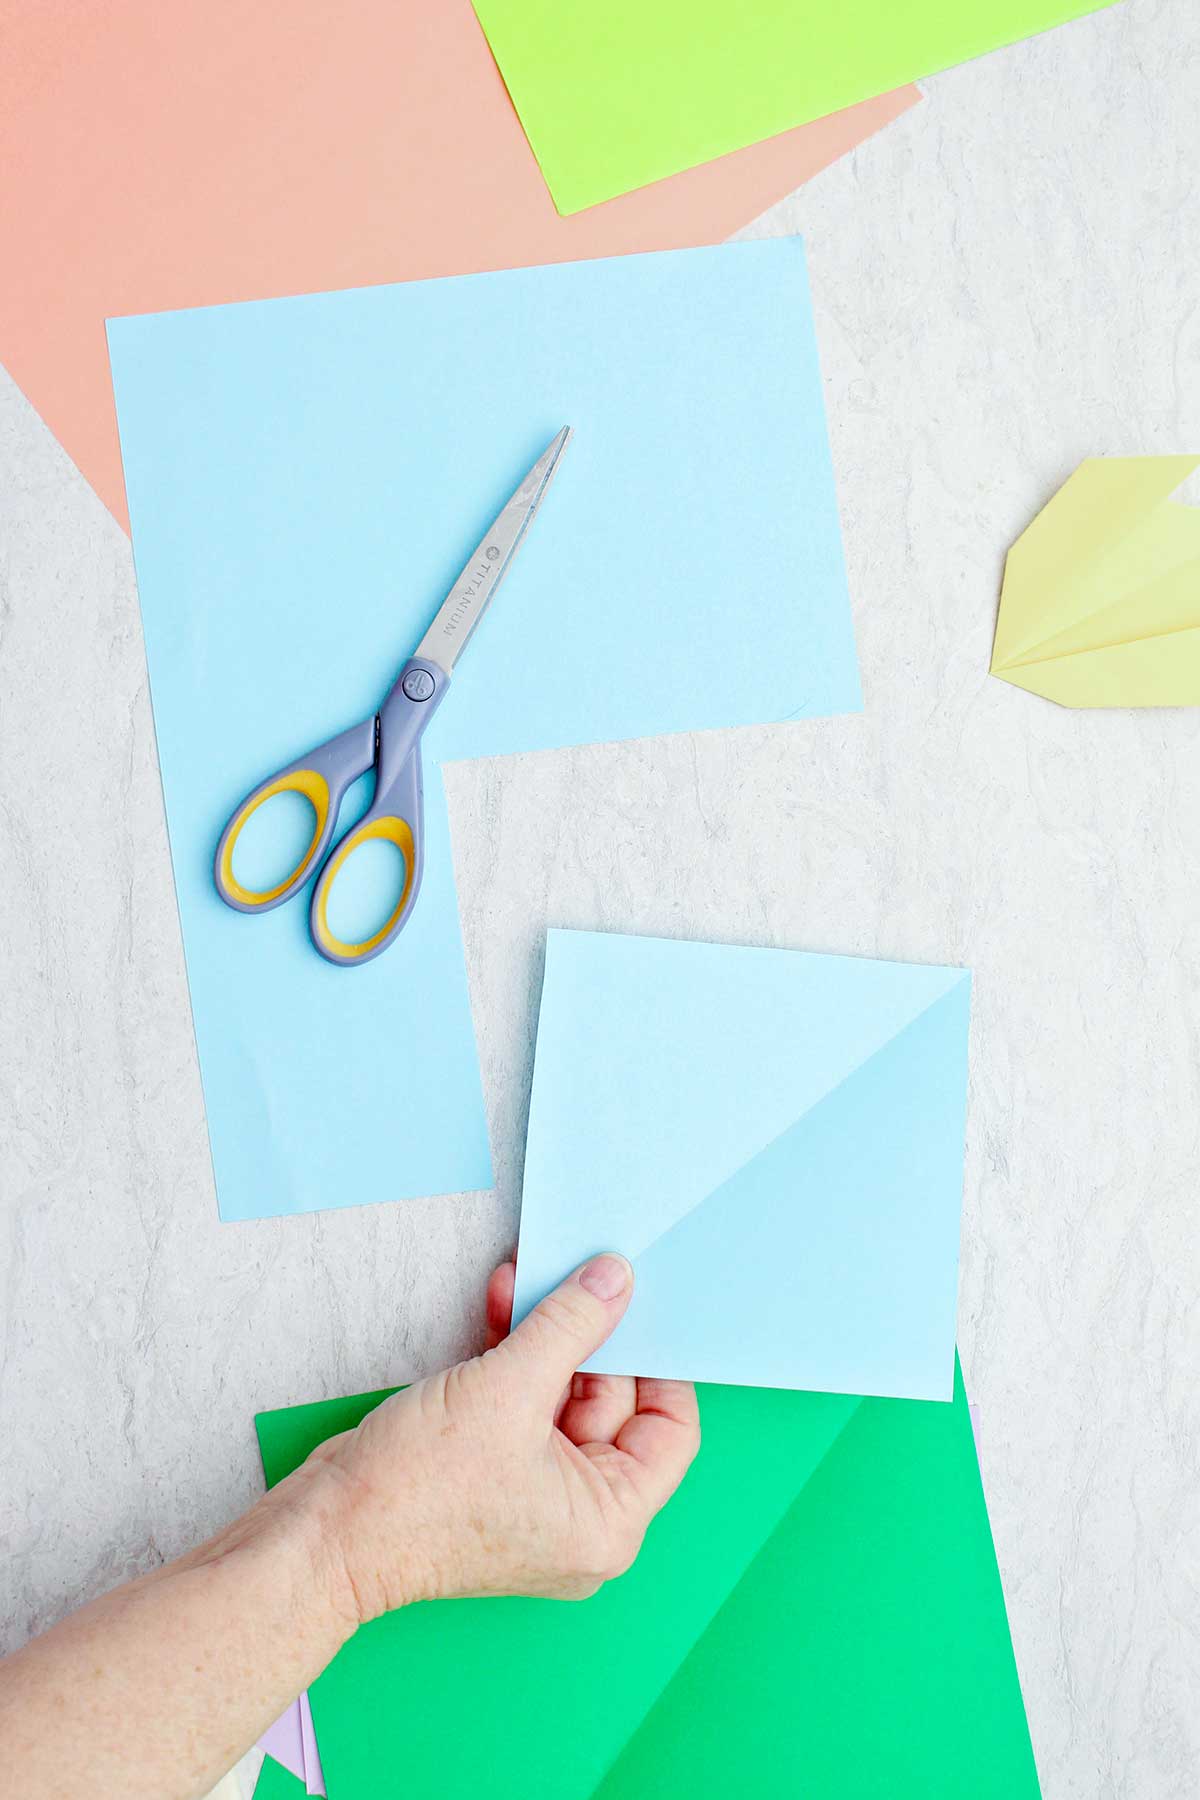
A. Cut your paper to size.
The green paper for the stem should be roughly four times as large as the colored paper for the tulip bloom.
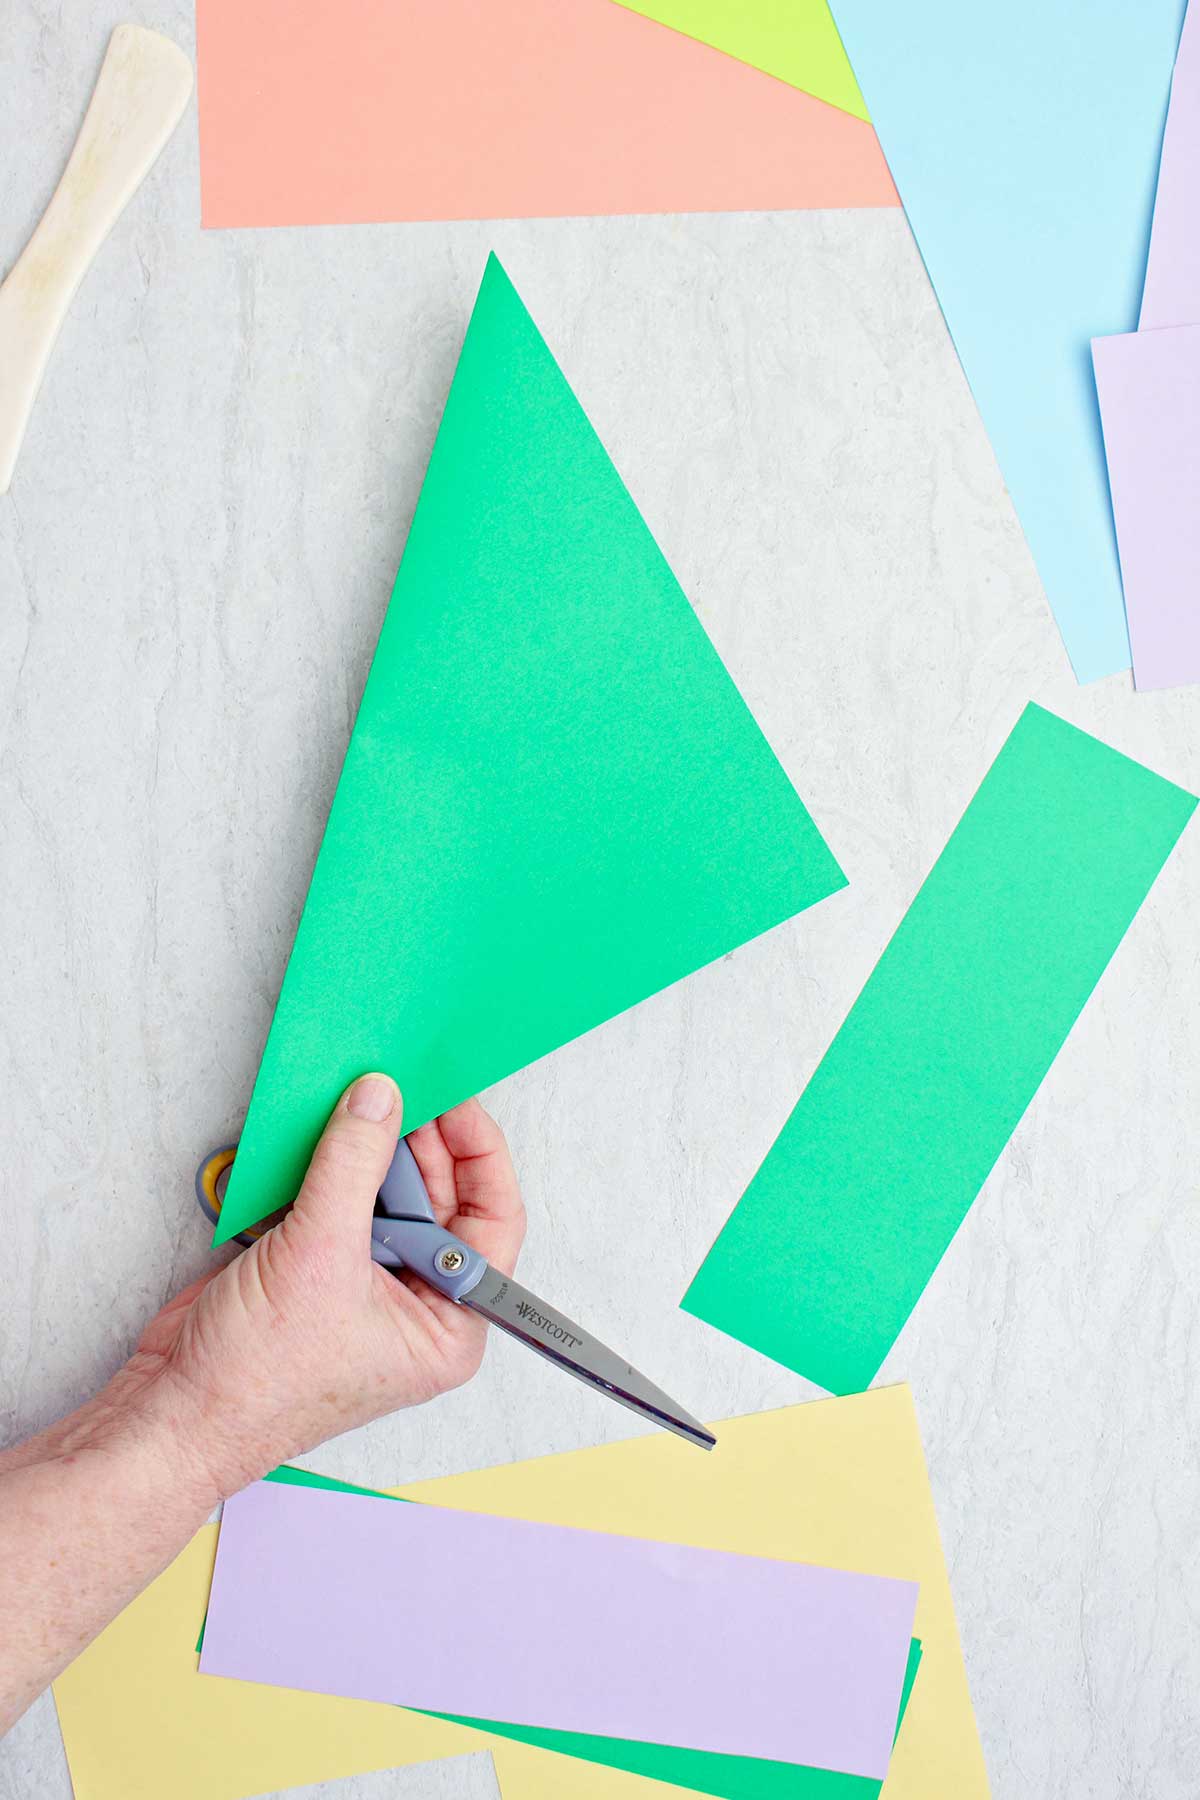
- Cut the green paper into a square using the full size of the copy paper.
- Cut the colored paper for the tulip bloom into the same size square as the green paper. Then fold it in half as a rectangle in both directions and cut it into four squares along the folds, ¼ the size of the original square.
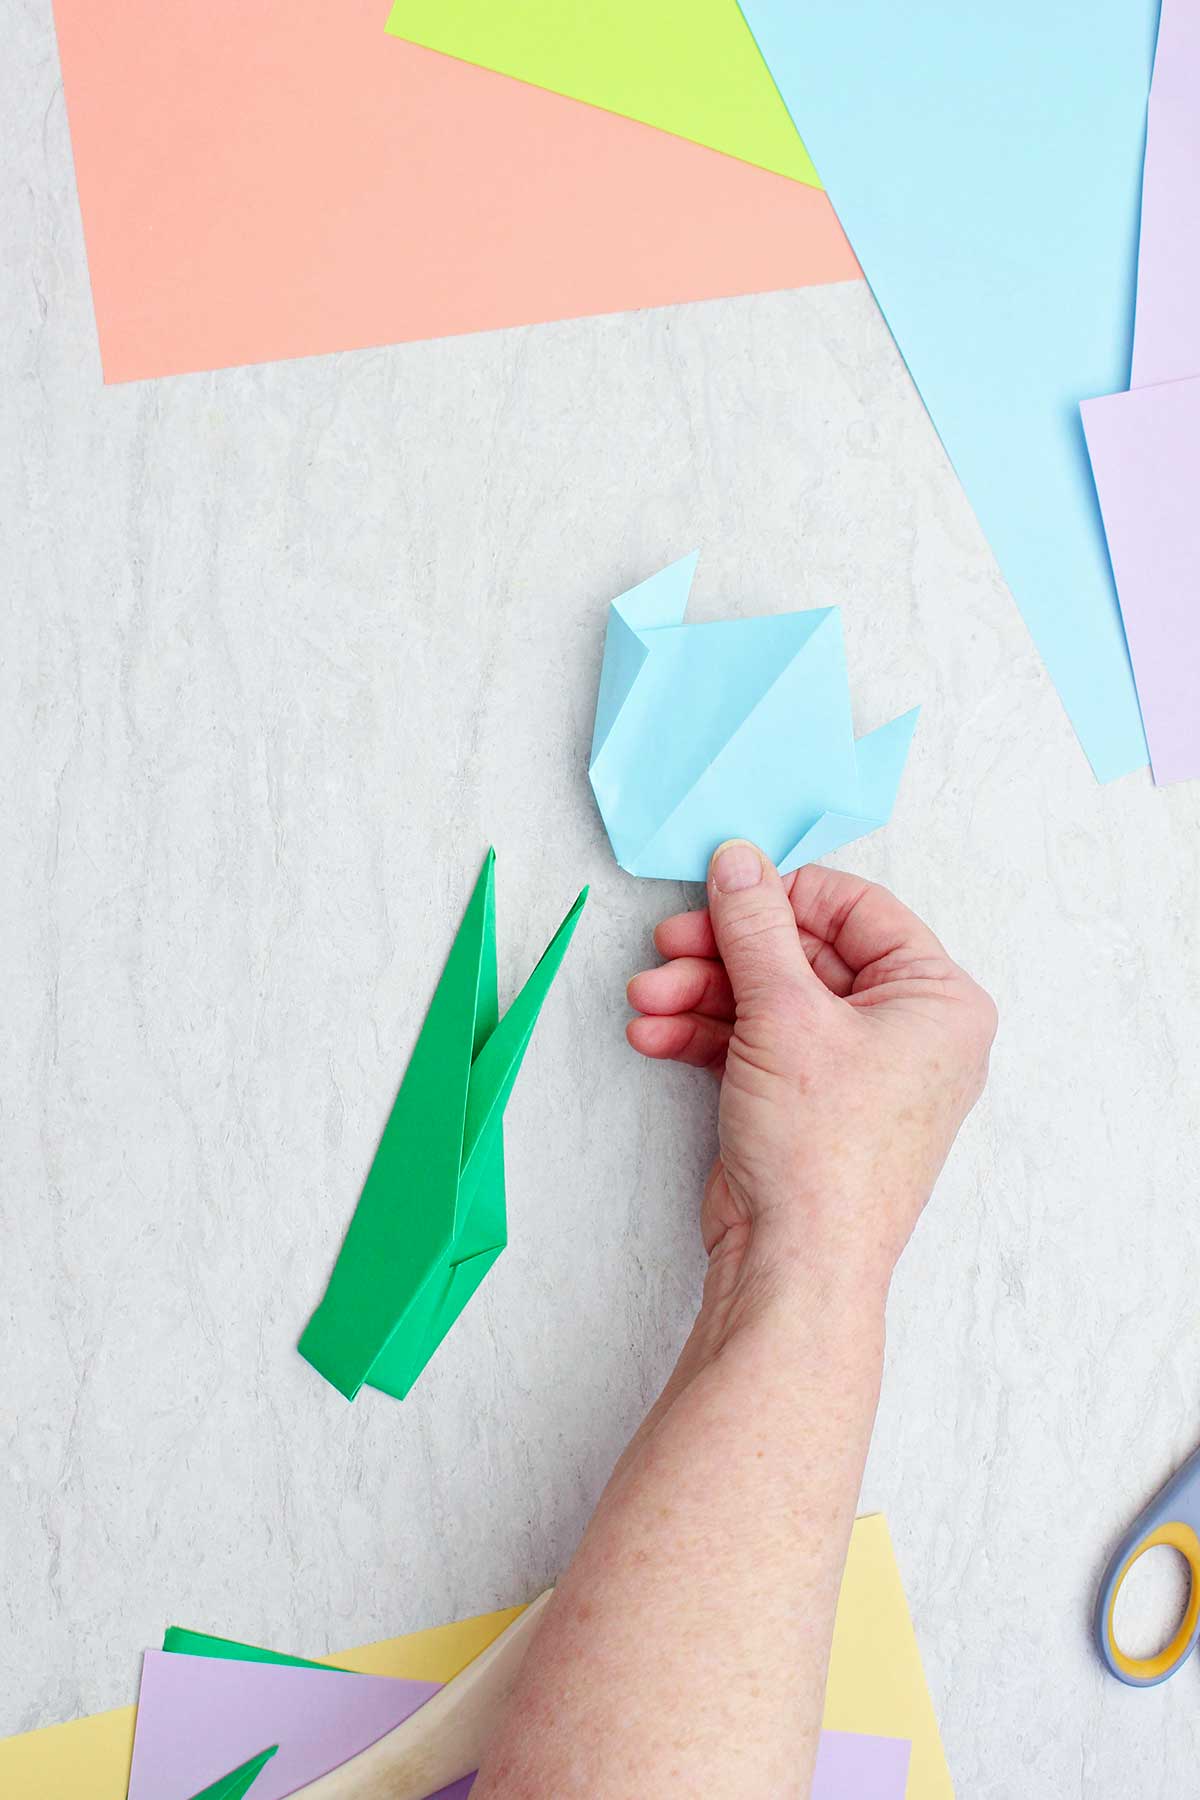
B. To make the tulip flower
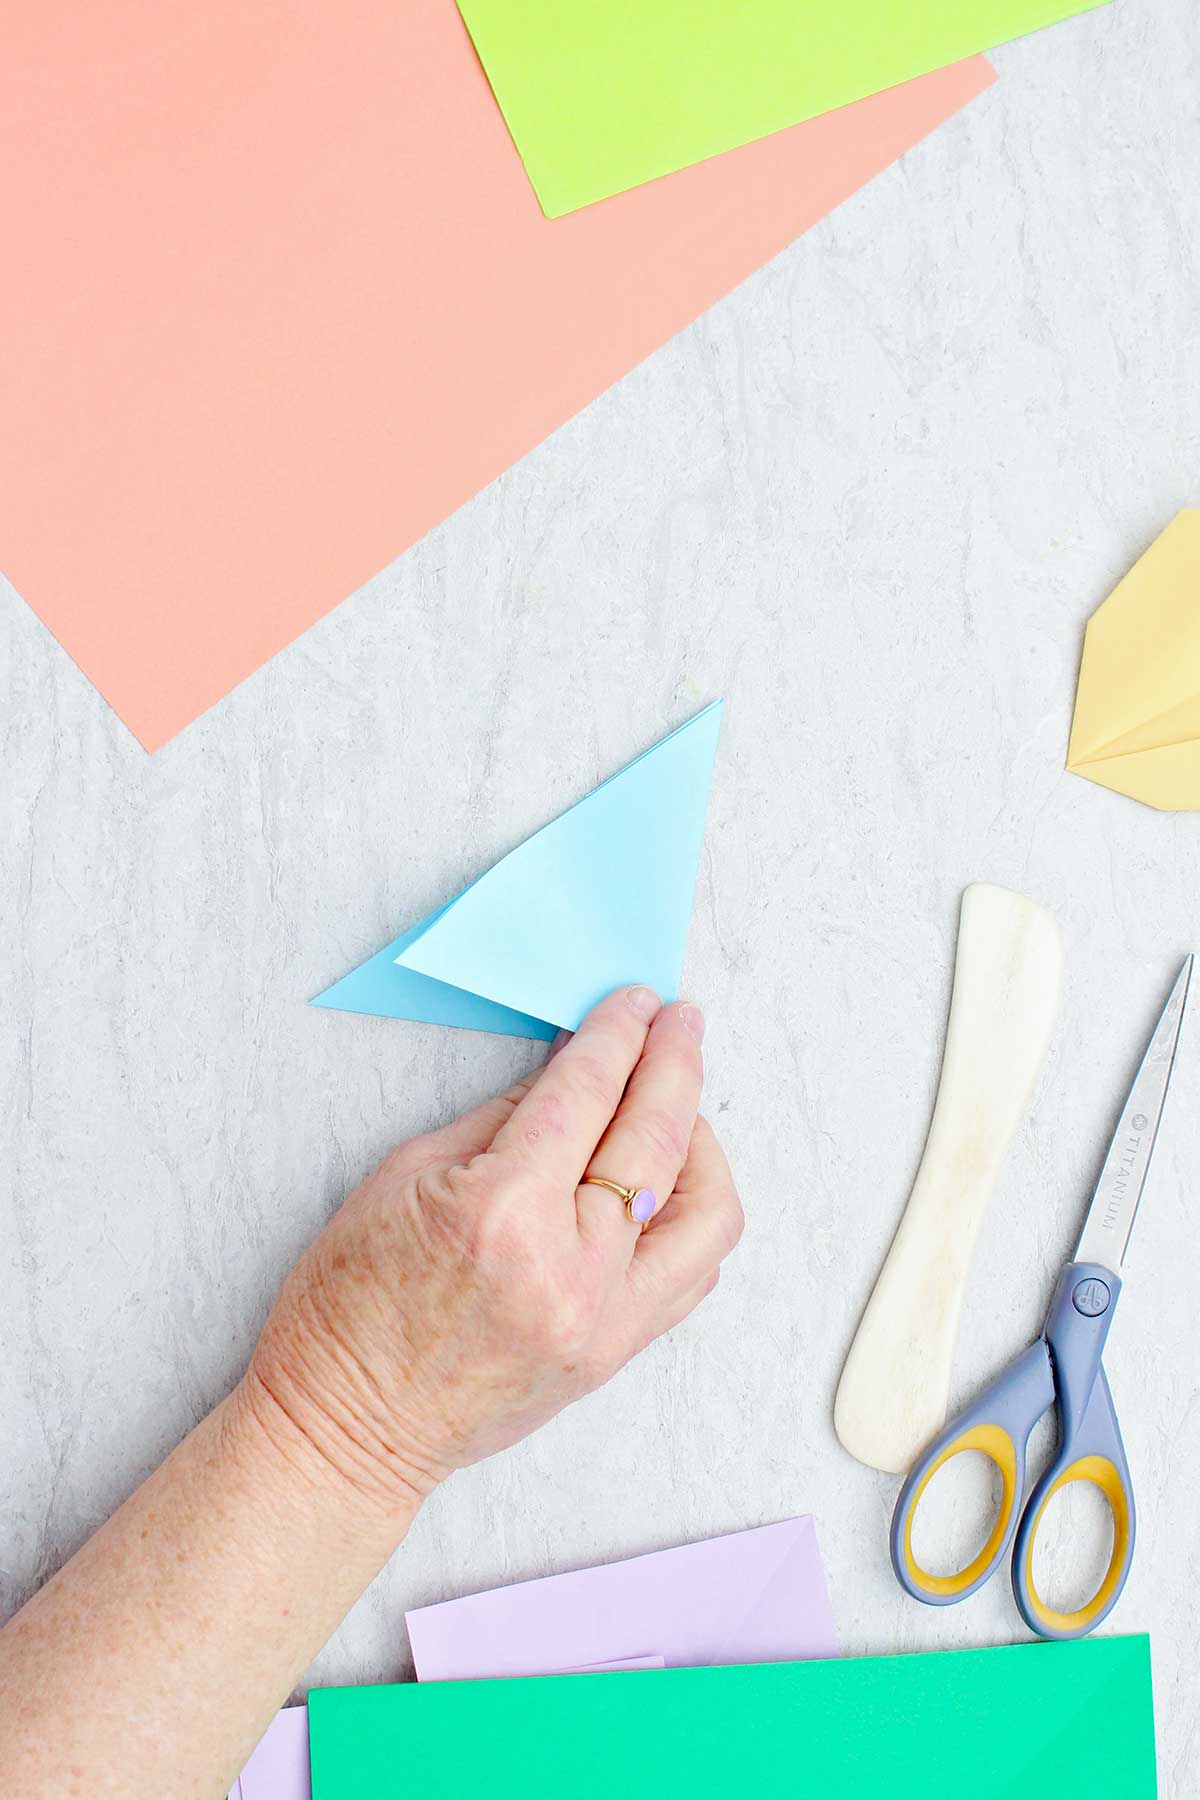
- Start with your square piece of colored paper for the tulip bloom, color side down (if one sided paper)
- Fold diagonally to form a triangle
- Fold the triangle in half again to make a smaller triangle, open it up again.
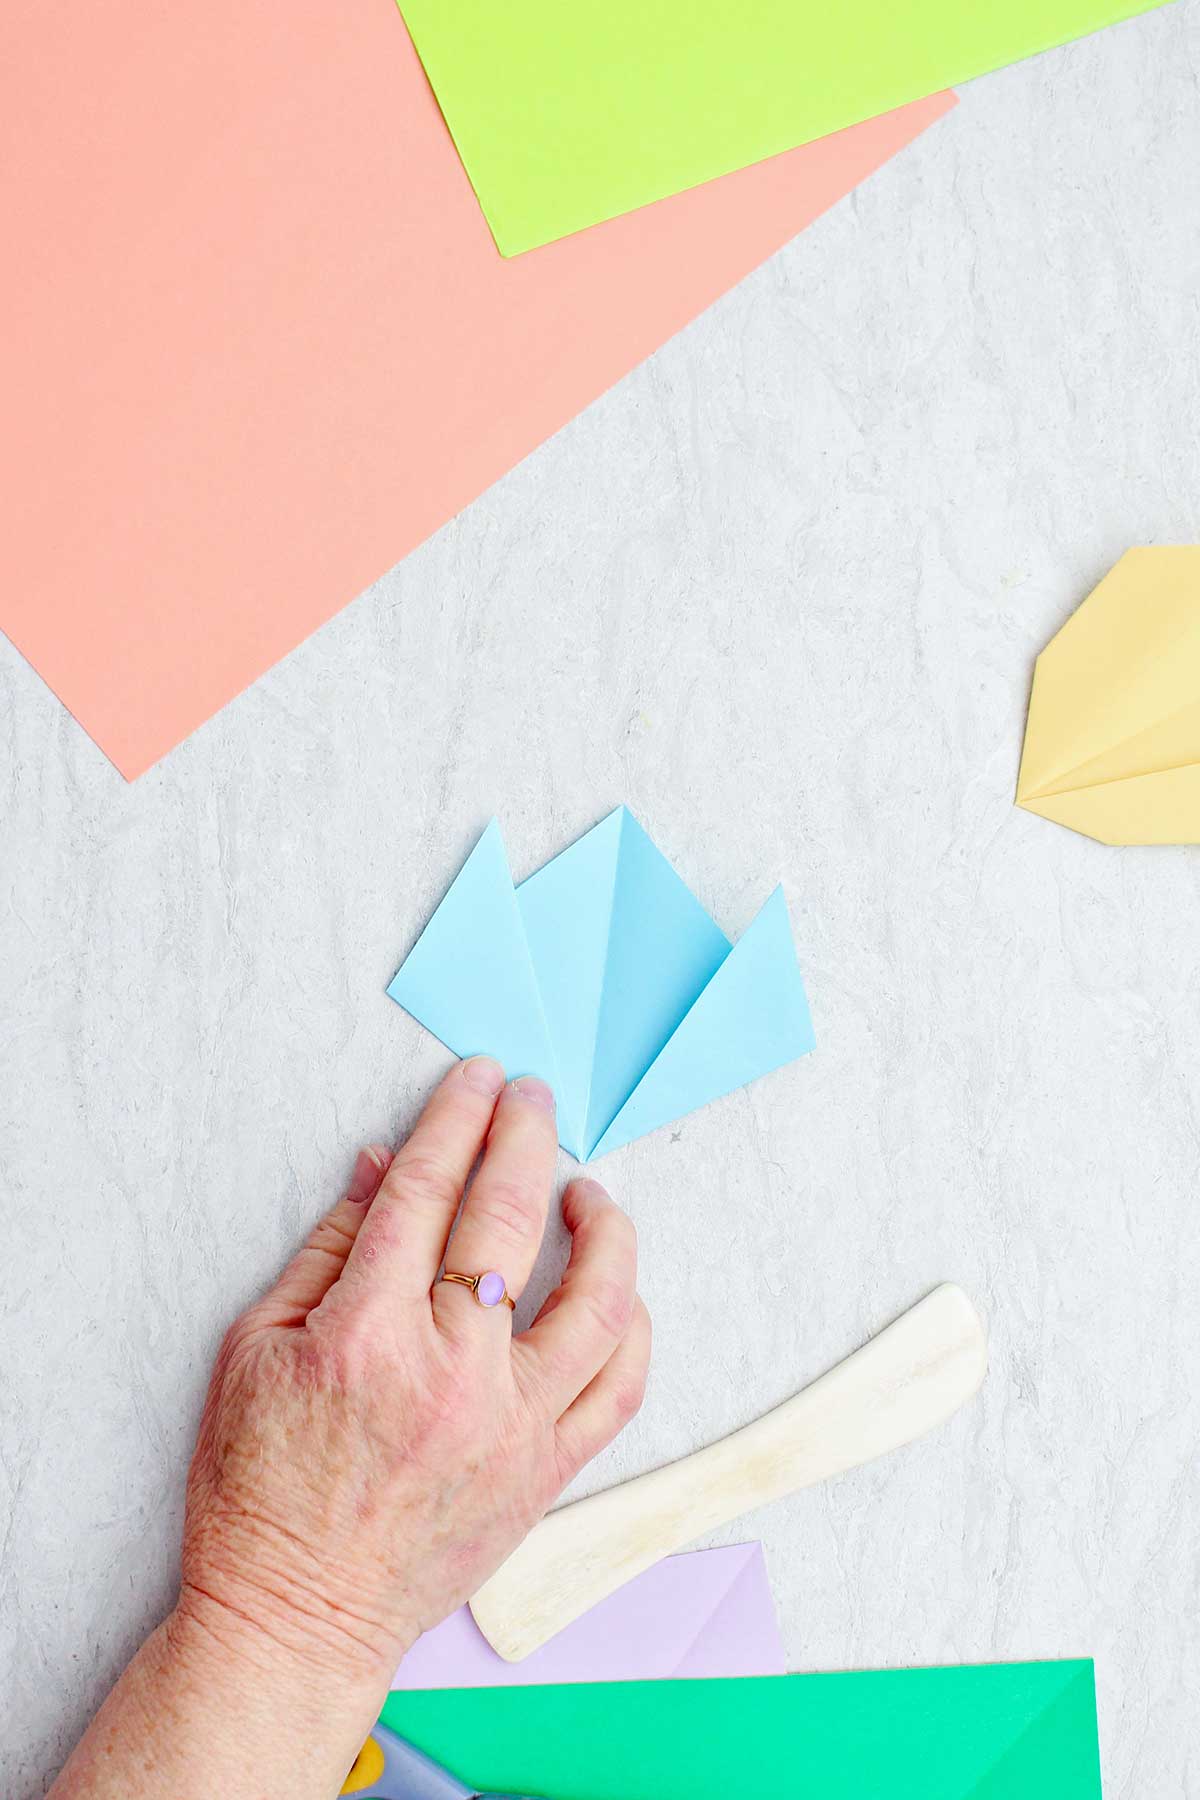
- Place the triangle in front of you with the long side at the bottom. Take one corner (right or left) and bring it upward towards the center fold. With the fold beginning at the bottom center, fold this side upwards so the top of the fold is about ¾ inch from the center fold. This will form a tulip petal. Fold the opposite corner up in the same manner.
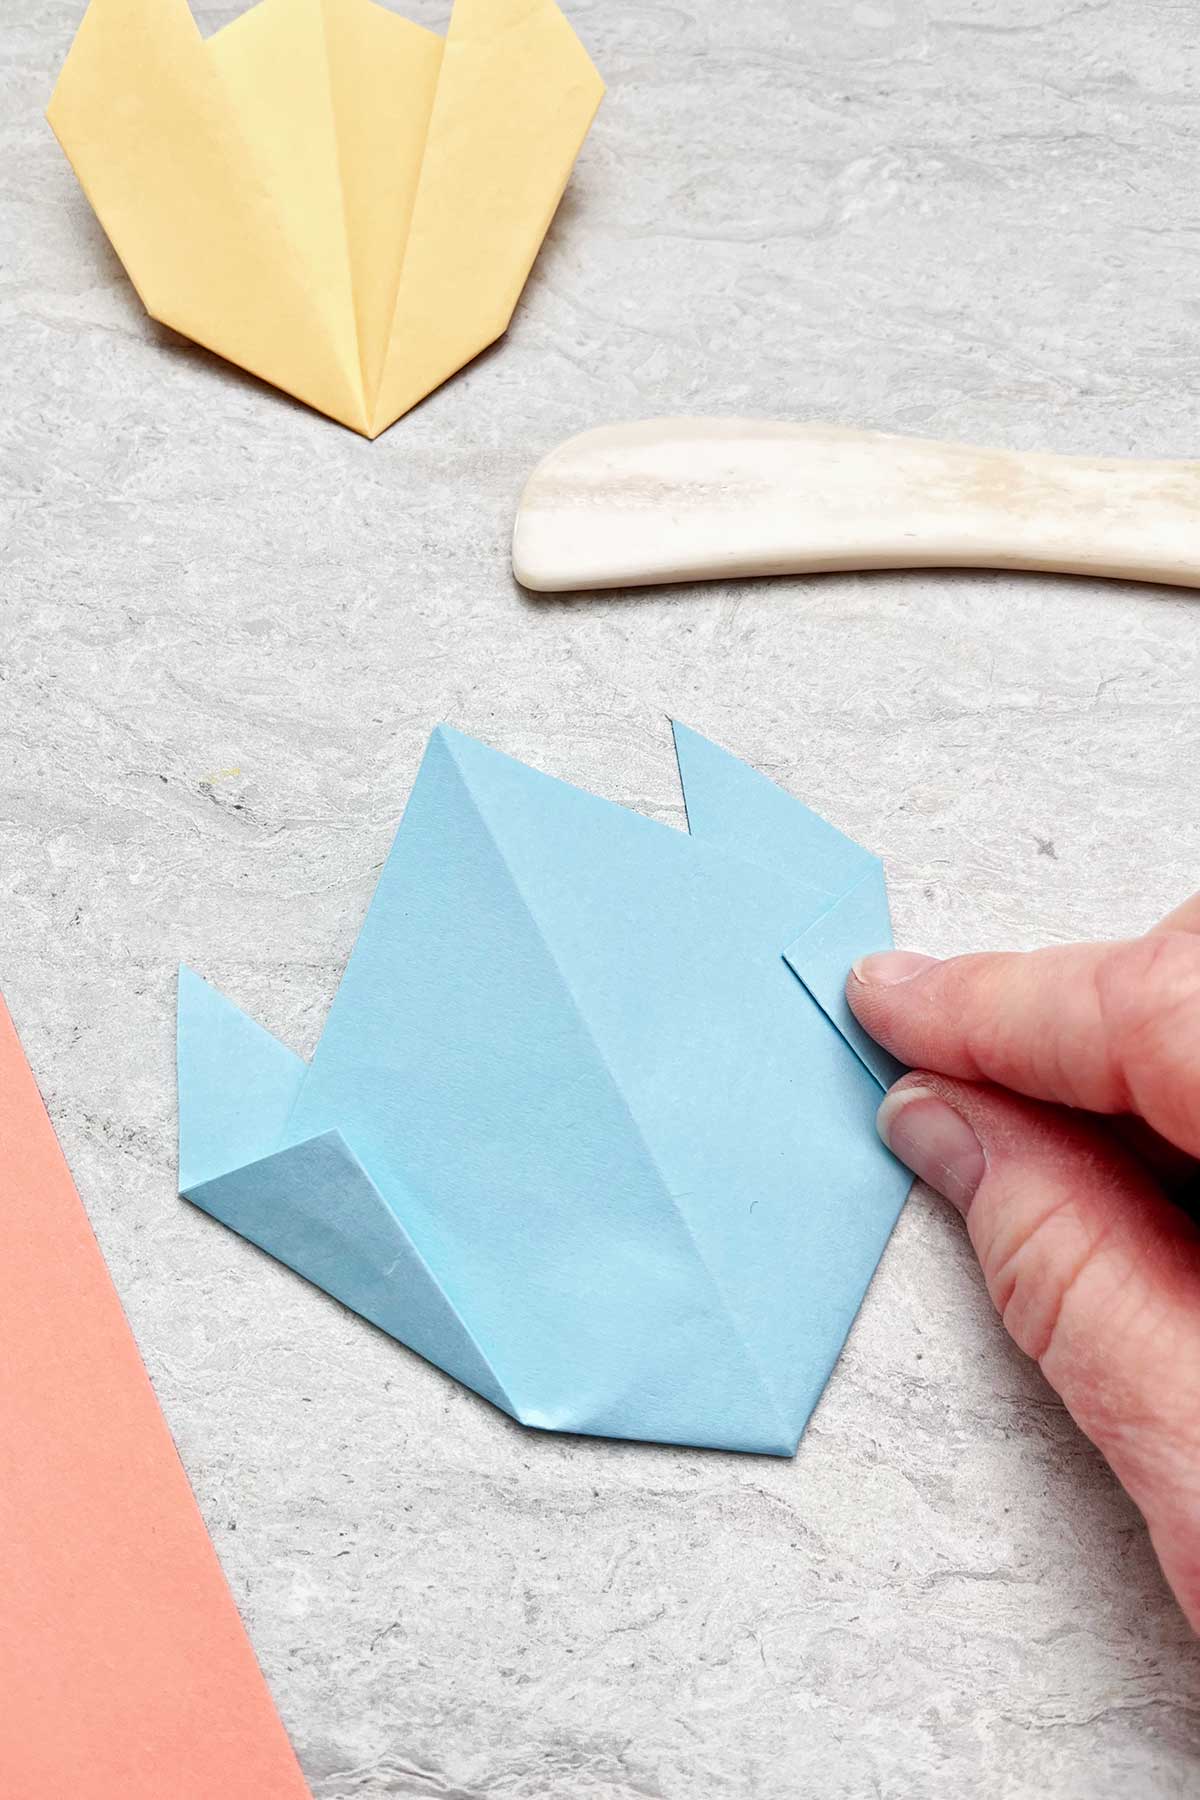
- Turn the tulip bloom over from right to left. Bend in the right corner about ½ inch. Repeat on the other side. I make this fold wider at the top then the bottom which creates more of a tulip shape when done. See the picture or video.
- Turn the folded paper over again right to left.
Now you have your tulip bloom! Ta-da!
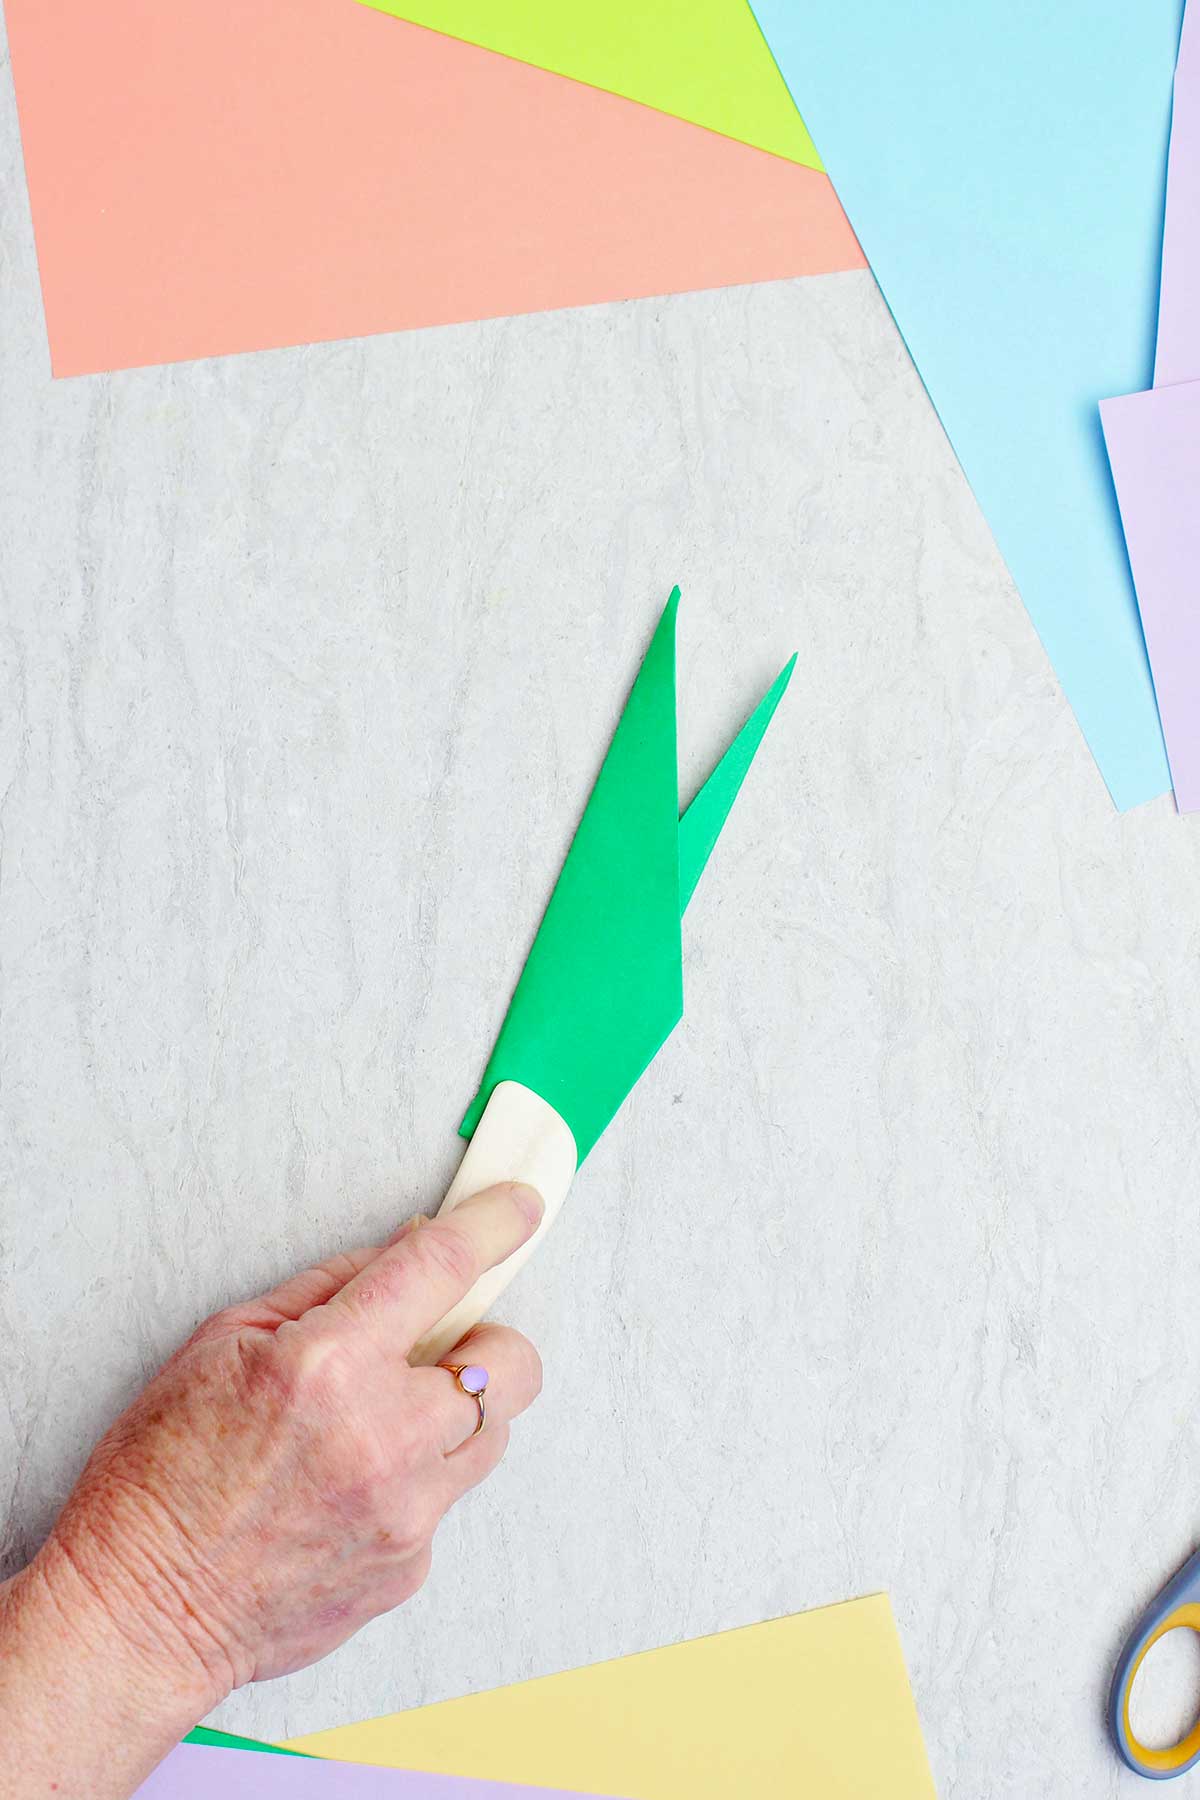
C. To make the stem:
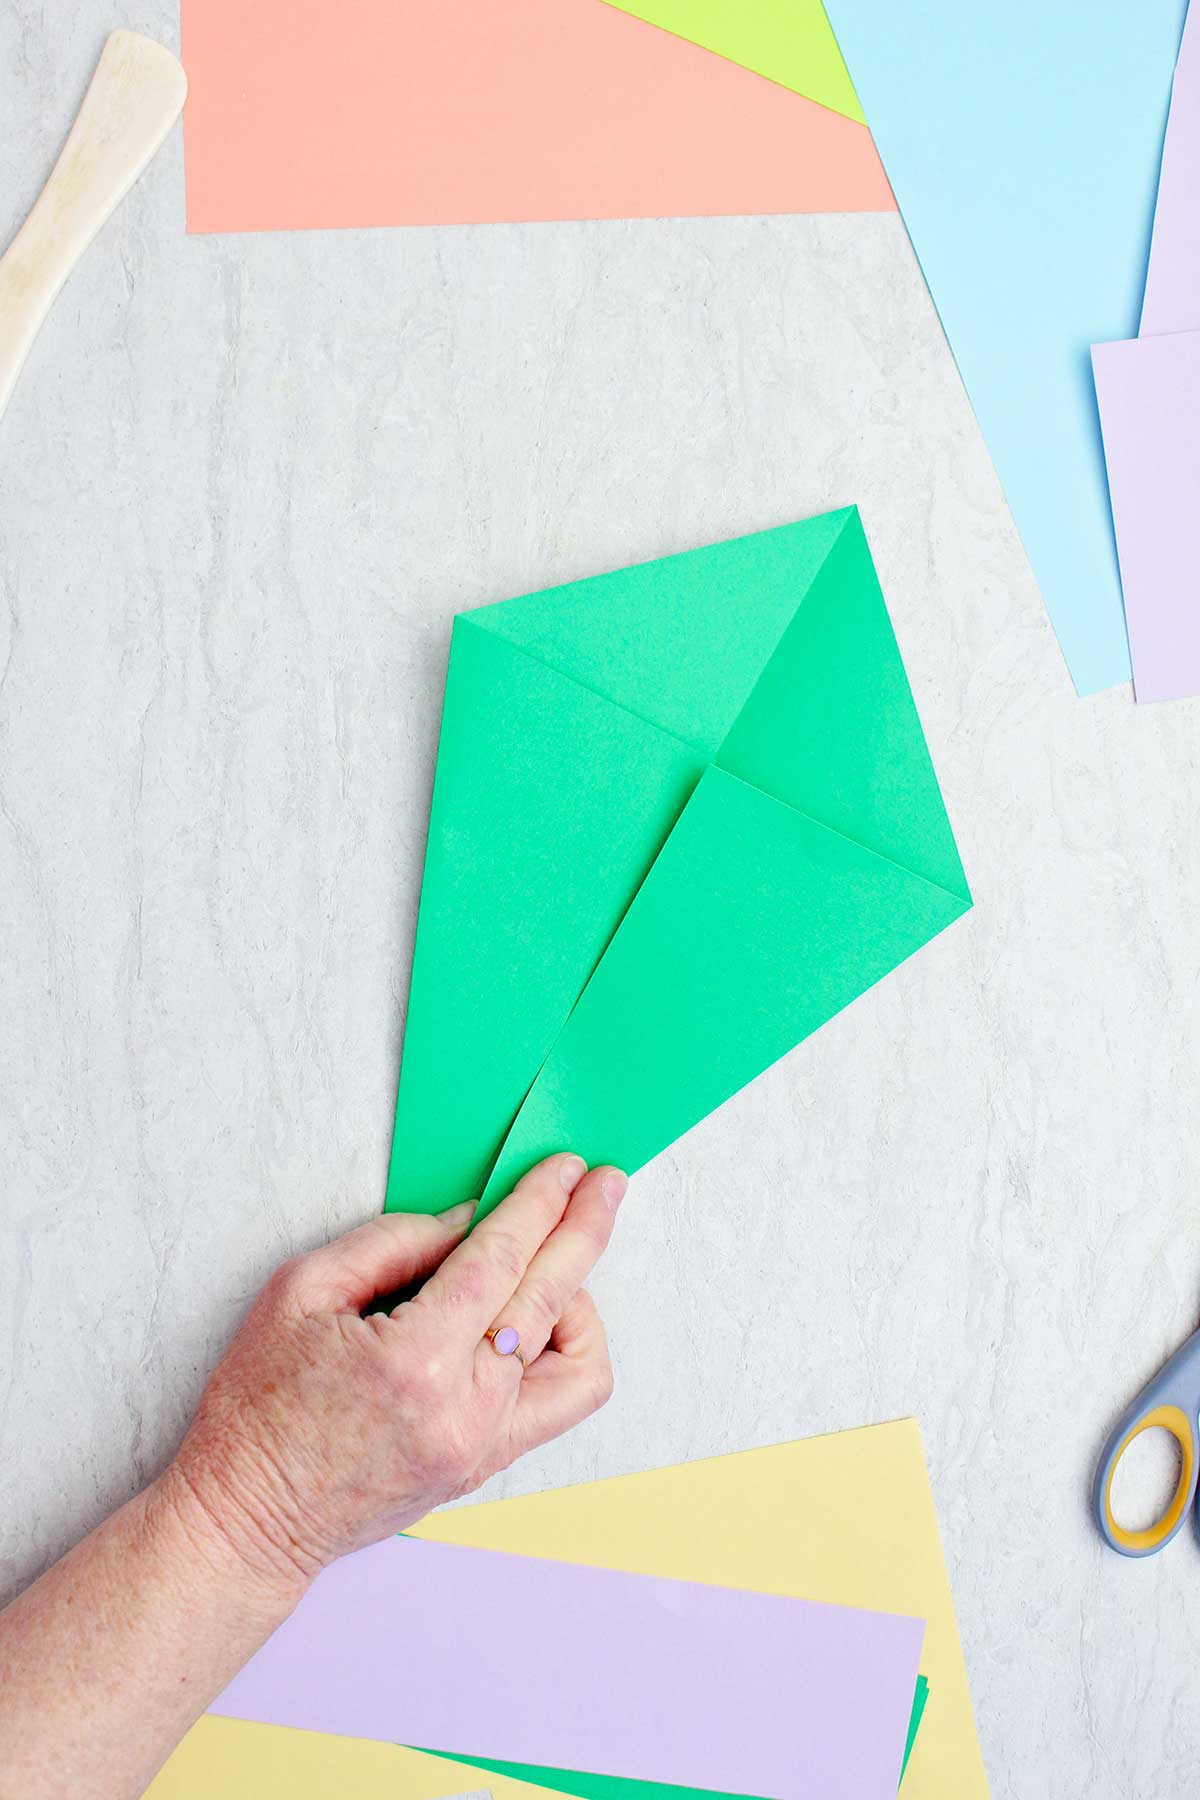
- Take a green square of paper, fold it diagonally and then reopen. Place the paper in front of you as a diamond in its position with the fold running up and down. Put color side down if using one sided paper.
- Take the right corner and fold it up so the bottom right edge of the paper lines up with the center crease. Repeat this with the left corner. It will have a kite shape. Pivot the paper so the bottom corner is now at the top.
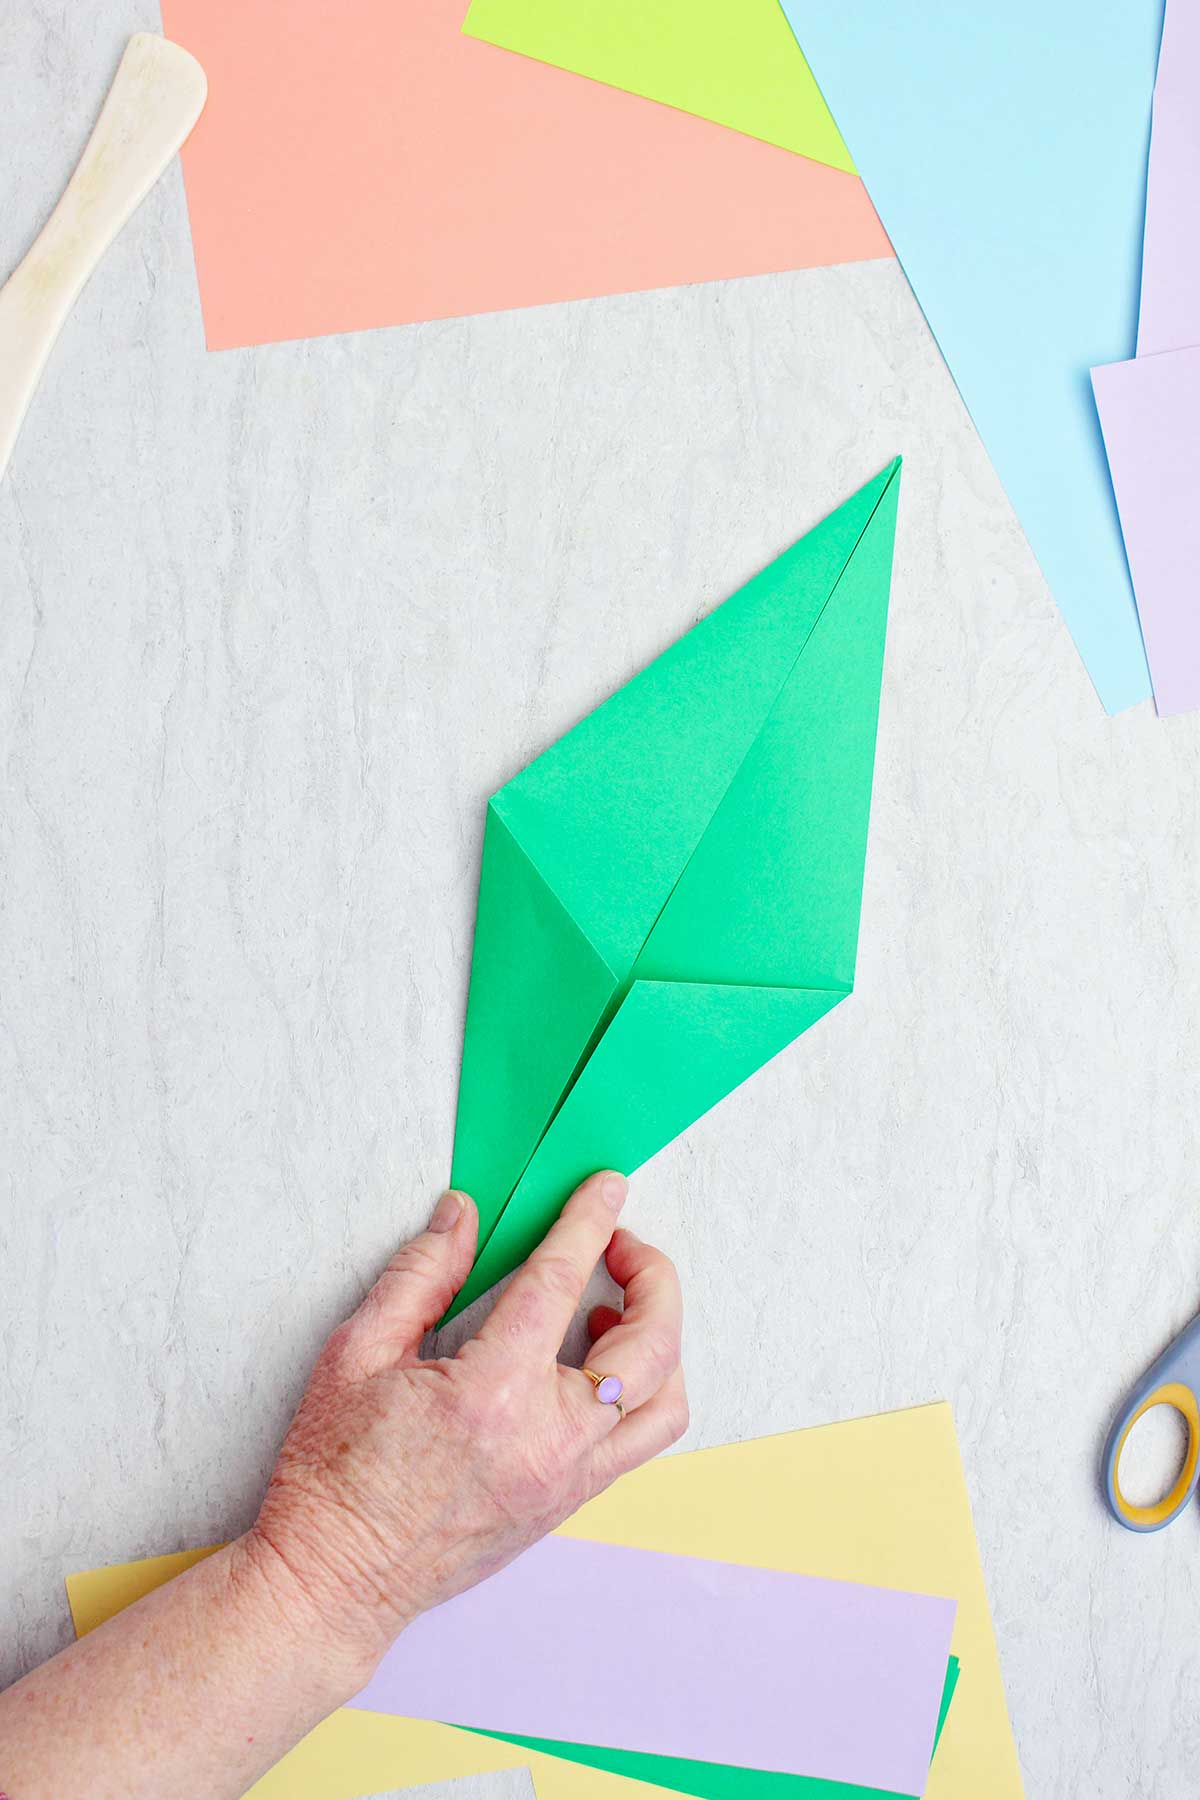
- Fold the right corner up so the bottom right edge lines up with the center crease. Repeat this with the left corner. Now it will have a diamond shape. Leave it in the same position.
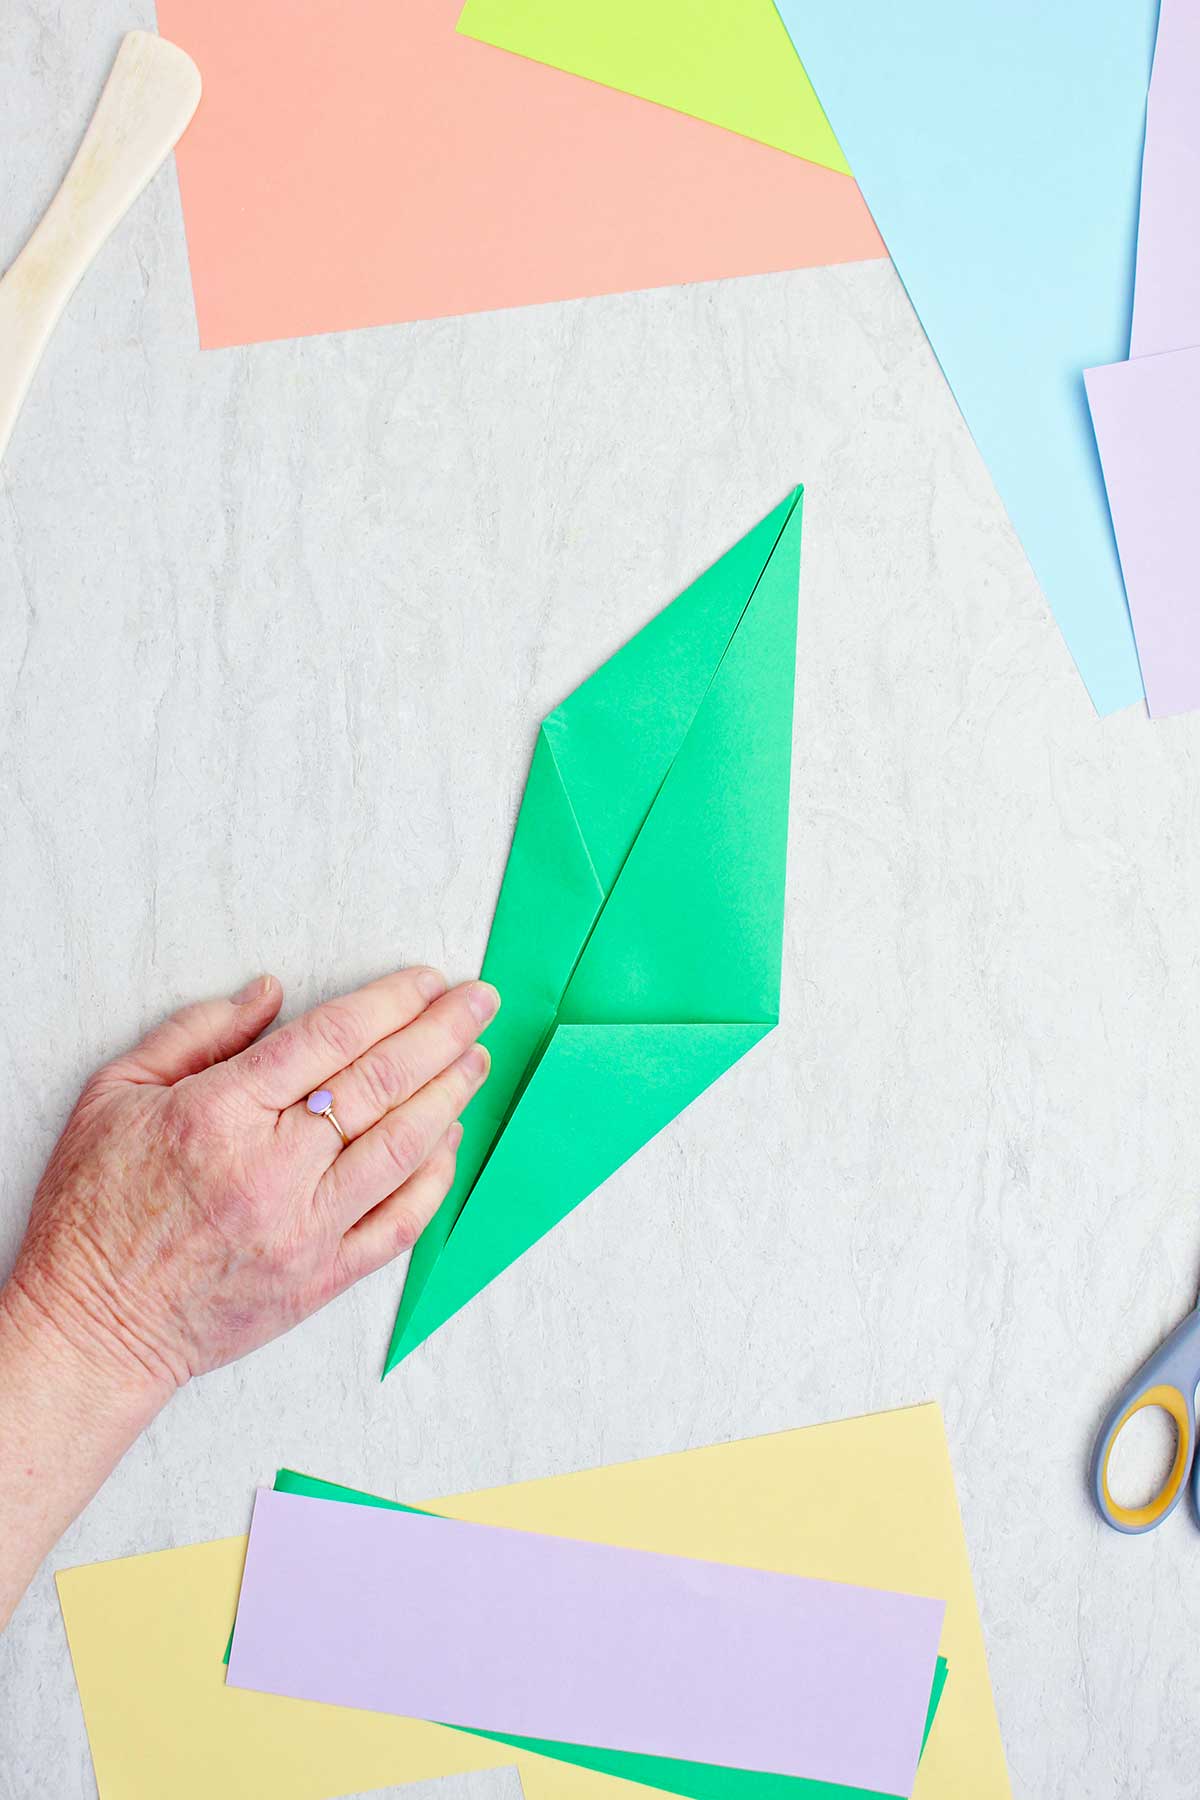
- Repeat step three with the right and left corners of the paper. It ends up in a very long kite shape. Leave the paper in the same position.
- Fold the bottom pointed corner up to the top corner and fold.
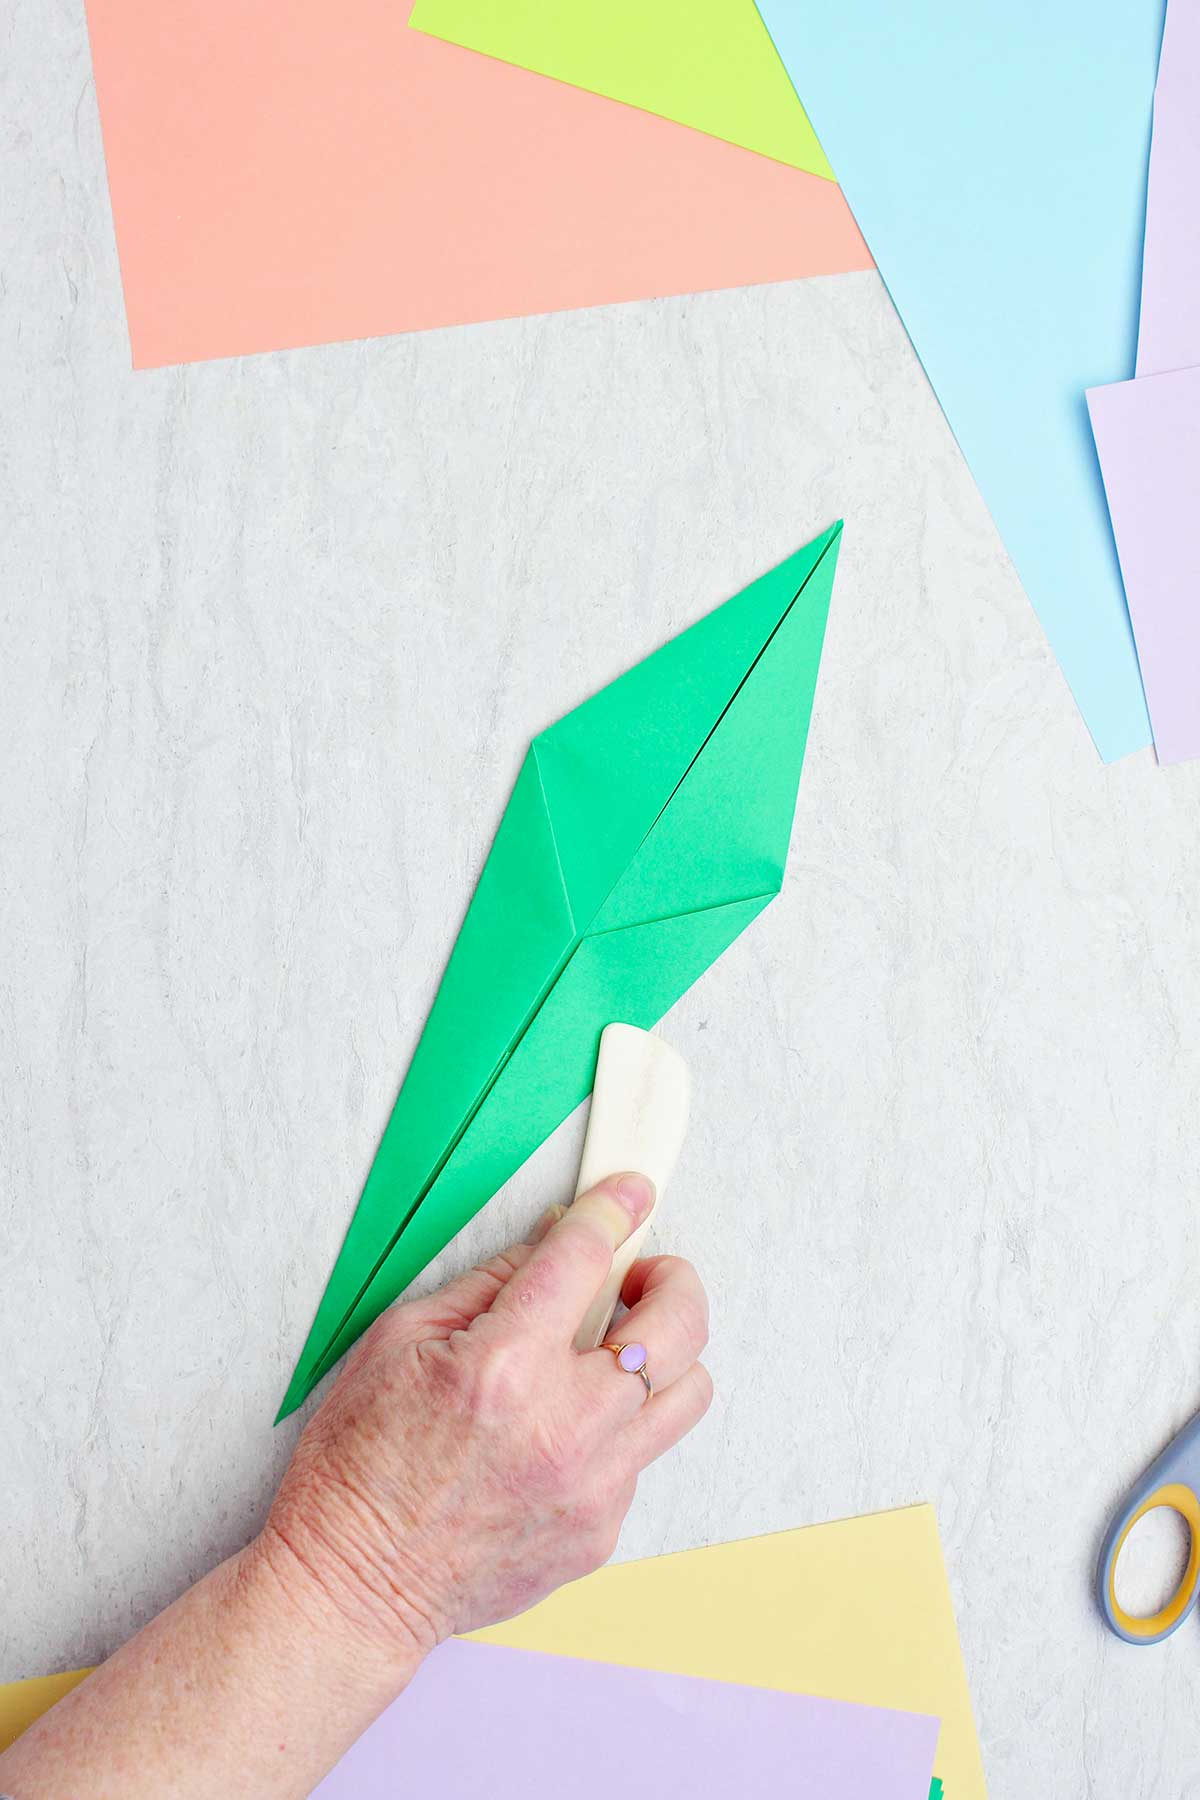
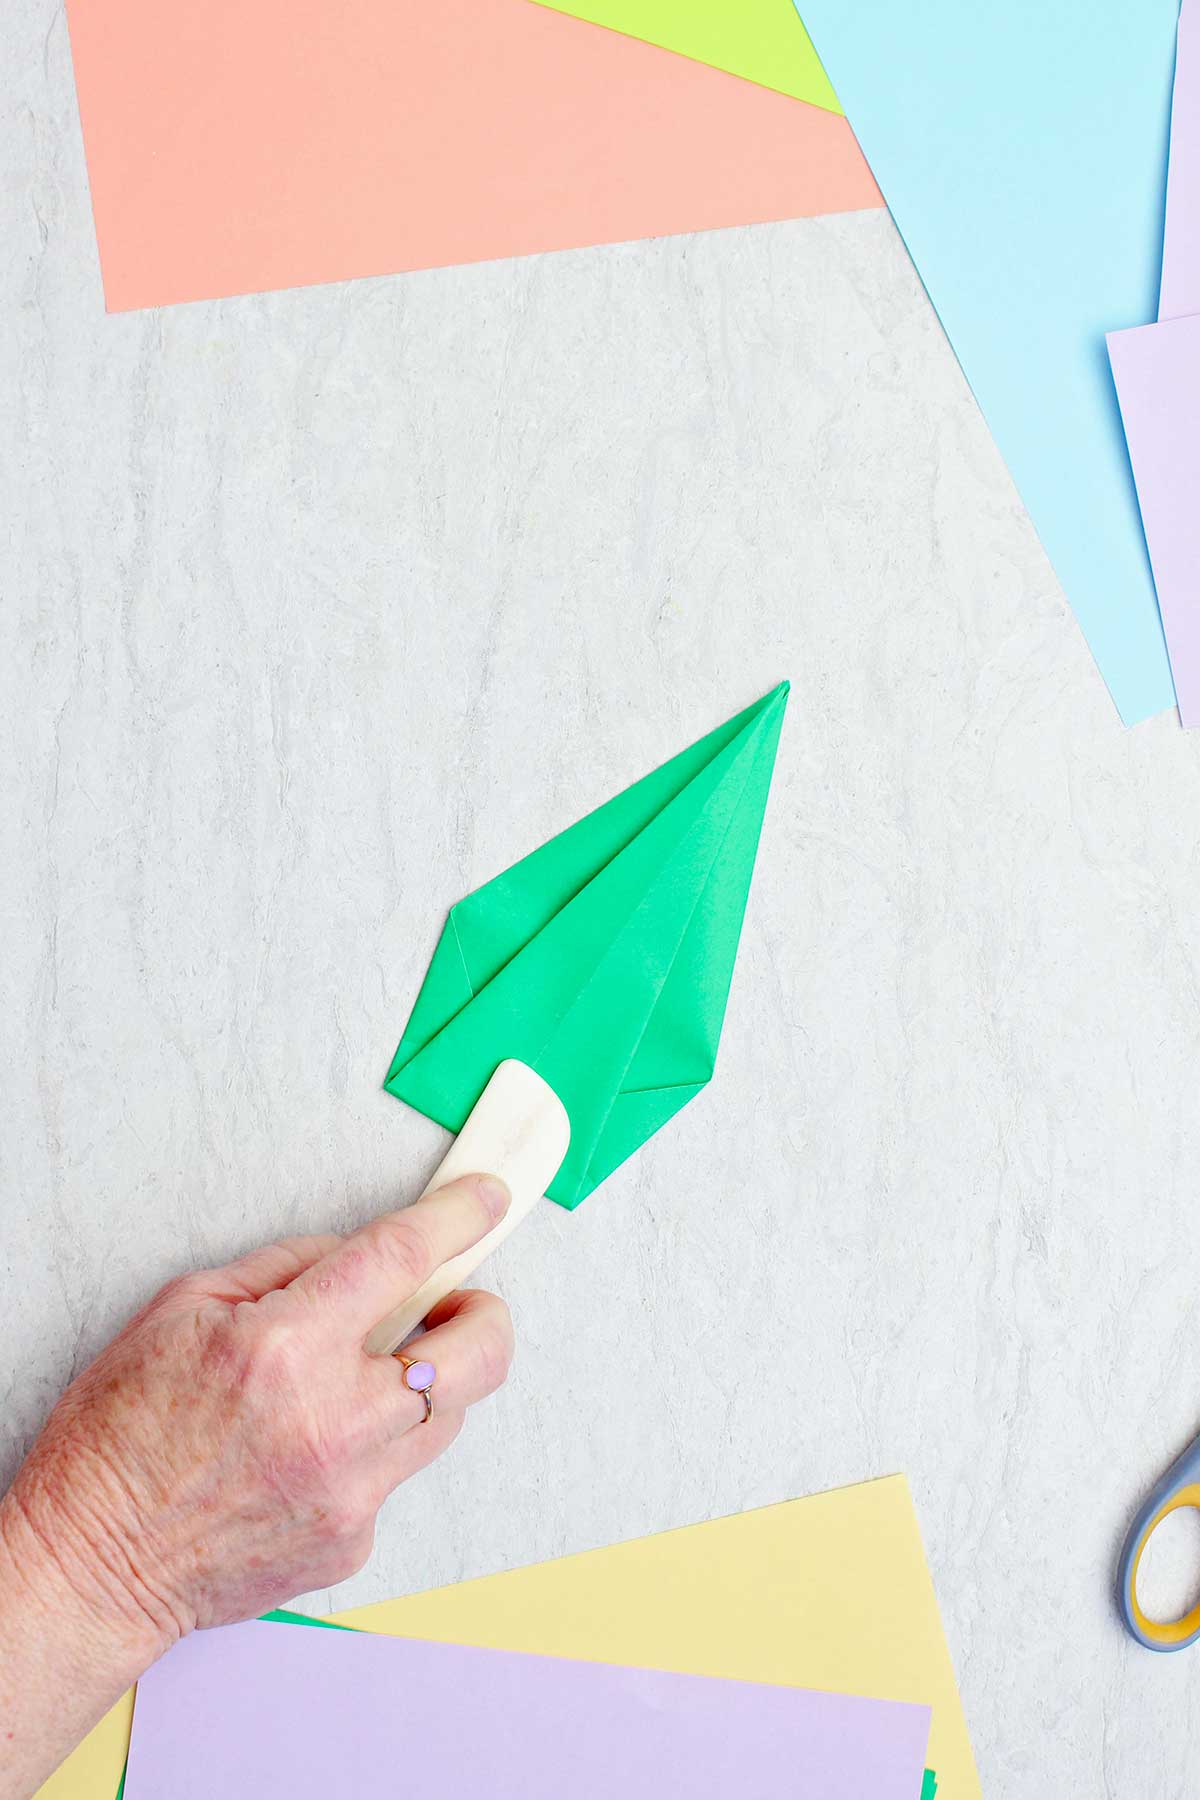
- Fold the paper in half along the center crease. Pull the center pointed section out about an inch and firmly fold again. This is where the bone folder tool really comes in handy! This center point will be the stem and the outside point is the leaf.
- Cut the bottom tip off of the tulip, just 1/16 to ⅛ inch is all you want.
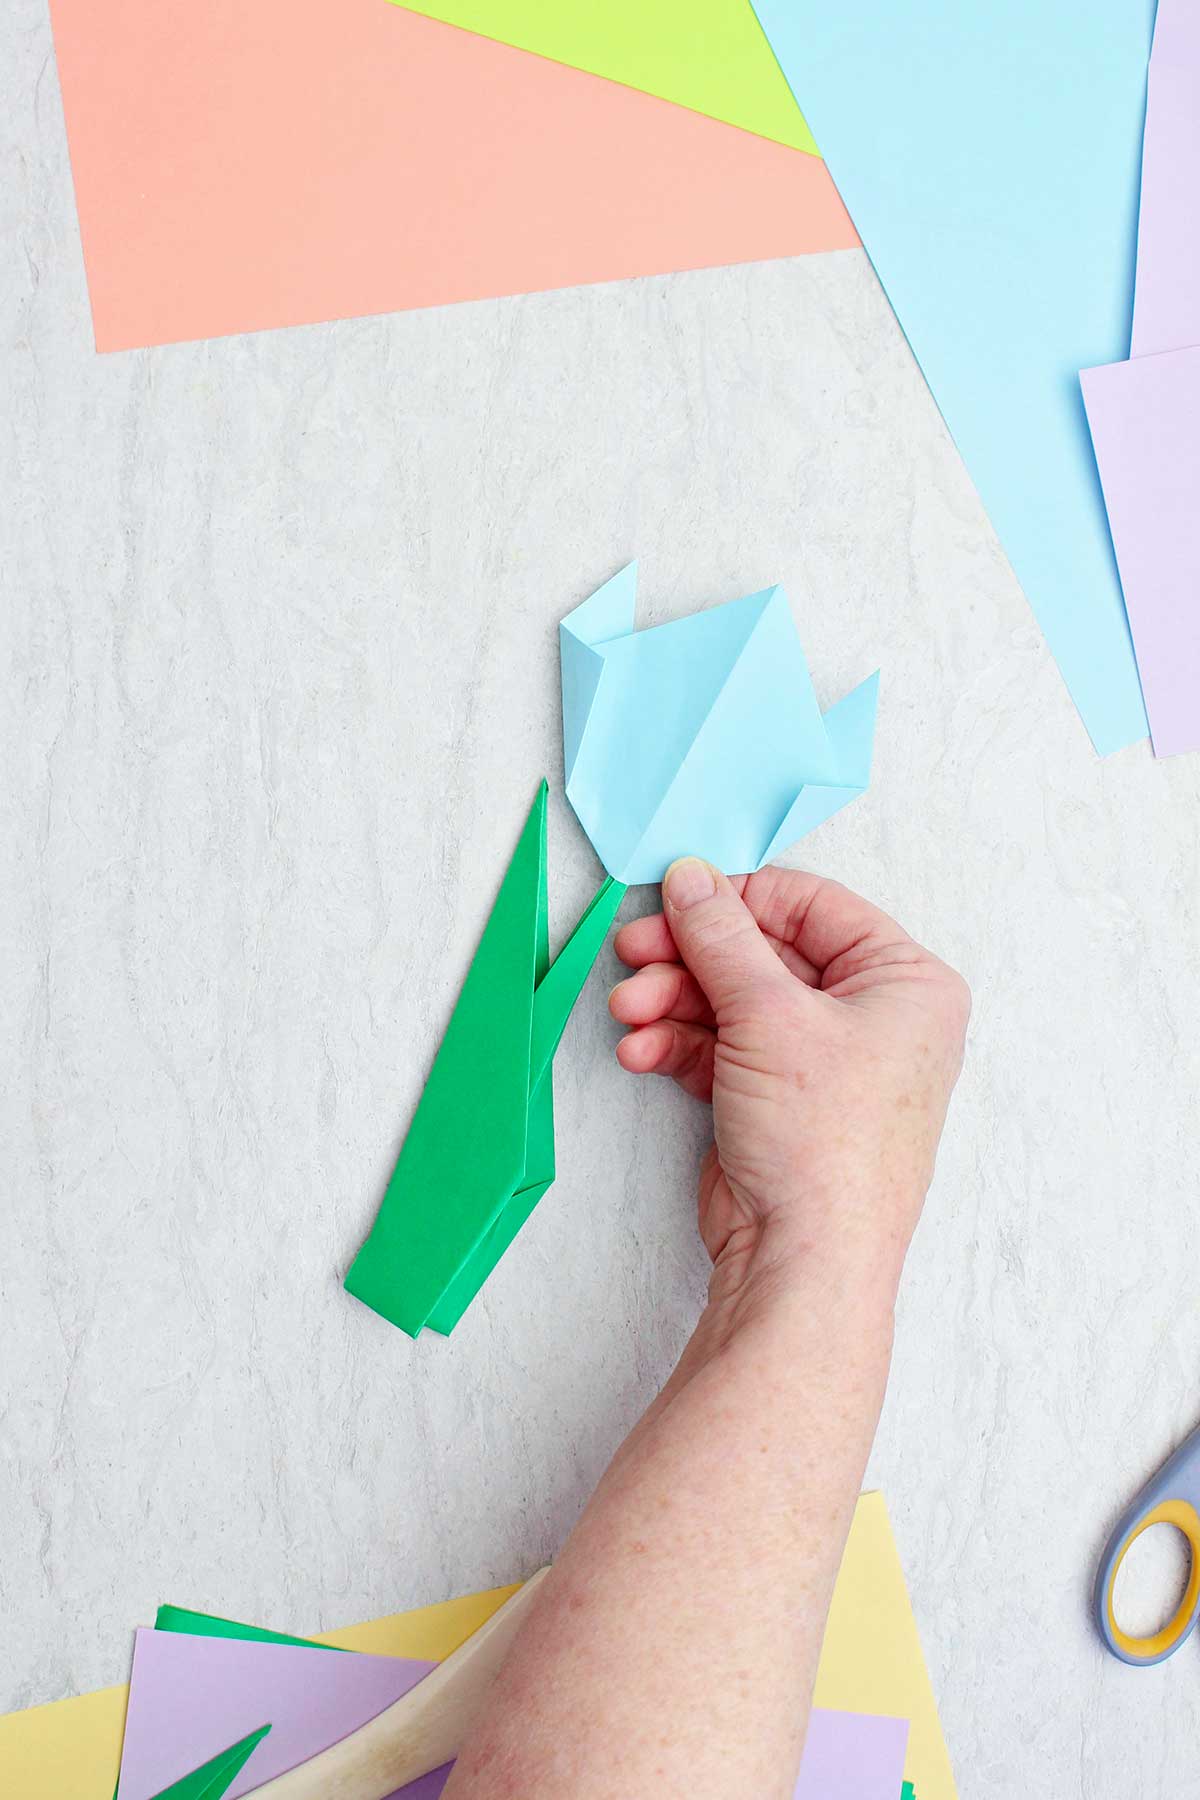
- Slide the stem into the bottom of your flower where you cut the small hole. Add a bit of glue to keep it in place if you want to.
Isn’t that the coolest origami tulip flower? It will stand up on the bottom edge of the stem too! I love that part.
Nana's Easy Origami Flower Video Tutorial
If you’re more of a visual learner, I have a full length YouTube video to help you in the step-by-step process of folding this origami flower. Click this link: Origami Flower Full Length Video
Follow along and stop the video at any point to work at your own pace. Watching the folding of the paper in real time can make the directions click!
Nana's Professional Advice: Elevating Your Easy Origami Flower
Once I finished my first origami flower tulip I found it hard to stop. I made a whole “bouquet” in various colors. There are so many things you can do with them.
- Line them up down the center of the table.
- Put them in a grouping on a bookshelf.
- Place a bunch in a wide mouth pint sized canning jar or cup.
- Give them as a gift.
- Glue them onto a card or piece of artwork.
- String them together to make a garland.
This project will get you ready to fold other origami flowers or projects. You will keep building skills as you go.
Nana's Flower Origami Top Tips
These tips can help making origami flowers even easier!
- Remember, it works best to have green paper for the stem that is about 4 times bigger than the paper used for the tulip flower.
- Crease each fold firmly for crisp edges. Using a bone folder is helpful for this.
- With younger kids it works best to use larger paper.
- Watch the video and stop with each step, take your time.
- Two sided color/design origami paper gives projects a neat effect.
- Avoid construction paper as the folds get too thick.
Craft Variations-
Here are a few variations you’re welcome to try with this origami flower craft:
- I like using patterned scrapbook paper for unique designs. It comes in 12x12” squares too, which is nice.
- Smaller squares will make mini flowers.
- Add stems made from small dowel rods cut to various lengths. Glue on leaves and put in a vase.
- Decorate the tulip petals with markers or crayons
- Try making a “rainbow garden” many tulips in every color
FAQ
The origami tulip is one of the easiest and most beginner-friendly designs. This makes it perfect for kids and first-timers.
Origami paper is ideal, but any lightweight paper cut into a square will work. I often use colored copy paper or scrapbook paper. Avoid construction paper as the folds get too thick.
Yes! The younger kids usually need some help at first, but this simple design is great for kids to do on their own.
More DIY Crafts for Kids
Looking for more easy flower crafts to try? Here are a few of our favorites:


Come join the fun at WTN!
Try this craft, leave a comment, rate it, and tag a photo with #WelcometoNanas wherever you post.
More crafts, please!
Love getting crafts straight to your inbox? Sign up to receive a weekly email and get a free gift!
How to Make Easy Origami Flowers: A Tulip and Stem
Equipment
- Scissors Scissors are needed to cut rectangle paper into squares
- Bone folder (optional) A bone folder is handy for making good creases/folds in the paper.
Items Required
- Colored copy paper Choose colored copy paper in colors you enjoy
- Colored copy paper in green Green paper is used to fold the tulip stems
- Scissors Scissors are needed to cut rectangle paper into squares
- Origami paper squares (optional) Origami paper can be different colors or patterns and are precut squares
- Markers or crayons (optional) Use colored markers or crayons if you want to decorate the petals.
Instructions
Cut your paper to size
- Cut the green paper into a square using the full size of the copy paper. The green paper for the stem should be roughly four times as large as the colored paper for the tulip bloom.
- Cut the colored paper for the tulip bloom into the same size square as the green paper. Then fold it in half as a rectangle in both directions and cut it into four squares along the folds, ¼ the size of the original square.
To make the tulip flower
- Start with your square piece of colored paper for the tulip bloom, color side down (if one sided paper). Fold diagonally to form a triangle
- Fold the triangle in half again to make a smaller triangle, open it up again.
- Place the triangle in front of you with the long side at the bottom. Take one corner (right or left) and bring it upward towards the center fold. With the fold beginning at the bottom center, fold this side upwards so the top of the fold is about ¾ inch from the center fold. This will form a tulip petal. Fold the opposite corner up in the same manner.
- Turn the tulip bloom over from right to left. Bend in the right corner about ½ inch. Repeat on the other side. I make this fold wider at the top then the bottom which creates more of a tulip shape when done. See the picture or video.
- Turn the folded paper over again right to left. Cut the bottom tip off of the tulip, just ⅛ to 1/16 inch is all you want. You will use this small hole after folding the stem.
To make the stem:
- Take a green square of paper, fold it diagonally and then reopen. Place the paper in front of you as a diamond in its position. Put color side down if using one sided paper.
- Take the right corner and fold it so the top right edge of the paper lines up with the center crease. Repeat this with the left corner. It will have a kite shape. Leave it in the same position.
- Fold the right corner so the bottom right edge lines up with the center crease. Repeat this with the left corner. Now it will have a long diamond shape. Leave it in the same position.
- Repeat step three with the right and left corners of the paper. It ends up in a very long kite shape. Leave the paper in the same position.
- Fold the bottom pointed corner up to the top corner and fold.
- Fold the paper in half along the center crease. Pull the center pointed section out about an inch and firmly fold again. This is where the bone folder tool really comes in handy! This center point will be the stem and the outside point is the leaf.
- Slide the stem into the bottom of your flower where you cut the small hole. Add a bit of glue to keep it in place if you want to.


Leave a Reply