Learn How to Make Your Own Miniature Journal with some paper, glue, and a few simple steps. It's a cute craft for kids that is great for doodles, drawings and notes!
Jump to:
- A New Journal for a New Year!
- Watch How To Make Your Own Miniature Journal
- How To Make Your Own Mini Journal
- Decorating Your Mini DIY Journals
- How to Use Your Miniature Journal or Notebook
- More DIY Book Ideas
- Supplies for How To Make Your Own Mini Journal:
- Other Creative Paper Crafts
- Enjoy!
- How to Make Your Own Miniature Journal
A New Journal for a New Year!
Have you started the new year and you want to start a new journal? Or maybe you and the kids are looking for a great way to keep notes, thoughts, or a little list of things to do during the summer break?
These little mini journals are just the thing! Using just a some paper, glue, and a bit of creativity, kids can make their own mini books by hand. It's such a fun, quick and simple craft that kids (and perhaps adults as well) will love.
Wouldn’t it be special to introduce journals to your grands? Kids always love a little book of their very own where they can doodle and write their secrets. So do I. How about you?
I have several in my desk drawer right now. Ready? Let's jump right in!
Watch How To Make Your Own Miniature Journal
Check out this amazing video and get the details in the instructions below. So fun!!

How To Make Your Own Mini Journal
There are many different ways to make your own journal, this is just one that I think is pretty fun. Don't you just love miniatures?
We will start first thing by cutting up the paper to the right size, then binding it together. Once that is finished, we'll make a cover and decorate it!
This craft uses hot glue and scissors, so younger kids may need some assistance.
Ready to jump in? Remember, the most important thing is to have a little fun 🙂
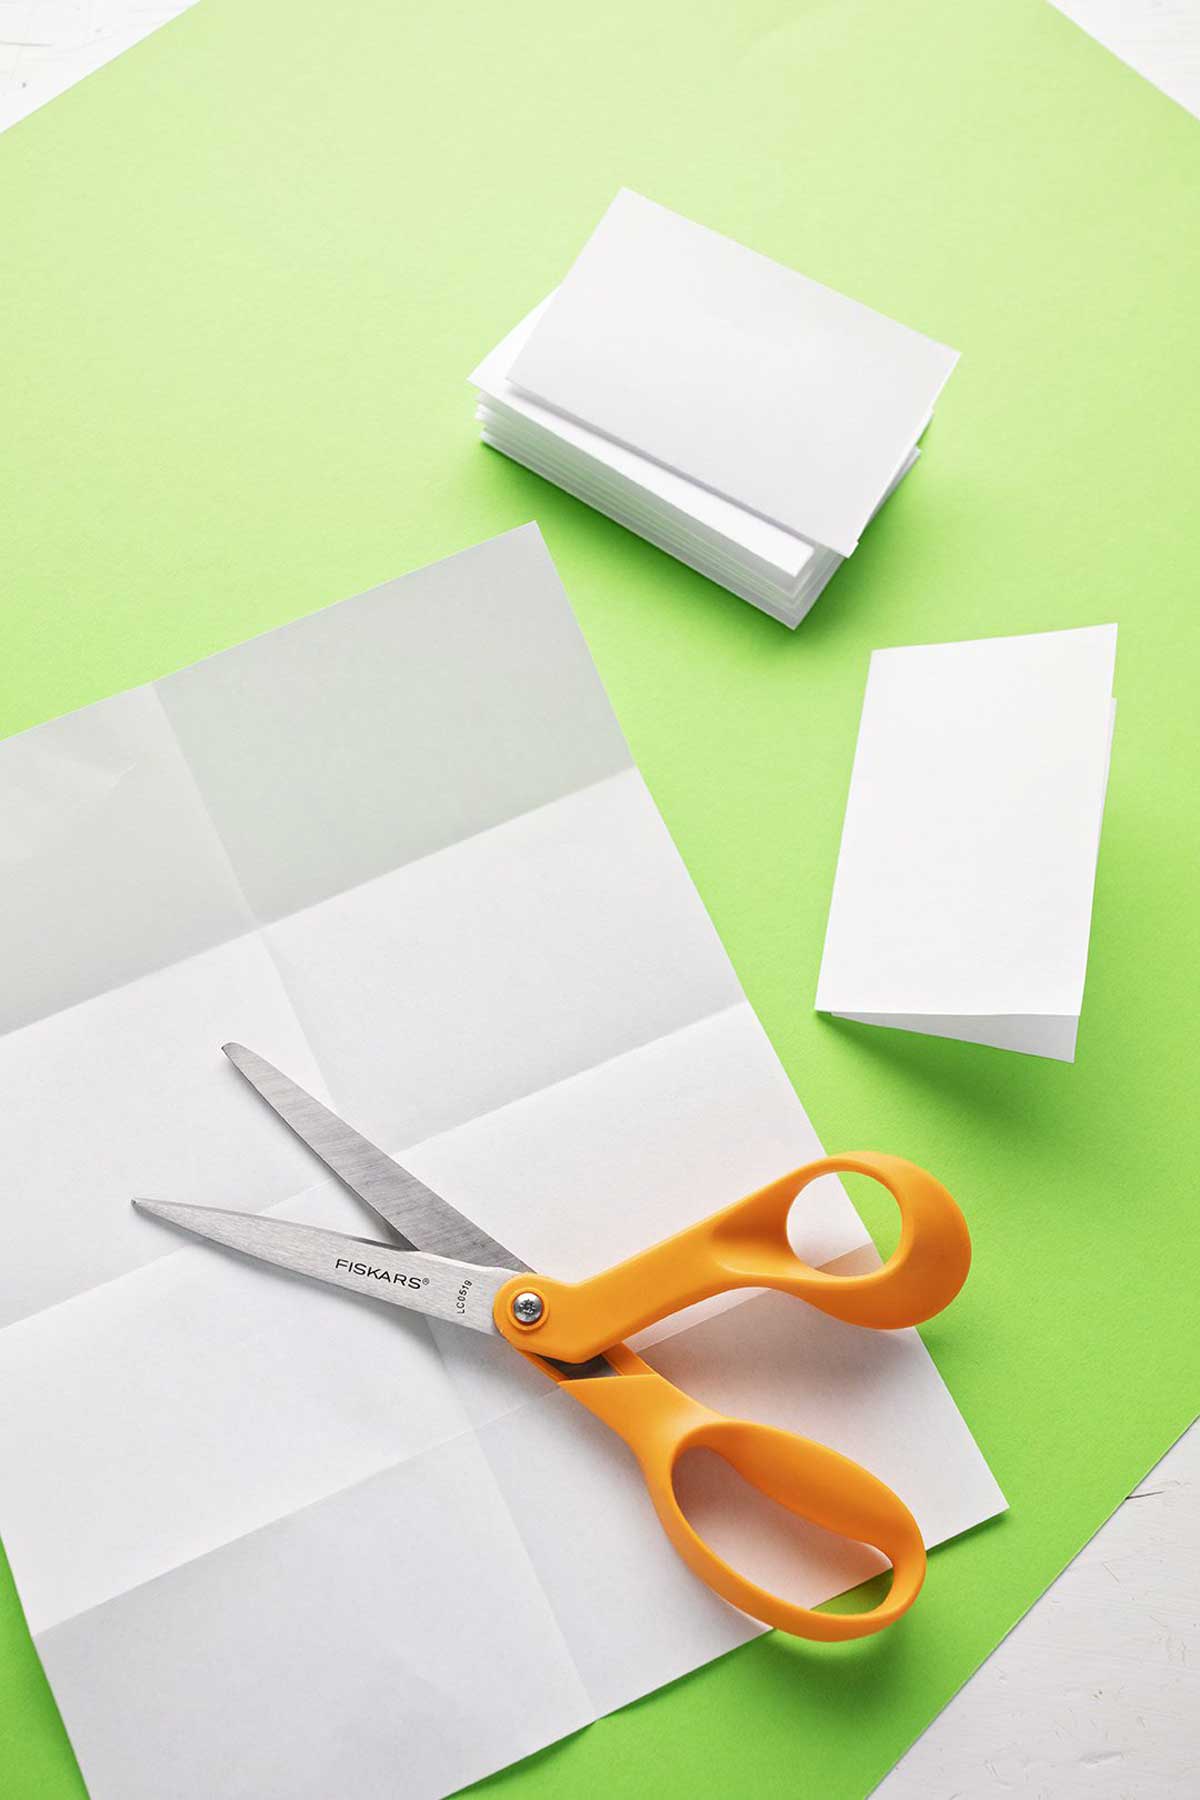
Fold and Cut the Paper
Let's begin by trimming our paper to the correct size. We are going to start with a piece of typing paper, though you can use another type of paper if you prefer.
Fold the piece of paper hamburger fold, then fold it again the same direction.
Unfold and fold it in half, hot dog fold.
Next, cut the paper into fourths and fold each fourth on the fold line in the center. You could also use a paper trimmer for easy and clean cutting!
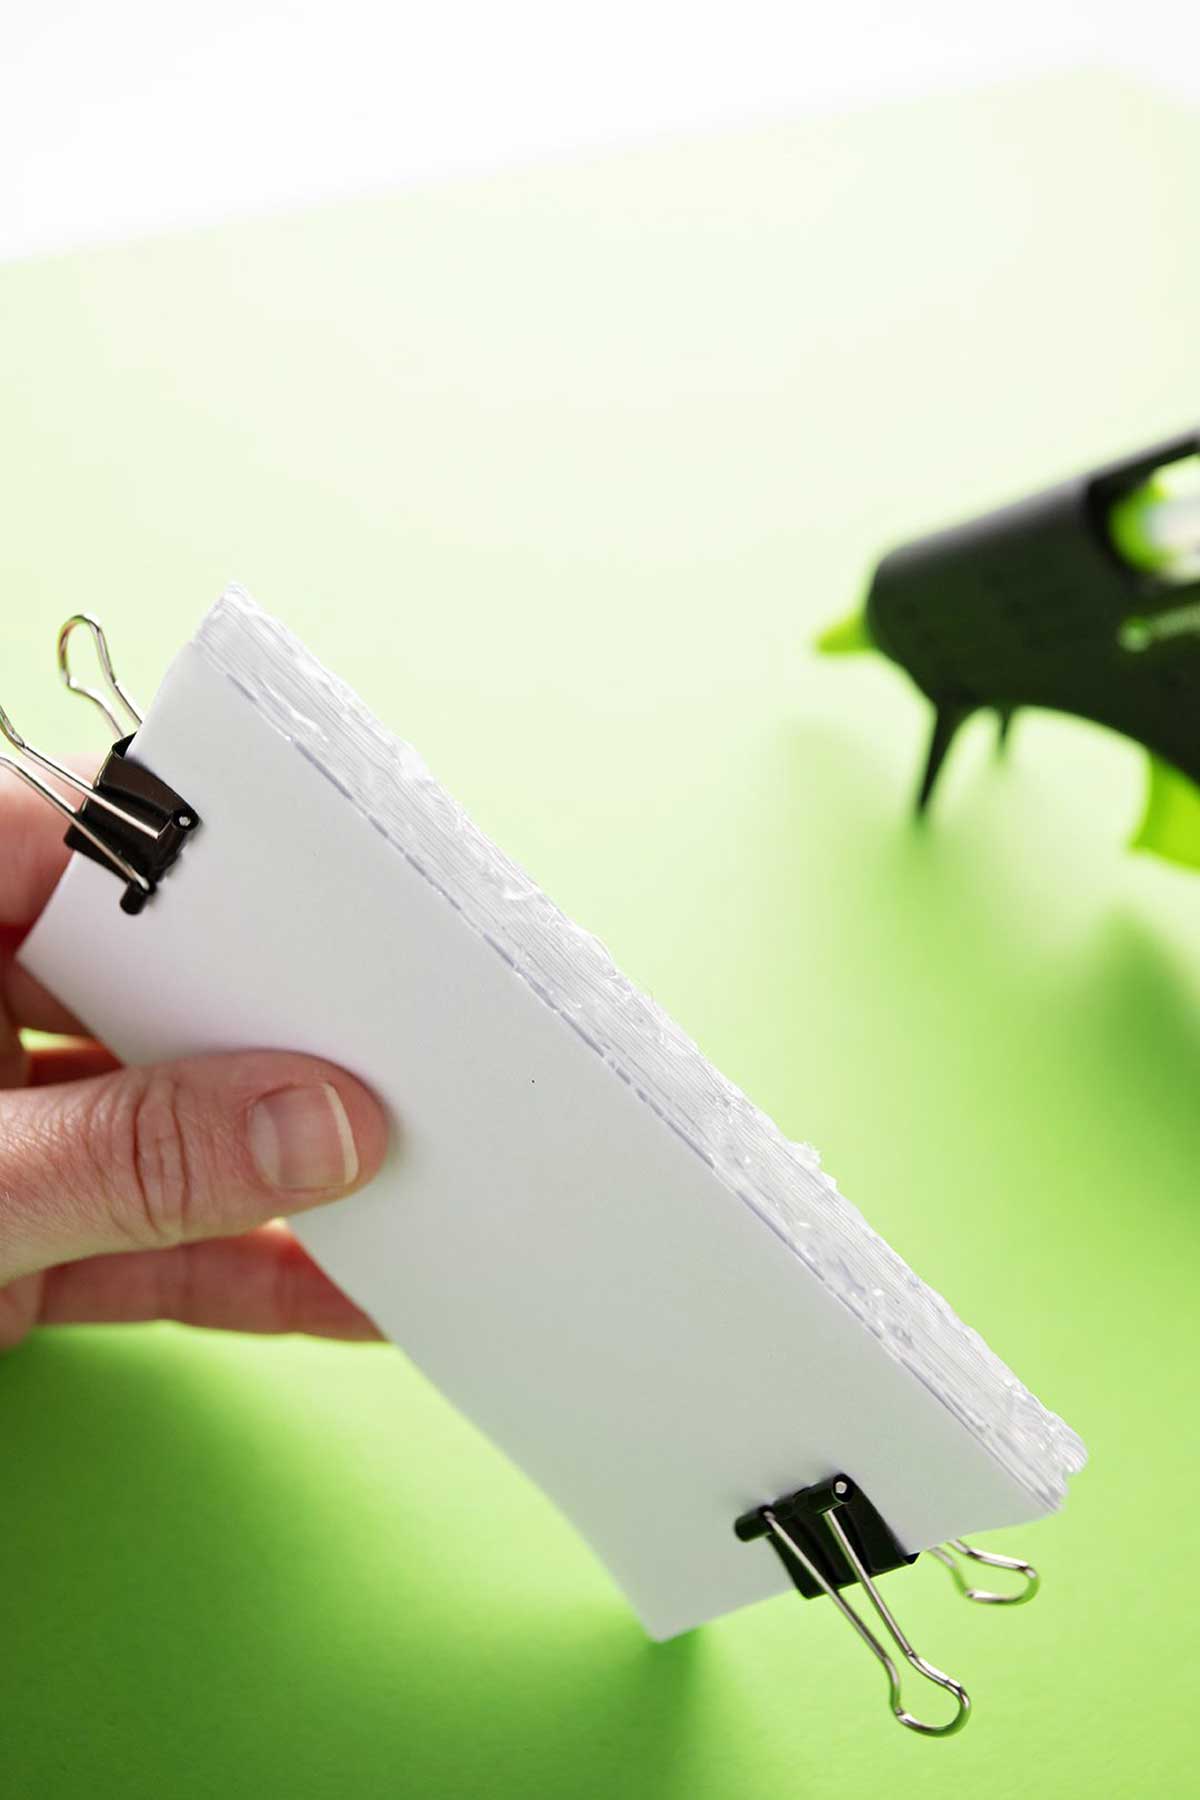
Stack the Paper and Glue a Binding
Once you've completed all the trim sizes, stack these up with all folds on one side.
Repeat with about 5 more sheets of paper and stack them all up, folds on one side.
Tip: If your paper is thicker you may need to do 4 sheets of paper. If you want more pages you will need to alter the size of the spine and the cover of your journal to be wider so the pages will fit correctly.
Hold the papers together with a binder clip on each end, this is an easy way to keep the folded edges straight and held together well.
Put a layer of hot glue along all of the folded edges of the papers so they are “bound” together.
Make a cover for the mini journal
Cut a poster board piece that is 4 ½ inches by 6 inches long for the cover of your book.
Fold this so it has to “flaps” and a “binder” by folding in the short edge 2 ⅞ inches on both ends. This creates two cover flaps and a center binder giving space for the pages of the journal.
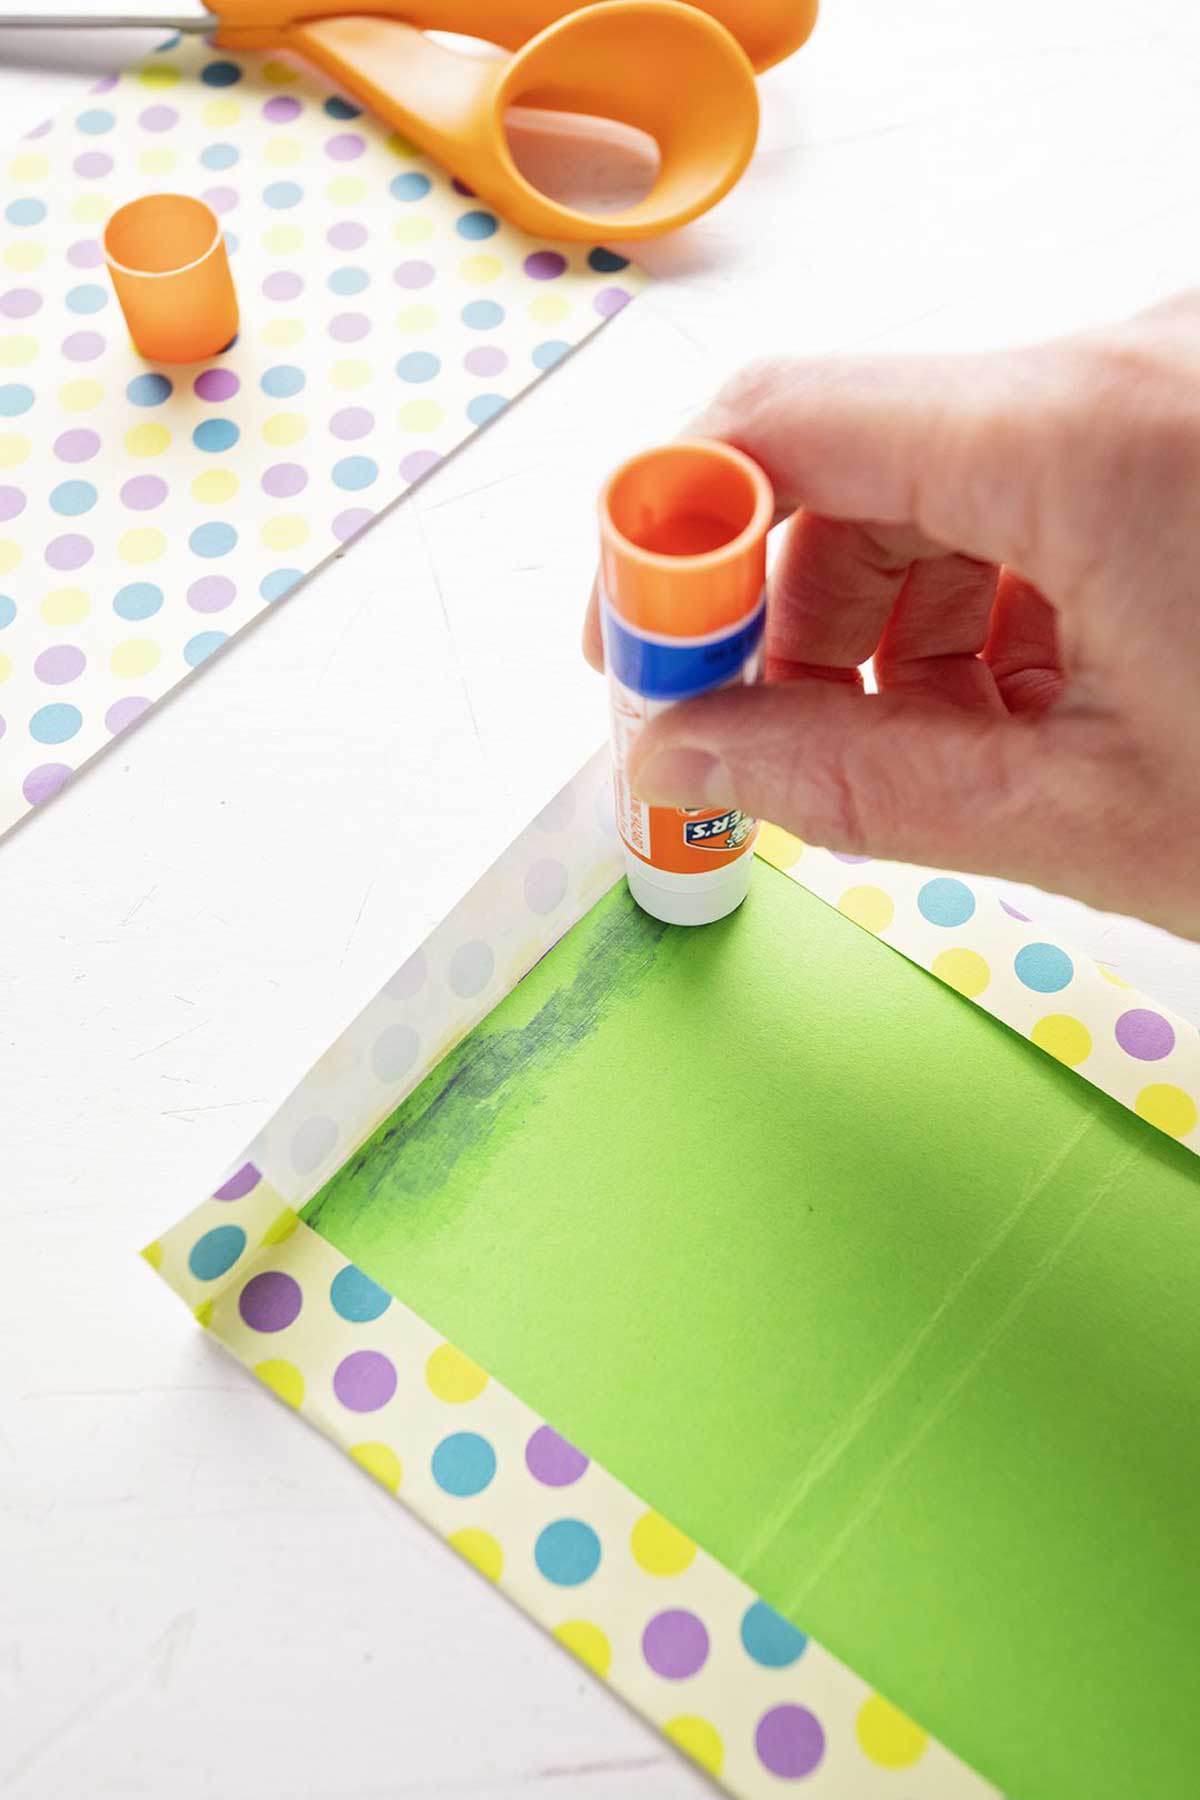
Lay the poster board down on the wrong side of the scrapbooking paper that you have chosen and cut about an extra inch all around the poster board size.
Use a glue stick to glue the poster board to the center of this paper and then fold the extra paper onto the top side of the poster board on all four sides. Glue these flaps down.
If you want to create a harder cover, you could try using cardboard, the thin kind from cereal boxes could work well. You may need to adjust the size of the scrapbook paper to accommodate for the extra size from the hard cover pieces, of course.
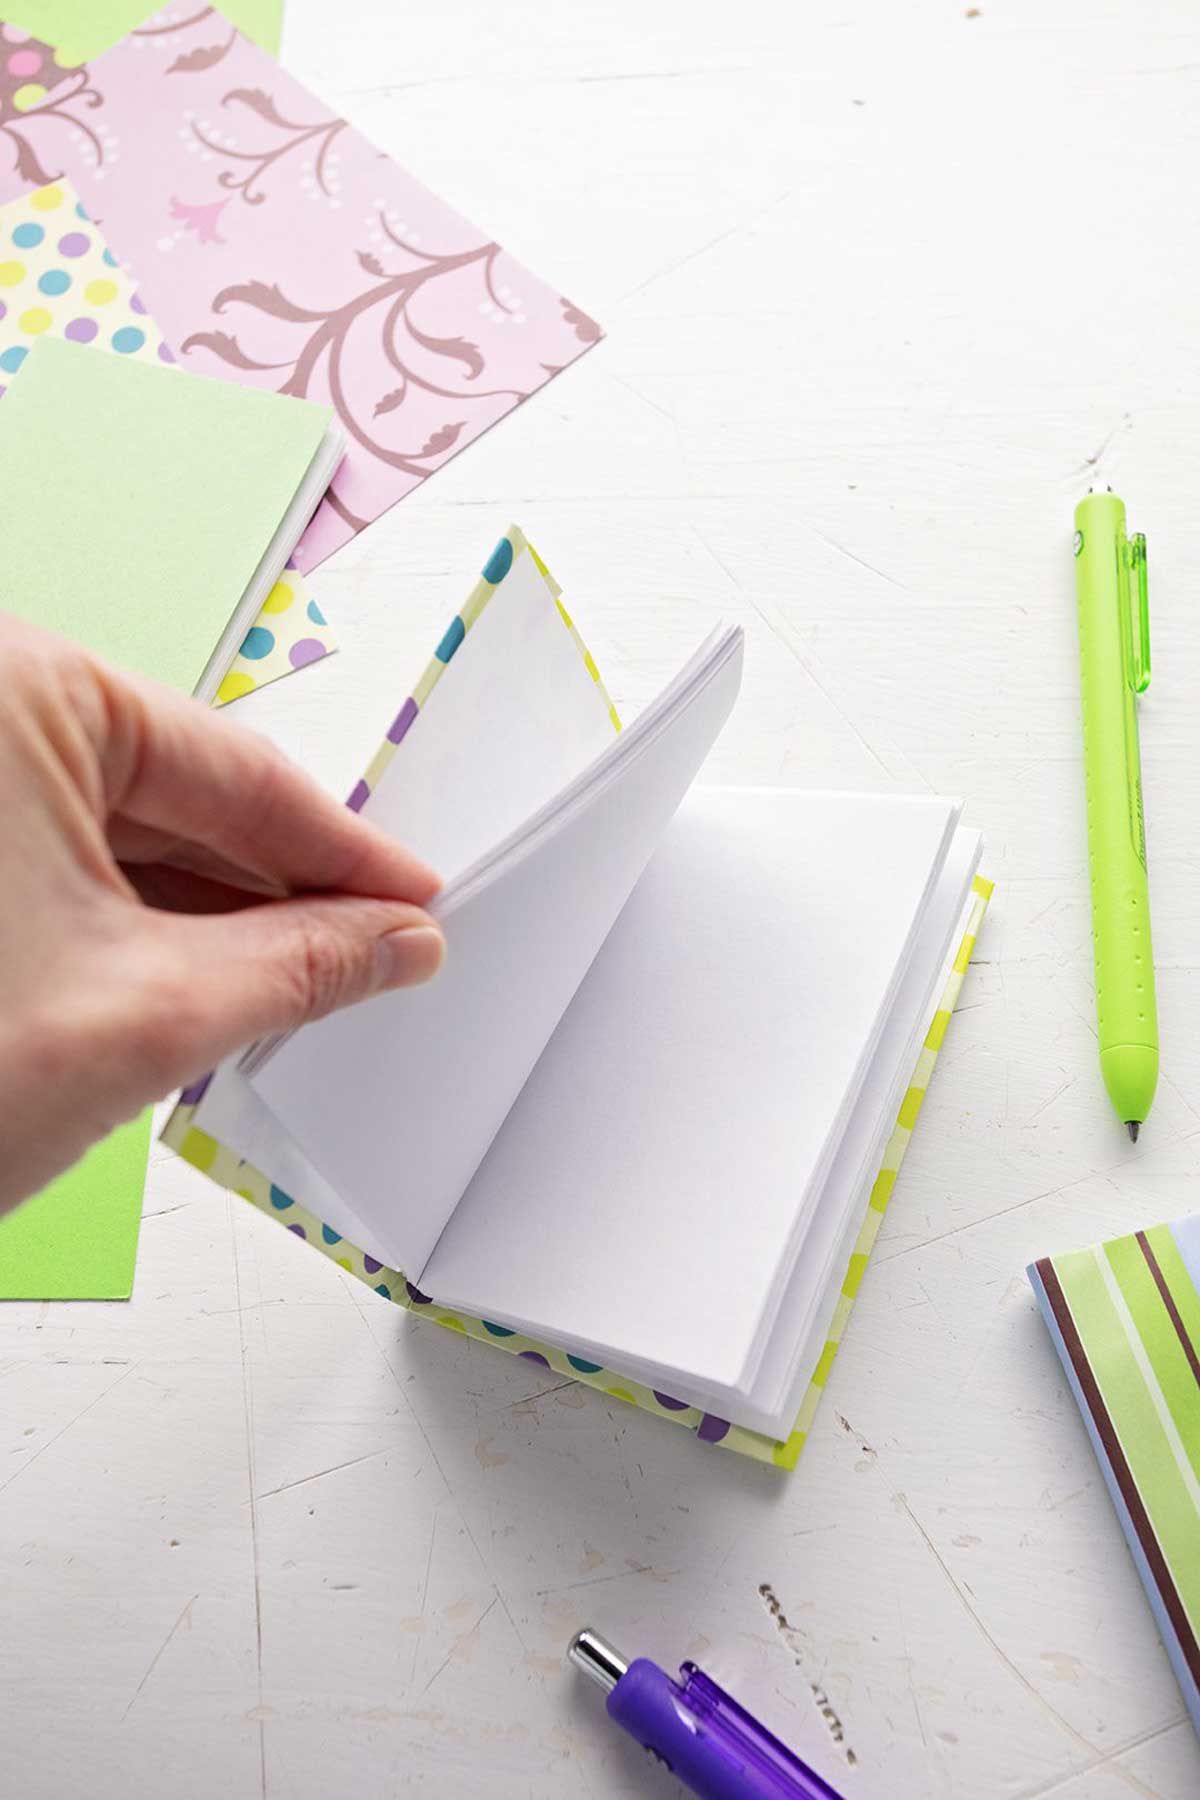
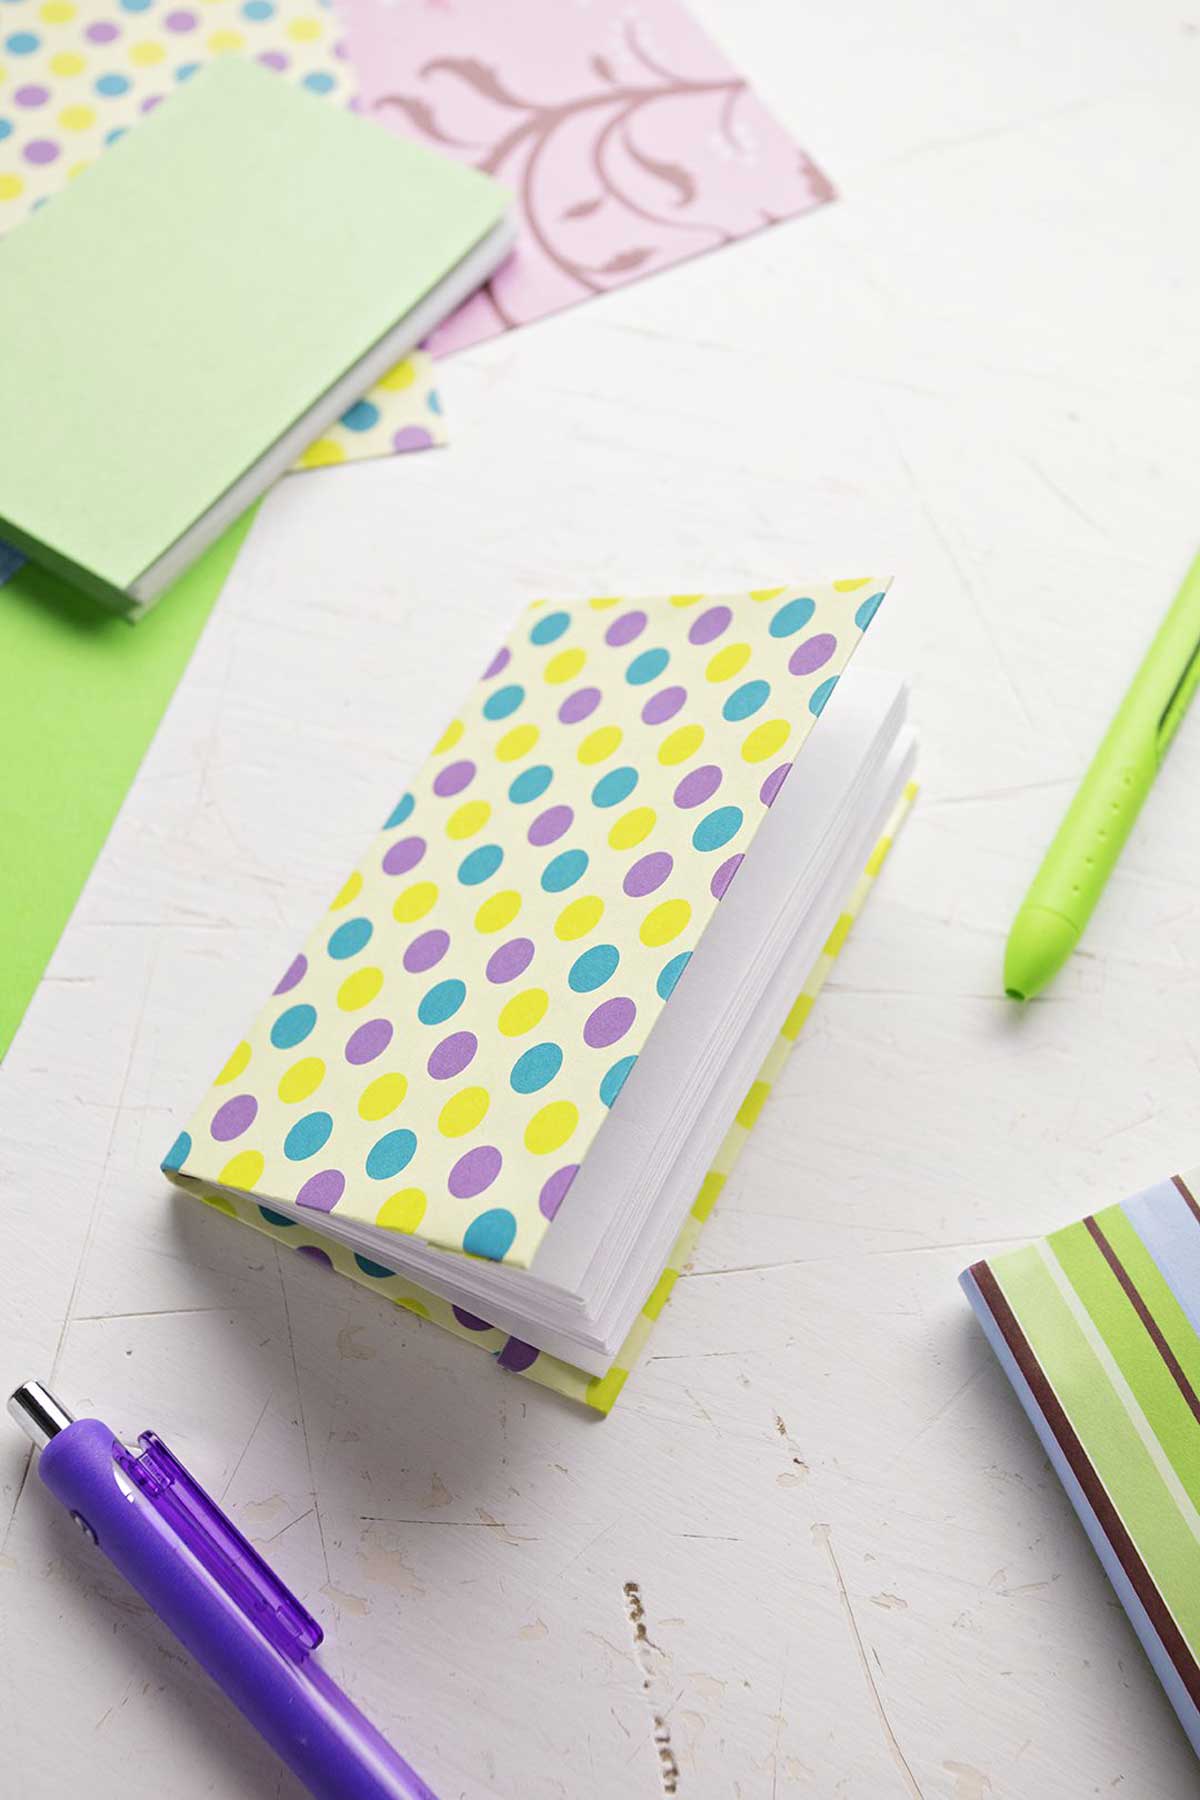
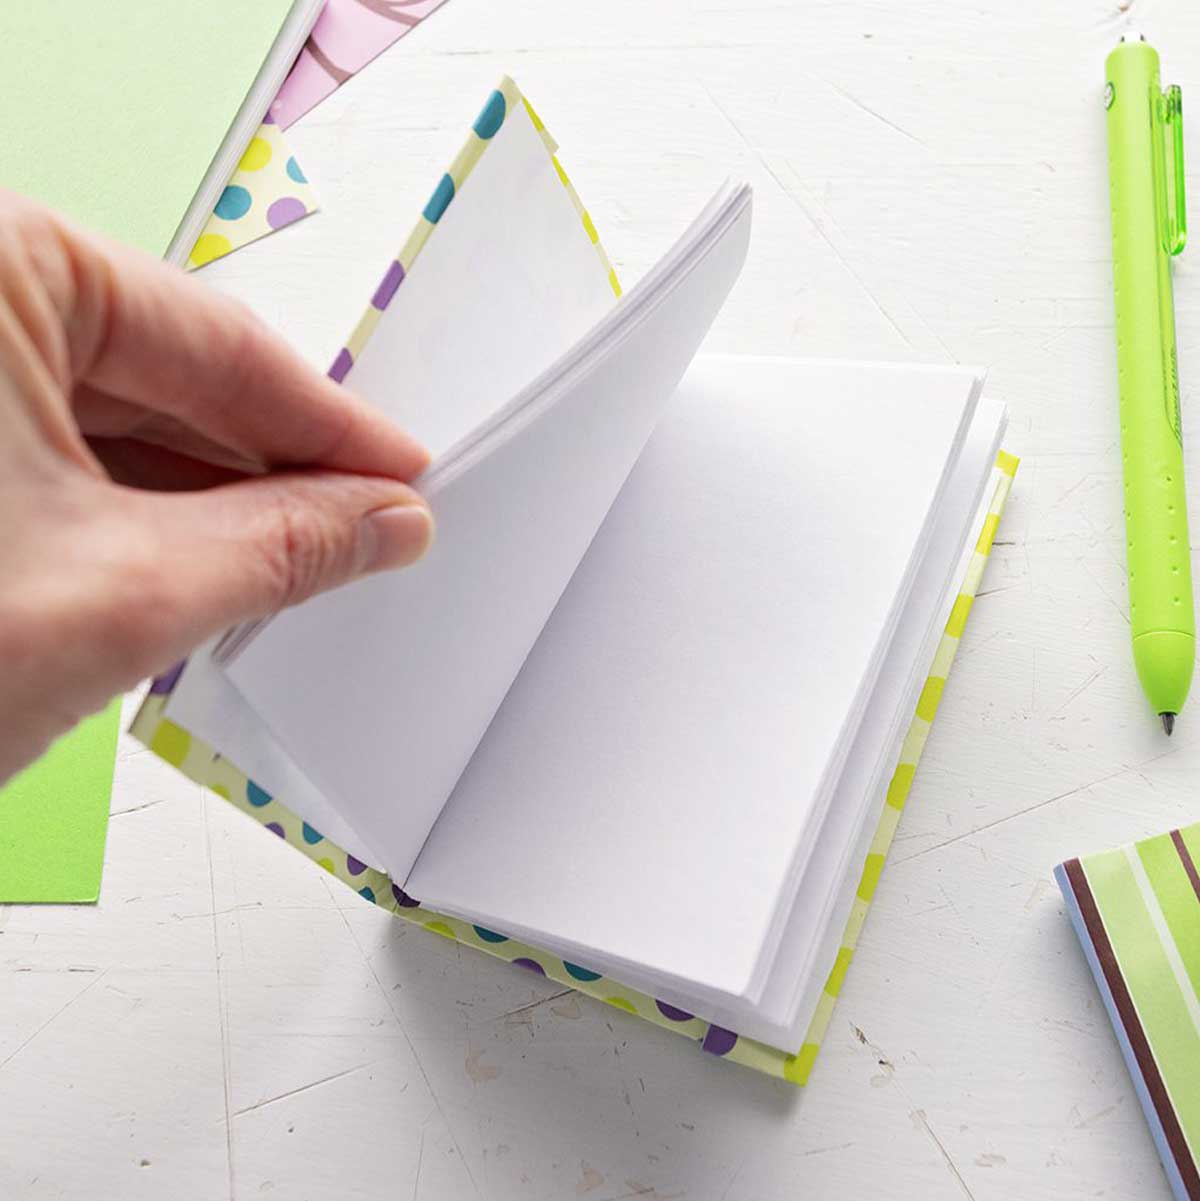
Assemble the mini journal cover & pages
Use some hot glue on the binder area of the cover. Quickly place the glue bound edge of the pages on the center binding area of the cover.
Glue (can use glue stick or school glue) one of the white typing paper pages down to the inside cover on the front for the journal and the inside of the back of the journal. This attaches the papers to the cover piece. Be sure to allow your paper journal to sit and dry completely before using.
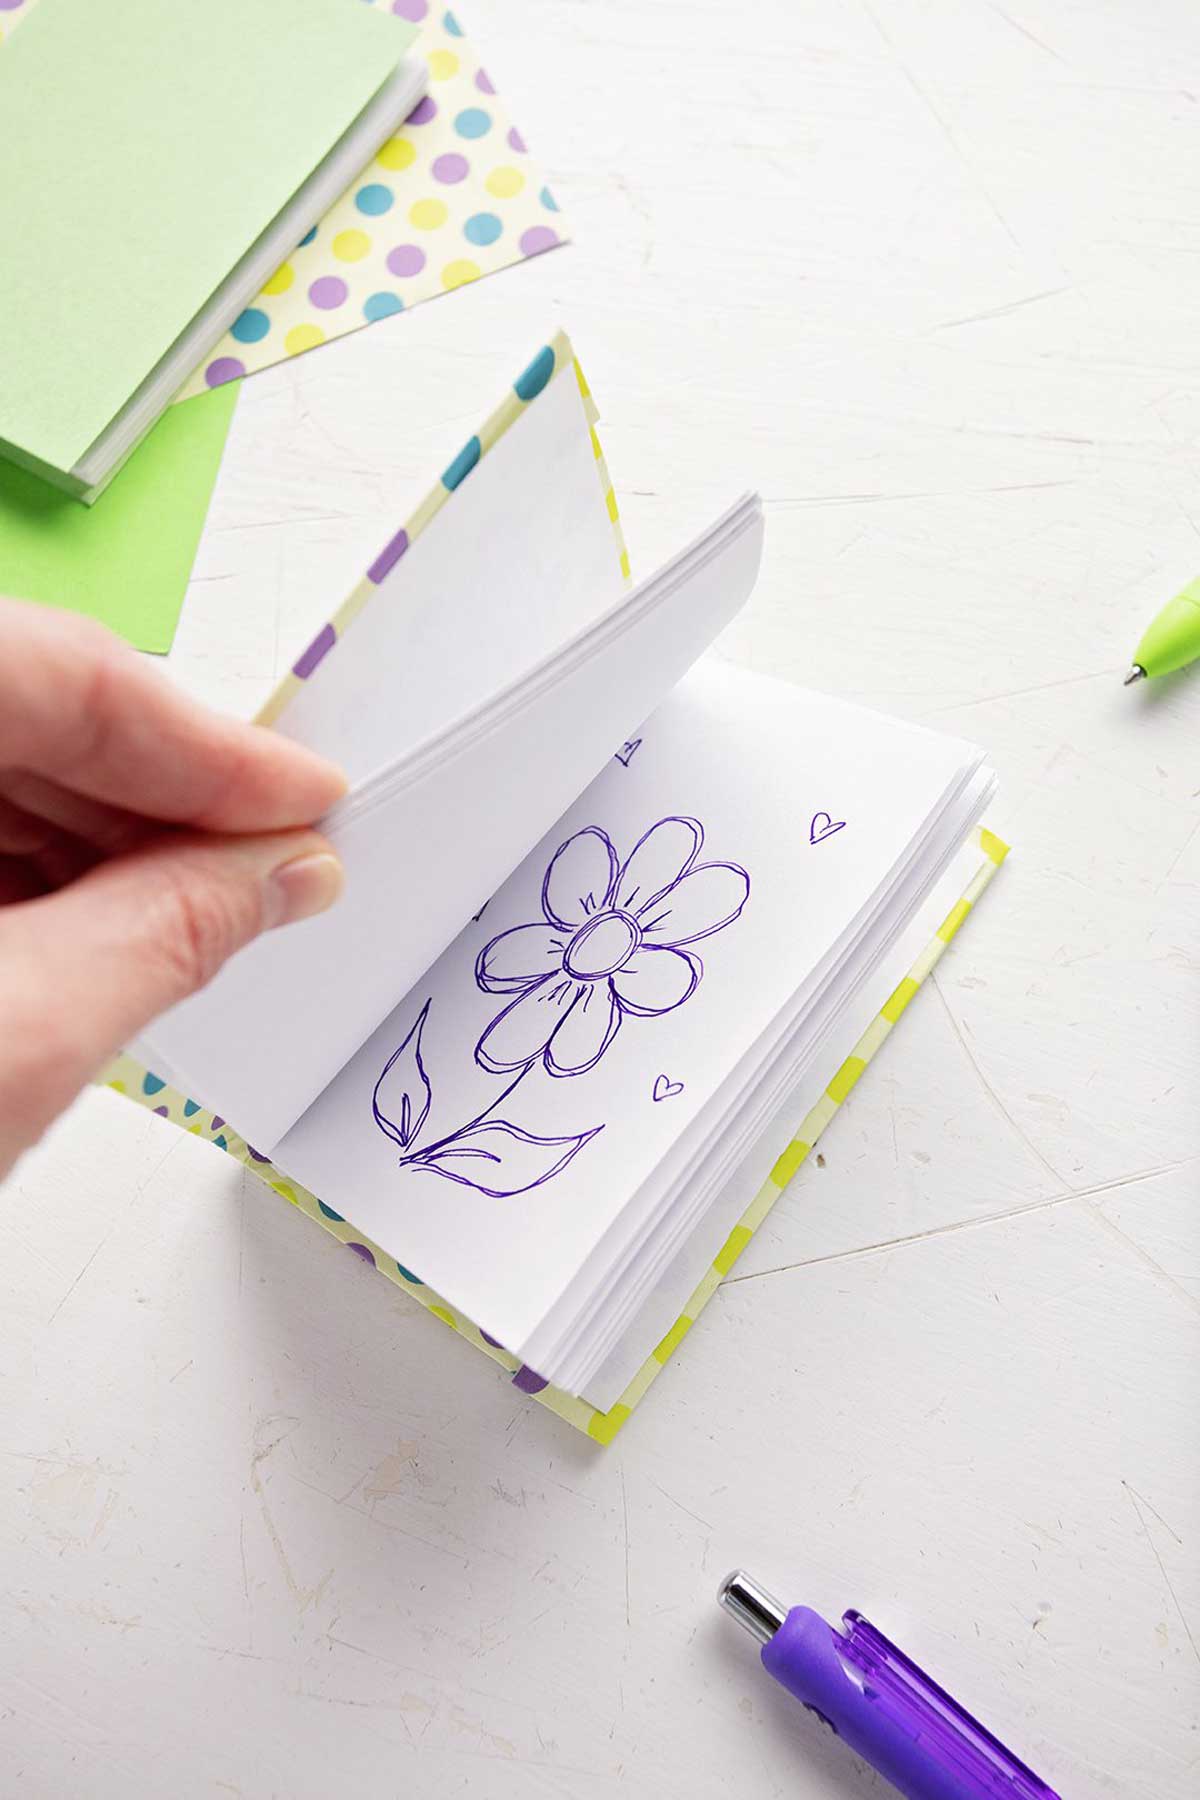
Decorating Your Mini DIY Journals
Now here's the fun part. Once you've created your little book journal, it's time to decorate the front cover! You can add any sort of extras that you'd like, but here are a few fun ways to get started:
- Washi tape
- Gemstones
- Stickers
- Decorative duct tape
- Colorful paper clips
- Scrapbook paper scraps
- Acrylic paint
- Decorative label
If you want to add some fun extras to the inside, you can do that too! You could decorate the first page with a fun title page, or a note to a friend if it's a gift.
I thought it could be fun to add book pockets to the inside of the front or back cover as well. Thought I haven't tried it yet, I think the best way would be to staple or glue the edges of an extra piece of paper to the inside of the cover. Leave a pocket space in the center for tuck spots, it would be a great place for folded notes!
Be sure to let the glue dry before you place anything in the pocket!
How to Use Your Miniature Journal or Notebook
Now that you have a blank notebook finished and decorated, it's time to put it to good use! I can think of so many ways the kids may want to use their miniature journals:
- A gratitude journal
- A place to write secrets
- A quote collection
- A place to doodle pictures
- A list for shopping
- A location for school notes or assignments
- A spot for morning pages
- A list of daily routines
- A dream journal
- A travel journal
One of the best things about a blank journal is that you can turn it into whatever you want! What are your ideas or your kids' ideas for their DIY journal notebooks?
What do you think about a mini first bullet journal? Is it a mini pocket diary for free writing or a journal entry every day? It may have to be a short paragraph 😉 a little bit of space can go a long way!
More DIY Book Ideas
If you want to try some more book-centered craft ideas, I've got some ideas for you from around the blog! From creating your own kinds of books to repurposing old books, there are DIY ideas for all ages and interests:
- DIY Art Portfolio for Kids' Artwork
- DIY Paper Bag Book
- How to Make a Paper Bag Book Cover
- Tree Leaf Identification Journal
- DIY Painted Book Cover
- Cute DIY Purse from a Book Cover
You can create your own mini journal using just paper, glue, and a few other craft items! We will start first thing by cutting up lots of layers of paper to the right size, then binding it together. Once that is finished, we'll make a cover and decorate it! It's one of the easiest ways to create your own miniature book, to use for a journal, notebook, or even to give as a gift to a friend.
There are a number of ways to make your own diary or journal, but this tutorial walks you step-by-step to make a miniature one! Grab some paper, glue, and poster board, and you have almost all you need to create your little diary. It's the perfect place for some expressive writing as you start your journaling practice.
You can make a simple binding for a journal or diary using some hot glue! Line up the folds of your paper and secure with binder clips to keep the pages aligned. Put a layer of hot glue along all of the folded edges of the papers so they are “bound” together. Once this has dried, use some hot glue on the binder and place the pages on the center of the cover of your book.
Supplies for How To Make Your Own Mini Journal:
- Printer paper (can use other kinds, even homemade paper)
- Poster board (for a cover)
- Scrapbook paper (to cover the poster board)
- Hot glue gun, glue stick or school glue
- Scissors, ruler, pencil, and 2 binder clips
- Colorful pens, pencils, eraser
Other Creative Paper Crafts
Are you and the kids enjoying crafts that use paper? Here's a few more ideas to try!
- Free Printable Paper Dolls
- How to Make a Paper Whirligig
- Torn Paper Mosaic Art
- Folded Origami Lucky Stars
- Awesome Origami Shirt Father's Day Card
- Handmade Envelopes: 3 Ways
Enjoy!
If you try this recipe (especially with the grands), let me know! Go ahead and leave a comment, rate it, and tag a photo with #WelcometoNanas wherever you post.
Come join the fun at www.WelcomeToNanas.com
How to Make Your Own Miniature Journal
Equipment
- Hot glue gun
- Glue stick or school glue
- Scissors
- Ruler
- Pencil
- 2 Binder clips
Items Required
- 6 pieces Printer paper (can use other kinds, even homemade paper)
- 1 piece Poster board (for a cover)
- 1 piece Scrapbook paper (to cover the poster board)
- Colorful pens, pencils, eraser
Instructions
- Fold a piece of typing paper (or other paper type of your preference) hamburger fold, then fold it again the same direction. Unfold and fold it in half, hot dog fold.
- Next, cut the paper into fourths and fold each fourth on the fold line in the center. Stack these up with all folds on one side. Repeat with about 5 more sheets of paper and stack them all up, folds on one side.
- Hold the papers together with a binder clip on each end so the folded edges are straight and held together well.
- Put a layer of hot glue along all of the folded edges of the papers so they are “bound” together.
- Cut a poster board piece that is 4 ½ inches by 6 inches long for the cover of your book. Fold this so it has to “flaps” and a “binder” by folding in the short edge 2 ⅞ inches on both ends. This creates two cover flaps and a center binder giving space for the pages of the journal.
- Lay the poster board down on the wrong side of the scrapbooking paper that you have chosen and cut about an extra inch all around the poster board size. Use a glue stick to glue the poster board to the center of this paper and then fold the extra paper onto the top side of the poster board on all four sides. Glue these flaps down.
- Use some hot glue on the binder area of the cover. Quickly place the glue bound edge of the pages on the center binding area of the cover.
- Glue (can use glue stick or school glue) one of the white typing paper pages down to the inside cover on the front for the journal and the inside of the back of the journal. This attaches the papers to the cover piece. Allow to sit and dry.
Video
Notes
This post was originally published in January 2021 and has been updated to add more relevant and detailed content.


Laura says
Cute idea, I love miniature things 🙂