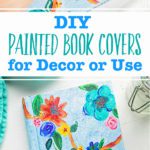
Learn how to make DIY Painted Book Covers to upcycle old books for decorating, or to express creativity on a journal or notebook!
Jump to:
- What can I make with old books?
- Here's a video for DIY Painted Book Covers if you prefer!
- The Best Kinds of Books to Paint
- Best kind of paint to paint a book cover
- Decide How Will You Use Your Painted Books
- Painting the First Layer of Color
- Painting Your Designs on the Book
- More Fun Painting Projects for Kids
- Enjoy!
- Supplies for DIY Painted Book Covers for Decor or Use
- DIY Painted Book Covers for Decor or Use
What can I make with old books?
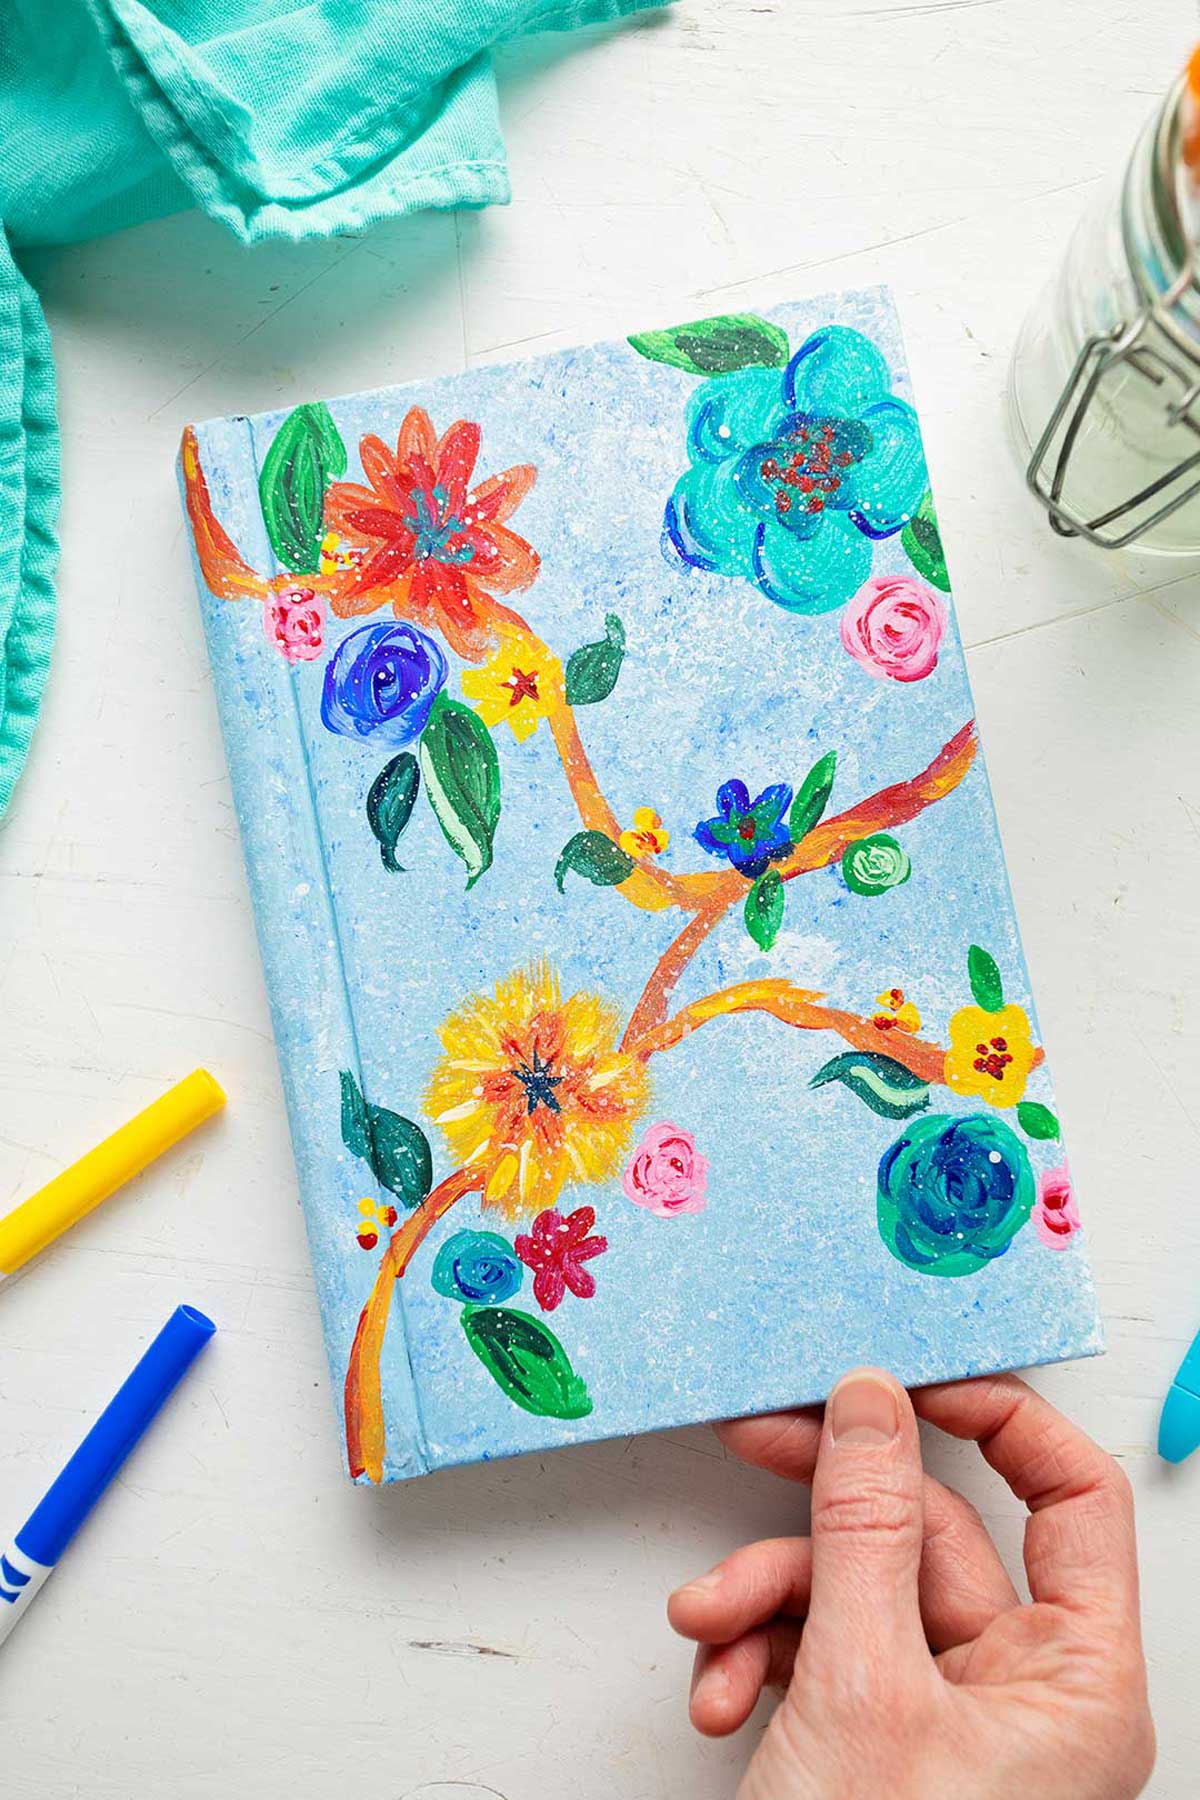
Your old books and your journal are begging you for a facelift, and I'm here to show you how to do it with this easy DIY!
Painting books is a great way to give those old books you have on the shelves a second life, maybe even make them decorating superstars! It also gives you and the kids a way to express your creativity on that journal or notebook that you look at every day.
A redecorated book would make such a great gift for an avid reader, don't you think?
Oh my goodness this is a fun project! Let's get started.
Here's a video for DIY Painted Book Covers if you prefer!

The Best Kinds of Books to Paint
The best kind of book to use for this upcycle project is definitely a hardback book or journal.
You can use beautiful books with thick cardboard covers as well, but unfortunately a paperback cover curls and warps when wet with paint, not lying flat even when dry. Hardcover books will hold up with the paint added, and dry nice and flat with a clean look.
SO, grab your extra hardback books that were heading to the thrift store, this is such an easy way to give them a second life!
Best kind of paint to paint a book cover
For this project, I would recommend using acrylic craft paints. These are the specific types of paints that I used!
If it's your first time using acrylic paints, don't worry, they are easy to use. In fact, they are such a versatile medium for craft projects.
Once you have them in your craft closet, I'm sure you'll have so much fun with them on a whole host of arts and crafts!
A water based wall paint could even work for the overall color if you are wanting to match your room.
I think it would be fun to try some chalk paint as well, but I haven't tried this yet so you'd be experimenting if you did!
Decide How Will You Use Your Painted Books
Now there are many different ways you can use these painted books.
If using this book for a home decor, you may want to use a solid color and not paint any designs on the book at all. It is popular to paint books an off white or ivory as the main color scheme.
These white painted books can be used as a beautiful touch in a stack to set a plant or other knick knack on. Or they can be used alone or in a series of books standing upright.
It would look cool to paint each book one color, say blue, but add a bit more white paint to the blue paint each time you paint another book cover. Each book cover would then be a lighter shade of the same color, giving an ombre look.
These book stacks would look great on a shelf, don't you think?
But if the kids are wanting to express that personality of theirs, the book cover is just like a blank canvas waiting for a personal touch!
Painting the First Layer of Color
Once you've picked the main colors and type of paint you'd like to use, you are to start with your first book.
Go ahead and remove the dust jacket (if your book has one).
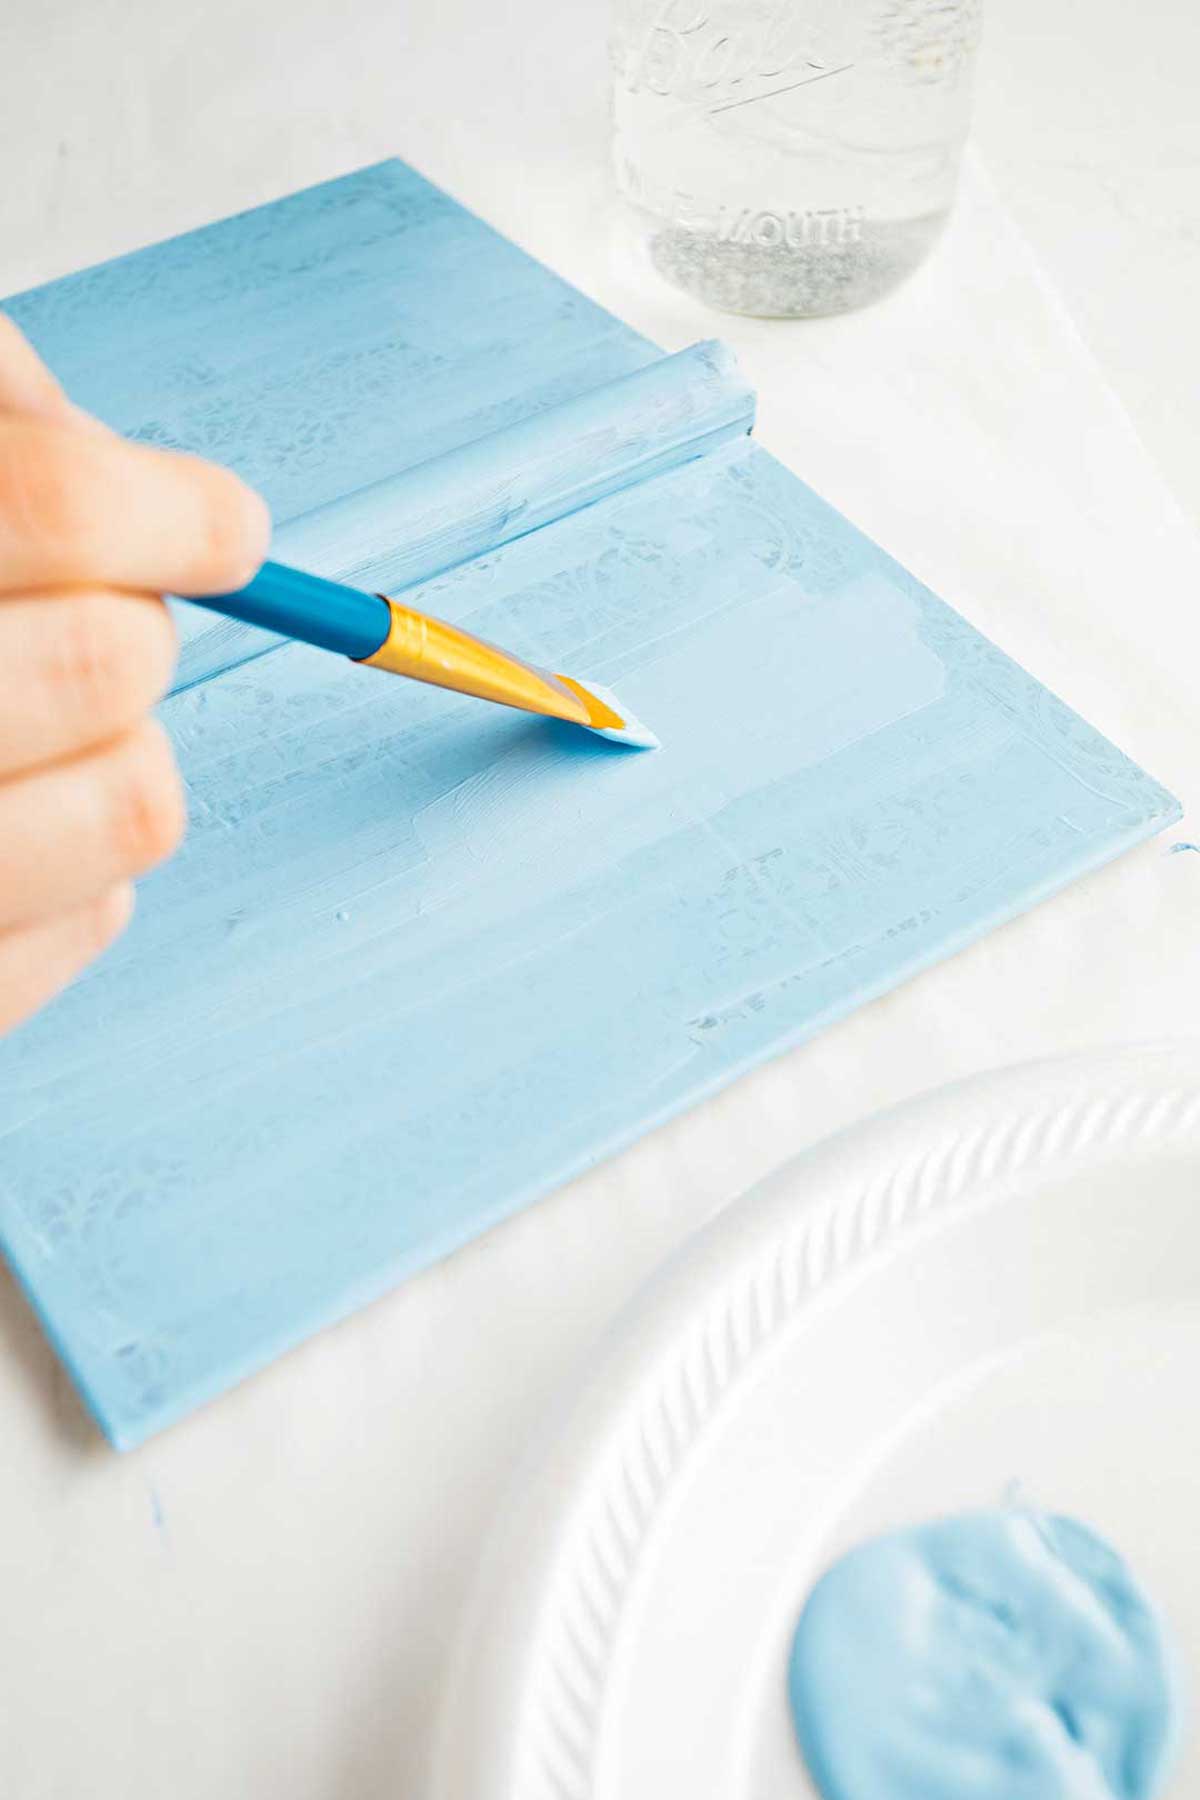
Paint the front and back cover with white acrylic paint (or a different background color of choice) to give a base coat on which to paint a design. You may need to stand the book up a bit to get a little paint in the “nooks and crannies” of the spine and edges of the cover.
Continue painting all around the spine of the book, using as much paint as needed to get a good solid application over the entire cover. I stopped my painting along the side of the book where the front wraps around the see the inside cover.
Let this base coat dry completely, it shouldn't take a very long time. Apply a second coat if needed to cover up the colorful or decorative book covers underneath.
Depending on the book, sometimes it looks neat if a little bit of the book cover color shows through!
You can leave it this solid color if you want. Project done!
Painting Your Designs on the Book
So…if you and the kids are looking to have some more fun, it's time to pull out some additional colors and get creative! This is the best part.
Now that the base color is done and dry, it's time to paint a design on the book. Like I said, this is a new blank canvas, ready for some self expression.
Open the book in about the middle. Lay it pages down/spine up on a covered surface.
This puts the entire cover facing up, ready for painting!
There are lots of options. Lots and lots and lots of options.
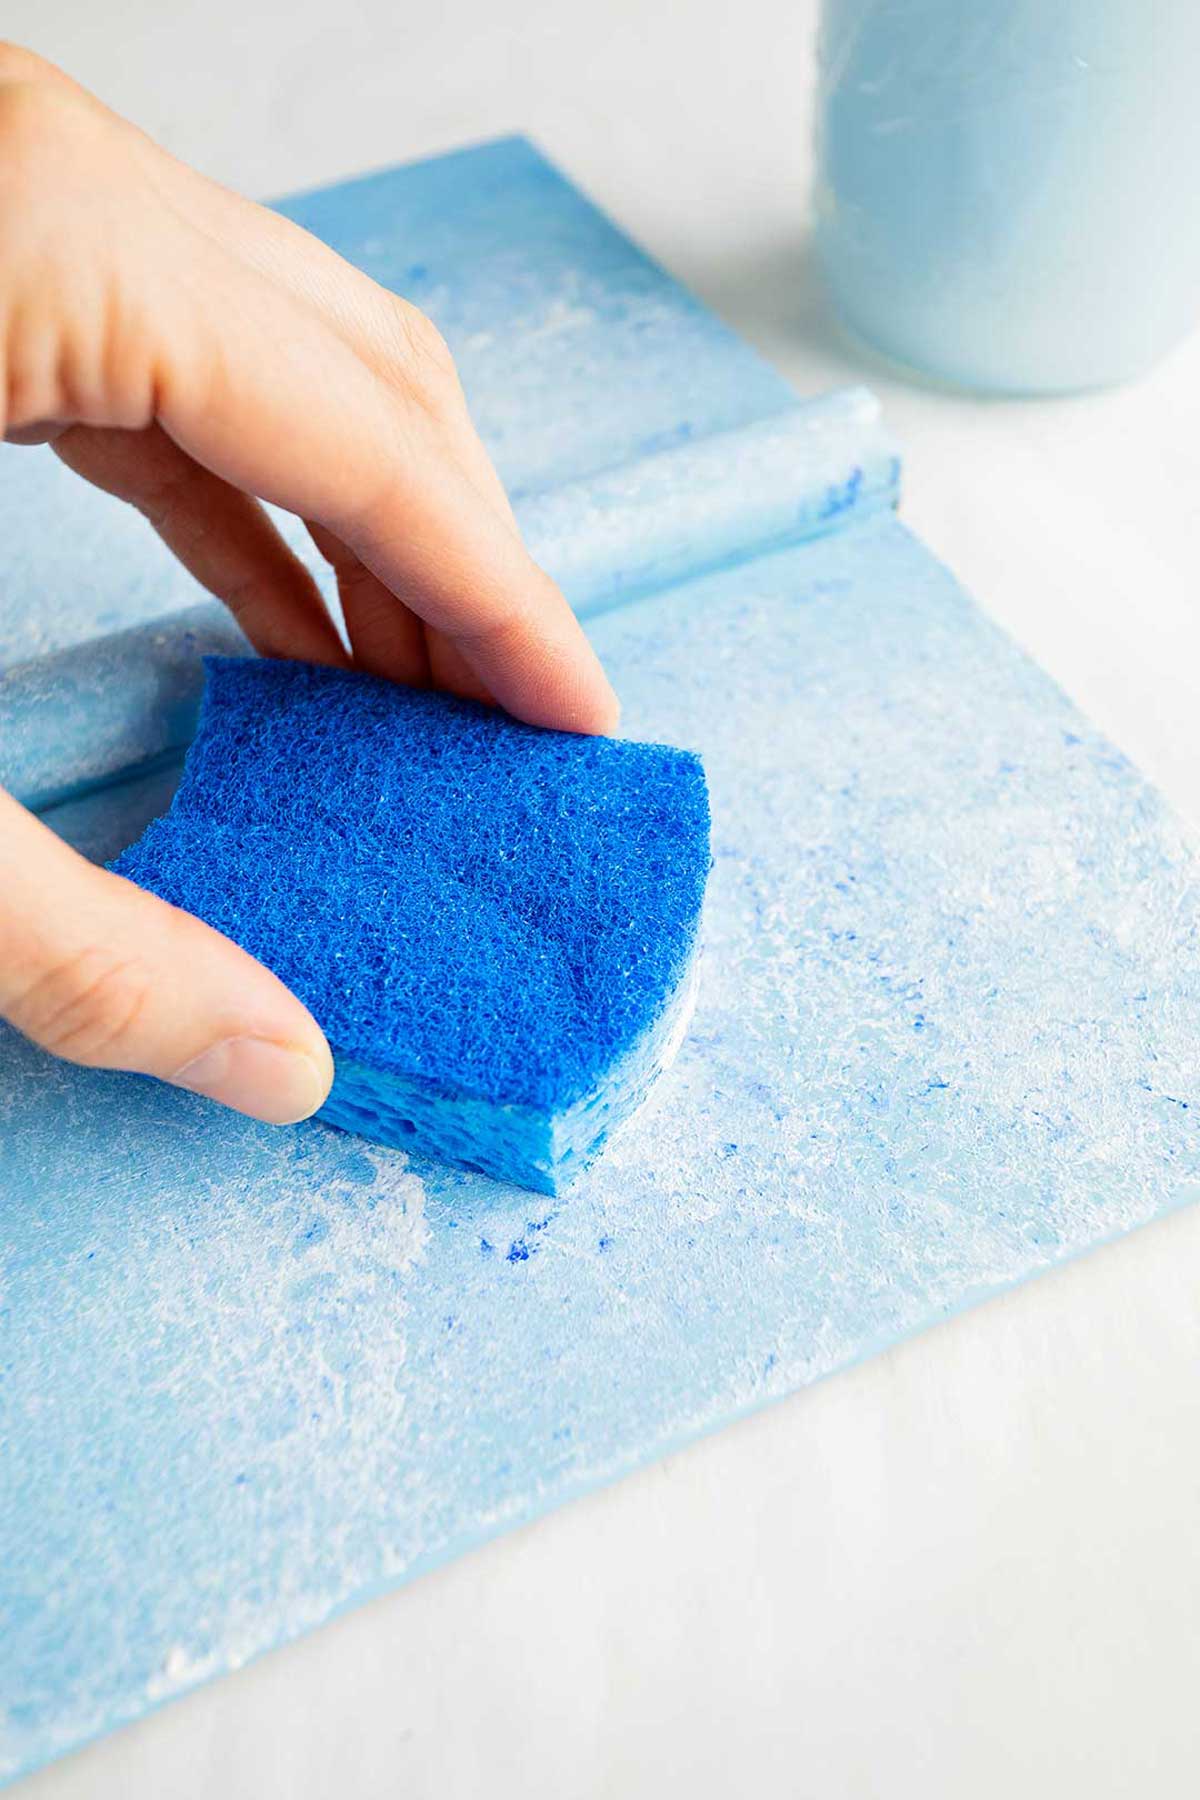
To start with, you may want to layer some texture over your background, before adding more intricate designs.
One idea is to paint or sponge on another background color of choice. If you want a hazy look on the background (like clouds or just a mottled look) you can use a sponge, or a wadded napkin or paper towel to dab paint onto the book cover.
Another fun technique is to preserve the background color as you paint on another layer with masking tape.
If you cover part of the book cover with masking tape (in the shape of your initials, for example), you can do your painting and then peel it off at the end. This leaves your initials in the original cover color.
This technique works to create stripes, plaids, and other patterns as well. Put the tape on the book, paint over the tape and pull it off when paint is completely dry.
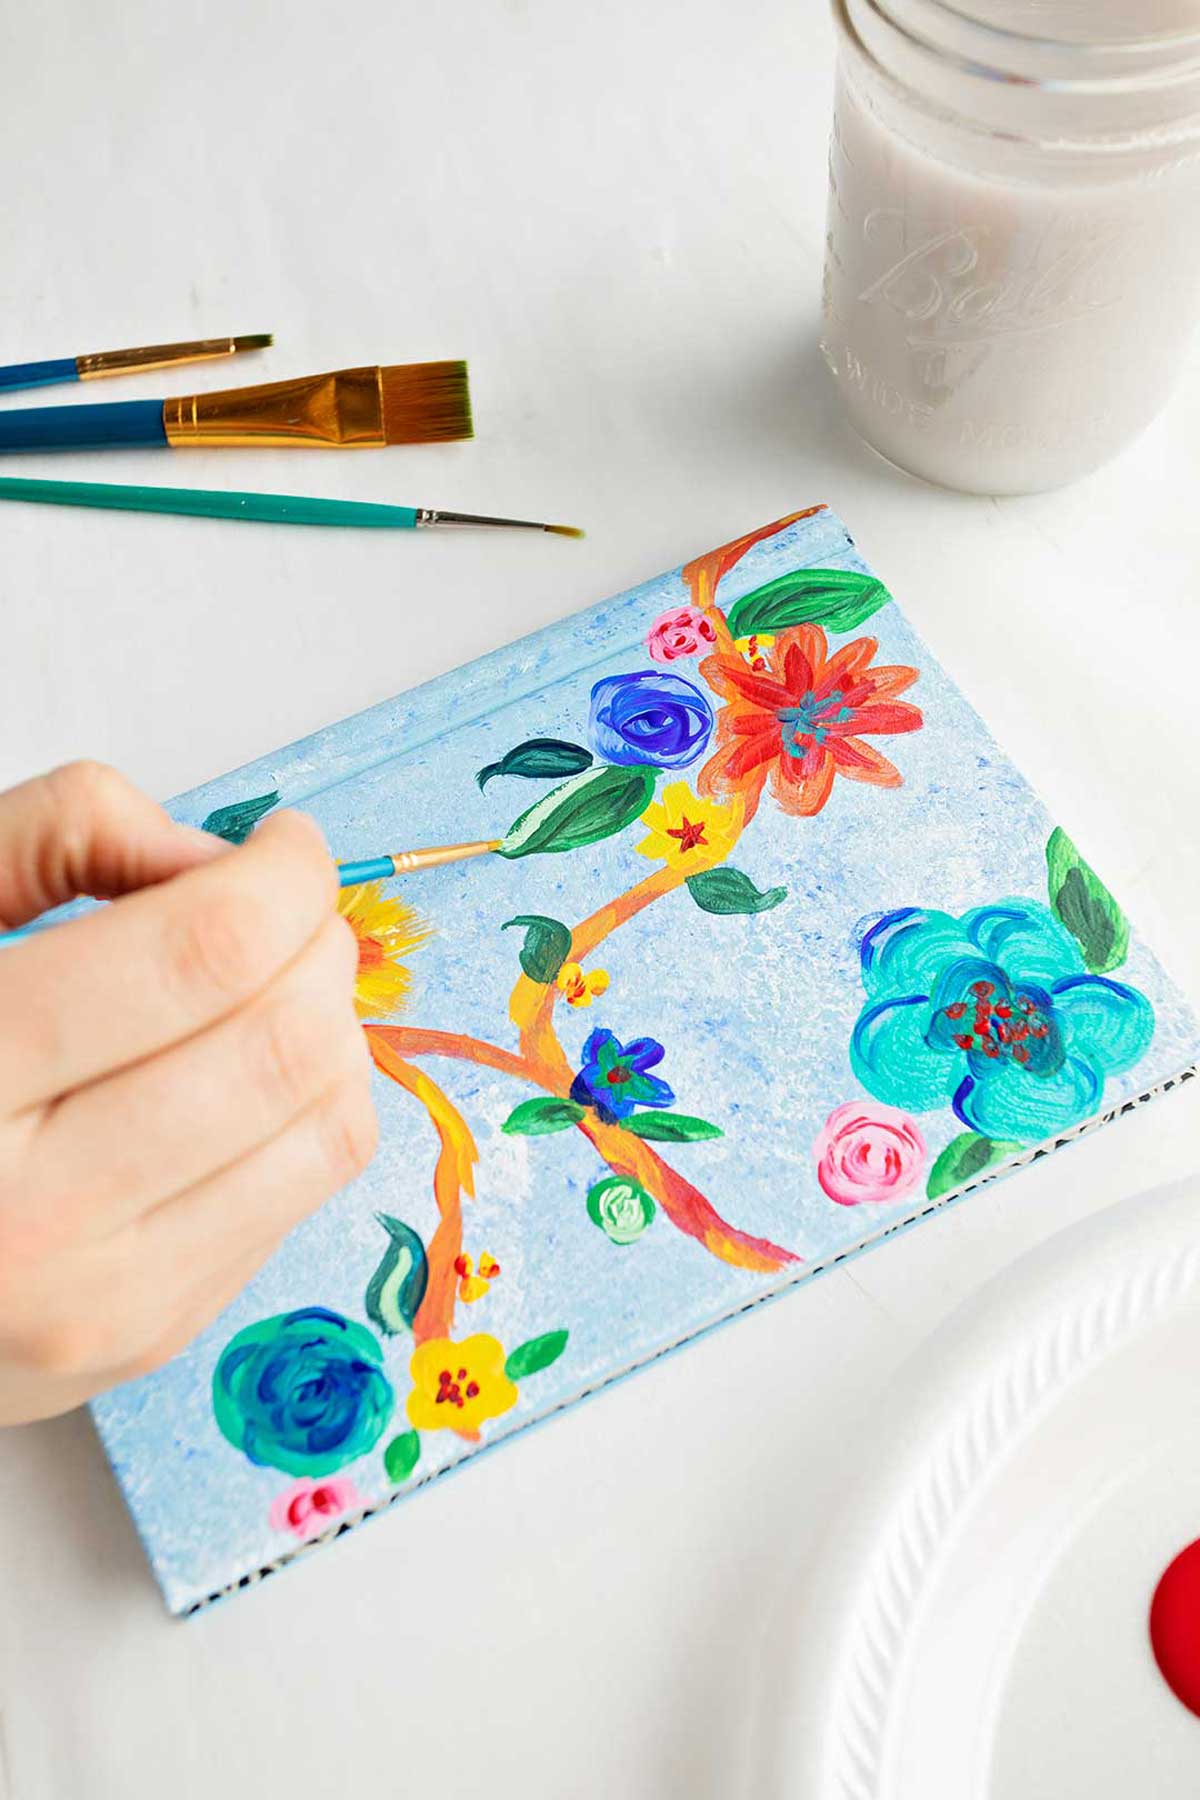
Painting your design on the book cover
Then use your paint brushes and acrylic paint to personalize the cover design. Your imagination is the limit!
Paint a design, flowers, animals, write a saying or Bible verse, letter your name…the list goes on and on.
Don’t forget that you can use a stencil if you want.
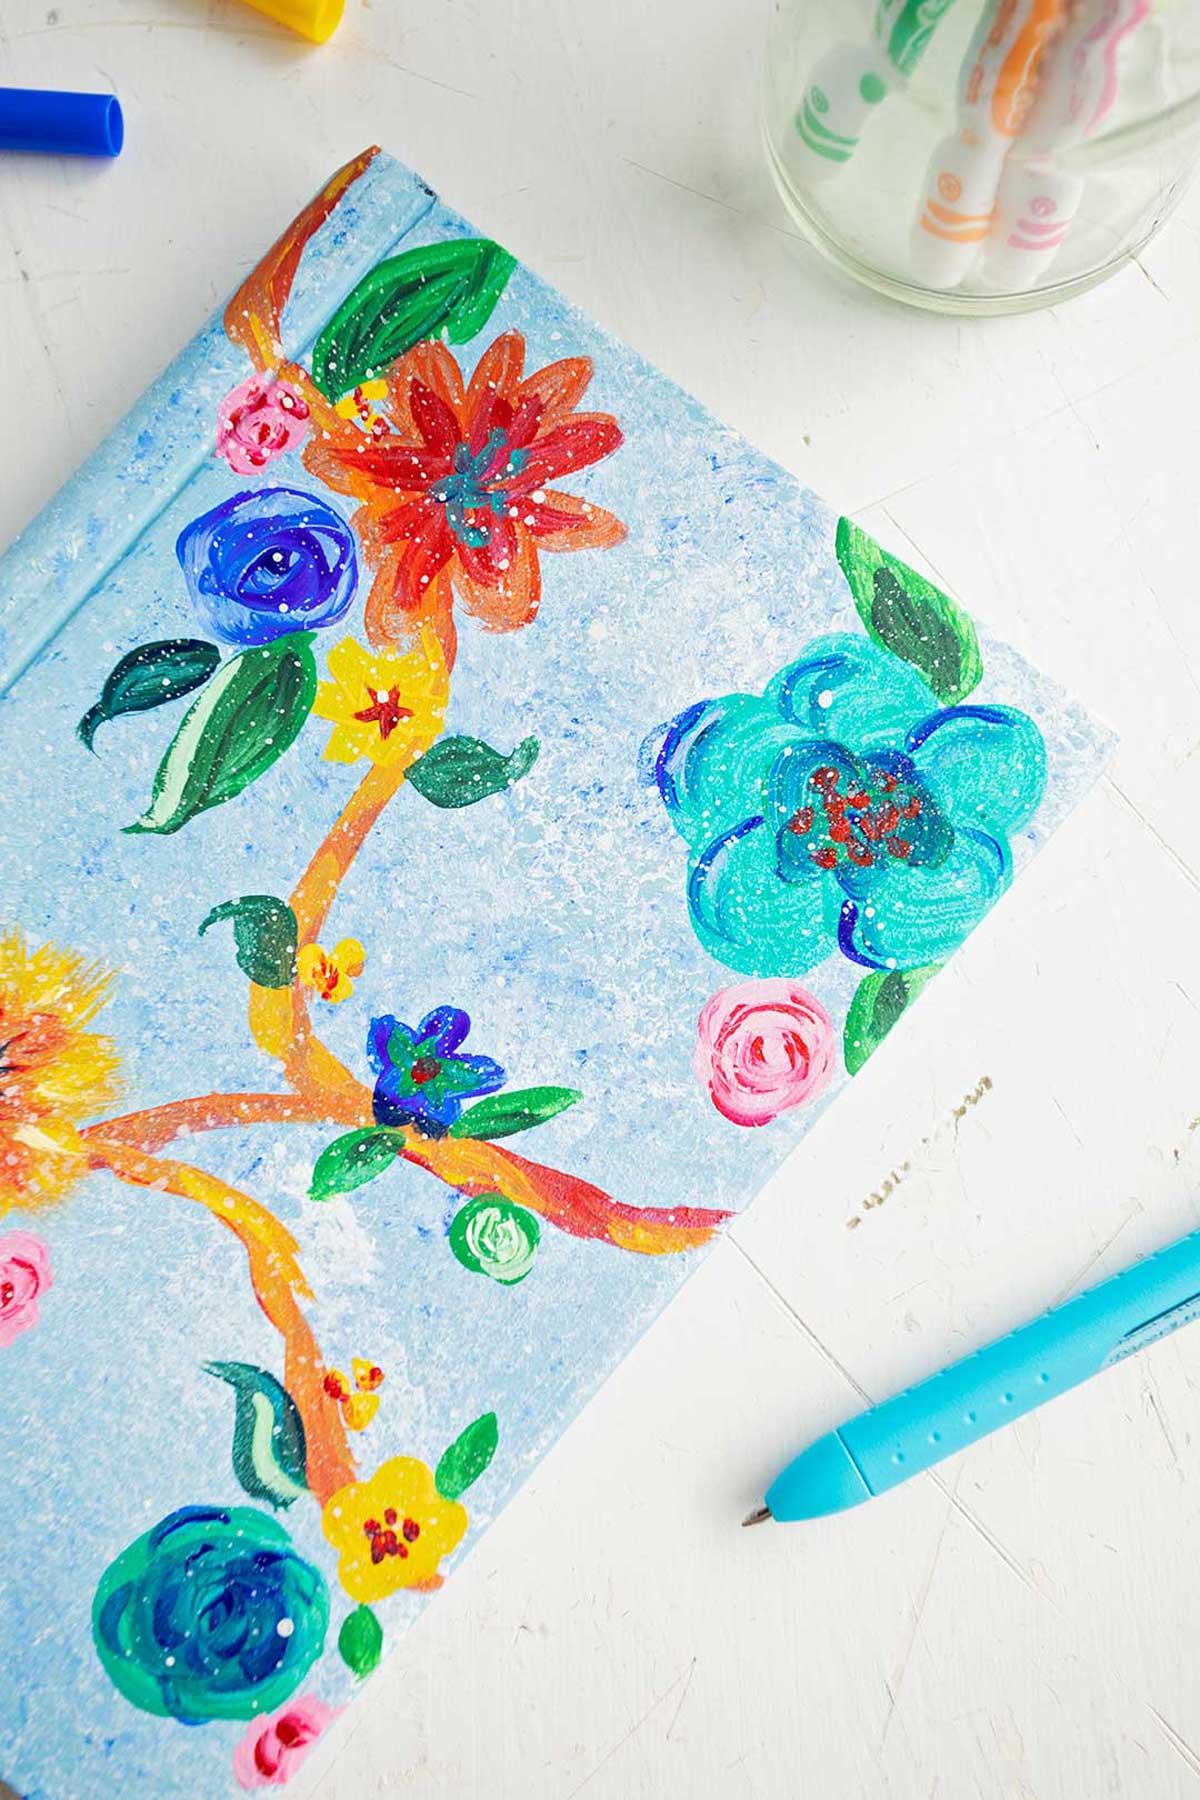
You can spatter the image with flicked paint from an old toothbrush to get a small spray of paint for another neat effect. This can be done at any point of your painting, but the video shows it at the end.
You may need to add a bit of water to the paint for it to spatter well.
What? You don’t like your design? Well that is just fine!
Simply repaint your own book with the background color and try again! How’s that for a re-do option if needed?
Protecting the cover design
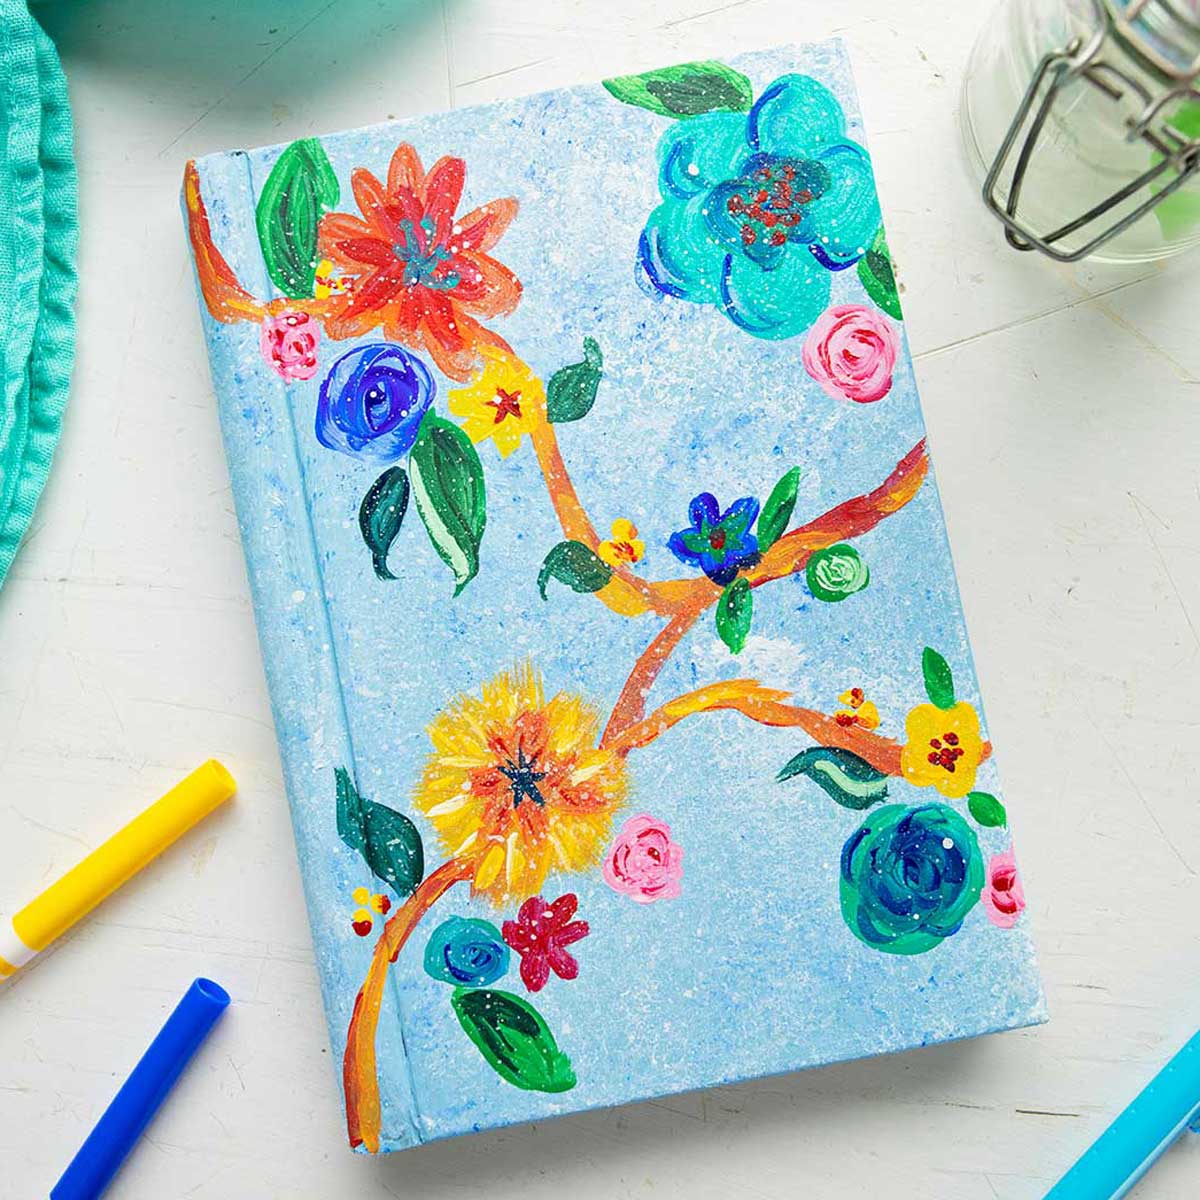
After you are finished painting, you may want to protect the designs.
The easiest way to do this is to decoupage the cover using Mod Podge as a layer of protection.
Stick on jewels, washi tape, or other stickers to finish things up if desired! You could even use some hot glue to secure some fun extras to the front covers.
My mind is just spinning with ideas. PLEASE attach pictures of what you. and the kids come up with.
I would really like to see them! Happy crafting!
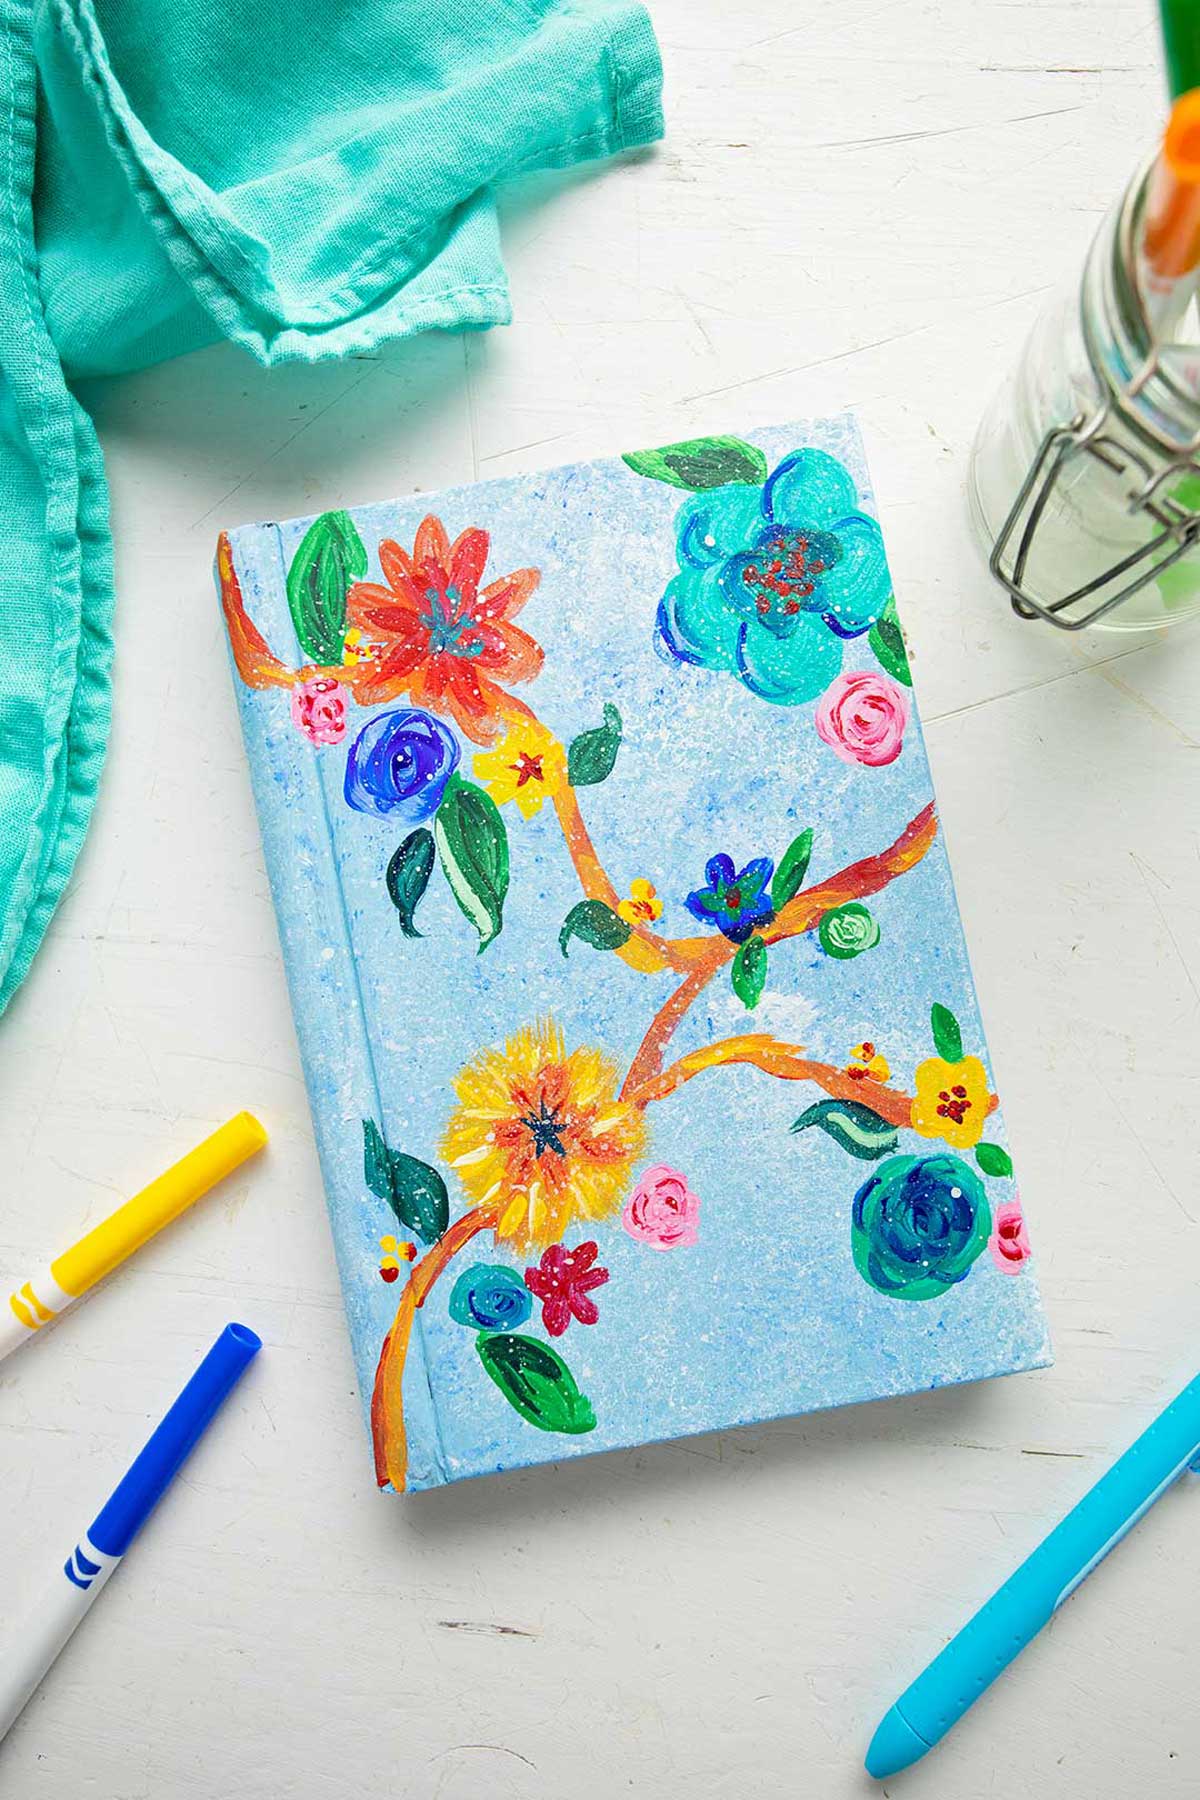
Painting the cover of a book is easy to do and such a fun craft for kids! Use acrylic paints to create a base coat of color, then let it fully dry. Next, paint on any decorations that you'd like to create your own unique design. After it's fully dried, you can coat it to protect the cover as well.
After you are finished painting your book cover, you may want to protect the designs. The easiest way to do this is to decoupage the cover using Mod Podge as a layer of protection.
For this project, I would recommend using acrylic craft paints. If it's your first time using acrylic paints, don't worry, they are easy to use. A water based wall paint could even work for the overall color if you are wanting to match your room.
More Fun Painting Projects for Kids
While you've got the paints out, why not try a few more fun art projects! There are painting ideas for all skill levels, so choose one that fits best and have fun.
- Painted Initial Wall Hanging
- Painted Terra Cotta Flower Pots
- Try Glue Line Painting
- Easy Abstract Heart Painting
- Tiny Canvas Painting Ideas
Enjoy!
If you try this craft, let me know! Go ahead and leave a comment, rate it, and tag a photo with #WelcometoNanas wherever you post.
Supplies for DIY Painted Book Covers for Decor or Use
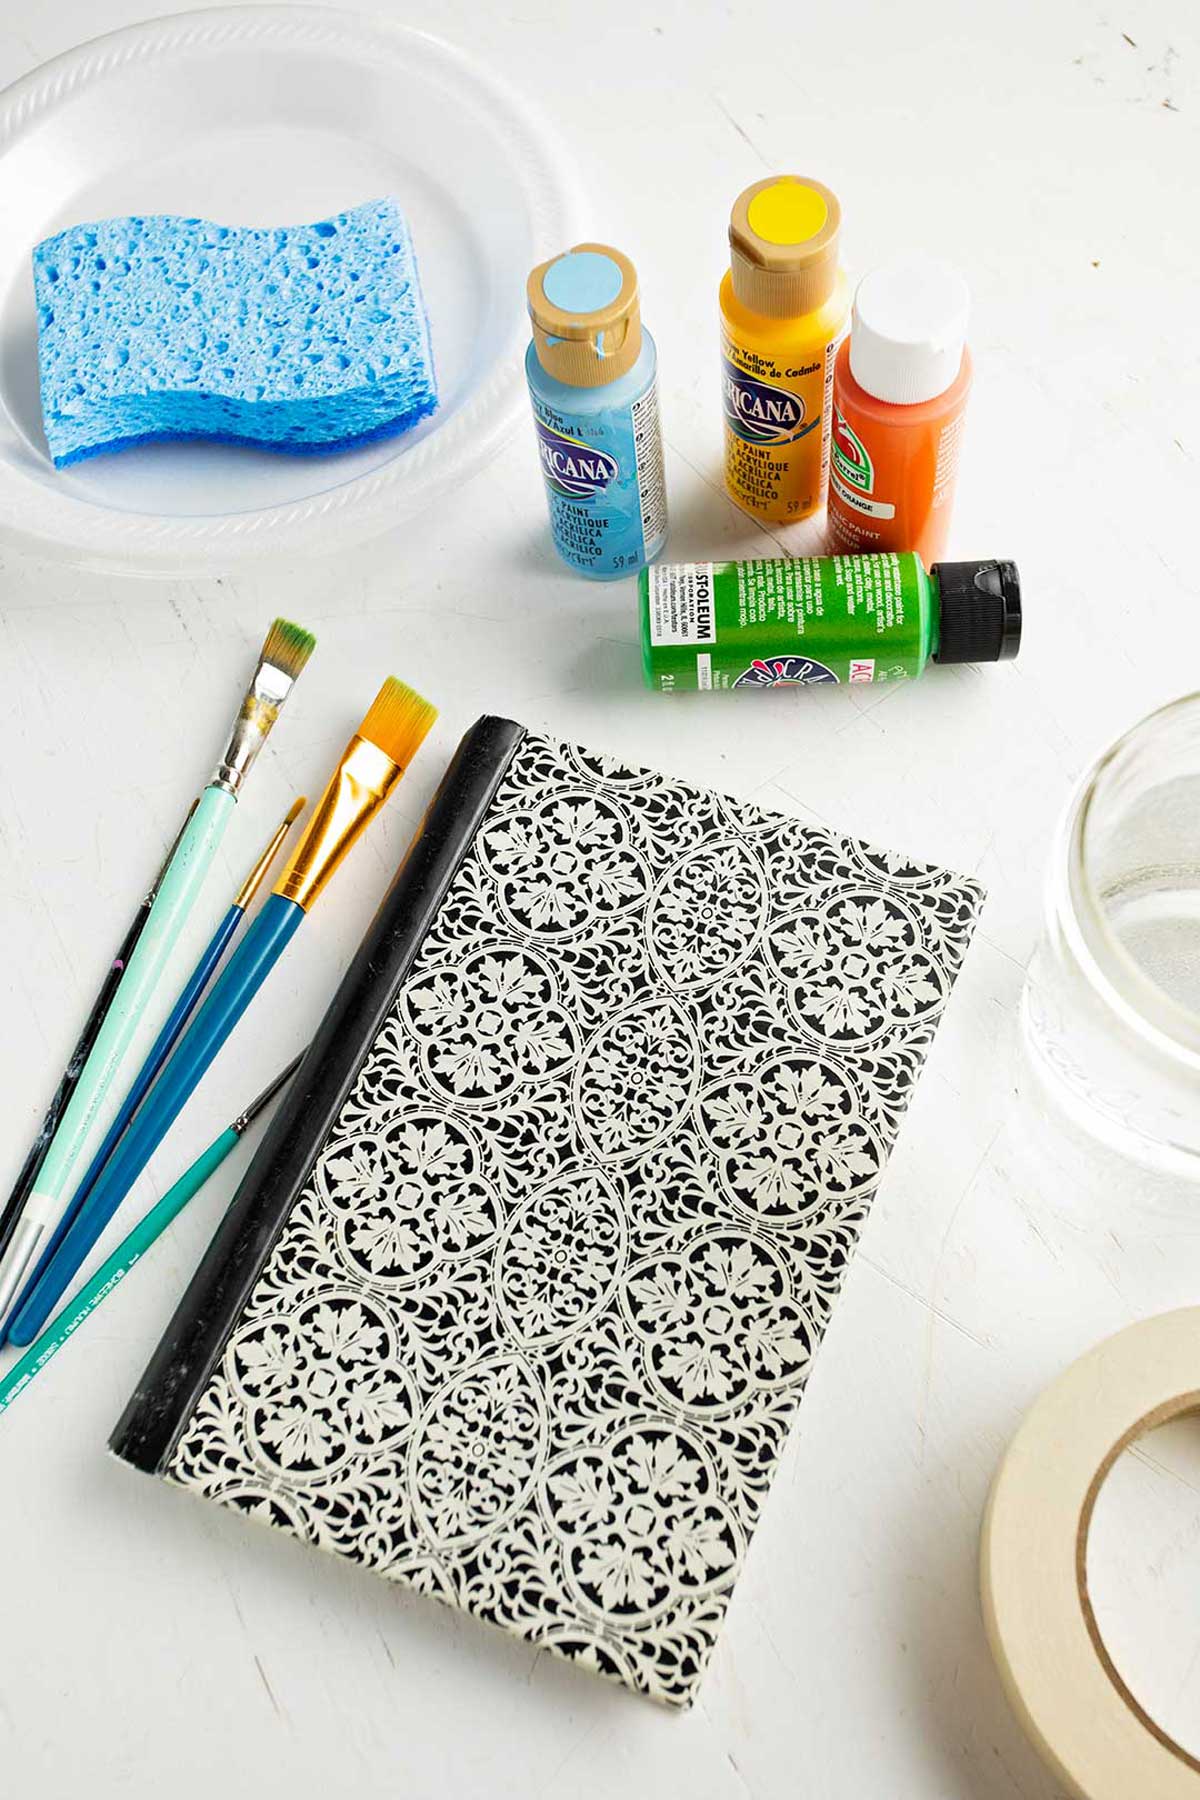
- Hard backed book or journal
- Acrylic paints
- Brushes
- Small dish/glass of water to clean brushes
- Napkin or paper towel
- Sponge (optional)
- Old toothbrush (optional)
- Masking tape (optional)
- Mod Podge (optional)
- Stick on jewels or stickers (optional)
DIY Painted Book Covers for Decor or Use
Equipment
- Brushes
- Small dish/glass of water to clean brushes
- Sponge (optional)
- Old toothbrush (optional)
Items Required
- 1 Hard backed book or journal
- Acrylic paints
- Napkin or paper towel
- Masking tape (optional)
- Mod Podge (optional)
- Stick on jewels or stickers (optional)
Instructions
- Paint the cover white (or color of choice) to give a base coat on which to paint a design. You may need to stand the book up a bit to get in the “nooks and crannies” of the spine and edges of the cover.Let this base coat dry. Apply a second coat if needed.
- You may paint or sponge on another background color of choice.
- If you cover part of the book cover with masking tape (your initials for example), you can do your painting and then peel it off at the end.
- Use your paint brushes and acrylic paint to personalize the cover design. Paint a design, flowers, animals, write a saying or Bible verse, letter your name…
- Decoupage the cover using Mod Podge to protect it if you want.
- Stick on jewels or other stickers to finish things up if desired.
Video
This post was originally published in April 2022 and has been updated to add more relevant and detailed content


Laura says
Oh I've got plenty of books that could be repurposed with this!