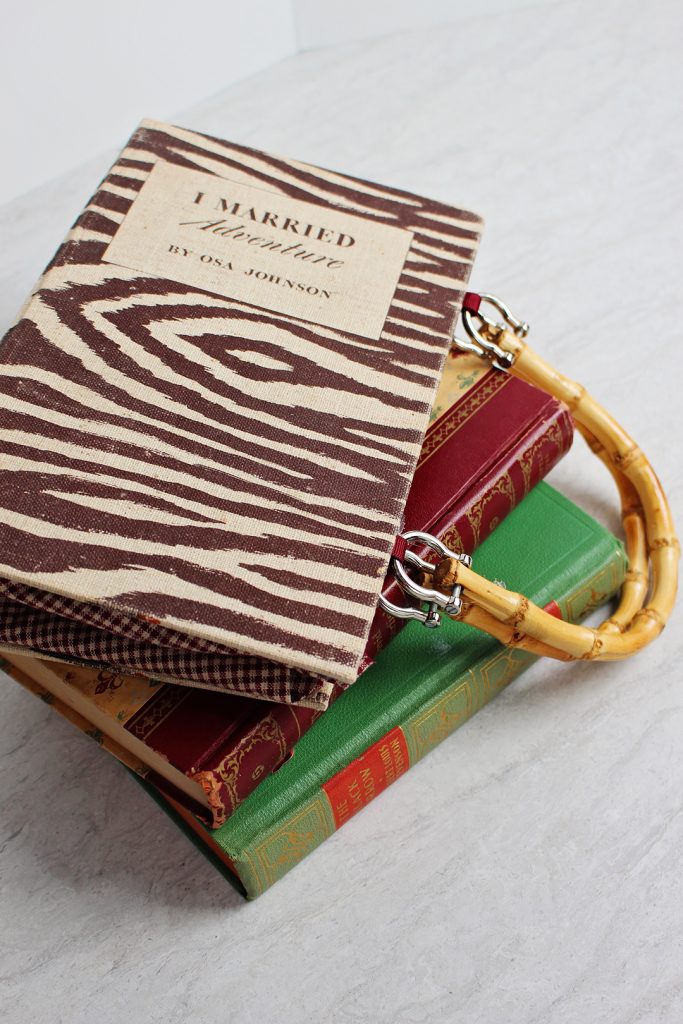
Recycle an old book into a purse!
This Cute DIY Purse from a Book Cover has been on my list to try for a long time (like years)! What a perfect craft or gift for your little book worms (or a friend or for yourself!!). It is a wonderful way to give a new life to an old book that is falling apart. I think that some of these book covers are just works of art and a second purpose as a purse brings them out of retirement (or the trash- gasp!).
A great craft for an older grand
I need to say up front that this is a more challenging craft to do and is best for the older grands to make. Making a Cute DIY Purse from a Book Cover takes more coordination and uses a hot glue gun in some tighter spaces. That being said, it is a really cool project.
Be sure to look at the pictures as you go so you catch each step.
Prep the book cover
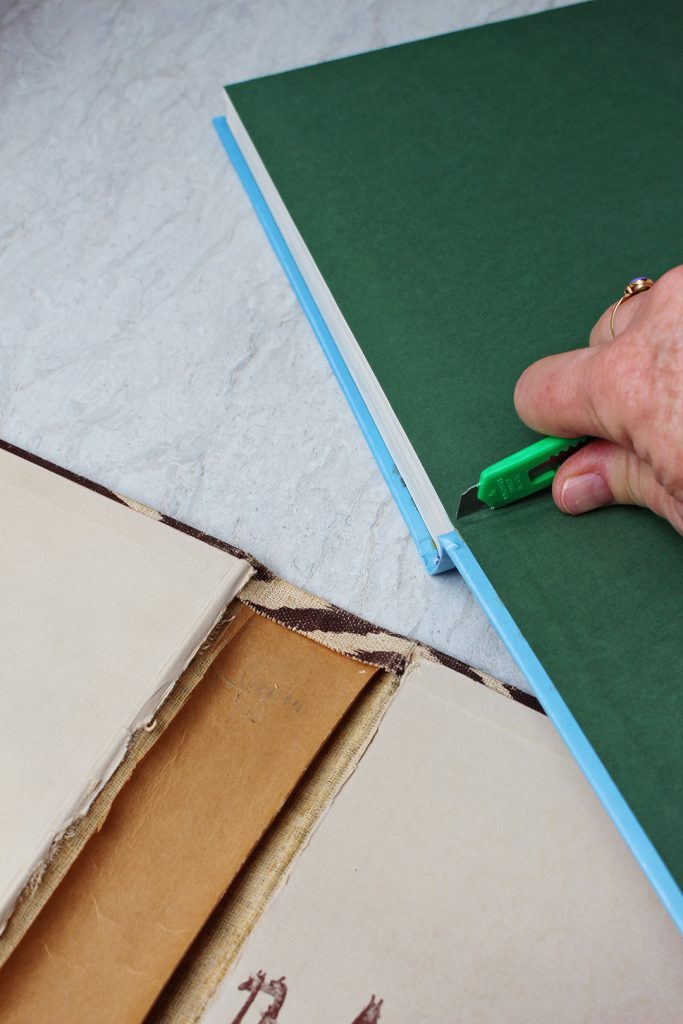
The only part of the book that is used is the cover, so the first step involves removing the pages.
Use a utility knife to slit the inside binding of the book. Of course I don’t need to tell you to be careful.
Pull out the pages, leaving only the cover. I used a couple books that were already falling apart so this was pretty easy to do. On a newer book, or one that is still firmly attached at the spine, it takes some tugging to get the pages to let loose from the cover!
I stuck the extra pages in my paper stash to use for another project in the future. I don’t have any immediate plans for them but know they will come in handy sometime soon. I’ll surprise you! 😉
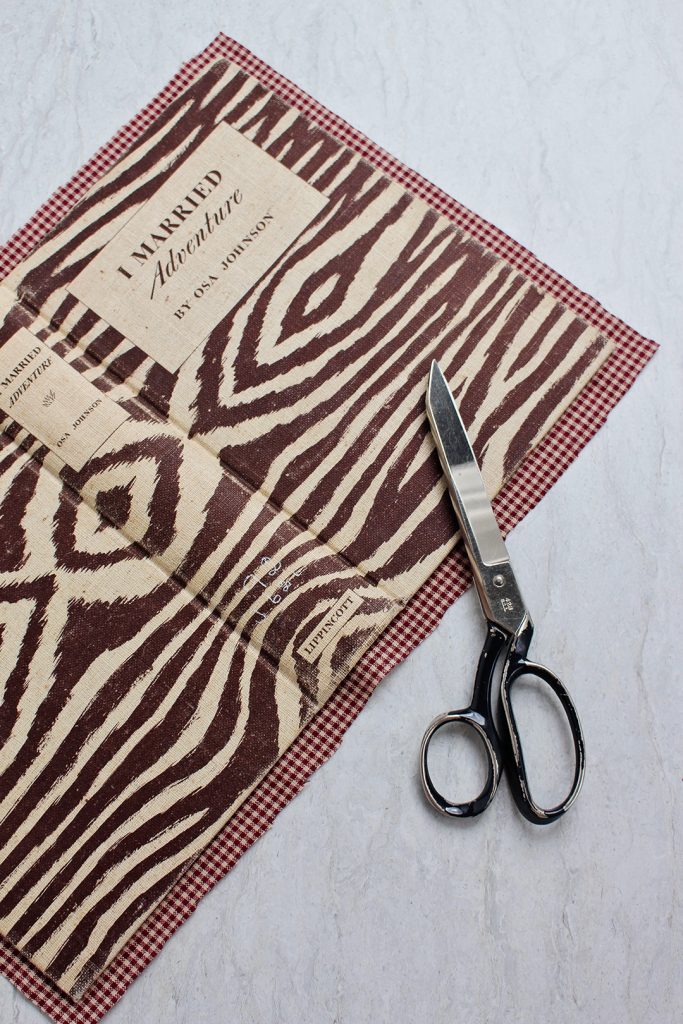
Cut the purse lining
Lay the book cover out flat on a single layer of your fabric.
Cut a piece of fabric that is ½ inch larger than the book cover on all sides. Iron under ½ inch all around the edge of the fabric. This will be the inside lining of your Cute DIY Purse from a Book Cover.
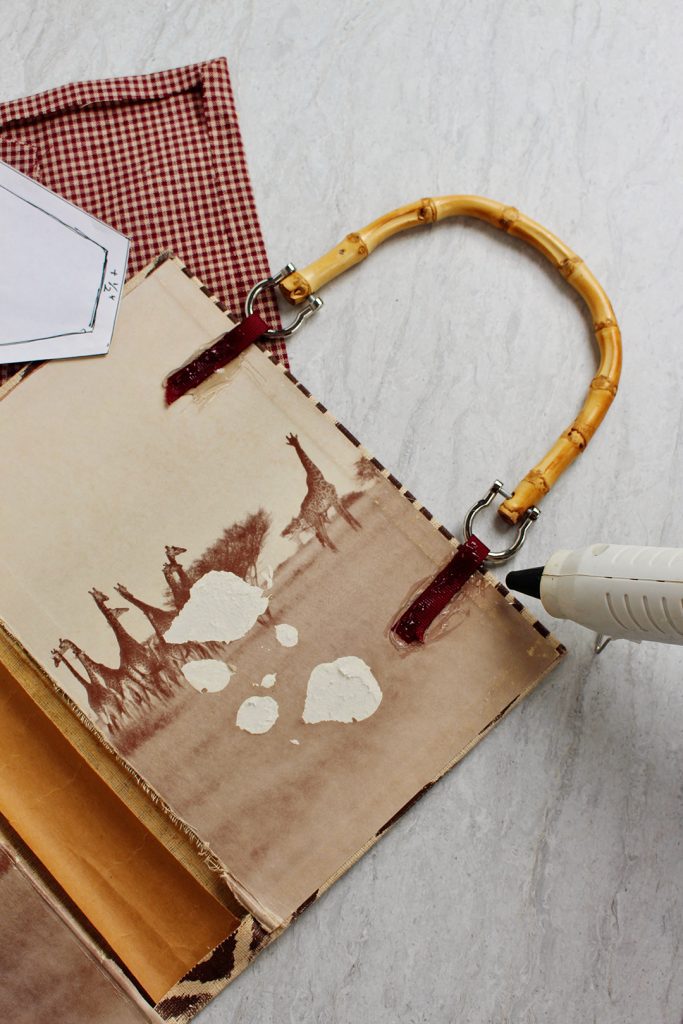
Add handles and clasp
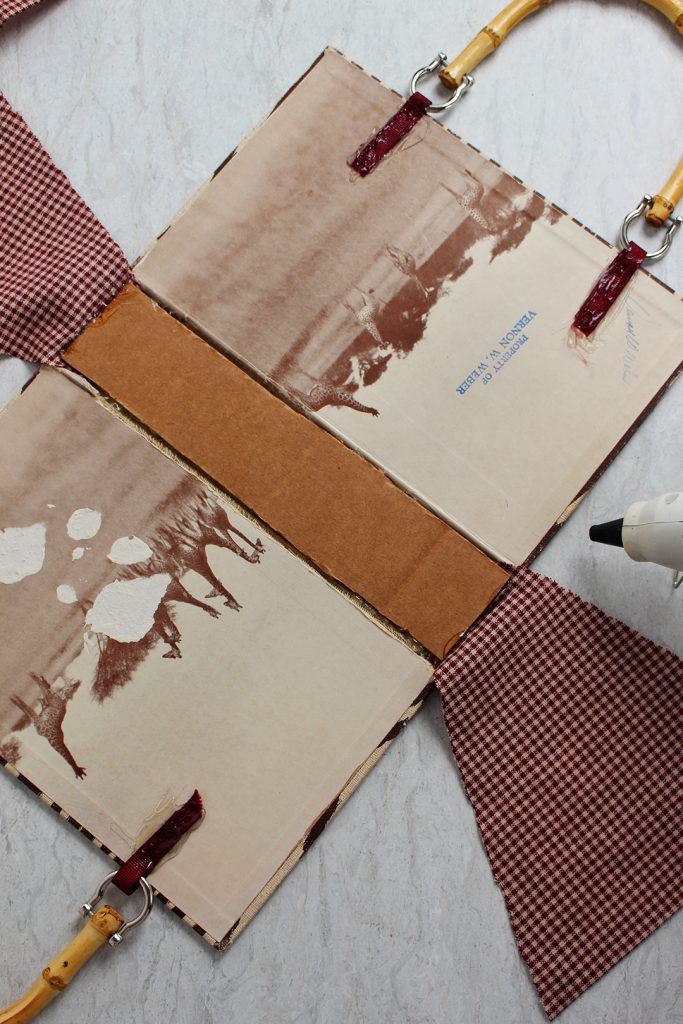
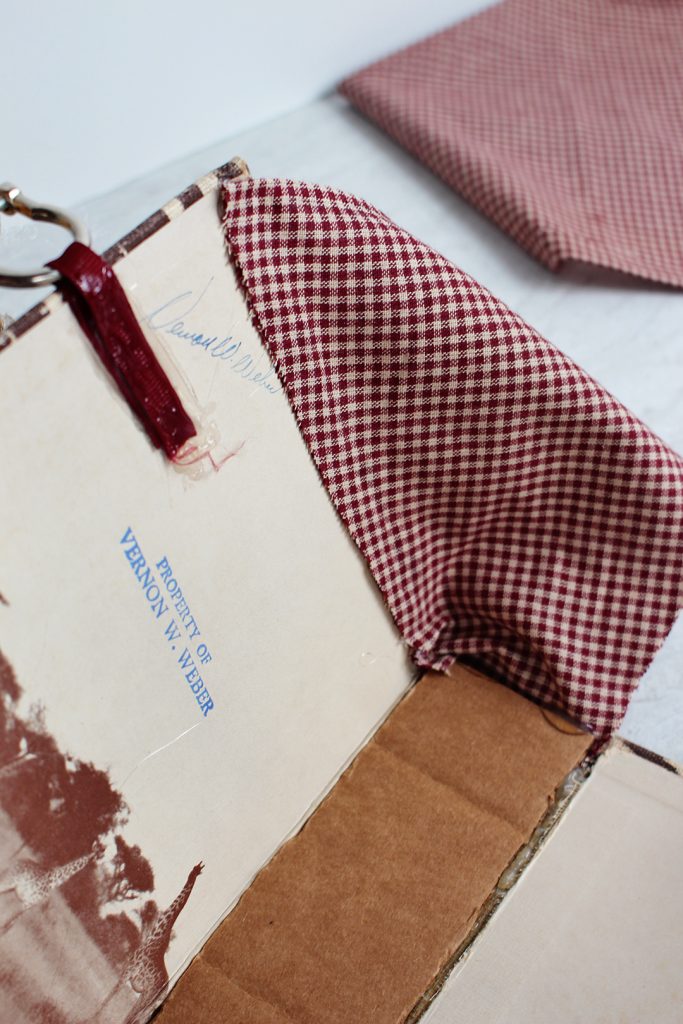
Glue pieces of ribbon (cut to about 4 inches long) onto the inside of each cover to hold the handles in place. The handles should just come to the edge of the book.
You can purchase purse handles at a craft store, fabric store or online. I got mine at a thrift store and cut them off the old purse. They got a new life too!
Also glue a large bead to the inside of one cover of the book and a loop of ribbon onto the inside of the other cover to be used to latch the purse and hold it shut. I’m really sad that I didn’t think of this till after I had made this Cute DIY Purse from a Book Cover. I plan on adding it to the purse now but don’t have a picture to show you, you'll just have to imagine it!
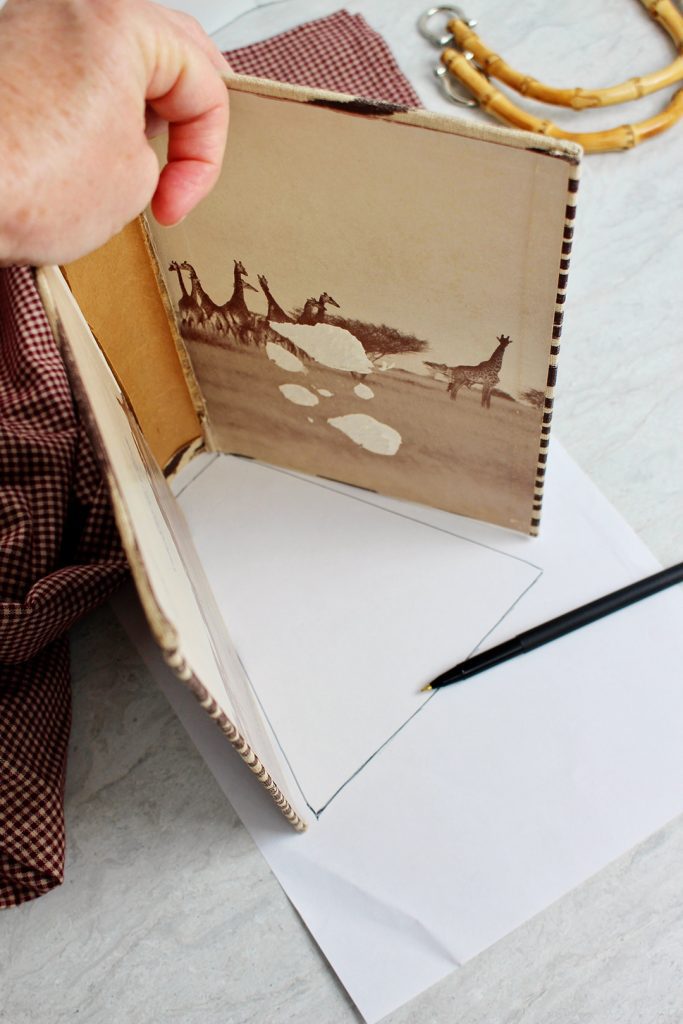
Make the ends of the purse
Stand the book cover up on its edge on a sheet of paper so that it is open about 45-50 degrees.
Draw around the inside edges of the cover. Draw down the front cover, across the spine, and up the back cover. Then draw a straight line across the open top. It is basically a triangle shape. This is the pattern for the two ends of your purse.
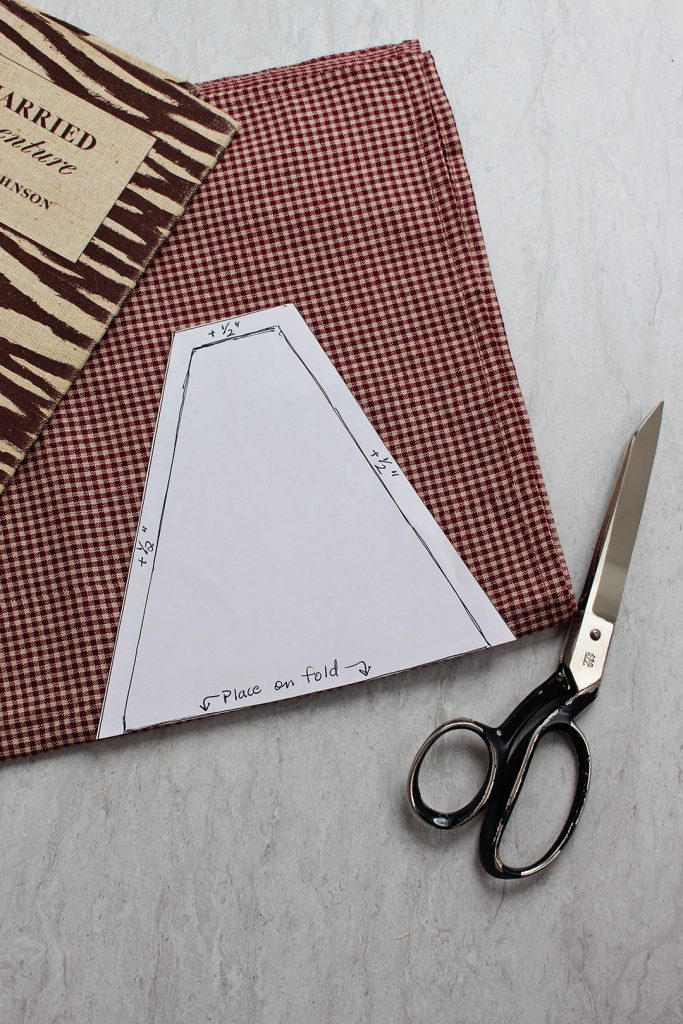
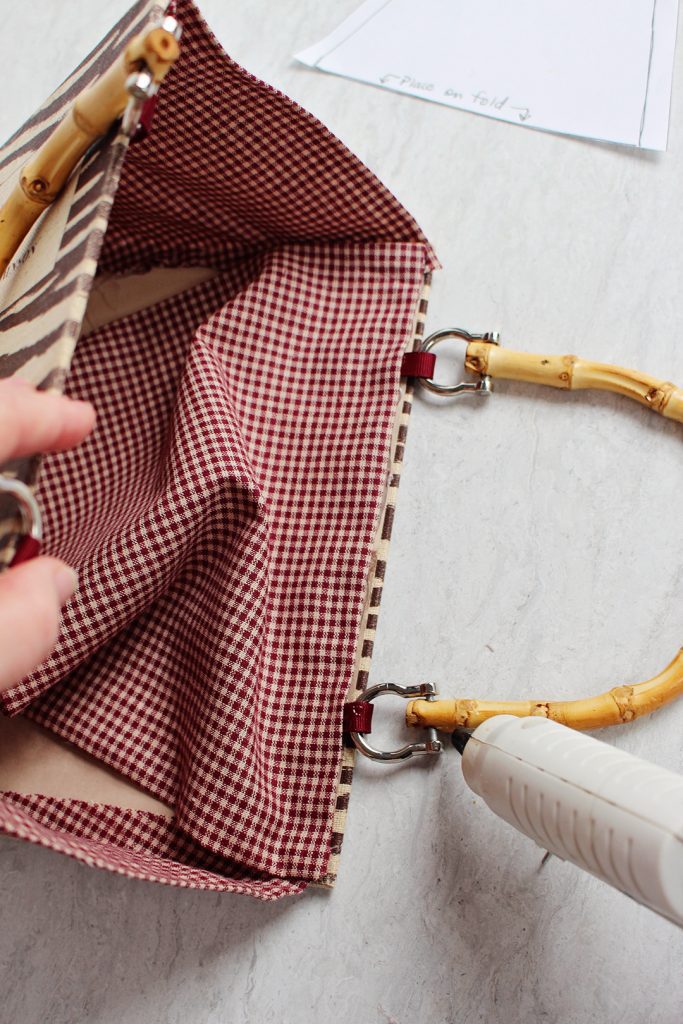
On your pattern, add ½ inch to the 2 cover edges and the spine edge of the triangle (not to the base of the triangle that goes between the book cover edges). This base edge will be placed on the fold so mark that edge “Place on fold”.
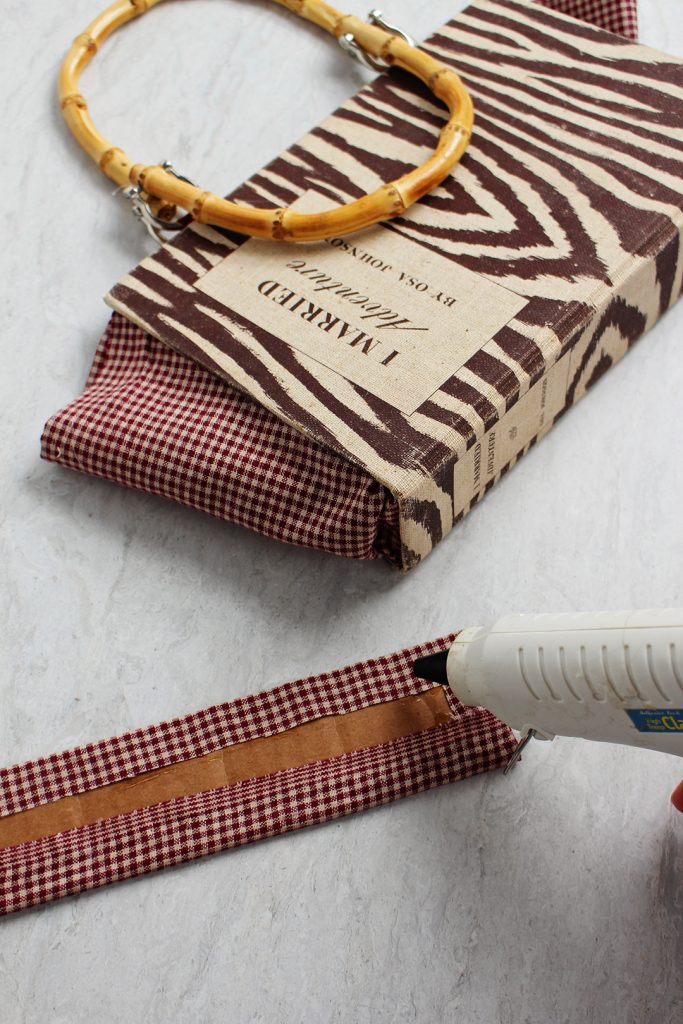
Fold the fabric to a double thickness with the right sides of the fabric on the outside so it is wide enough for this pattern piece to fit on it. Place the base of the triangle piece on the folded edge of the fabric. Pin it in place and cut out the pattern shape (do NOT cut on the folded edge). Cut a second piece just like it. Iron these two folded pieces so they are flat.
Use the fabric glue to glue the fabric together on the open edges.
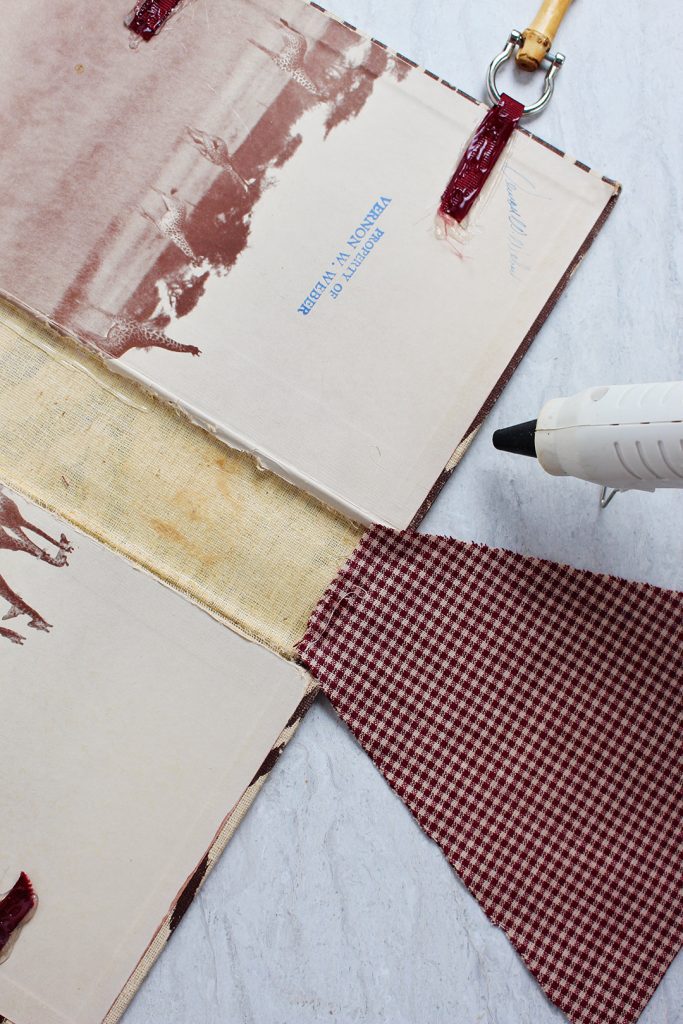
Glue the purse ends to the book cover
Hot glue ½ inch of the spine edge of one end piece to the end of the spine of the book so that the rest of the fabric piece is away from the book. Be sure to look at the picture for this step. Repeat for the other end piece on the other end of the book spine.
The bottom of the book purse
Cut two pieces of cardboard that are the same size as the area of the spine. Hot glue one piece onto the spine to strengthen it and cover where the fabric pieces are glued. Set the other aside for a later step.
The next step is kind of tricky.
Finish the ends of the book purse
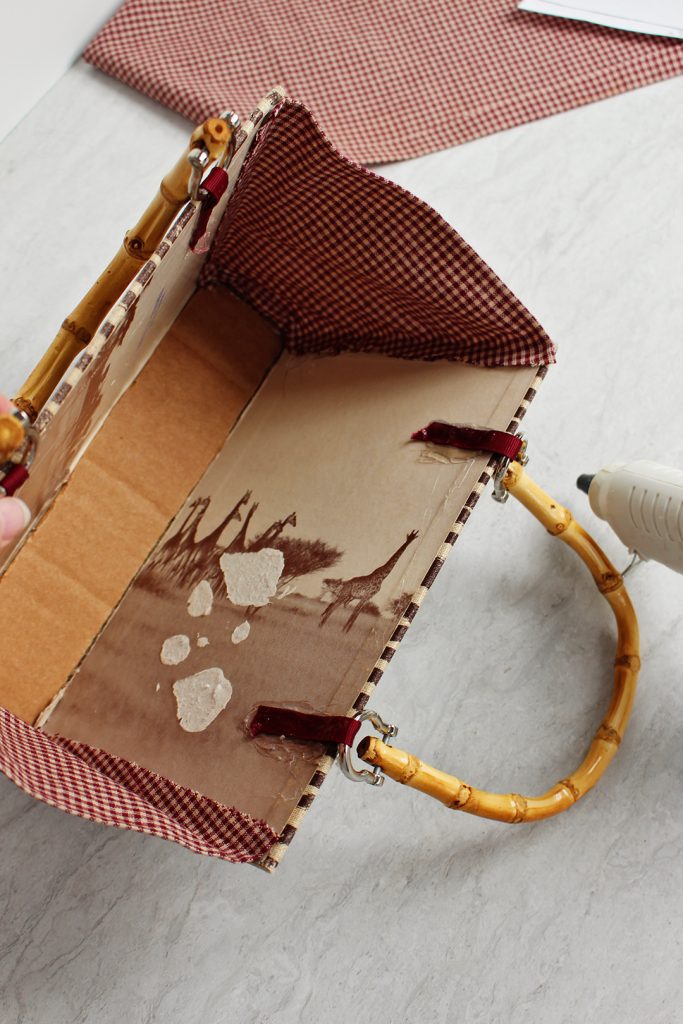
Pull the end fabric triangular piece up and glue ½ inch of one triangle side to the inside end of the book cover. Glue the other side inside the book on the other side of the book cover. Repeat this step on the other end of the book. The folded edge will be stretching from book edge to book edge. This completes the two ends of your purse.
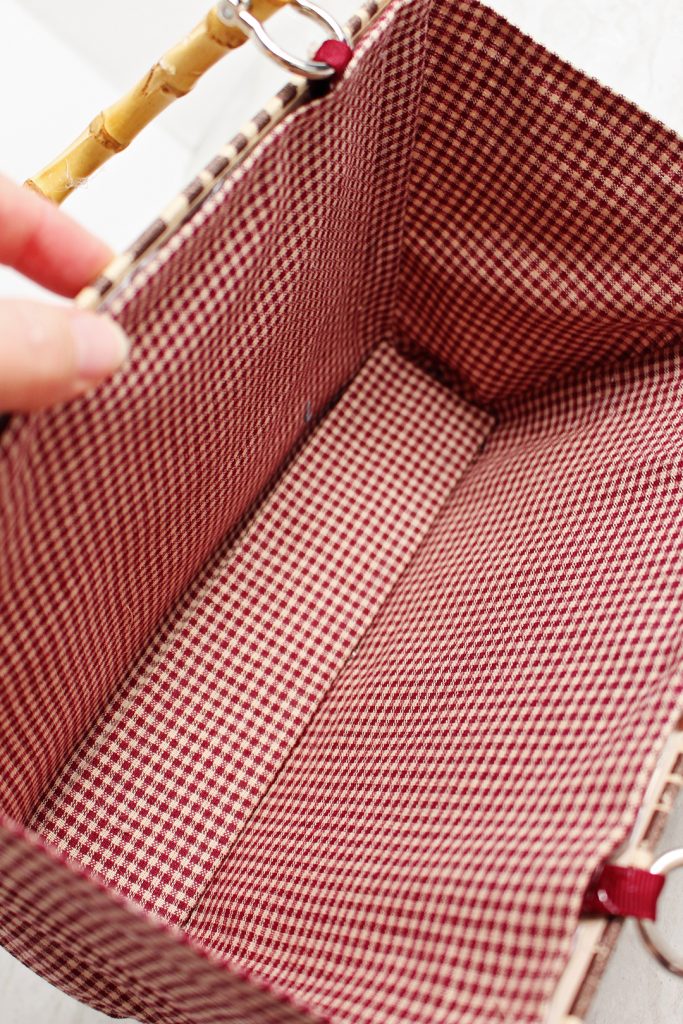
Line the inside of the purse
Place the liner for the purse down inside the purse with the folded edges against the inside of the cover. Lift the edges up and hot glue this in place all around the edge.
Cut a piece of fabric that is ½ inch larger around the edges of the second piece of cardboard you cut for the spine of the book. Cover the cardboard with this fabric and hot glue it in place.
Glue this piece into the bottom of your purse to strengthen the bottom of the purse and give it a finished look inside.
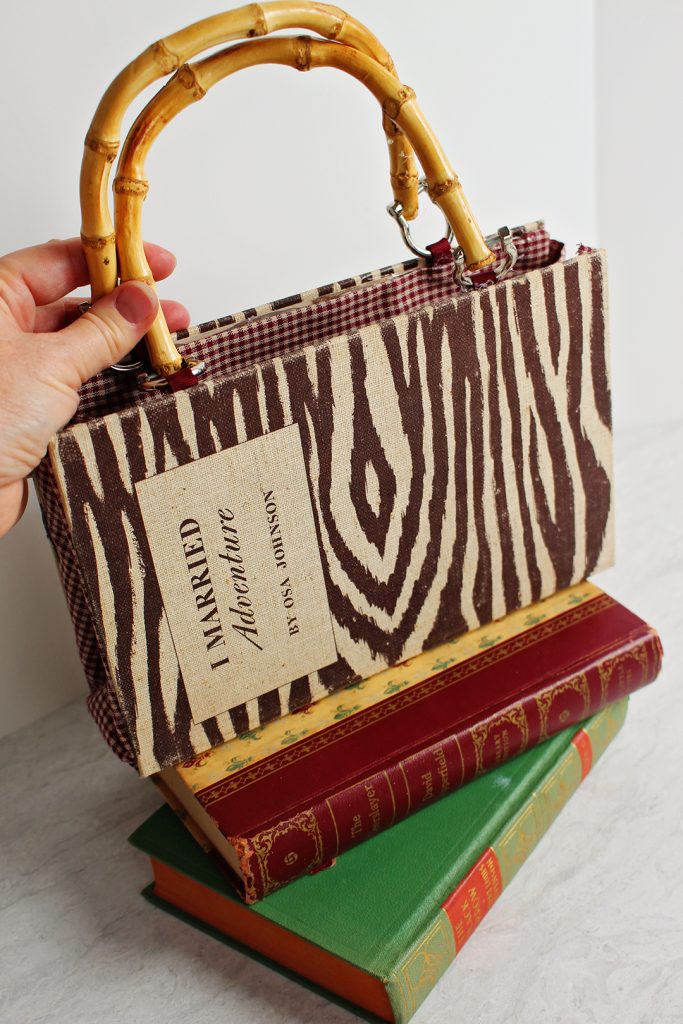
Close your DIY Cute Purse from a Book Cover
Tuck the fabric ends of the purse inside as you close and latch it by putting the ribbon loop around the bead.
Wow! Look what you have made!
What a Cute DIY Purse from a Book Cover!! I just love this purse and plan on giving it as a gift to a book loving, animal print wearing friend! I will be making more as soon as I can get a few more handles like shown in the supplies list!
Enjoy making these as gifts for your book worm grands or help the grands to make one for themselves or for a gift for mom! Love, love, love how this turned out!
Send a picture showing what book you used to make your book purse!
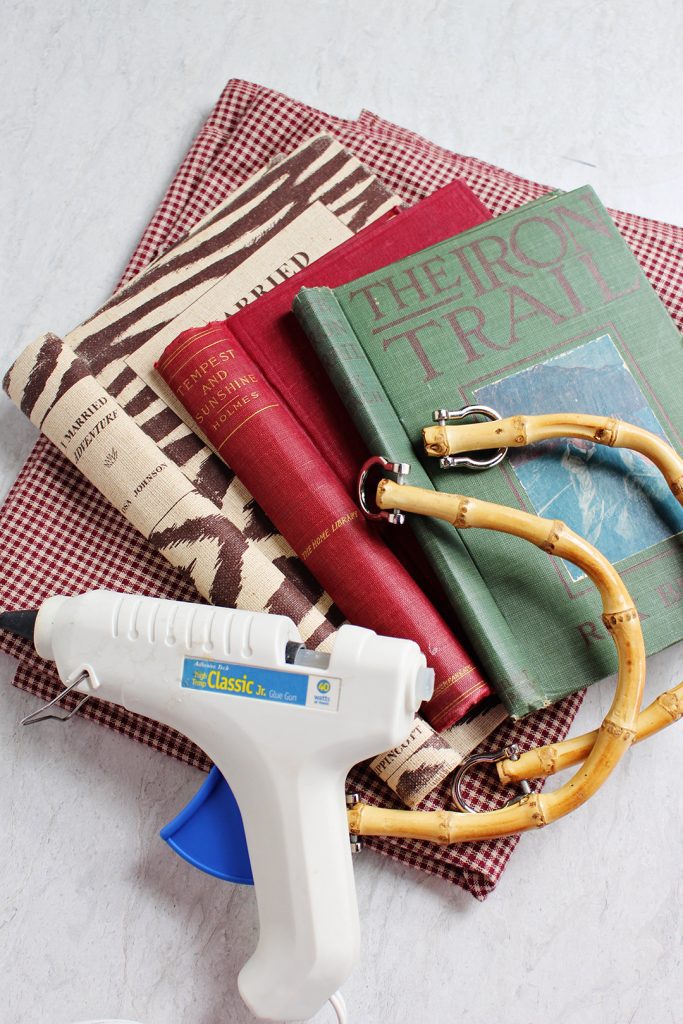
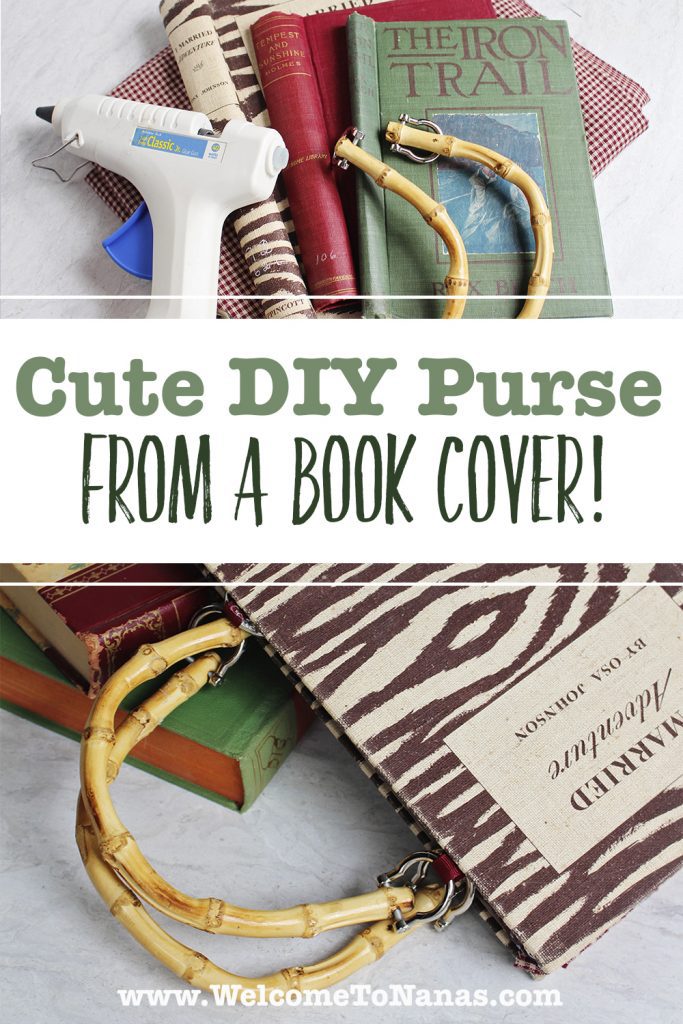
Supplies for a Cute DIY Purse from a Book Cover
- An old book with a cover that you like
- ½ yard of woven fabric (not a stretchy knit fabric)
- Two purse handles
- ½ yard of ribbon that is ⅜-1/2 inch wide
- A large bead or button that may be used as a closure (needs a large hole or shank for ribbon)
- Fabric glue
- Hot glue gun and hot glue- TopElek Mini Glue Gun Kit with 30pcs Glue Sticks, High Temp

- Piece of cardboard
Enjoy!
Welcome to Nana’s! Where there’s fun things to do with your “grand” kids!
Come join the fun at www.WelcomeToNanas.com


Kaz says
Hi Nana, this is so gorgeous thanku so much.
Im about to start making mine.
I made a bag years ago with a pair of jeans, just the top part of course as was far easier than fiddling with the legs. Then probably about 20yrs ago I made another shoulder bag from 2 LP records 😅😁
Turned out great but sadly, over the years it cracked so i had to hang it as a decoration. Got so many comments when I used it. Made heaps of smaller purse sized shoulder bags too out of scraps of leather. Being on the motorbike its far easier to carry a smaller flat bag than anything of a normal bulkier bag.
Thanks so much for the photos, very helpful with the triangal side panels.
Cheers Kaz from Oz 🥰