
How to Make a Paper Bag Book Cover
My mom covered books she borrowed from other people with a brown paper bag book cover. She wanted to return the book in good shape. As an avid coffee drinker I’m sure she had experience in spills on books!
How to Make a Paper Bag Book Cover seems like a natural follow up to Making a Fabric Book Cover, don’t you think?
What's under that paper bag cover?
I must admit I was curious a few times and looked under the brown paper cover to see if she was just trying to hide contraband books. She wasn’t, just borrowed books plain and simple. But you may want to use a brown paper cover for your “I’d rather you not see this” titles. There are some titles you may rather not let your littles see, ha!
This takes minutes to do, and I mean minutes. And it protects both hard cover and paperback books well. So, let’s dive in.
Paper book covers
Did I mention that a paper book cover is also an upcycle project and very economical! You can just use a brown paper bag that you get from the grocery store if you don’t want to purchase a roll of brown paper for wrapping packages. One bag will cover most typically sized books.
How do I cover a book with paper?
I’m glad you asked! Ha!
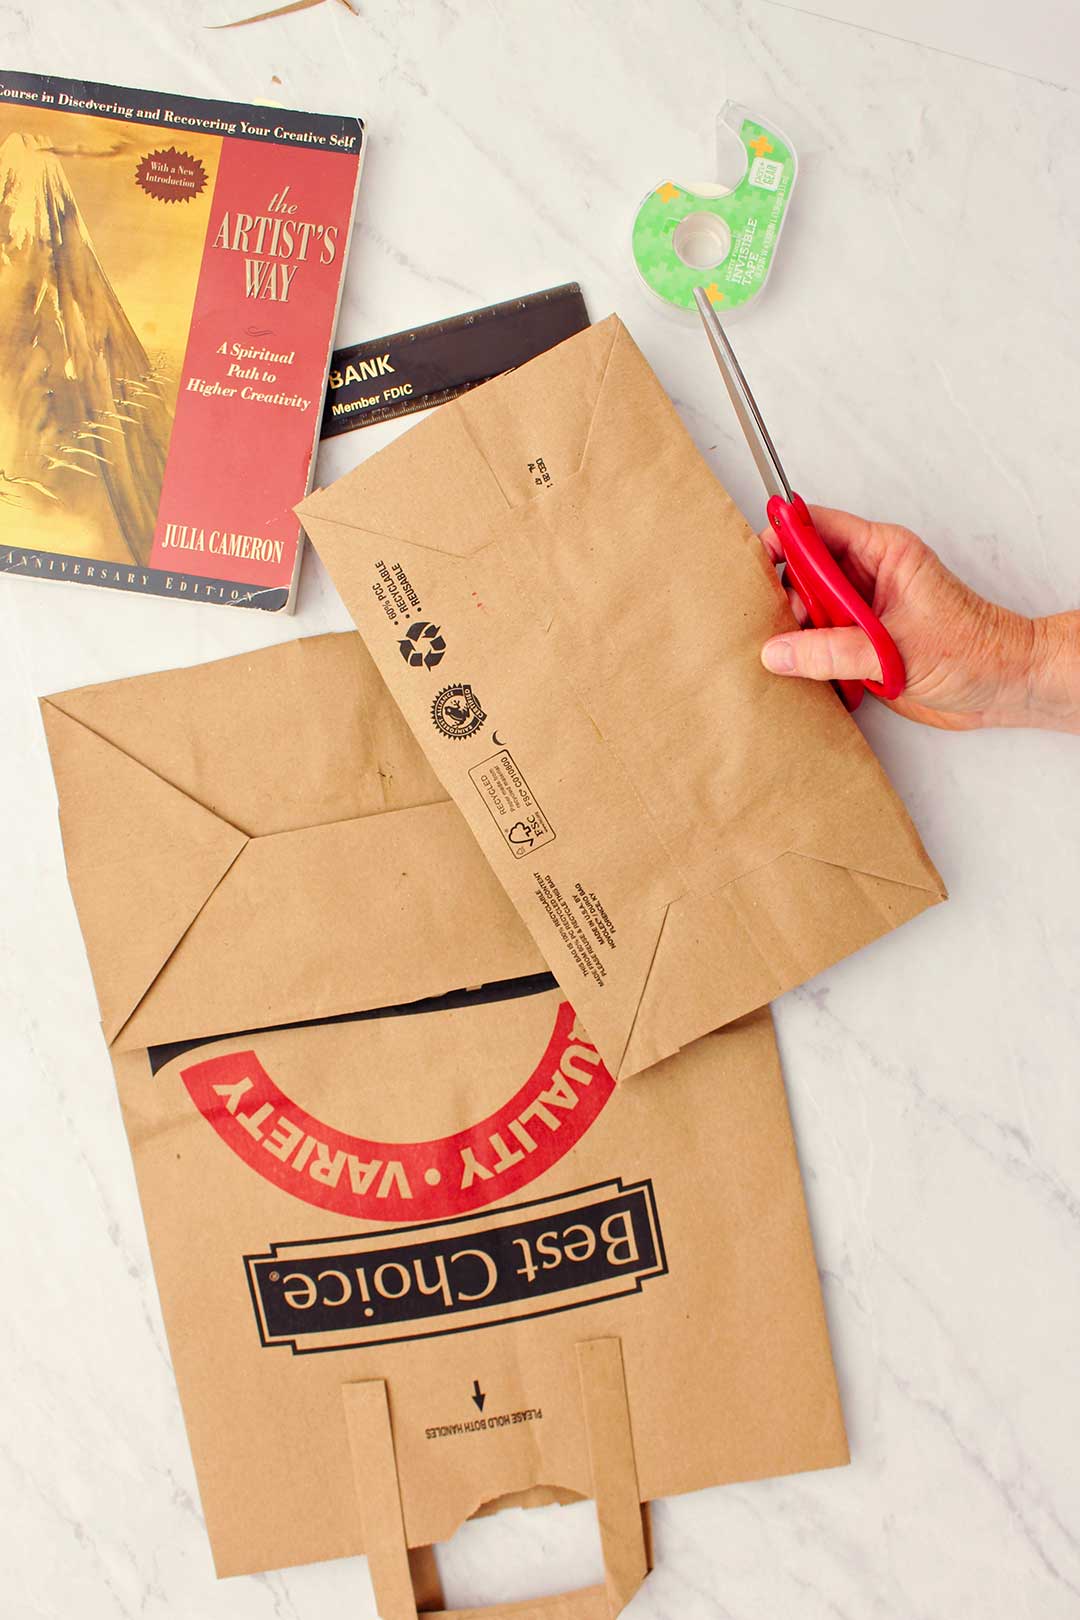
Cut the bottom of the brown bag off by carefully clipping all around the edge of the bottom. With that off you can just cut up the side of the bag and lay it out flat, printed side up.
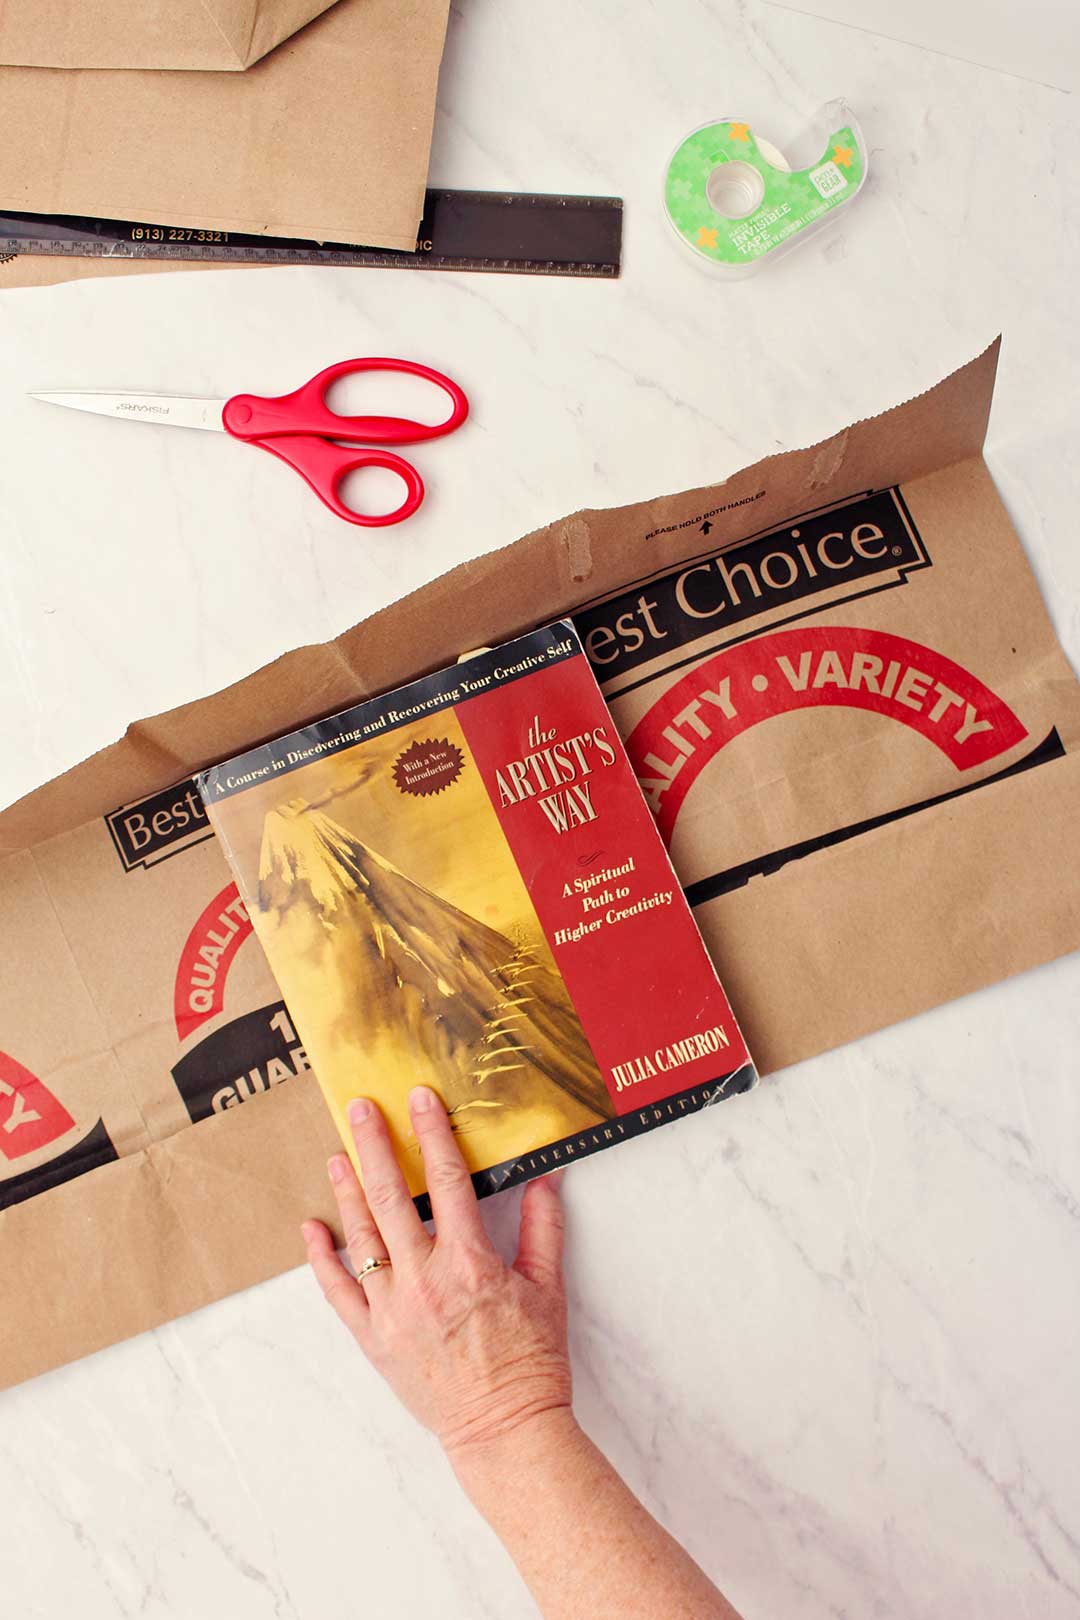
Place your book on top and fold up the bag to make a crease along the bottom edge of the book. Then continue to fold the bag all the way across.
With the bottom of the edge of the book in that first fold, do the same thing to the top of the book. Fold the bag up to make a crease along the top edge of the book. Continue to fold the bag all the way across.
Now the book should fit well right between these two folds.
Take the book off the bag for a moment.
Trim the folded-up parts of the bag to about two inches wide.
Paper wrapped books
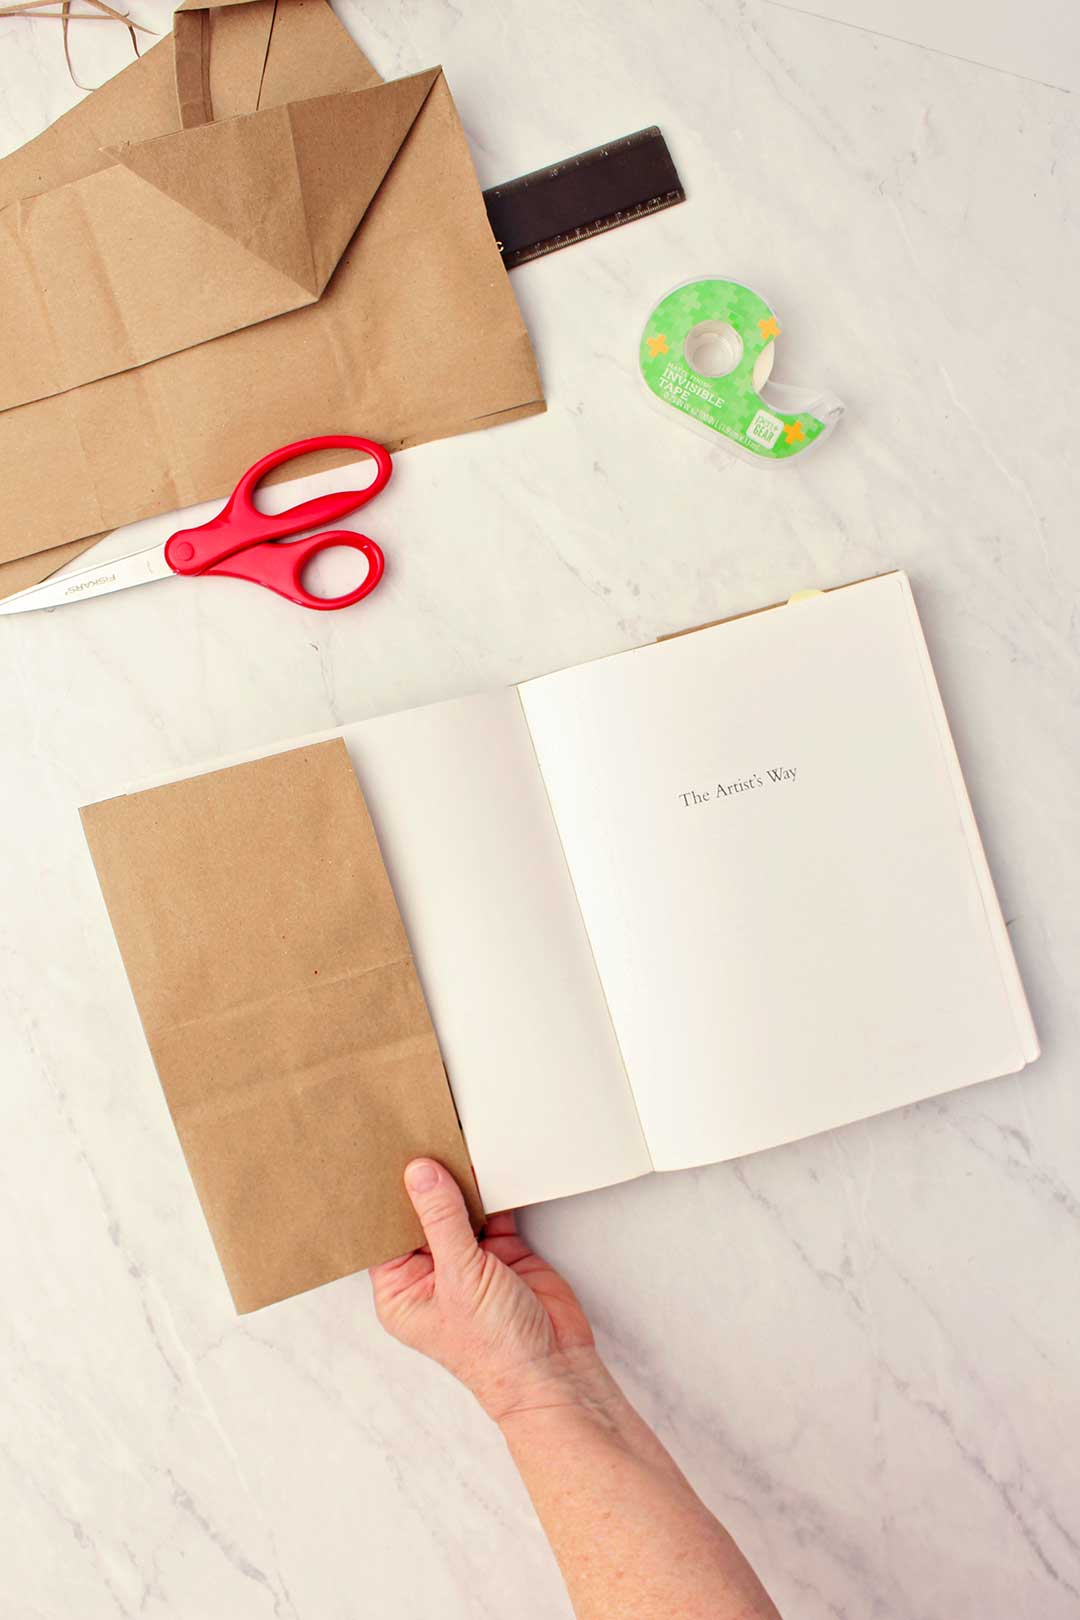
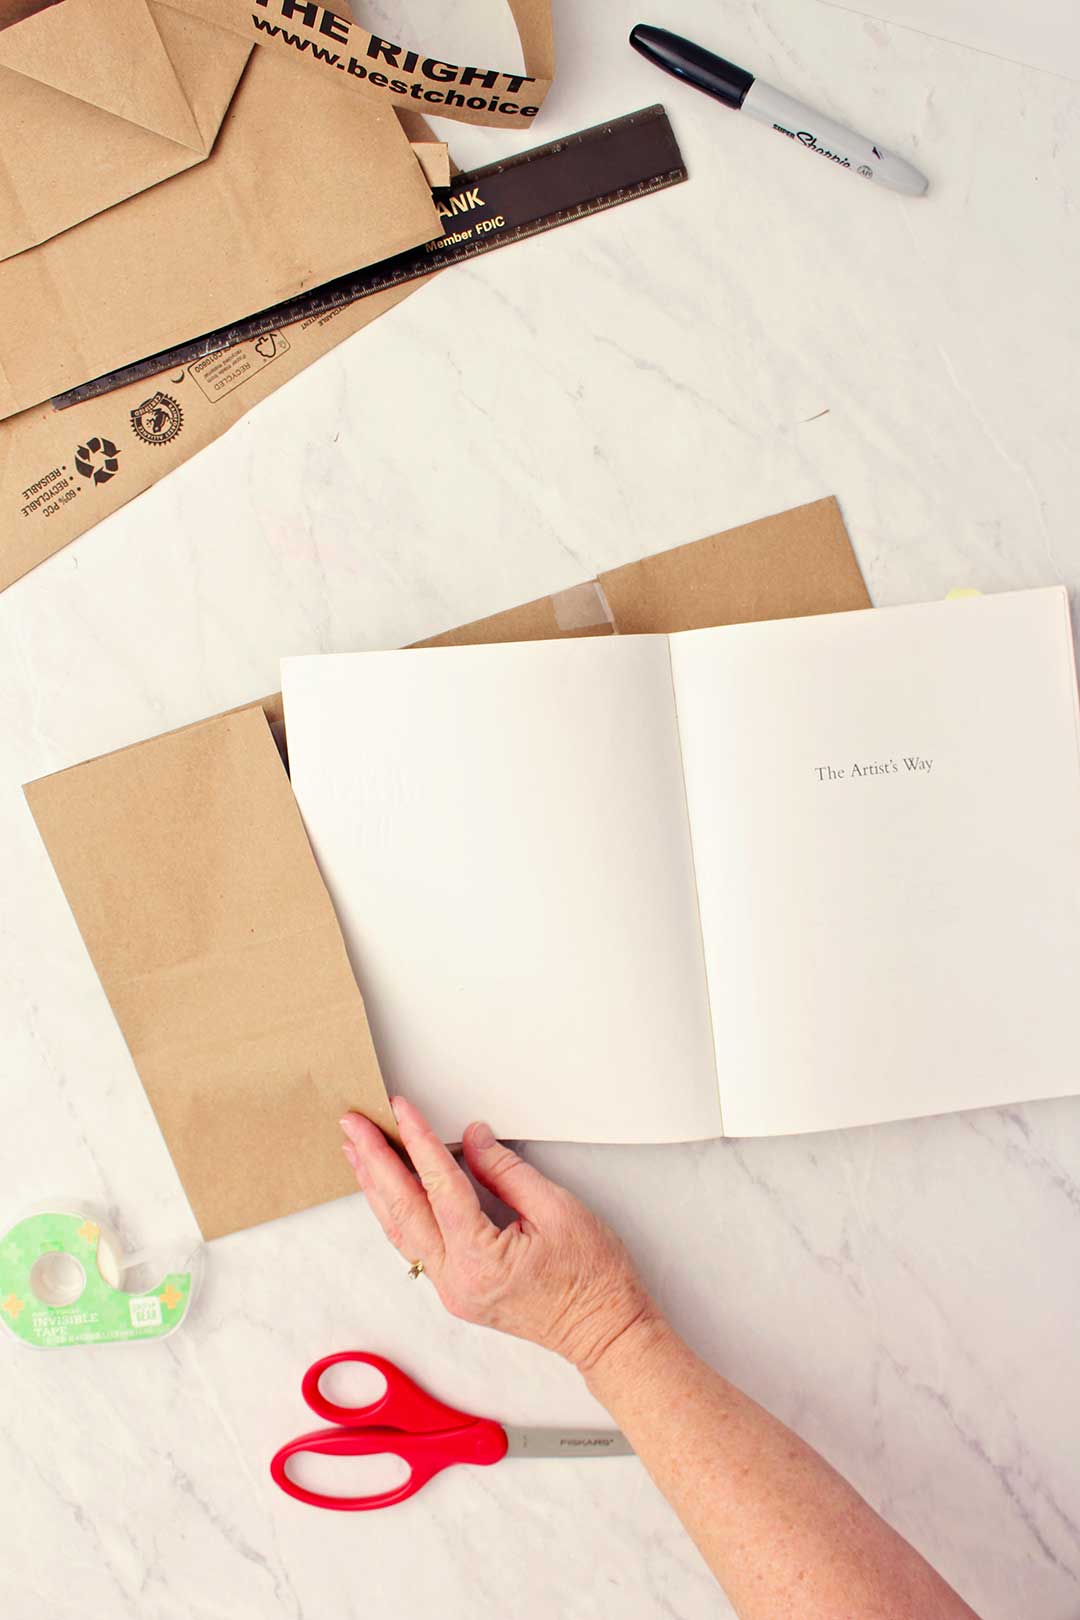
With the two folded flaps flat against the bag, place the book on top. Open the front cover of the book and tuck about 3 inches of the paper bag inside. Close the cover and crease the bag well on the sides of the book.
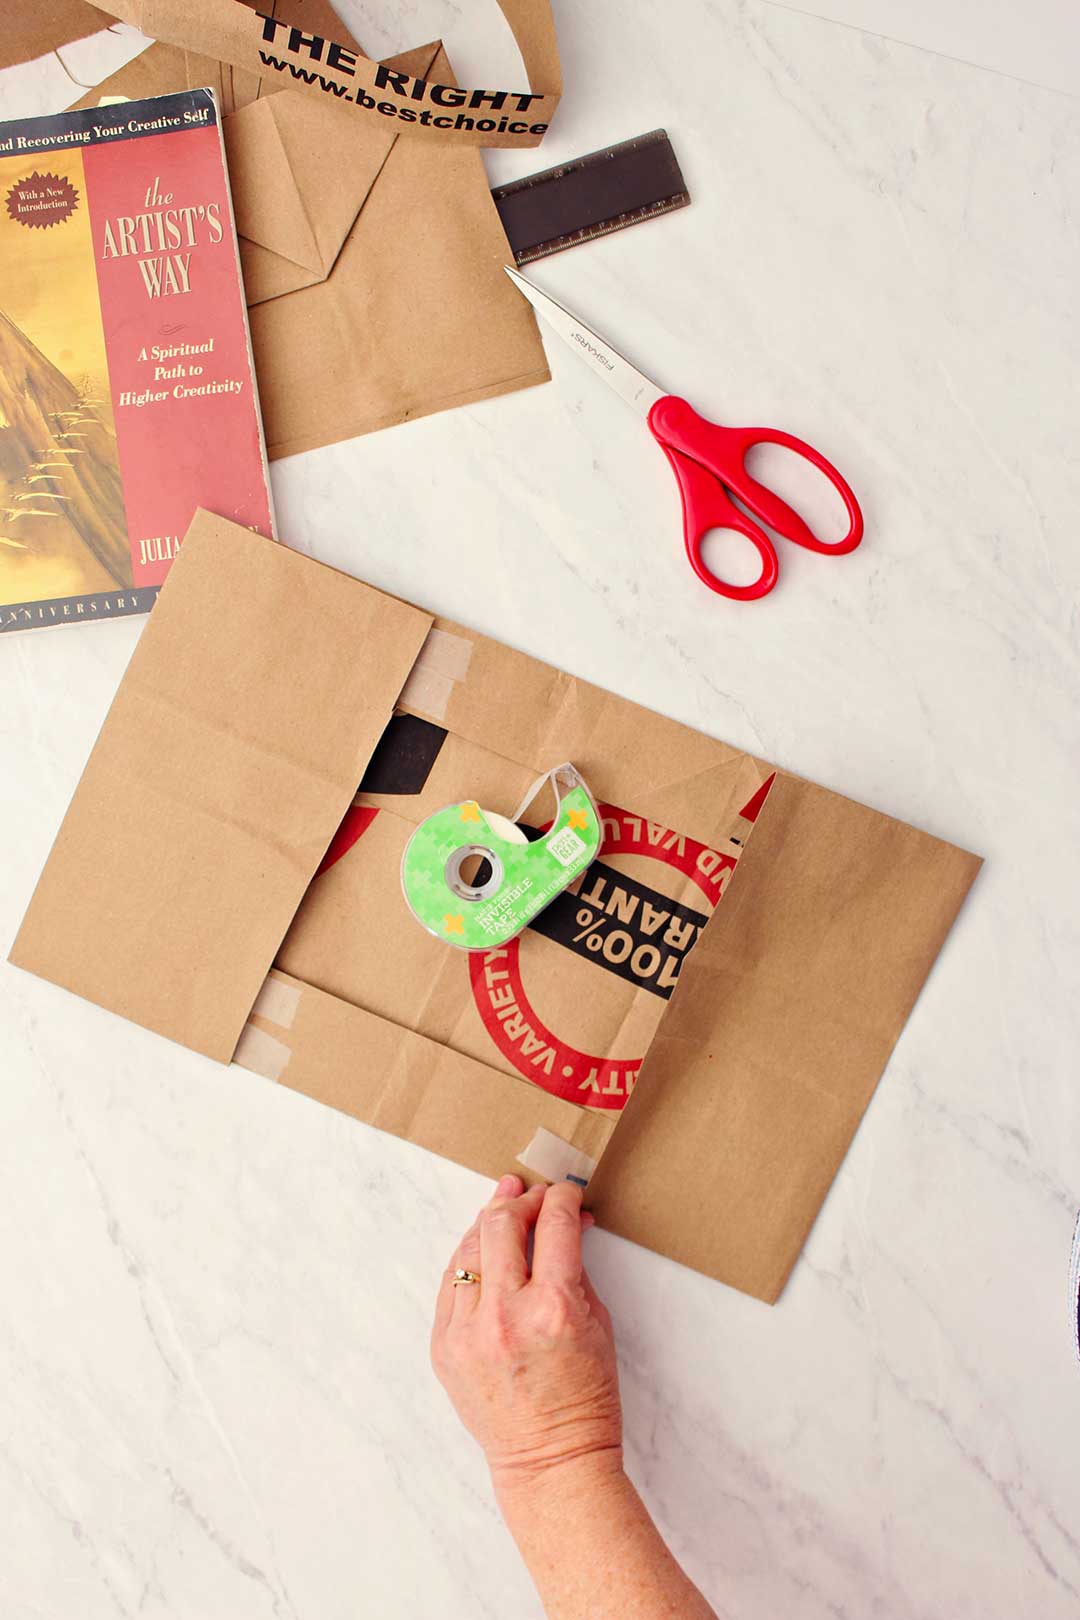
Wrap the paper around the back of the book and tuck in the sack. You want this to tuck in about 3 inches wide so trim off the extra paper bag. Crease the cover on the sides of the book.
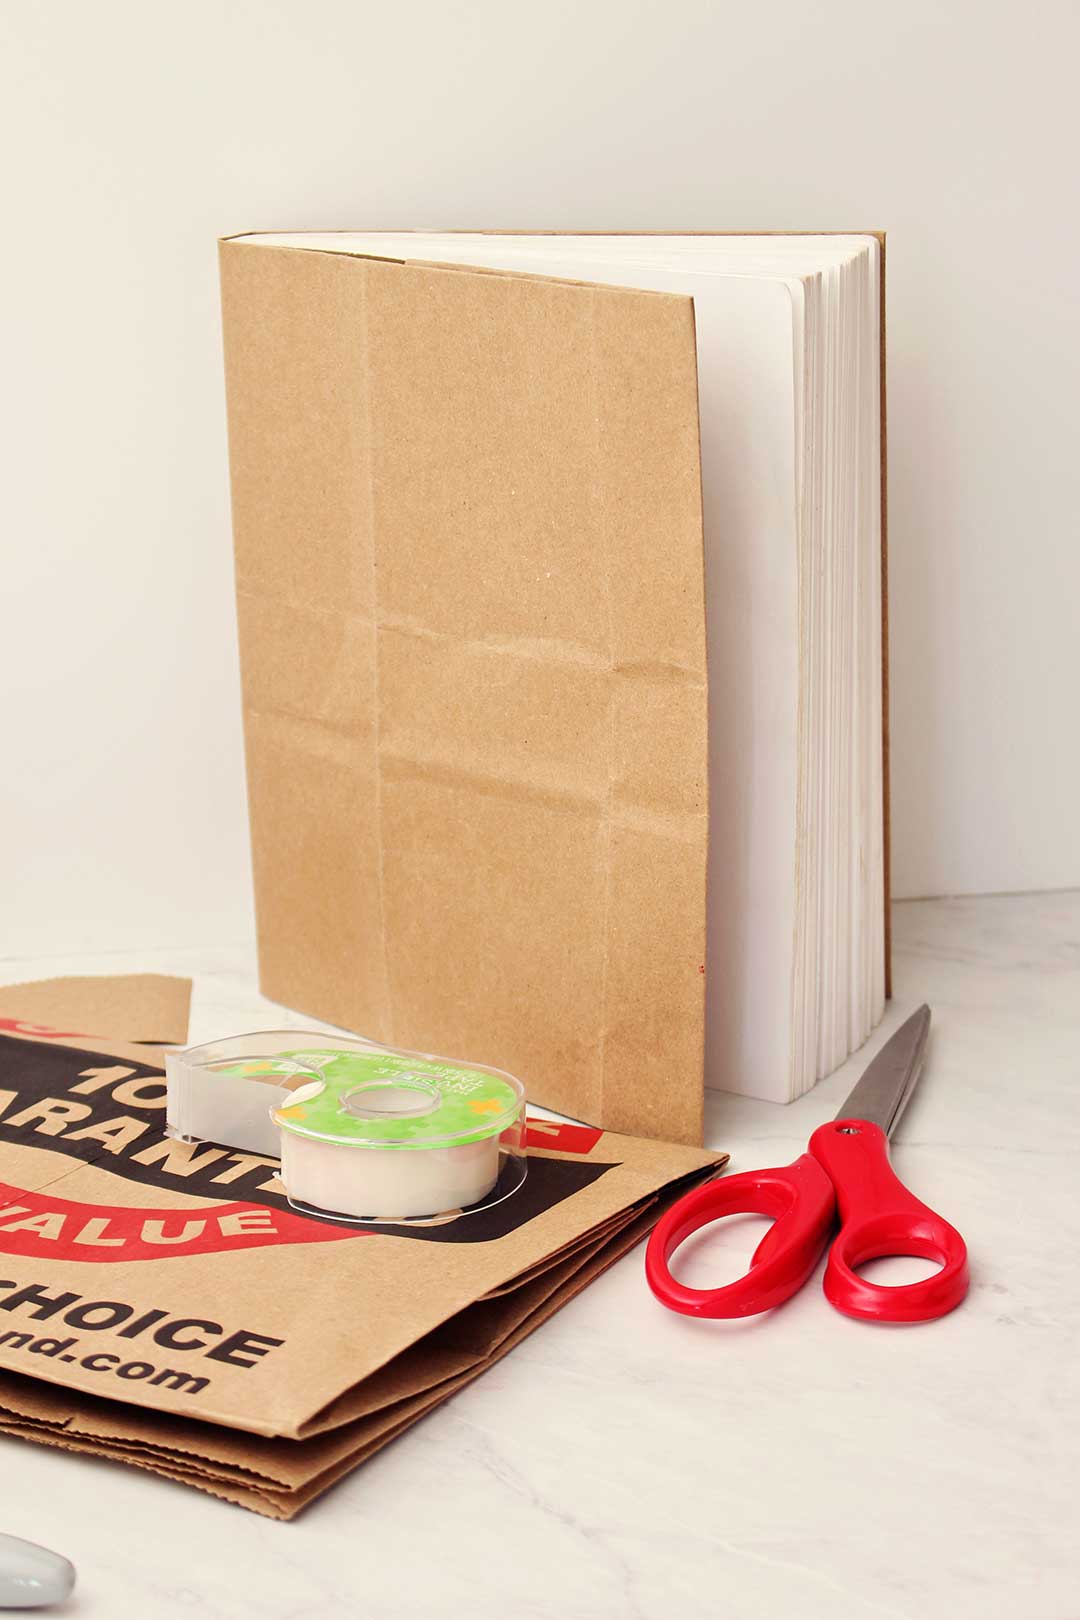
When all done, this should look like a typical book jacket that comes on a new hard backed book.
Take the book out again for a moment.
How to Make a Paper Bag Book Cover
On the inside front flap of the book cover, tape down just the bottom layer of the flap to the front cover. Do this to the top and the bottom of the flap.
Repeat this step with the back book cover flap.
Now, carefully slide your front book cover into the pocket of the front flap.
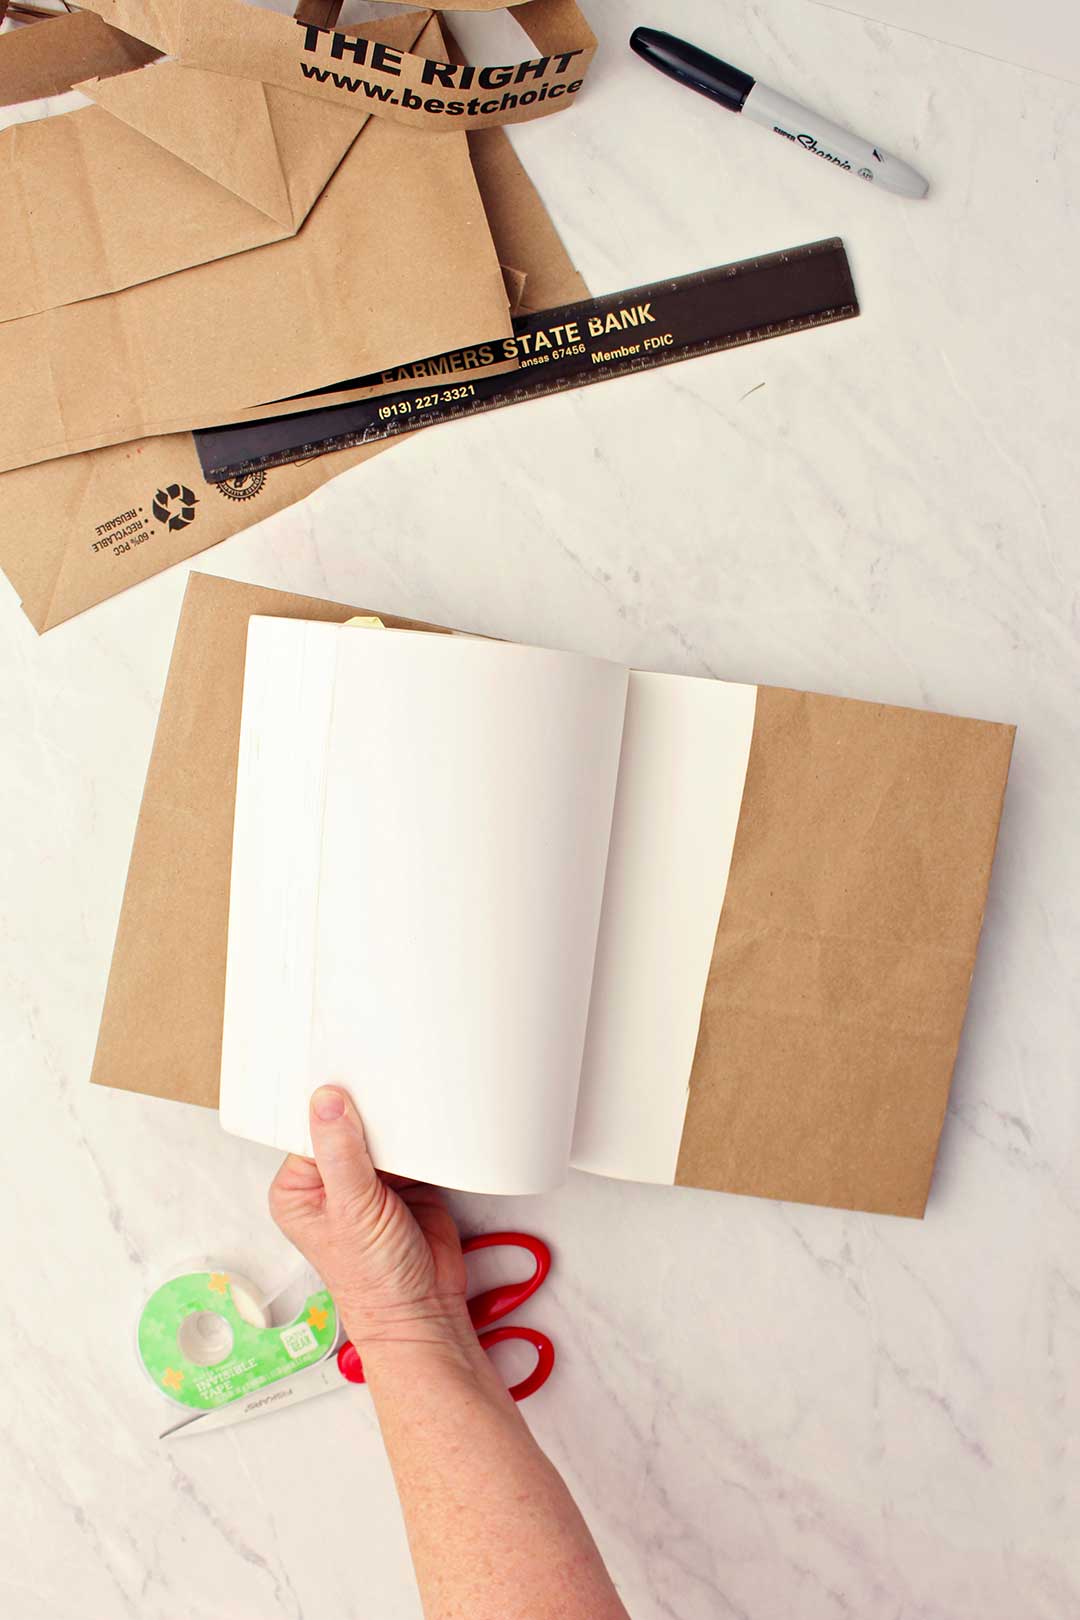
Open the book to the back cover and slide it into the pocket of the back flap.
Gently close the book and let it nestle into the book cover.
That’s it! Isn’t that easy? And it fits perfectly!
Paper bag textbook cover
Do you have some kid’s schoolbooks, borrowed books, old books, or books with weird titles that you would like to cover and protect? This is your fast solution.
Look good on the shelf
But…how about those drab books on your bookshelf?
Think how you could take some of your old books that may have been slated to go to Goodwill and give them a new life?
Decorative book cover paper
Use some decorative paper to cover your books in colors that would stack well or provide a lifted surface for decorating.
I’m thinking that heavier gift-wrapping paper would be the best bet. I highly recommend gift paper from Hobby Lobby (not an affiliate, just love HL!). It has a heavier weight, creases well, and doesn’t rip easily. The brown paper for mailing packages does work well too.
Use the exact same process as outlined above. Cover several books and make a stack somewhere. They look so nice and so updated with their new facelift.
More Book Cover Ideas and Tutorials
Wasn’t that easy? I did write the name of the book on the front of the cover. If I cover too many books, I will have to hunt for the one I wanted otherwise! Thanks for the idea, Mom!
If you would like to try some other book projects, check out these posts:
- How to Make a Fabric Book Cover
- DIY Paper Bag Book with Pockets
- DIY Painted Book Covers for Décor or Use
Enjoy!
If you try this craft, let me know! Go ahead and leave a comment, rate it, and tag a photo with #WelcometoNanas wherever you post.
Come join the fun at https://welcometonanas.com

How to Make a Paper Bag Book Cover
Equipment
- Books to cover
- Scissors
Items Required
- Brown paper bag from the grocery
- OR Brown paper to wrap packages
- Tape
Instructions
- Cut the bottom of the brown bag off by carefully clipping all around the edge of the bottom. With that off you can just cut up the side of the bag and lay it out flat, printed side up.
- Place your book on top and fold up the bag to make a crease along the bottom edge of the book. Then continue to fold the bag all the way across.
- With the bottom of the edge of the book in that first fold, do the same thing to the top of the book. Fold the bag up to make a crease along the top edge of the book. Continue to fold the bag all the way across.
- Now the book should fit well right between these two folds. Take the book off the bag for a moment. Trim the folded-up parts of the bag to about two inches wide.
- With the two folded flaps flat against the bag, place the book on top. Open the front cover of the book and tuck about 3 inches of the paper bag inside. Close the cover and crease the bag well on the sides of the book. Wrap the paper around the back of the book and tuck in the sack. You want this to tuck in about 3 inches wide so trim offthe extra paper bag. Crease the cover on the sides of the book. Take the book out again.
- On the inside front flap of the book cover, tape down just the bottom layer of the flap to the front cover. Do this to the top and the bottom of the flap. Repeat this step with the back book cover flap.
- Now, carefully slide your front book cover into the pocket of the front flap.
- Open the book to the back cover and slide it into the pocket of the back flap. Gently close the book and let it nestle into the book cover.
Video
Supplies for How to Make a Paper Bag Book Cover:
- Books to cover
- Brown paper bag from the grocery
- OR Brown paper to wrap packages
- Tape
- Scissors


Leave a Reply