After making 100’s of these handmade envelopes on my own and with my kids and grandkids, I can assure you that these designs are the perfect way to add personality and heart to a simple note or card! Let me show you how to fold three different envelope designs, each from a single piece of paper.

Learning how to make an envelope is not only fun, but economical and easier than you might think. Backed by 50+ years of crafting experience, this step-by-step tutorial will teach you how to effortlessly design your own envelope for any size of card.
Jump to:
- Cute Craft: How to Fold An Envelope!
- Supplies for DIY Envelopes
- How to Make a Traditional Envelope
- How to Make a Square Envelope
- How to Make a Pocket Envelope
- How to Mail a Handmade Envelope
- Envelope DIY Tips
- Craft Variations
- Making an Envelope FAQs
- More DIY Cards for Kids
- Enjoy!
- More Crafting!
- Homemade Envelope
Cute Craft: How to Fold An Envelope!
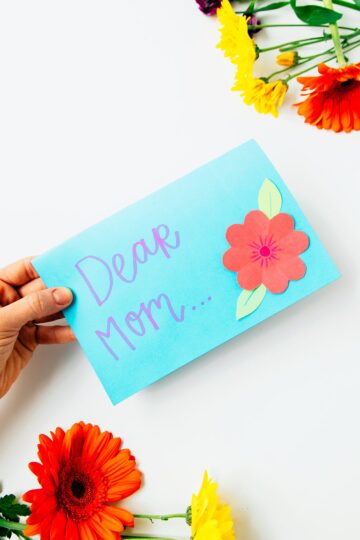
Each homemade card is so special, but where can I find an envelope to put it in? If your kids are busy making DIY cards, they probably need DIY origami envelopes to go along with them!
Here are three ways to make handmade envelopes to use with those wonderful handmade cards. Be sure to watch the video to make it even easier!
Kids can learn how to make an envelope out of paper in three different styles: Traditional, Square, or Pocket. Customize to fit the card you'd like to send, then, as the old saying goes, "send it in a letter...sealed with a kiss!"

Supplies for DIY Envelopes
These easy envelopes come together quickly, without the need for lots of supplies!
- Paper- You can use any kind of paper to make envelopes! We used colorful cardstock, but scrapbook paper, printer paper, or other kinds of paper would work great as well.
- Glue- Stick glue will work well, or you can use school glue.
- Scissors- Used to trim the paper several times.
- Pencil- For marking your place throughout the tutorial.

Paper Sizing for Making Envelopes
We use cardstock to make an envelope to fit a 4 ¼ x 5 ½” sized card. This is ¼ the size of a regular 8 ½ x 11” piece of paper.
However, the beauty of this tutorial is that you can change the size to fit any card! Use your card as a guide along the way to make the envelope a perfect fit for your DIY card.
Keep in mind that you may want to hand deliver your uniquely sized cards. The postal service has size requirements and variations in the card size may take extra postage to send in the mail.
Now, put out the paper and markers for the “grand” kids to make a card for that special someone. Then make a handmade envelope that fits it like a glove. In this digital age, a handmade card is sure to touch a heart!

How to Make a Traditional Envelope
First, let's walk through the steps to make a traditional style envelope.
- If you are using an 8.5x11” piece of paper, you’ll first need to cut it down to a square size. To do so, use a separate piece of 8.5x11” piece of paper as a pattern.
- Make a “taco fold” by folding one corner of the pattern paper down so the edges of the paper align. Use the edge of the paper as a guide to cut off the excess tab of the paper. Unfold the triangle, then use this square pattern to cut a square from your envelope paper.
- Position your piece of the envelope paper like a diamond. Position the card horizontally, centered in the middle of the diamond.
- Fold the right pointed corner of the paper over the right edge of the card and make a crease, then repeat with the left corner. Unfold the paper completely.
- Now fold the bottom corner over the bottom edge of the card and make a crease, repeat with the top corner then unfold completely.
- Using the creases as guidelines, cut out the four small triangles that your folds created along the edges of the paper.
- Fold the bottom flap in, then fold the right and left corners to the center. You will see the point of the bottom flap showing between the left and right flaps.
- With your pencil, make two small dots on the bottom flap, right where the right and left flaps intersect with it.
- Unfold the right and left flaps, then cut off the tip of the bottom flap in a straight line between the two dots. Erase the dots if they are still showing.
- Fold the right and left flaps in and add a stripe of glue along the bottom edges of both flaps.
- Fold up the bottom flap and secure it on the glue.
- Lastly, let the glue dry, then your handmade envelope is ready to go!

How to Make a Square Envelope
Next, let's make a square envelope!
- Position your sheet of paper vertically. Next, position your card horizontally, with the bottom edge of the card aligned with the bottom edge of the paper.
- Fold the top of the paper over the card and, using the top edge of the card as a guide, make a crease in the paper. Unfold the paper completely.
- Move your card so that the bottom edge of the card aligns with the crease.
- Fold the top flap of the paper over the card, using the top edge of the card to again make a crease in the paper. Unfold the paper.
- Center your card on the paper, then fold the right side of the paper over the card. Repeat with the left side of the paper.
- Unfold the right and left edges of the paper, then use the creases as guidelines to cut away the top two smaller corners.
- Fold in the sides of the paper, then place a stripe of glue along the middle section.
- With the edges still folded in, fold the bottom section up and secure it on the glue stripes.
- Let the glue dry, then your handmade envelope is ready to go!

How to Make a Pocket Envelope
Ready to make a pocket envelope?
- Position your paper horizontally, then your card vertically in the center of the paper.
- Fold the right side of your paper over the card and make a crease.
- Repeat with the left side.
- Now fold the bottom edge of the paper up over the card, and repeat with the top edge.
- Completely unfold the paper and remove the card to show the pattern that the creases have created.
- Use the creases as guidelines to cut the “boxes” out from each corner of the paper.
- At this point you can either round off the corners of the top and bottom flaps, or leave them as-is to if you’d prefer the square look.
- Fold in the left side of the envelope and add a stripe of glue along the edge, now fold in the right side and secure it shut.
- Add a stripe of glue along the bottom flap, then fold it up to secure it shut.
- Finally, let the glue dry, then your handmade envelope is ready to go!

How to Mail a Handmade Envelope
Now that you've finished, it's time to send off your special note! After you add your card, add some glue with your glue stick to the edge of the envelope flap and fold it over to seal.
Before send your envelope in the mail, you'll want to make sure it fits the correct guidelines for your local mail carrier. You can check the dimensions and weight requirements for envelopes sent through the USPS here on their website. Generally, you'll want to make sure your envelope is less than ¼" thick and less than 1 oz in weight.
If your card inside the envelope is too thick or lumpy from fun card decorations, you may have to pay some extra postage. If you have any concerns, check in with your local post office to send the envelope. They will tell you what postage you need!

Envelope DIY Tips
- Use the Edges as Guides- As you fold the paper, use the edges of the paper as a guide for that fold. When you align the edges of the paper, you are more likely to make a straight crease!
- Make Crisp Creases- Use your scissor handles, the side of the pencil, or even a fingernail to make your creases crisp. This makes such a clean, beautiful looking envelope.
- Completely Dry the Glue- I like to set a book or something heavy on top of the envelope while the glue dries. This seals the glue securely so it stays shut until it reaches the recipient!

Craft Variations
- Try Different Paper- Once you get the hang of it, think outside the box! How about trying wrapping paper for a large card, old maps, butcher paper, newspaper or magazine pages? The sky is the limit.
- Make with Fabric- Did you know you can make envelopes out of fabric? Give it a try, it's so cool!
- Decorate the Seal- Place some DIY stickers or decorative tape over the edge of the envelope flap. This adds some decoration and a little extra protection to the seal!
Making an Envelope FAQs
First, decide which kind of envelope you'd like to make - traditional, square, or pocket style. Next, choose the correct size of paper for your card. Follow the tutorial to make the correct origami folds and small cuts, then glue the flaps together. Finally, add your card and seal it shut with glue!
If you don't have an envelope on hand, you can easily make your own! Choose your favorite paper, then follow the steps to fold an envelope to fit the size of your card. Hand deliver the DIY envelope, or send it in the mail! Just make sure to check size requirements at your local post office.
Folding your own envelopes from paper is quick and easy with this step by step tutorial. First, choose your favorite envelope style, then position the paper and card. Use the edges of the paper and the card size as guides to fold and cut your envelope. Secure the flaps with glue, then send your card to a friend!
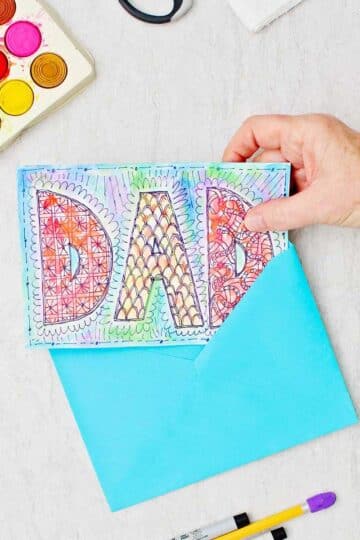
More DIY Cards for Kids
Want to make something to put in your envelope? Check out more fun tutorials for DIY stationary:

Enjoy!
If you try this craft, let me know! Leave a comment, rate it, and tag a photo with #WelcometoNanas wherever you post.
More Crafting!
Get 10 free greeting cards to color (free printable) and a weekly email with the newest crafts from Welcome To Nana's for signing up!


Homemade Envelope
Equipment
- Scissors
- Pencil
Items Required
- 1 piece Card Stock (or other paper of choice)
- Glue
Instructions
Traditional Envelope
- If you are using an 8.5x11” piece of paper, you’ll first need to cut it down to a square size. To do so, use a separate piece of 8.5x11” piece of paper as a pattern.
- Make a “taco fold” by folding one corner of the pattern paper down so the edges of the paper align. Use the edge of the paper as a guide to cut off the excess tab of the paper. Unfold the triangle, then use this square pattern to cut a square from your envelope paper.
- Position your piece of the envelope paper like a diamond. Position the card horizontally, centered in the middle of the diamond.
- Fold the right pointed corner of the paper over the right edge of the card and make a crease, then repeat with the left corner. Unfold the paper completely.
- Now fold the bottom corner over the bottom edge of the card and make a crease, repeat with the top corner then unfold completely.
- Using the creases as guidelines, cut out the four small triangles that your folds created along the edges of the paper.
- Fold the bottom flap in, then fold the right and left corners to the center. You will see the point of the bottom flap showing between the left and right flaps.
- With your pencil, make two small dots on the bottom flap, right where the right and left flaps intersect with it.
- Unfold the right and left flaps, then cut off the tip of the bottom flap in a straight line between the two dots. Erase the dots if they are still showing.
- Fold the right and left flaps in and add a stripe of glue along the bottom edges of both flaps. Fold up the bottom flap and secure it on the glue.
- Lastly, let the glue dry, then your handmade envelope is ready to go!
Square Envelope
- Position your sheet of paper vertically. Next, position your card horizontally, with the bottom edge of the card aligned with the bottom edge of the paper.
- Fold the top of the paper over the card and, using the top edge of the card as a guide, make a crease in the paper. Unfold the paper completely.
- Move your card so that the bottom edge of the card aligns with the crease. Fold the top flap of the paper over the card, using the top edge of the card to again make a crease in the paper. Unfold the paper.
- Center your card on the paper, then fold the right side of the paper over the card. Repeat with the left side of the paper.
- Unfold the right and left edges of the paper, then use the creases as guidelines to cut away the top two smaller corners.
- Fold in the sides of the paper, then place a stripe of glue along the middle section. With the edges still folded in, fold the bottom section up and secure it on the glue stripes.
- Let the glue dry, then your handmade envelope is ready to go!
Pocket Envelope
- Position your paper horizontally, then your card vertically in the center of the paper.
- Fold the right side of your paper over the card and make a crease. Repeat with the left side.
- Now fold the bottom edge of the paper up over the card, and repeat with the top edge.
- Completely unfold the paper and remove the card to show the pattern that the creases have created. Use the creases as guidelines to cut the “boxes” out from each corner of the paper.
- At this point you can either round off the corners of the top and bottom flaps, or leave them as-is to if you’d prefer the square look.
- Fold in the left side of the envelope and add a stripe of glue along the edge, now fold in the right side and secure it shut. Add a stripe of glue along the bottom flap, then fold it up to secure it shut.
- Finally, let the glue dry, then your handmade envelope is ready to go!
Video
This post was originally published in June 2017 and has been updated to add more relevant and detailed content.


Laura says
Easy instructions, going to try all three!