Learn how to make paper mache paste and projects and create fun, budget-friendly crafts with kids! This paper mache glue recipe is a go-to for crafting - easy to use and always reliable!

Jump to:
- Make DIY Paper Mache Paste and Projects Today!
- Cute Craft Alert: Paper Mache Maraca Memories
- What is Papier Mache?
- DIY Paper Mache Ingredients
- Equipment for Paper Mache Paste and Projects
- What is the best paper mache glue to use?
- How to Make Paper Mache Paste
- How Do You Make Paper Mache?
- Craft Tips for Paper Mache Paste and Projects
- Craft Variations
- DIY Paper Mache Paste FAQs
- More DIY Crafts for Kids
- Come Join the Fun at WTN!
- Paper Mache Glue Recipe- Make DIY Paper Mache Paste and Projects Today!
Make DIY Paper Mache Paste and Projects Today!
These simple paper mache recipes are easy to make at home using everyday newspaper and glue into amazing DIY creations!
Whether you’re wondering how do you make paper mache or looking for a reliable paper mache glue recipe, you’re in the right place.
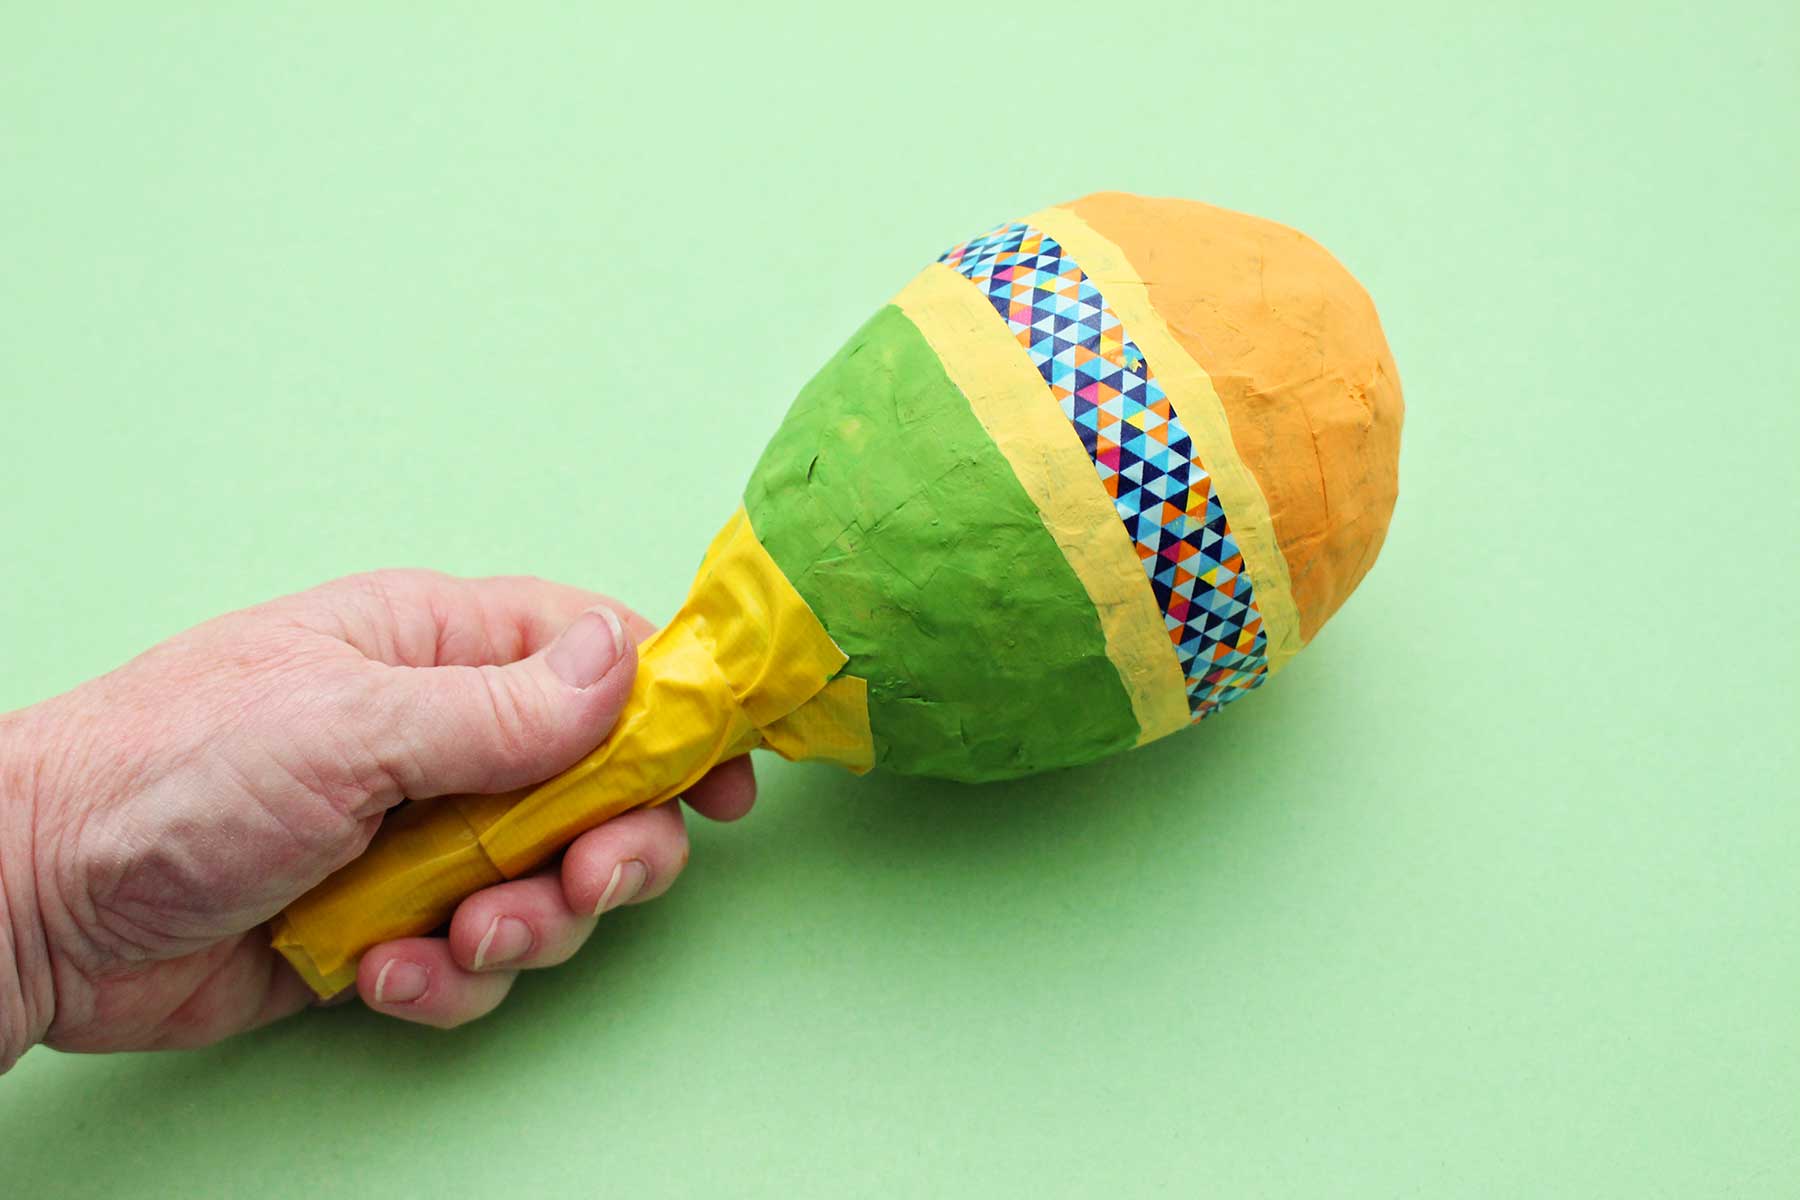
Cute Craft Alert: Paper Mache Maraca Memories
I have an early memory in Kindergarten of making a paper mache maraca. When they were dry and painted we played along in music class with our own instrument. It was epic at the age of five! But truth be told, I still love making paper mache projects 50 years later!!
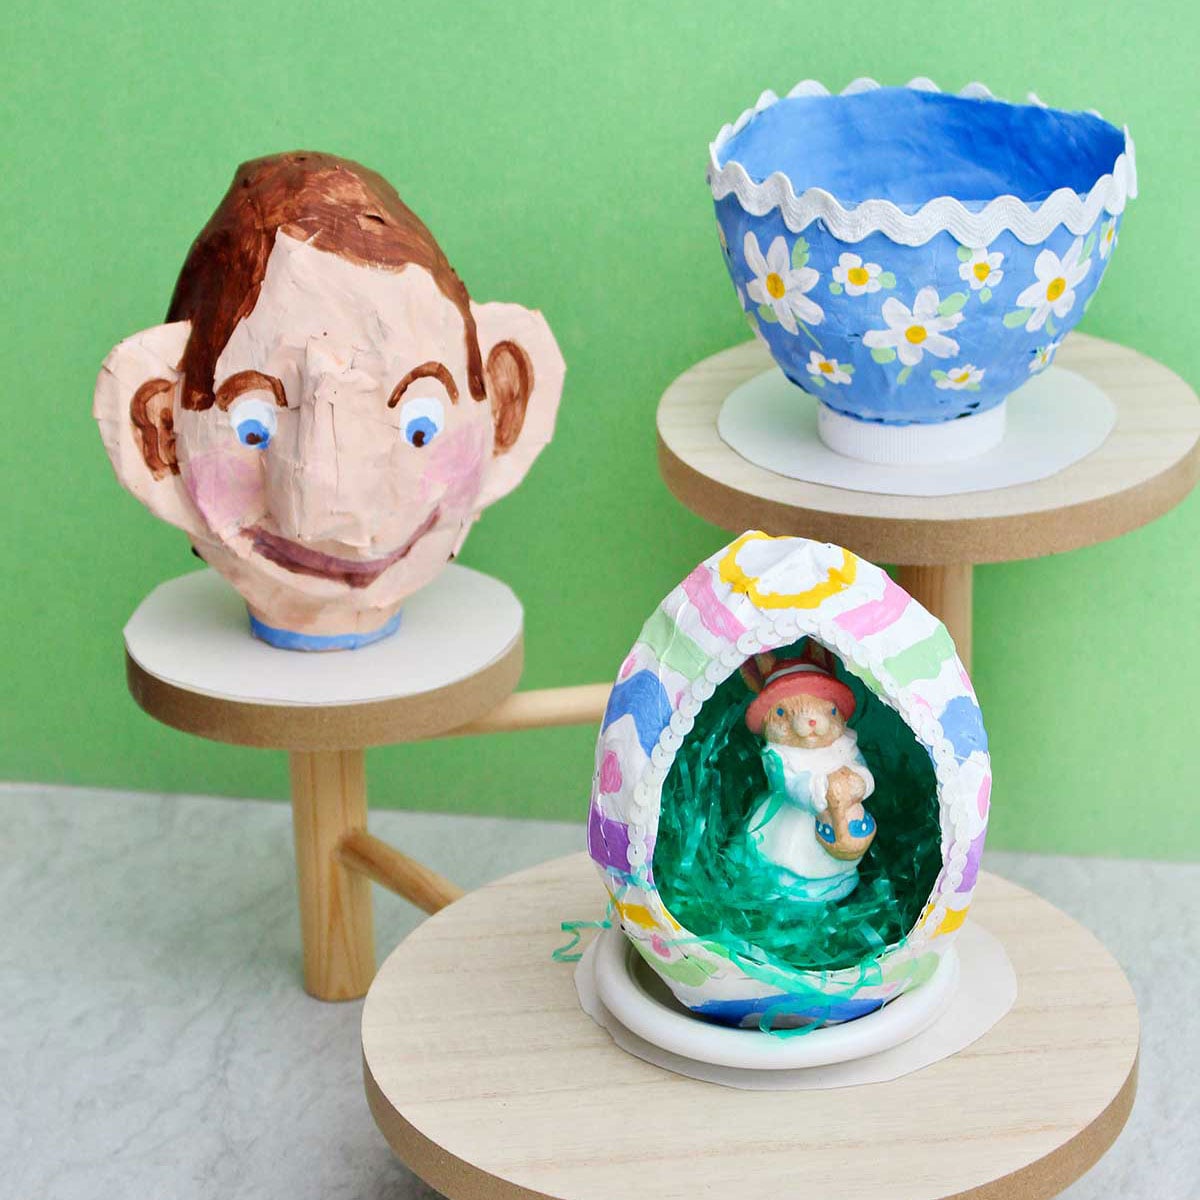
There’s just something amazing about using recycled paper from newspapers and paper mache paste to make a project that can be painted. A balloon is the perfect thing to start with as the round shape can be used in so many creations- like an animal, hot air balloon, or a maraca. Plus the balloon is fun to pop and pull out of its paper mache cocoon!
So if you need an inexpensive but intriguing creative medium to explore, check out the instructions and the paper mache glue recipe options in this post. You’ll develop a bit of patience as you wait for the layers of glue and paper to dry. I’ll throw that valuable lesson in for free. You’re welcome! 😉

What is Papier Mache?
Papier mache is the fancy name for a craft technique which involves layering strips of paper dipped in a paste or glue mixture. The layers are allowed to dry and when done, the project is lightweight and shell-like.
The name “papier mache” is French and means “chewed paper”. It’s possible to make a ground paper and glue mixture that can be molded like clay and dried too, but we’ll save that for another post. This technique is also spelled paper mache, and that’s the spelling I’ll use primarily in this post.
Paper mache is a technique that people have used to make projects for hundreds of years. You can make small things like bowls, puppets, maracas and masks. Or you can make larger items like science project volcanos, pinatas, and sculptures of animals or people.
Amazingly, paper mache is still a popular craft today. I love how it uses supplies that are in most of our homes and the projects are so hands on. It’s not about perfection, it’s about the joy of creating something.
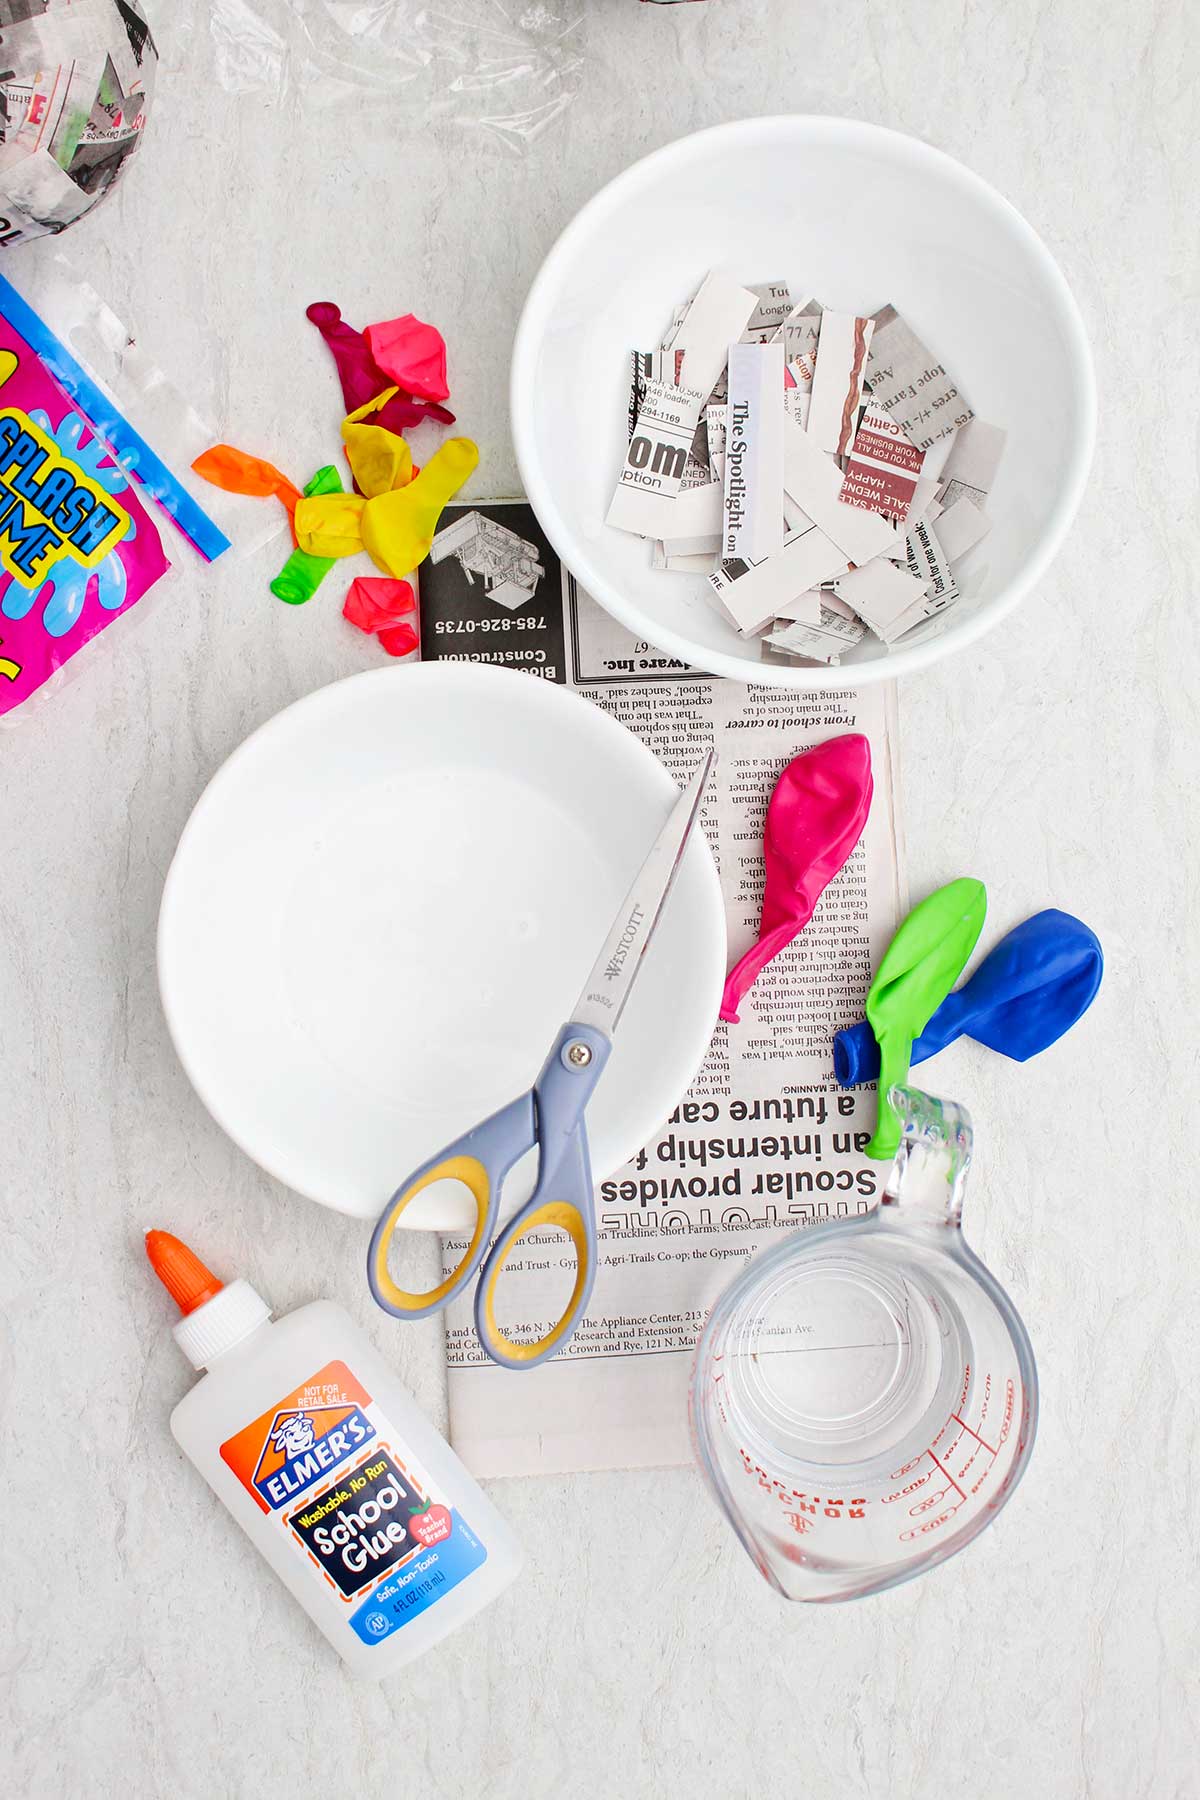
DIY Paper Mache Ingredients
Here are a few quick notes about the supplies you will need to make paper mache!
- Newspaper or scrap paper- Cut or tear the newspaper into strips.
- Scissors- Scissors to cut up the paper
- Mixing bowl- A mixing bowl for stirring together the glue or paste mixture.
- Spoon- A spoon for stirring the mixture.
- Balloon- The balloon is for the base shape we’ll use for these projects. I chose to use the water balloon size rather than larger balloons to demonstrate.
- Cardboard, bottle lids, etc.- Recycled cardboard, bottle lids, etc. add additional shape to the project.
- Hot glue gun and hot glue- A hot glue gun works well to attach pieces of cardboard and such to your base.
- Plastic wrap- Set the wet project on plastic wrap to dry so it won’t stick to the work surface.
- Acrylic craft paint- Acrylic craft paint can decorate the project when dry.
- Paintbrushes- Paintbrushes to apply the paint.
- Clear sealer (optional)- Apply a clear sealer over the finished project to seal and protect it.
Option 1 for paper mache glue (the option I use for these projects)
- School Glue- School glue like Elmer’s Glue or a generic brand equivalent.
- Water- Tap water is added to the glue in a 1:1 ratio.
Option 2 for paper mache glue
- Mod Podge- Mod Podge works as an option for paper mache glue but is more expensive than making your own by the option 1 recipe.
Option 3 for paper mache paste
- Flour- All-purpose flour is the main ingredient for homemade paper mache paste.
- Water- Tap water is added to the flour to make a pancake batter like consistency.
- Salt (optional)- Salt is sometimes added to the mixture to lessen the possibility of mold.
Equipment for Paper Mache Paste and Projects
- Plastic table covering or newspapers for ease in cleanup.
- Aprons or old t-shirts to protect your clothing.
What is the best paper mache glue to use?
There are several options for paper mache glue to use on your project. Choose the one that meets your needs. Here are the options and the positives and negatives of each one.
Option 1: School glue and water
A white school glue diluted 1:1 with water creates a stronger and smoother finish for a paper mache project (one part glue, one part water). As a crafter I keep a large container of school glue on hand which makes this an easy option. You can just use glue from your smaller bottle though. Use a small mixing bowl and spoon to whip up this option.
A school glue and water paper mache glue dries clear and creates a hard shell for your project. It is inexpensive and easy to paint over and decorate. It doesn’t mold and doesn’t attract rodents (unless your rodents like dry school glue!). So if you want to keep your project long term this option will hold up better over time. This is my go to choice for paper mache projects.
Option 2: Mod Podge
Store bought Mod Podge is another option for making a paper mache project. It has the same positives as the school glue and water option but is ready made and as a result is more expensive. I have used Mod Podge and like the finished project.

Option 3: Flour and water paste
When I was young the flour and paste option was all I ever used to make paper mache projects. It is inexpensive and the ingredients are on hand. For most kids’ crafts that you don’t plan on keeping long term, this option works well. It’s easy to make and safe for children.
But flour and water paste leaves a white coating on the project and can mold or attract rodents. I’m not too excited about those possibilities so this isn’t my first choice of a paper mache glue any more.
Note: There is a cooked version of flour and water paste that is supposed to dry clear but I’ve not tried that option. It still has the other undesirable traits so I probably won’t try it anytime soon. Sorry about that!
How to Make Paper Mache Paste
These two easy paper mache glue recipes only take a few minutes to mix up. It’s your choice which one to use. Only mix up the amount you will use in one day on your project. These recipes don’t keep well.
Option 1: Easy School Glue and Water Paper Mache Glue Recipe
- School glue (like Elmer’s School Glue or a generic brand)
- Water (approximately the same amount as the school glue)
Directions
- Pour an amount of the school glue into a mixing bowl.
- Slowly add about the same amount of water into the glue.
- Stir until mixed.
Option 2: Mod Podge for Paper Mache Glue
- No mixing is necessary for this option.
Option 3: Simple Paper Mache Paste Recipe
- 1 cup flour
- 1 cup warm water (approximately)
- ¼ teaspoon salt (optional)
Directions
- Pour the flour into a mixing bowl.
- Slowly stir in the warm water until the consistency of pancake batter.
- Stir until the mixture is as smooth as possible (I can’t ever get all of the little lumps out!).
- Add a little more water if needed if it gets too thick or if you want a thinner paste.
That’s it! Your homemade paper mache paste is ready to use.
How Do You Make Paper Mache?
Step-by-Step Instructions
There is a full length YouTube video if you want to watch the process: Make DIY Paper Mache Paste and Projects Today!
Preparation for Paper Mache
- Cover your work surface with newspaper or a washable table cloth.
- Cut or tear the newspaper into strips about ½ to ¾ inch wide.
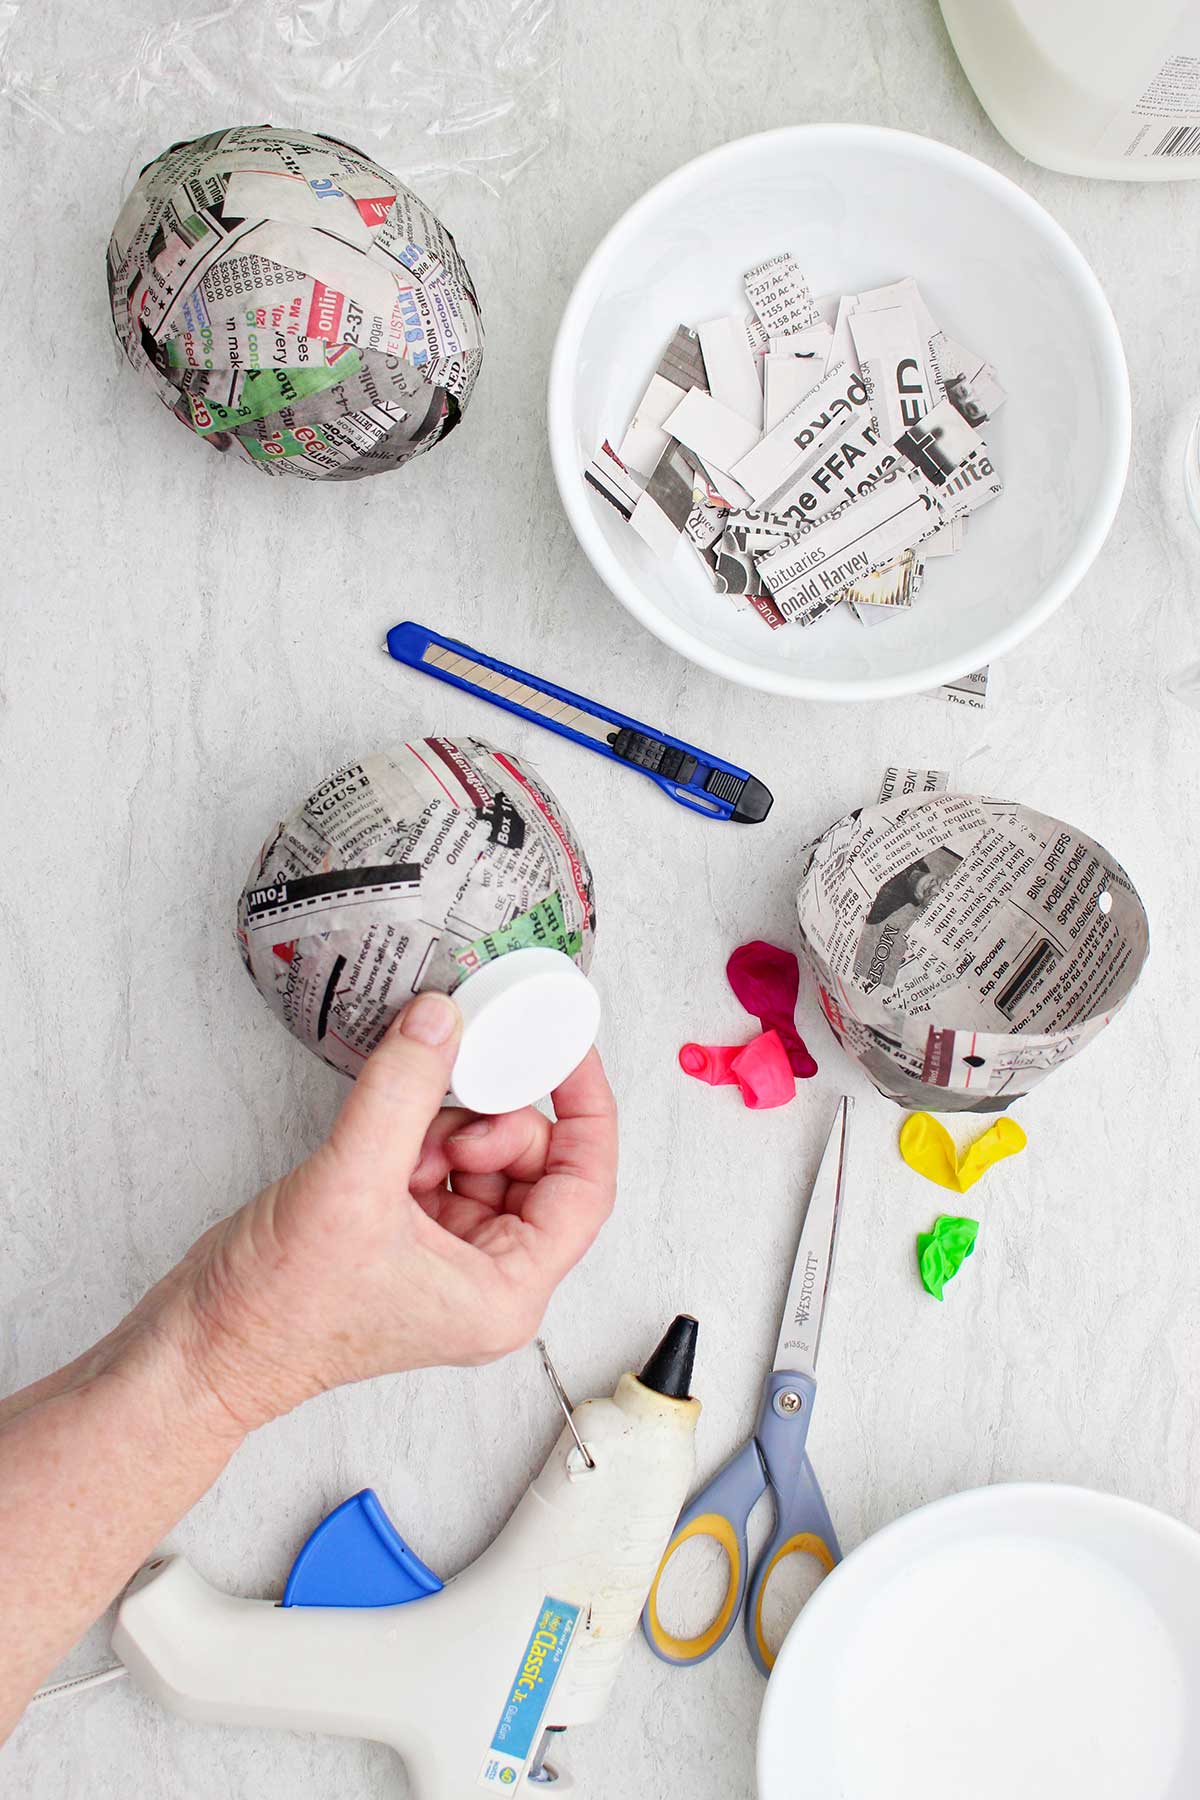
- Blow up a balloon, shape foil/paper, or use cardboard as the base of your project. I chose water balloons for the projects in this tutorial.
- Mix up the paper mache paste or glue mixture you've chosen to use in a mixing bowl (options and recipes are above)
Creating DIY Paper Mache Paste and Projects
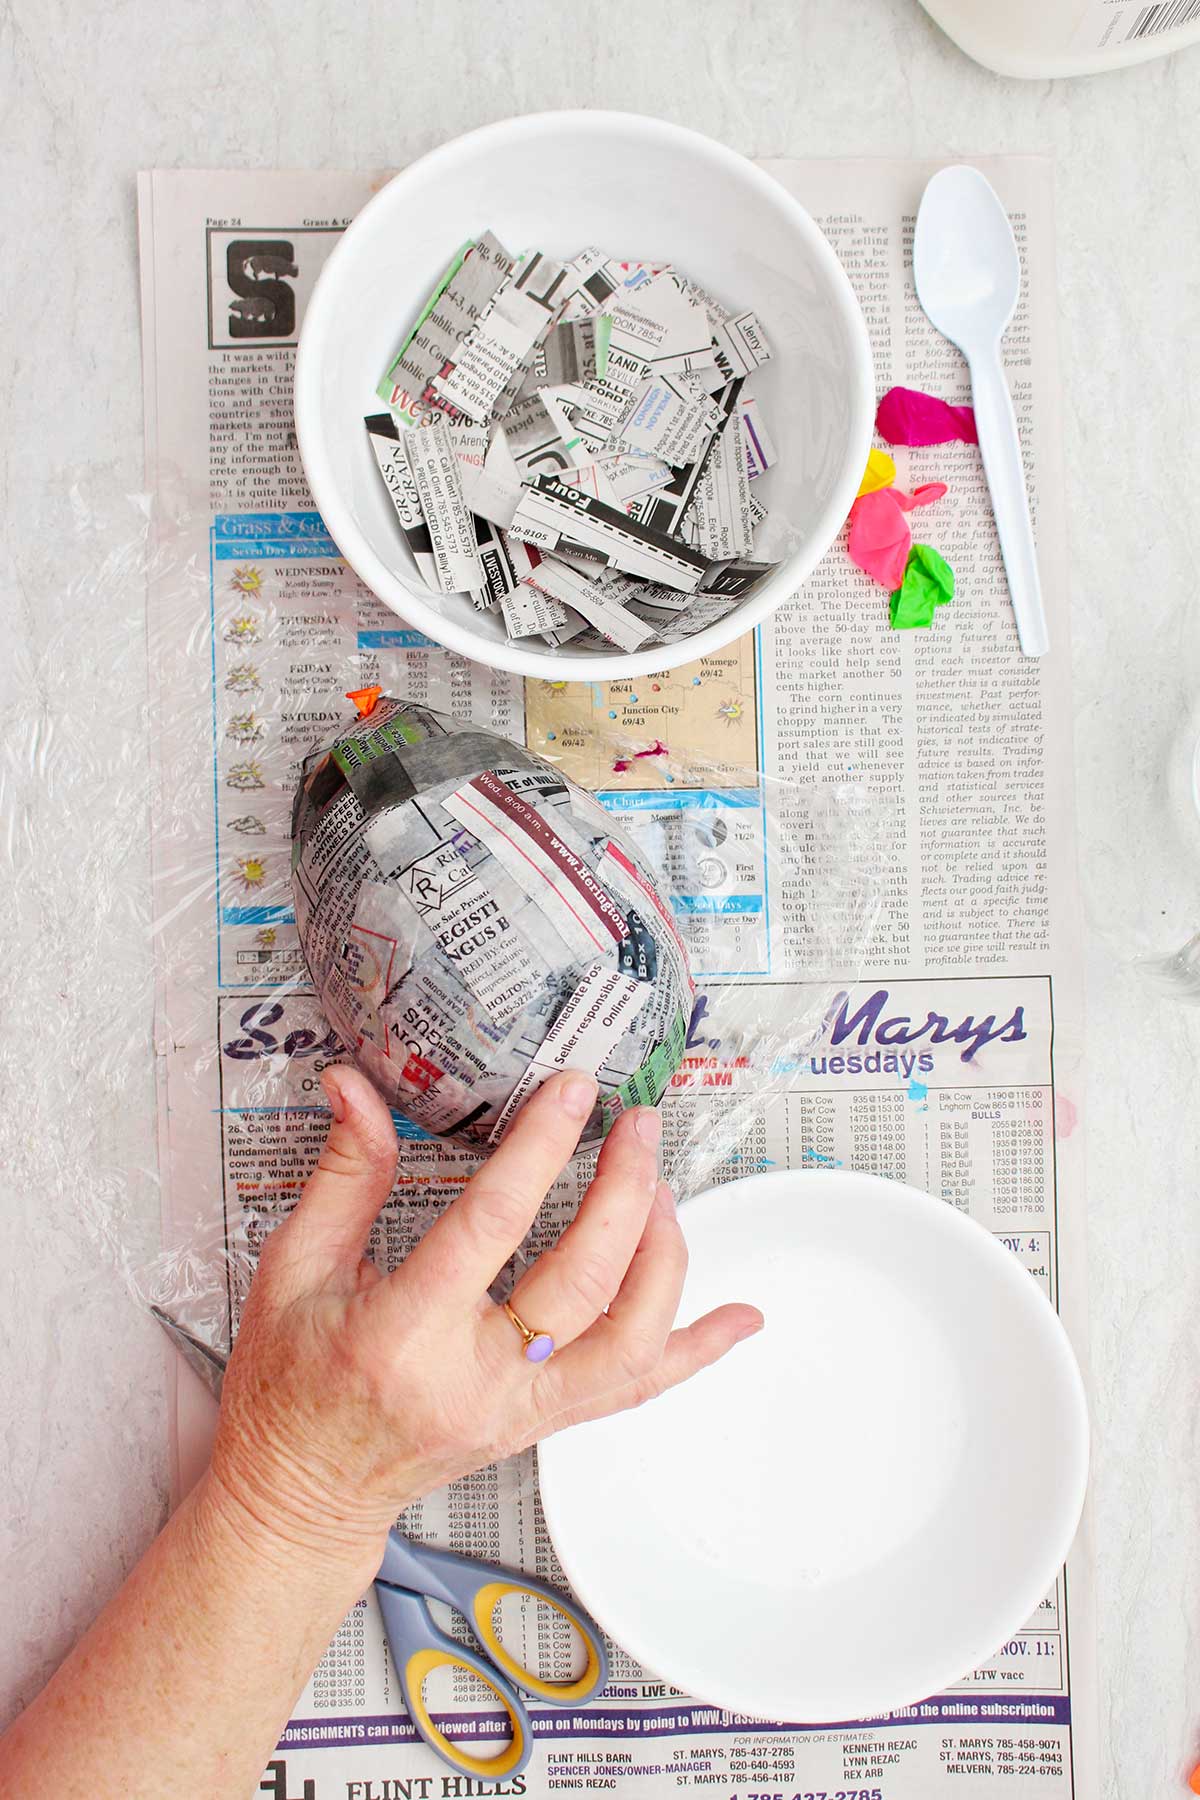
- Dip the paper strips into the paste or glue. Pull the strips over the edge of the bowl or between your fingers to get off the extra glue.
- Layer the paper strips onto the balloon base. Overlap the strips in different directions so they hold together when dry. When You have covered the balloon well set it to the side to dry (set on plastic wrap).
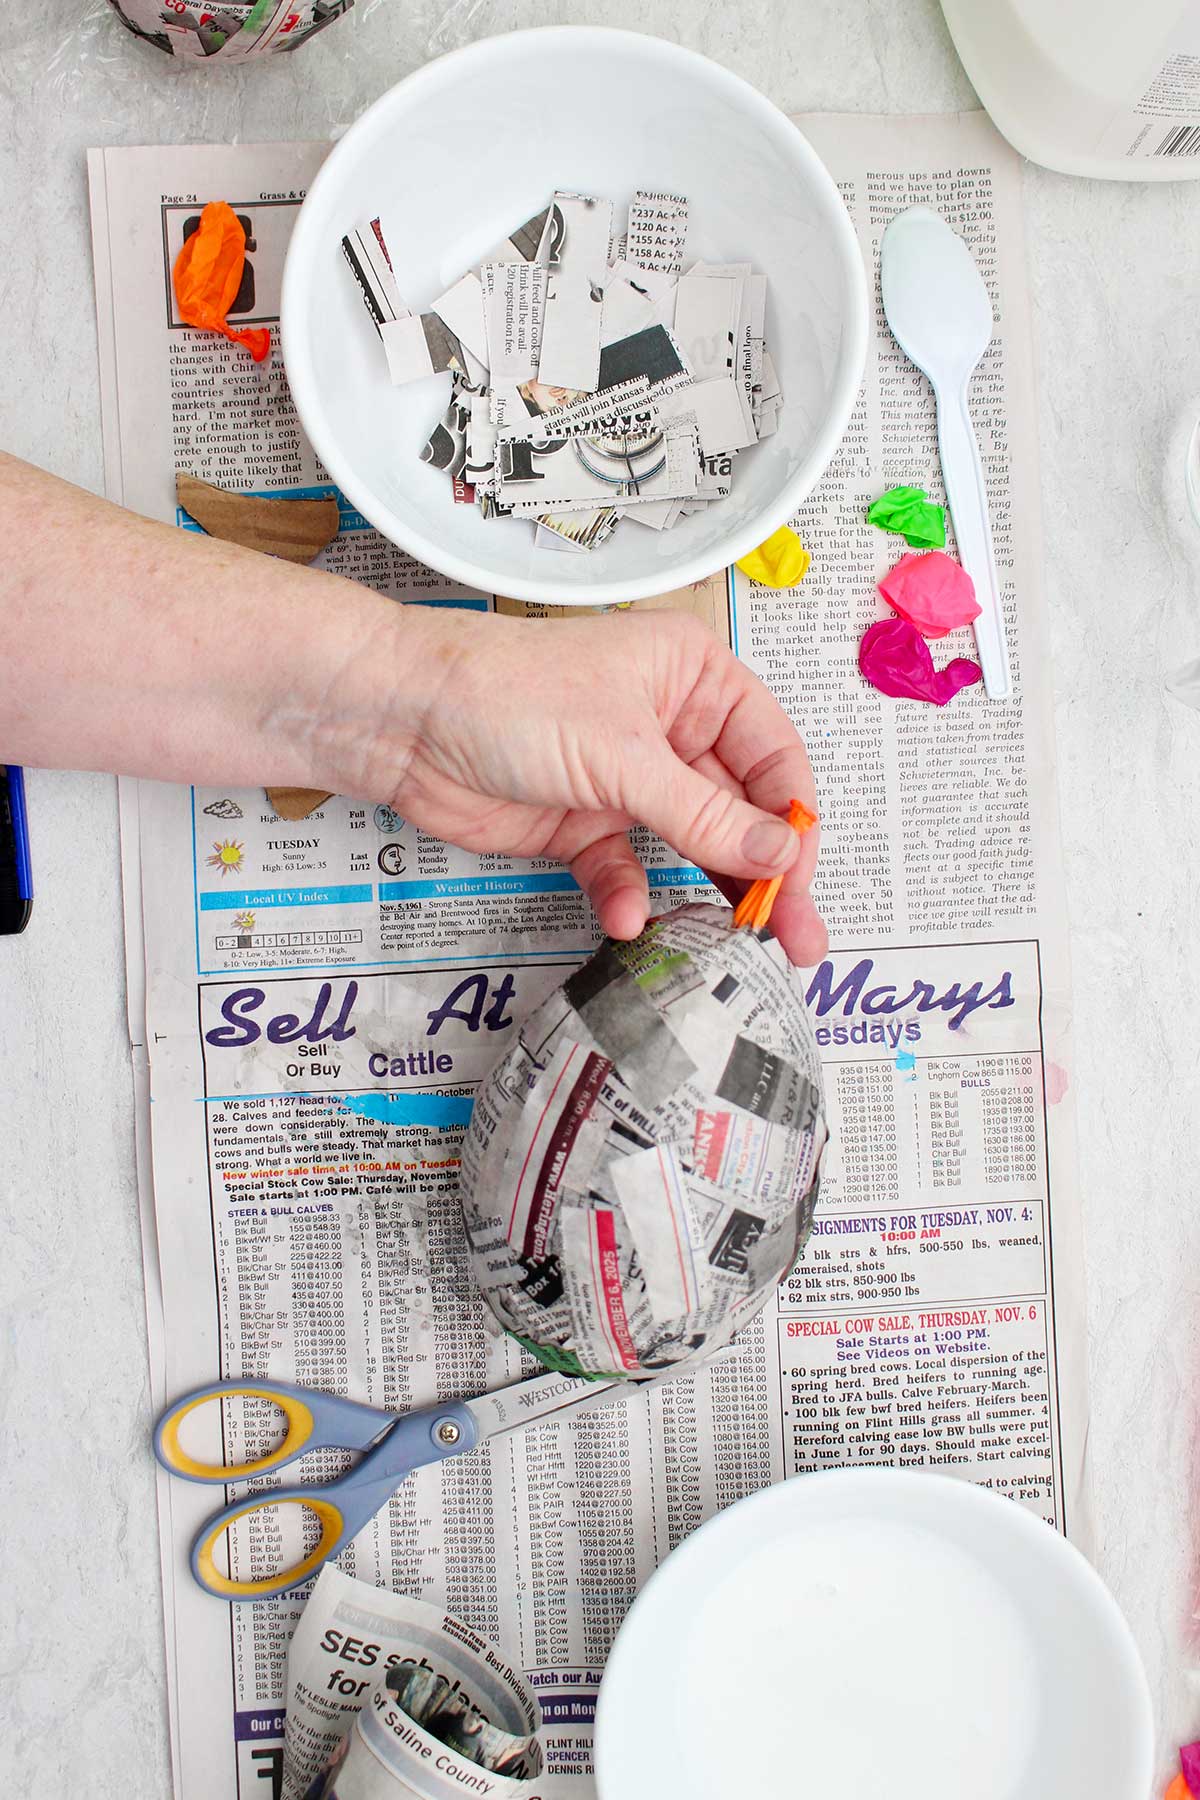
- Add several layers of the paper strips letting each layer dry before putting on the next layer. About 3-4 layers will be enough for these small projects. Remove the balloon from inside the project and cover the hole.
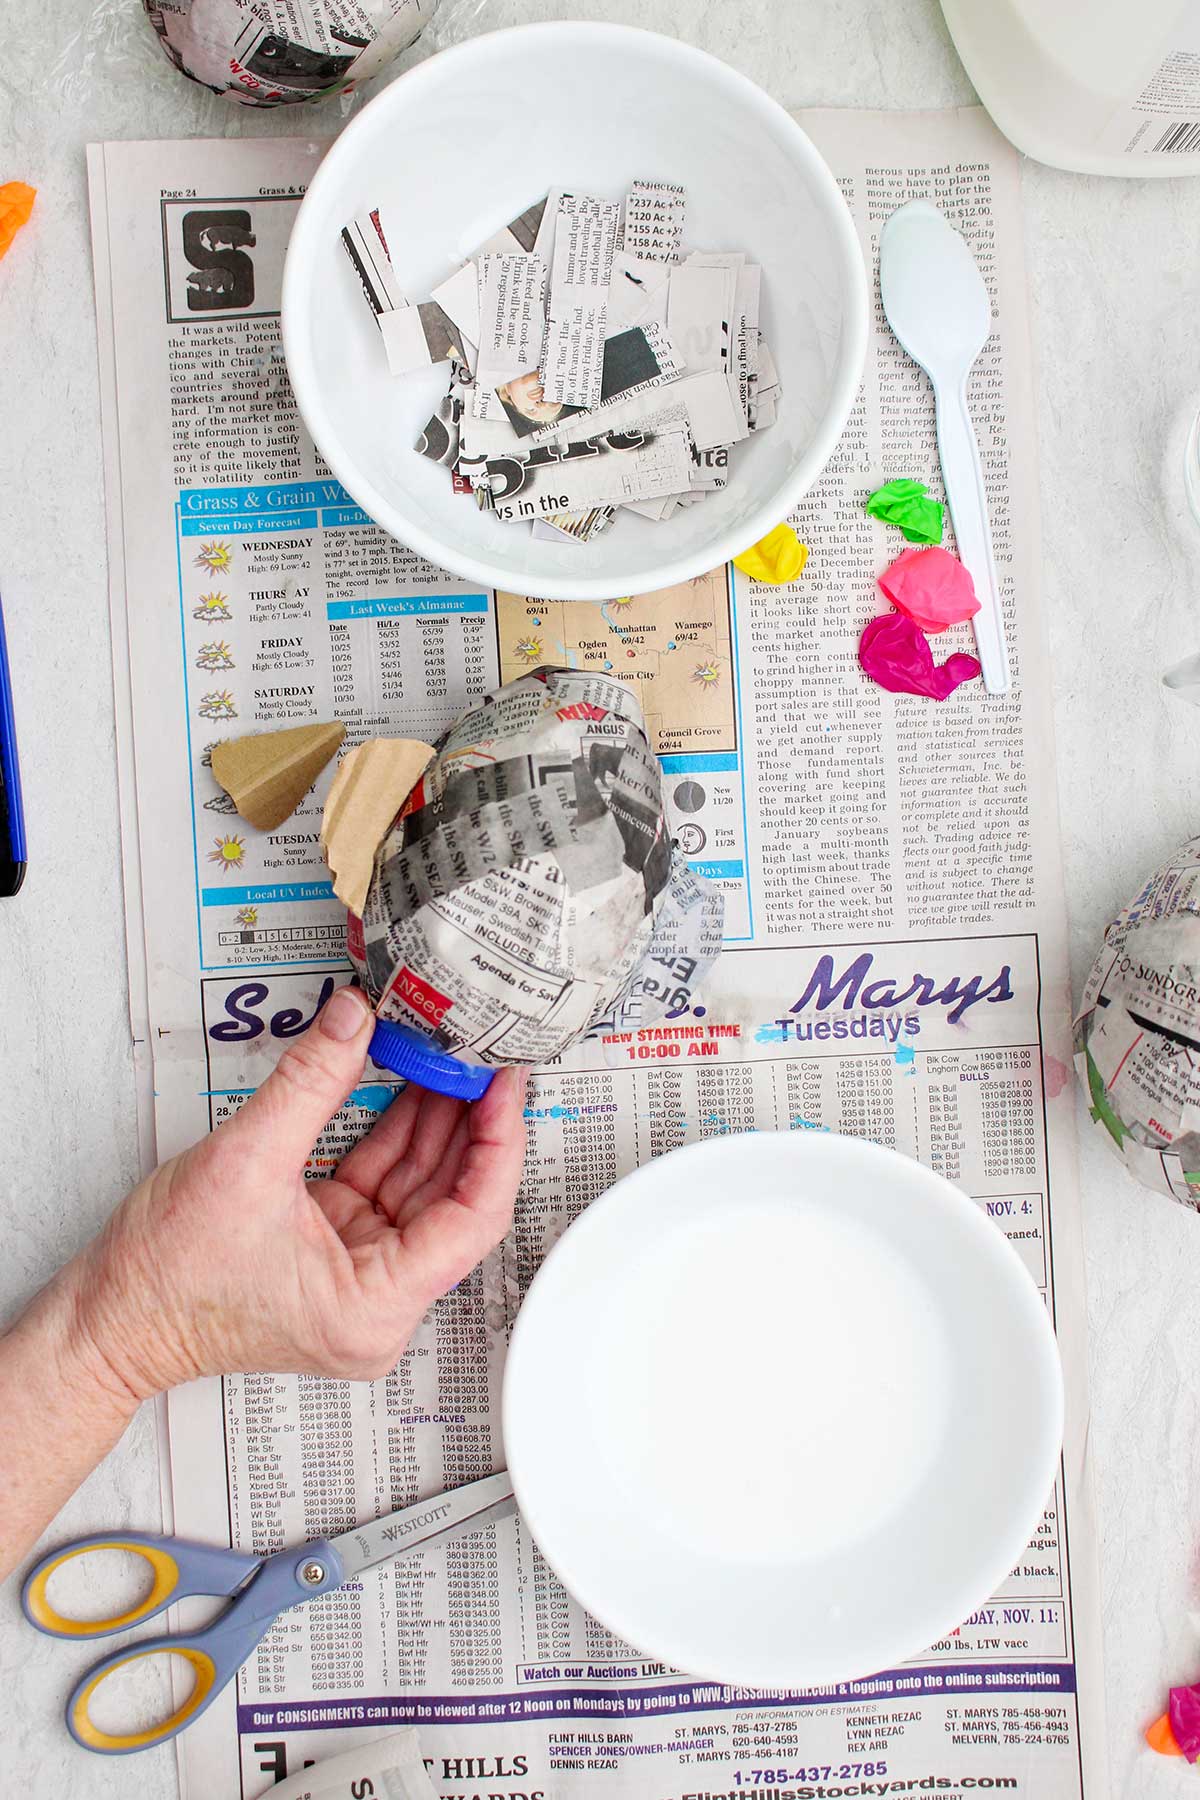
- Add cardboard pieces, wadded newspaper, bottle lids, etc to make the project have the shape you want for your finished project. I use hot glue to attach them to the base form. Cover them with paper mache.
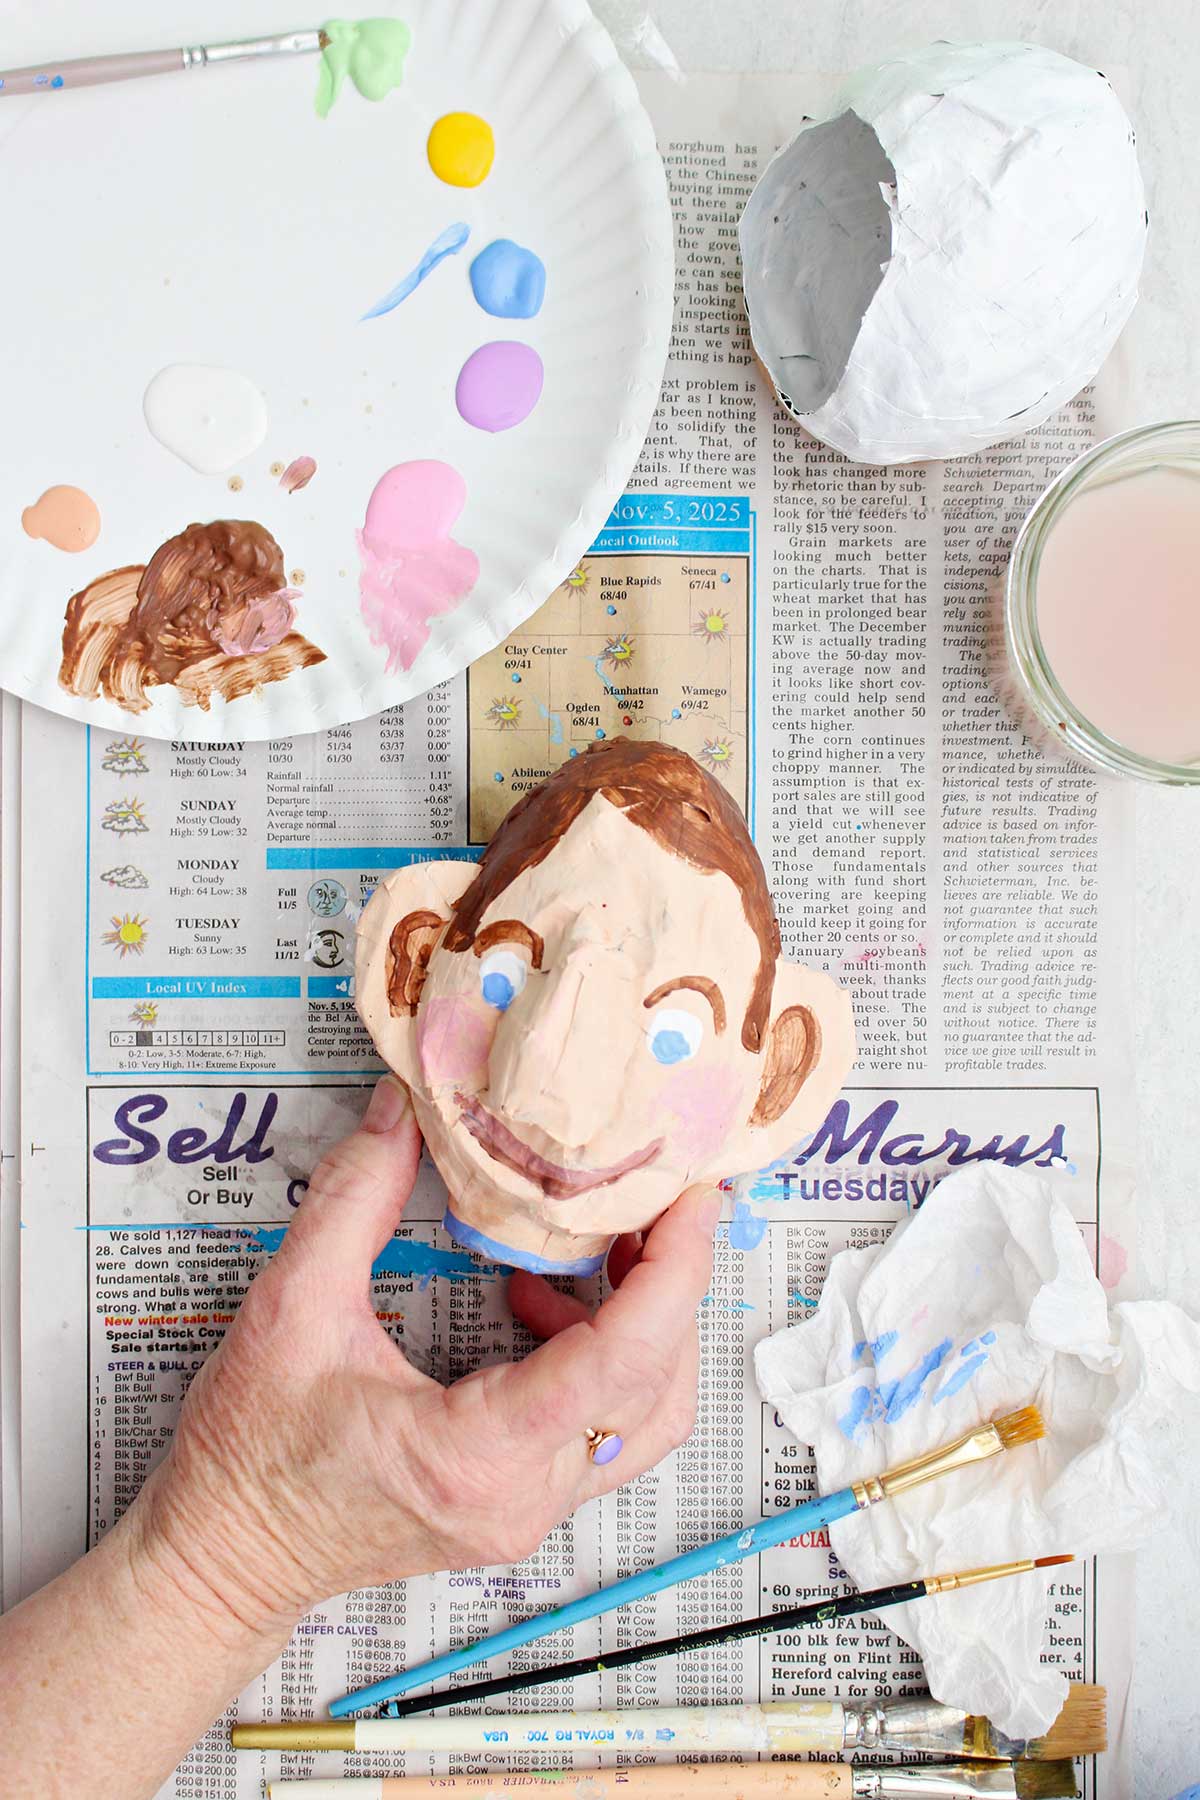
- Use a final layer of paper towel for a smoother finish. Use a final layer of tissue paper for a colorful finish that doesn’t need painting.
Finishing the Project
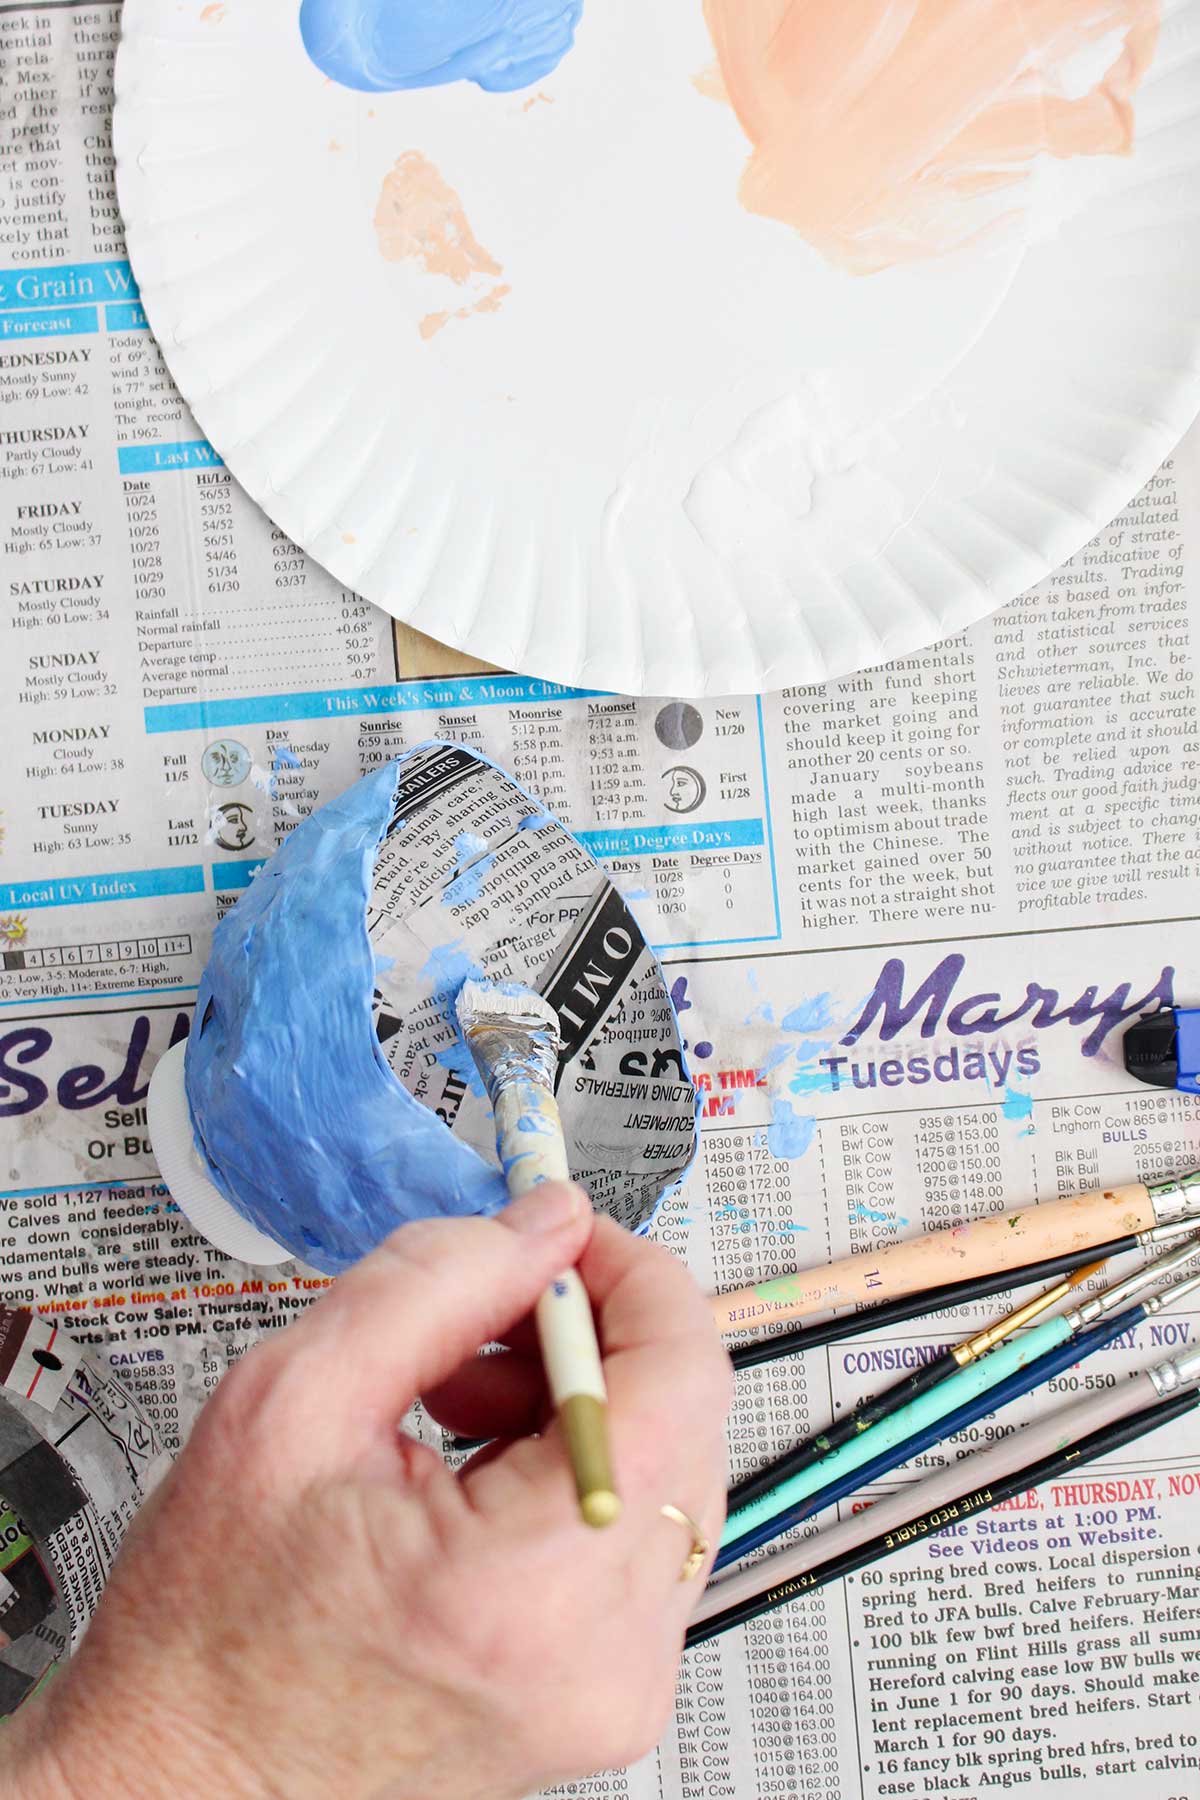
- Let the project dry completely before decorating or painting. It would be good to let it dry overnight. It could take even longer if you live in a humid location or you used more layers.
- Decorate your project. There are many options for decoration. Acrylic craft paint works well if you want to paint it. You can glue on a layer of tissue paper as a last layer of paper mache to add color. Color with markers for a simple option. Finally, glue on gems, glitter, lace or trims.
- Seal with a coat of clear sealant if desired. This will protect your project and help it to last longer. This is optional.
Craft Tips for Paper Mache Paste and Projects
These tips can help making paper mache even easier!
- In a hurry? Use Mod Podge for your paper mache glue. No muss, no fuss.
- Create thin layers of paper mache strips instead of globs. It will dry better.
- It’s good to let each layer of paper mache dry before applying another if possible. It works well to set it on plastic wrap so it doesn't stick to the work surface.
- A fan can help the project dry faster.
- Instead of cutting the paper strips try tearing them. That feathers the edges to get them to blend better.
- Mold appears (especially on flour and water paste) when the project is wet too long. Try using a fan or placing it in a breezy area.
- Acrylic craft paints is a good option for painting and there are a variety of bright colors to choose from.
- A clear sealant may help prevent mold over time.
- Hold the balloon from the stem and glue the paper strips close to the stem without covering it. Remove the balloon and cover the small opening as you finish the project.
- Use hot glue for gluing on cardboard, bottle caps, paper wads, etc to shape the project as you want.
- Apply a final paper layer of paper towel strips for a smoother surface.
Craft Variations
Want to switch things up? Here are a few ways you can customize and play with this craft.
- Experiment with different types of paper to paper mache. For example, use white paper, brown craft paper or magazine page paper. Each creates a different effect.
- Try adding food coloring to your paste or glue.
- Use tissue paper for the last layer as a colorful finish for your project.
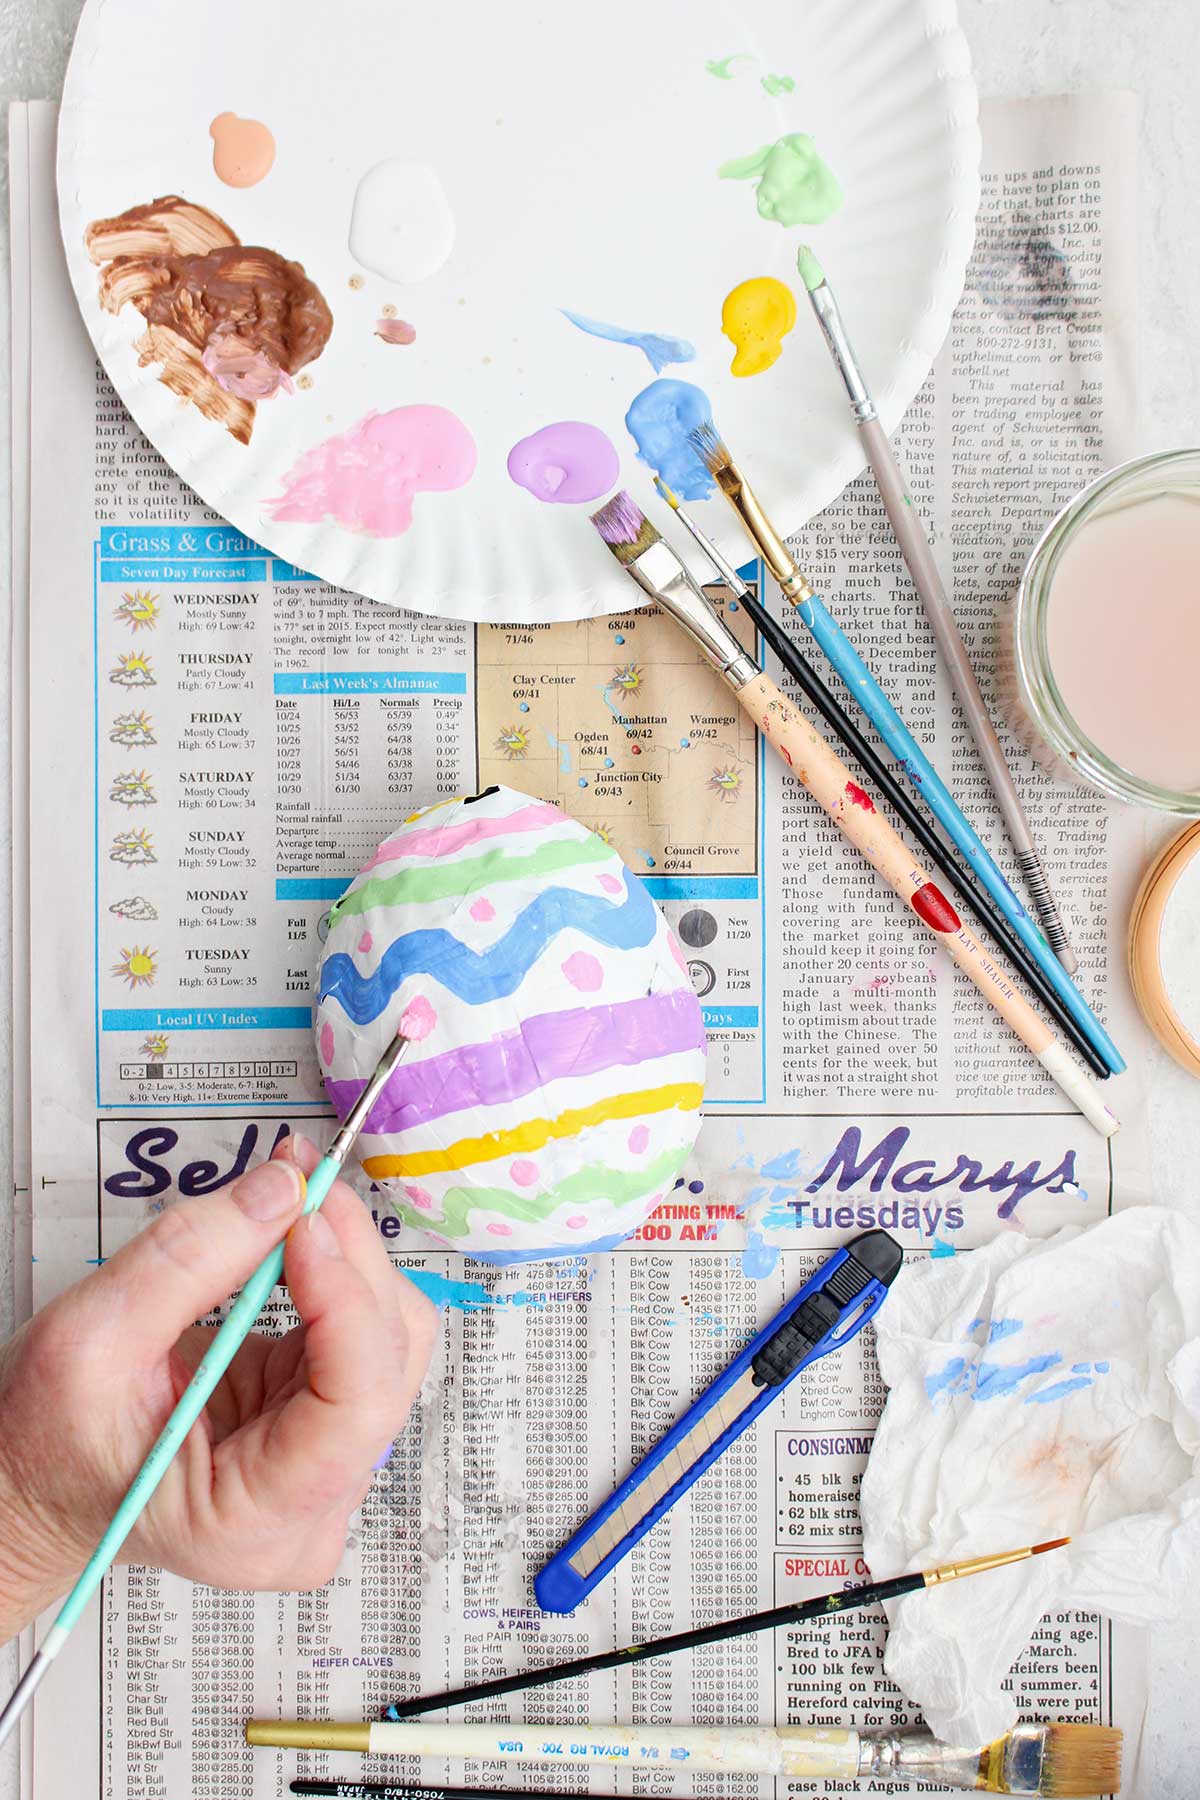
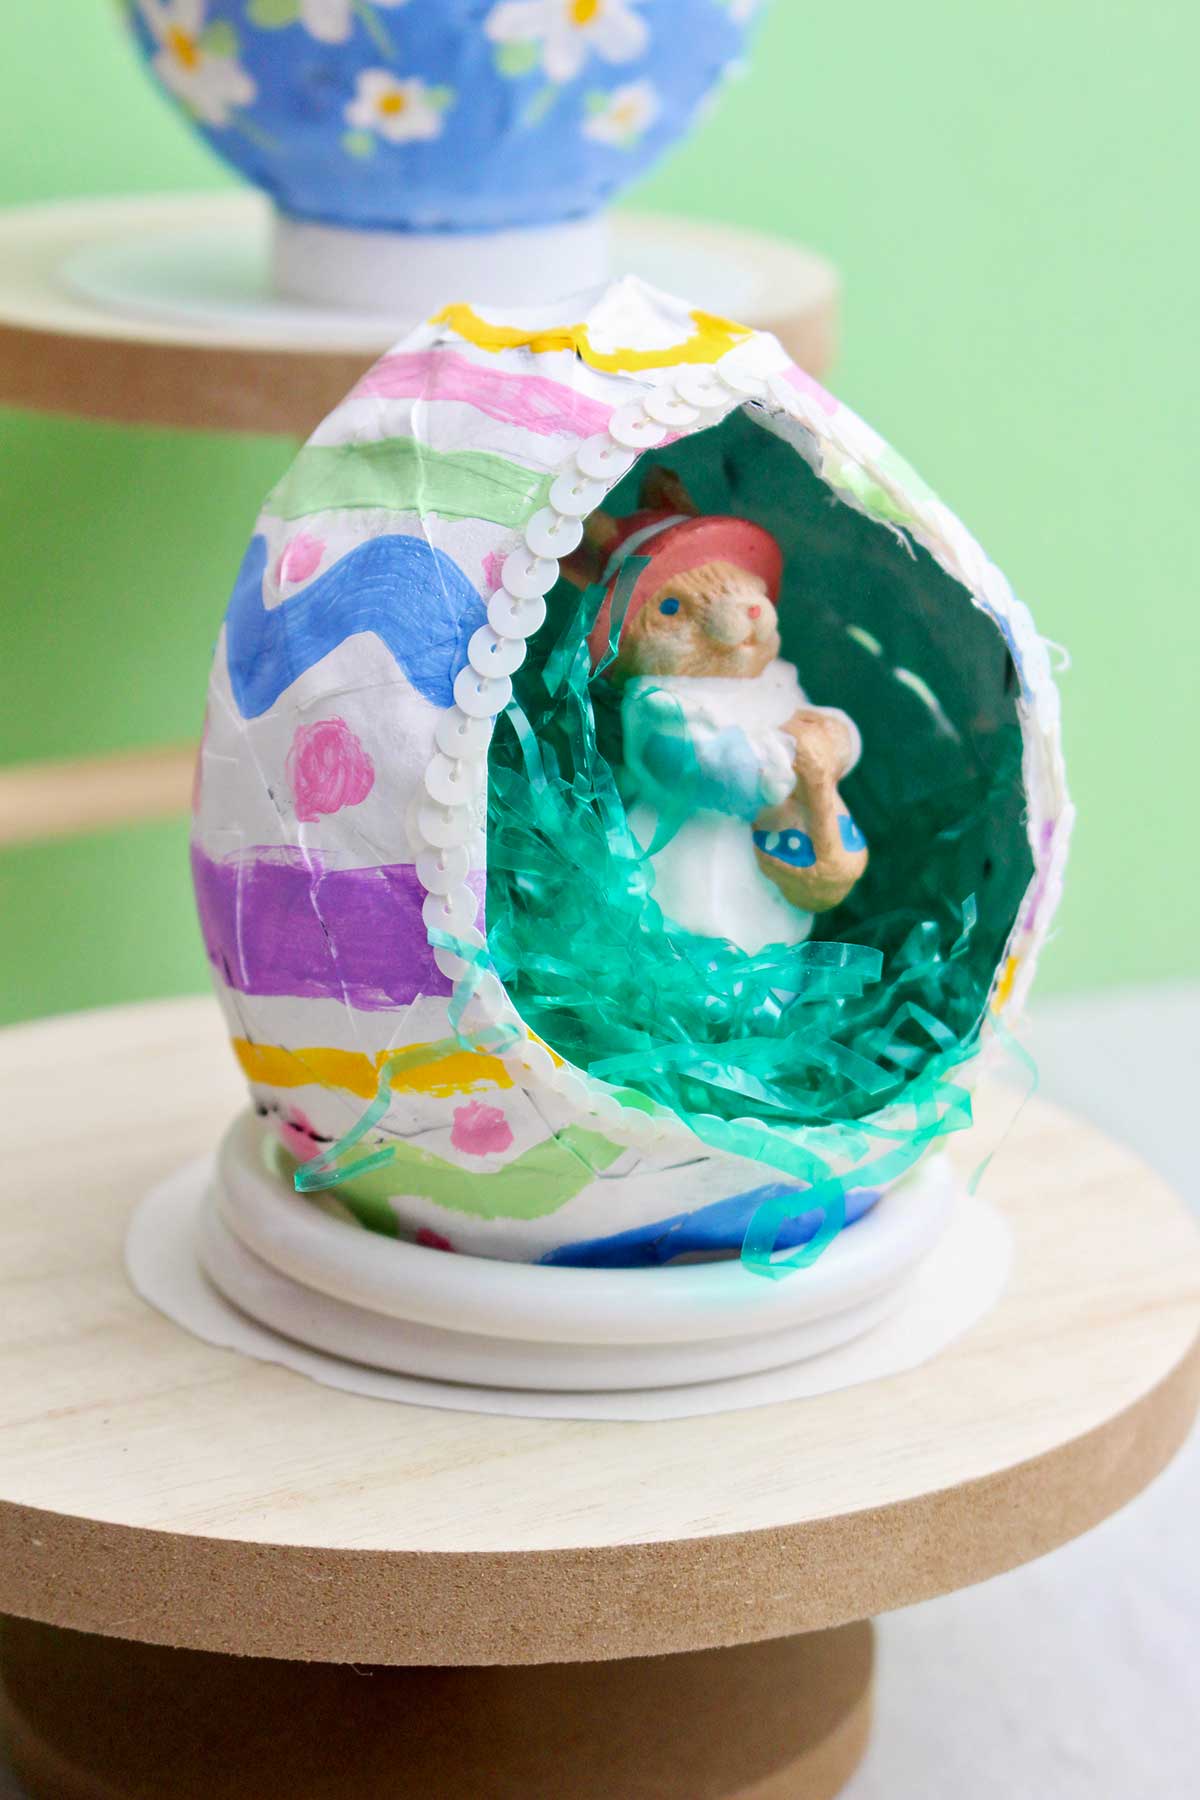
- Make various shaped projects with your balloon shape. A large paper mache balloon base can make a piniata or cut in half lengthwise to make a mask. A small paper mache water balloon sized base can be an Easter egg, and animal, or a puppet head.
- Add a final layer of paper towels for a smoother finish.
DIY Paper Mache Paste FAQs
You can use diluted white glue, wallpaper paste, Mod Podge, or even liquid starch for your paper mache paste instead of the flour and water homemade paste.
A soft project is usually because it hasn’t dried long enough or there was too much paste used. It is best to use multiple thin layers of paper mache and is best if they can dry completely between layers.
Strong paper mache comes from applying several thin layers of paper with the paper mache glue or paste. The paper mache glue makes a harder finish so if this is your goal I recommend using that for your glue recipe.
Cover the base or mold with plastic wrap, petroleum jelly, or aluminum foil before adding paper layers. Then the paper mache will come off more easily. If using a balloon as a base sticking usually isn’t a problem.
More DIY Crafts for Kids
Looking for more easy paper mache crafts to try? Here are a few of our favorites:
- DIY Paper Mache Maracas Instrument
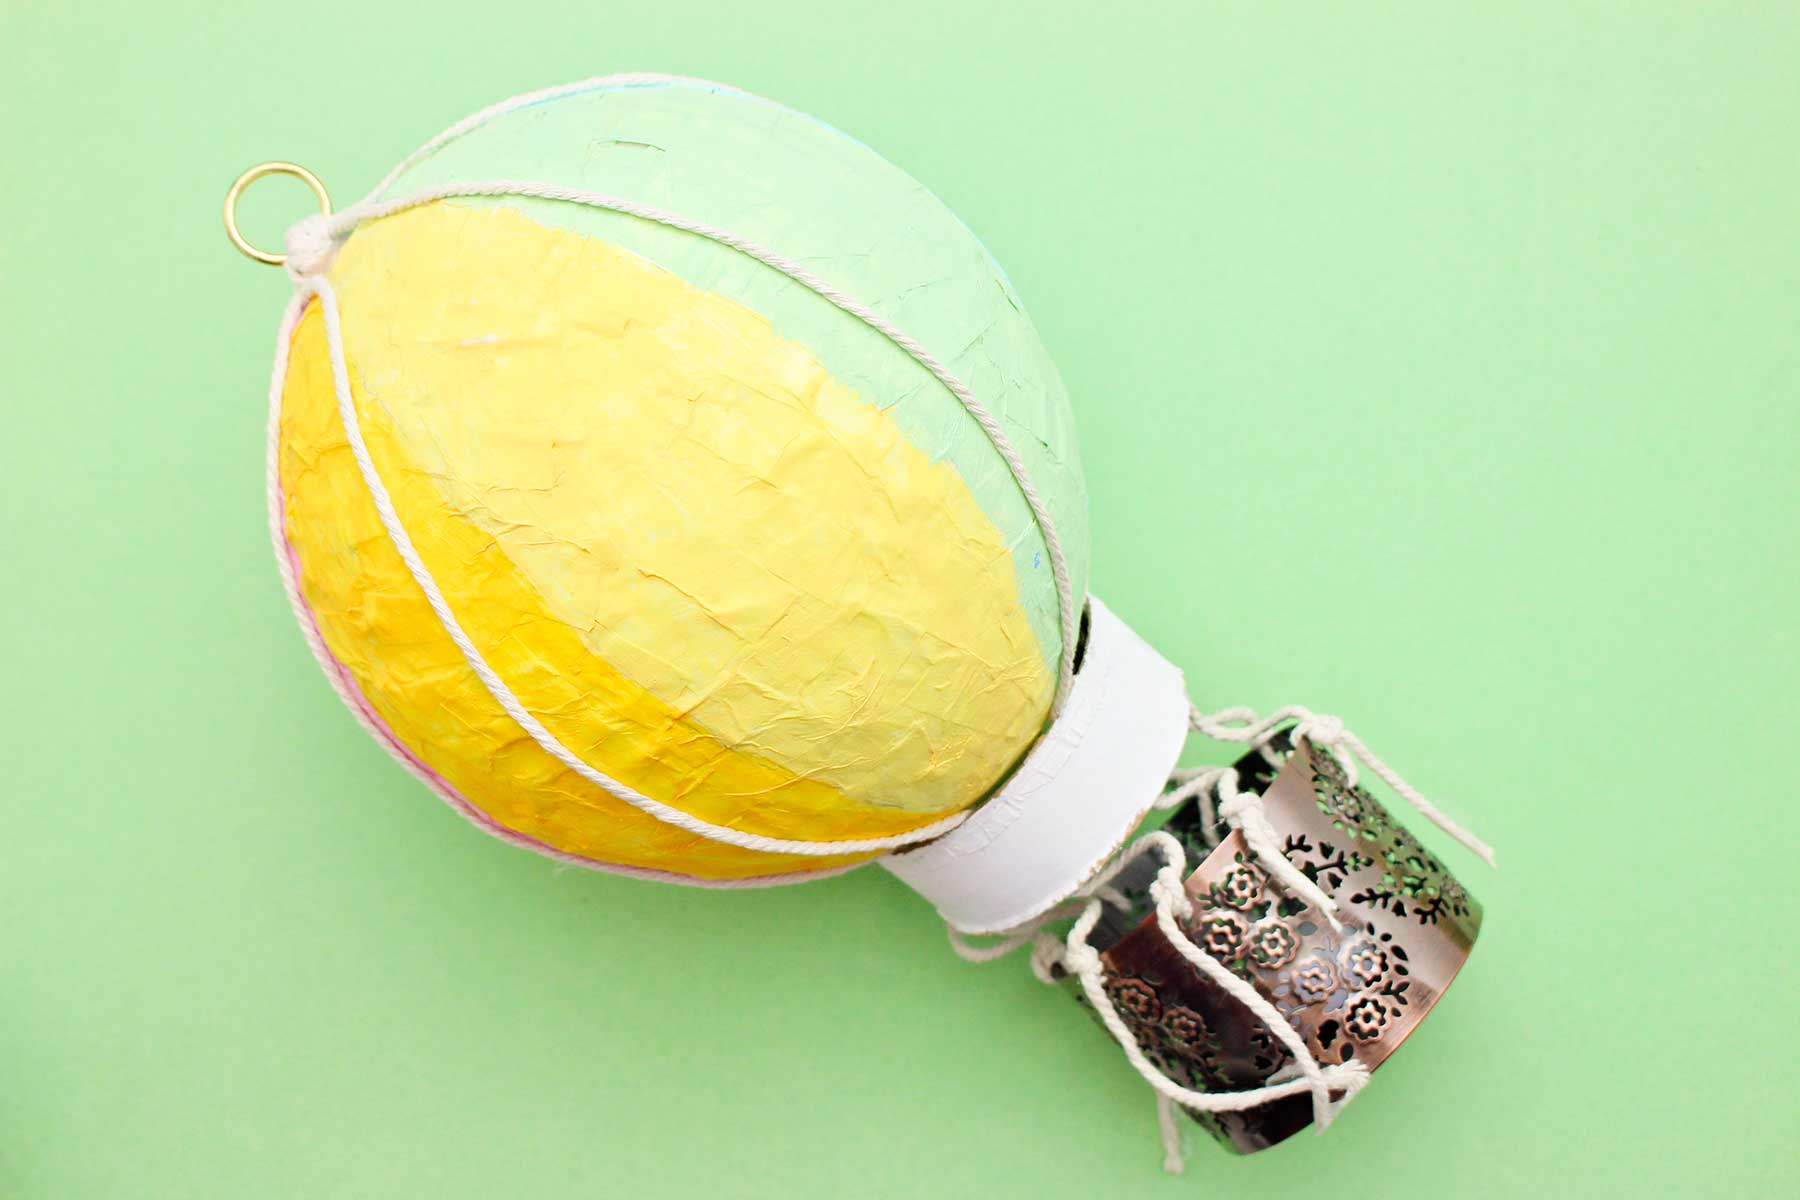
- Paper Mache Miniature Hot Air Balloon Craft
- How to Make Homemade Paper
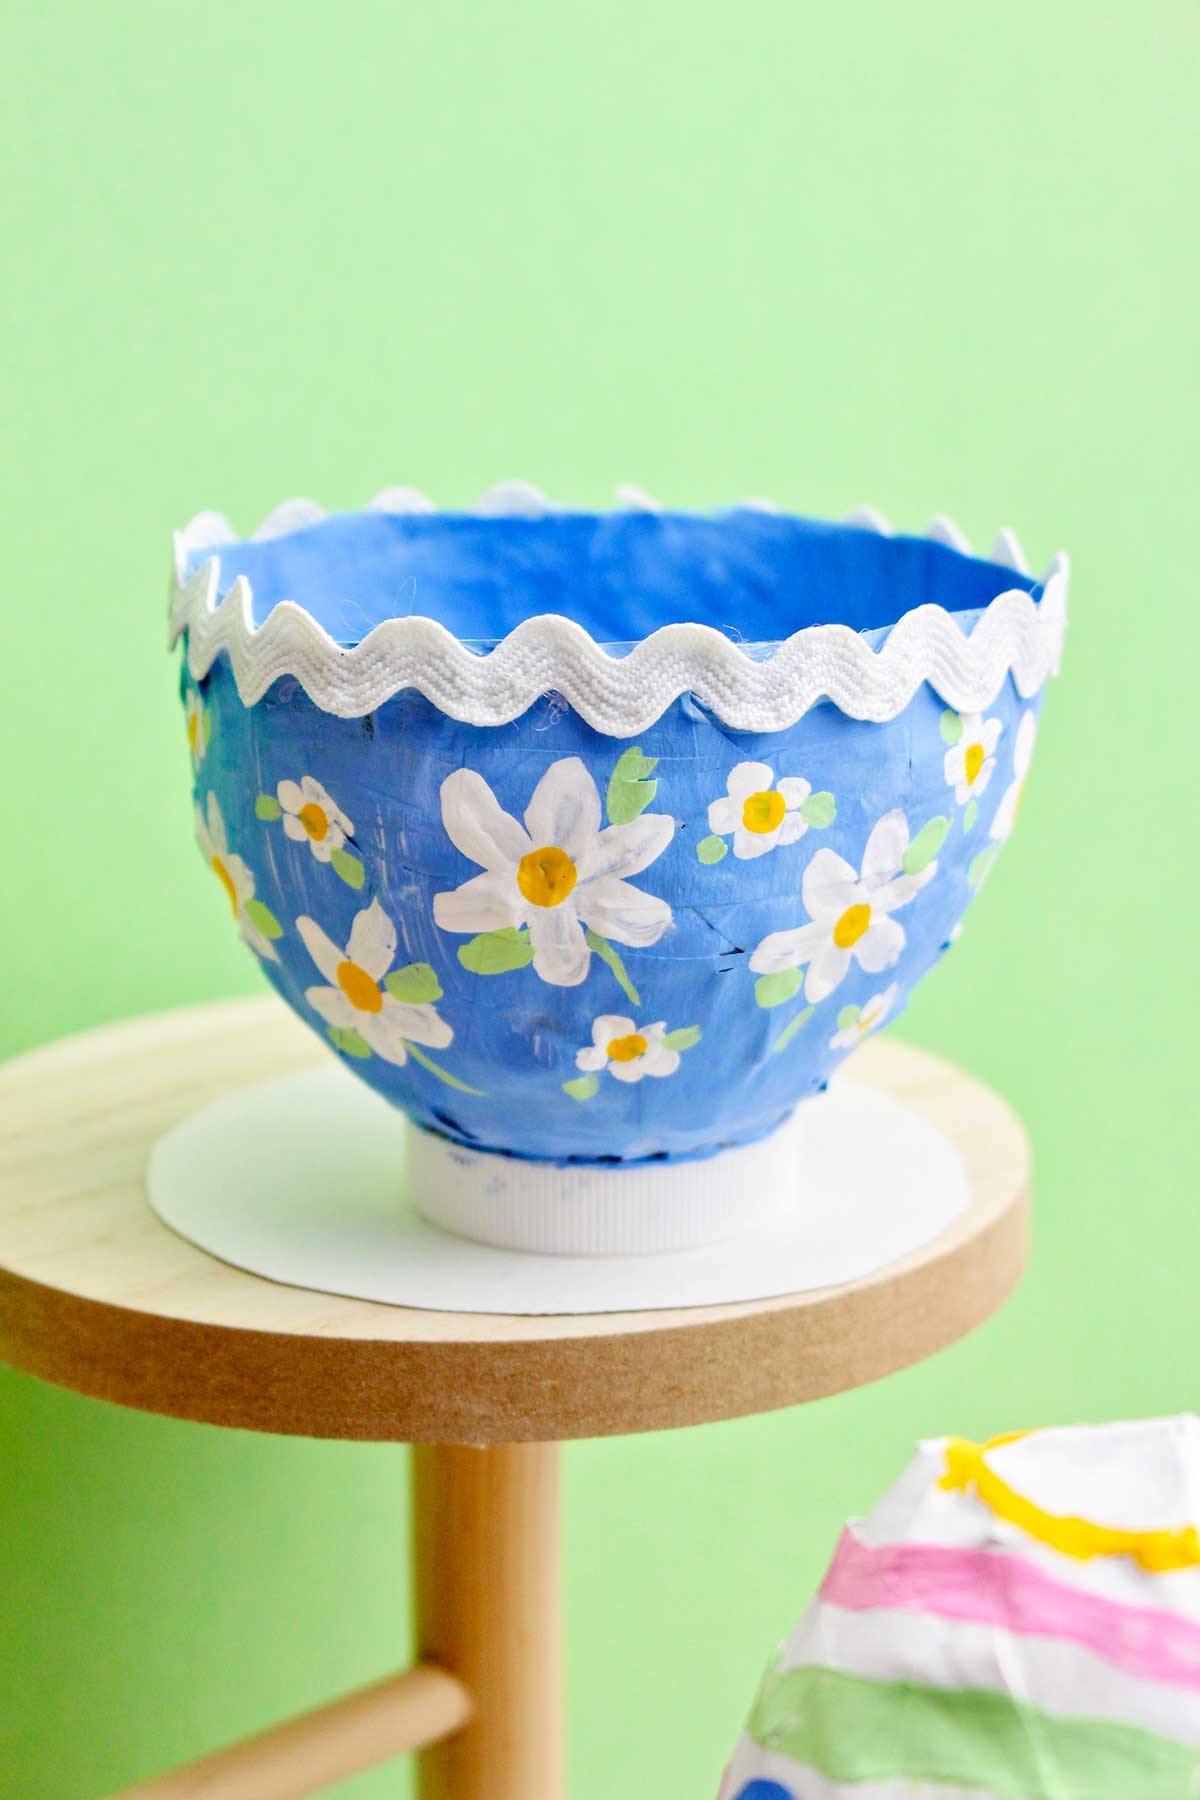
- Paper mache balloon bowl (shown in tutorial)
- Paper mache Easter egg (shown in tutorial)
Come Join the Fun at WTN!
Try this craft, leave a comment, rate it, and tag a photo with #WelcometoNanas wherever you post.
Love getting crafts straight to your inbox? Sign up to receive a weekly email and get a free gift!

Paper Mache Glue Recipe- Make DIY Paper Mache Paste and Projects Today!
Equipment
- Plastic table covering or newspapers for ease in cleanup
- Aprons or old t-shirts to protect your clothing
Items Required
Supplies for all Options of Paper Mache Paste Projects
- Newspaper or scrap paper recycled paper cut or torn into strips
- Scissors
- A mixing bowl
- spoon
- The balloon is for the base shape we’ll use for these projects. I chose to use the water balloon size
- Recycled cardboard, bottle lids, etc.
- A hot glue gun
- plastic wrap
- Acrylic craft paint
- Paintbrushes
- a clear sealer (optional)
Option 1 for paper mache glue (the option I use in these videos for projects)
- ½ cup School glue
- ½ cup Water
Option 2 for paper mache glue (fast and no mixing)
- Mod Podge Note: there is a glossy option and a matte option
Option 3 for paper mache paste (inexpensive, ingredients on hand)
- 1 cup Flour
- 1 cup Warm water approximate
- ¼ teaspoon salt (optional)
Instructions
Option 1: Easy School Glue and Water Paper Mache Glue Recipe
- Pour an amount of the school glue into a mixing bowl.
- Slowly add about the same amount of water into the glue.
- Stir until mixed.
Option 2: Mod Podge Paper Mache Glue
- Mod Podge can be used directly from the container, no mixing necessary.
Option 3: Simple Paper Mache Paste Recipe
- Pour the flour into a mixing bowl.
- Slowly stir in the warm water until the consistency of pancake batter.
- Stir until the mixture is as smooth as possible (I can’t ever get all of the little lumps out!).
- Add a little more water if needed if it gets too thick or if you want a thinner paste.
Step-by-Step Instructions for paper mache projects
- Cover your work surface with newspaper or a washable table cloth.
- Cut or tear the newspaper into strips about ½ to ¾ inch wide.
- Blow up a balloon, shape foil/paper, or use cardboard as the base of your project. I chose water balloons for the projects in this tutorial.
- Mix up the paper mache paste or glue mixture you've chosen to use in a mixing bowl (options and recipes are above)
- Dip the paper strips into the paste or glue. Pull the strips over the edge of the bowl or between your fingers to get off the extra glue.
- Layer the paper strips onto the balloon base. Overlap the strips in different directions so they hold together when dry. When You have covered the balloon well set it to the side to dry (set on plastic wrap).
- Add several layers of the paper strips letting each layer dry before putting on the next layer. About 3-4 layers will be enough for these small projects. Remove the balloon from inside the project and cover the hole.
- Add cardboard pieces, wadded newspaper, bottle lids, etc to make the project have the shape you want for your finished project. I use hot glue to attach them to the base form. Cover them with paper mache.
- Use a final layer of paper towel for a smoother finish. Use a final layer of tissue paper for a colorful finish that doesn’t need painting.
- Let the project dry completely before decorating or painting. It would be good to let it dry overnight. It could take even longer if you live in a humid location or you used more layers.
- Decorate your project. There are many options for decoration. Acrylic craft paint works well if you want to paint it. You can glue on a layer of tissue paper as a last layer of paper mache to add color. Color with markers for a simple option. Finally, glue on gems, glitter, lace or trims.
- Seal with a coat of clear sealant if desired. This will protect your project and help it to last longer. This is optional.


Leave a Reply