Learning how to color a pumpkin (and draw it too) is easy with this step-by-step tutorial! Once you're done, fold the paper and use it for a pumpkin card, a place card for the holidays, or a thank you or birthday card!
Jump to:
- Cute Drawing Idea: Color a Real Looking Pumpkin!
- Supplies to Color a Pumpkin
- Steps to Draw a Pumpkin
- Finish Making a Pumpkin Card
- Tips to Make How to Color a Pumpkin Even Easier
- Craft Variations, Just for Fun!
- Pumpkin Coloring Pages Made for You
- FAQ
- More Pumpkin Crafts for Fall
- Happy Halloween & Happy Fall ya’ll!
- How to Color a Pumpkin
Cute Drawing Idea: Color a Real Looking Pumpkin!
Pumpkins are everywhere in the fall. I drink pumpkin spiced tea and doodle pumpkins on all my papers. Would you like to learn how?
This is a great drawing idea for kids, no matter their skill level. Follow the tutorial below to draw, then coloring pumpkins and jack-o-lanterns, step by step.
Supplies to Color a Pumpkin
You don't need much to bring this real looking colored pumpkin drawing to life!
- Drawing paper: Using a heavier weight drawing paper rather than just copy paper is best when making a card.
- Colored pencils: Prismacolor colored pencils provide smooth and vibrant colors. But use any brand you would like or use crayons.
- Other supplies: You will need Scissors, a pencil and eraser as well.
Steps to Draw a Pumpkin
The placement of the pumpkin on the paper will depend on what you would like to make with it. For this project we are going to start by making a card.
Fold and cut the drawing paper so it will fit in an envelope. Do that now so you know what size to draw the pumpkin. Turn the card to the vertical or portrait direction.
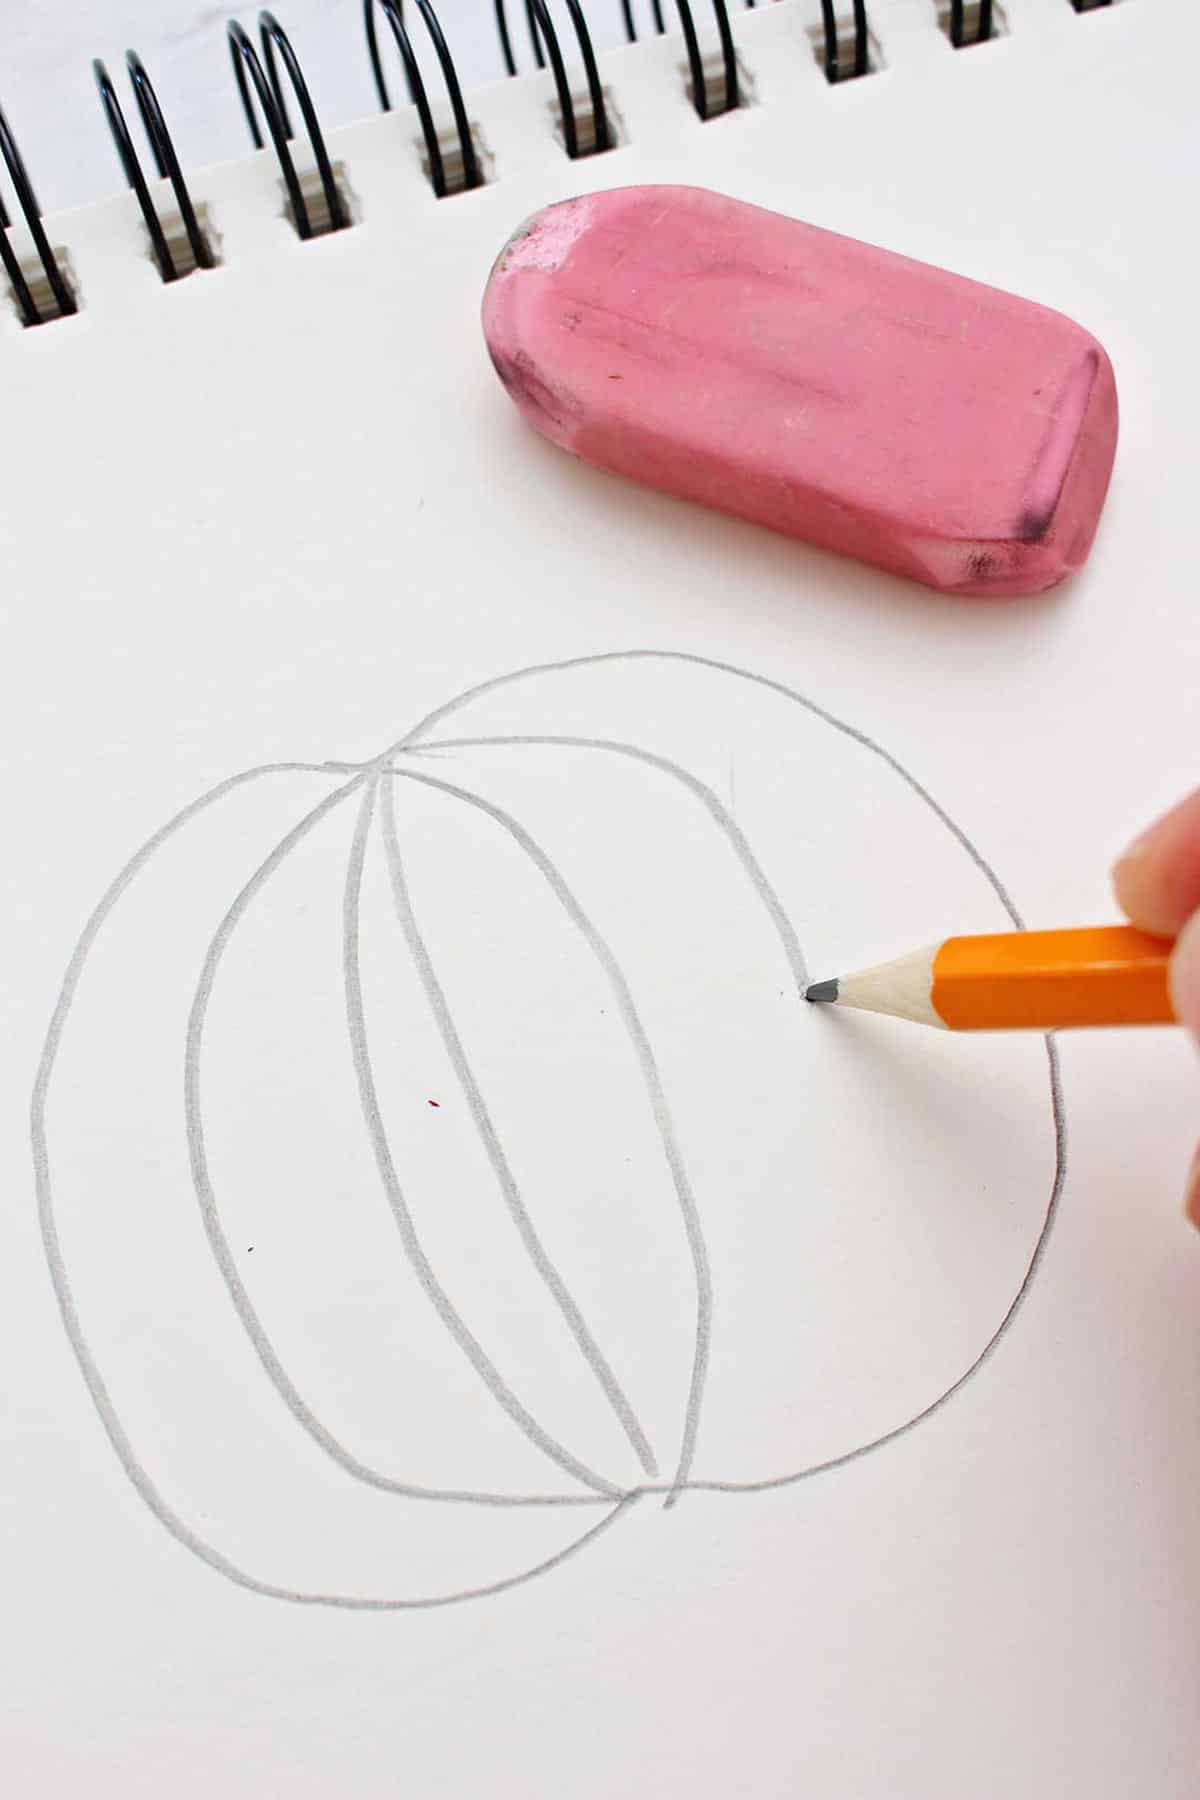
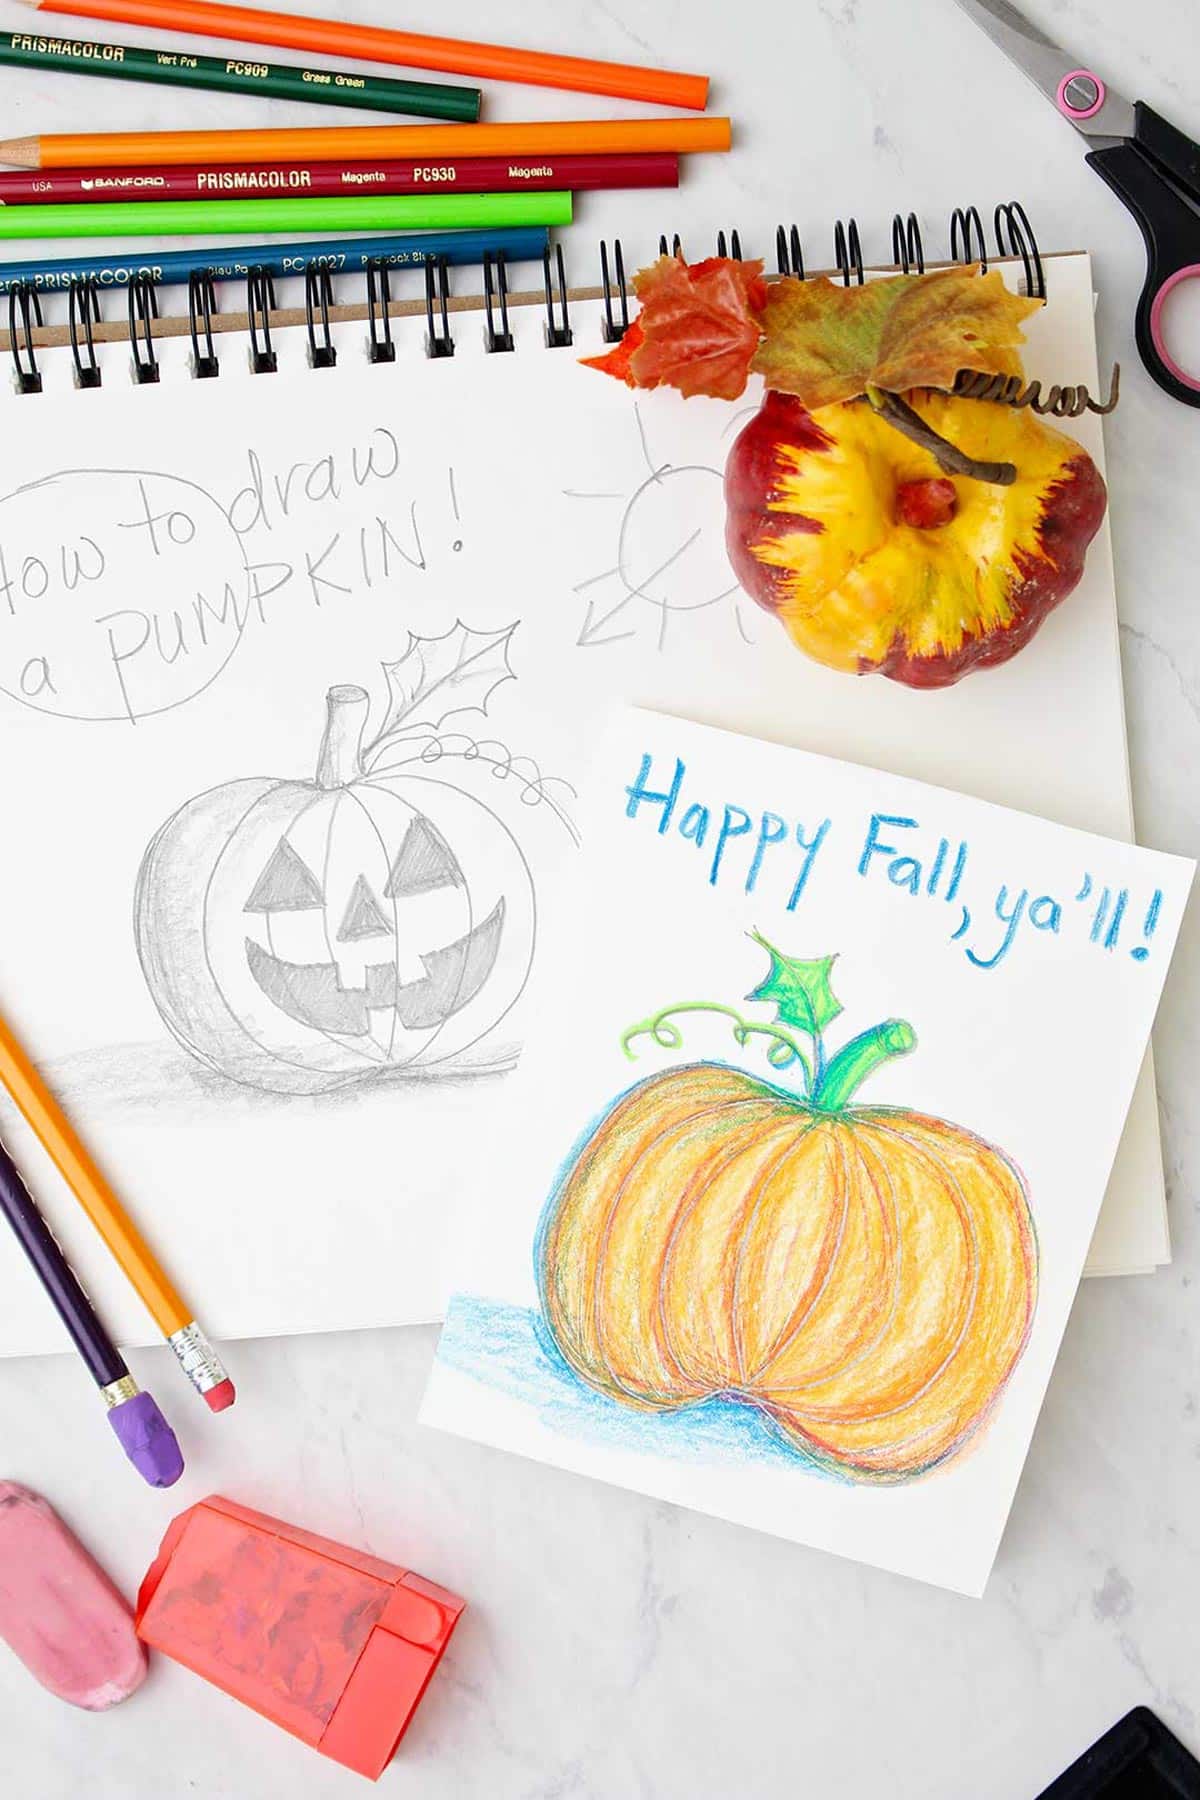
How to draw a pumpkin
The starting point is drawing the pumpkin. Take a couple minutes to refer to the How to Draw a Pumpkin easy post if needed. I don't repeat those instructions in their entirety here.
Draw a pumpkin by making the sphere shape of your choice (tall or short, wide or narrow) with the dips in the top and bottom.
Draw the ribs on the pumpkin, like vertical smiles. Add the stem, curlicues, and a leaf.
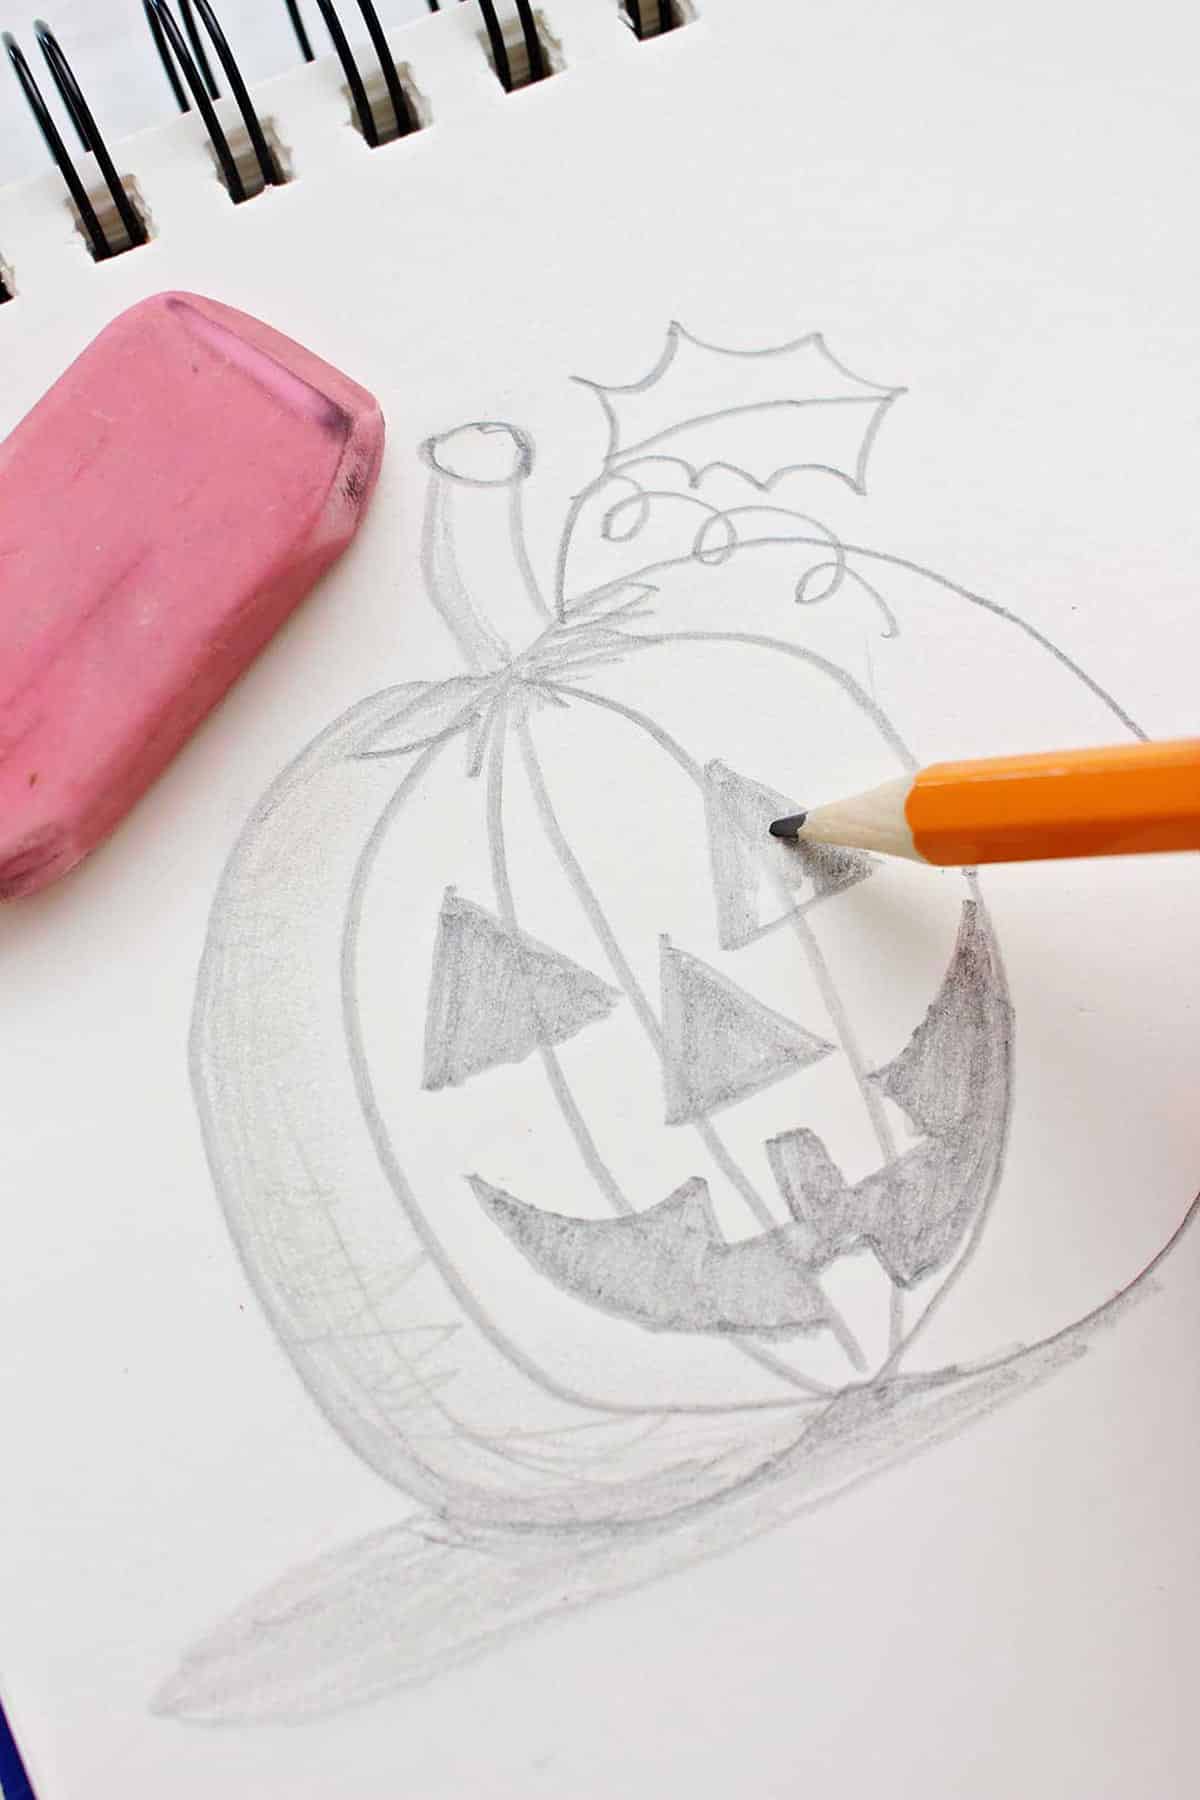
Make a jack-o-lantern
To make this a Halloween pumpkin drawing, add a jack-o-lantern face. The carved pumpkin face is 3 triangles for the eyes and nose and a wide, toothy grin.
Again, it helps to see the pictures and video on the How to Draw a Pumpkin post.
How do you color a pumpkin?
Now for the fun of learning How to Color a Pumpkin to look like a real pumpkin!
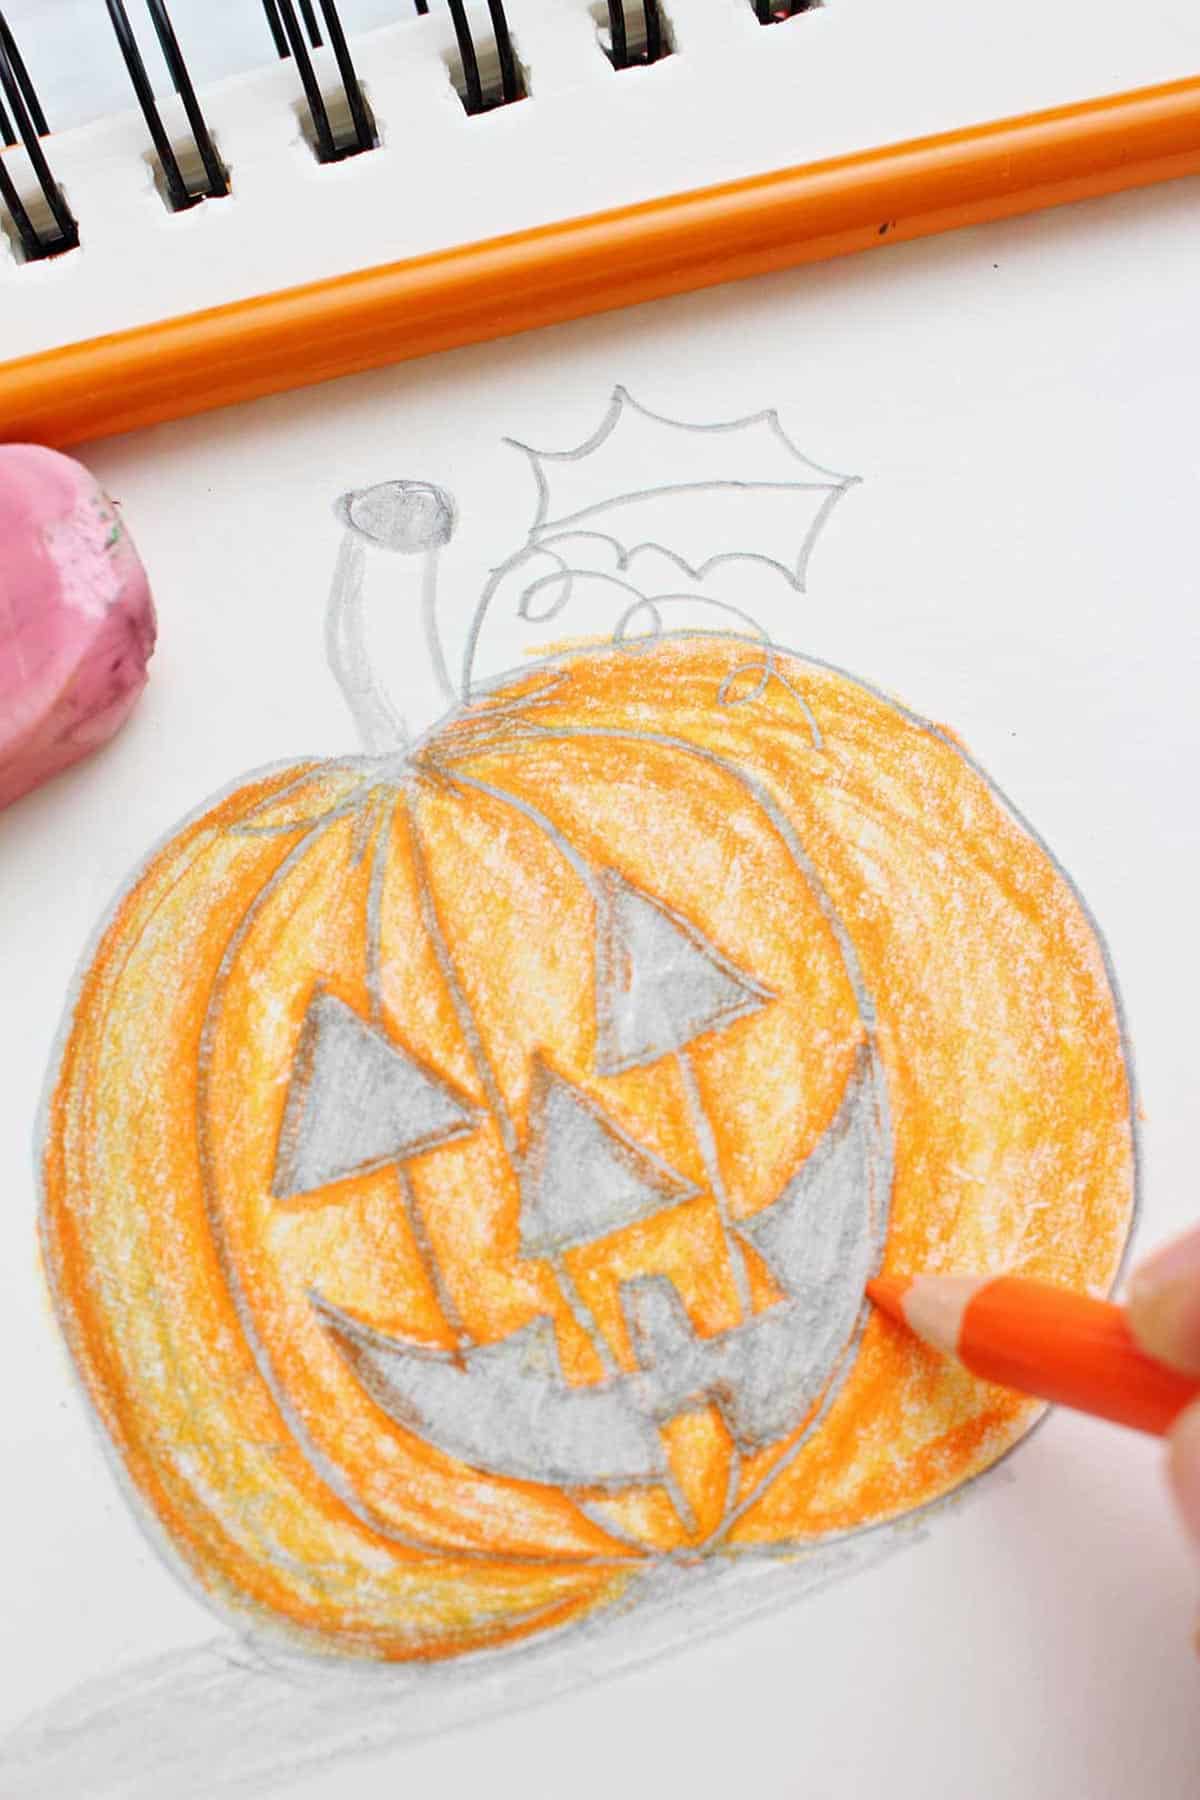
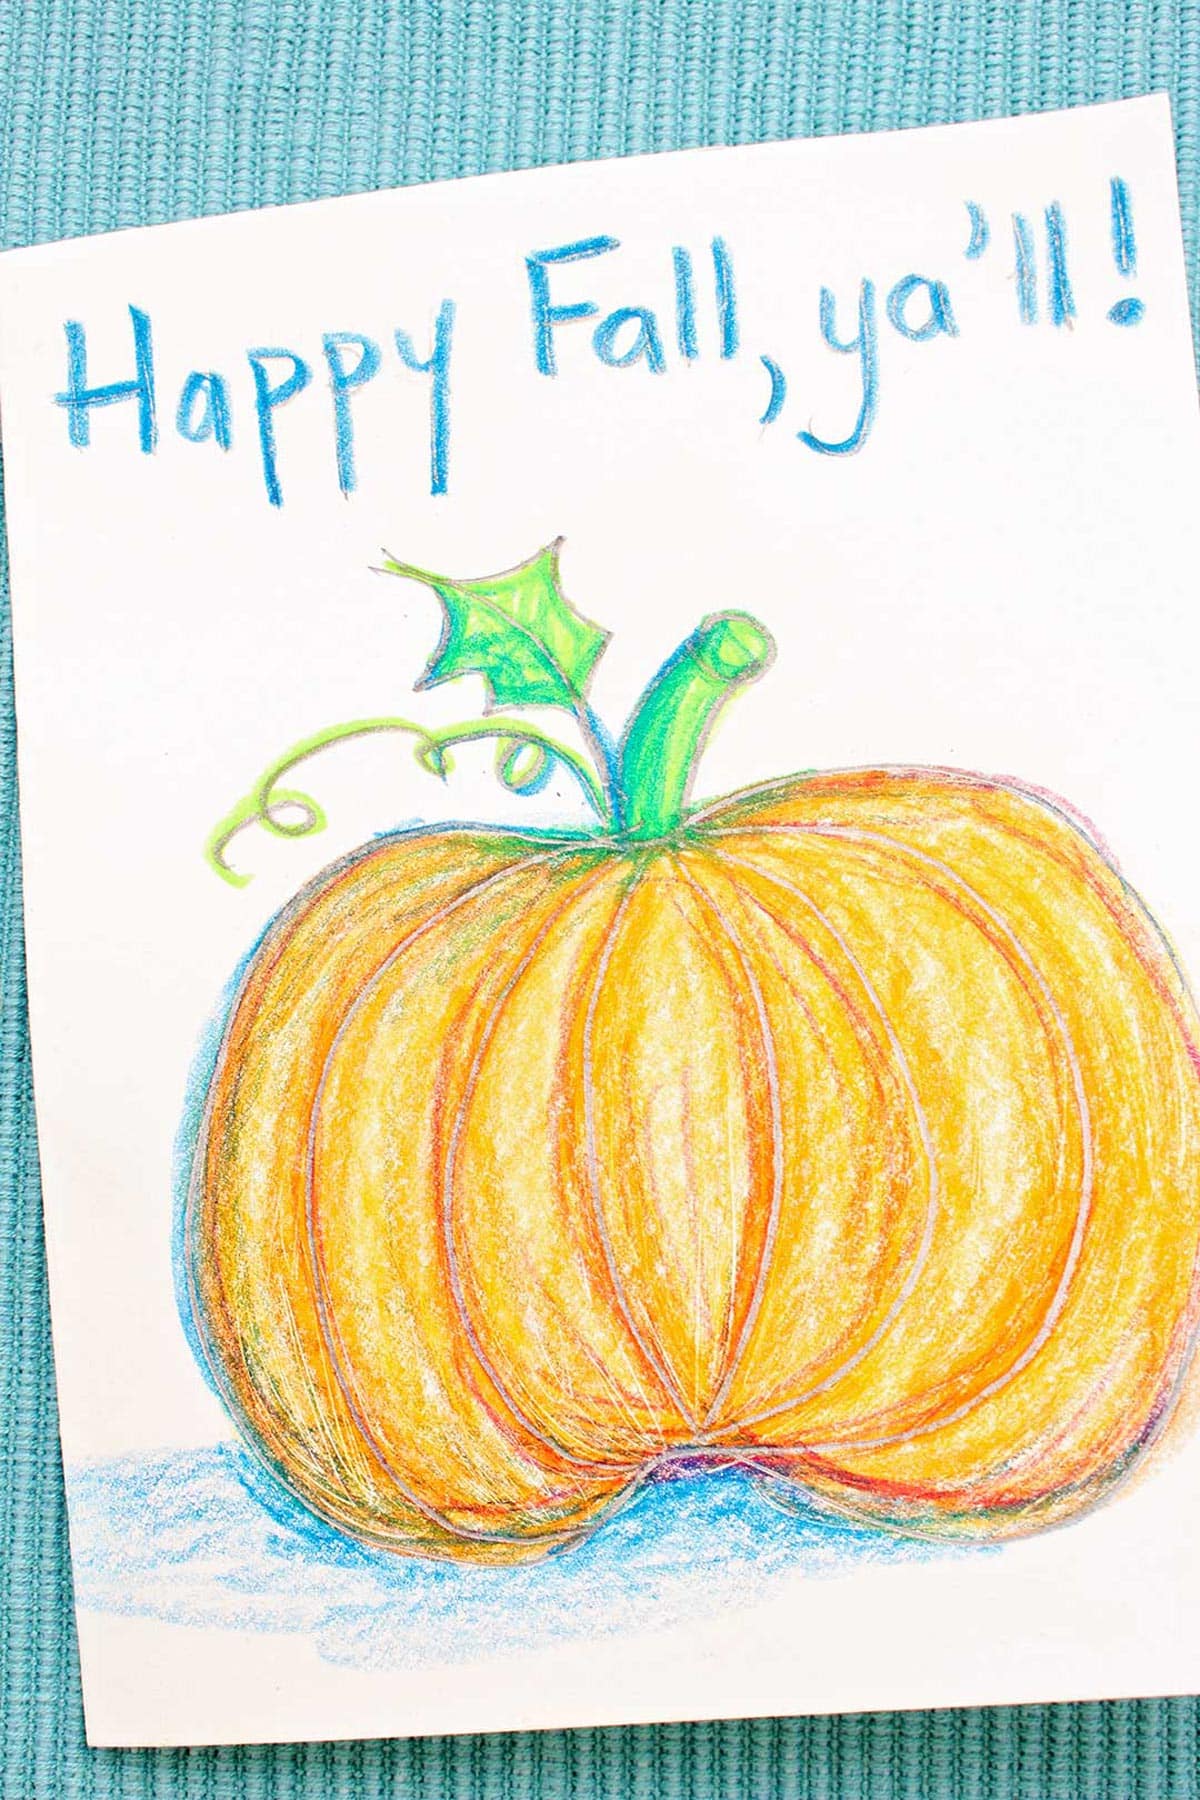
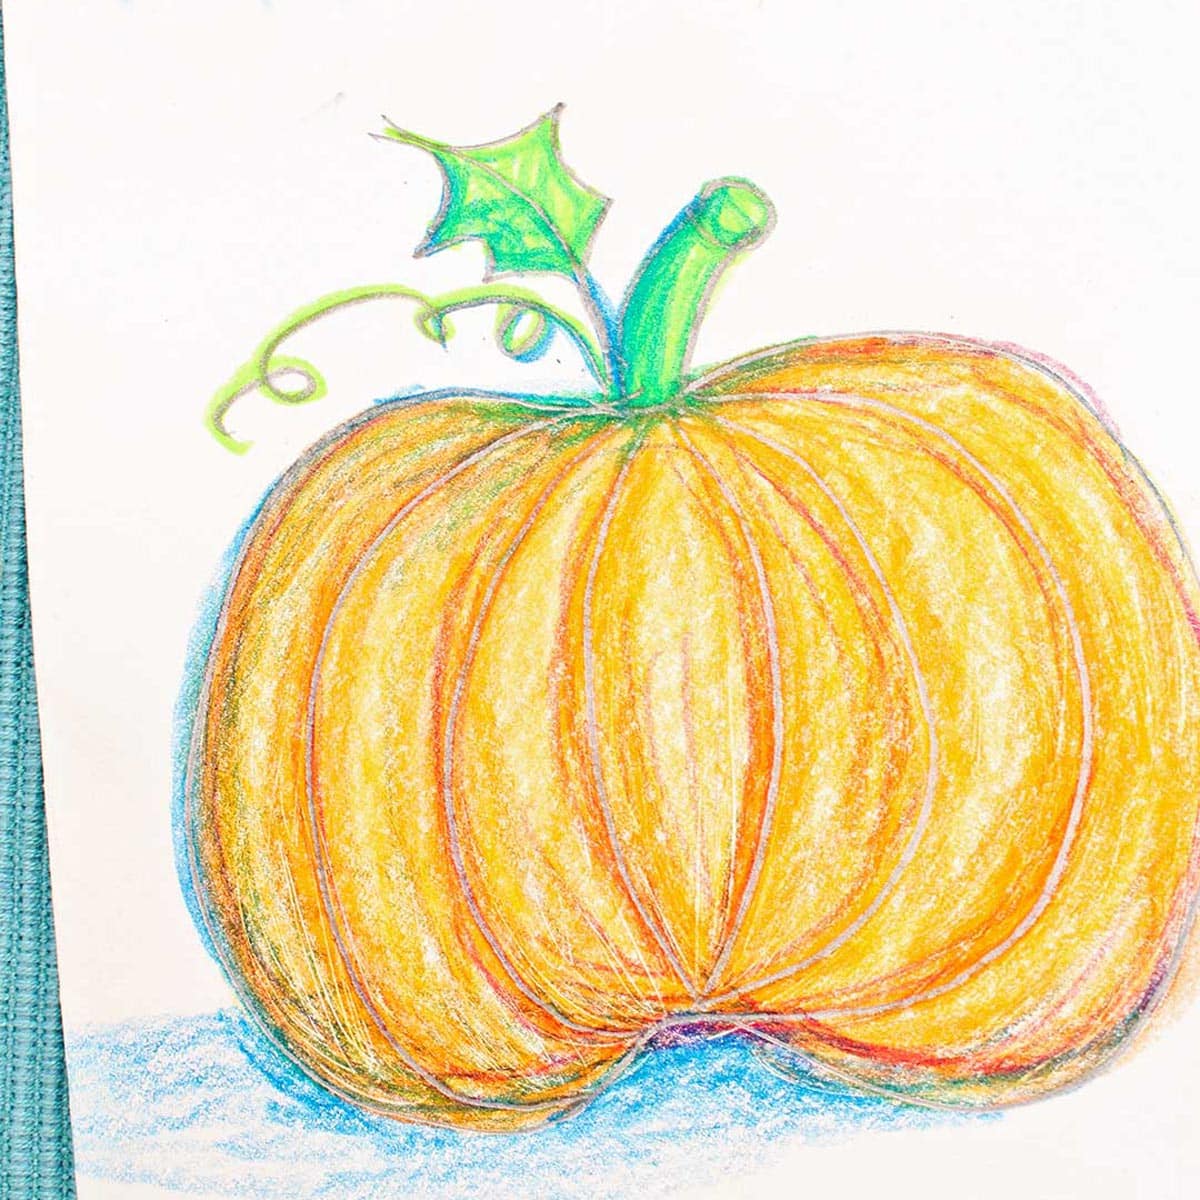
Start by coloring the entire pumpkin with a lighter yellow orange color as a base color. If you drew the jack-o-lantern face do not color the features, leave them white for now.
Use an orange color to darken the edges and ribs of the pumpkin, fading out to the center of the ribs.
Then use a red orange color to darken just the edges and deepest part of the ribs of the pumpkin. Fade out the color in between the ribs.
These blended colors should not be hard lines that stand out.
Do something similar with the leaf and stem using yellow green, green and a dark green. But there are no ribs so use the edges of the leaf and stem and the stem lines instead of the ribs.
How to color a pumpkin with shading
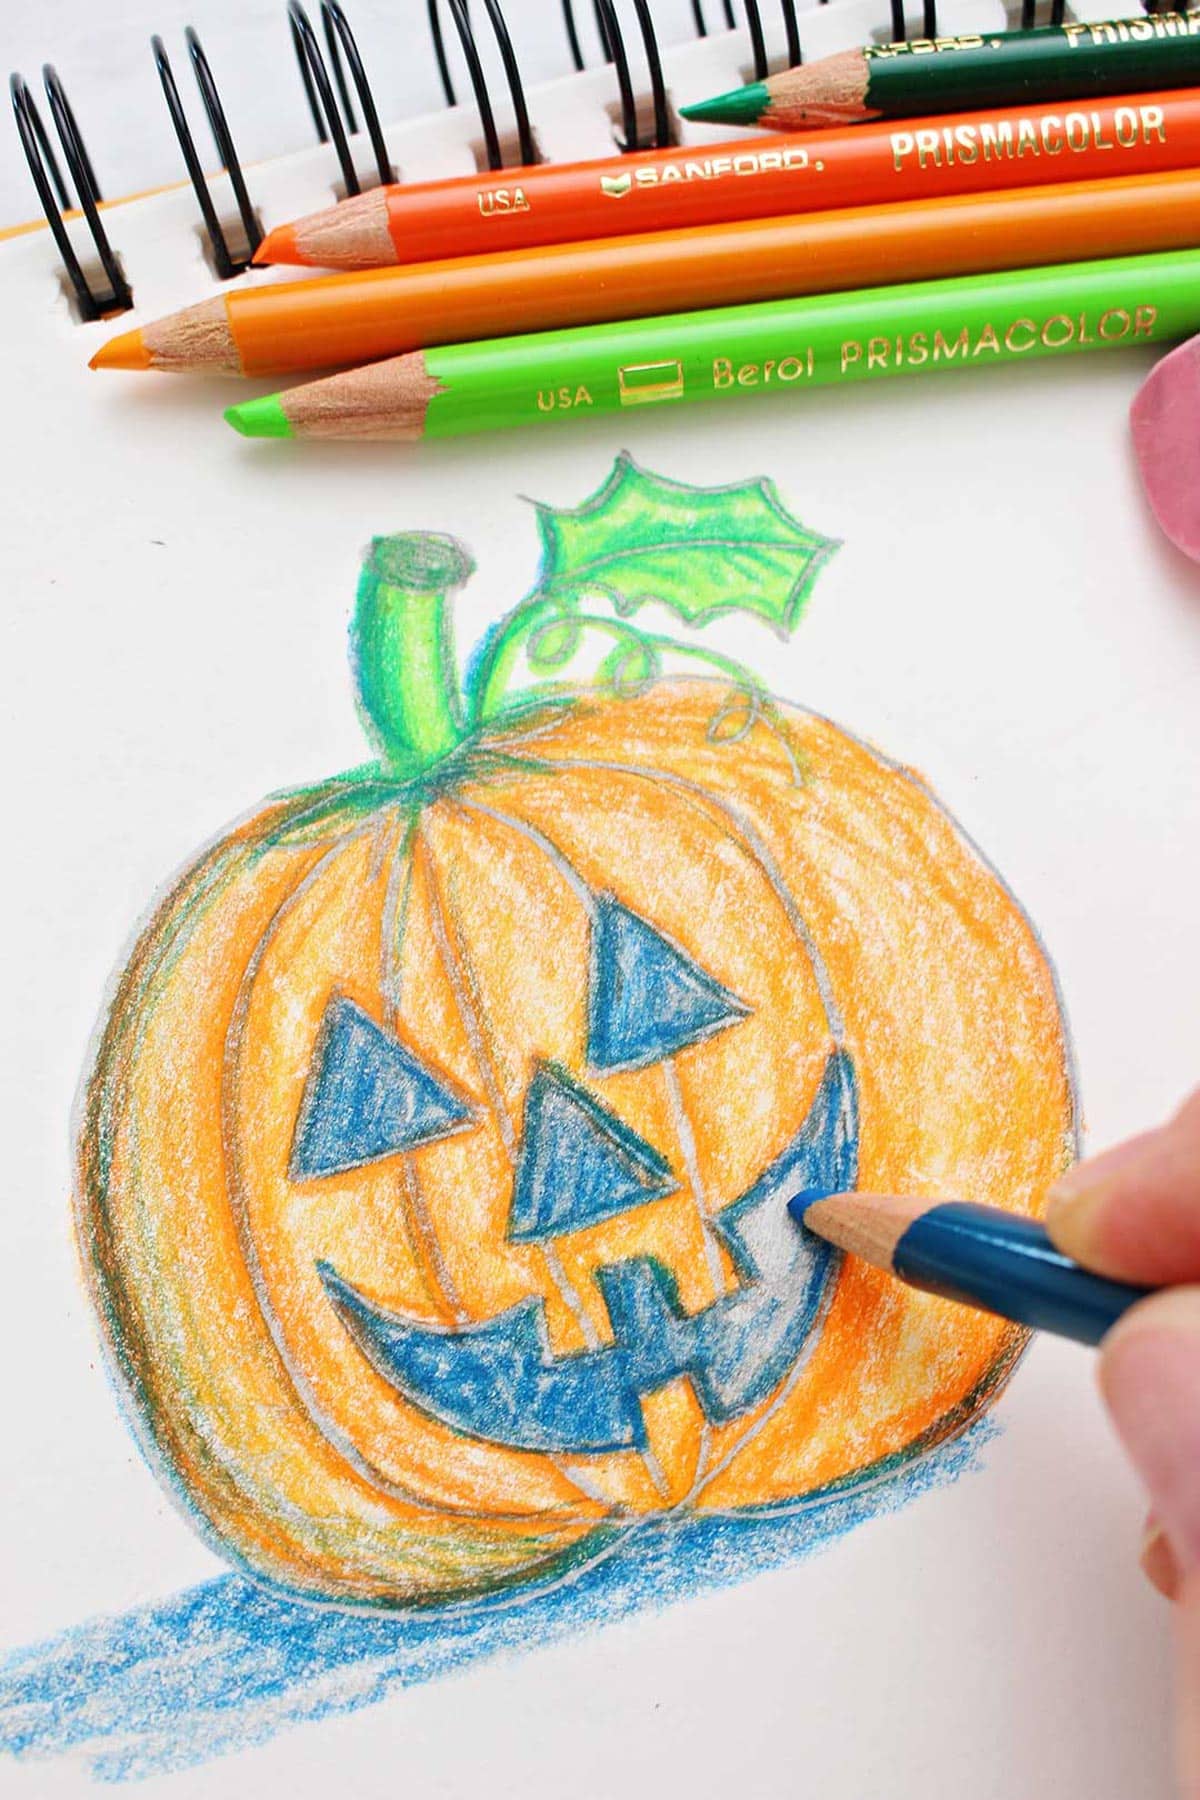
Lastly, use a medium blue for shading the pumpkin. The blue I use here is a bit on the turquoise side.
Color in the features of the jack-o-lantern now with the medium blue if you chose to make a face on your pumpkin. Then continue with the shading in the next step.
We will pretend that the light source is in the upper right and shining down onto the pumpkin. Do some shading with the blue on the side of the pumpkin, stem, and leaf that are away from the light source.
Also shade some on the ground under the pumpkin and to the side away from the light source.
Finish Making a Pumpkin Card
Write a saying on the card that is appropriate for your purpose- Happy Fall ya’ll, thank you, happy birthday, etc.
Place this in an envelope you have, or make your own envelope!
Tips to Make How to Color a Pumpkin Even Easier
- Make an envelope: Try one of these Three Ways to Make an Envelope! Or you can create a Fabric Envelope to fit the card, if you don’t have the right sized envelope.
- Experiment with the color: Have fun with this add a bit more color where you would like until you feel content with how it looks.
Craft Variations, Just for Fun!
- Pumpkin place card: Fold a 4x4 inch paper in half tent style so it will stand up on the table. Draw the pumpkin on the left or right side of the card with the opening to the bottom. Add a name on each card instead of a message. These are so cute sitting on the table next to or on top of the plate.
- Pumpkin Halloween treat sack: I drew pumpkins on Halloween candy bags for my grands and then wrote a message.
- Paint a pumpkin on a pumpkin 😉 : How about painting little pumpkins on a real pumpkin as a decoration? Painting with craft paint instead of cutting a design with a knife will help a real pumpkin last longer.
Let me know what you come up with using this fun pumpkin drawing and coloring design!
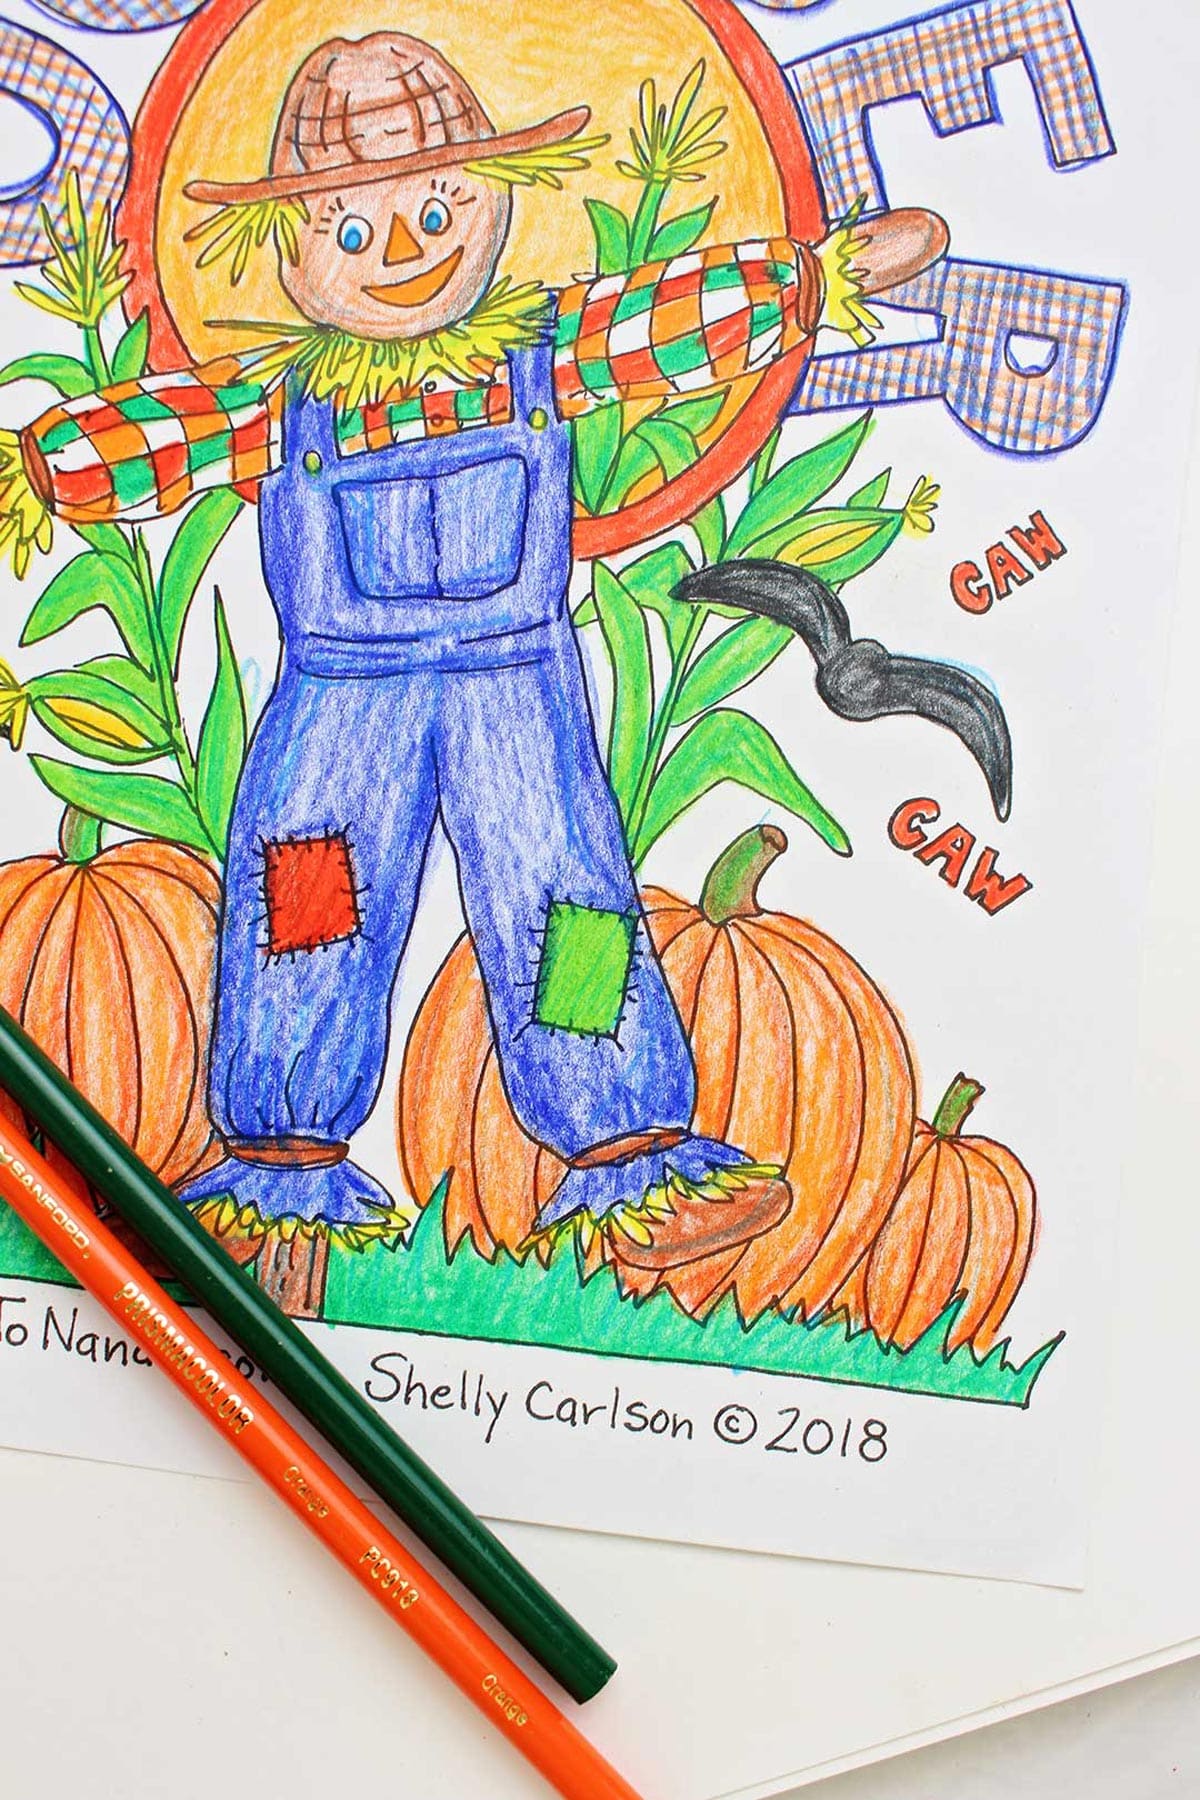
Pumpkin Coloring Pages Made for You
Want to color a few of the pumpkins I've drawn? Here are links to Free Printable Fall Coloring Sheets with pumpkins on them, just for fun!
FAQ
Learning how to color a pumpkin (and draw it too) is easy with this step-by-step tutorial! I use a pencil to draw the shape first, then color it in with colored pencils so you can shade and add dimension to the pumpkin. Once you're done, fold the paper and use it for a pumpkin card, a place card for the holidays, or a thank you or birthday card!
Drawing a Halloween pumpkin is easy with this simple tutorial! Draw a pumpkin by making the sphere shape of your choice (tall or short, wide or narrow) with the dips in the top and bottom. Add the ribs on the pumpkin, like vertical smiles. Add the stem, curlicues, and a leaf. Now draw on a jack-o-lantern face if you'd like!
When starting your shading, pick the placement of a pretend light source that's shining down onto the pumpkin. Do some shading with the blue on the side of the pumpkin, stem, and leaf that are away from the light source.
Also shade some on the ground under the pumpkin and to the side away from the light source.
More Pumpkin Crafts for Fall
If you are looking for a few more fall crafts to do with the kids as the weather cools off, check these out:
- Easy DIY Sweater Covered Pumpkin Decoration
- Mini Pumpkin Halloween Decorations
- Simple Fall or Thanksgiving Table Decorations
- Woodland Owl Pumpkin Carving Deluxe
Happy Halloween & Happy Fall ya’ll!
If you try this craft, please let me know! Go ahead and leave a comment, rate it, and tag a photo with #WelcometoNanas wherever you post.
Come join the fun!
How to Color a Pumpkin
Equipment
- Scissors
Items Required
Instructions
- We will make a pumpkin card first.Fold and cut the drawing paper so it will fit in an envelope. Do that now so you know what size to draw the pumpkin. Turn the card to the vertical or portrait direction.
- To draw the pumpkin take a couple minutes to refer to the How to Draw a Pumpkin post if needed. Draw on the front of the card. To make the pumpkin into a jack-o-lantern, draw the face.
- Start by using colored pencils to color the entire pumpkin with a lighter yellow orange color as a base color.If you drew the jack-o-lantern face do not color the features, leave them white for now.
- Start by coloring the entire pumpkin with a lighter yellow orange color. This will provide a base color that we will add to in the next steps.Tip: if you drew the jack-o-lantern face do not color the features, leave them white for now.
- Use an orange color to darken the edges and ribs of the pumpkin, fading out to the center of the ribs. Then use a red orange color to darken just the very edges and deepest part of the ribs of the pumpkin with a bit of fading out. These colors should not be hard lines that stand out, but blended.
- Do something similar with the leaf and stem using yellow green, green and a dark green. But there are no ribs so use the edges of the leaf and stem and the stem lines instead of the ribs.
- Lastly, use a medium blue for shading the pumpkin. The blue I use here is a bit on the turquoise side. Color in the features of the jack-o-lantern now with the medium blue if you chose to make a face on your pumpkin. Then continue with the shading in the next step.
- We will pretend that the light source is in the upper right and shining down onto the pumpkin. Do some shading with the blue on the side of the pumpkin, stem, and leaf that are away from the light source. Also shade some on the ground under the pumpkin and to the side away from the light source.
- Write a saying on the card that is appropriate for your purpose- Happy Fall ya’ll, thank you, happy birthday, etc.Place in an envelope you have or make your own envelope.
- If you want to make a place card for Thanksgiving, make a small 4x4-inch rectangular card (fold tent style so it will stand up on the table). Draw the pumpkin on the left or right side of the card with the opening to the bottom. Add a name on each card instead of a message. These are so cute sitting on the table next to the plate or on top of the plate.
Video
Notes
This post was originally published in October 2022 and has been updated to add more relevant and detailed content


Laura says
Always love new doodle ideas 🙂 Cute card idea!