Heart Waterfall Card for Valentines Day
Wow! This fun pop-up Heart Waterfall Card for Valentines Day is so cool. It looks so special in the way the hearts lift to reveal your personal message to your sweetie!
Use the free printable pattern to easily make this card. The person you give it to will be feel special and will want to know how to make it themselves!
Heart Waterfall Card Colors
My Heart Waterfall Card is made with traditional Valentines Day colors of pinks and white. The hearts are multi-colored, so the hearts needed to be cut from several different colors of cardstock paper.
That is obvious, but it makes a difference when copying the pattern so hear me out.
You can make a card like this example or you can change it up!!
Rainbow Waterfall Card
What about a rainbow of colored hearts (red, orange, yellow, green, teal, blue, and purple)? The card uses seven hearts in total so you can have up to seven different colors.
Or you could make all of the hearts one color.
I can’t wait to see pictures of the cards you create and the colors you choose! Be sure to upload a picture of your card in the comments.
The choice about the color of your hearts is the first step in making your Heart Waterfall Card. Then you can make a copy of the free pattern to fit what you want to make!
Heart Waterfall Card Free Printable Pattern
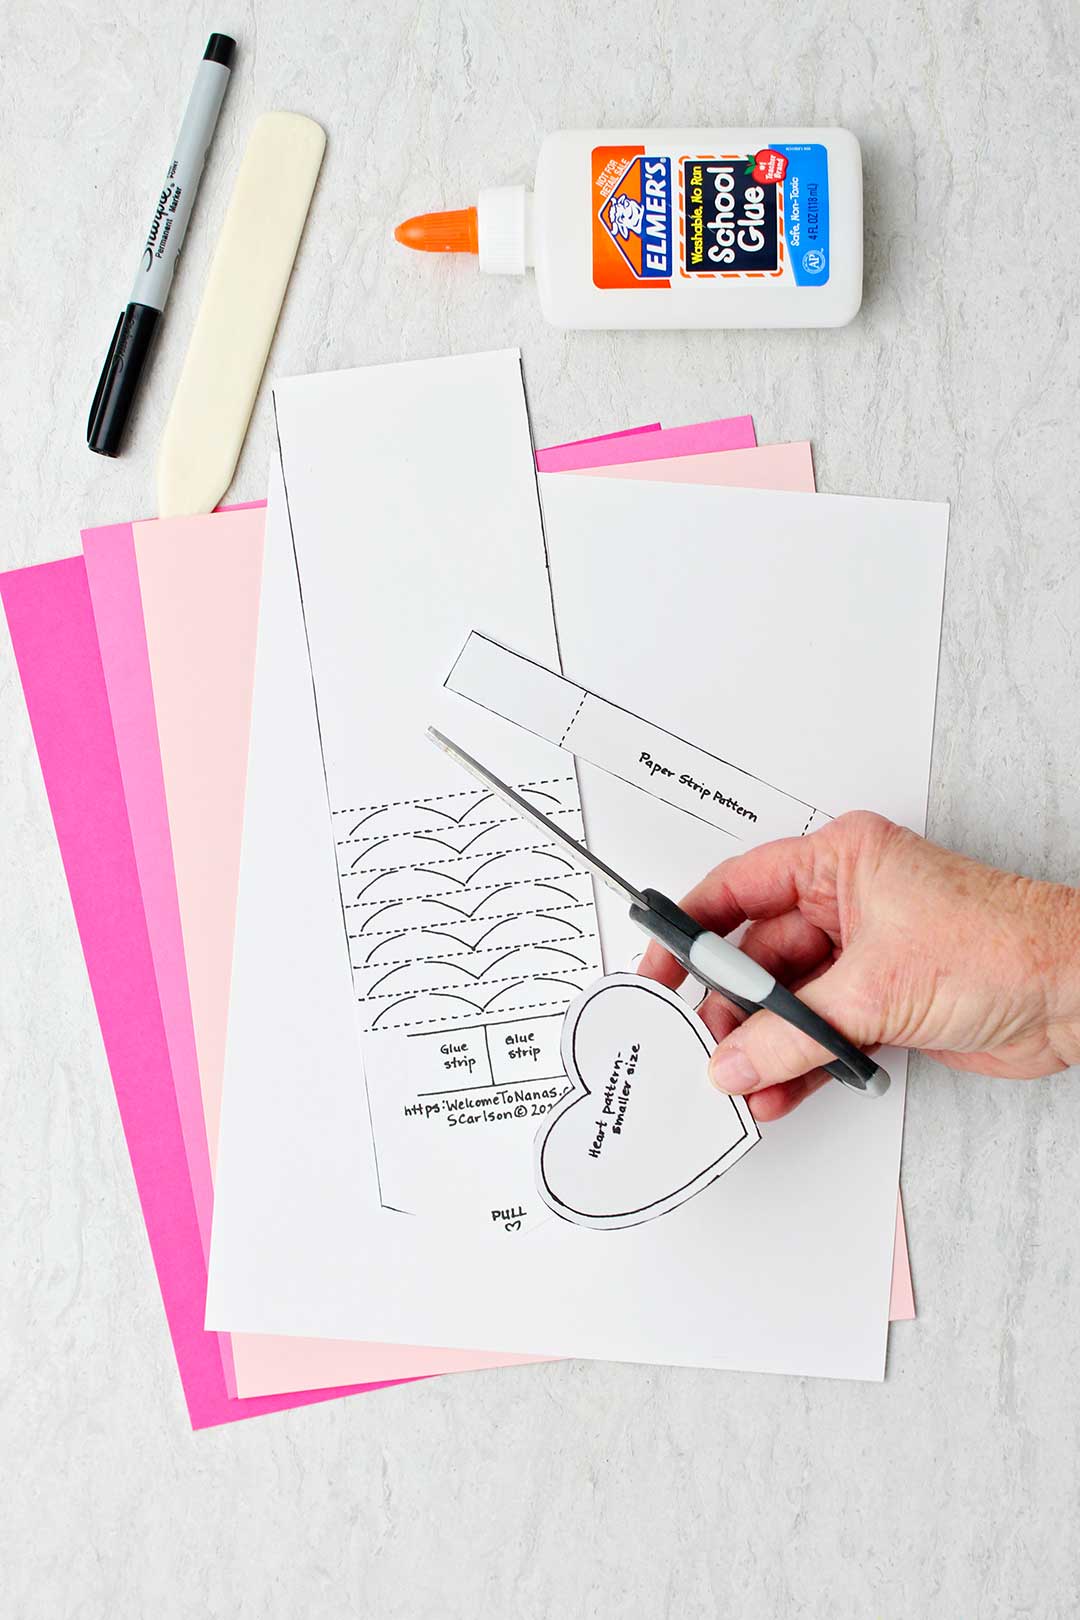
Get started on your Valentines Day card by copying the free printable pattern onto card stock. It needs to be a heavier paper than plain copy paper for the simple slide mechanism to lift the hearts. Without this there is no waterfall effect!
Print the first page of the free pattern on whatever color you want for the base of your card. Mine was copied on white card stock.
If you are making a card with one color of hearts, copy the second page of the pattern on the color of card stock paper you have chosen.
When making a card with multiple colors of hearts, don’t copy the second page of the pattern. Just cut out the heart pattern on the first page and use it as a pattern to draw around on the various colors of card stock you have chosen to use for your Heart Waterfall Card.
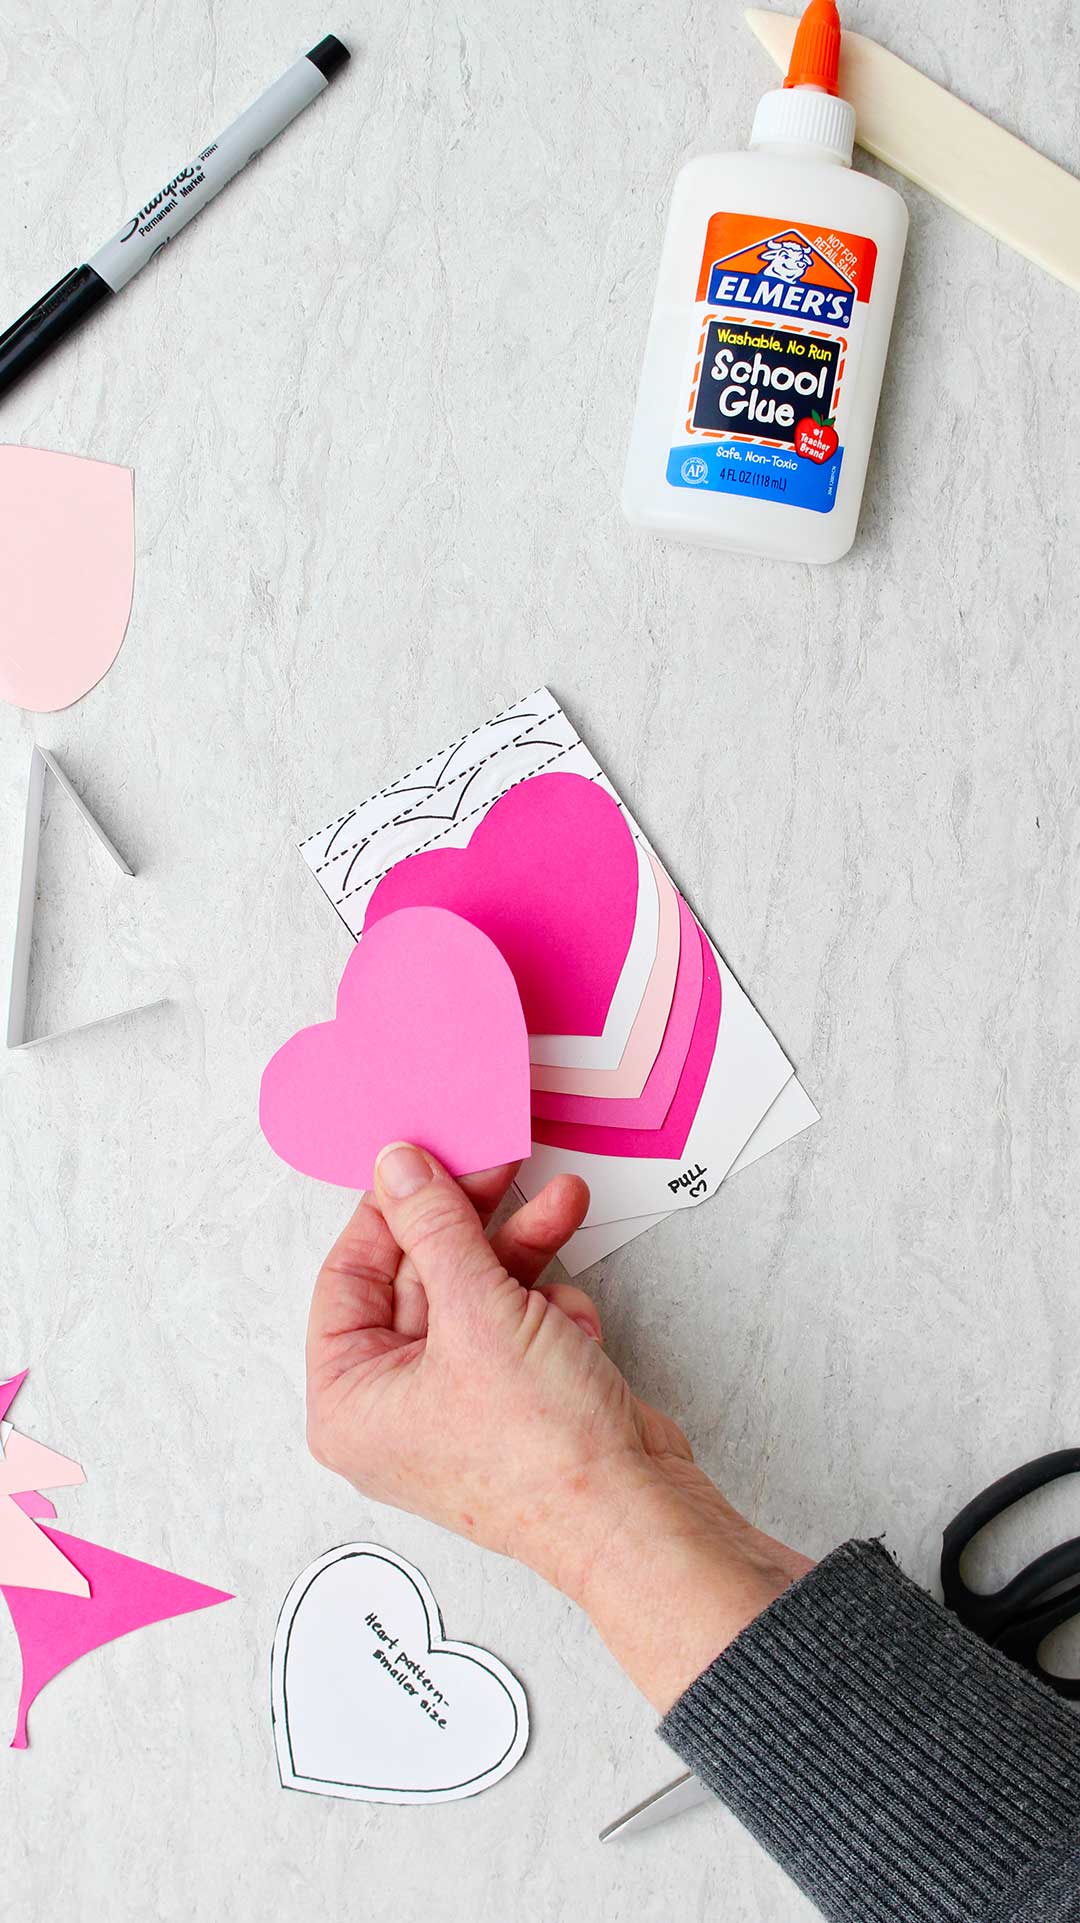
Just as a reminder, you need seven hearts to make this card.
Waterfall card instructions
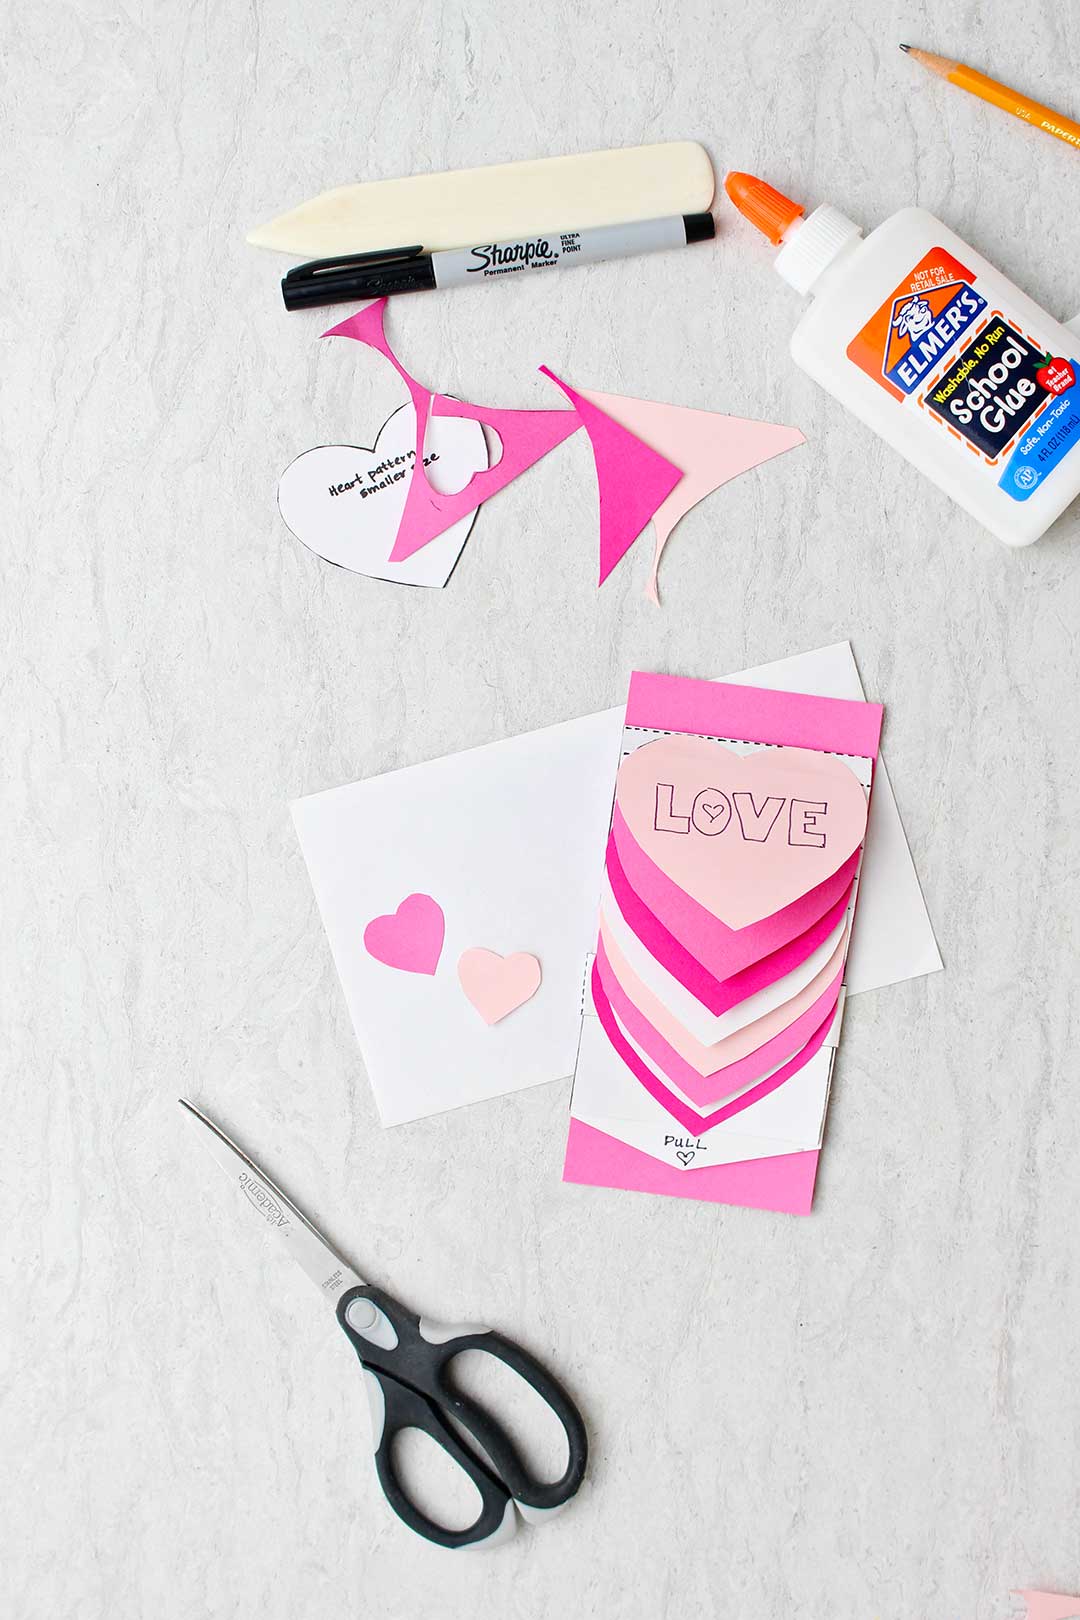
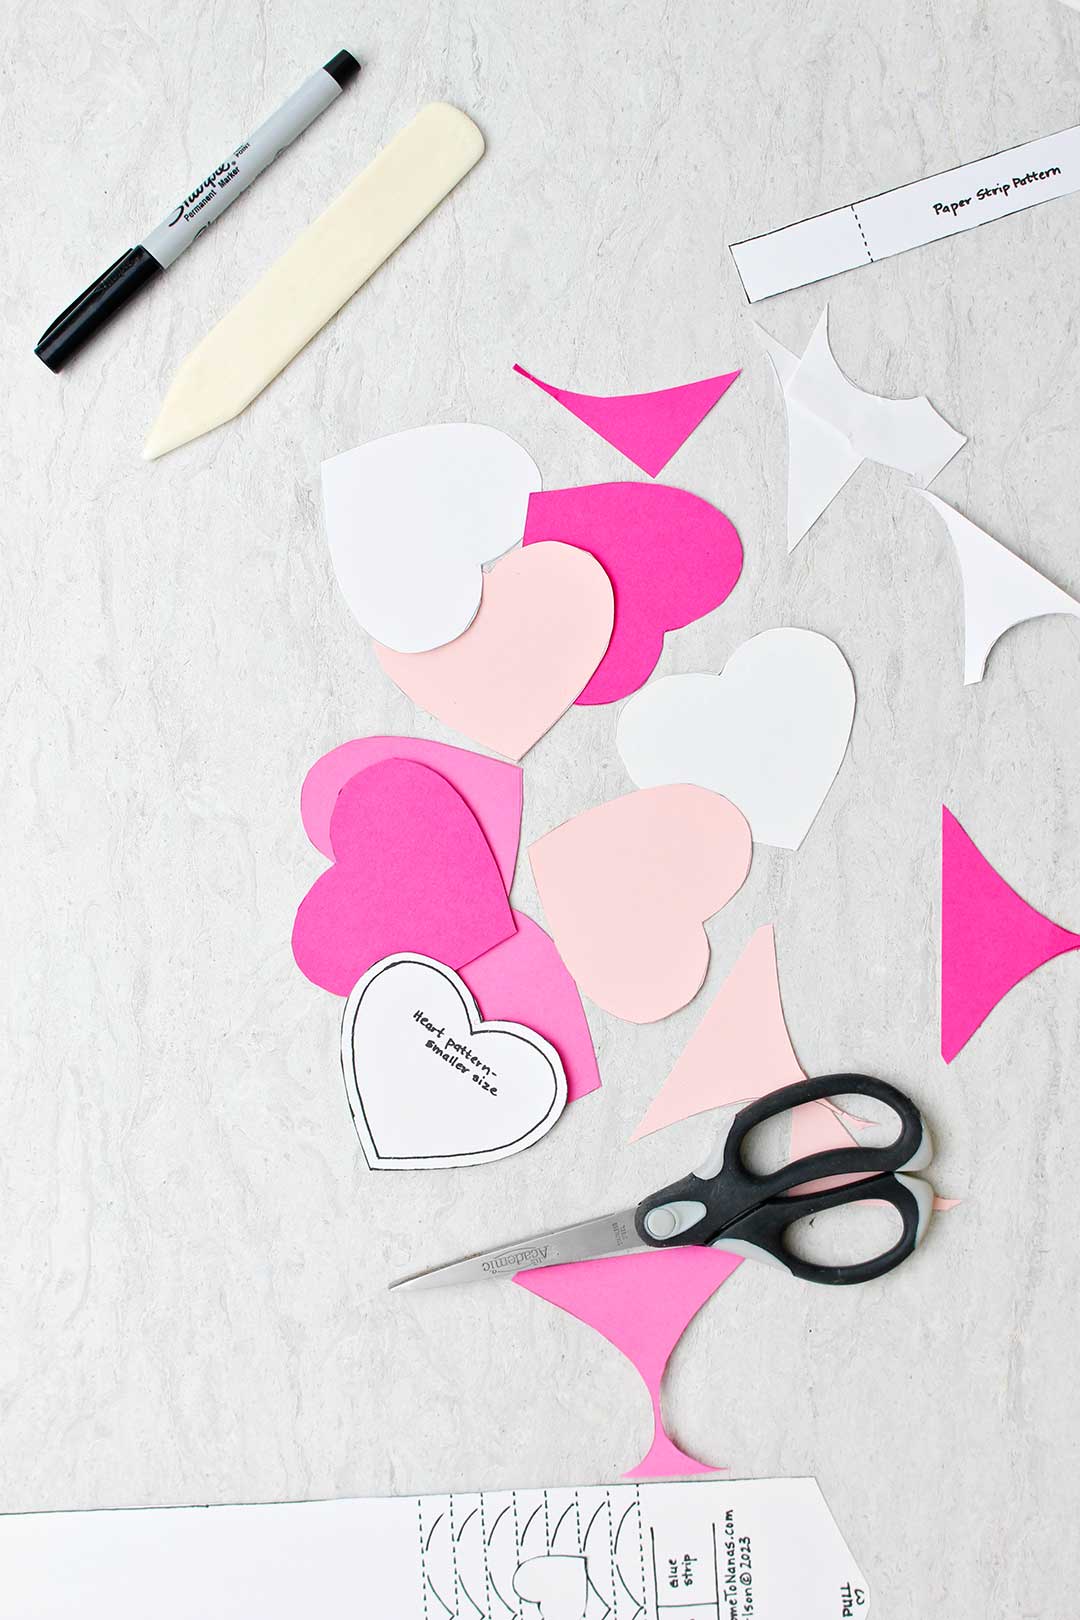
Cut out the pieces
Go ahead and cut out the seven hearts. Line them up in the order you like and set them aside.
Cut out the two rectangle card pattern pieces on the heavy black lines (don’t cut on the dotted fold lines).
This mechanism is so intriguing but must be done according to directions! Let’s do it!!
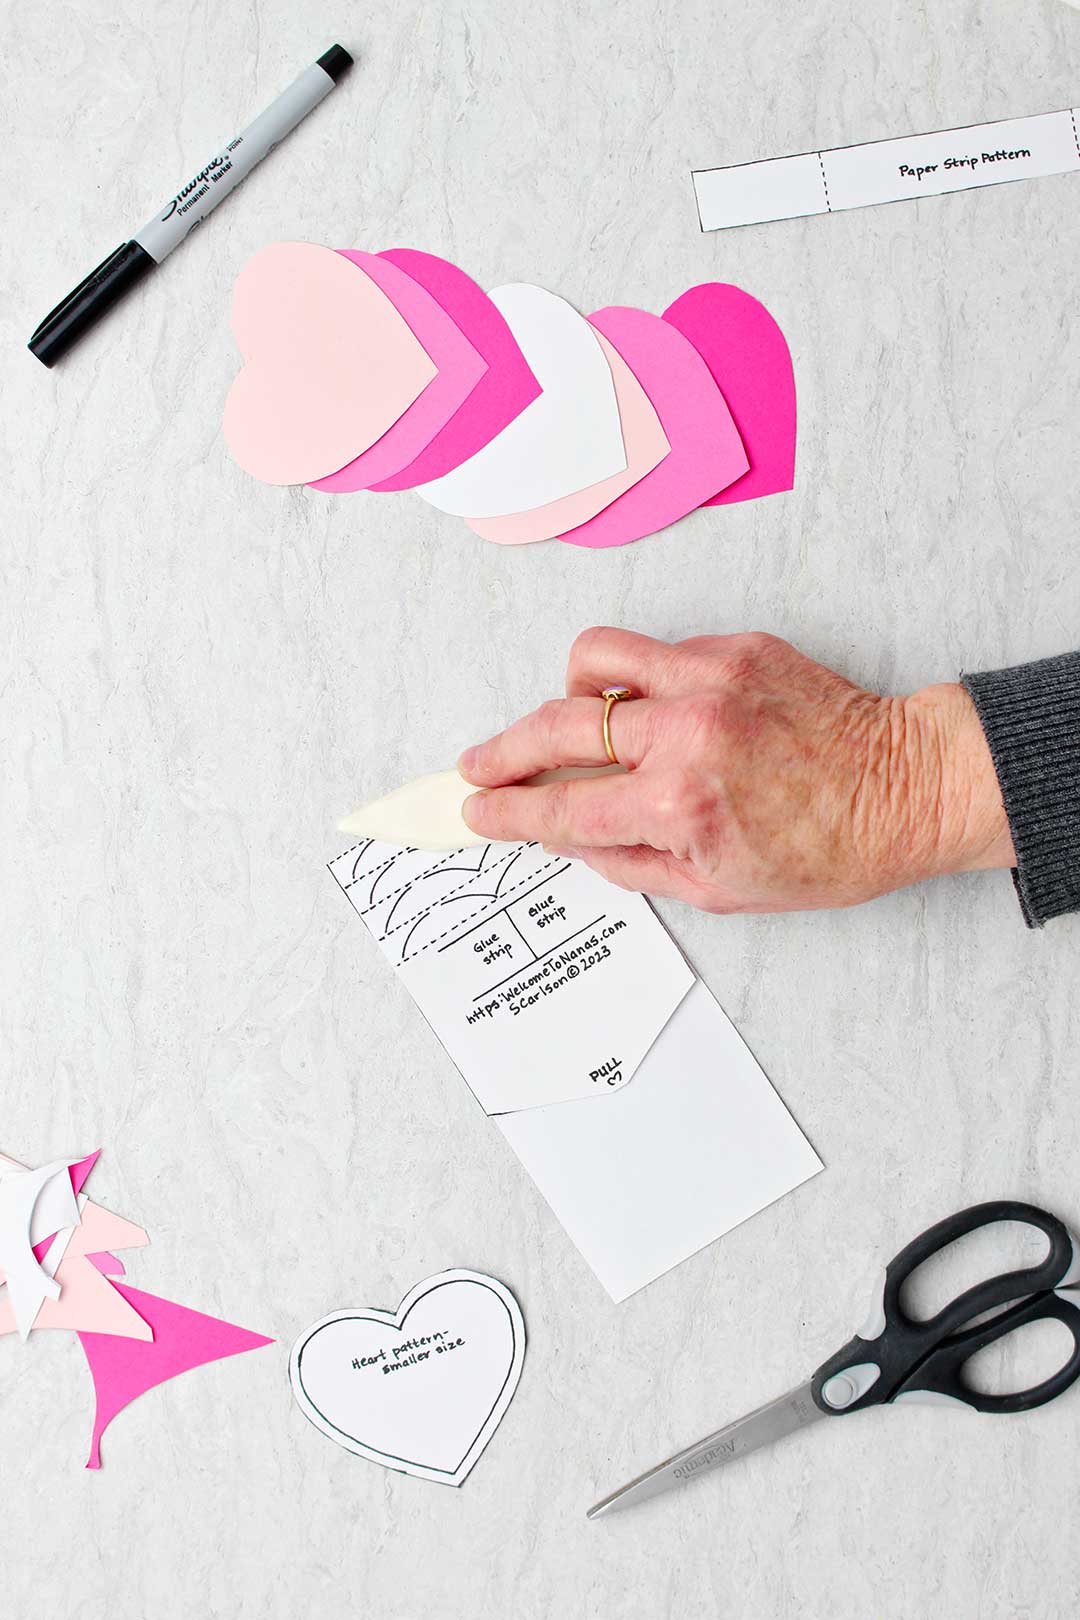
Make the folds
Take the larger rectangle piece and fold it back on each of the eight dotted lines. Crease it as closely on these lines as possible.
You don’t have to use the bone folder/scorer tool that I use in the video, but it is a handy tool to have when making creases in crafts. That is what is in my hand in the video in case you were wondering.
Fold the long strip on the two dotted lines and set it aside.
Glue on the hearts
Now let’s glue the hearts onto the large rectangle base piece.
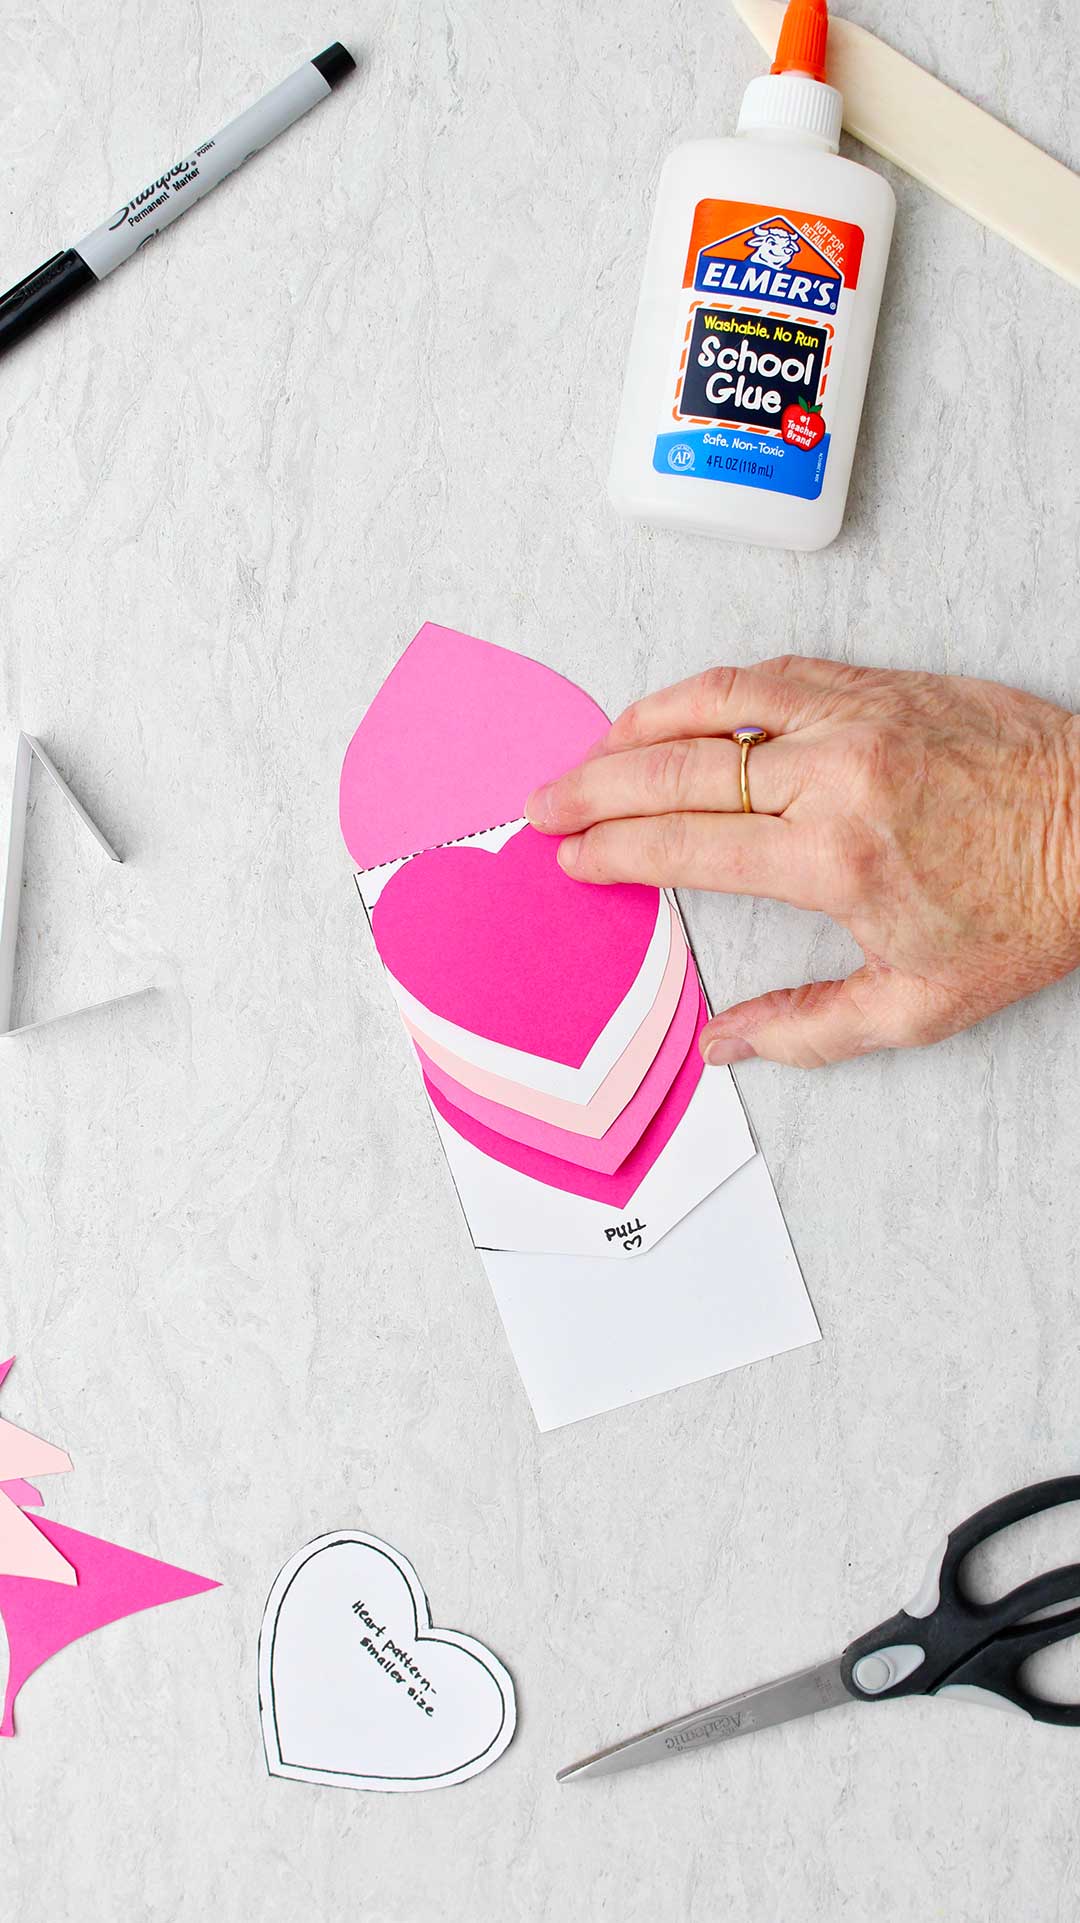
Place some glue on the base ONLY in the small arched areas between the dotted lines. I used school glue but you can also use a glue stick as long as the glue stays in the arched areas.
Start by gluing the bottom heart on first. Take that heart out of your lined up hearts and place it so the top arches of the heart fit in the first set of arches (closest to where it says “Glue strip”).
Continue gluing down the hearts in the order you chose in your lineup. Of course the order doesn’t matter if all the hearts are the same color!
Gently fold the base of the card back at each dotted line to make sure that each heart can flip up. If there is extra glue that has gotten on a heart it will stick down and not pop up. We don’t want that! We want a waterfall!!
The card will naturally bend back on the dotted line where the last heart was glued. Hold the card in your hand in this position.
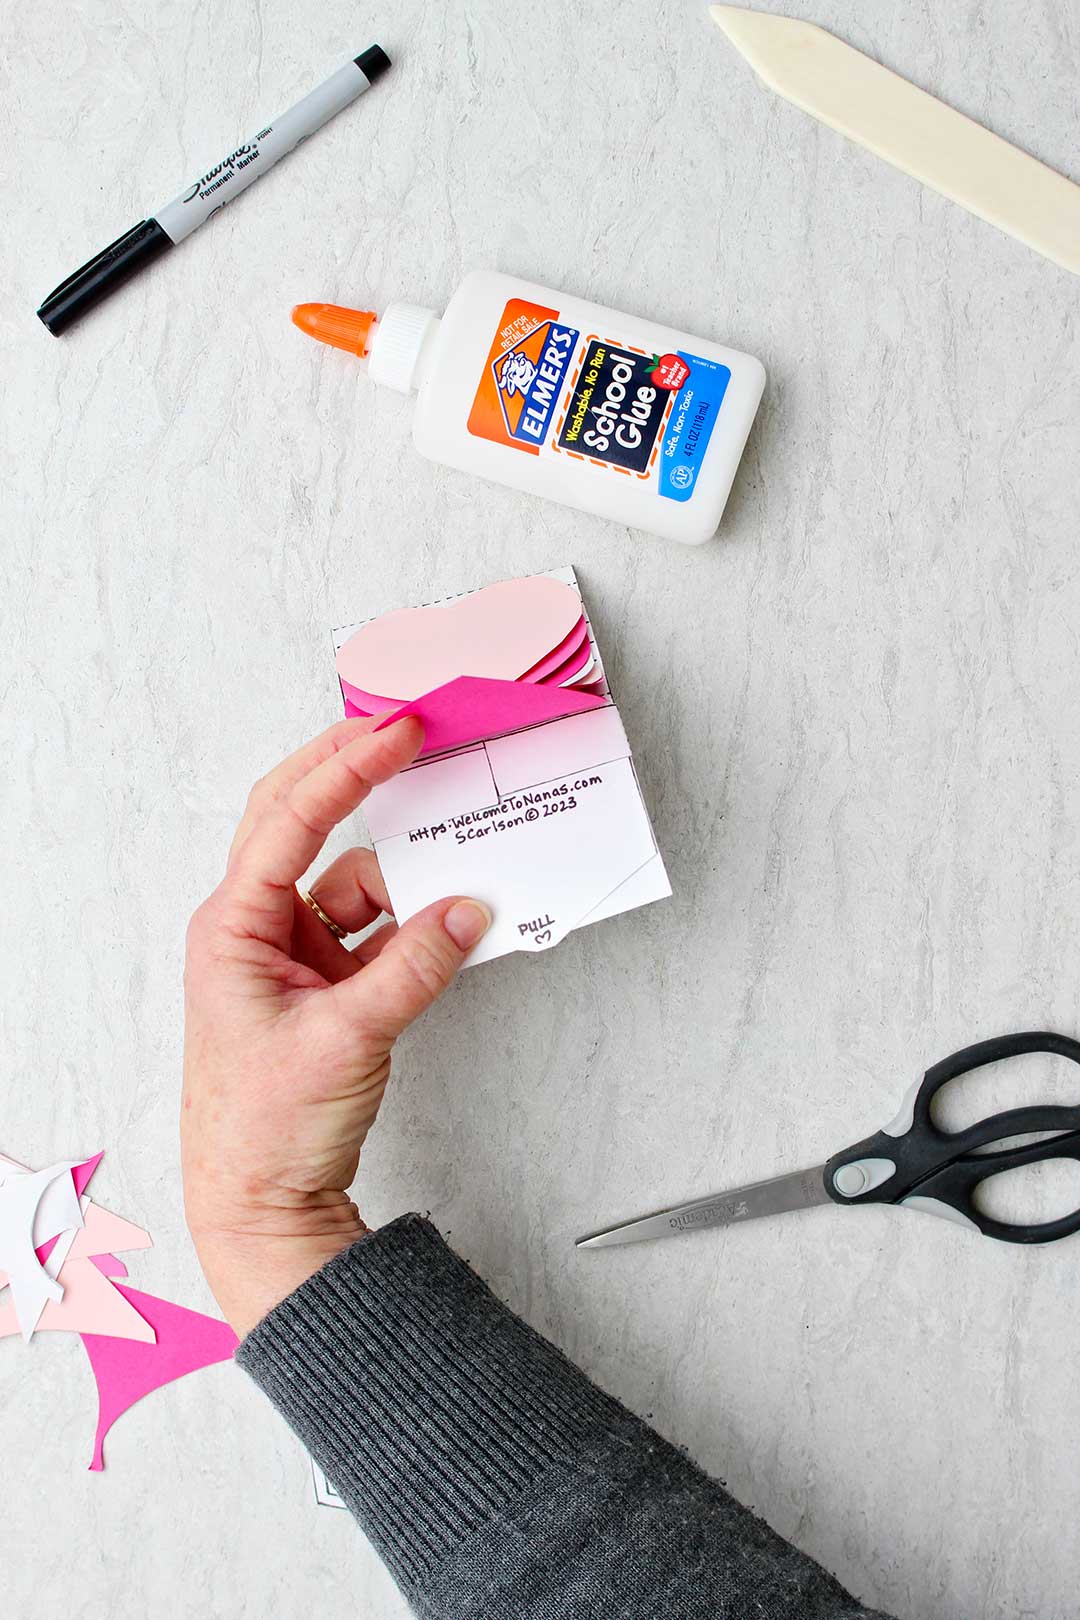
Add the paper strip
Take the long paper strip you set aside and wrap it around the card from the back. The strip shouldn’t be tight around the card but have just a bit of space so the back half of the card can slide easily. If it is too tight, adjust the folds in the long strip so the back piece of the card slides better.
Glue the two front tabs of the long piece UNDER the bottom heart.
Then glue the bottom heart down over the tabs.
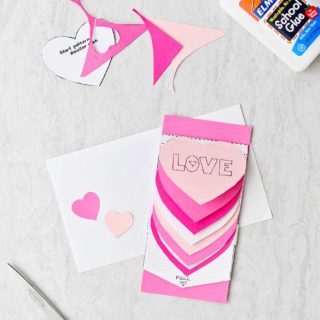
DIY Waterfall Card- it works!
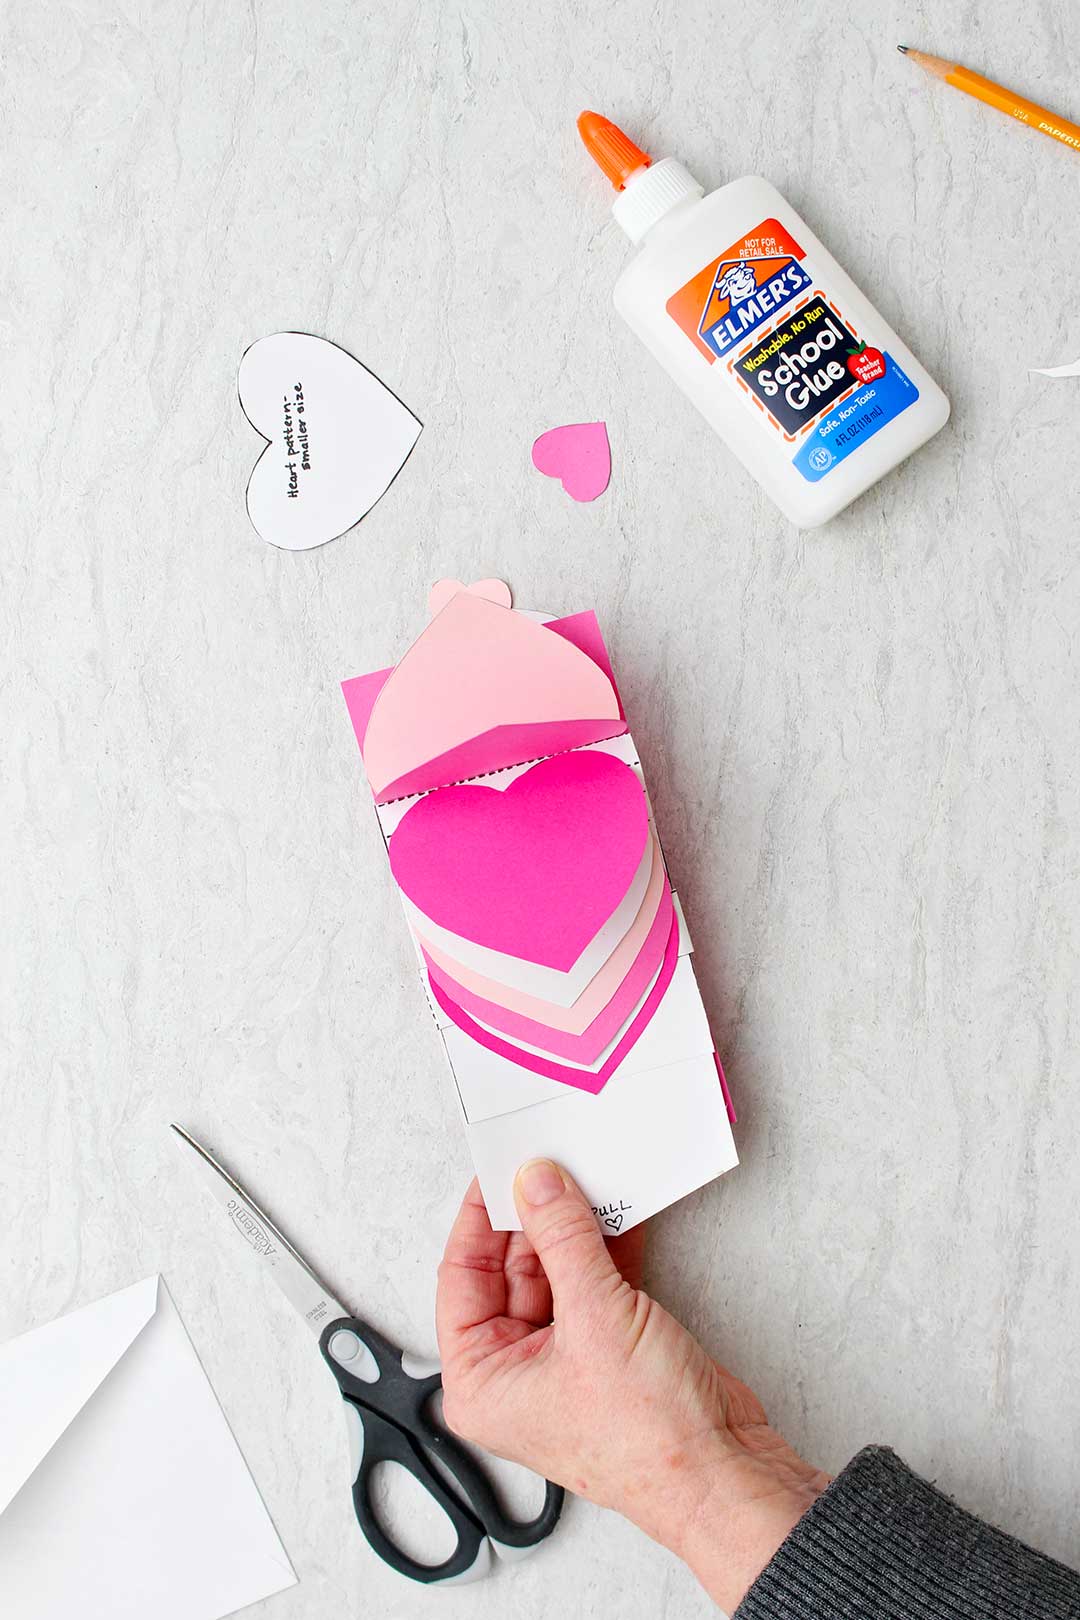
When dry, hold the card in one hand and gently try pulling the triangle of the bottom back part of the card with the other hand. You want the hearts to flip up one at a time in the waterfall effect.
If there is any resistance, try lifting and folding the hearts to get the mechanism to work better. It may take a couple tries and then it will slide back and forth easily.
You can leave your card like this or cut a piece of cardstock that is 3 ⅛ by 6 ½ inches in size and mount the heart waterfall on it as I did. Put glue ONLY on the paper strip that is on the back of the card and glue the waterfall onto the piece of paper.
Note: Do NOT glue the whole card down or the mechanism cannot slide.
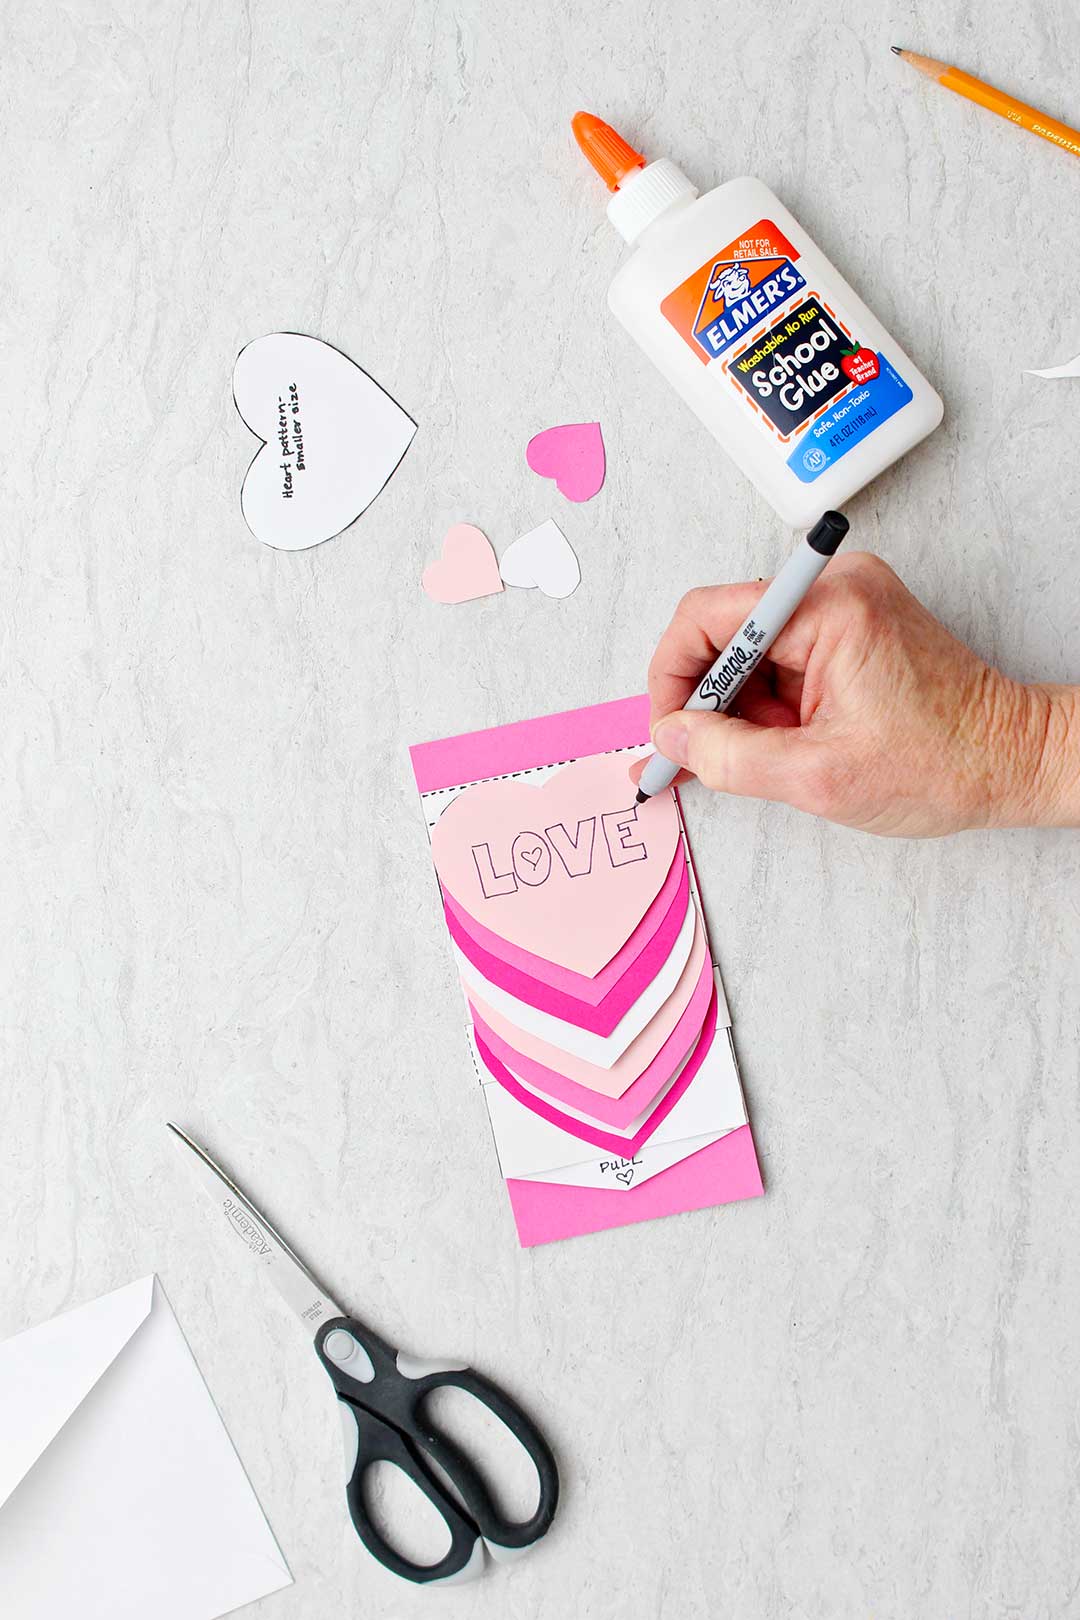
Decorate & add message to Heart Waterfall Card
Lastly, decorate your card and add a personalized message with markers.
The message will be read from the top heart down to the last heart. So you have seven hearts that you may write on and decorate. Have fun.
Think of a message that is perfect for the person that will receive the card. They are going to love it and feel so special. Plus they will want to know how you made the Heart Waterfall Card for Valentines Day.
Write "Pull" on that triangle shaped pointed end of the bottom back part of the card so the person who gets the card will know what to do! They are going to love this!
THIS IS SO COOL!
Sorry for the all caps- but this is a Nana’s favorite. There are so many ways to use this watercolor card effect.
If you want, you can enlarge this pattern or try making your own larger pattern for a larger card. It takes some thinking, but you can do it. I made this one at this size so the pattern would copy easily onto an 8.5 x 11-inch piece of cardstock paper.
You will be seeing variations of this design in the future, for sure!!
Prefer YouTube?
Here is the link to the video in YouTube. Watch it here and subscribe! Link to YouTube Heart Waterfall Card for Valentines Day.
More Valentines Day Ideas for you
Want more Valentines Day ideas? Here are a few more you may enjoy from around the site. Check them out!!
- 10 Valentines Day Craft and Activity Ideas
- Stamped Valentines Day Craft Bags
- DIY Stained Glass Valentines Day Card
Happy Valentine’s Day to you all!
Enjoy!
If you try this craft, let me know! Go ahead and leave a comment, rate it, and tag a photo with #WelcometoNanas wherever you post.
Come join the fun at https://welcometonanas.com
Heart Waterfall Card for Valentines Day
Equipment
- Scissors
- Bone folder/scorer tool (optional)
Items Required
- Copy (or copies) of Heart Waterfall Card Free Printable Pattern
- Cardstock paper- 8.5 x 11-inch size in colors of your choice (2-7 colors)
- Bone folder/scorer tool (optional)
- Glue
- Markers
Instructions
- Get started on your Valentines Day card by copying the free printable pattern onto card stock.Print the first page of the free printable pattern on whatever color you want for the base of your card. Mine was copied on white card stock.If you are making a card with one color of hearts, copy the second page of the pattern on the color of card stock paper you have chosen.When making a card with multiple colors of hearts, don’t copy the second page of the pattern. Just cut out the heart pattern on the first page and use it as a pattern to draw around on the various colors of card stock you have chosen to use for your Heart Waterfall Card.
- Go ahead and cut out the seven hearts. Line them up in the order you like and set them aside.Cut out the two rectangle card pieces on the heavy black lines (don’t cut on the dotted fold lines).
- Take the larger rectangle piece and fold it back on each of the eight dotted lines. Crease it as closely on these lines as possible.
- Place some glue on the base ONLY in the small arched areas between the dotted lines. I used school glue but you can also use a glue stick as long as the glue stays in the arched areas. Start by gluing the bottom heart on first. Take that heart out of your lined up hearts and place it so the top arches of the heart fit in the first set of arches (closest to where it says “Glue strip”). Continue gluing down the hearts in the order you chose in your lineup. Of course the order doesn’t matter if all the hearts are the same color!Gently fold the base of the card back at each dotted line to make sure that each heart can flip up. If there is extra glue that has gotten on a heart it will stick down and not pop up. We don’t want that! We want a waterfall!!
- The card will naturally bend back on the dotted line where the last heart was glued. Hold the card in your hand in this position.Take the long paper strip you set aside and wrap it around the card from the back. The strip shouldn’t be tight around the card but have just a bit of space so the back half of the card can slide easily. If it is too tight, adjust the folds in the long strip so the back piece of the card slides better.Glue the two front tabs of the long piece UNDER the bottom heart.Then glue the bottom heart down over the tabs.Add the paper strip
- You can leave your card like this or cut a piece of cardstock that is 3 ⅛ by 6 ½ inches in size and mount the heart waterfall on it as I did. Put glue ONLY on the paper strip that is on the back of the card and glue the waterfall onto the piece of paper.
- Lastly, decorate your card and add a personalized message with markers.
Video
Supply List for Heart Waterfall Card
- Copy (or copies) of Heart Waterfall Card Free Printable Pattern
- Cardstock paper- 8.5 x 11-inch size in colors of your choice (2-7 colors)
- Bone folder/scorer tool (optional)
- Scissors
- Glue
- Markers


Leave a Reply