Make your own DIY Snow Globe with my easy to follow craft for kids! I put my decades of crafting experience to work to make this step by step tutorial that takes all the mystery out of making a homemade snow globe with beautiful, slowly floating snow.
Jump to:
Cute DIY Snow Globe Ahead!
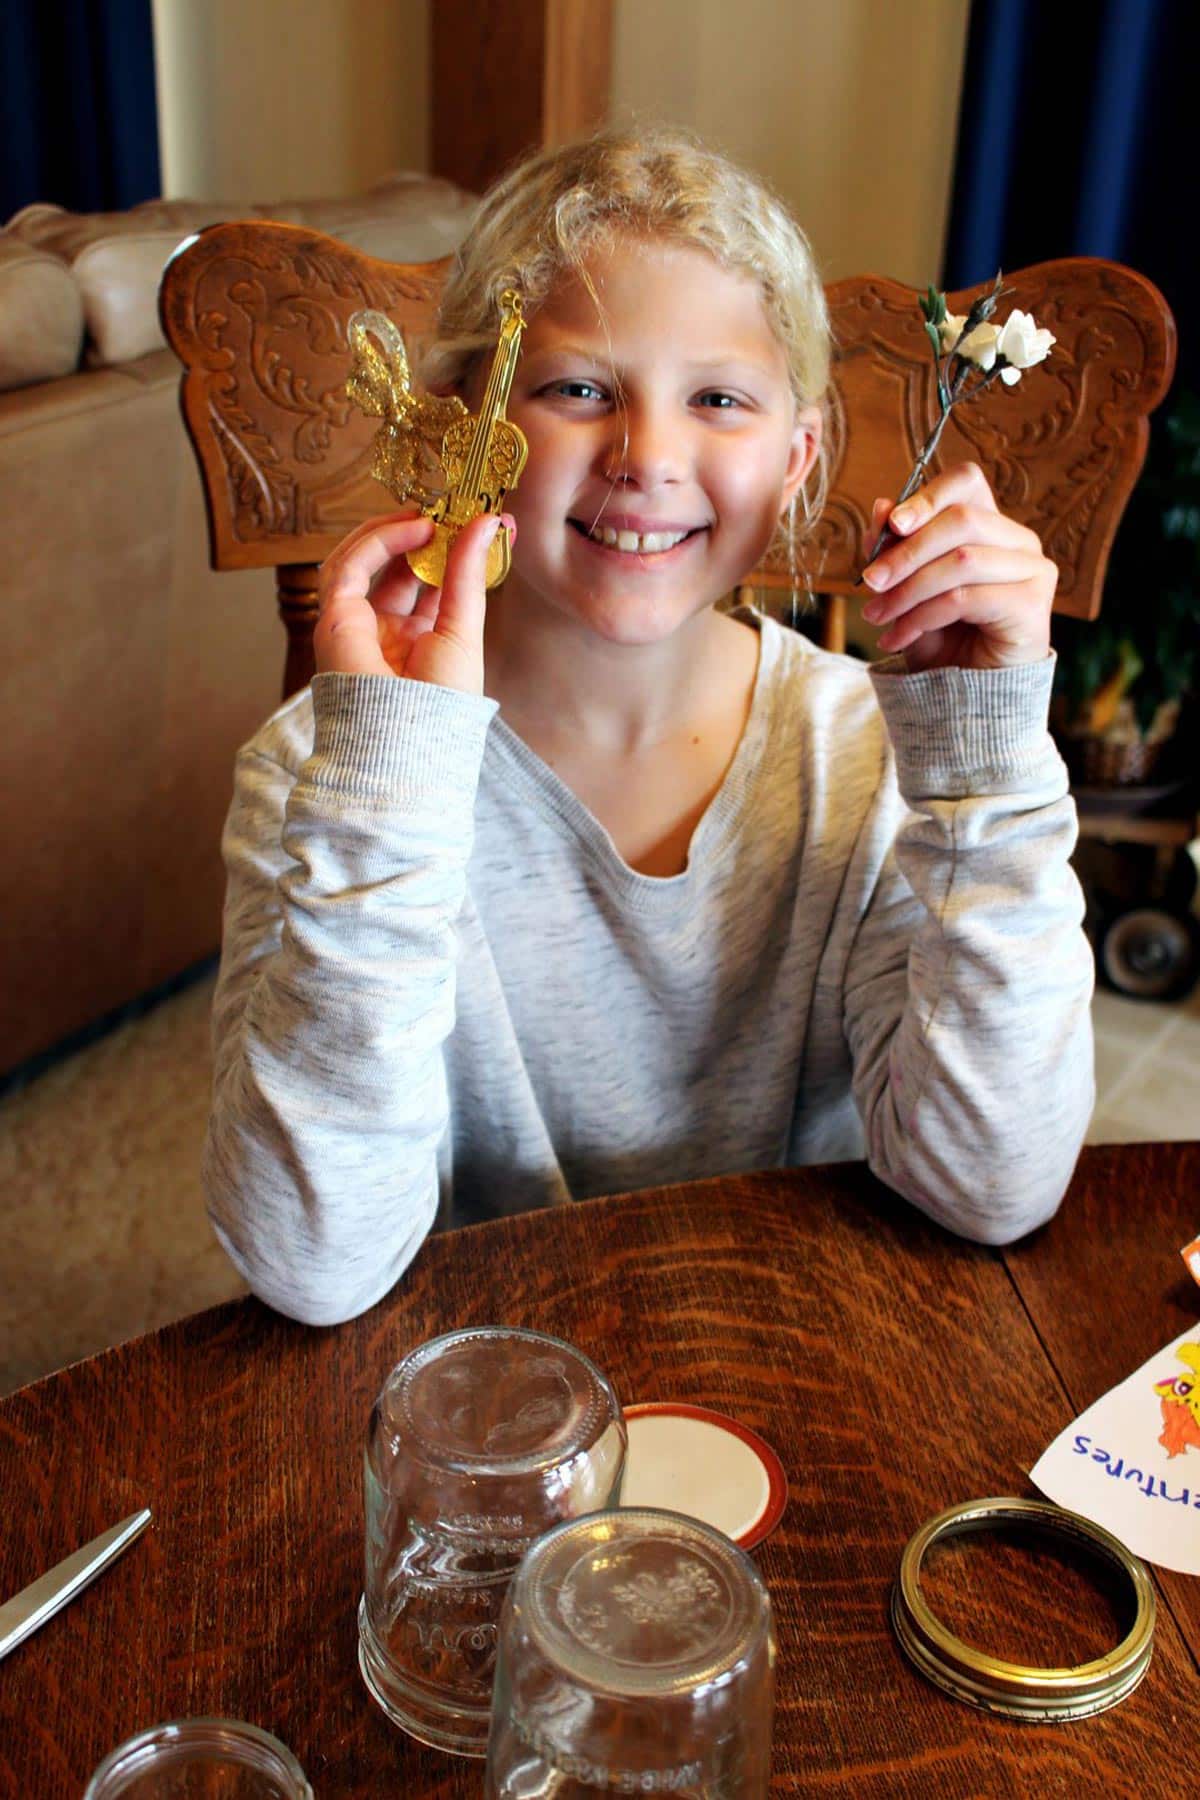
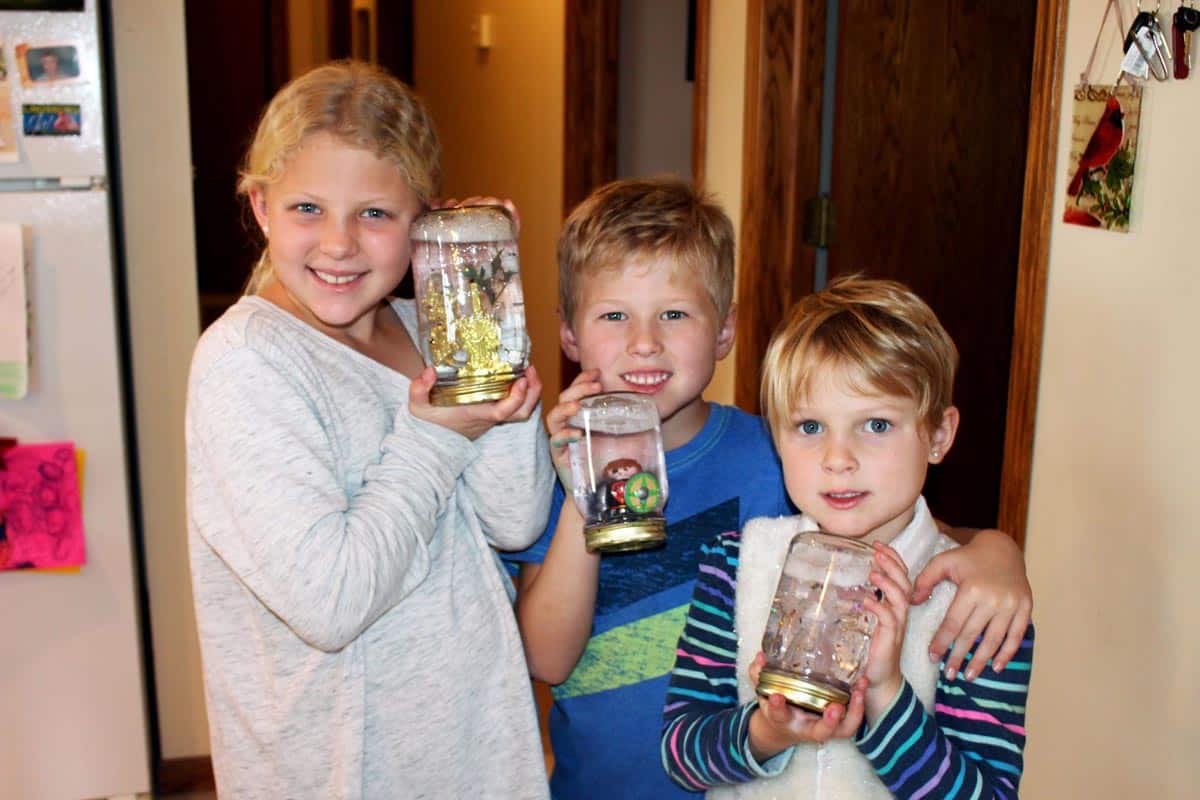
My grandkids followed the simple directions and were amazed at how easy it was to make a unique snow globe all by themselves. We had all of the materials on hand already, and I think you might as well. Wouldn’t this be a great themed party craft?
DIY Snow Globe Supplies
- Glass jar- Collect a variety of sizes of jars from recycling. Clear glass works best.
- Small items that fit upright in the jar- Christmas ornament or small figurine.
- Glitter- Use a color(s) of Glitter that fits with your figurine.
- Distilled water- Distilled Water is without minerals and such that create "floaties".
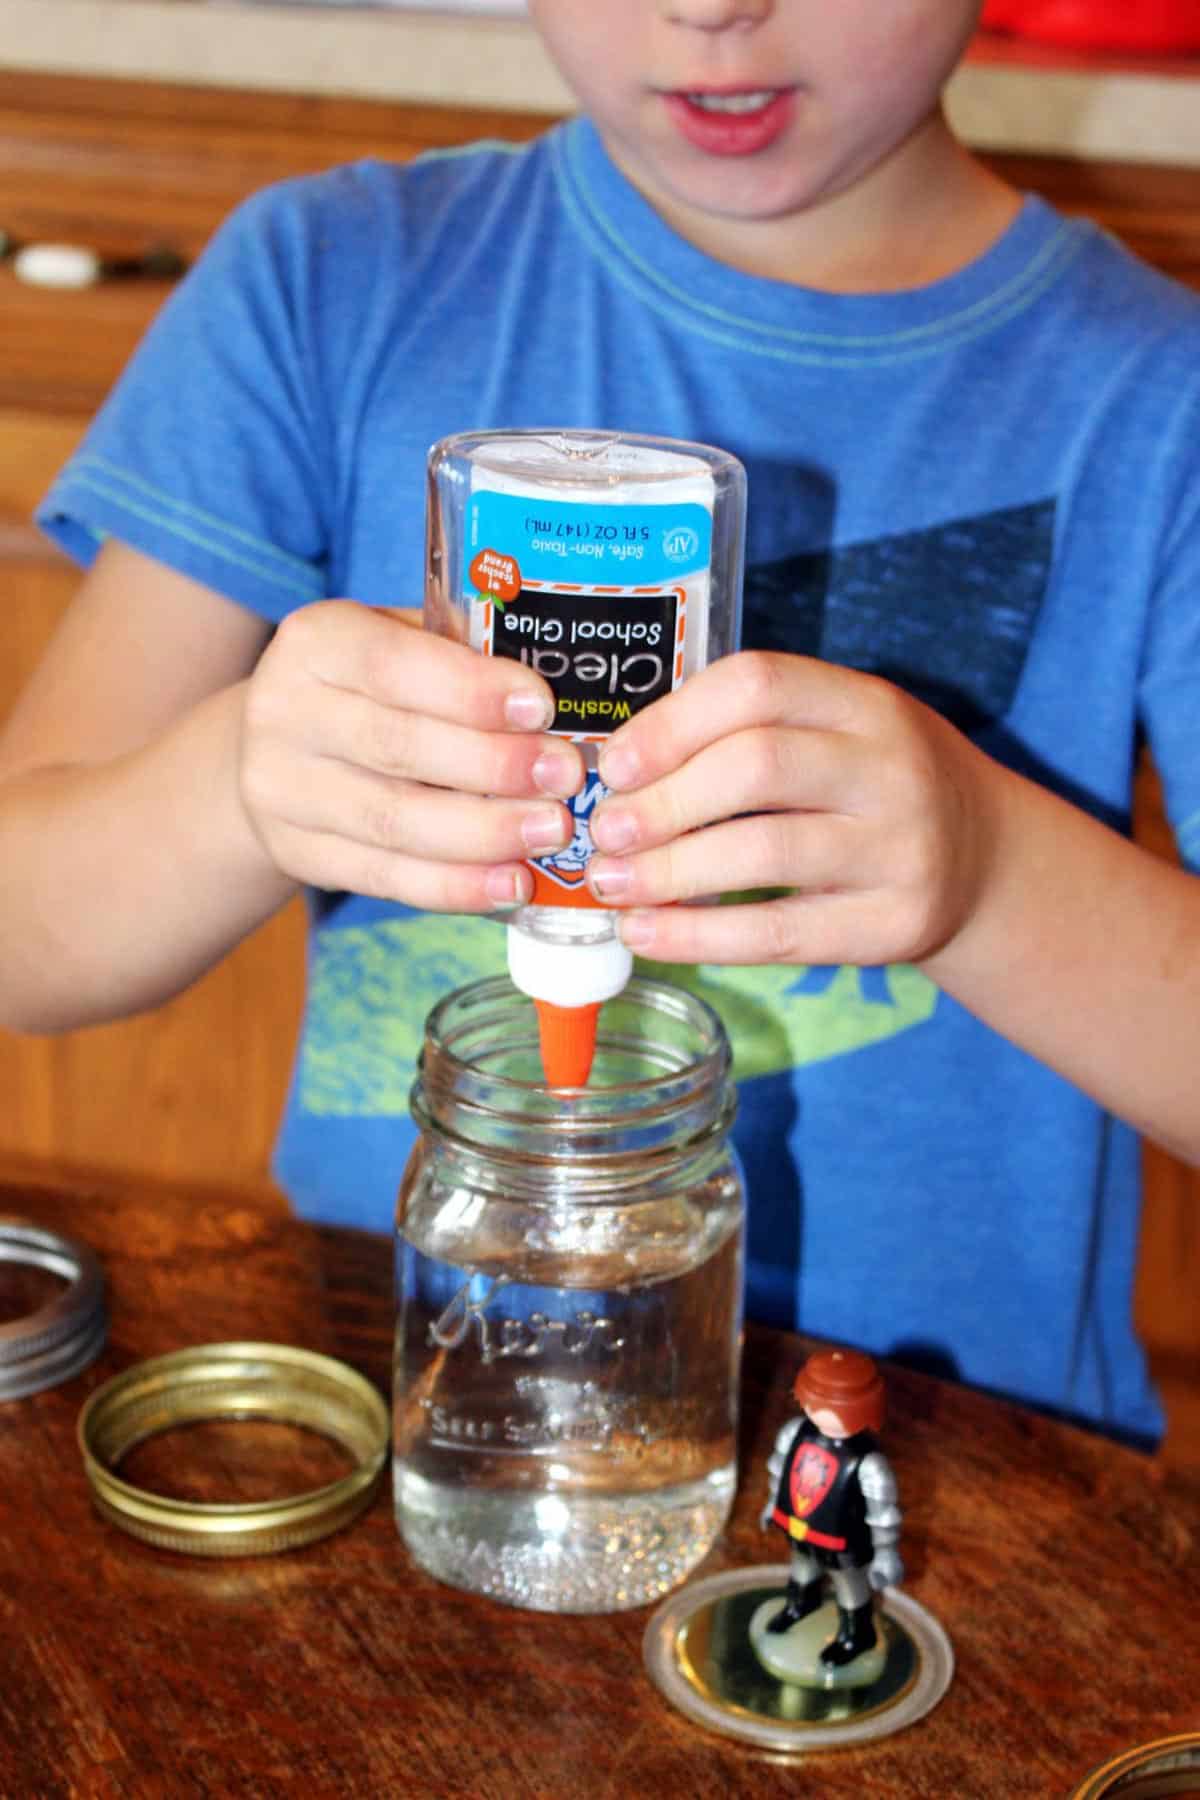
- Clear glue- A clear glue like Elmer's Glue, Clear is used to thicken the water.
- Hot glue gun- This is for gluing your figures into place. A Hot glue gun glue does not dissolve in water!
How to Make Your Own Snow Globe
1. Choose Your Snow Globe Focal Point and Jar
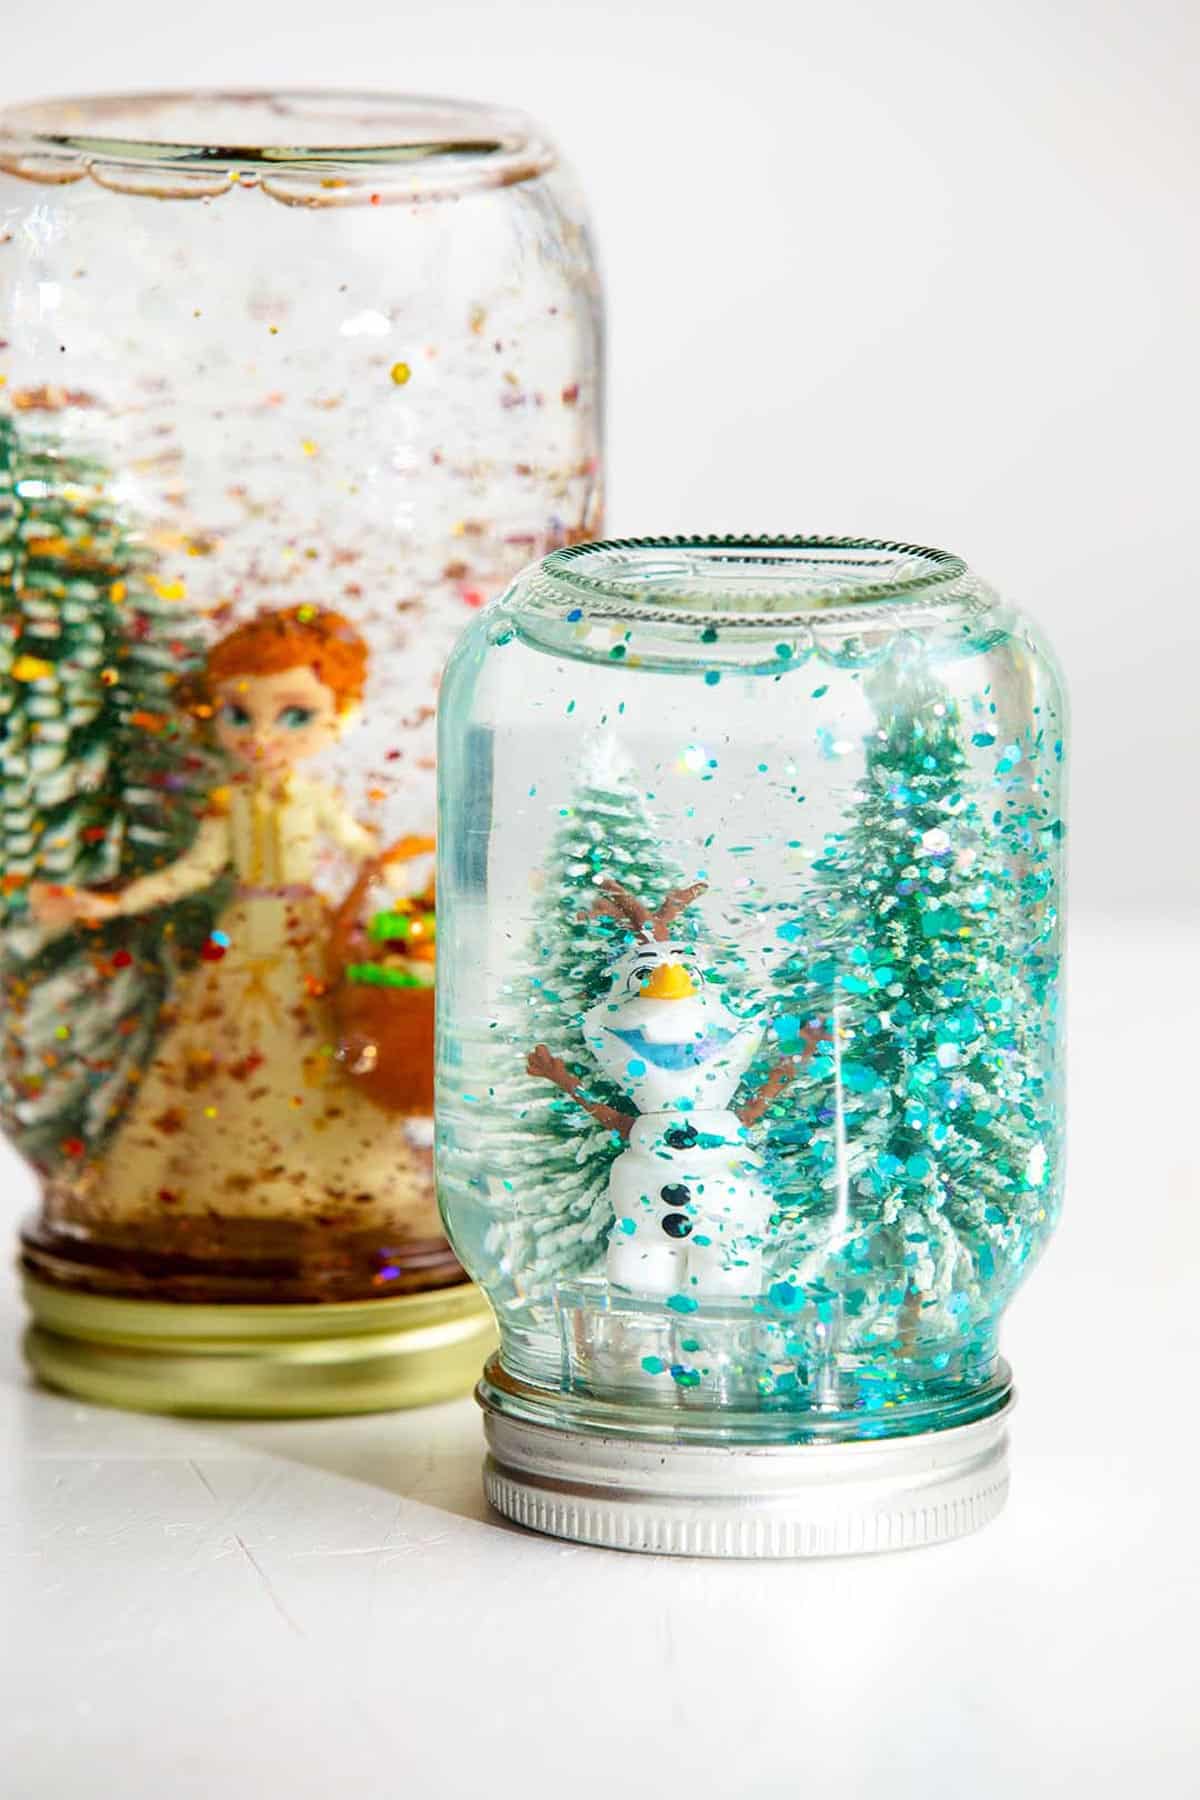
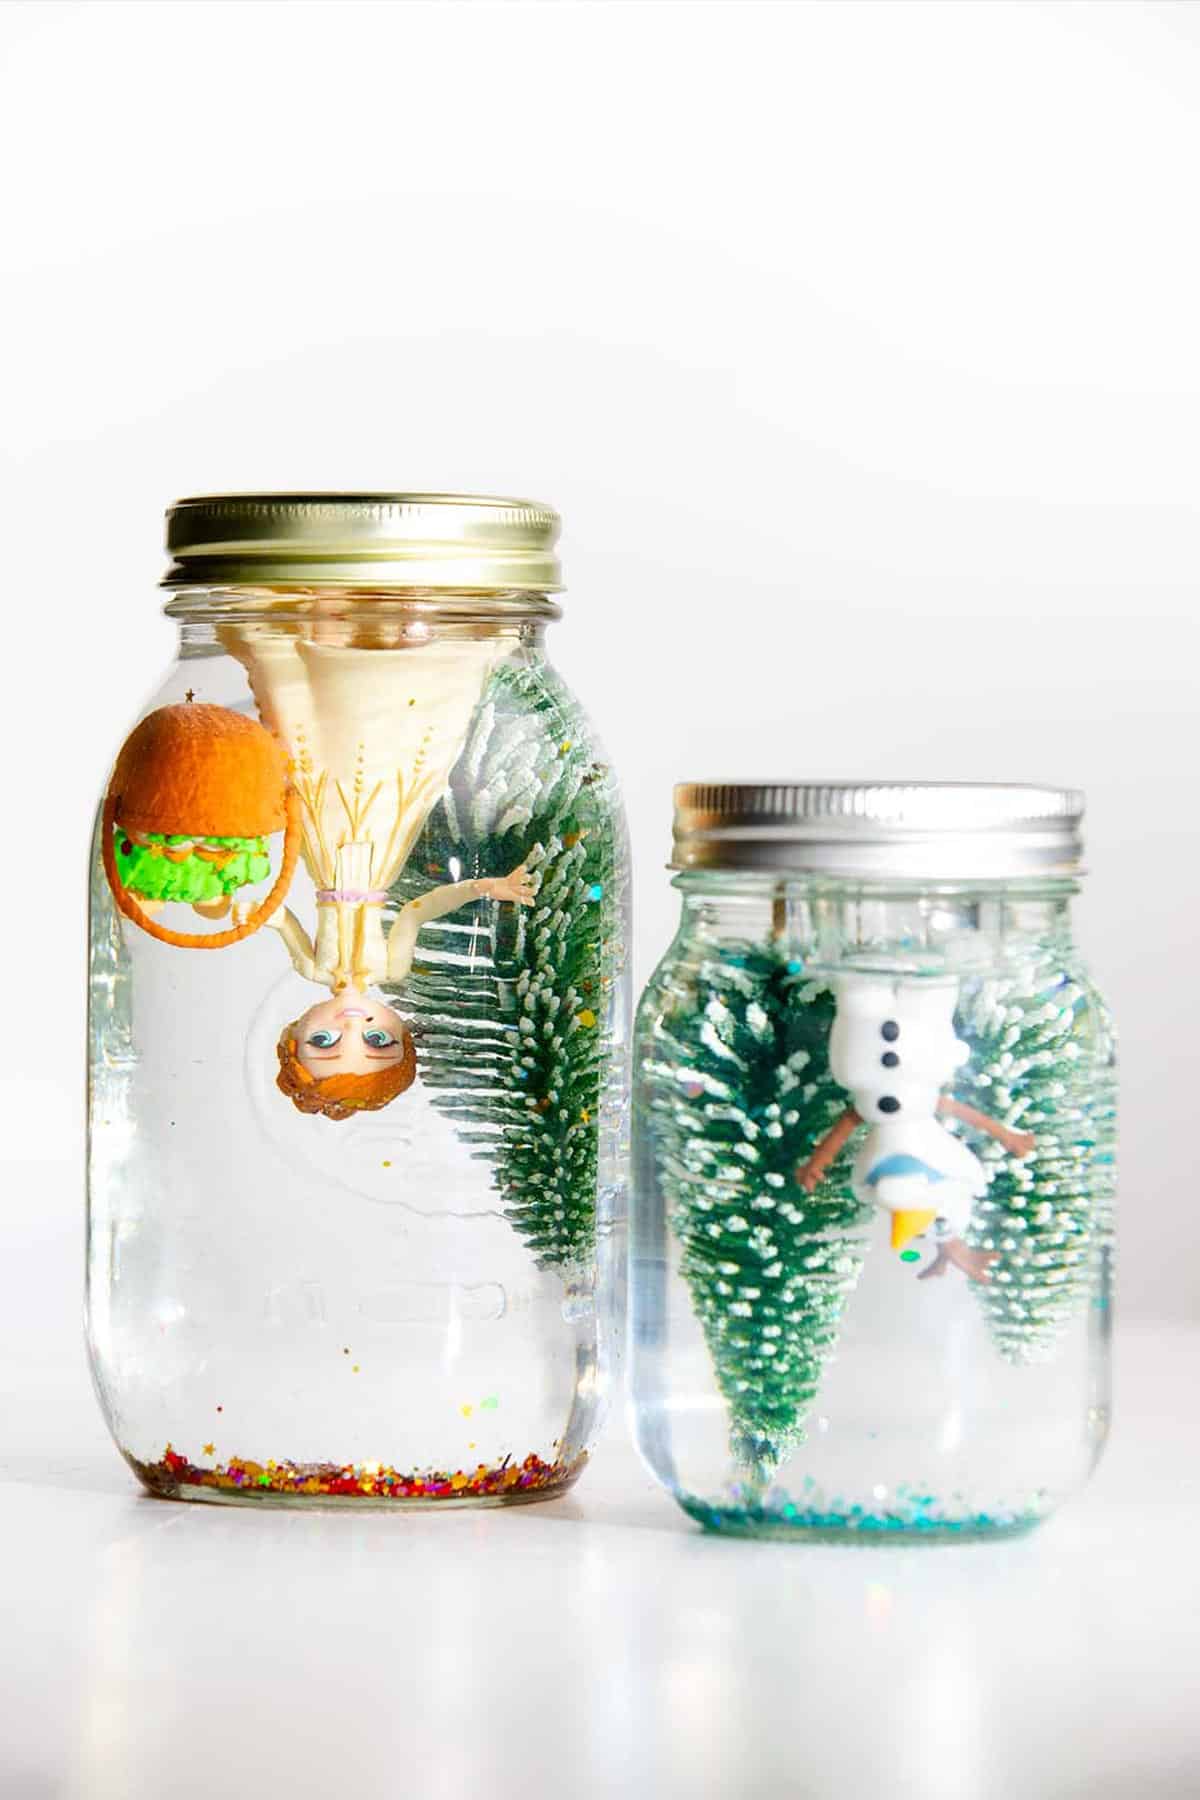
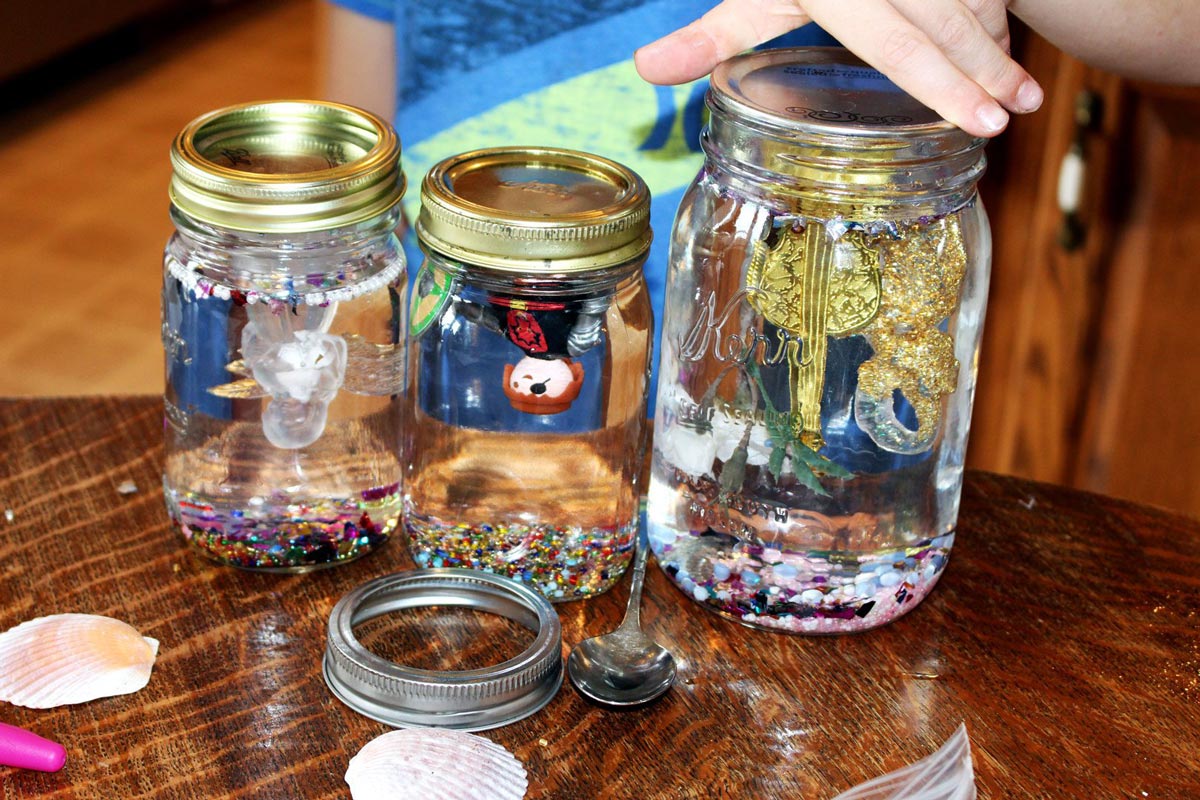
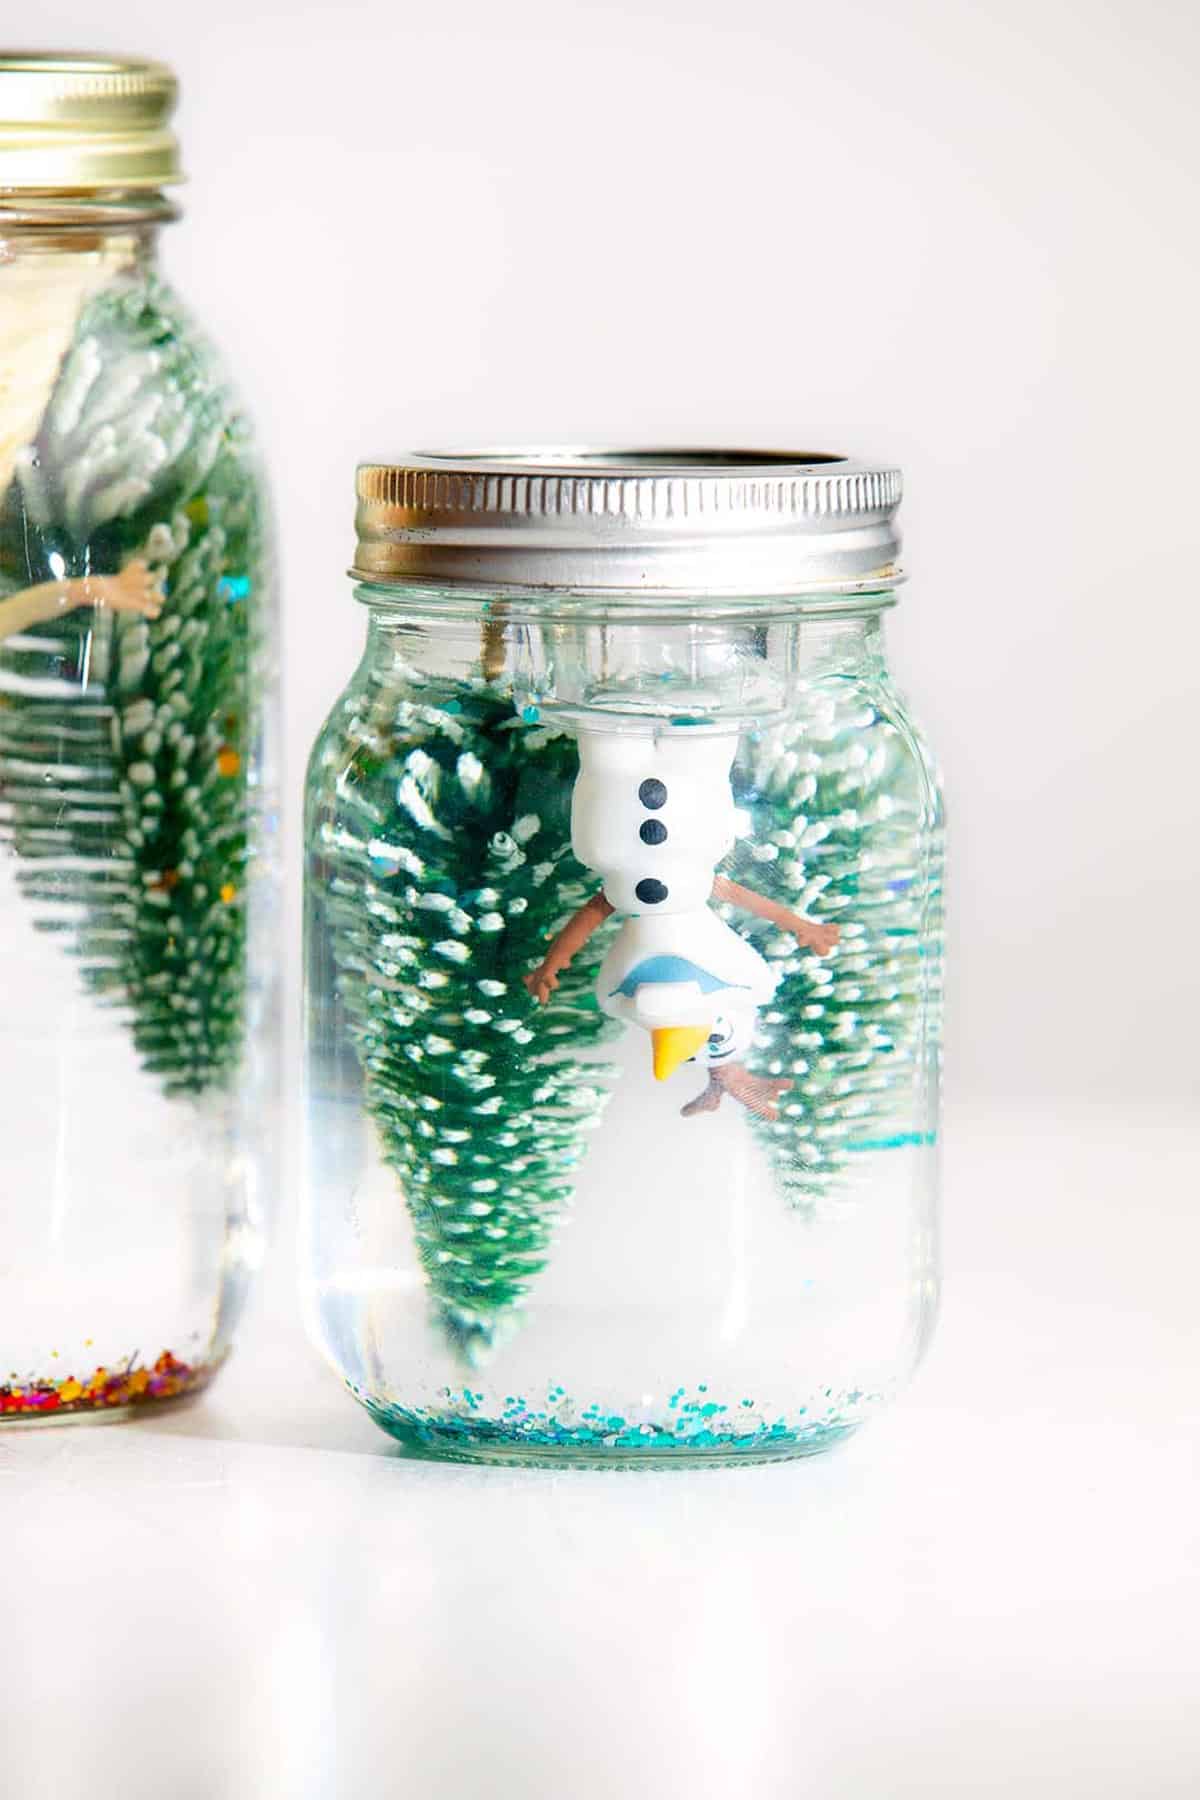
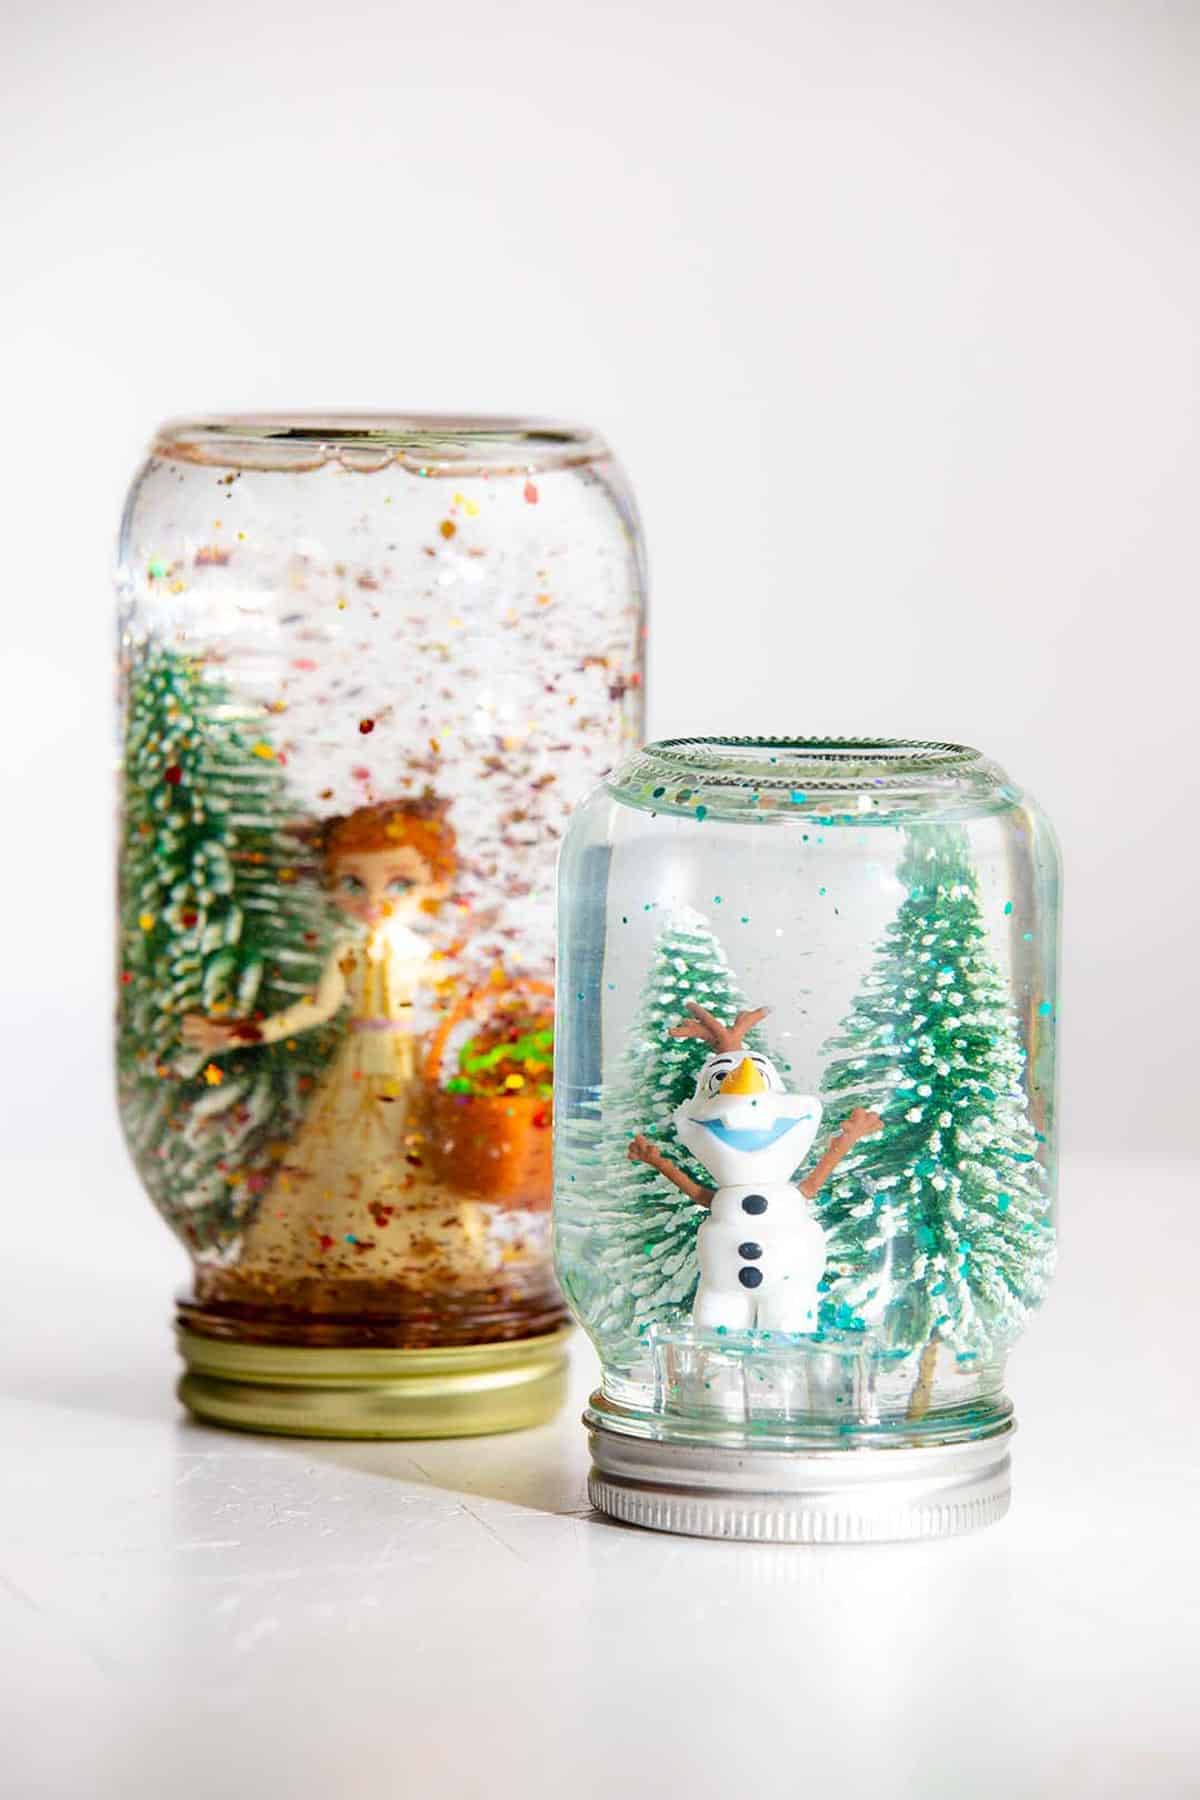
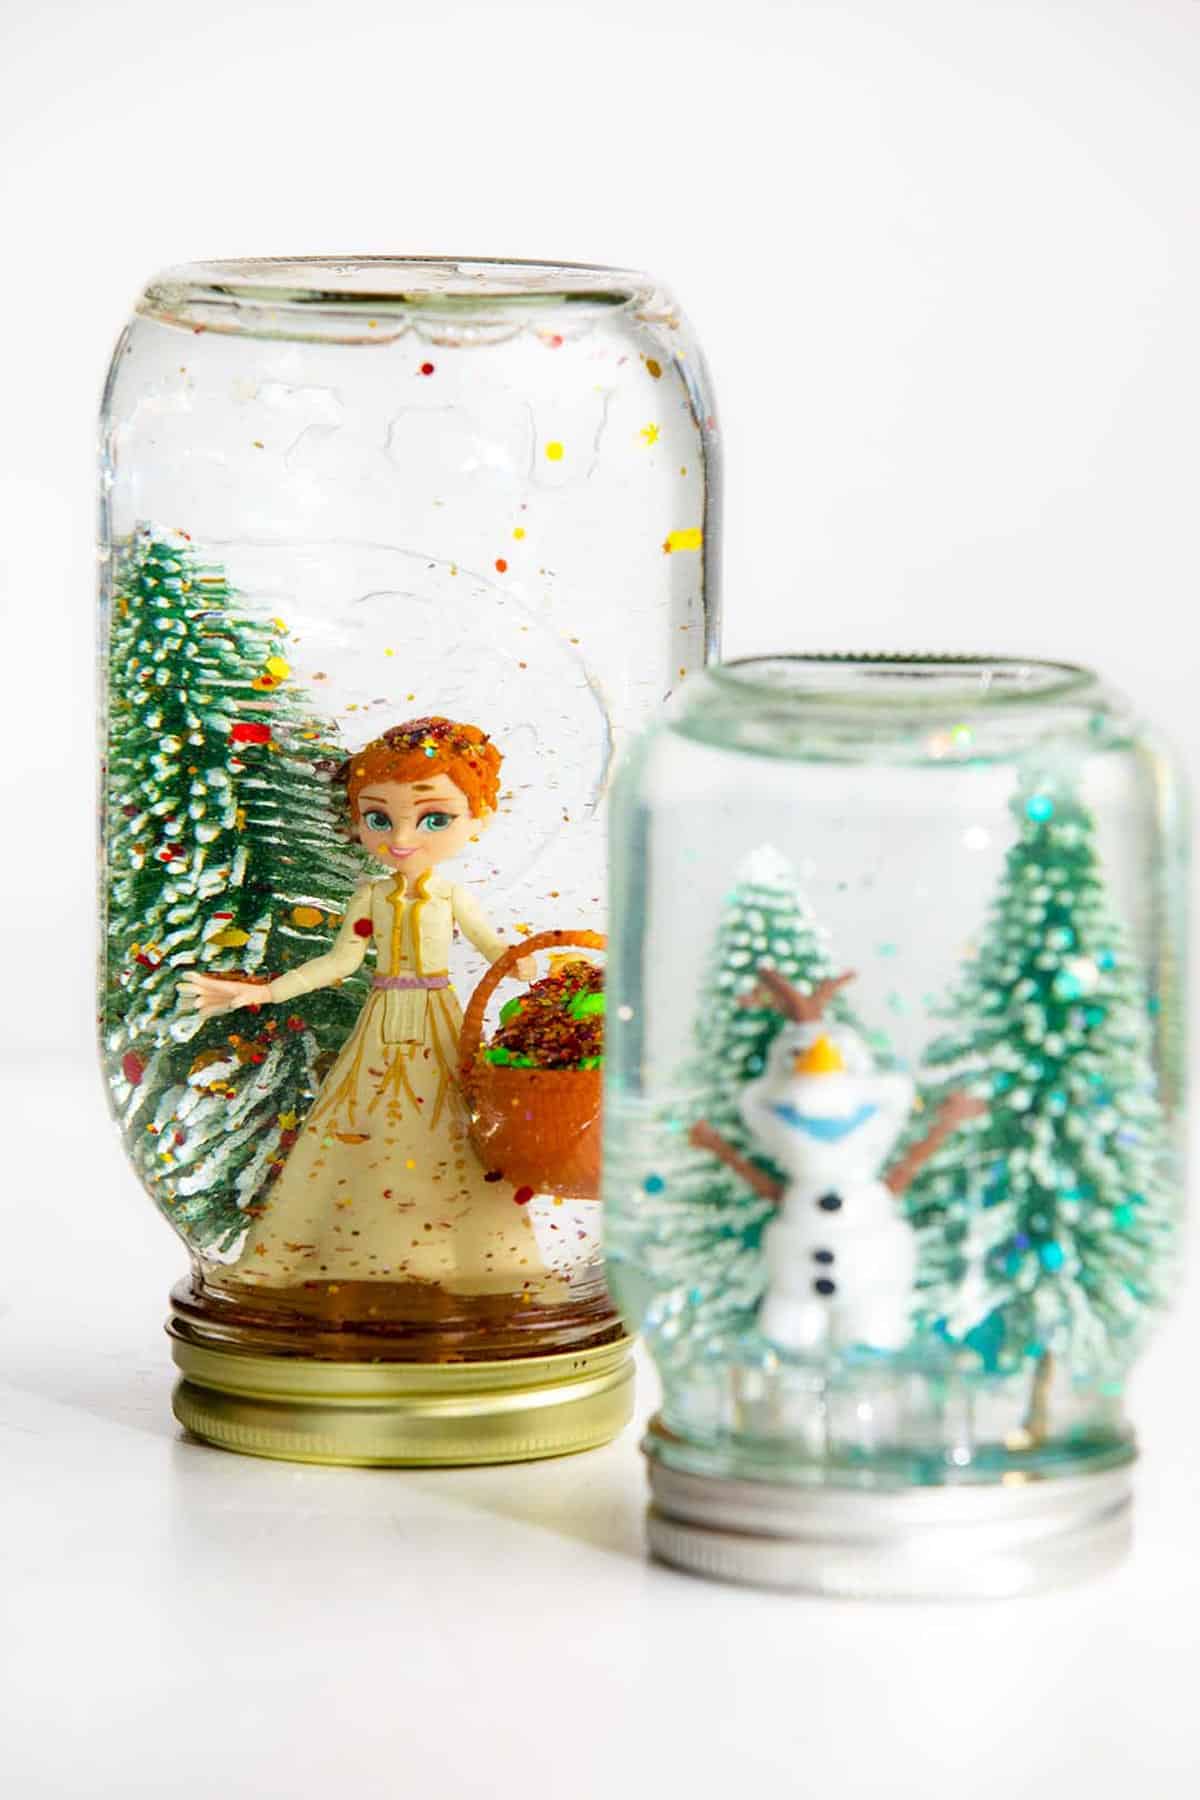
Select a focal point object to use in your simple DIY snow globe jar, such as a Christmas ornament. We also loved using little characters, creating "snowy" winter scenes with forest trees.
2. Glue Items In Place
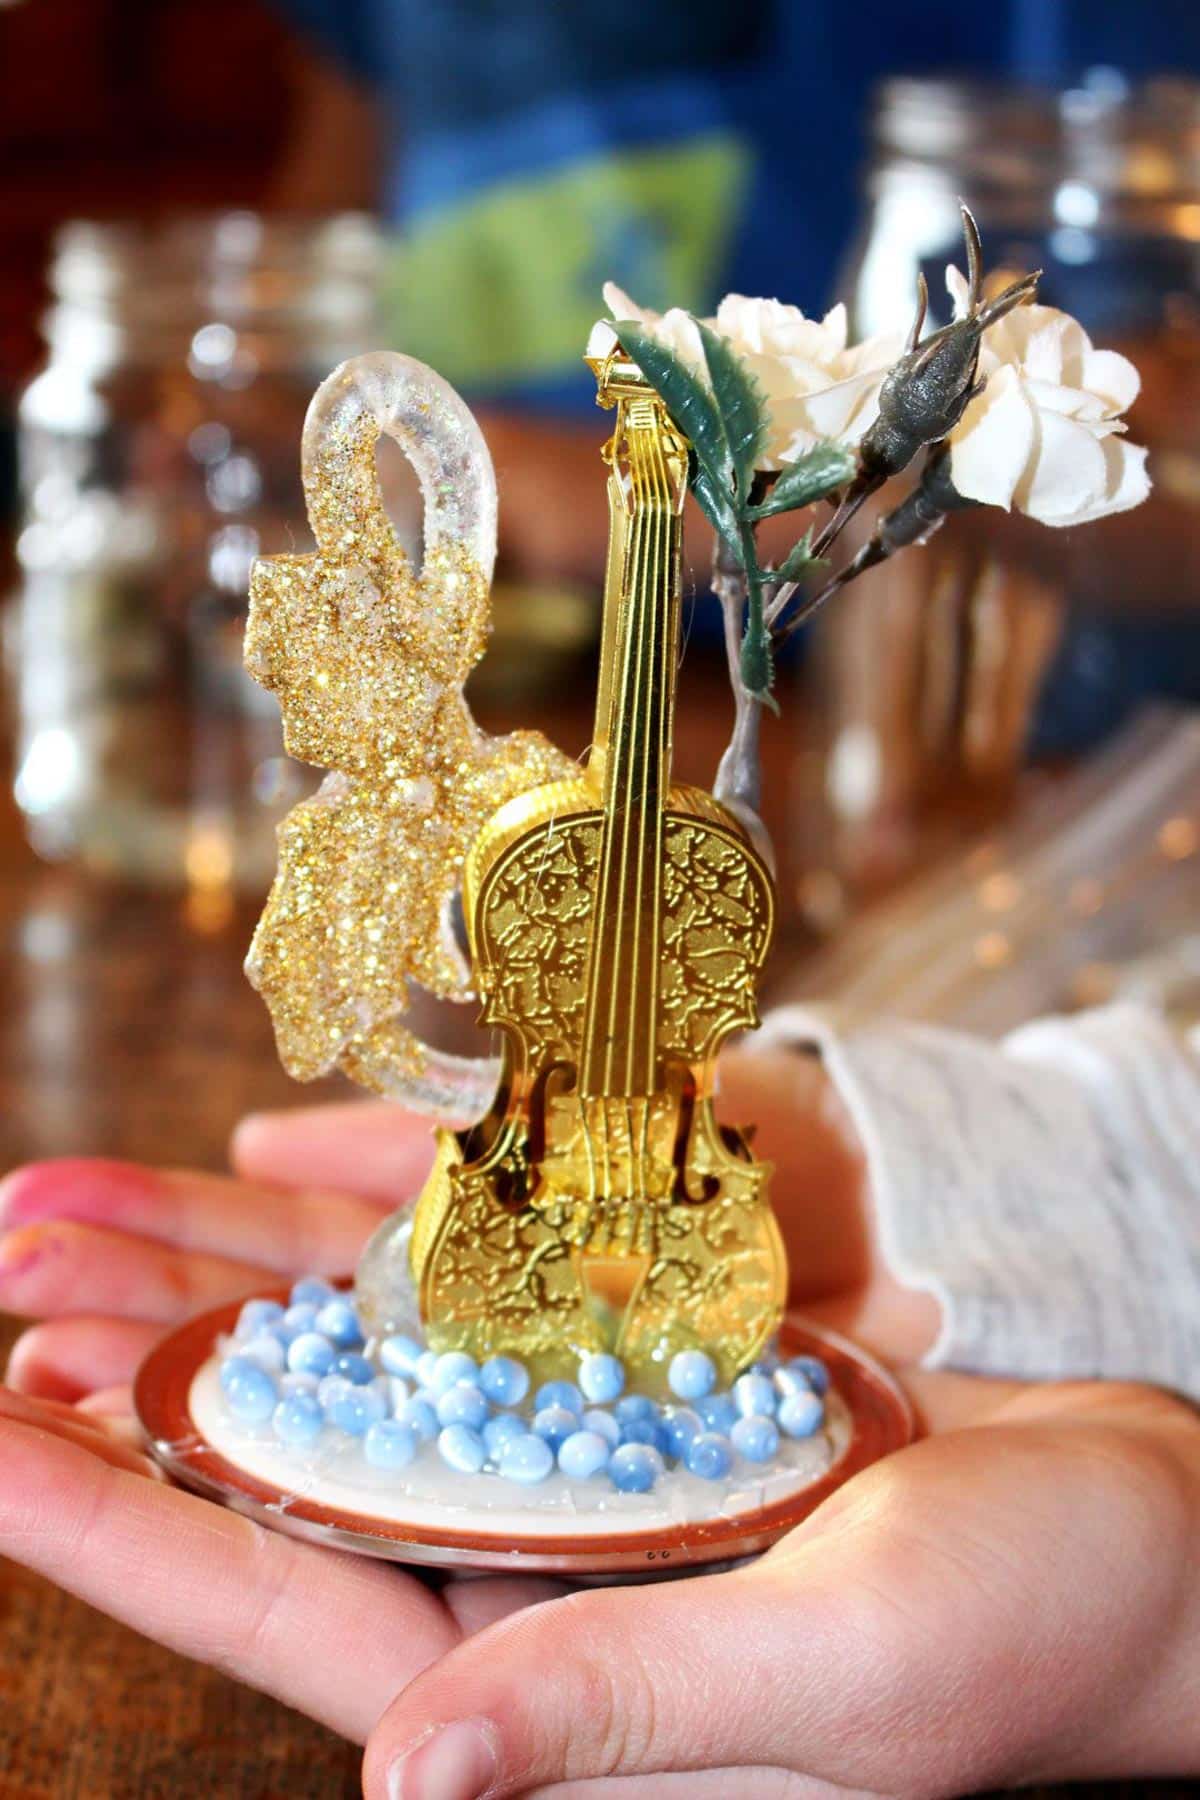
Use hot glue to glue the focal point object to the center of the lid of your mason jar. You may glue down other small things to the lid such as pebbles or beads.
Don't glue items close to the edge where they would be in the way of being able to screw the lid onto the jar.
3. Snow Globe Glue and Water Filler
Fill the jar half way full of distilled water. Squirt in some clear glue and stir it into the water. This will thicken the water and cause the glitter to fall more slowly when the kids shake the snow globe.
You can adjust the amount of glue to your preference. The more glue you use the thicker the water will become.
4. Adding Glitter for Snow
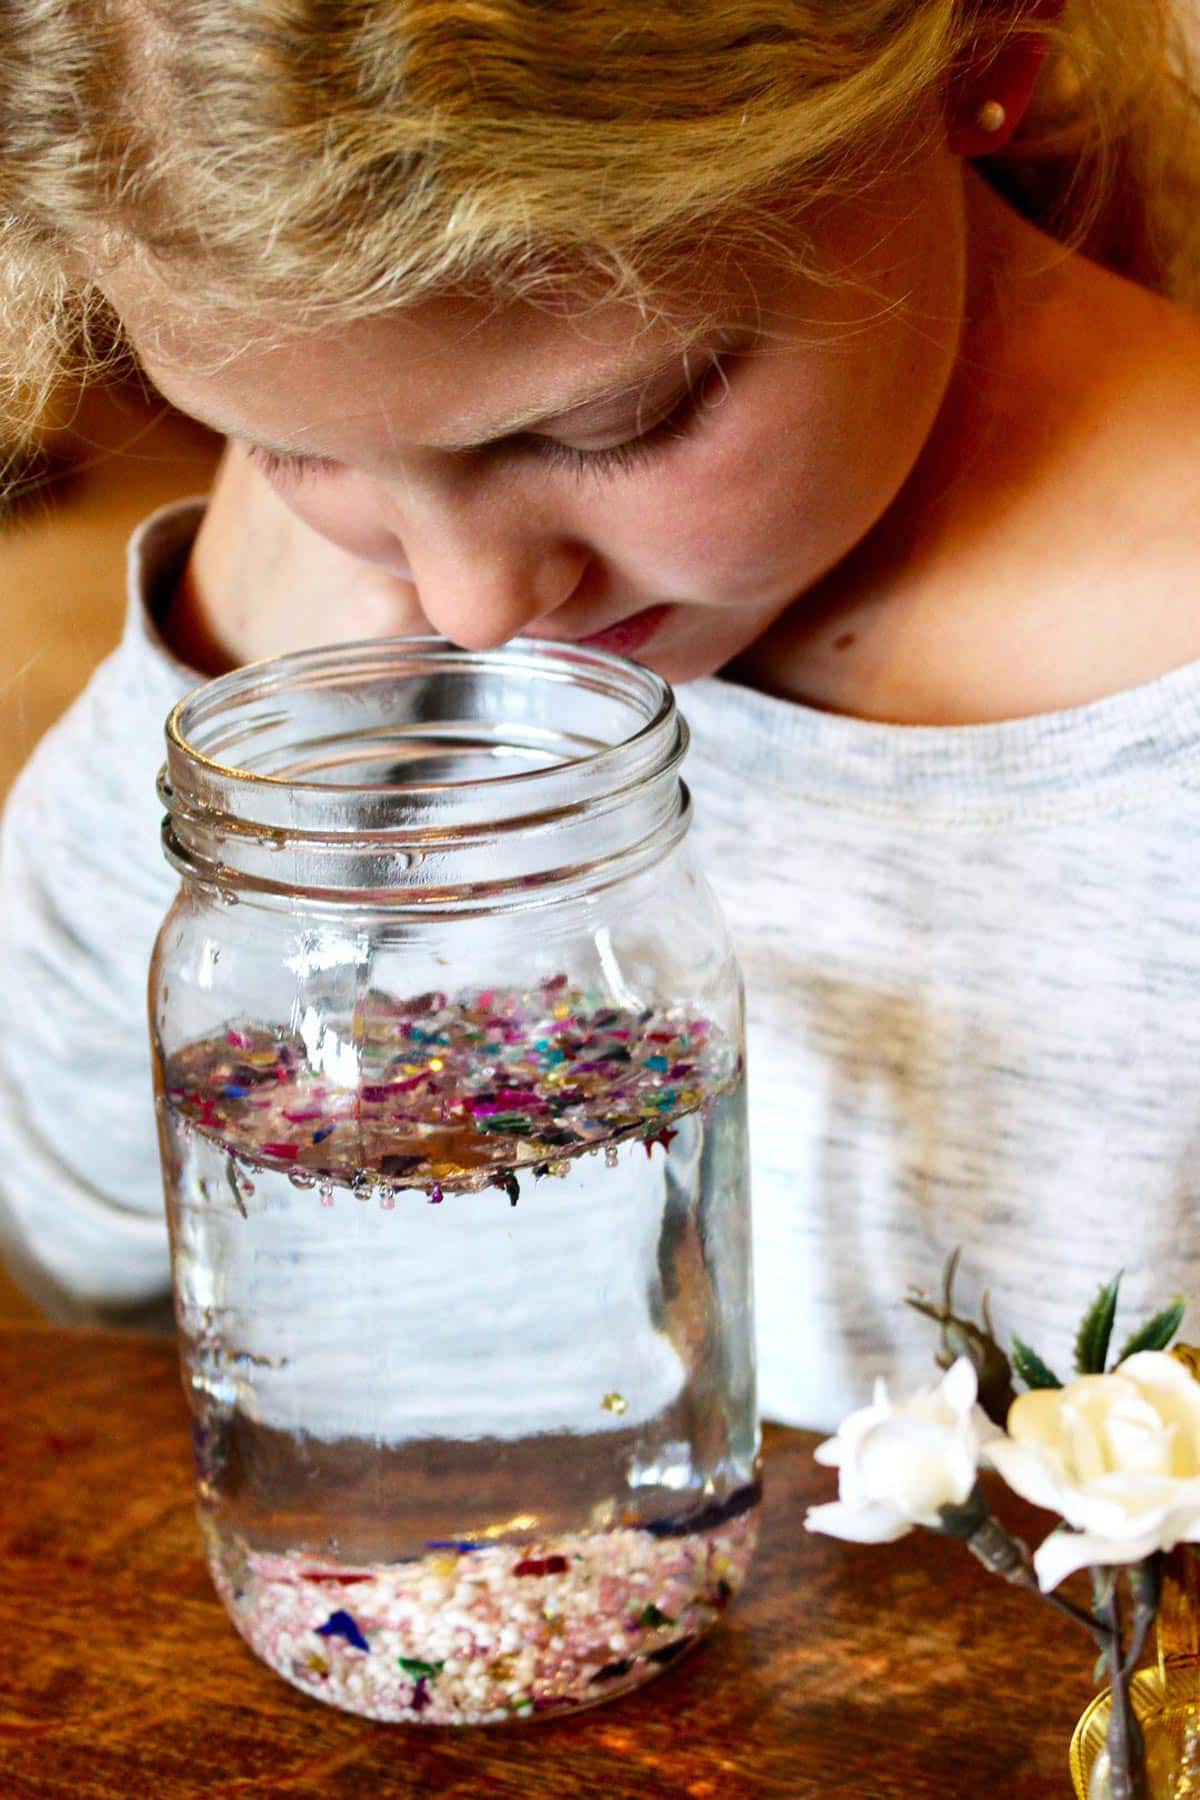
Next, it's time to add the glitter which makes the craft amazing! Add about 1-2 teaspoons of your favorite color.
Don't worry, the glitter stays in the jar so don’t be too scared of it!! 😉
5. Finishing the Snow Globe DIY
Fill the jar up to almost full with more distilled water. Do this over a cookie sheet with sides to prevent spills!
The trick is to balance the following two things. Leave enough space in the jar for the focal point object so the jar doesn't overflow. But don't leave too much head space so the snow globe looks full of water.
When you are content with the amount of water in your jar, screw the lid tightly onto the jar. The focal point object should fit nicely inside.
You Will Love these Small Snow Globes!
Okay, now the best part is to turn the jar upside down! Your DIY snow globe will now stand on the lid of the jar as a base and the glitter will fall down like snow!
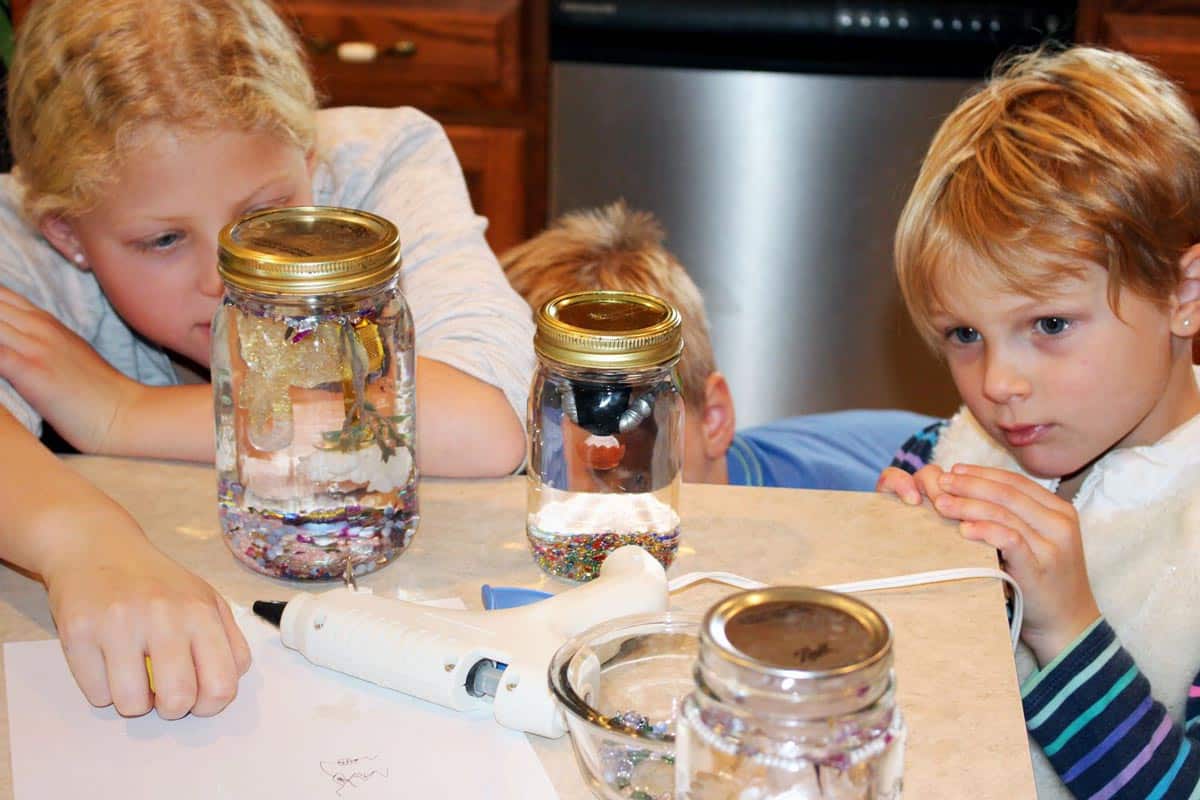
I love shaking a snow globe and watching the snow fall and so did the kids. The grands loved making this project.
Snowglobe Craft Tips
- Jar size- The trick is to match the size of the focal point object and the jar size, especially in width. Save a variety of types and sizes of jars prior to doing this craft. Then you'll have several sizes of jars available. Clear glass works the best.
- Raise the focal point- You may want to glue a small object onto the lid to "raise" your focal point a bit. The edge of the lid hides the shorter objects when they sit down into the jar lid.
- Center objects on the lid- Don't glue items close to the edge where they would be in the way of being able to screw the lid onto the jar.
- Glue on the lid- You can glue the lid on if you're concerned the kids will try to open it later. This will prevent any spills after the glue dries!
- Bendable objects: We tried a Playmobile person in one of the jars. Because it bent at the joints, it eventually worked its way loose from the lid after my grand shook the snow globe a few times. I plan to undo that one and super glue the joints of the toy so they don’t move. That will solve the problem.
Craft Variations
- Glitter color- You can mix and match the colors of glitter. Choose the colors you feel will best fit your character or focal point!
- Focal points- Use small objects like toys, Christmas ornaments, stones, decorative objects. Make sure the objects are water safe and fit in the jar.
- Theme globes- For a themed event you can purchase or order small plastic figures to match the theme. Each child can make a snow globe in the same theme.
- Gifts- A snow globe would be a nice gift for grandparents, friends, or teachers for the holiday season.
Mason Jar Snow Globe FAQs
The best liquid to use to make a snow globe is distilled water. That way, there are no impurities that make "floaties" in the water! In this tutorial, you'll also add clear glue to the water to thicken it up so the snow falls more gracefully.
Making a snow globe without glycerine is easy! Clear glue is my recommendation for a thickening agent in the water. It's possible that baby oil or drops of glycerin can work as well. But I have not used them personally to give a recommendation on how well they work. Purchase these items at a craft store or online.
One of my favorite things to use as snow for a snow globe is sparkly glitter. It settles slowly in water thickened with some clear glue and is so pretty!
If you are on the hunt for figures to feature in your snow globe, start in your own home! Look around your home to find a small ornament, plastic toy, or figurine. If there is nothing appropriate purchase one in a discount store or order online.
More Fun Snow Ideas for Kids!
If you and the kids are loving the wintery snow themed crafts, we've got more for you! Here are some more cute snow craft ideas from around the site that you may enjoy:
- Amazing Free & Easy Snowflake Pattern Template
- Make and Incredible Ice Luminary and Ice Globe
- 4 Adorable and Easy Paper Penguin Crafts for Kids
- Silly Sock Snowman
- Free Printable Snow Globe Coloring Page
- How to Make a Giant Paper Bag Snowflake
Come join the fun at WTN!
Try this craft and then go ahead and leave a comment, rate it, and tag a photo with #WelcometoNanas wherever you post.
More from Welcome To Nana's

DIY Snow Globe Craft
Equipment
- Glue gun-
Items Required
- 1 Glass jars (3)
- Small item to use as a focal point in the jar Christmas ornament, small toy, plastic or ceramic figurine
- Glitter, 12 Assorted Colors
- Distilled Water
- Elmer's Glue, Clear
Instructions
- Select a focal point object to use in your simple DIY snow globe jar. Use hot glue to glue the focal point object to the center of the lid of your jar.
- Fill the jar half way full of distilled water. Squirt in some clear glue and stir it into the water.
- Add 1-2 teaspoons of glitter.
- Fill the jar up almost full with more distilled water, leaving enough space in the jar for the focal point object so the jar doesn't overflow.
- Screw the lid tightly onto the jar so the focal point object fits nicely inside.
- Turn the jar upside down and watch the snow fall!
Video
Notes
This post was originally published in January 2019 and has been updated to add more relevant and detailed content.


Laurie Jernigan says
Shelly, I am loving your blog and activities! Great job! Tell everyone hello!
Shelly says
Thank you, dear cousin! I'll pass along the greeting, please do the same. Love to you.
Sarah says
Love this idea! Where did you get that small plastic riser that the little snowman was glued onto. I would like to raise our display up but can’t figure out what to use.
Thank you
Shelly says
Thank you! The little riser in the video is just a small plastic jar without the lid, turned upside down. It worked great!
Laura says
Love the Frozen characters with the matching glitter 🙂 so cute!
Emily says
In your video, I saw that you used a small object to "raise" your focal point. What did you use? What were the dimensions of the object you used? I would like to use one that would be a good fit for a 16 oz mason jar
Shelly says
I used a twist off lid I believe. You could even stack two if needed.
Leia says
Hello! Could I use a plastic jar instead of a glass one?
Shelly says
Yes you can. I understand that glass is not preferred with children. I will say that it is usually more blurred to look through than clear glass. But it will work!!
GT says
Great idea for gifts, looks cute but unfortunately we had multiple issues. Hot glue did not last & items came unglued. Twist off jar lids leaked when shaking even though screwed on tightly, glitter clumped. Fortunately had another craft project for kids to give as gifts that worked out better.