Pressed Flower Art is so simple to make, and such a beautiful way to preserve fresh flowers! Kids can make a glass frame or shadow box, bookmarks, or cards to give as gifts.
Jump to:
Why You'll Love Making Pressed Flower Art
Pressed flower art is the perfect way to use your dried flowers, after you've learned how to press flowers! You can decorate cards and bookmarks and double glass pictures for your home with the beautiful, pressed flowers you have saved.
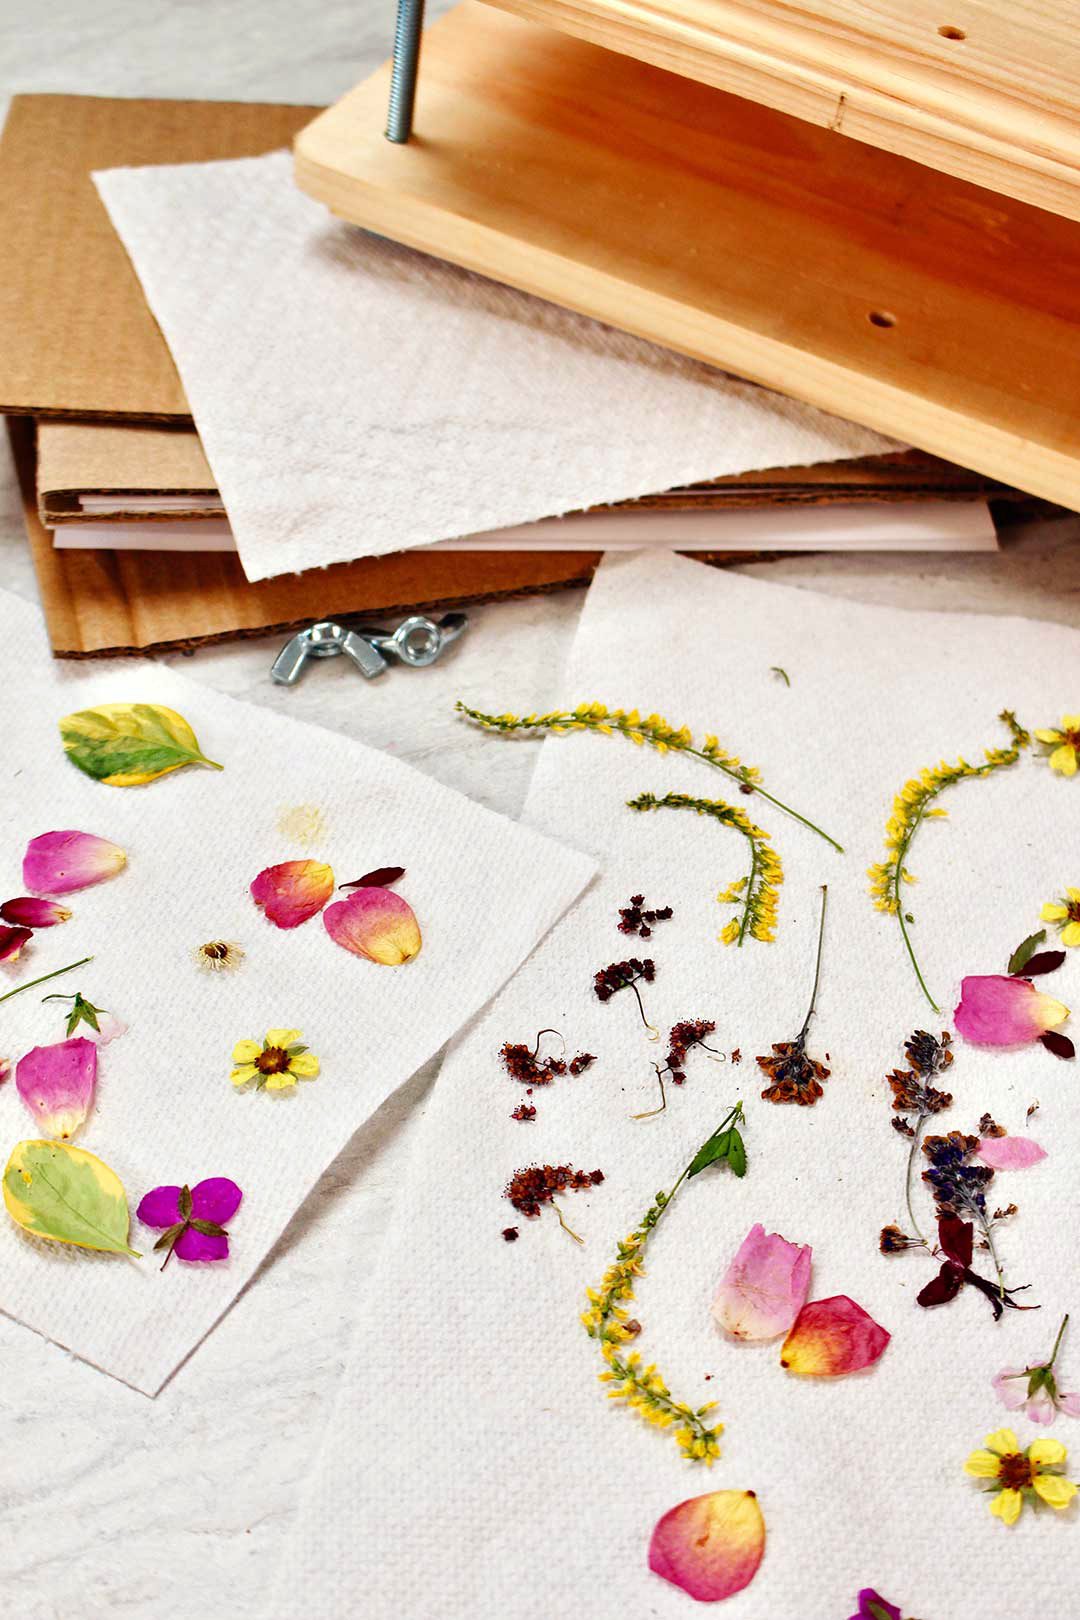
A DIY flower press holds lots of flowers and after 2-4 weeks they are completely dry and as flat as they are going to be. That is just what you need to make these crafts with dried flowers as their decorations.
When I was pressing flowers as a kid, the spring and summer flowers and leaves were pressed between the pages of our encyclopedias (I had to explain what these were to my grandkids). We would run to get them out when we wanted to make cards for mom’s birthday in the fall. It almost seemed magical to pull out the colorful buds weeks later when the flowers outside may even be under snow!
WATCH VIDEO: How to Make Pressed Flower Art
Pressed Flower Art Ideas
So, what art projects can we make with our pressed flowers? Let’s try a bookmark, a card and a picture framed in glass.
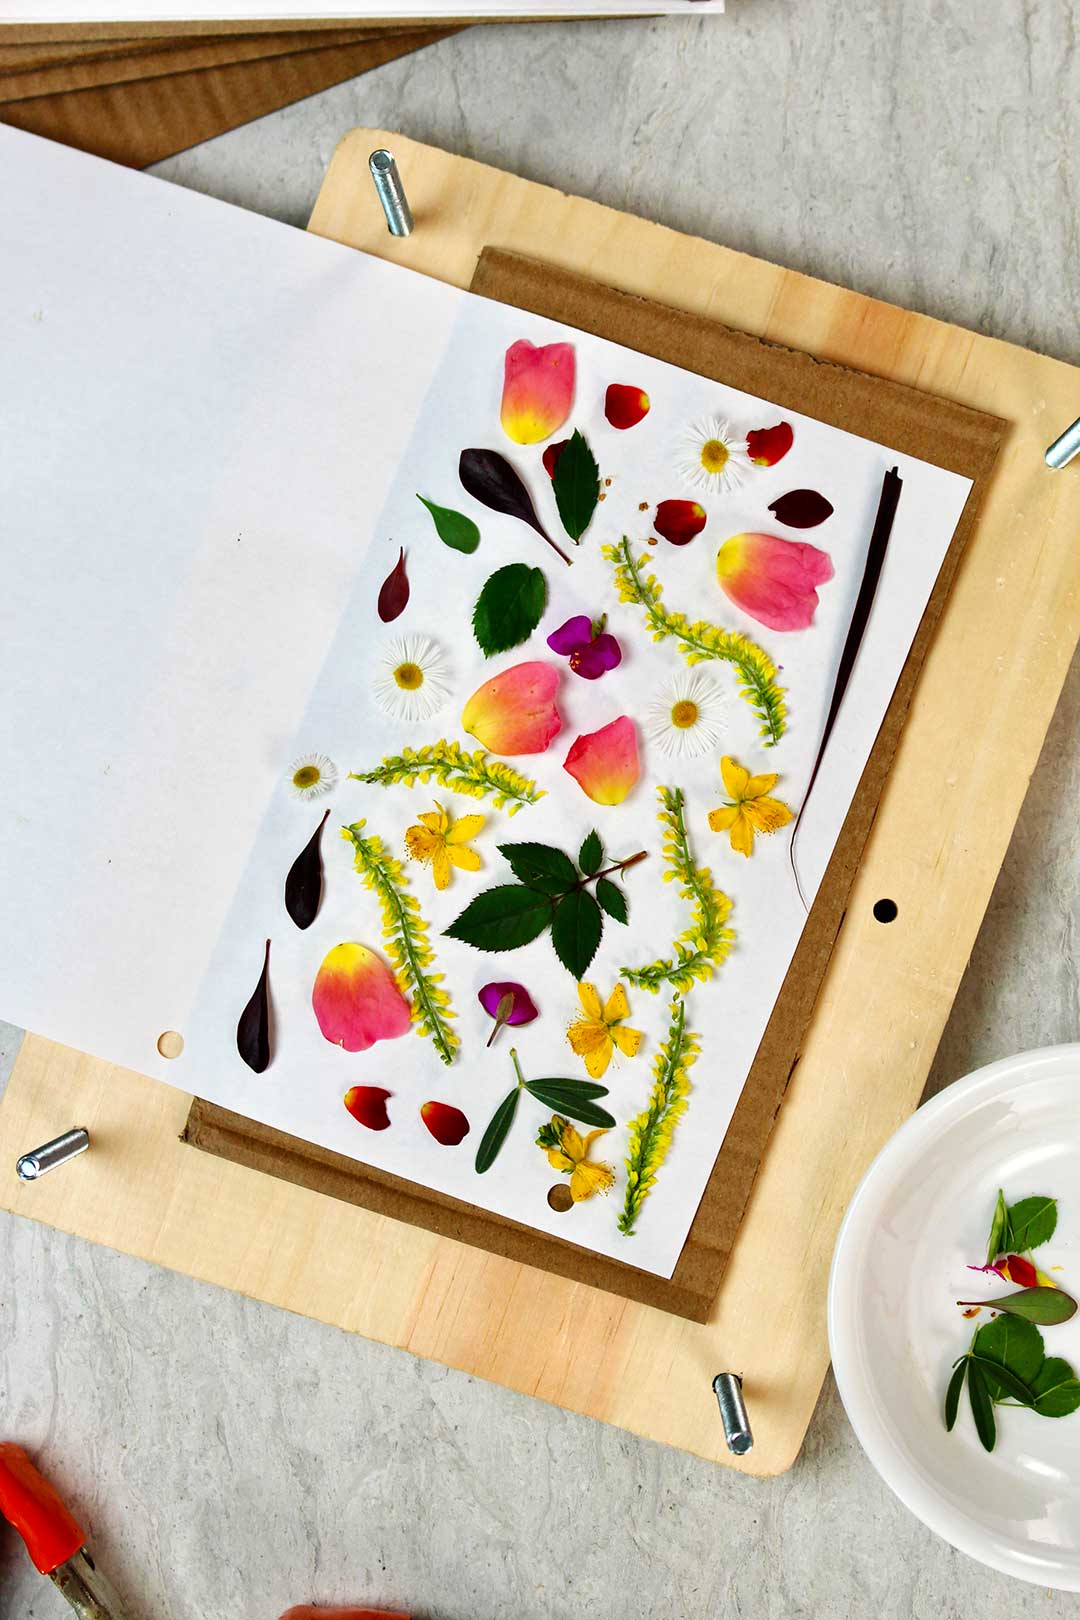
Flower art with real flowers
Get your pressed flowers out of your press and place them on a plate or paper towel to see what you have available to use. You can make designs from them or just randomly place them on the art project.
1. How to Make Pressed Flower Bookmark
Cut a piece of cardstock to about 1.5 inches by 8.5 inches with scissors or a paper cutter.
Tip: This is a great way to use left-over pieces of cardstock from other projects.
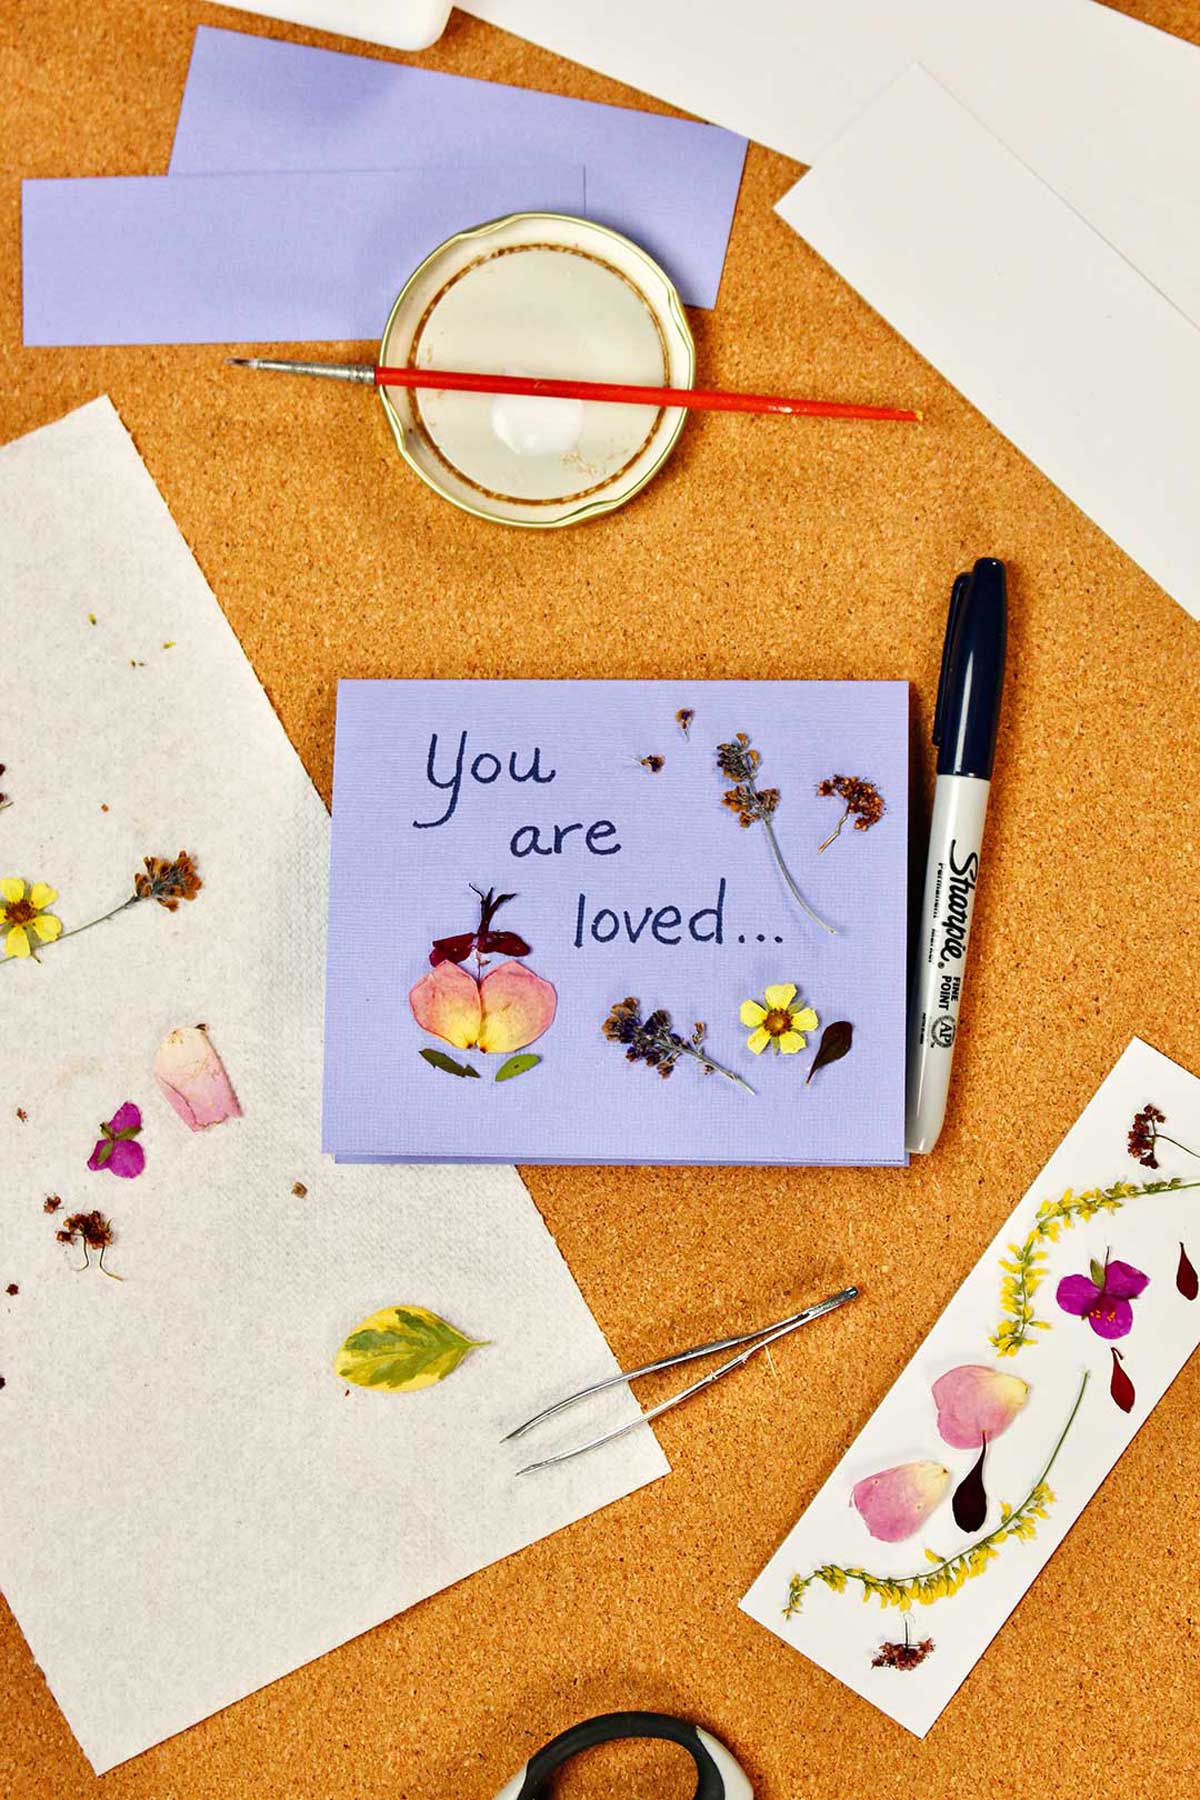
If you want a message or your name on your bookmark, write it on the paper with markers or colored pencils before placing the dried flowers.
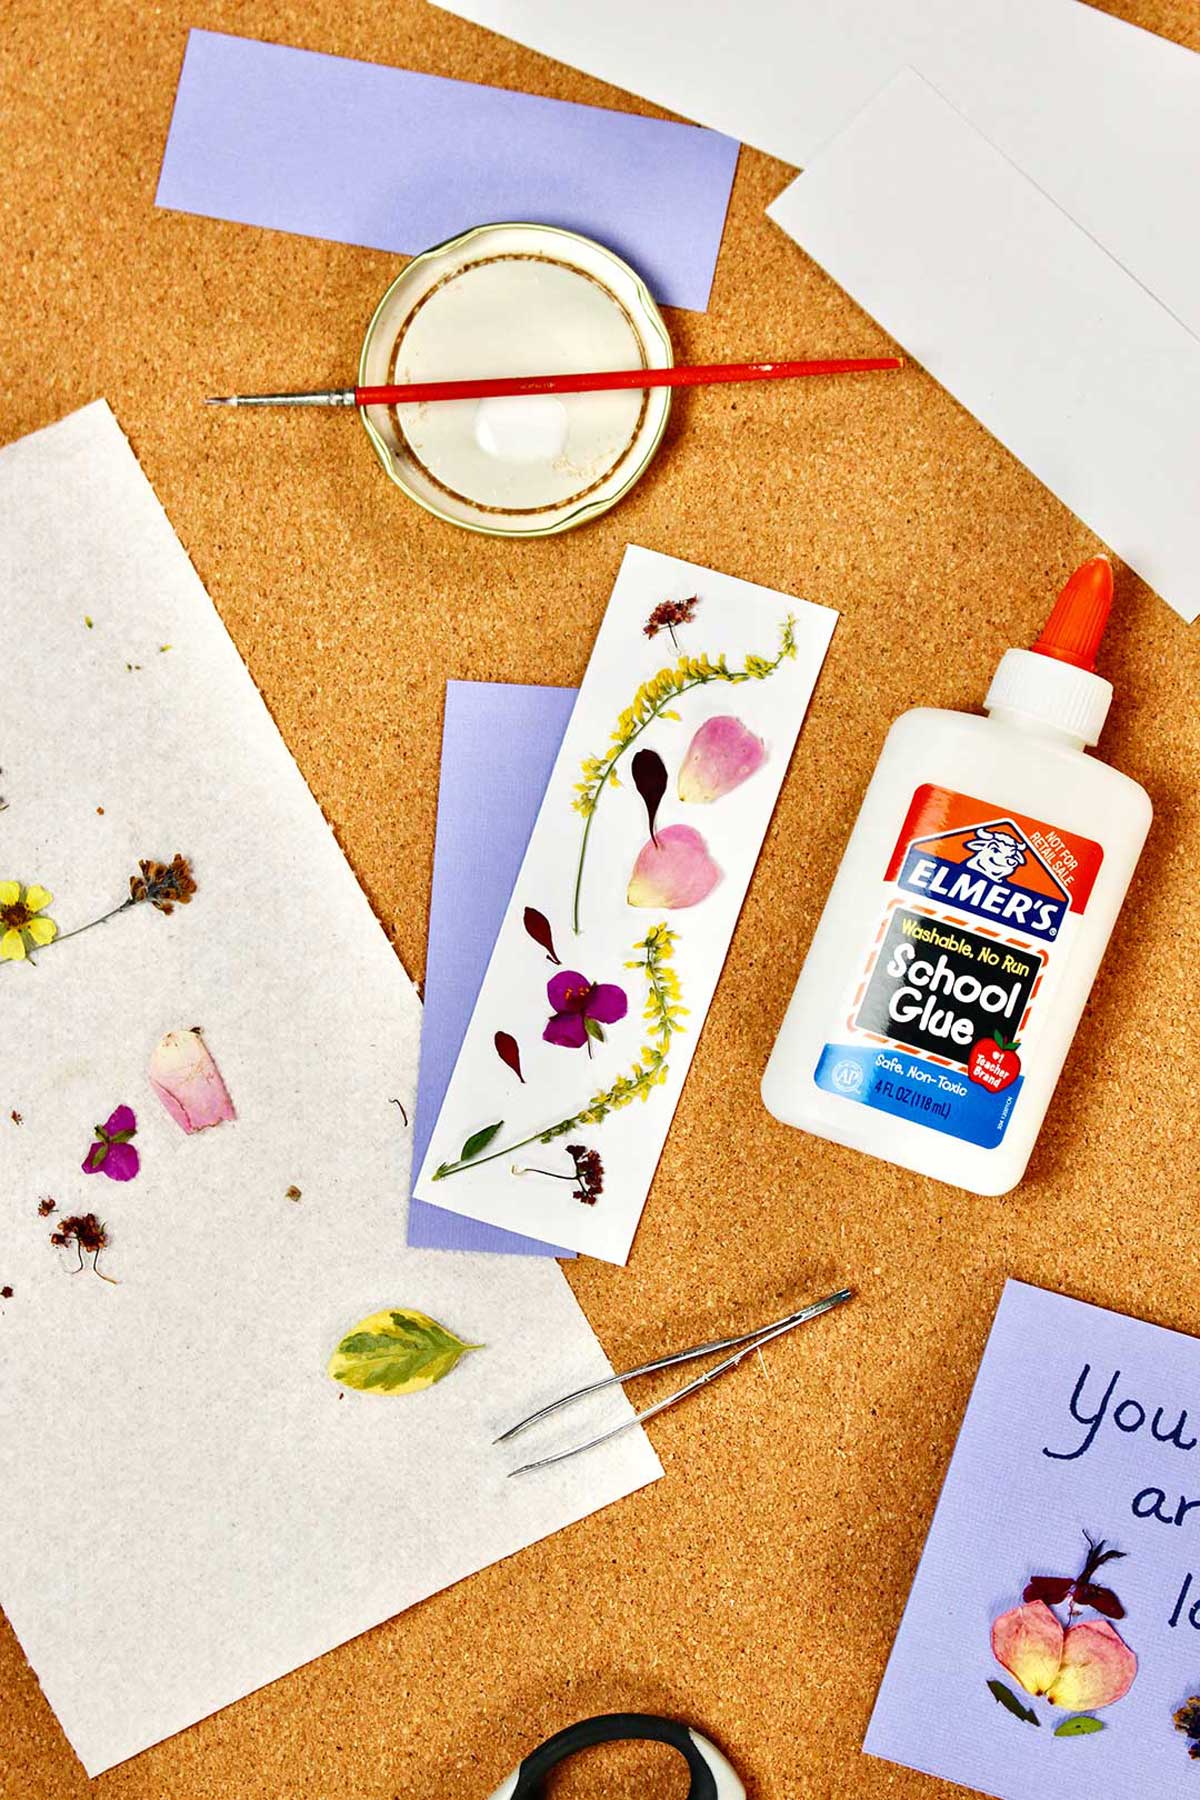
Attach your dried flowers to your bookmark with a very small spot of glue. You may even want to use a small paintbrush to place a bit of glue on the back of the flower or on the paper before positioning it.
Aren’t the flowers beautiful?
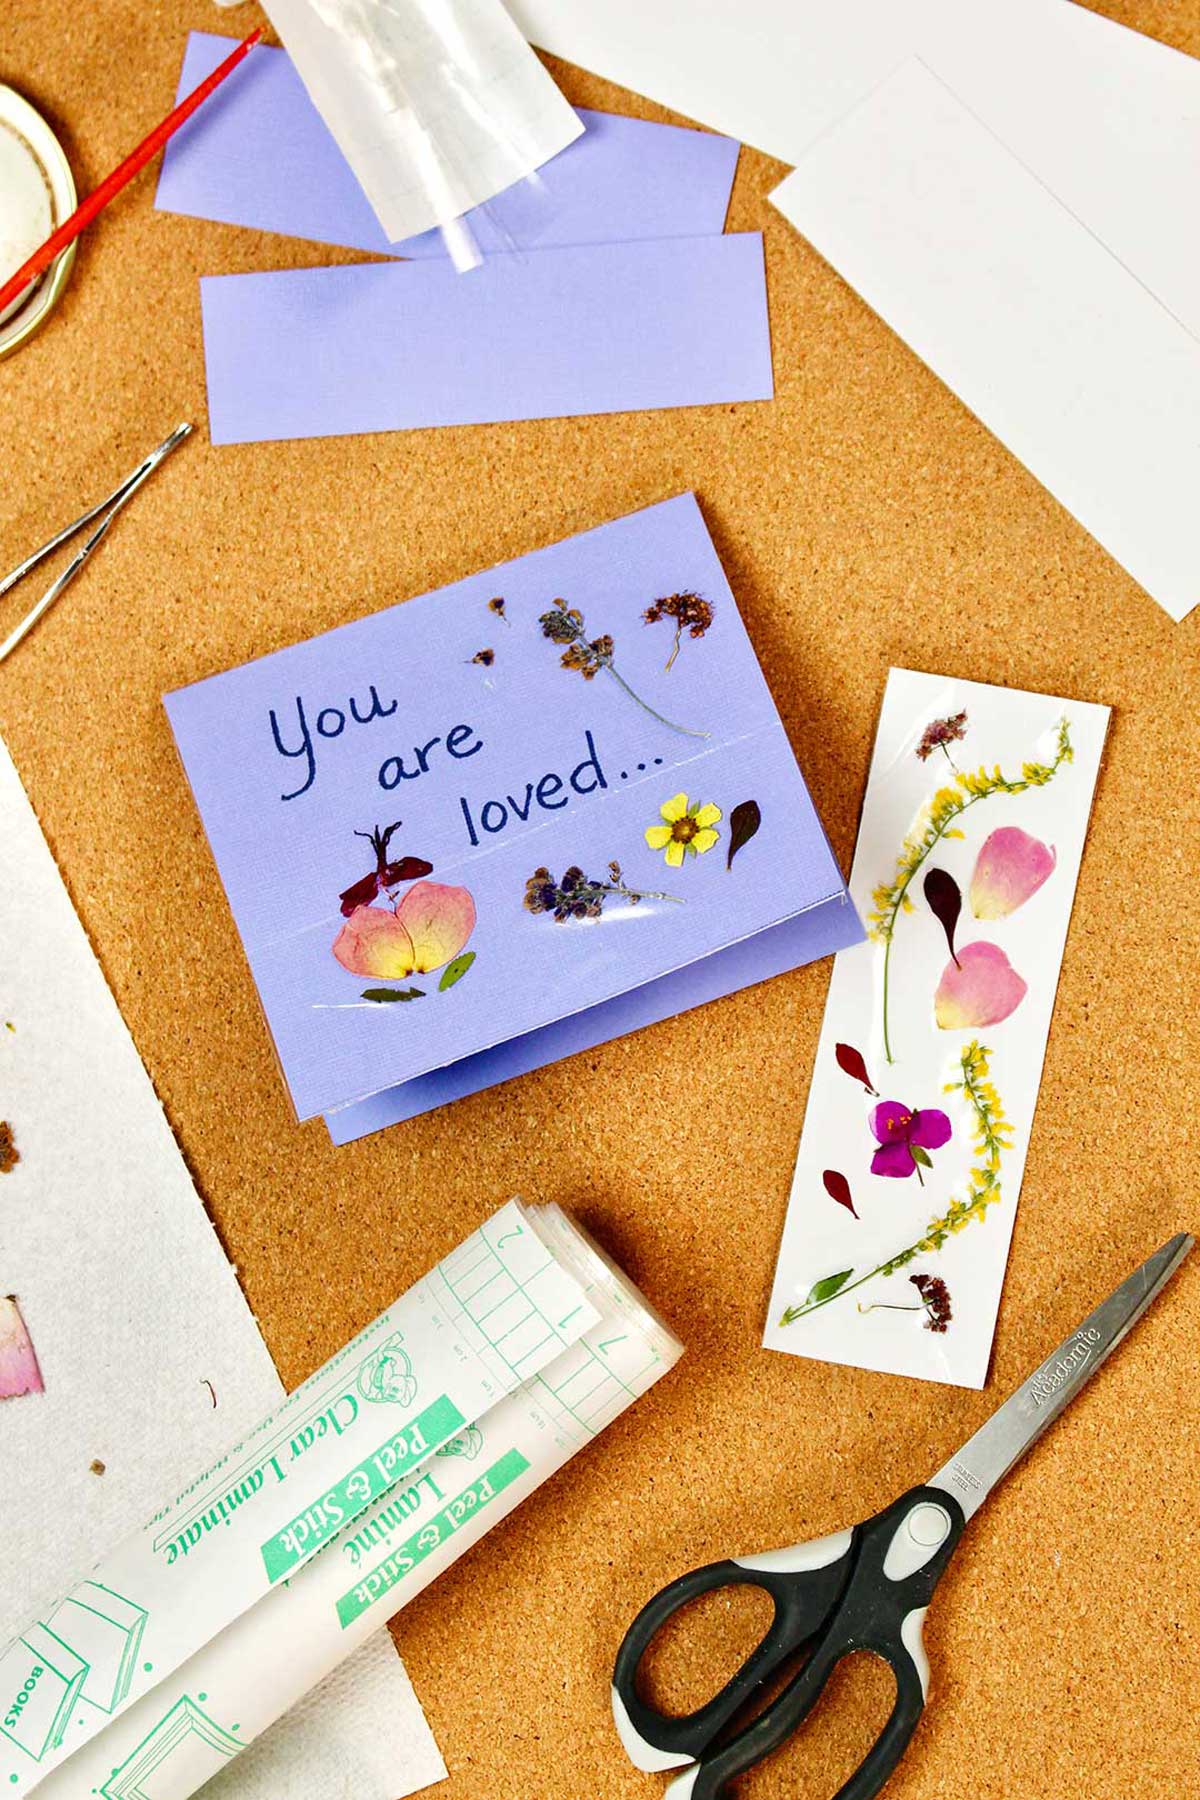
Cut a piece of clear contact paper 2 ½ times the width of the bookmark and a bit longer.
After the glue is dry, take off the contact paper backing. Place the bookmark face down on the center of the sticky side of the contact paper. Be careful to get it on flat to avoid wrinkles and air bubbles.
Wrap the extra contact paper on the sides around to the back of the bookmark. Press out as many air bubbles as possible. Trim the extra off each of the short bookmark ends.
This project makes me wish I had a laminator...that is going on my wish list!
2. How to Make Pressed Flower Notecard
Cut a piece of cardstock to the size desired for a card. If using 8.5 x 11-inch cardstock it works well to cut it in half and then fold each of the halves in half to make a card.
Use the same steps as for the bookmark to decorate and finish the card.
Tip: A tweezers helps to pick up and place the dried flowers.
When putting on the clear contact paper though, just cut a piece slightly larger than the front of the card. Take off the paper backing and place the card face down on the sticky side of the contact paper. Trim off the extra.
People will love receiving this pretty card!
My daughter sold her pressed flower cards when she was young. It was a great art project and a great small business experience.
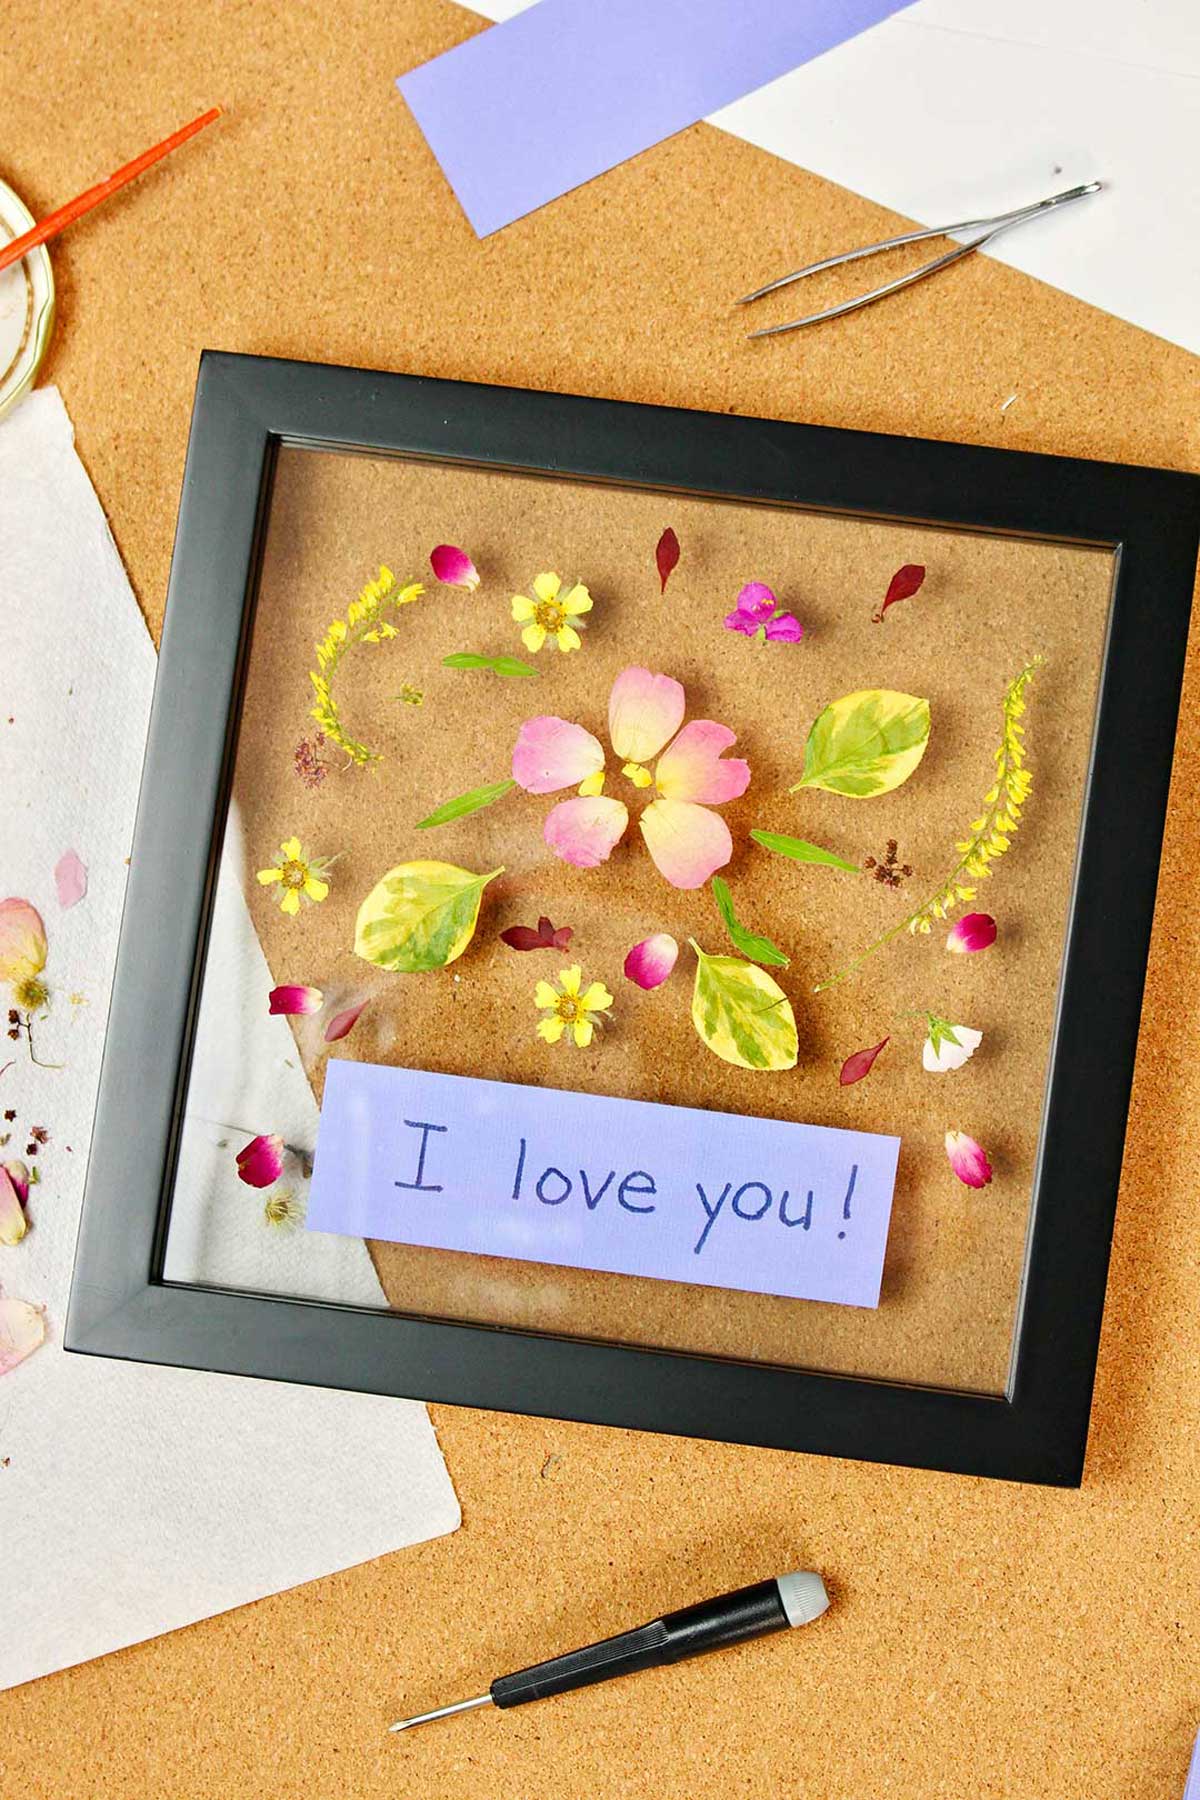
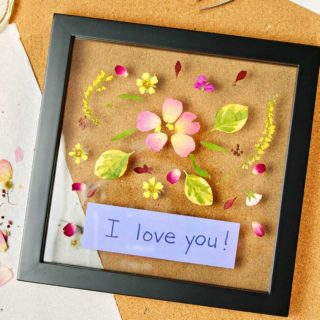
3. How to Make Pressed Flower Art in Glass Frame
So, I love how this project came out! The dried flowers are placed between two pieces of glass in this frame. It is so showy and looks nice either hanging on the wall or sitting on a small easel.
Recommended Glass Frames for Dried Flower Art
This double glass frame for pressed flowers came from Hobby Lobby. They have a whole series of these in various sizes with this was the smallest one they had. It would be a perfect size for a gift. I’m sure there are a myriad of sizes and shapes online or in craft stores.
These frames are typically held together with a couple screws in the back. Open the frame according to directions and slide the double panes of glass out. Clean the glass if needed.
There are frames made specifically for pressed flowers too!
A traditional frame can be used as well
Note: It would work to use a traditional frame with a mat (one glass), cut a piece of cardstock to fit the frame and place your pressed flowers on the paper in the same way as instructed for the bookmark. Then just place it in the frame for display under the glass instead of using contact paper.
How to Assemble Pressed Flower Art in Frame
I cut a piece of cardstock in a rectangle and wrote my message on it. The paper was about 1.5 inches by 4 inches. This is optional of course, but it worked well. Write whatever you would like, a message, quote, or a name. Place this on the glass where desired.
Place the flowers around the message in an attractive arrangement. I just did a random design.
Tip- If I did this again, I would attach each item (paper and flower) to the back glass with a spot of glue before putting the second glass over it. The flowers in my project are free floating, no glue holding them in place.
Place the second glass over the flowers and slide them back into the frame. Close the frame as shown in the instructions.
Note: The flowers must be quite pressed very thin in this project. Thicker flowers cause the two panes of glass to be too thick to get back into the frame.
Don’t you love the look of pressed flowers in glass? I can't wait to hang mine up.
Flower Art for Gifts
All this lovely flower artwork, now it's time to share it! This is such a beautiful way to turn fresh flowers into something for a special occasion or special person.
These DIY botanical prints would be a great gift for Mother's Day, a bridal shower, or the birthday for a flower lover in your life. What a unique gift!
You could even use a flower arrangement or bouquet of flowers from a wedding to give to the bride as a special memory from their day. No matter if you use a frame for flower wall art, a shadow box, a card, or any other idea that you come up with, this is a great way to add a personal touch by gifting original pieces, made by you and your kids!
How to Press Flowers
If you are wanting an easy tutorial on how to press fresh blooms, check out this tutorial for Pressing Flowers, 4 Ways!
You'll find step-by-step help for the pressing and drying process, with several methods so you can choose what fits you best. From using a heavy book, to making your own flower press, to drying flowers in a microwave, you can find tips and tricks for the best results.
And if you want to make an envelope to fit your handmade card I've got that covered! Try this- How to Make Handmade Envelopes 3 Ways! post. It's easy to make your own envelope.
Remember, have fun with this! There is no wrong way to go about it, so pick your method, grab your craft supplies, and turn your own flower arrangements into beautiful pieces of art!
More Flower Crafts for Kids
Looking for more fun flower-themed crafts for kids? Check out these ideas from around the blog, featuring all kinds of flowers!
- Hammered Flower Prints on Fabric
- How to Grow Spring Flower Bulbs Inside
- DIY Midsummer Flower Crown
- DIY Flower Corsage
- DIY Flower Boutonniere
Pressed flowers are simple to make, and can be done multiple ways! Press your flowers between wax paper in a heavy book for a traditional method. Or you can microwave your flowers with just some paper towels and a dish. You can even make your own flower press from wood, check out the tutorial!
To seal my pressed flower art that wasn't in the glass frame, I used contact paper! Place your part face down on the center of the sticky side of the contact paper. Wrap the extra contact paper on the sides around to the back and trim. Easy easy!
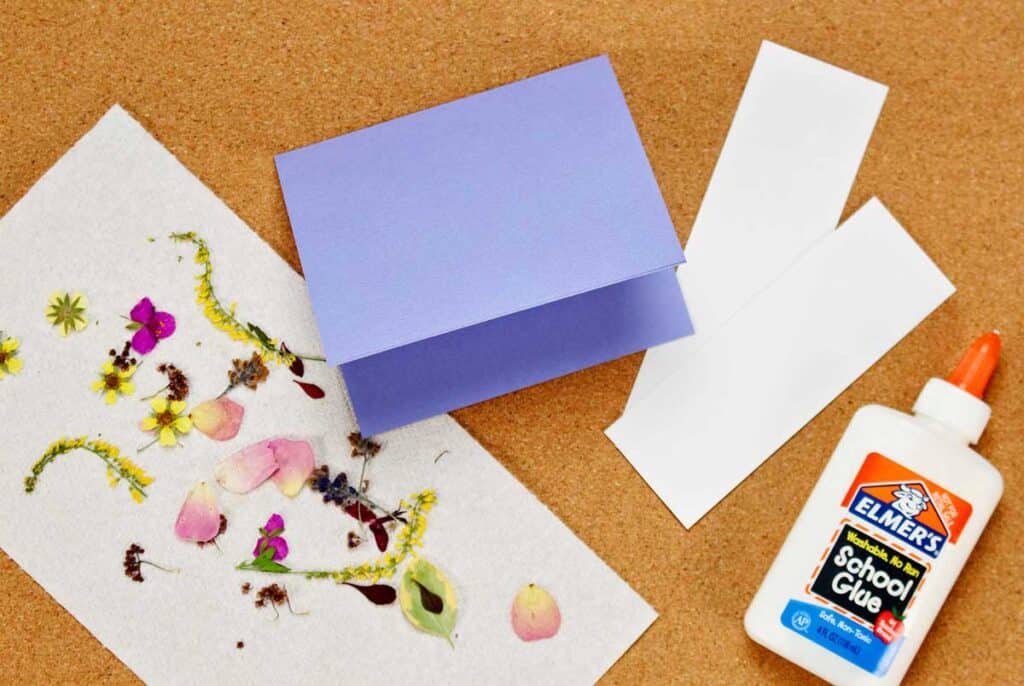
In order to make a pressed flower frame, bookmark, or card, I would suggest using a nice and sturdy paper. To me, the perfect paper to use is card stock! I used it for all of these crafts, it's one of my favorite crafting papers to keep on hand.
To secure pressed flowers to the card stock, I use clear drying Elmer's glue. Attach your dried flowers to your art with a very small spot of glue. You may even want to use a small paintbrush to place a bit of glue on the back of the flower or on the paper before positioning it.
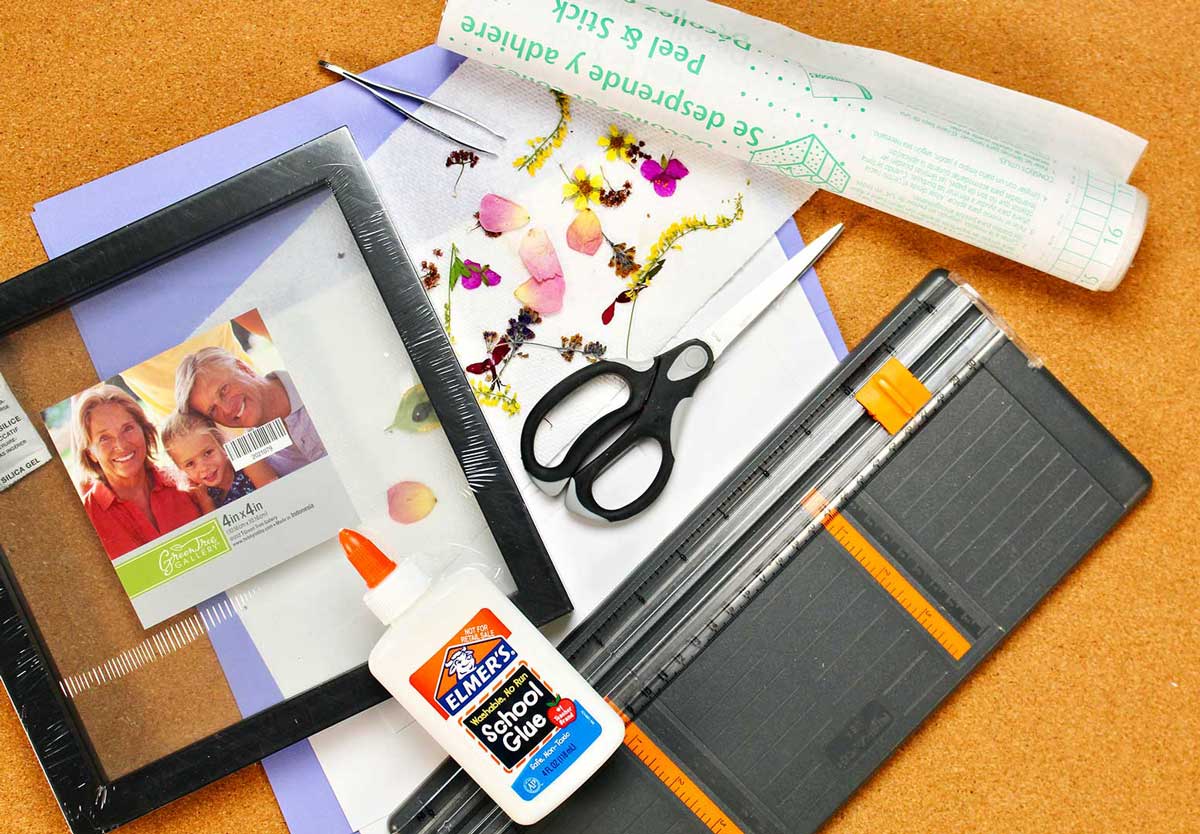
Supplies for Pressed Flower Art
- Pressed flowers
- Card stock- white or a color
- Clear Contact Paper
- Frame- double glass frame (no mat) in the size of your choice
- Scissors
- Colored Markers or Colored Pencils
- Glue
- Tweezers (optional- help pick up flowers)
How to Make Beautiful Dried Flower Art
Equipment
- Scissors
- Tweezers (optional- help pick up flowers)
Items Required
- Pressed flowers
- Card stock- white or a color
- Clear Contact Paper
- Frame- double glass frame (no mat) in the size of your choice
- Colored Markers or Colored Pencils
- Glue
Instructions
- PROJECT 1- Pressed flower bookmark
- If you want a message or your name on your bookmark, write it on the paper with markers or colored pencils before placing the dried flowers.
- Attach your dried flowers to your bookmark with a very small spot of glue.
- Cut a piece of clear contact paper 2 ½ times the width of the bookmark and a bit longer. Take off the contact paper backing. Place the bookmark face down on the center of the sticky side of the contact paper. Wrap the extra contact paper on the sides around to the back of the bookmark. Trim the extra off each of the short bookmark ends.
- PROJECT 2- Pressed flower notecard
- Use the same steps as for the bookmark to decorate and finish the card. When putting on the clear contact paper though, just cut a piece slightly larger than the front of the card. Take off the paper backing and place the card face down on the sticky side of the contact paper. Trim off the extra.
- PROJECT 3- Pressed flower frame diy- pressed flowers in glass
- Open the frame according to directions and slide the double panes of glass out. Clean the glass if needed.
- I cut a piece of cardstock in a rectangle and wrote my message on it. The paper was about 1.5 inches by 4 inches. This is optional of course, but it worked well. Write whatever you would like, a message, quote, or a name. Place this on the back glass where desired. Anchor with tape or spot of glue.
- Place the flowers around the message in an attractive arrangement. Anchor with a spot of glue.
- Place the second glass over the flowers and slide them back into the frame. Close the frame as shown in the instructions.
- Check out this post for 3 ways to make your own envelopes. It makes creating your own envelopes a cinch!
Video
This post was originally published in June 2022 and has been updated to add more relevant and detailed content.


Laura Heller says
This brings back memories!