I can’t wait to walk you through How to Draw a Pencil with this easy, step-by-step drawing tutorial! Over the last 60 years I’ve drawn and shaded the pencil shape countless times, teaching hundreds of artists of all ages how to follow the same techniques. Now you can join me too, no matter your skill level or prior art experience!
How to Draw a Pencil
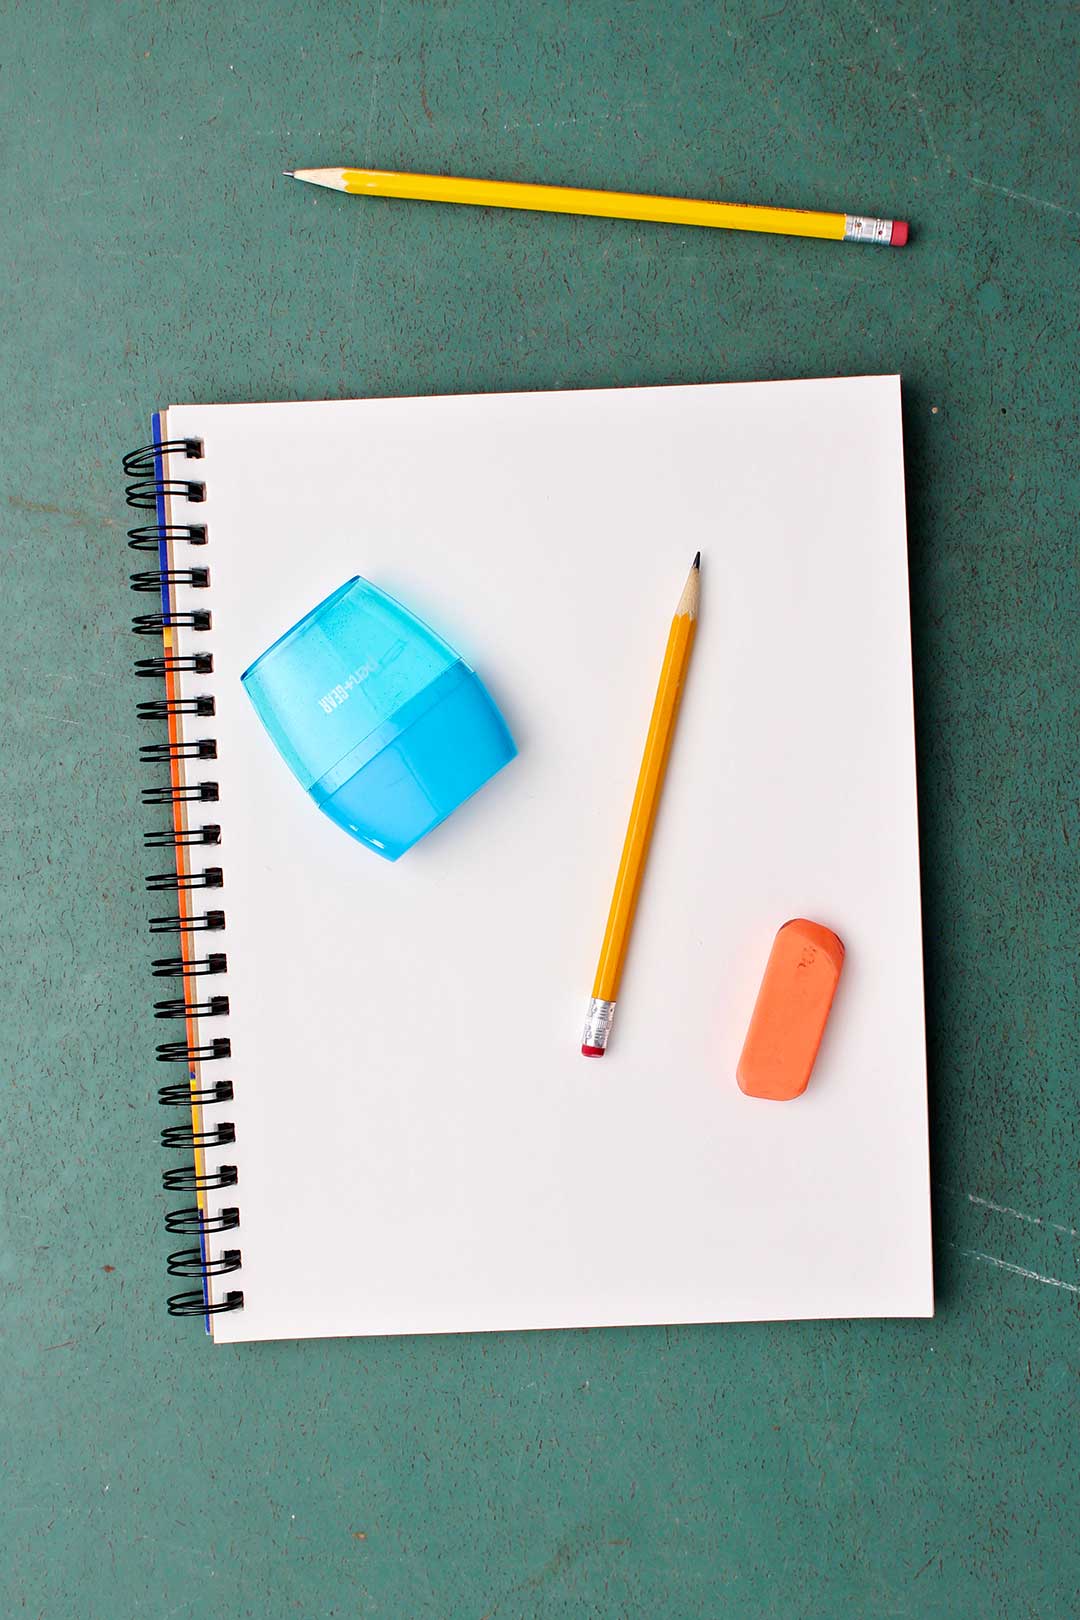
Drawing a pencil may seem like a small project, but I love these sketches because they build drawing skills and confidence. Plus all you need is a paper and a pencil to get started. So grab your supplies and let’s walk through how to make an easy pencil drawing that looks real.
Drawing of a Pencil Made Simple
The shape of a pencil is a cylinder. We’ve drawn cylinders and other objects that have a cylinder shape before, like a cake. The link to that post is found below.
OK, a pencil is a long, slender cylinder, but this time we’ll draw it with a twist. We will draw it in several positions.
Lay a pencil on the table in front of you and just observe what it looks like, move it side to side up and down, and back and forth. Let’s look at how to draw a pencil so that it looks as if it is in some of these positions.
Drawing of a Pencil Three Ways
Option 1
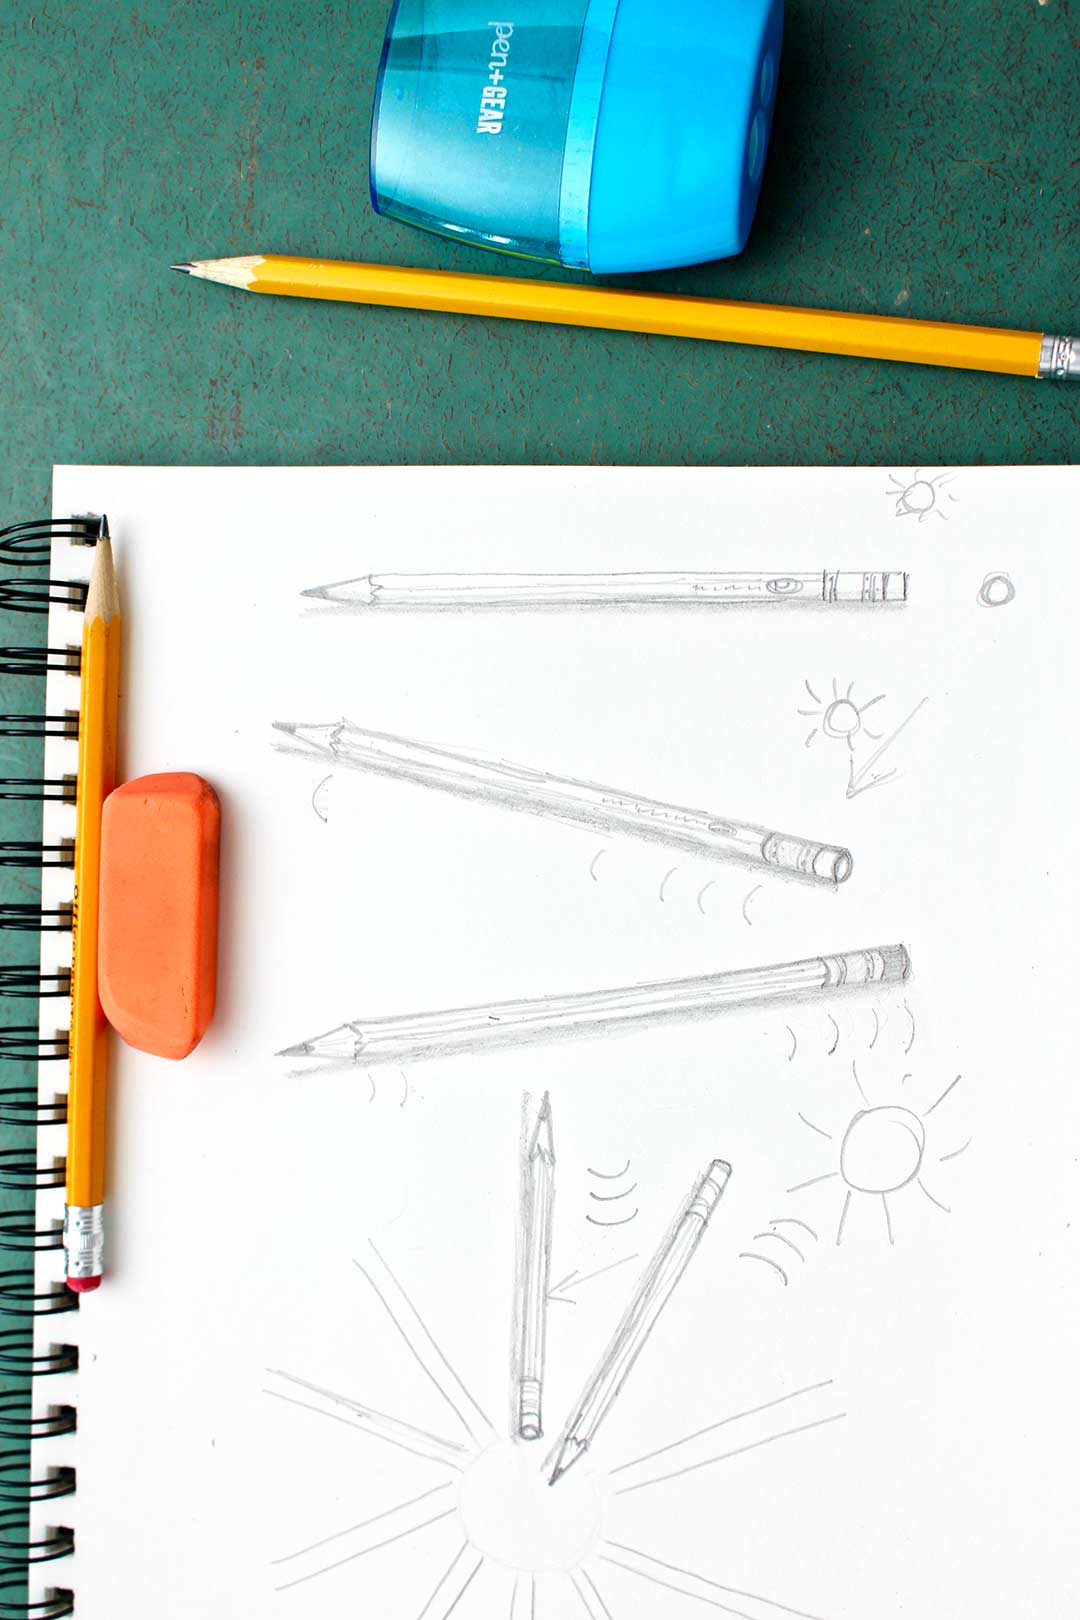
Let’s start by drawing a pencil that is on the table with you looking at it straight on from the side.
I’m excited to show you how to draw a pencil in several positions because it always intrigues me to see how making a few lines and bits of shading can make a drawing on a flat piece of paper look more 3D.
If you are a YouTube fan, here is a link to a longer, step-by-step video to help you draw a pencil: How to Draw a Pencil PlayH Demo. Subscribe while you are there!!
Looks like a rectangle
From this viewpoint a cylinder-shaped pencil looks like a long, narrow rectangle with a pointed end.
Draw a long narrow horizontal rectangle and then add the triangular pointed end. The pointed end is actually a cone which is another shape we have already learned to draw.
Add details
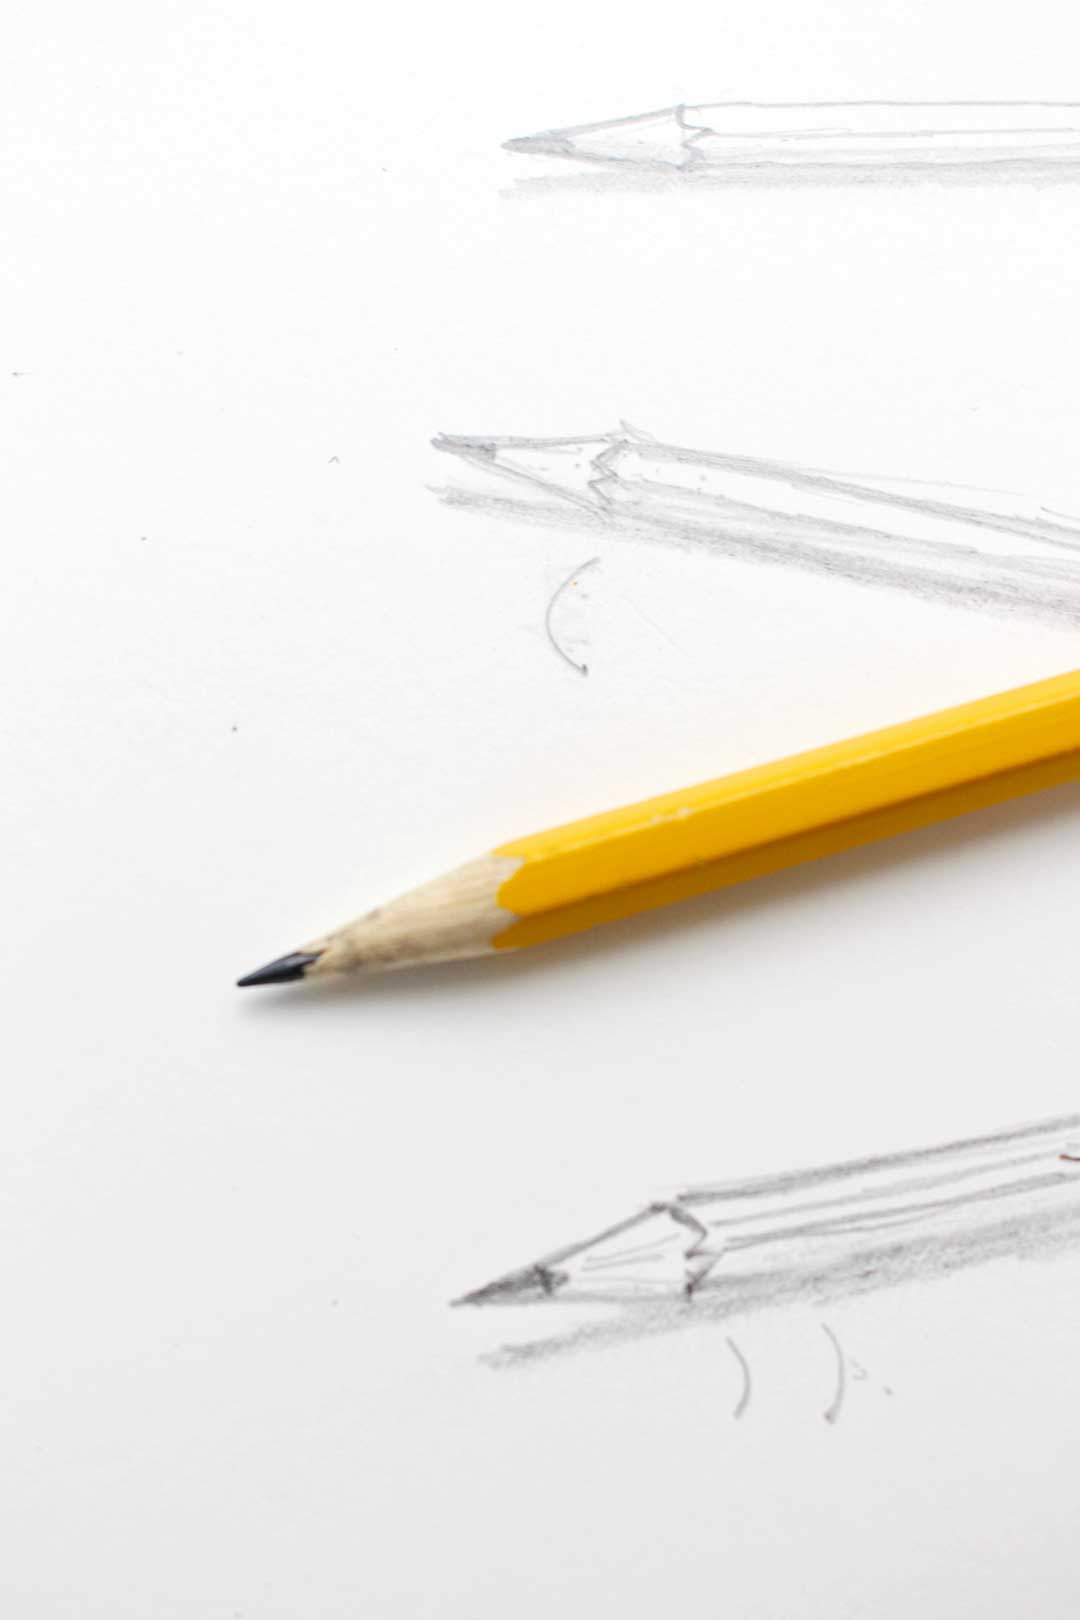
We add the eraser and metal end with the ridges of the metal part of the eraser. Then replace the straight line of the rectangle with a jagged line to give the look of where the pencil is sharpened. Darken the pointed end to look like pencil lead.
Shading
The shading and details on the pencil are what make the drawing seem more 3D.
So pretending that the light source is to the upper right, there is a shadow under the pencil where the light is blocked. Lay the pencil you are using to draw with over to the side and use the side of the lead to shade the underside of the pencil. I do a little smudging with my finger when I’m done.
If the pencil you are drawing is round, leave it as it is, if it has the flattened sides, draw lines the length of the pencil excluding the point and the eraser.
You can add whatever lettering is on the pencil if you want.
Option 2
Now, let’s draw a pencil in another position.
Place the pointed end of the pencil to your left and push it back about 2 inches. The eraser end will be closer to you than the pointed end.
This change in position changes how we draw the pencil.
Two horizontal lines
Now the two vertical lines of our cylinder pencil look slanted with the left side higher than the right side. Draw these two lines. Also draw the pointed end on the left end.
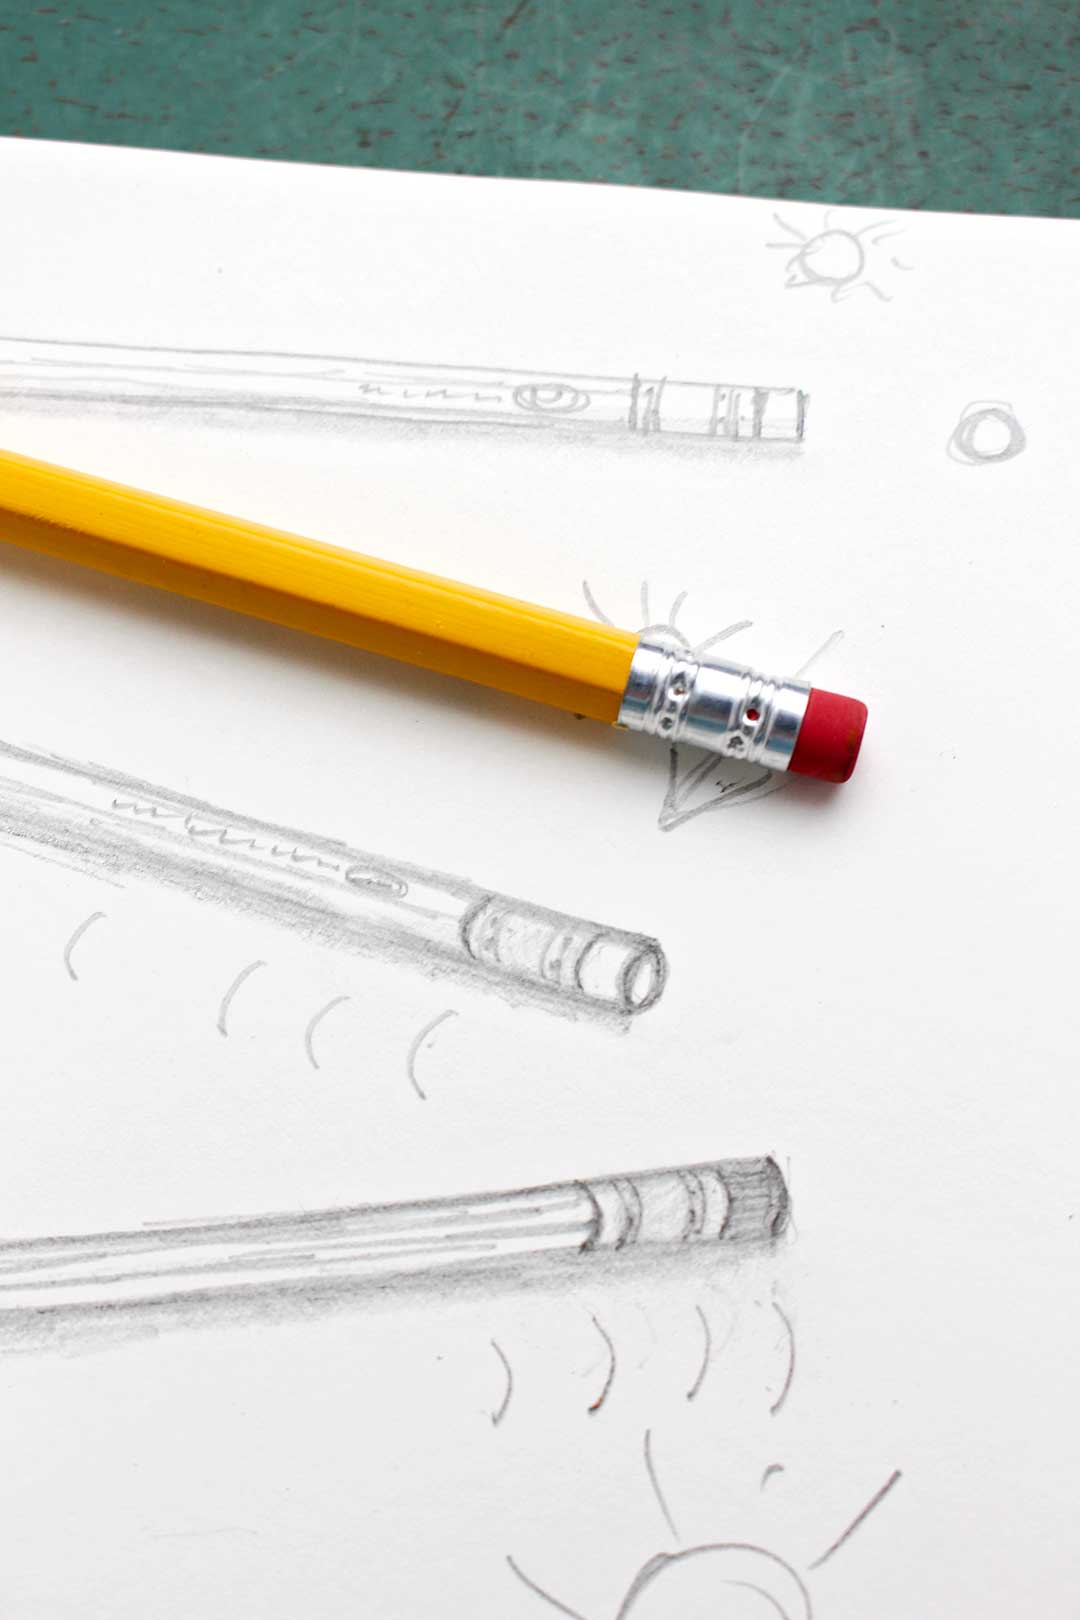
Oval end
We can now see the end of the eraser on the right end which looks like an oval (a foreshortened circle). Draw this oval that is the end of the eraser. The oval is vertical and fits between the two lines we just drew.
Note: If you are looking at the pencil with the eraser straight at you, it looks like a circle. This circle shape changes to an oval as you slant the pencil in different directions.
Details
Now draw the rings of the metal part of the eraser by making “smile” lines that are the same “smile” slant as the left side of the oval. The video helps you to see what I mean by this if that is confusing.
Lightly draw the same slanted smile line on the other end of the pencil to show where the painted part of the pencil ends, and the pointed end begins.
Make this line kind of jagged to look like where the sharpener cut into the wood and erase the light line you made before.
Darken the end of the pointed part to look like pencil lead.
Shading
Pretend that there is a light source to the upper right and shade the lower part of the pencil and the area below the pencil where the light is blocked as we did before.
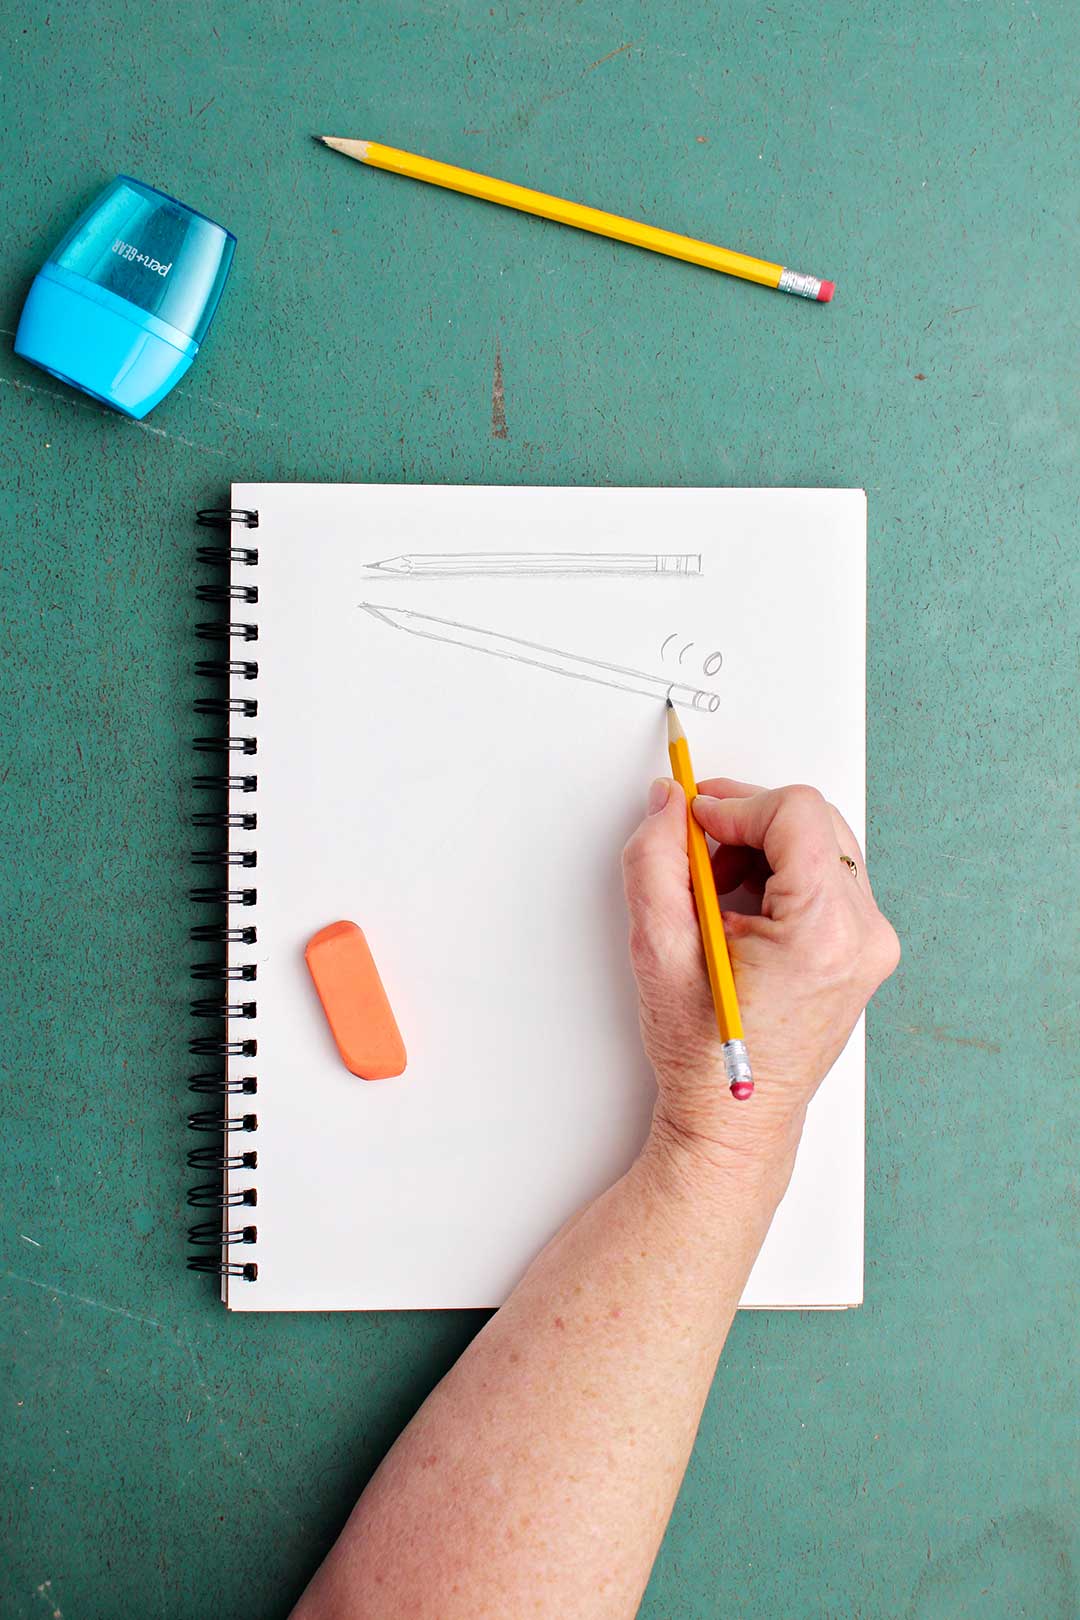
Option 3
Let’s look at one more pencil position and draw it on paper.
Take the pencil and move the pencil tip (lead) on the left closer to you and the eraser end on the right further away on the table.
Now the two vertical lines of our cylinder pencil look slanted with the right side higher than the left side. Draw these two lines. Also draw the pointed end on the left end.
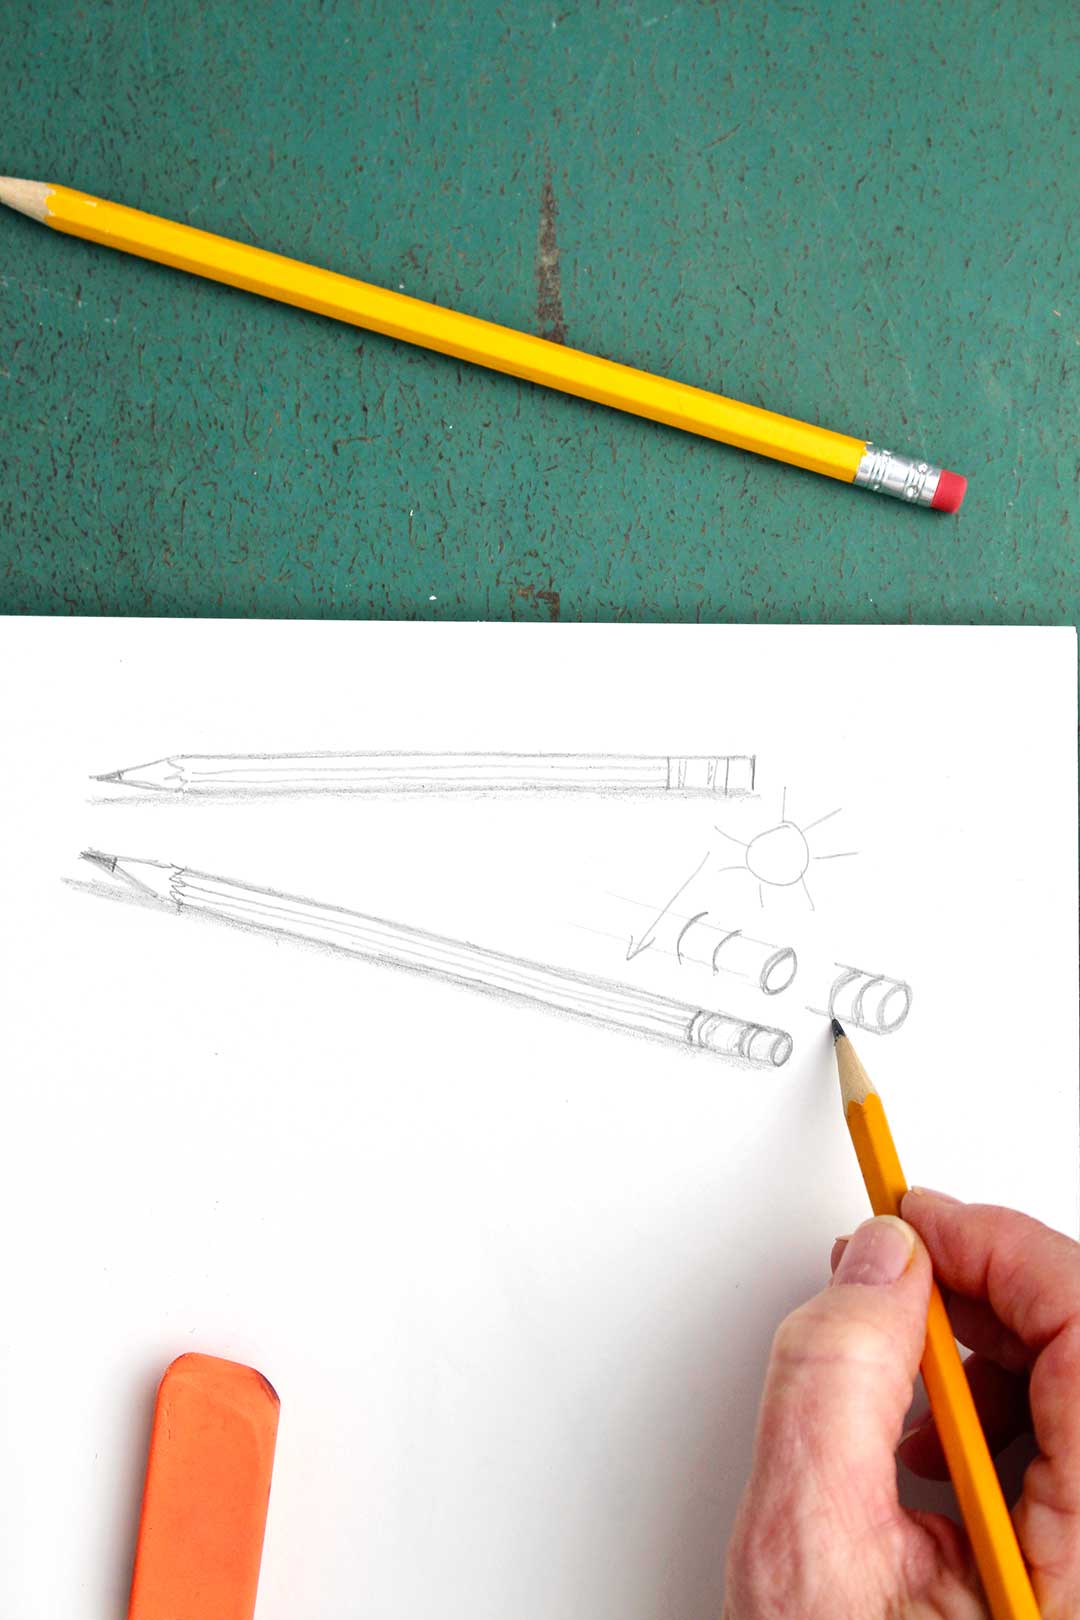
"Smile" lines
Now we CAN’T see the end of the eraser on the right end- draw a smile line that bows to the right to look like the rounded end of the eraser. You will not make the full oval this time because you can’t see the end of the eraser.
Now draw the rings of the metal part of the eraser by making “smile” lines that are the same “smile” slant as the one we just made. The video helps you to see what I mean by this if that is confusing.
Lightly draw the same slanted smile line on the other end of the pencil to show where the painted part of the pencil ends, and the pointed end begins.
Details and shading
Make this line kind of jagged to look like where the sharpener cut into the wood and erase the light line you made before.
Darken the end of the pointed part to look like pencil lead.
Pretend that there is a light source to the upper right and shade the lower part of the pencil and the area below the pencil where the light is blocked as we did before.
Add the details of the pencil as we did last time if you want.
How to Draw a Pencil Easy 3D
Isn’t it cool how our simple drawings look more 3D because of these techniques? I love it!
Are you ready for a fun assignment? I told you that we have pencils for school!
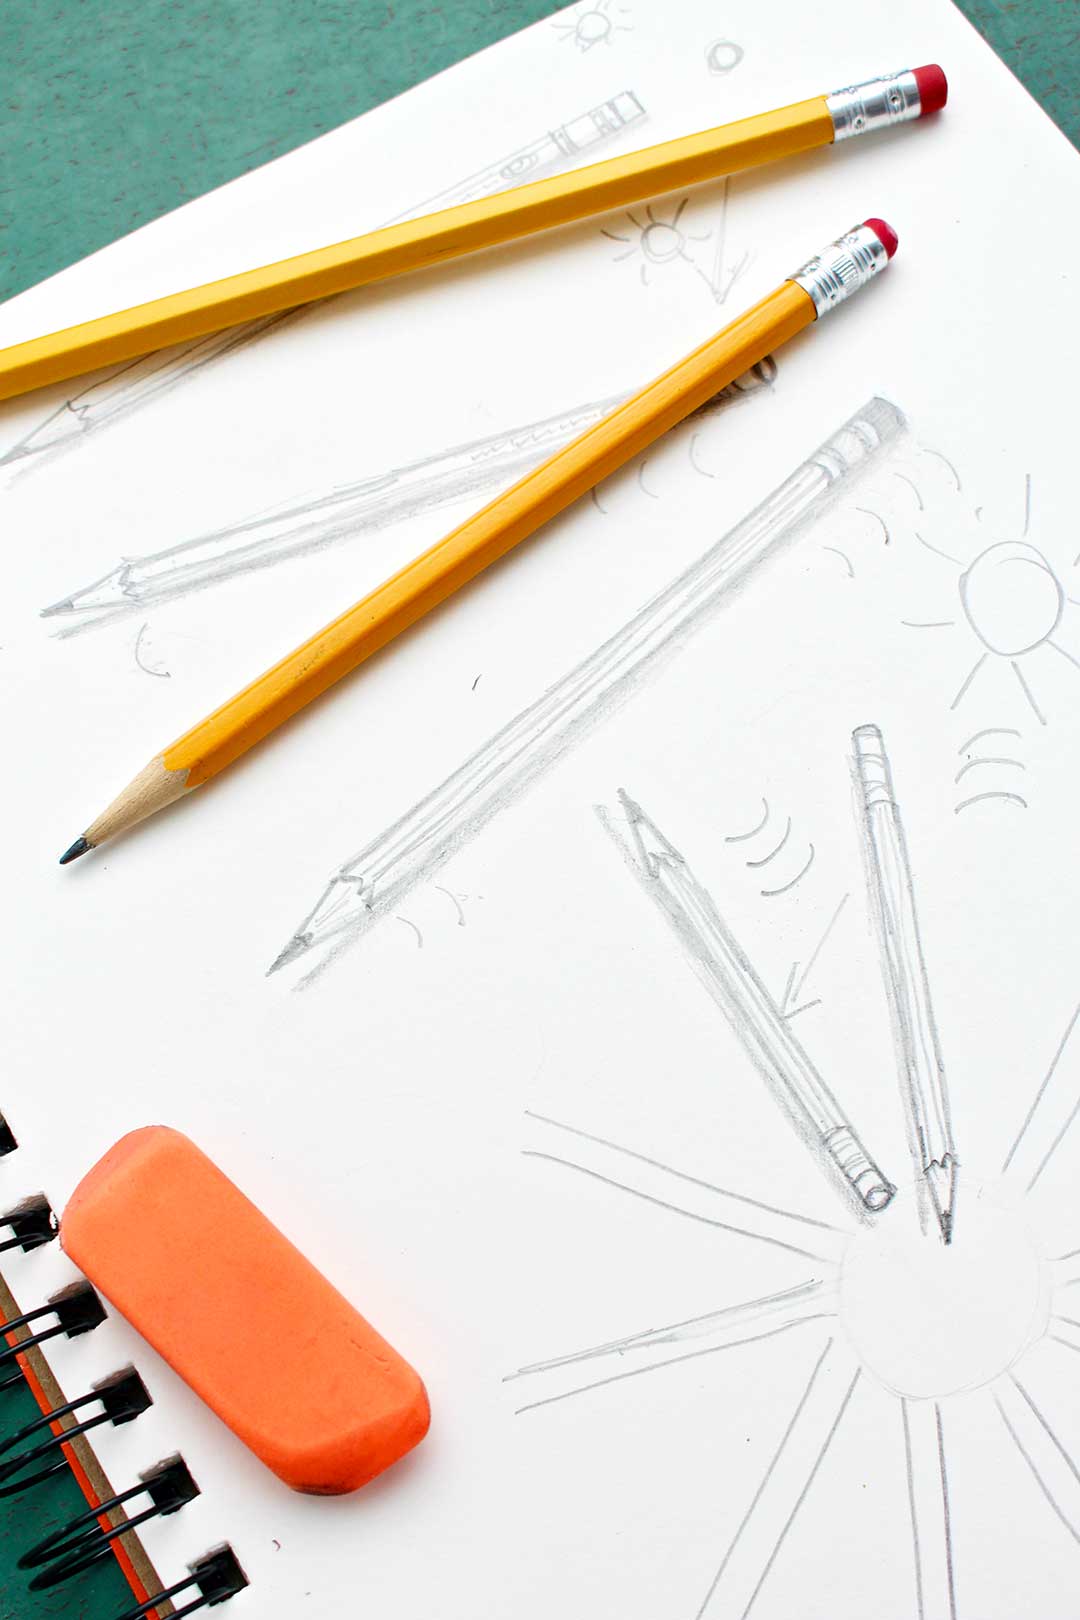
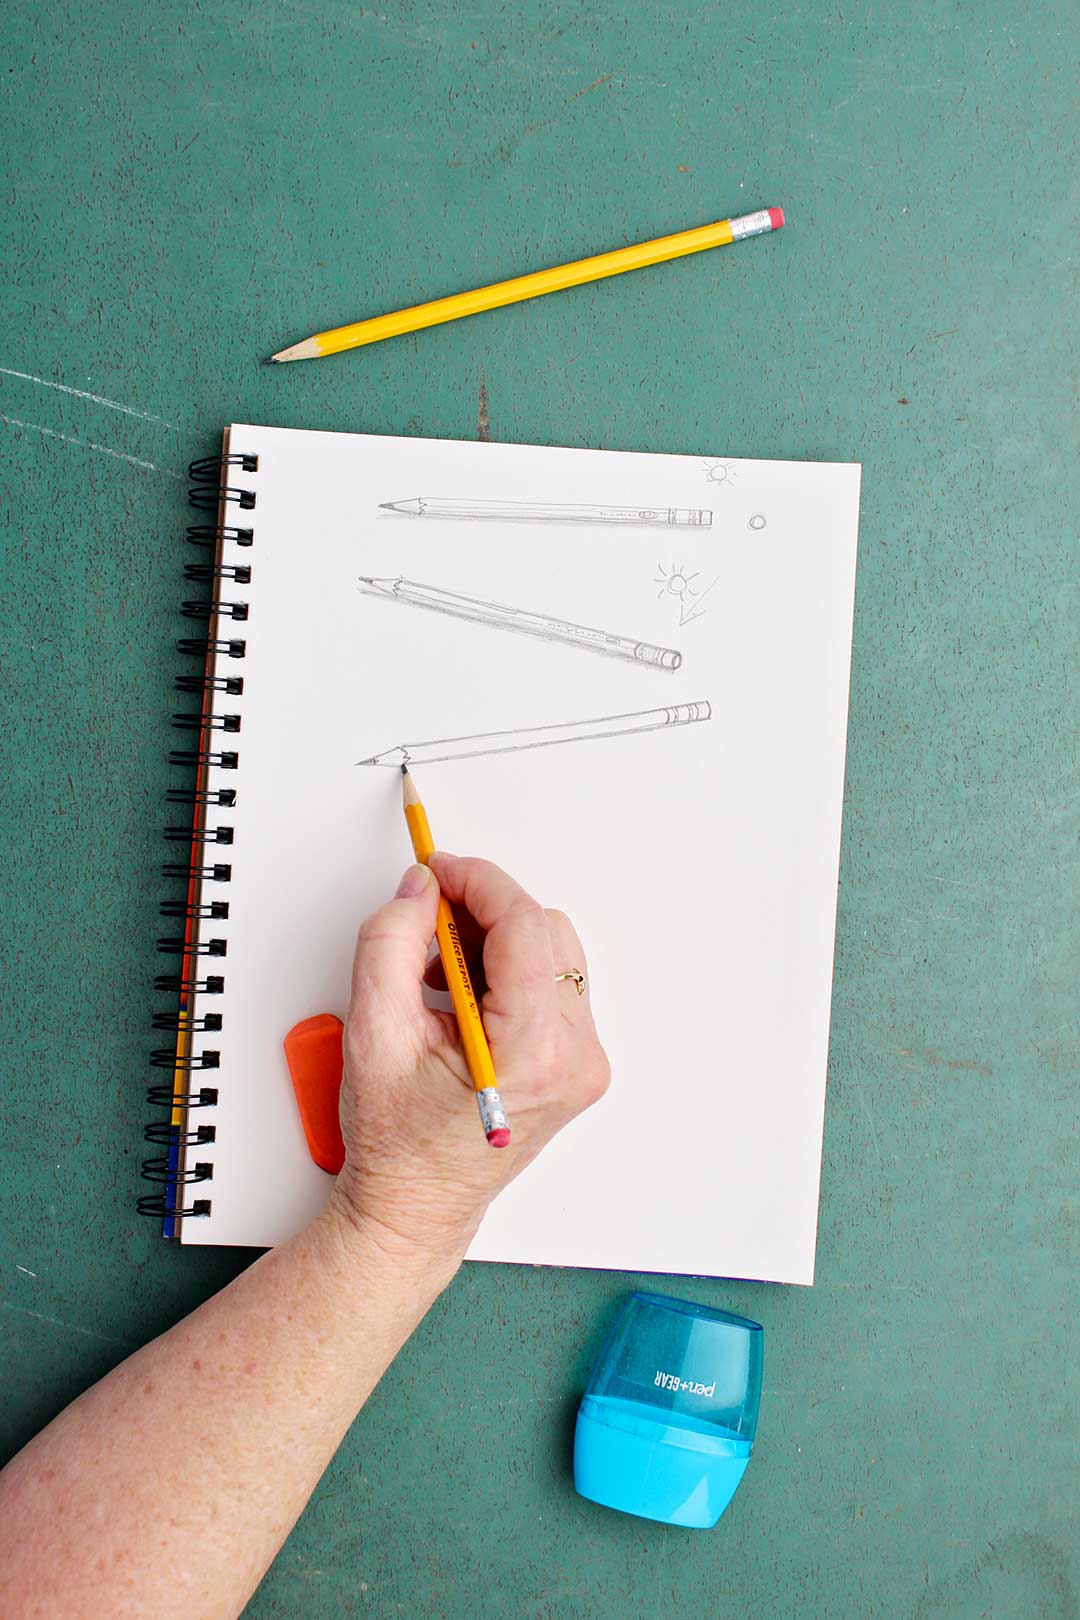
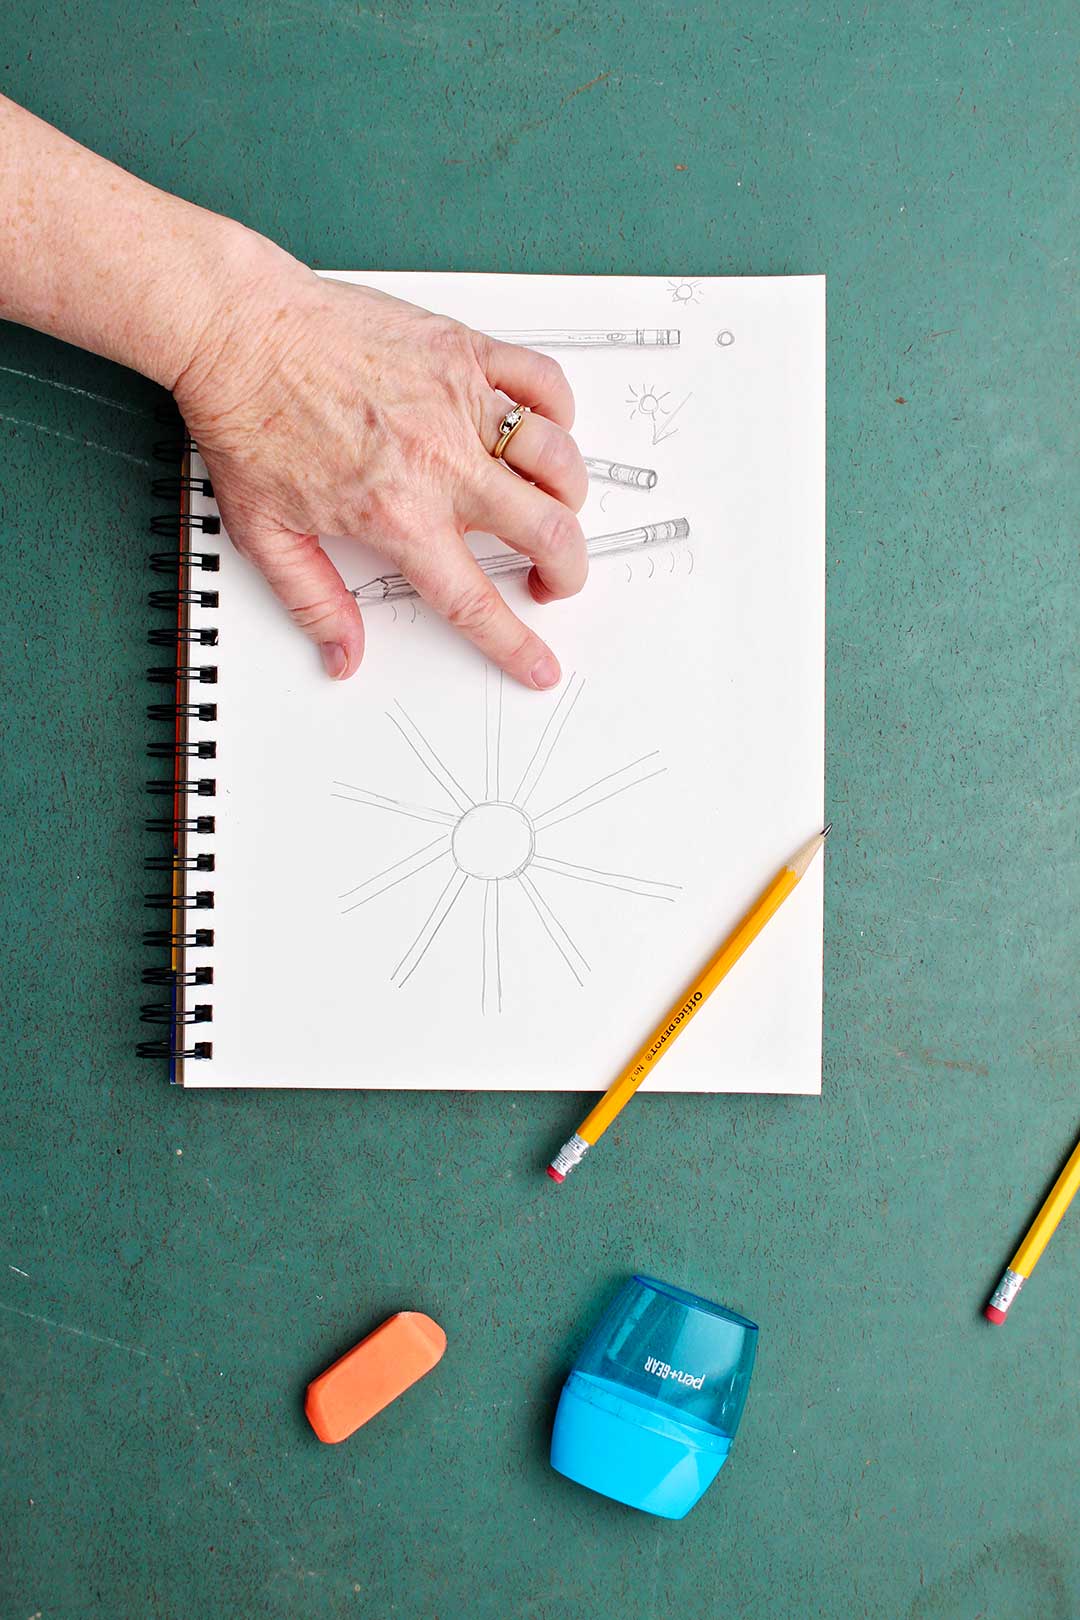
Practice How to Draw a Pencil
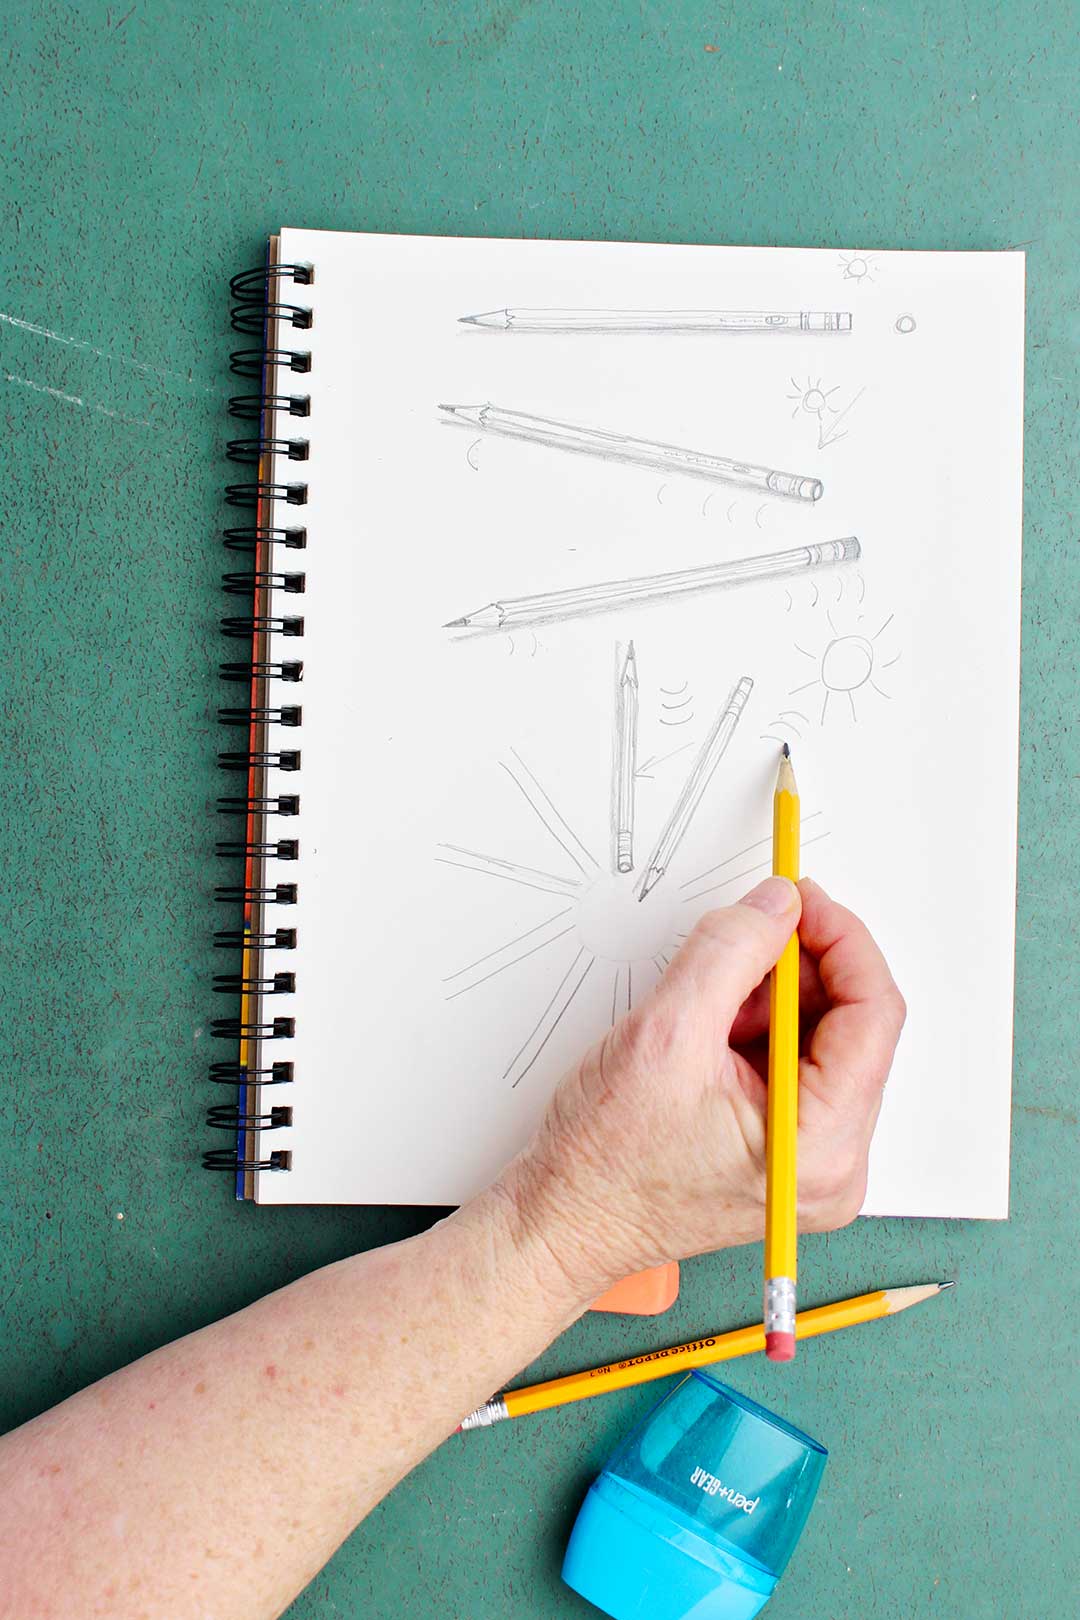
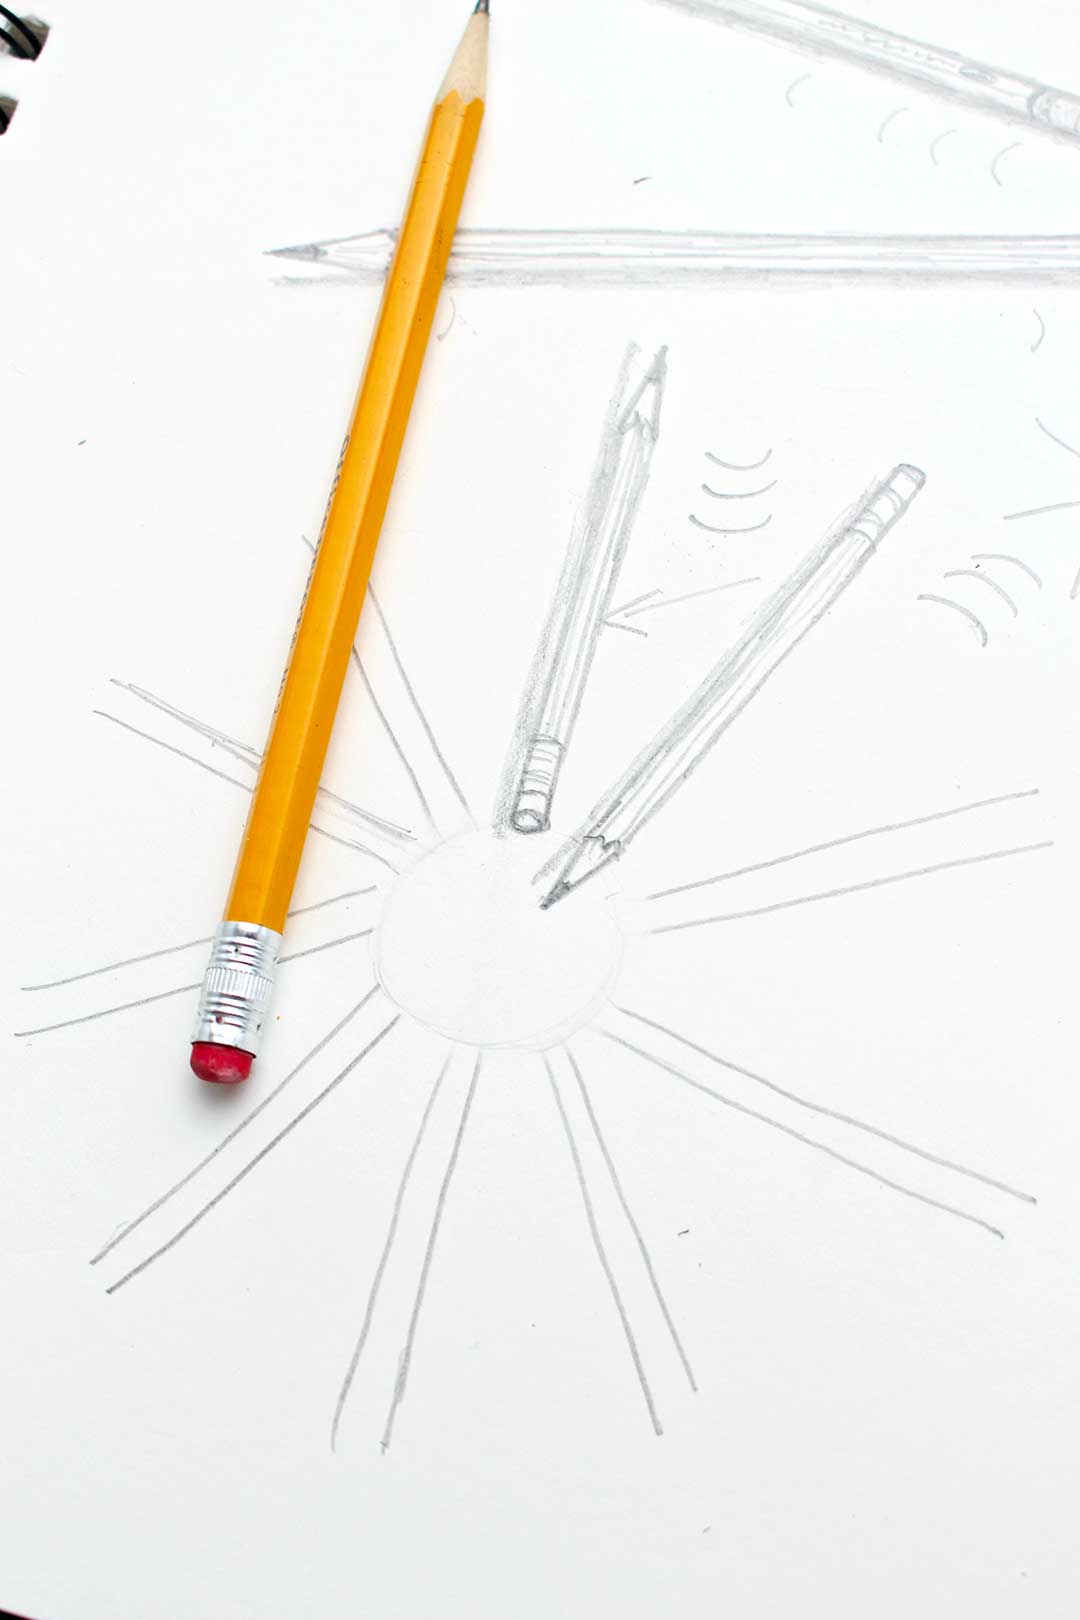
For practice, draw a circle in the center of your sketch book page that’s about the size of a quarter.
Draw sets of horizontal lines that radiate out of this circle in all directions that are about 3 inches long.
Erase the original circle.
Now make each of the sets of lines into a pencil that is positioned in difference directions. Are you getting the hang of it? This is a simple but great skill in drawing.
How to draw shapes series
So if you are just joining me on Welcome To Nana’s, we have done a series of how to draw tutorials featuring various shapes and objects with those shapes.
When you learn the skills of drawing these shapes you will notice that many things you want to draw are made up of these various shapes put together. So you have a good starting point for drawing what you want to draw.
When you do, doodle them!! You will be amazed at how your drawing skills improve as you do. Plus…it’s FUN!!
Learning how to draw a pencil in various positions is very helpful in this learning to draw process. Let me know how you do.
Other drawing shapes posts:
If you want to review How to Draw a Cylinder here is the link to that post: How to Draw a Cylinder. And if you're interested in more drawing tutorials, check out the following from around the blog:
Enjoy!
If you try this craft, let me know! Go ahead and leave a comment, rate it, and tag a photo with #WelcometoNanas wherever you post.
Come join the fun at https://welcometonanas.com
Pencil Drawing of a Pencil
Equipment
- Pencil sharpener
Items Required
Instructions
- Let’s start by drawing a pencil that is on the table with you looking at it straight on from the side. I’m excited to show you how to draw a pencil in several positions because it always intrigues me to see how making a few lines and bits of shading can make a drawing on a flat piece of paper look more 3D. From this viewpoint a cylinder-shaped pencil looks like a long, narrow rectangle with a pointed end.Draw a long narrow horizontal rectangle and then add the triangular pointed end. The pointed end is actually a cone which is another shape we have already learned to draw.
- We add the eraser and metal end with the ridges of the metal part of the eraser. Then replace the straight line of the rectangle with a jagged line to give the look of where the pencil is sharpened. Darken the pointed end to look like pencil lead.
- The shading and details on the pencil are what make the drawing seem more 3D. So pretending that the light source is to the upper right, there is a shadow under the pencil where the light is blocked. Lay the pencil you are using to draw with over to the side and use the side of the lead to shade the underside of the pencil. I do a little smudging with my finger when I’m done.If the pencil you are drawing is round, leave it as it is, if it has the flattened sides, draw lines the length of the pencil excluding the point and the eraser.You can add whatever lettering is on the pencil if you want.
- Now, let’s draw a pencil in another position.Place the pointed end of the pencil to your left and push it back about 2 inches. The eraser end will be closer to you than the pointed end.This change in position changes how we draw the pencil.Now the two vertical lines of our cylinder pencil look slanted with the left side higher than the right side. Draw these two lines. Also draw the pointed end on the left end.
- We can now see the end of the eraser on the right end which looks like an oval (a foreshortened circle). Draw this oval that is the end of the eraser. The oval is vertical and fits between the two lines we just drew.Note: If you are looking at the pencil with the eraser straight at you, it looks like a circle. This circle shape changes to an oval as you slant the pencil in different directions.
- Now draw the rings of the metal part of the eraser by making “smile” lines that are the same “smile” slant as the left side of the oval. The video helps you to see what I mean by this if that is confusing.Lightly draw the same slanted smile line on the other end of the pencil to show where the painted part of the pencil ends, and the pointed end begins.Make this line kind of jagged to look like where the sharpener cut into the wood and erase the light line you made before. Darken the end of the pointed part to look like pencil lead. Pretend that there is a light source to the upper right and shade the lower part of the pencil and the area below the pencil where the light is blocked as we did before.
- Let’s look at one more pencil position and draw it on paper.Take the pencil and move the pencil tip (lead) on the left closer to you and the eraser end on the right further away on the table.Now the two vertical lines of our cylinder pencil look slanted with the right side higher than the left side. Draw these two lines. Also draw the pointed end on the left end.
- Now we CAN’T see the end of the eraser on the right end- draw a smile line that bows to the right to look like the rounded end of the eraser. You will not make the full oval this time because you can’t see the end of the eraser.Now draw the rings of the metal part of the eraser by making “smile” lines that are the same “smile” slant as the one we just made. The video helps you to see what I mean by this if that is confusing.Lightly draw the same slanted smile line on the other end of the pencil to show where the painted part of the pencil ends, and the pointed end begins.
- Make this line kind of jagged to look like where the sharpener cut into the wood and erase the light line you made before. Darken the end of the pointed part to look like pencil lead. Pretend that there is a light source to the upper right and shade the lower part of the pencil and the area below the pencil where the light is blocked as we did before.Add the details of the pencil as we did last time if you want.


Leave a Reply