Art + Food = Charcuterie Board!
I enjoyed my first charcuterie board last year at a family get together. I loved it! It is such a cool blending of art and food and requires little or no cooking. Now that’s MY kind of meal!
And wouldn’t the grands love putting the food out? Such a great kid project when they come over to eat.
Buy a board or make one? Use an old wooden tray!
I had given thought to purchasing a charcuterie board several times but settled on making a DIY Wooden Charcuterie Board. I didn’t have a firm idea of how to do it, but it was in the back of my mind.
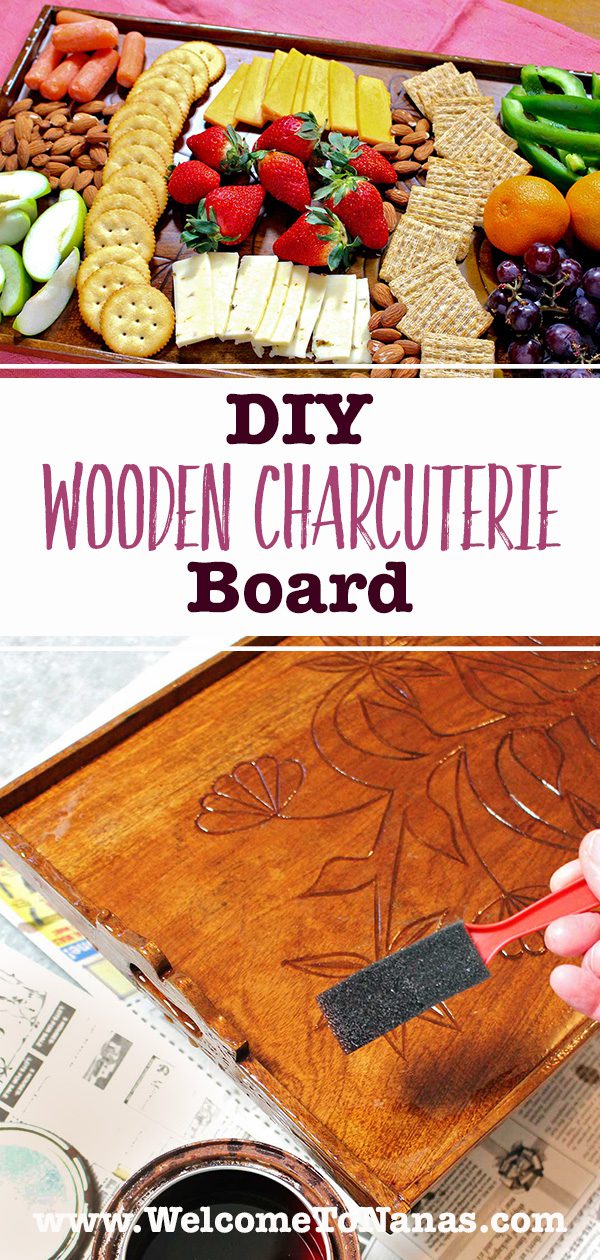
When cleaning out a cupboard I came across this wooden tray that we received for a wedding gift and had been unused for some time. It was going in my donation box when a little light bulb went off in my head. Why not make a charcuterie board (tray) out of this? Immediately I got so excited. I love upcycling!
Prefer to watch a video? Watch the process here!

How to make a charcuterie board for beginners
How to make a charcuterie board food safe
One thing that I desired was for the board to be food safe. If I use meats and such on it, I’d like to be able to clean it and not be concerned about food safety especially in the wood or corners of the tray.
What finish to use on the DIY Wooden Charcuterie Board (tray)?
I researched some options and found that the board can be rubbed with a food safe wax or oil after sanding. But with the carved designs in the surface of the tray, I didn’t care for that option.
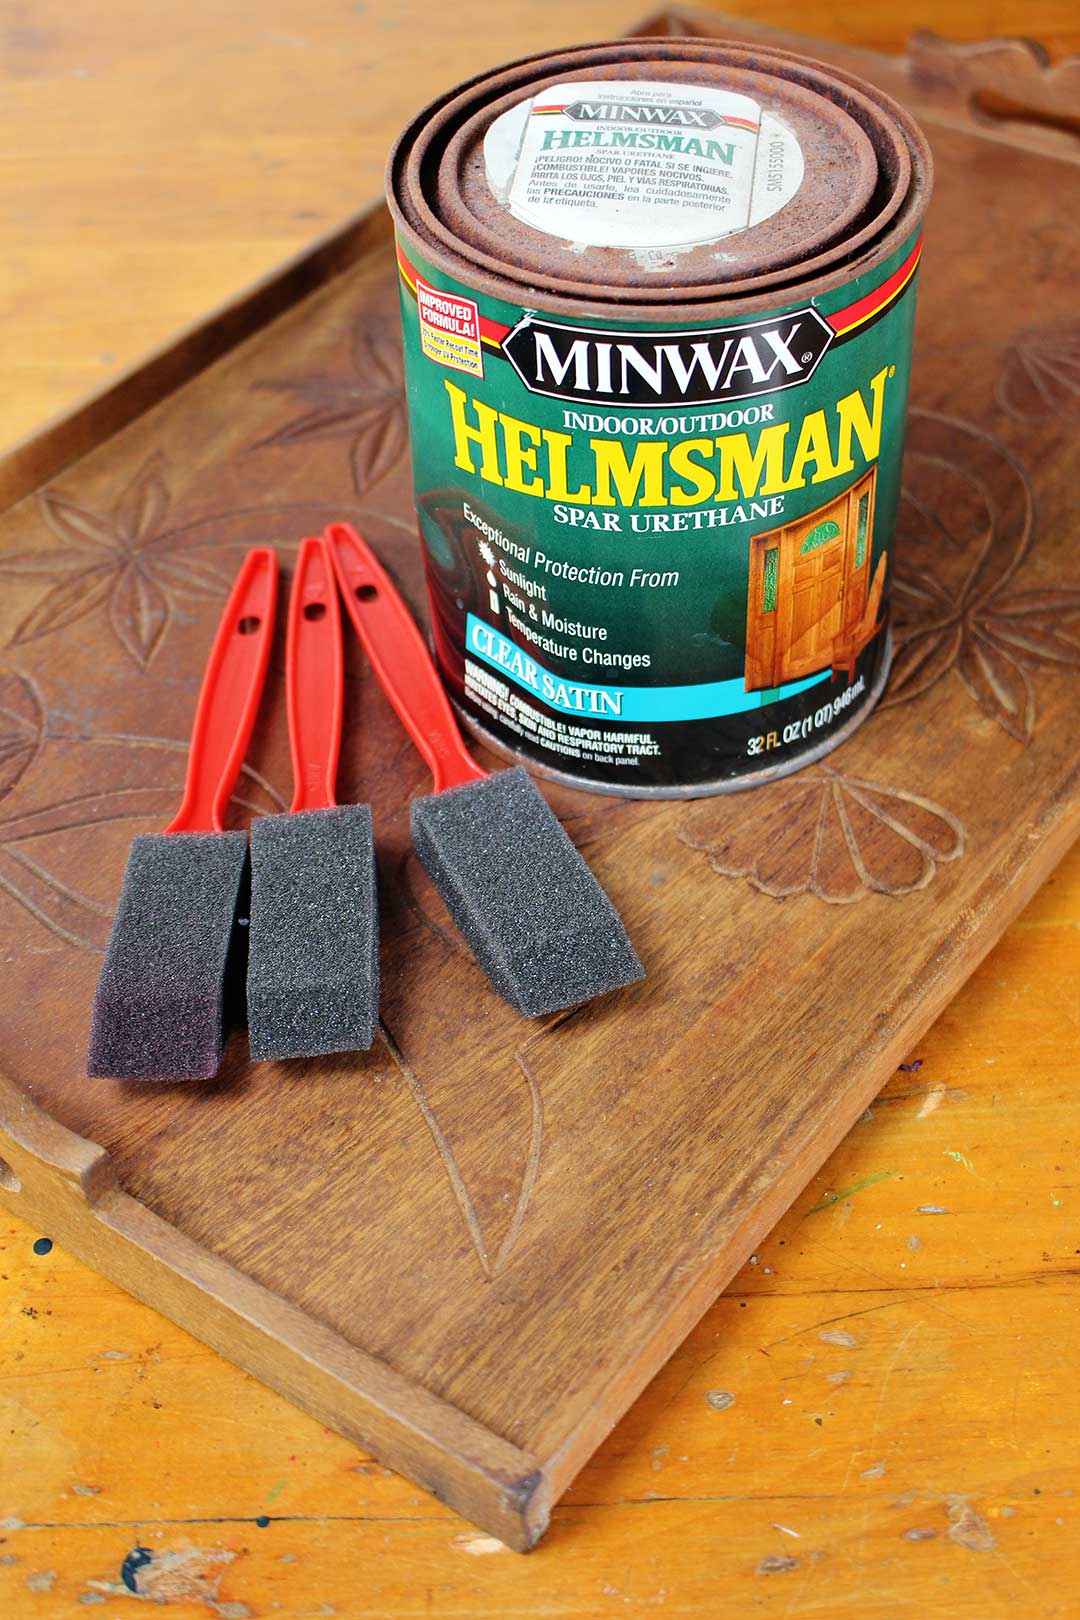
I have a friend that uses Spar Varnish for finishing tabletops. It is waterproof and is very tough (it’s for boats for Pete’s sake). I discovered that it is food safe after curing for 30 days. Plus, I had some already. The Varnish will go down in the designs and corners of the tray and fill them in, so I don’t need to be concerned about food safety.
Decision made. Spar Varnish.
Note: This board won’t be used for cutting on. That would damage the finish.
The board did not need to be sanded much at all and wasn’t waxed. So, the surface just needed to be wiped clean with a damp cloth and left to air dry.
How to make a charcuterie board (tray)
Fill cracks with wood putty
I did use wood putty in the cracks between the sides and bottom of the tray so that the varnish would not run through the cracks. My goal is for the varnish to fill the cracks from the top and seal them up.
Coat the back with Spar Varnish
I started by finishing the back and sides of the tray first.
My fancy stand was four tin cans set on top of newspaper. I did this work in a basement room with fans and an open window for ventilation.
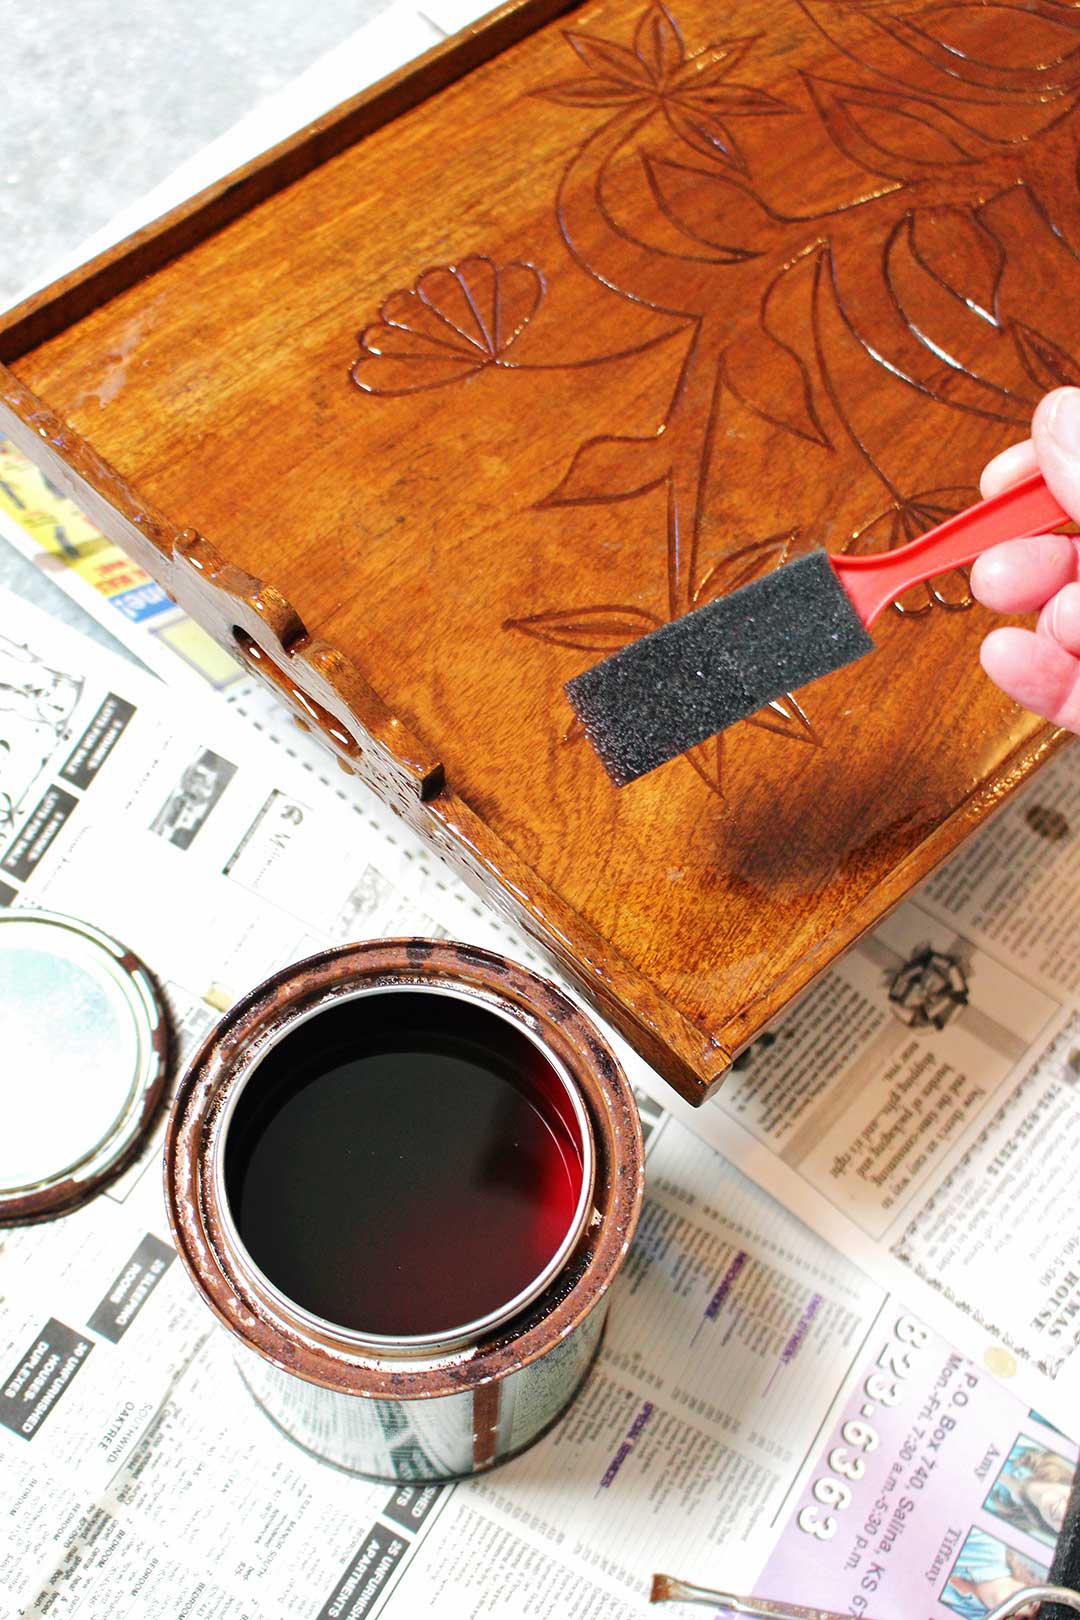
Open the Spar Varnish can, stir, and start in.
I used small disposable foam brushes because I didn’t want to clean a paint brush after every coat. Lazy, I know. Downside- I think that the small foam brushes caused there to be more small bubbles in the varnish. I would probably use a brush next time.
Tip: Don’t shake a varnish. Just stir it gently until mixed through.
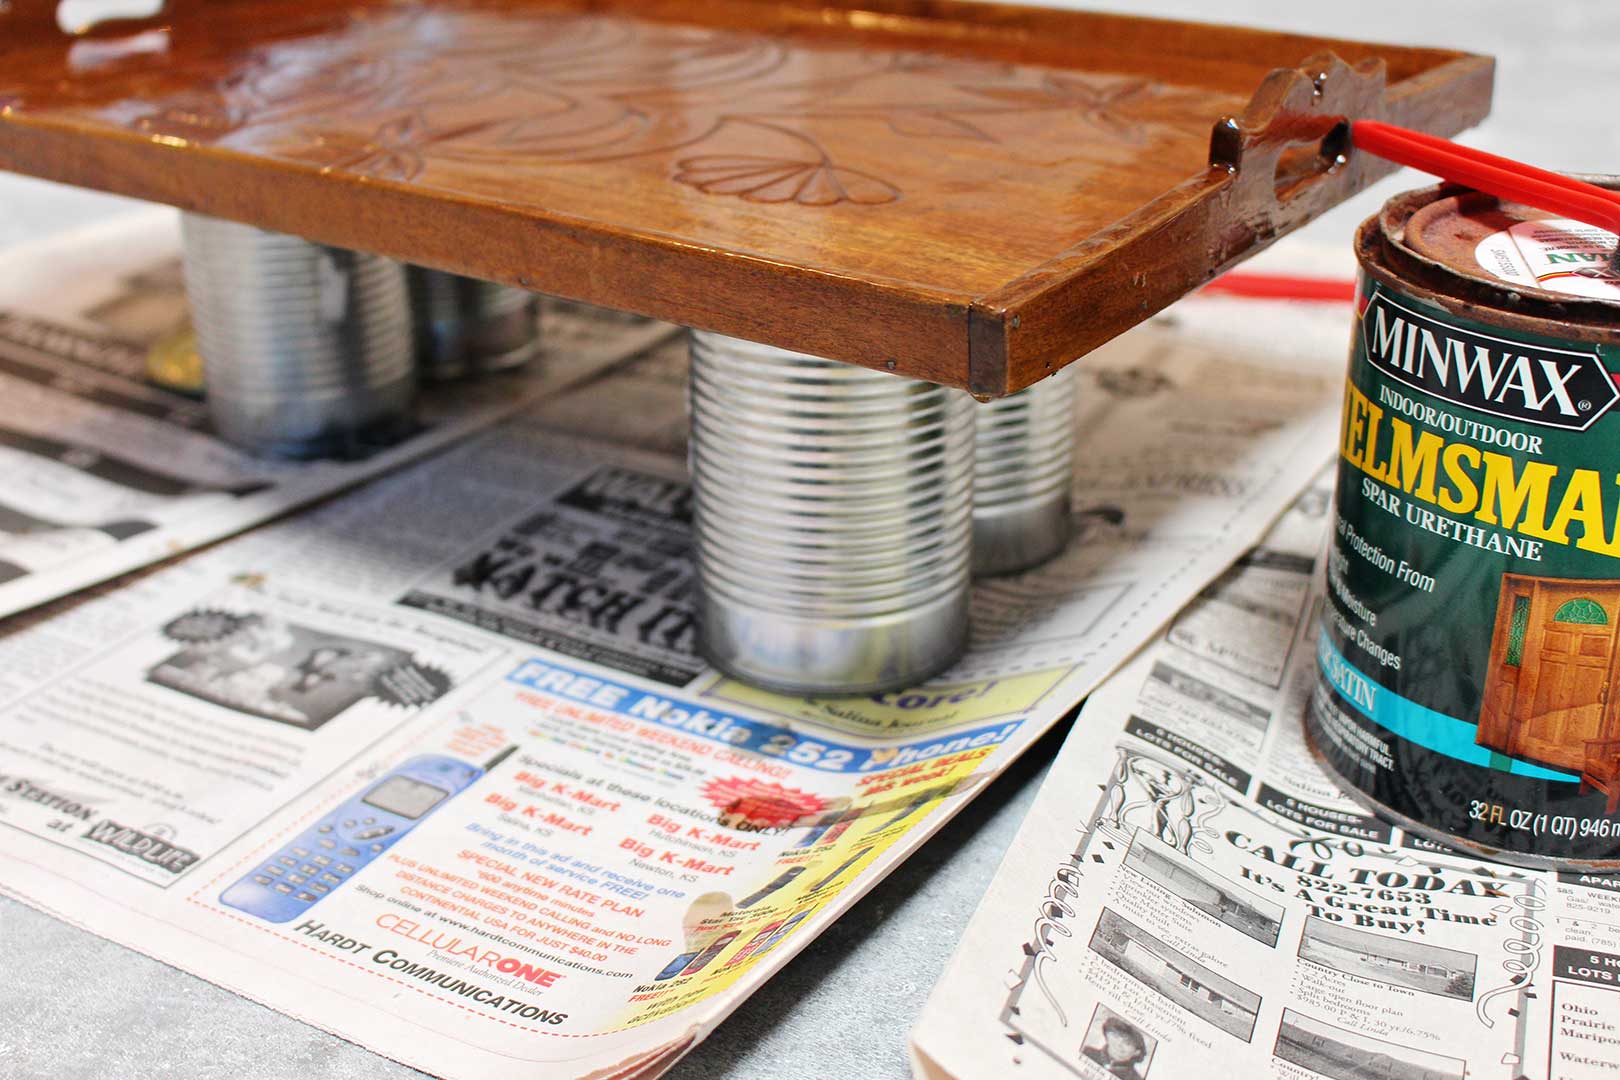
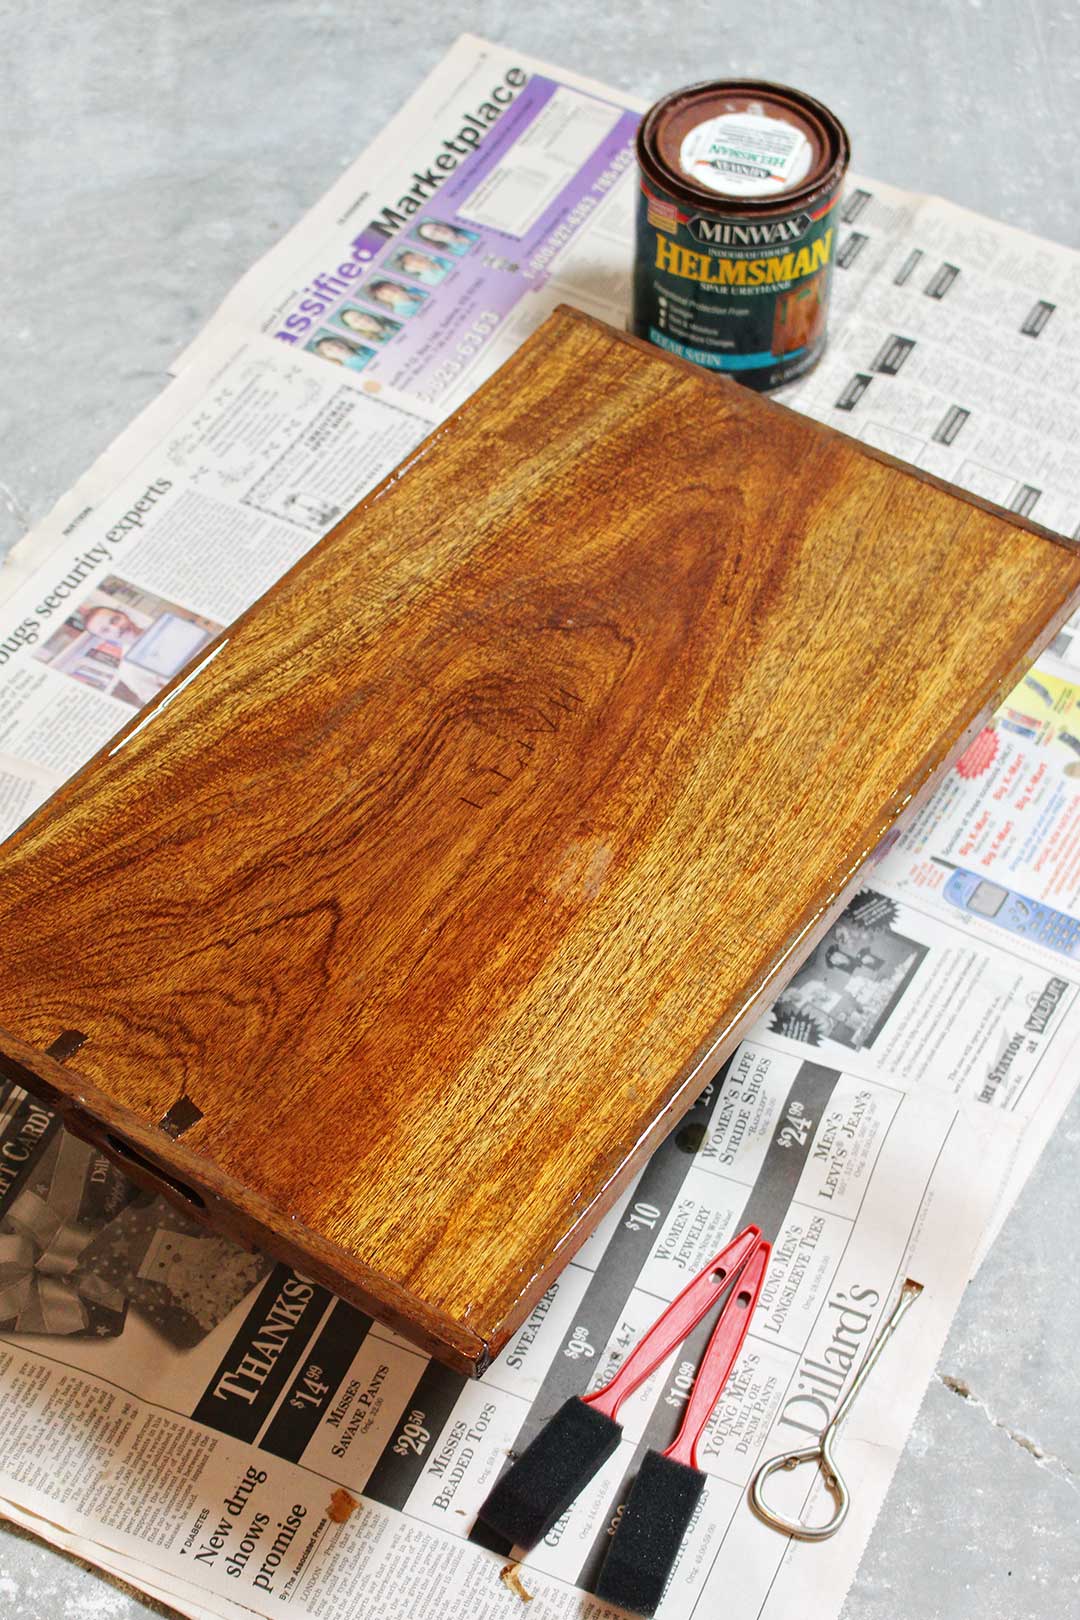
I brushed a coat of varnish on the back and sides of the DIY Wooden Charcuterie Board and let it dry for at least 4 hours before coating the tray again.
Tip: Some varnish may cause drips on the sides so wipe around the edge of the sides before letting the coat of varnish dry.
When the varnish is dry, use a fine steel wool to gently go over the dry varnish and wipe off with a soft cloth.
Repeat and repeat!
I used 3 coats of varnish on the back of the tray. Can you see the nice hard surface that this created?
Use Spar Varnish on the front of the board
When dry I turned the tray over and used the Spar Varnish on the top and inside edges and tops of the sides. I used the same process as before but this time I used 4 coats. The varnish sealed the cracks and filled in the carved designs on the surface of the tray. Yay!
Now to let it cure for 30 days….sigh, I don’t like waiting.
How do you say charcuterie?
I’m glad you asked! This question has sparked some pretty funny answers in our family. The best was from our son-in-law who thinks that a word like “charcuterie” is kind of asking to be mispronounced. So, his pronunciation is: Chunky corduroy or Charlie kitty kitty! It’s sure to get a laugh or an “oh, dad!” response.
Seriously though, saying charcuterie (pronounced “shaar-koo-tr-ee” according to Google) is easier than spelling it! I always slip in an extra vowel somewhere!
Now that I’ve got the pronunciation down, I love saying it AND having a charcuterie tray for any occasion.
DIY charcuterie board ideas
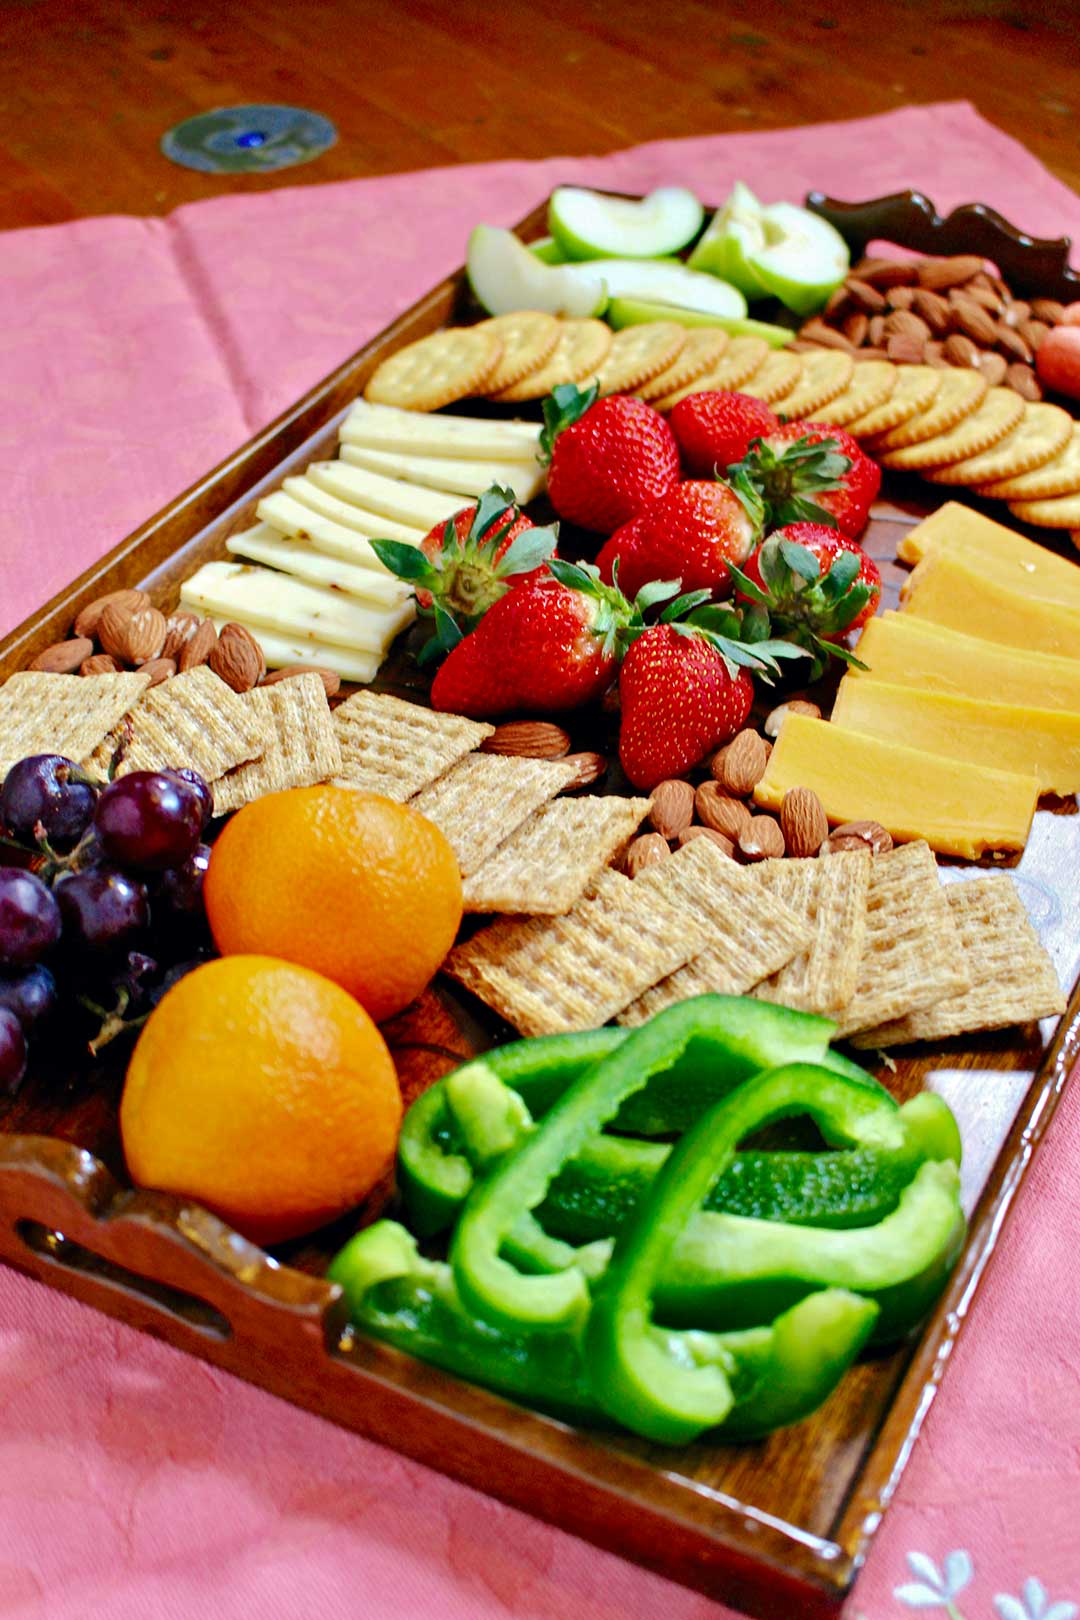
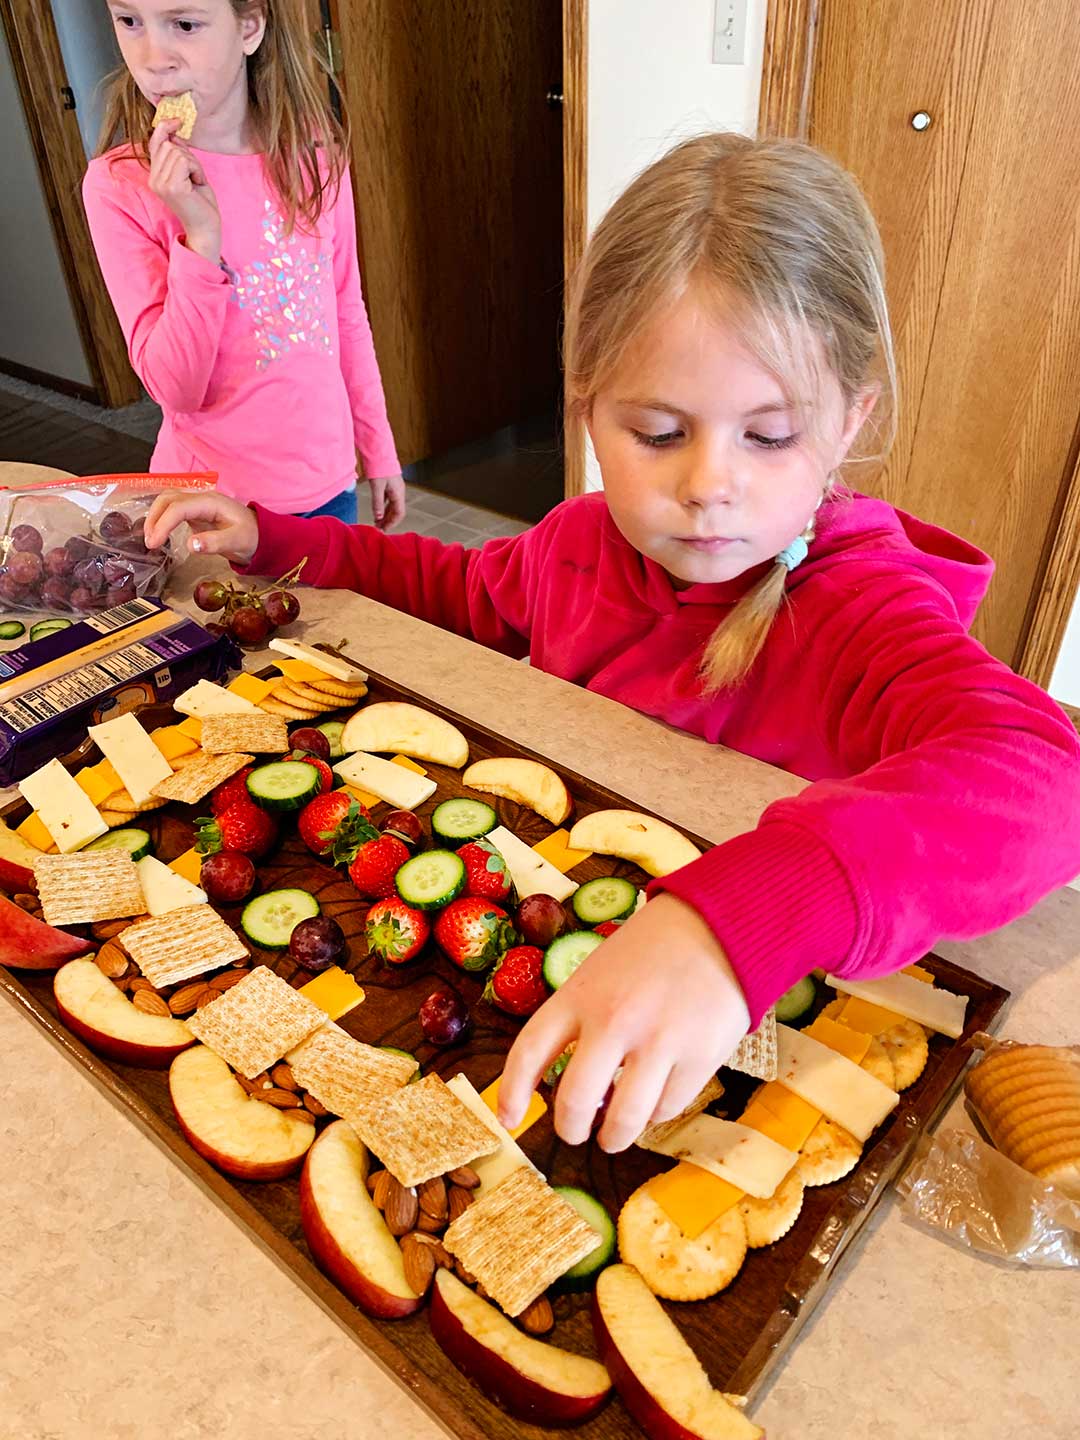
Last weekend the middle granddaughter had so much fun making up our DIY Wooden Charcuterie Board for lunch. Using the food to decorate the tray was serious business and she was in right brain mode. Sister was in snacking mode!
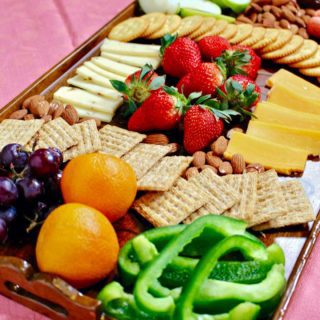
Making rows of crackers and designs of cheese, meats, nuts, fruits and vegetables is so satisfying and makes such a lovely presentation at a meal. Don't you think?
Your turn to make a DIY wooden charcuterie board
Keep your eye out for a tray or large wooden item that you could upcycle for your own DIY Wooden Charcuterie Board. I have a few items in my garage stash that could be possibilities. A surplus building supply store or a secondhand store might provide options for you.
PLEASE send me pictures of the boards or trays that you create. I’m excited for the possibilities and we use ours all the time, even though it’s usually just the two of us.
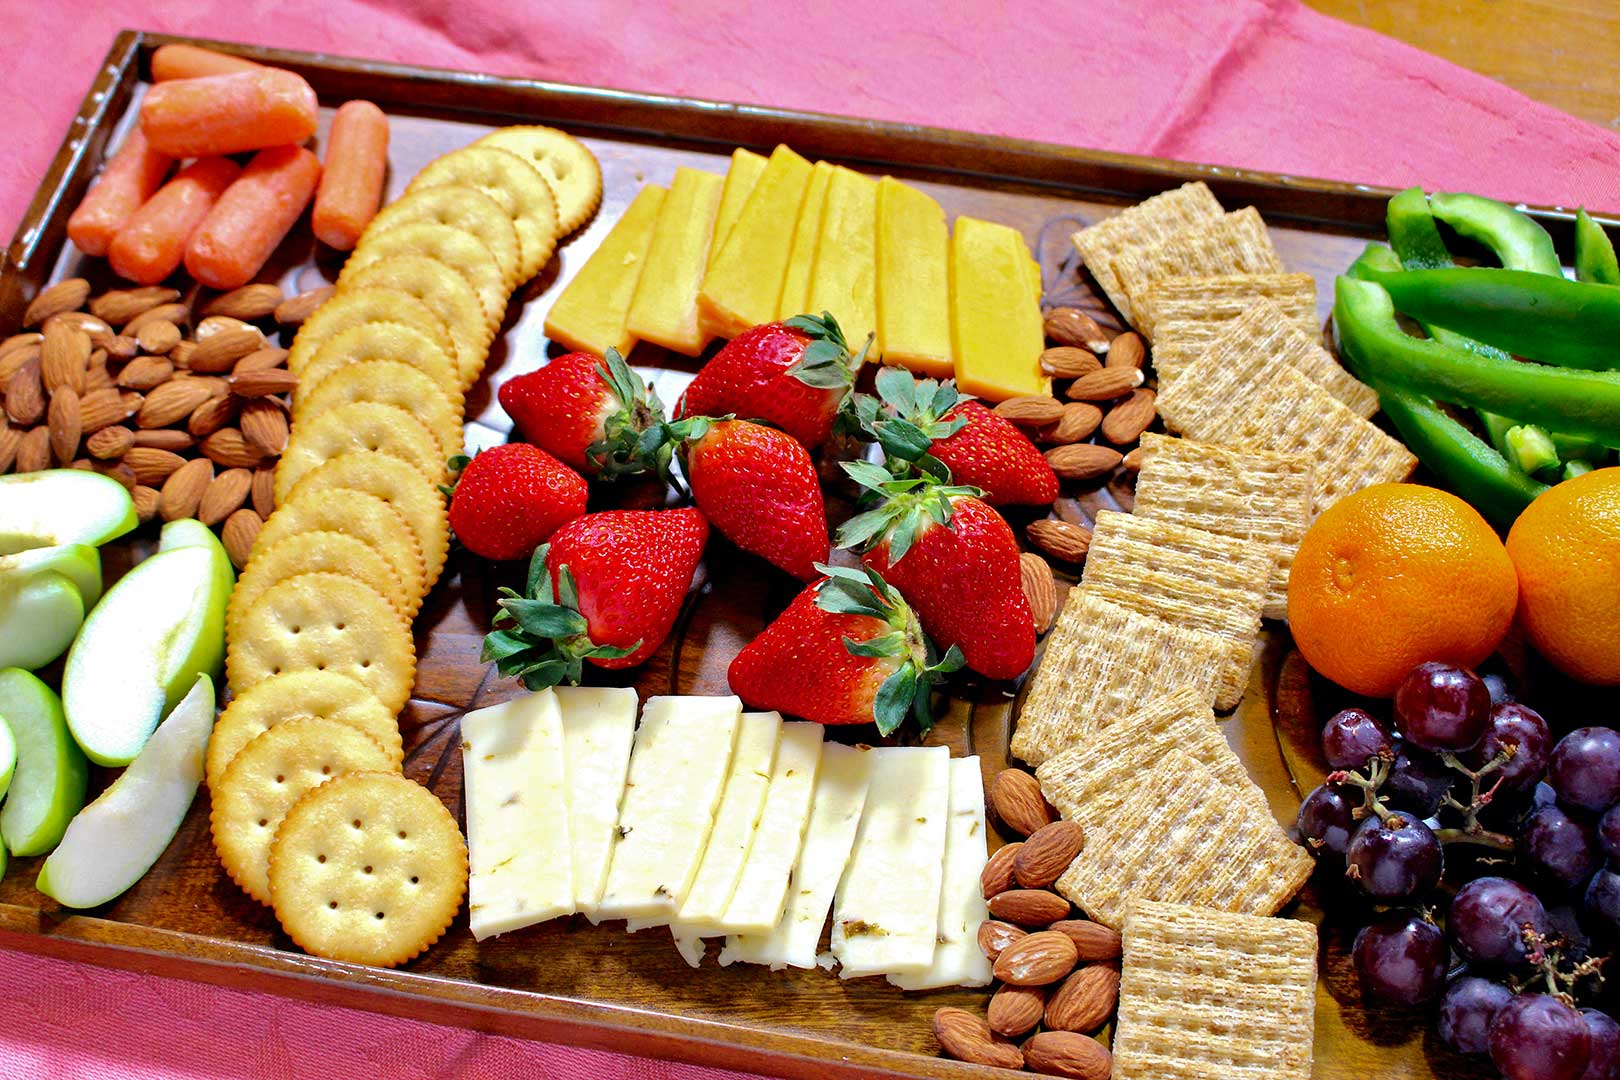
How about some ideas of things to serve on your board?
- Breakfast board: Saturday Morning French Toast, Make an Omelet, Yummy Biscuits and Gravy
- Lunch board: Easy Pizza Pockets, Easy Peasy Grilled Cheese, Turkey Wraps, State Fair Corn Dog Muffins
- Dessert board: Smores Bar, Tea Party Scones, White Chocolate Party Pretzels, Graham Crackers & Frosting
Enjoy!
If you try this craft, let me know! Go ahead and leave a comment, rate it, and tag a photo with #WelcometoNanas wherever you post.
Come join the fun at www.WelcomeToNanas.com
DIY Wooden Charcuterie Board
Equipment
- none needed
Items Required
- 1 Wooden tray- preferably up-cycled but can be purchased new
- 1 Wood putty/filler- stainable (can be purchased in colors)
- 1 Spar Varnish
- Paint brush or foam brushes
- Fine Steel Wool
Instructions
- Fill cracks in the tray with wood putty.
- Brush varnish on back and sides of tray. Let dry. Brush lightly with steel wool between applications. Repeat 3 times.
- Brush varnish on front and inside edges of tray. Let dry. Brush lightly with steel wool between applications Repeat 4 times..
- Allow to cure for 30 days before using.
- Enjoy making meal or snack "DIY wooden charcuterie board" (tray) masterpieces to serve!!
- Video and complete instructions on the website post "DIY Wooden Charcuterie Board"
Notes
Supplies for DIY Wooden Charcuterie Board
- Wooden tray- preferably up-cycled but can be purchased new
- Wood putty/filler- stainable (can be purchased in colors)
- Spar Varnish
- Paint brush or foam brushes
- Fine Steel Wool


Leave a Reply