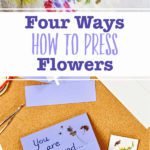
Learn how to press flowers with these four awesome methods: a flower press, book pressing, the microwave, and hammered flowers! With options that vary on time and items needed, you can choose which one fits you best.
Jump to:
Loving flowers...
When I was a kid, I couldn’t get enough of the wildflowers out back of our house. Truth is, I still can’t. Small bouquets came into the house often, and today our grandkids bring them in almost every time they are here as well.
But how about getting the sweet blooms of the wildflowers, summer blooms, annual or perennial flowers around your home to last longer?
Pressing flowers is my first go to. Here are 4 ways you can press flowers, to keep those blooms around all year long!
Here are 4 Ways to Press Flowers!
There are are many different ways to dry fresh flowers. Each of these 4 methods have particular pluses and minuses!
We're going to talk about four methods for the drying process, and how to obtain the best results for each one. These different techniques vary based on amount of time needed to dry, plus what is needed to actually do the pressing.
Let’s look at the different methods and you can choose the one that fits your needs the best.
1. DIY Flower Press Made from Wood
Let's start by looking at the wooden press method for drying flowers!
If you want a step-by-step tutorial on how to make your own flower press, check out the DIY Flower Press from Wood for Pressing Flowers post we did awhile back. It gives complete instructions for making a large wooden flower press from wooden plaques purchased at a craft store or pieces of wood you cut yourself.
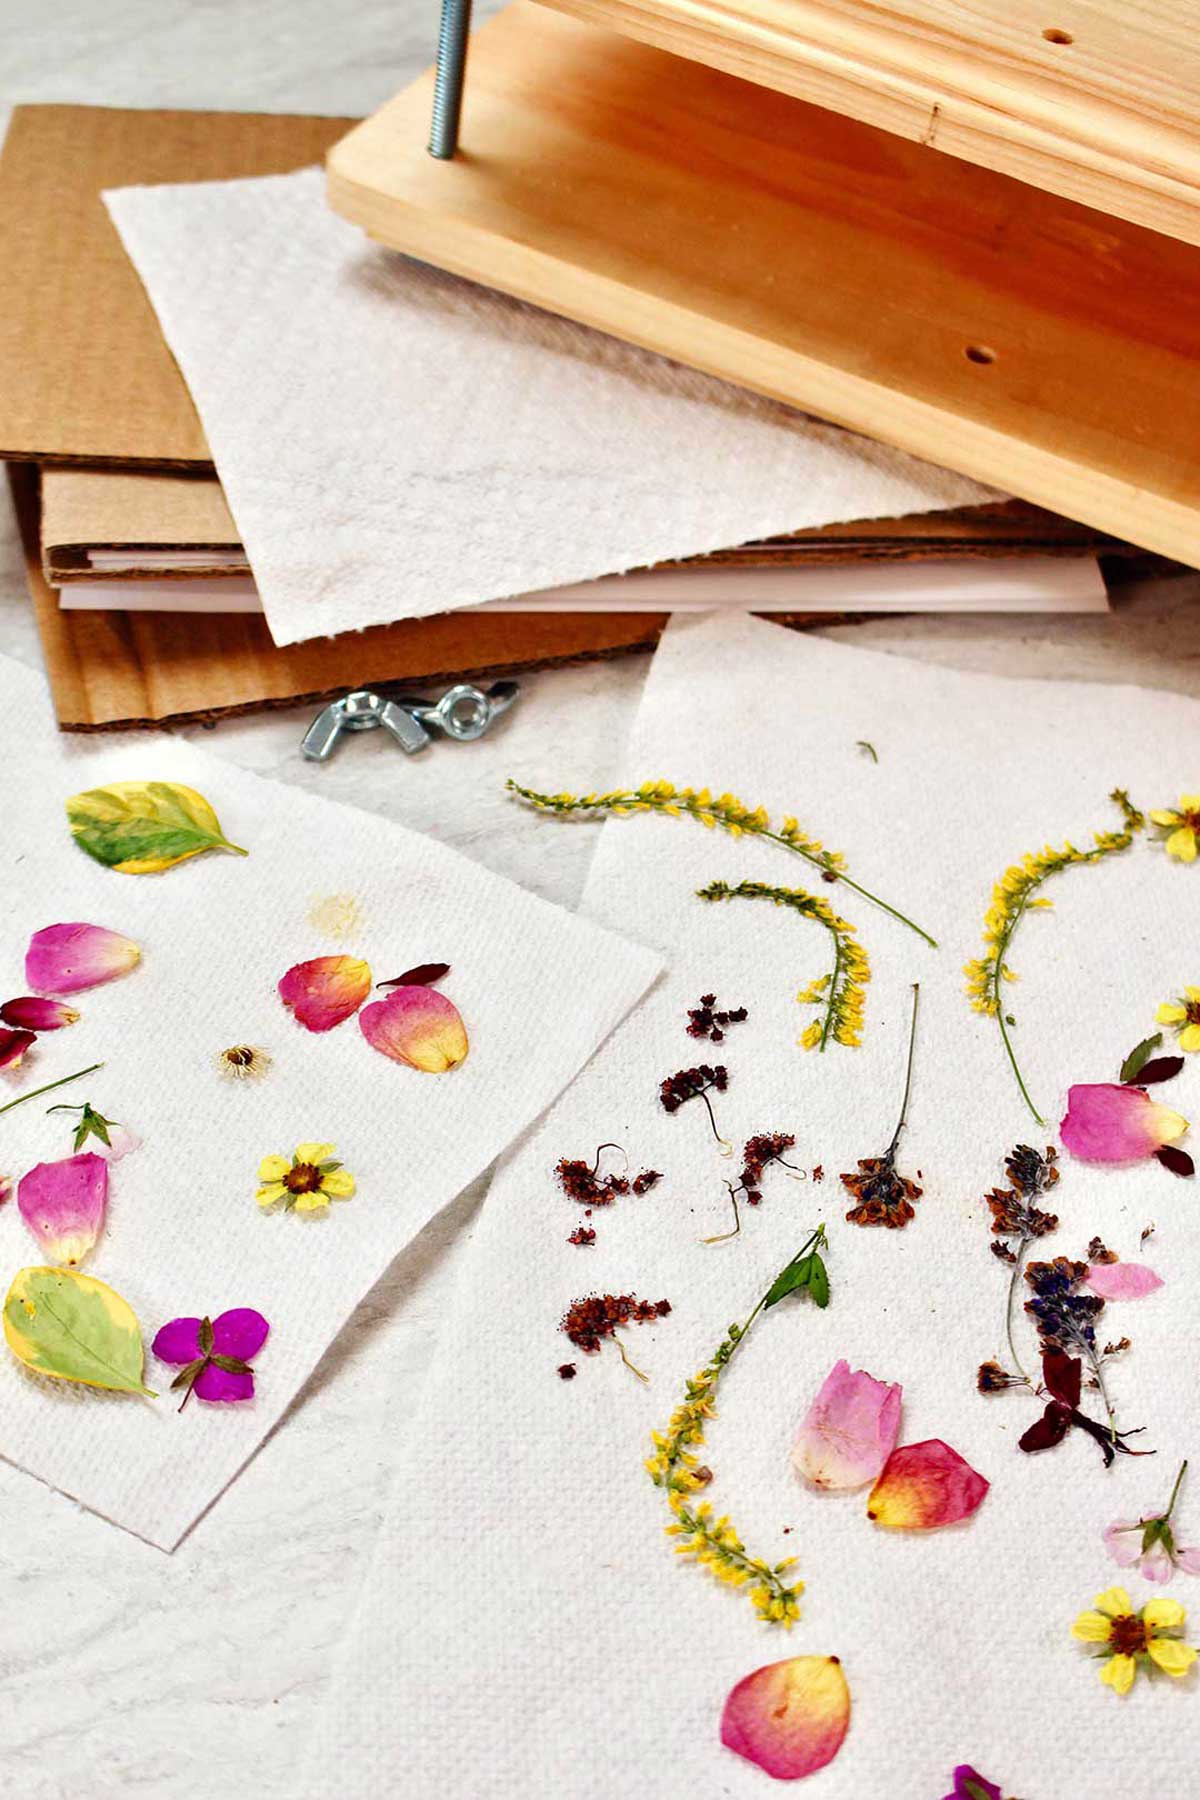
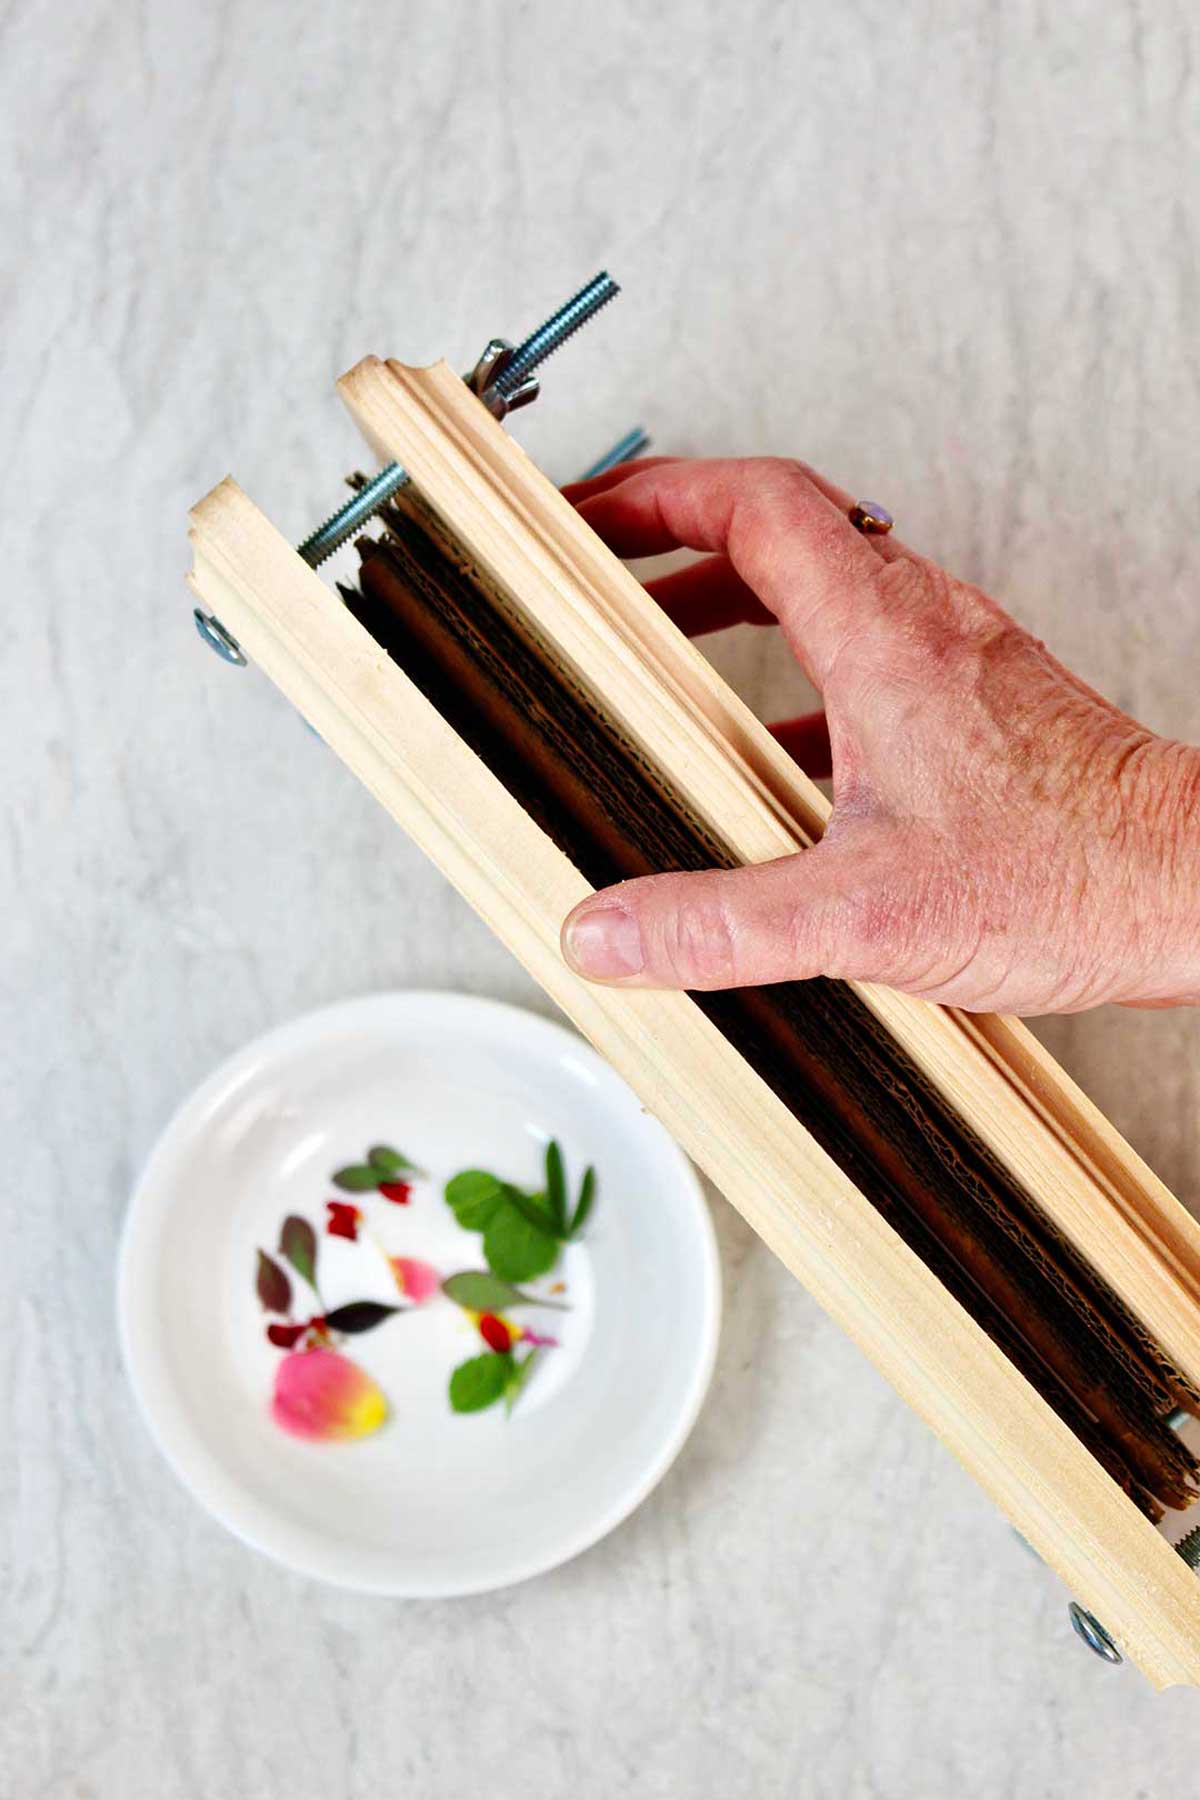
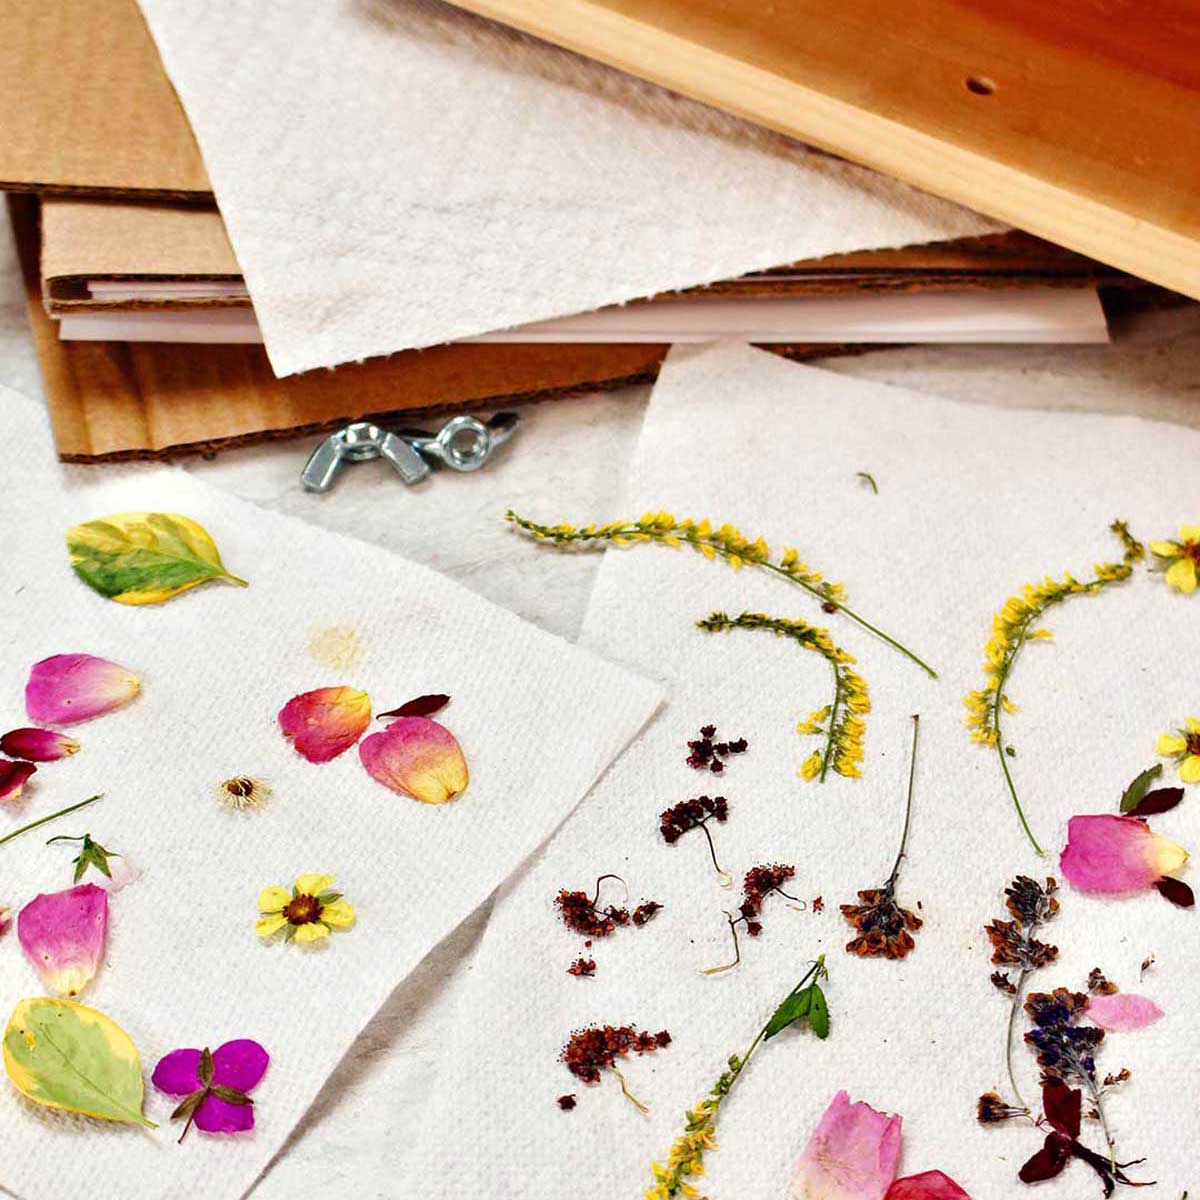
After you've made your press, the flowers are placed between blotter paper (sheets of absorbent paper) and a piece of cardboard, all held in place by the wooden boards and wing nuts of the press.
You can also use a piece of parchment paper, regular copy paper, or wax piece of paper. I have even heard of people using coffee filters or tissue paper, but I haven't tried these.
Pressing flowers in a press (homemade or purchased) is sure to dry the flowers completely and make them as flat as possible. This is a great way to press thicker flowers because you can squeeze the press together more evenly and thoroughly than some of the other methods.
The downside is waiting…it takes two weeks or more for flowers to be completely dry.
Check out the complete instructions at this link: DIY Flower Press from Wood for Pressing Flowers.
Of course, you can purchase a flower press as well! There are different types and sizes and I've put links to a few at the end of this post.
But what if you find some lovely blooms to press and you don’t have a flower press, or have time to make or purchase one?
Don't worry, there are still three methods to go and they are super simple!
Without further ado, here are a couple ways to press flowers without a flower press.
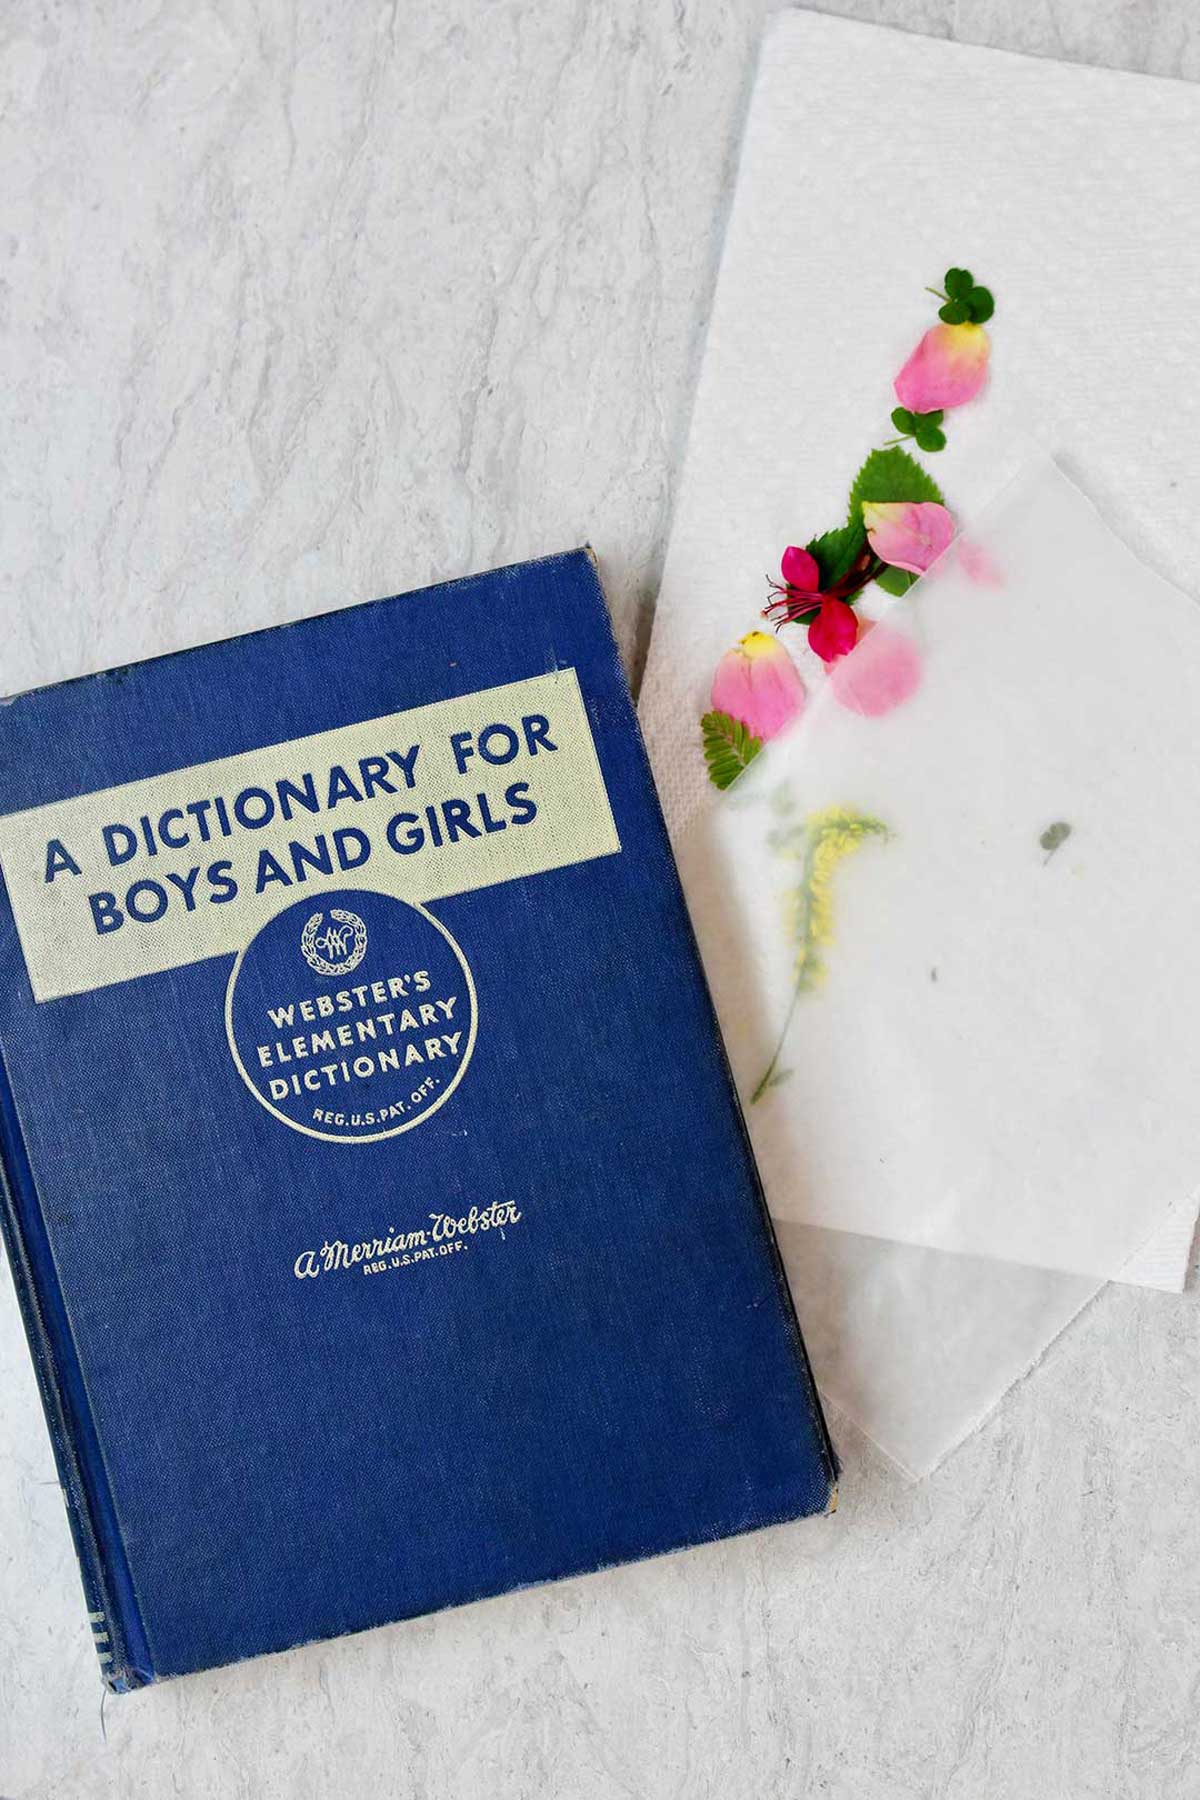
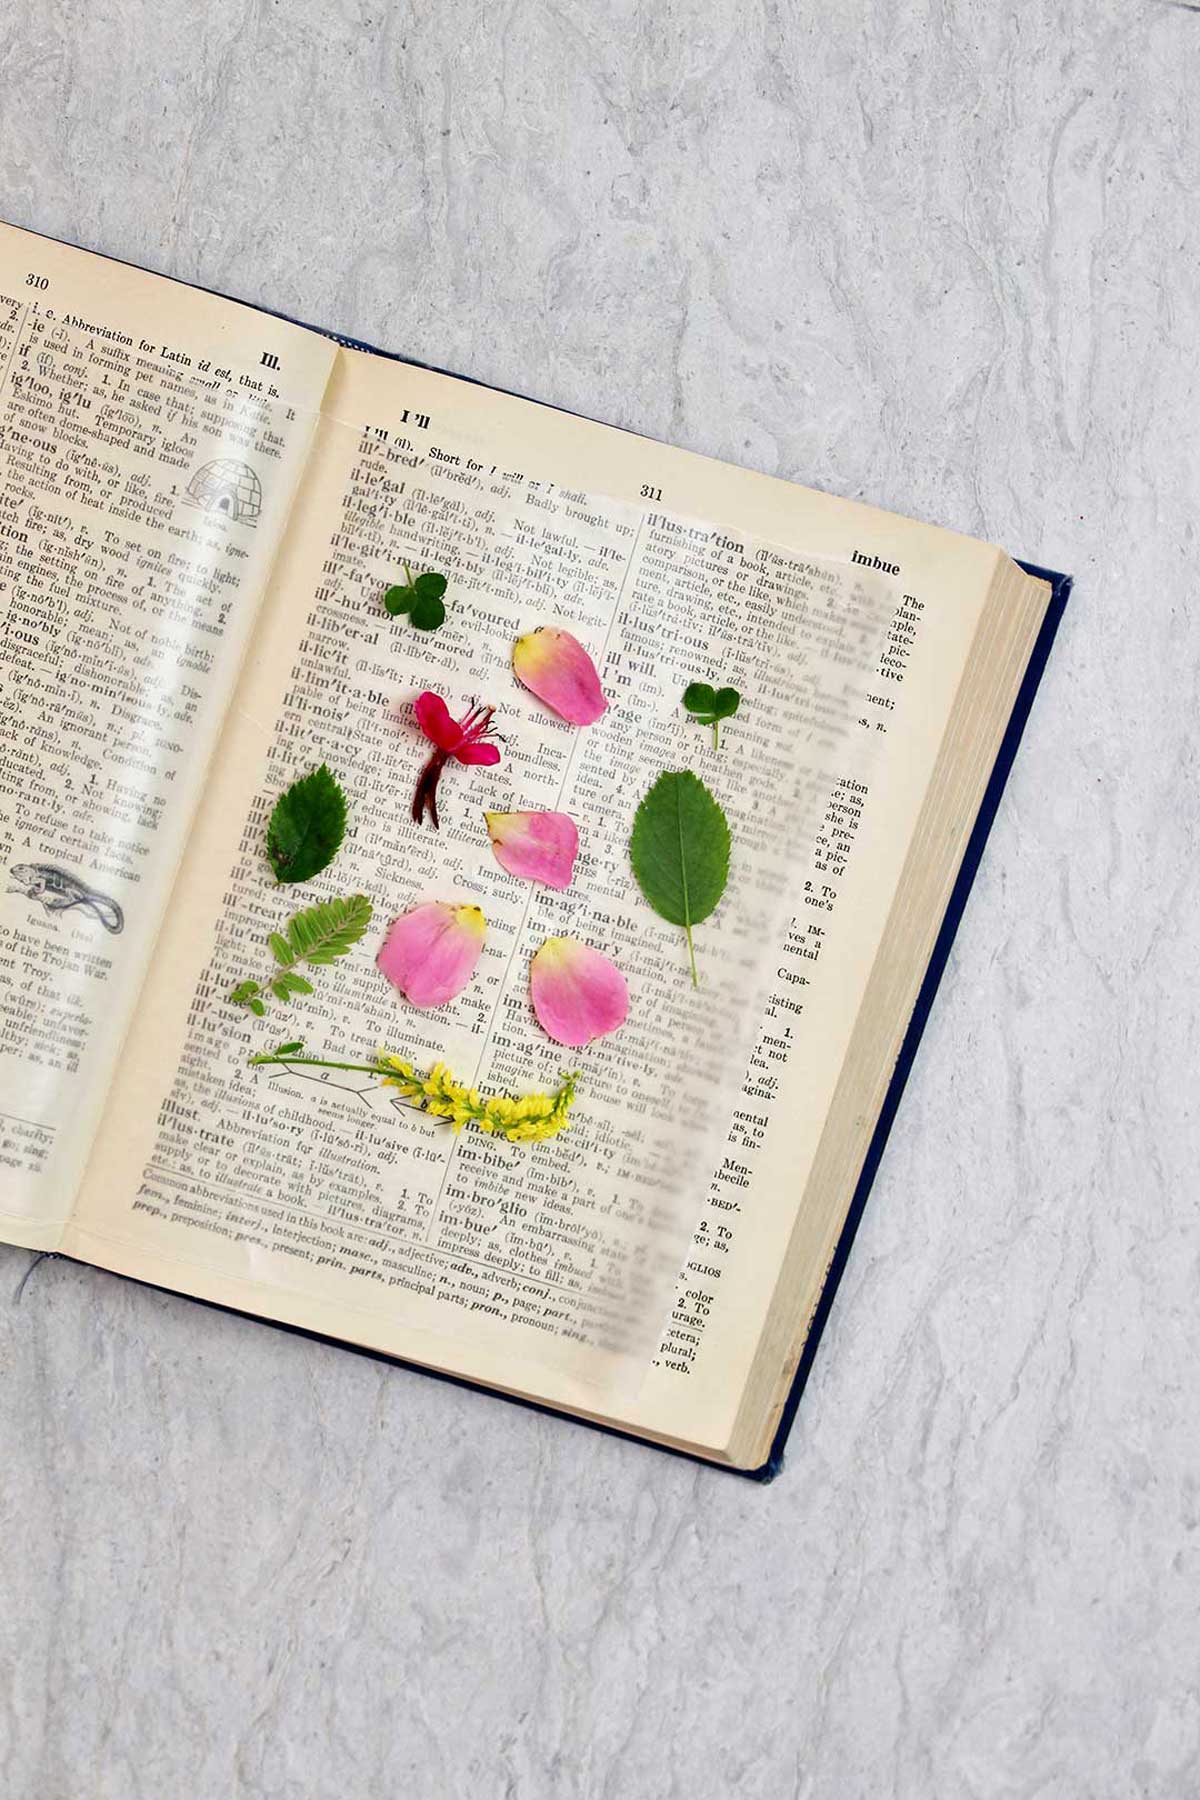
2. How to press flowers in a Book.
Back in the “olden days” we brought flowers inside and mom or dad got out an old book, usually dictionary or encyclopedias, for us to press them.
This is the dictionary we used when I was young and I found a four leaf clover taped inside under…”clover”…of course! Ha! I'm remember putting that there.
Open the large book you are using to about the halfway point. Use a piece of wax paper to lay the flowers down in a single layer of petals, then fold the wax paper over the top of the flowers.
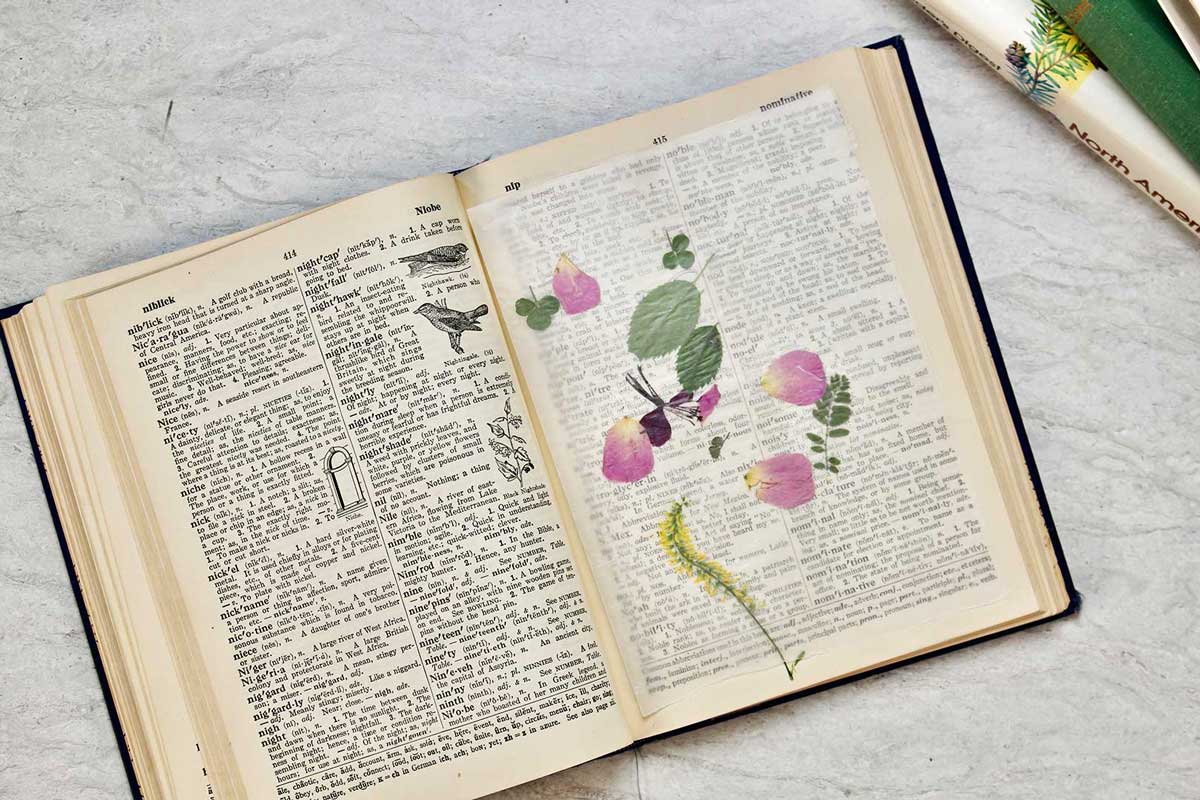
If you don't have wax paper you can try pieces of parchment paper, but I wouldn't use printer paper because this won't prevent the colored juices of the flower from staining your book.
You can add several sheets of paper and flower layers between the pages of a heavy book, but make sure the top of the book stays level enough to balance a heavy item on top of it.
Close the book and lay several other heavy books on top of it. You'll want some nice and thick books (like a phone book) to make sure you are getting really flat blooms.
Set your stack of books in a dry place and leave until the flowers press and dry fully.
This book method also takes a couple of weeks to dry the flowers.
That's a long time...tired of the waiting? You may consider the next possibility for pressing flowers!!

3. How to dry flowers in the microwave.
The next was it a bit quirky, and I was doubtful about this one before I tried it! But it ended up being a super quick way to achieve dry flowers.
This pressing technique is simple and fast - using your microwave.
Place your flowers in a single layer between two paper towels and set them on the turn table of the microwave. Place a microwave proof container over the flowers, covering the paper towel and flowers entirely. We used a Pyrex 9x13 which worked well for our microwave presses (I have a large microwave).
Turn on high power for one minute. Check the flowers carefully and continue to run the microwave for 30 second intervals until the flowers are completely dry.
The grands and I were really happy with the results. We used the microwave pressed flowers immediately in bookmarks and cards.
This is a very fast method, but I haven’t seen the flowers after a length of time to see if they preserve well like the first two options. Please give me some feedback on this option if you have made crafts from microwave pressed flowers that have lasted over time.
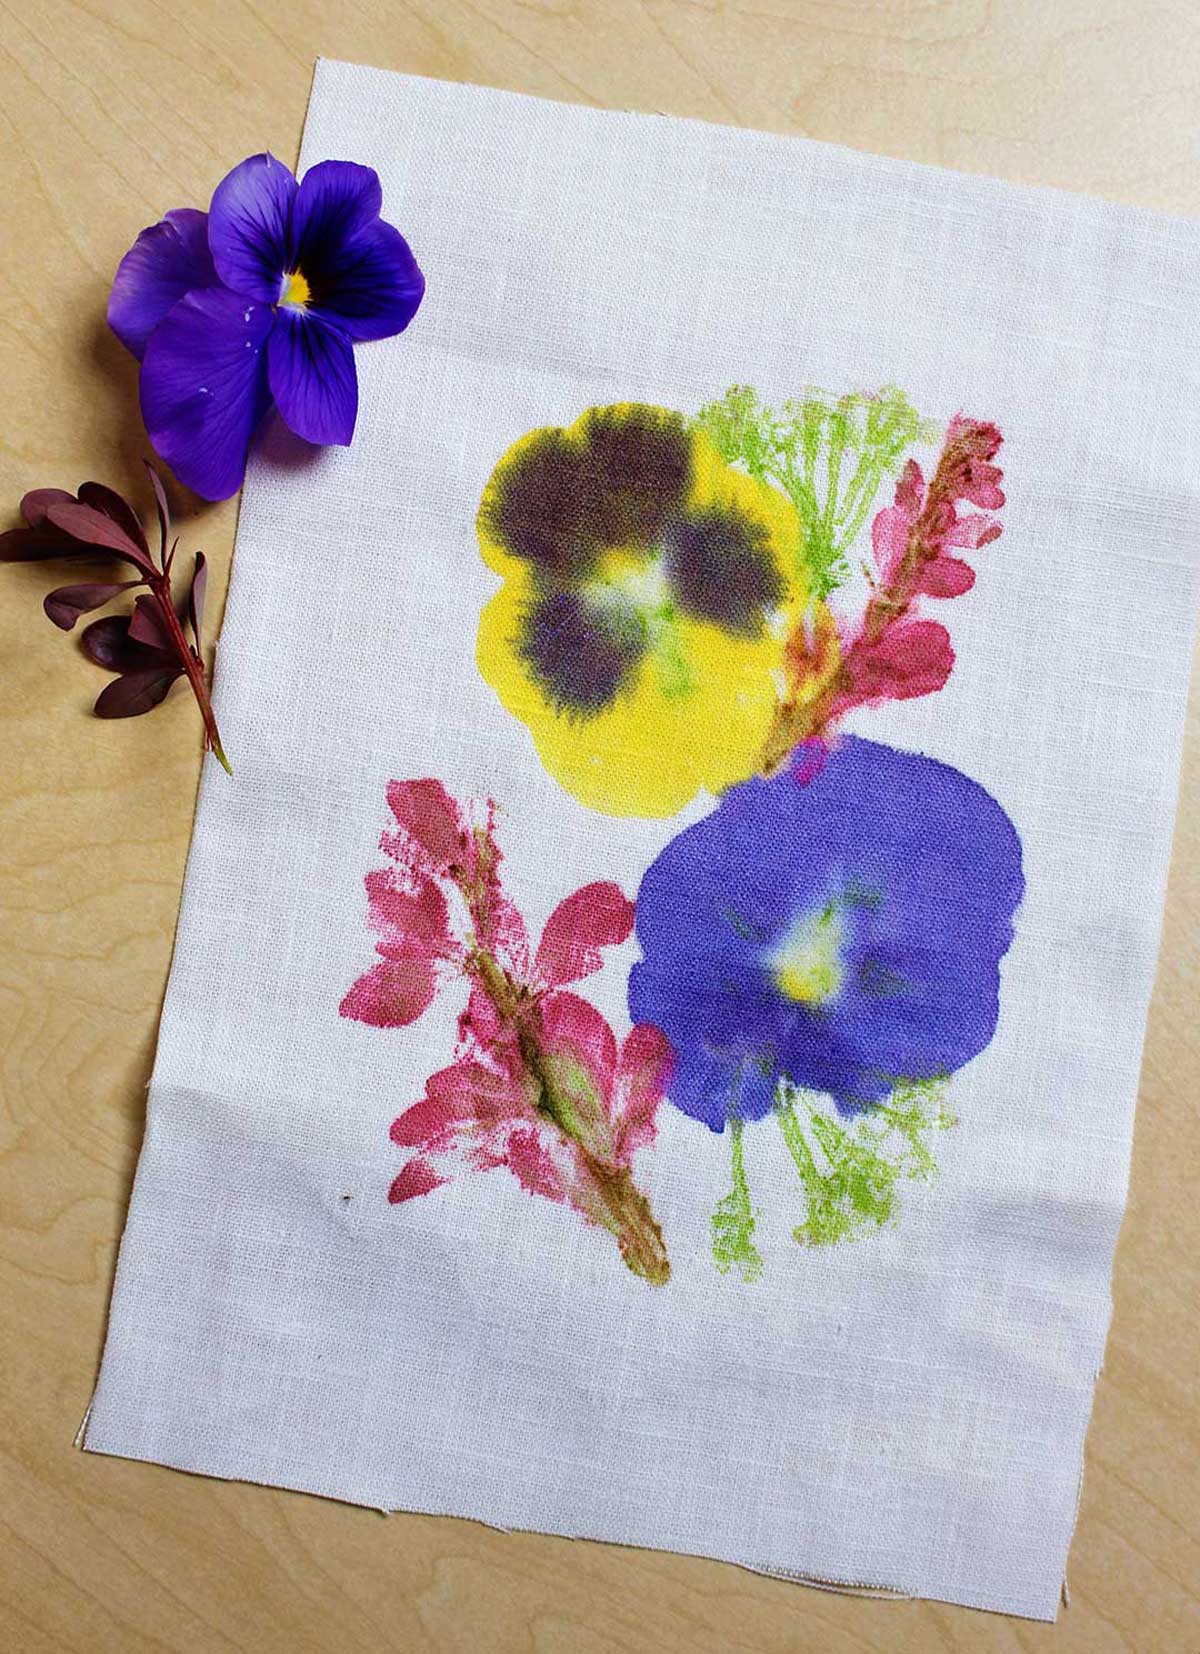
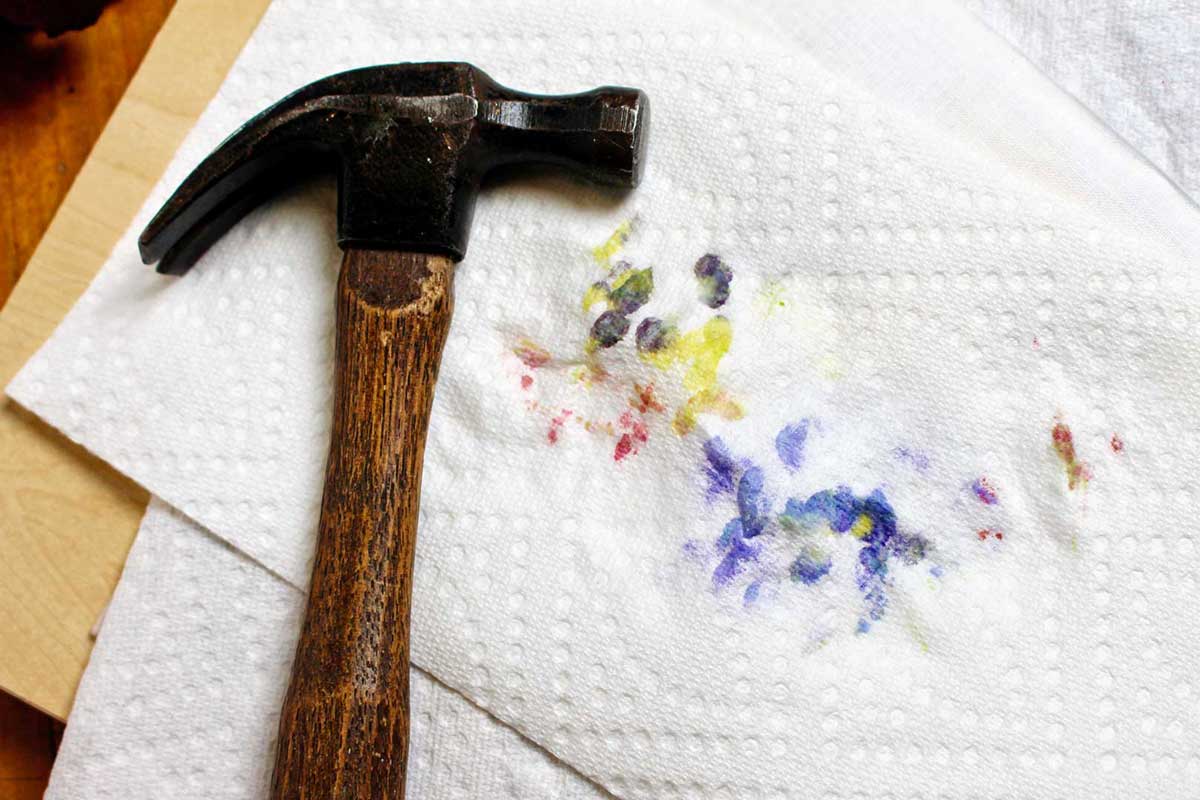
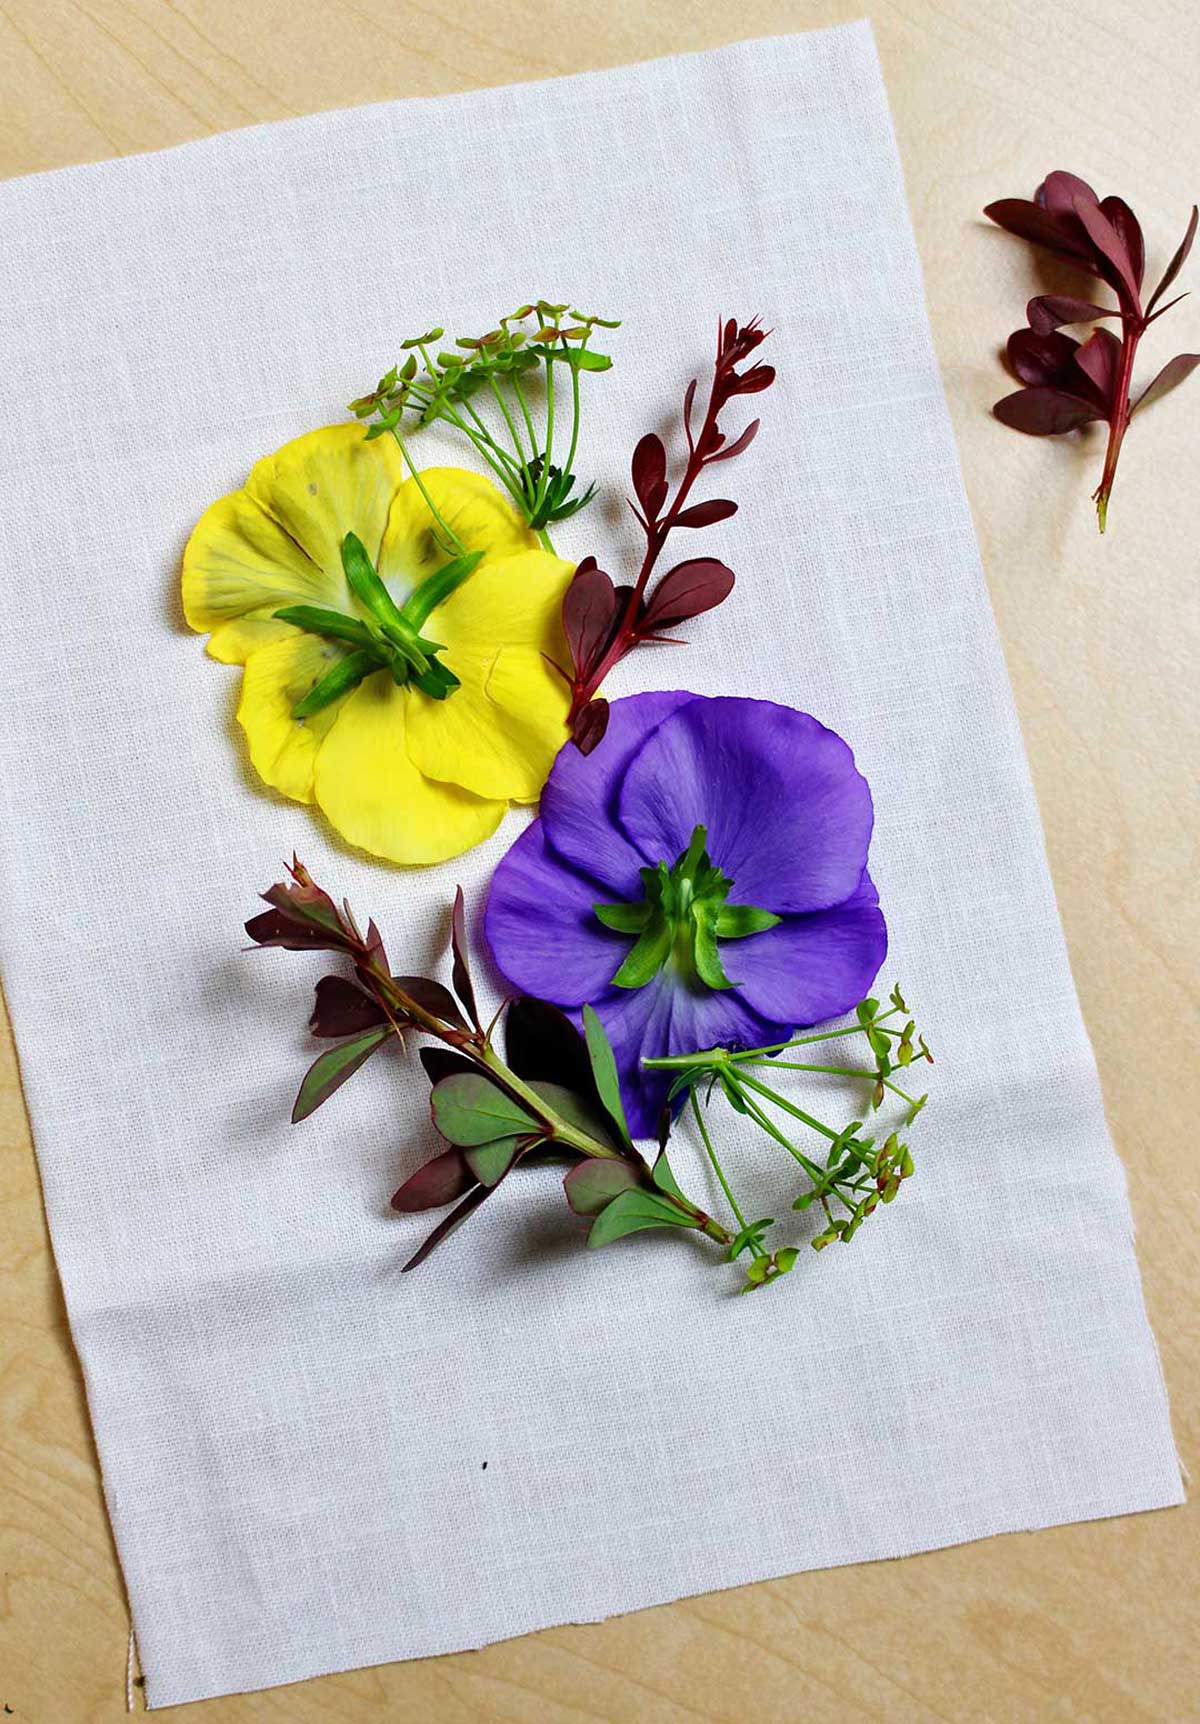
4. Hammering flowers
I’m including this as my fourth method for pressing flowers - hammered flower prints.
Now that I think about it, I’m not preserving the actual flower in this method, so I ask your forgiveness on tucking it in this post. But it does preserve the beautiful color of the blooms, so I will still include it!!
Hammering flowers involves taping the flowers and leaves to a piece of fabric (or heavy watercolor paper) and hammering them until the juices of the flowers stain the fabric.
This is a great stress relief as well as a beautiful way to get something to use in crafts.
The complete instructions are found in the following post- Hammered Flower Prints on Fabric.
You need to try this. This was a favorite with the grands!
This is another fast way to preserve the color of the flowers. But the disadvantages are that the actual flower is not preserved and that the hammered flower print on fabric is not washable. It is best done for decorative purposes (they make great gifts). Still a favorite though.
5. Bonus: How to Press Flowers with an Iron.
Okay, this is a bonus method and seems like a simple way to preserve fresh blooms. I have heard about pressing flowers with an iron (without steam) on an ironing board or heat-safe flat surface.
I have not tried this one yet so I can’t give any feedback. It reminded me of the microwave method, but the iron is the pressure, and the heat dries the flowers.
Let me know if you try this one. I’m curious (always curious)!
The Best Way to Press Flowers
Now that we've walked through (more than) 4 ways to press flowers, I have to say pressing the flowers in your actual flower press is usually the best method.
The next runner up, and perhaps the most common method, is to press them in a book's pages.
These flowers have steady pressure on them, have the most time to dry completely, and are as flat as possible to use in your pressed flower art.
The microwave method is perhaps the easiest way to get dried flowers for a project, but they aren’t quite as flat to use in pressed flower crafts.
As you place your flowers between the sheets of parchment paper (or paper towels), lay the flowers in a single layer, and read on for ideas for the best types of flowers to press!
What Type of Flowers Should I Press?
Regardless of which method you want to use to press your own flowers, you can preserve many kinds of different flowers! Here are a few tips for choosing the best flowers and achieving better results with them.
If you are picking from wild plants, be sure to pick them on a dry day. I often find the right time to gather wild flowers is after the morning dew has dried off a bit from direct sunlight.
Also, the it's a good idea to choose blooms that aren't too thick, or they will not dry properly (or take even longer to dry!). Perhaps you could pull the petals and leaves from larger flowers and press them individually?
Good candidates for the right flowers are thin, on the smaller side, and I would suggest you choose colorful options. White flowers rarely press well, they tend to brown.
Don't forget to press thin leaves for added greenery in your art!
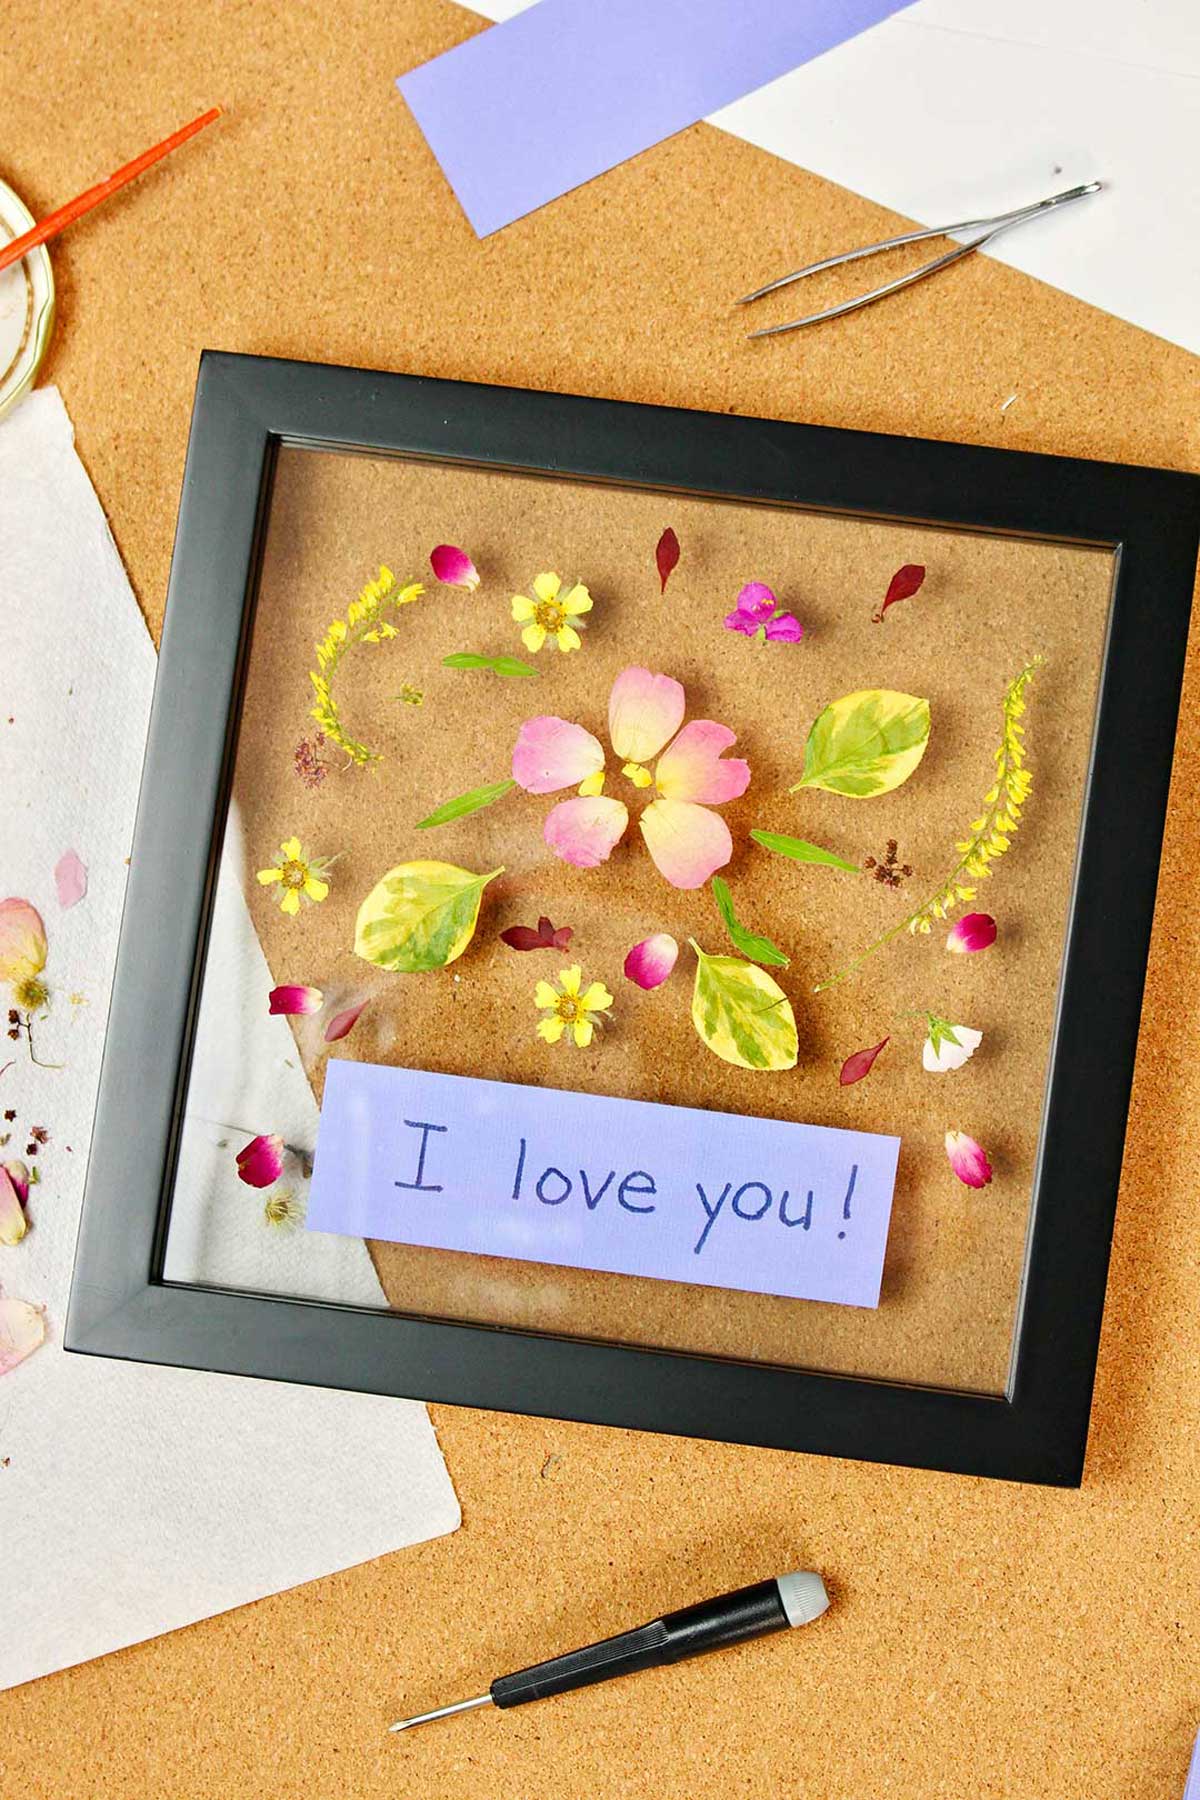
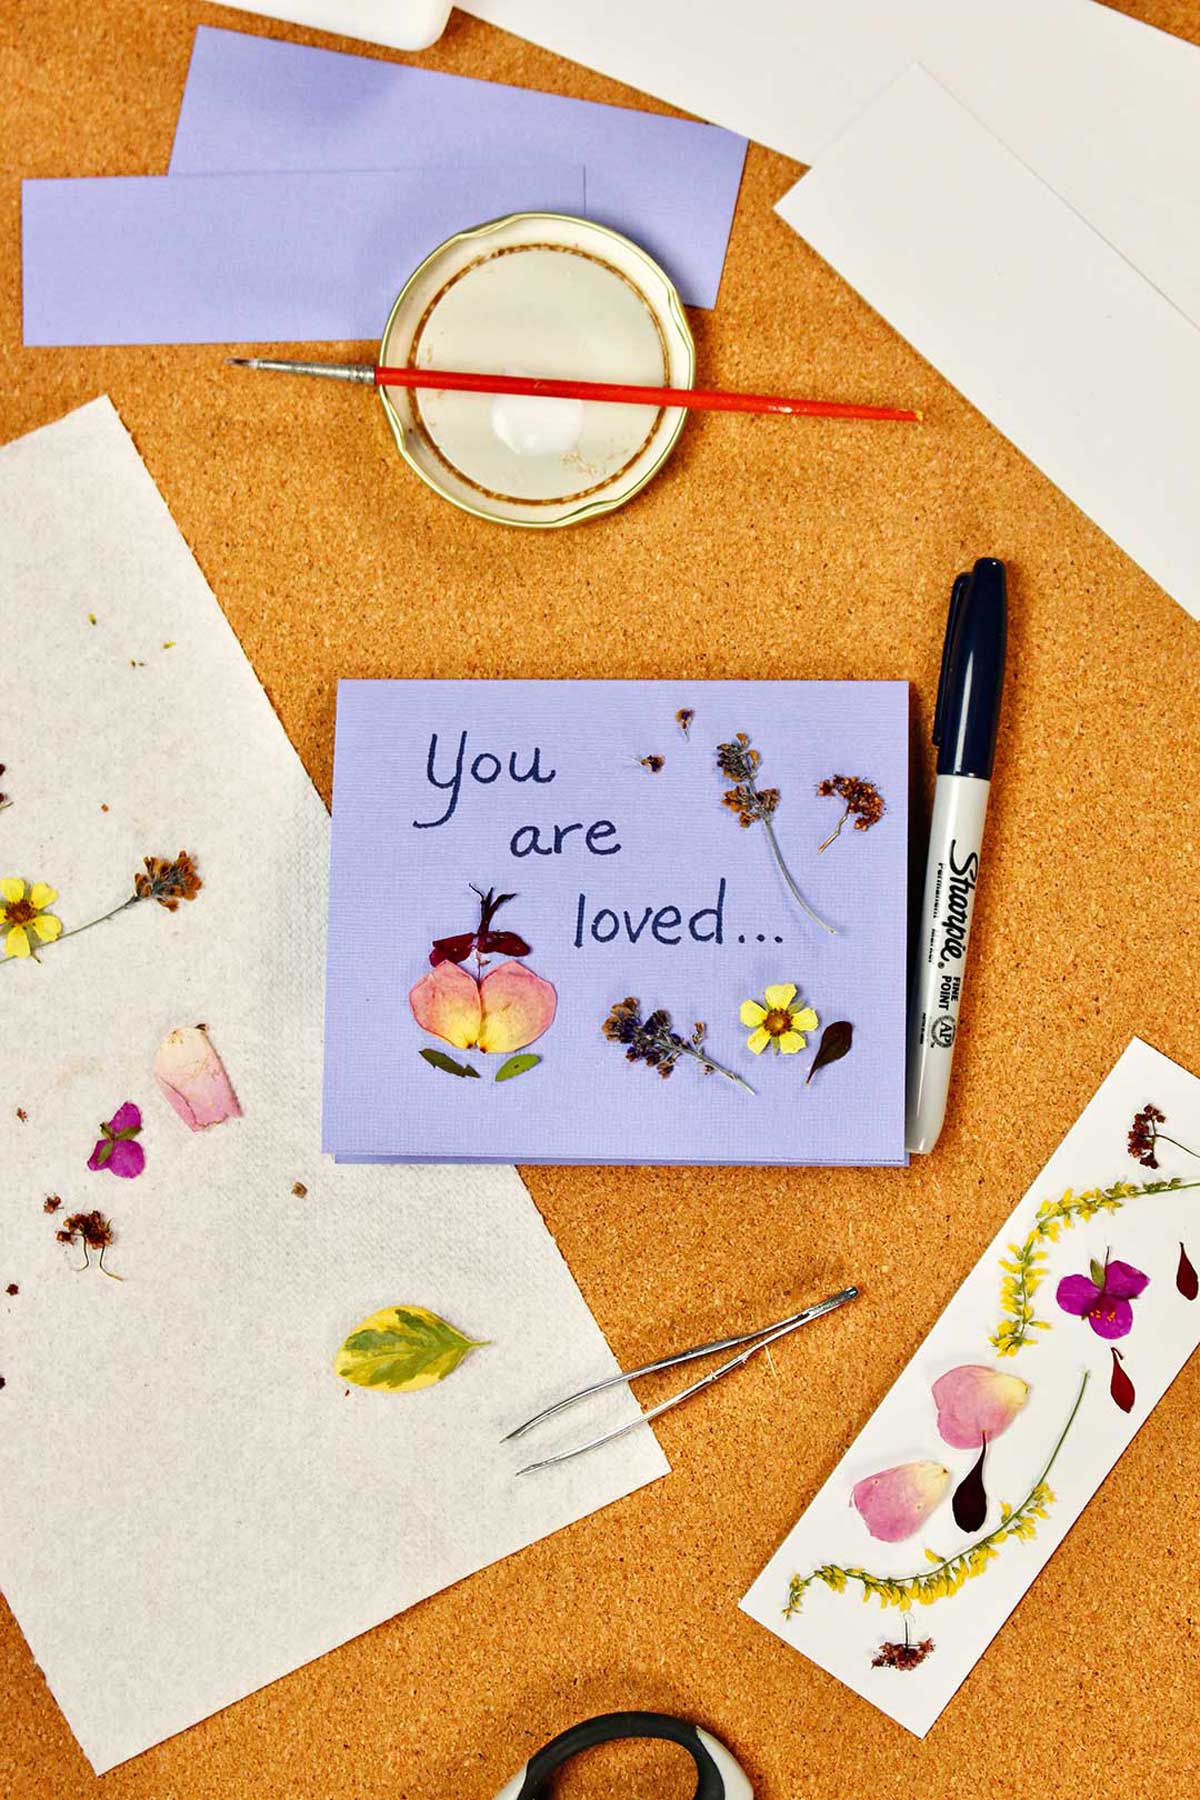
Pressed Flowers Art:
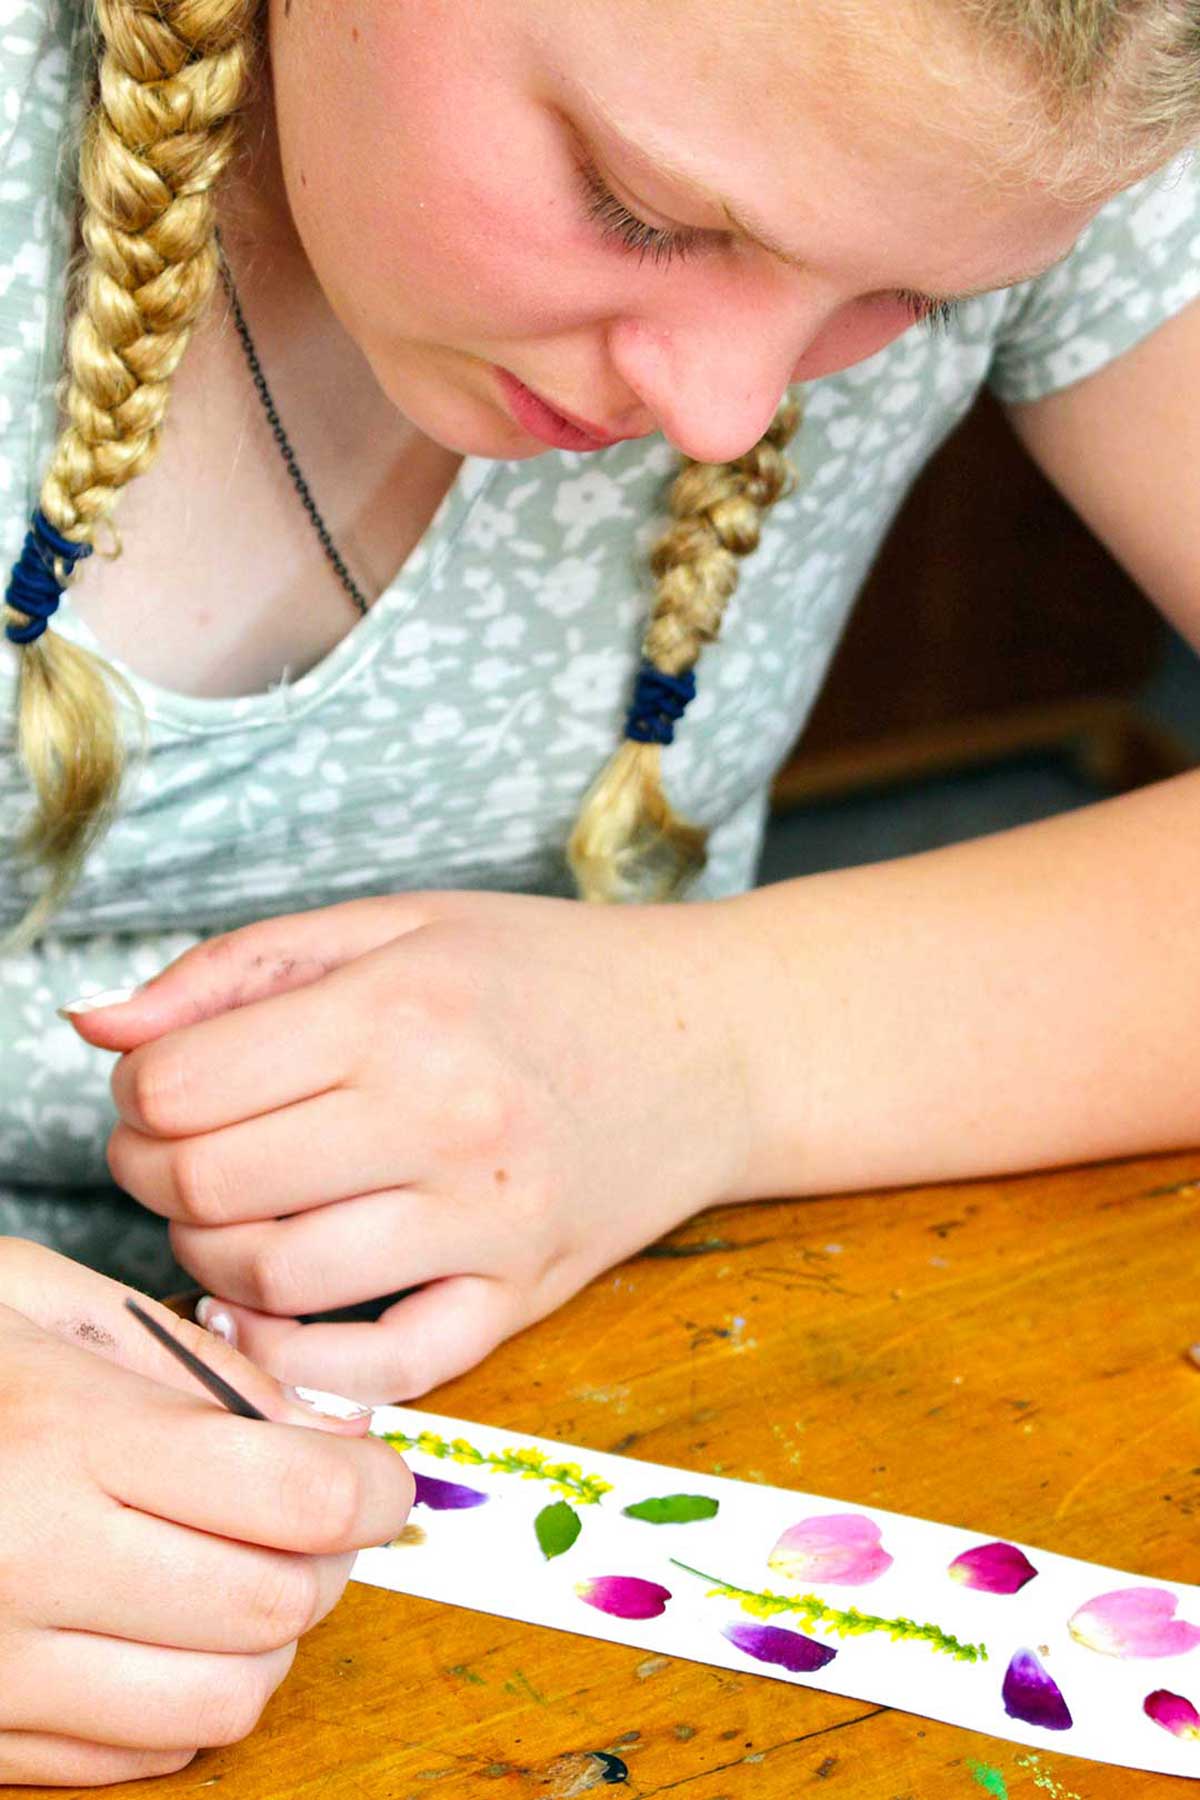
You can use your pressed flowers in many crafts. They work wonderfully on bookmarks, greeting cards, and in picture frames as a DIY botanical print.
You can find these fun ideas for pressed flower art crafts here: How to Make Beautiful Pressed Flower Art.
It could be fun to preserve flowers from a special event such as a wedding. Or you could use flower pressing in a craft project for a special occasion - how about using someone's favorite flowers for a birthday card?
I’m wanting to try some dried flower petals on wax letter seals next. I’ll let you know how it goes!
Have fun and let me know what you try and what works the best for you!
Flower Pressing FAQs
My favorite way to press flowers is with a wooden flower press! The press provides excellent structure to flatten the flowers evenly and tightly. This ensures beautifully pressed and dried flowers! If you don't have a wooden press, the next best method is with a stack of thick and heavy books.
You'll want to pick fresh flowers to press as the flowers will dry as they are being pressed! The best fresh flowers to press and dry are thin, on the smaller side, and colorful. Allow them to dry thoroughly as they are pressed and they will be preserved for all kinds of beautiful flower art!
My favorite method for pressing flowers to transfer to fabric is through hammering! Simply arrange and secure your flowers to a piece of fabric, place some paper towels over the top, then hammer away! As you smash the flowers, their color will dye the fabric.
Usually pressed flowers rot because they have moisture on them when placed in the press. Choose flowers that don’t have dew or rain on them, be patient and pick them when completely dry. Another reason the pressed flowers may rot is they are too thick and fleshy to dry all the way through in the press. Choose more delicate flowers or take the petals off thicker flowers instead of using the whole flower.
Allow the flowers to stay in the press for at least 2-4 weeks so there is no moisture in them when taken out of the press. That will keep them from rotting when they are out of the press as they are completely dried through.
You can change the blotting paper in the press part way through so there is more absorption to help the drying process. This is especially important for flowers with more moisture in the flower itself.
The length of time it takes to press flowers depends on the type of flower and the type of pressing you choose to do.
Typically flowers take between 2-4 weeks in a traditional flower press. The thinner flowers take less time than the thicker, more fleshy ones. Other factors like the humidity can affect drying time as well. Carefully check the flowers after 2-3 weeks to see if fully dried or leave them for longer if you are able.
The book pressing method takes a similar amount of time (2-4 weeks). Microwaving takes minutes as you read in the directions. Ironing takes about 5-10 minutes on each flower.
Take your pressed flowers from the press, making sure they are completely dry. Move them carefully so they don’t break. I preserve mine between layers of acid free paper in a container that is airtight and lightproof. Store it in a cool, dark, and dry place until they’re used in a project.
The flowers can also be preserved in frames, journals, in resin, or sealed under plastic (like a bookmark) with archival quality materials. The projects should still be kept away from direct light, heat, or moisture.
I’ve had pressed flowers for years that stayed pretty. Especially the darker colored flowers.
More Flower Crafts for Kids
Are you looking for more fun ways for kids to enjoy spring and summer flowers, greenery, and other growing things? Check out these ideas from around the blog!
- Nature Weaving for Kids (2 Ways!)
- DIY Midsummer Flower Crown
- How to Grow Spring Flower Bulbs Inside
- Treasure Hunt Nature Mobile
- How to Grow a Tree from a Pine Cone
Enjoy!
If you try this craft, let me know! Go ahead and leave a comment, rate it, and tag a photo with #WelcometoNanas wherever you post.
Come join the fun at https://welcometonanas.com
Flower Presses to purchase:
- Suziko large flower press kit
- Suziko flower press kit for adults and kids
- Happytime kids' flower press
More from Welcome To Nana's
Pressing Flowers (4 Ways!)
Equipment
- Determined by type of flower pressing chosen Refer to specific posts for equipment needed.
Items Required
- Determined by type of flower pressing chosen Refer to specific posts for equipment needed.
Instructions
- Don't you love flowers? But how about getting the sweet blooms of the wildflowers, annual or perennial flowers around your home to last longer?Pressing flowers is my first go to. Here are 4 methods How to Press Flowers for doing just that!
- 1. DIY Flower Press from Wood for Pressing FlowersThe DIY Flower Press from Wood for Pressing Flowers post on WTN gives complete instructions for making a large flower press from wooden plaques purchased at a craft store or pieces of wood you cut yourself. Instructions there for how to press flowers in a press as well.
- 2. Drying flowers in a book/pressing flowers in booksOpen the book you are using to about the halfway point. Use a piece of wax paper to lay the flowers on and then fold the wax paper over the top of the flowers. This will prevent the colored juices of the flower from staining your book.Close the book and lay several other heavy books on top of it. Leave for at least two weeks until completely dry.
- 3. Microwave flower pressPlace your flowers in a single layer between two paper towels and set them on the turn table of the microwave. Place a microwave proof container over the flowers, covering the paper towel and flowers entirely. We used a Pyrex 9x13 which worked well (I have a large microwave).Turn on high power for one minute. Check the flowers carefully and continue to run the microwave for 30 second intervals until the flowers are completely dry.
- 4. Hammering flowersI'm including this as my fourth of 4 Ways How to Press Flowers, hammered flower prints. Now that I think about it, I’m not preserving the actual flower in this method, so I ask your forgiveness on tucking it in this post. But it does preserve the beautiful color of the blooms, so I will still include it!!Hammering flowers involves taping the flowers and leaves to a piece of fabric (or heavy watercolor paper) and hammering them until the juices of the flowers stain the fabric. The complete instructions are found in the following post- Hammered Flower Prints on Fabric.
- 5. Pressed flowers with iron?So, this is a bonus method. I have heard about pressing flowers with an iron (without steam). I have not tried this one yet so I can’t give any feedback. It reminded me of the microwave method, but the iron is the pressure, and the heat dries the flowers.
Video
This post was originally published in March 2023 and has been updated to add more relevant and detailed content.


Laura says
What a fun idea to keep cheerful flower colors all year long!