2 Ways of Nature Weaving with Kids
2 Ways of Nature Weaving with Kids shows you how to make 2 types of nature looms. Both are winners and give a lot of flexibility for you to choose what works best for different aged grands.
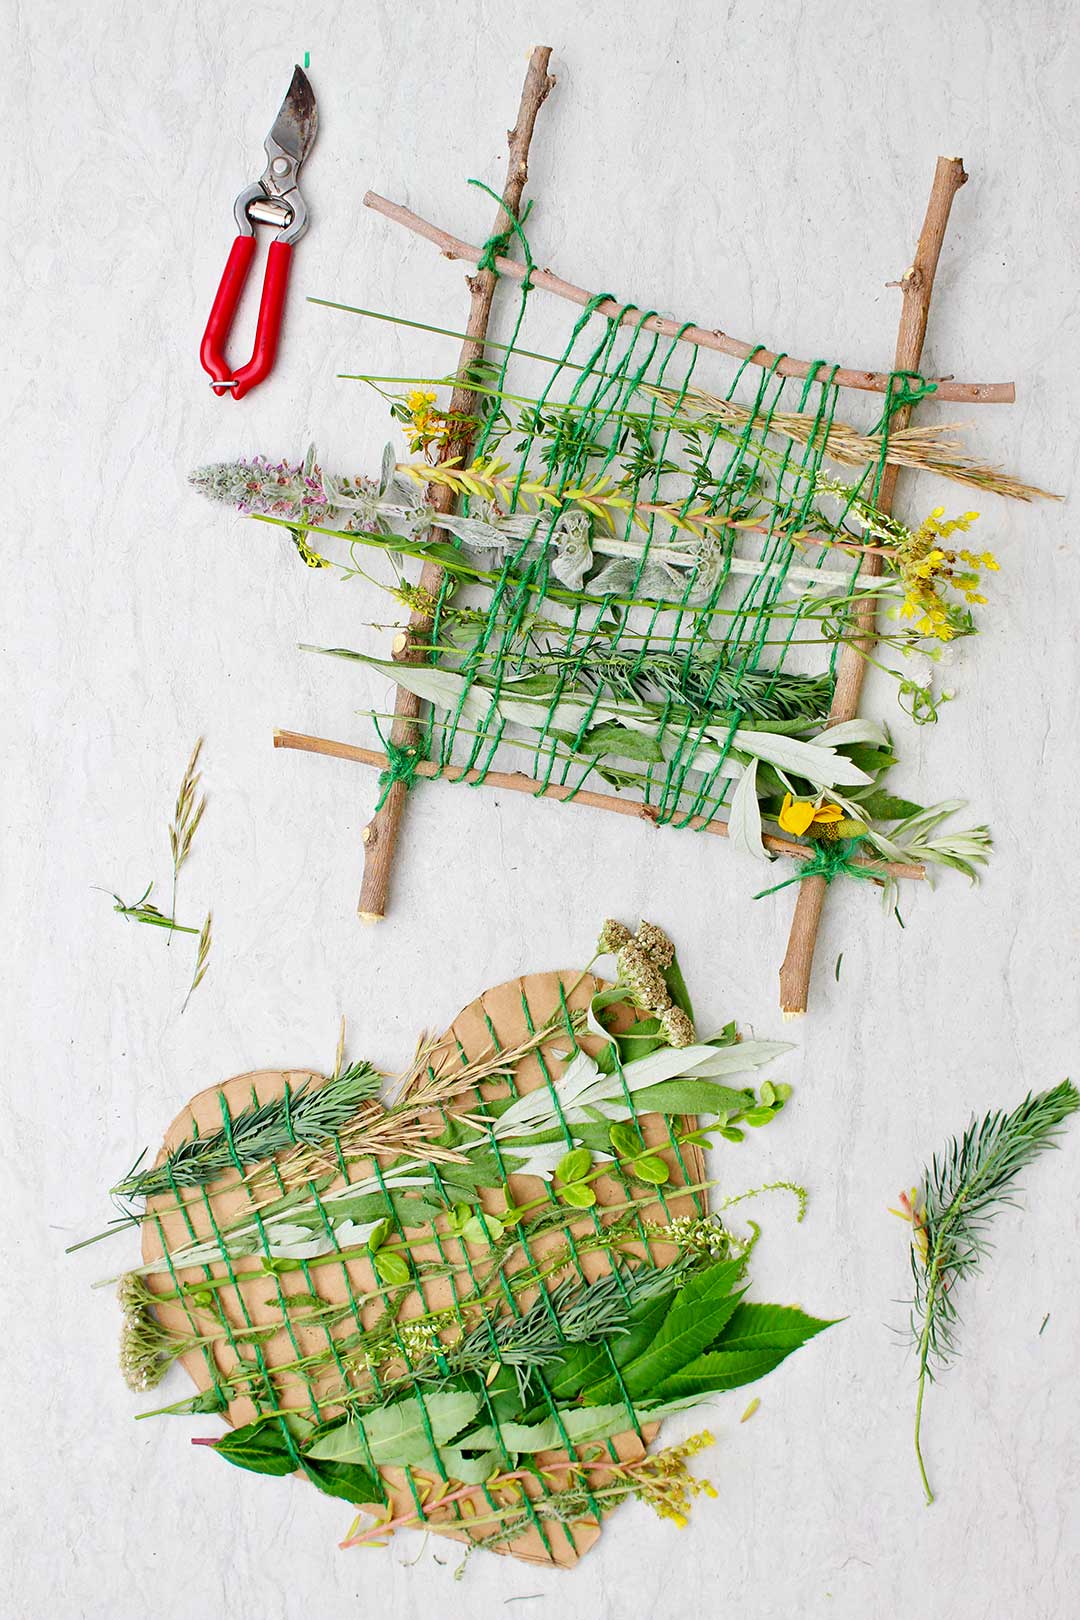
Collect greenery on a walk with your children and fill your loom with grasses, leaves, and flowers.
The nature weavings are beautiful and can be any size and any shape. Give it a try!
Nature weaving activity
This is a sweet way to spend time with the kids you love and make a sweet nature craft.
Nature Weaving starts off with something special, a nature walk.
Nature walk with your kiddos
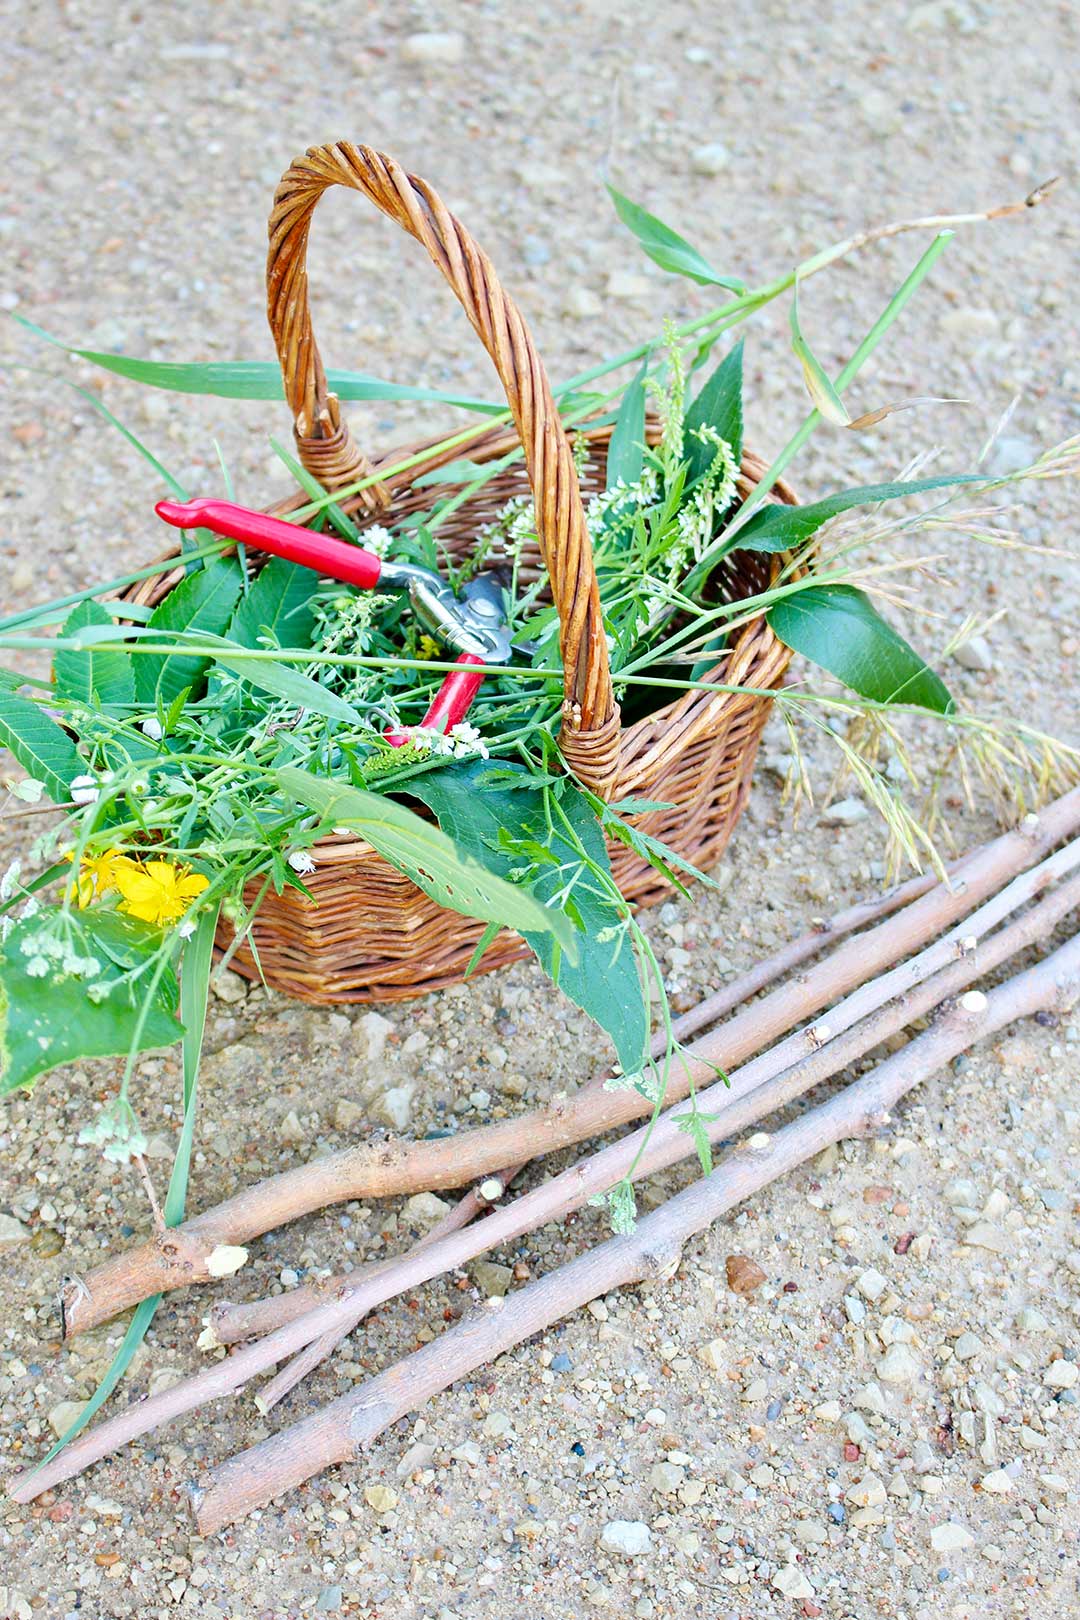
Plan a walk with your children and take along a basket or a tote and a garden clipper of some sort to collect the nature items you will need for your project.
You are looking for a variety of nature items that would work for weaving so they need to be long and slender. Look for things that can be easily clipped off and not hurt the bush, tree or flower.
I know I don’t need to remind you, but it is best to find items in your own yard.
If this isn’t possible, ask a friend or neighbor if you may take a few clippings in their yard. Always ask permission before clipping from plants that are not in your own yard.
When you have a nice selection of items you are ready to make your loom! But don’t be in a hurry to end your walk though, that’s a big part of the fun!
2 Ways to Make a Nature Loom
There are two loom possibilities described in this post that you can make. One loom is made of sticks and the other of heavy cardboard.
The stick loom is best for older kids that can tie the sticks together themselves unless an adult or older child is willing to help the younger child. The cardboard loom may work better for younger kids if you cut the heavy cardboard for them.
Choose which you would like to try and go to the instructions that follow for that loom type.
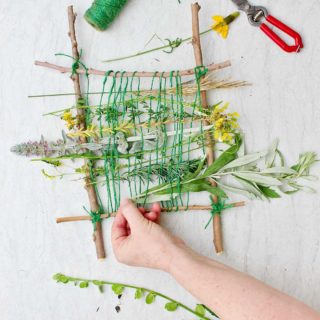
1st Way of Nature Weaving with Kids- Stick Loom
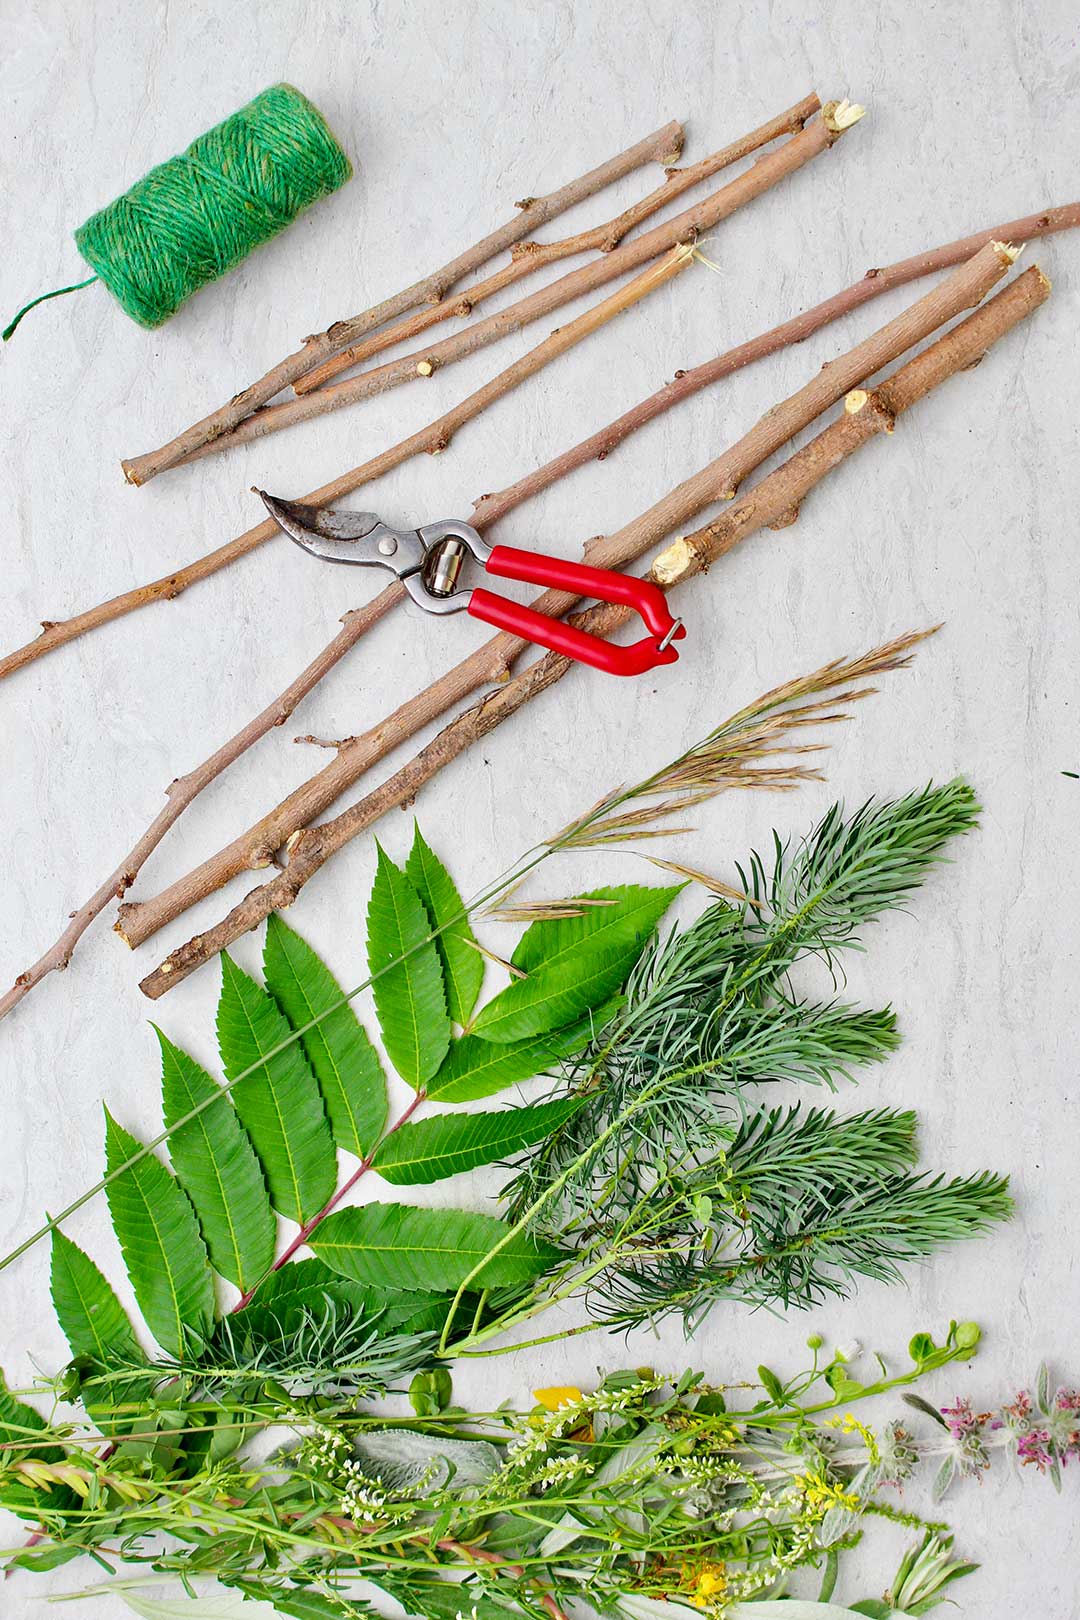
With the stick loom you will need several straight sticks in the size you would like for your loom. I used two 12 inch and two 8-inch sticks in the loom you see in these pictures. But the loom can be larger or smaller if you would like.
All of these sticks came from a tree branch that fell during a rain storm last week. It had several branches that could be clipped off and the branches were about ½ inch thick. See what you can find.
Clip off any extra little branches on your sticks and then cut them to your chosen length.
A handheld garden clipper would be nice to have. My small plant clipper worked, but it was barely large enough to clip the small branches I used.
How do you make a nature loom?
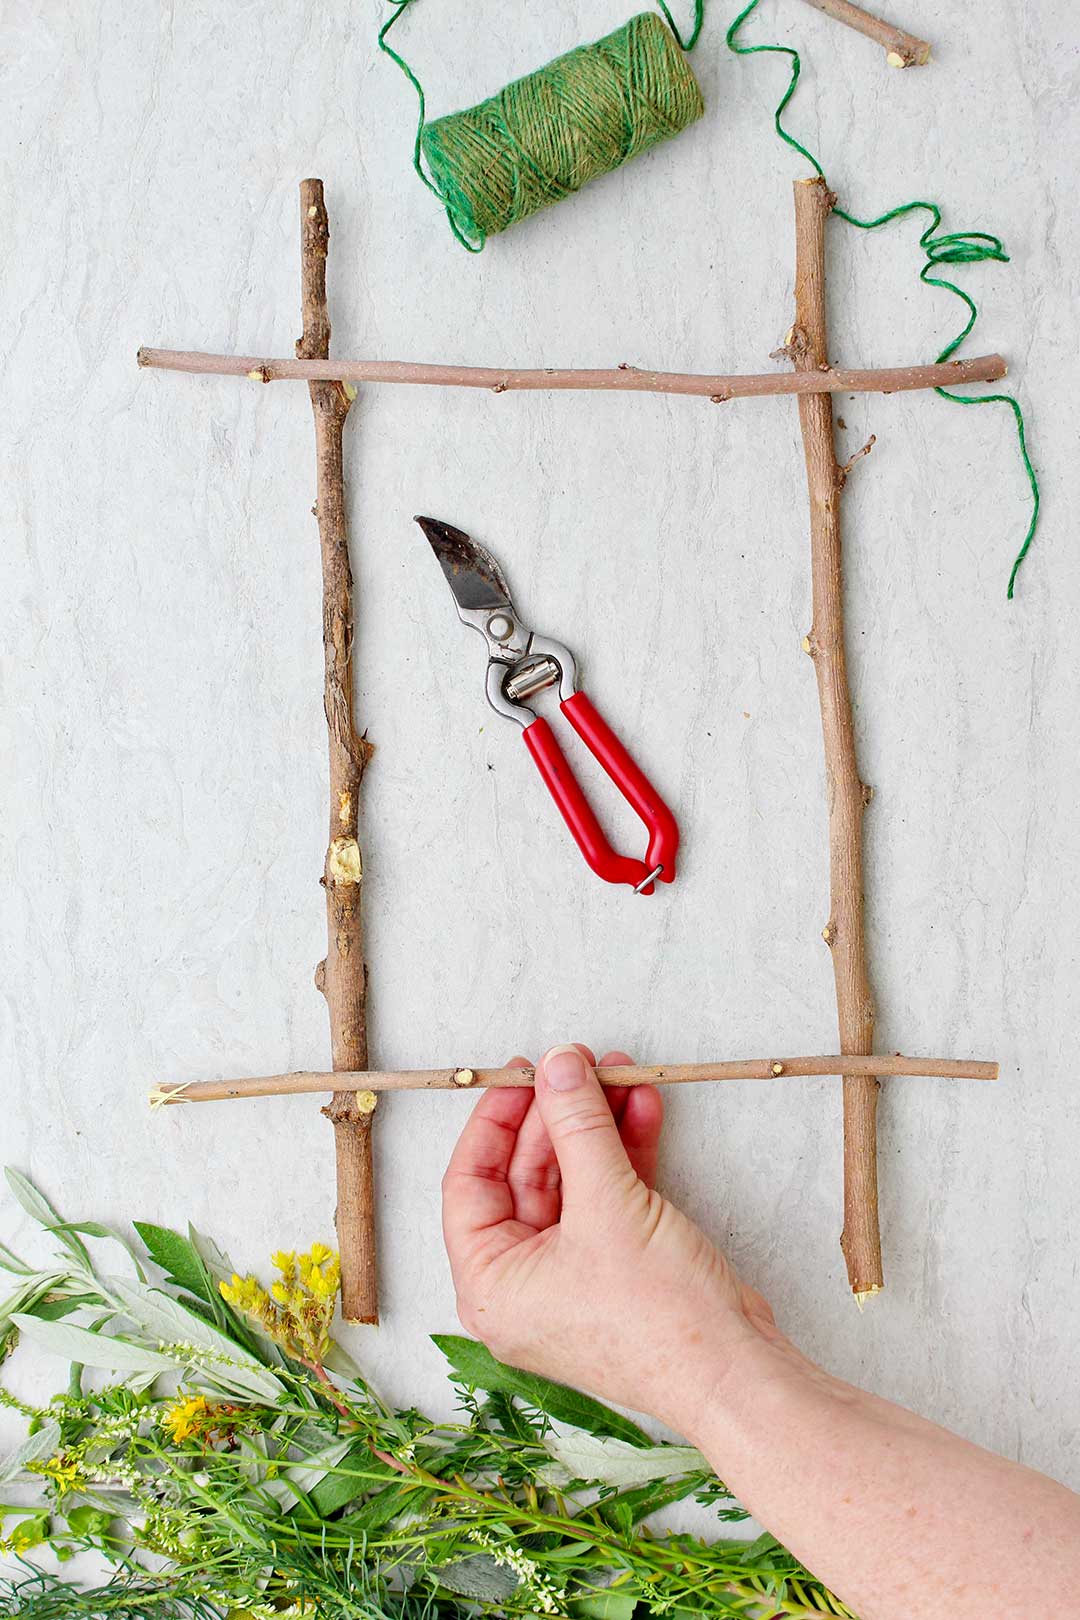
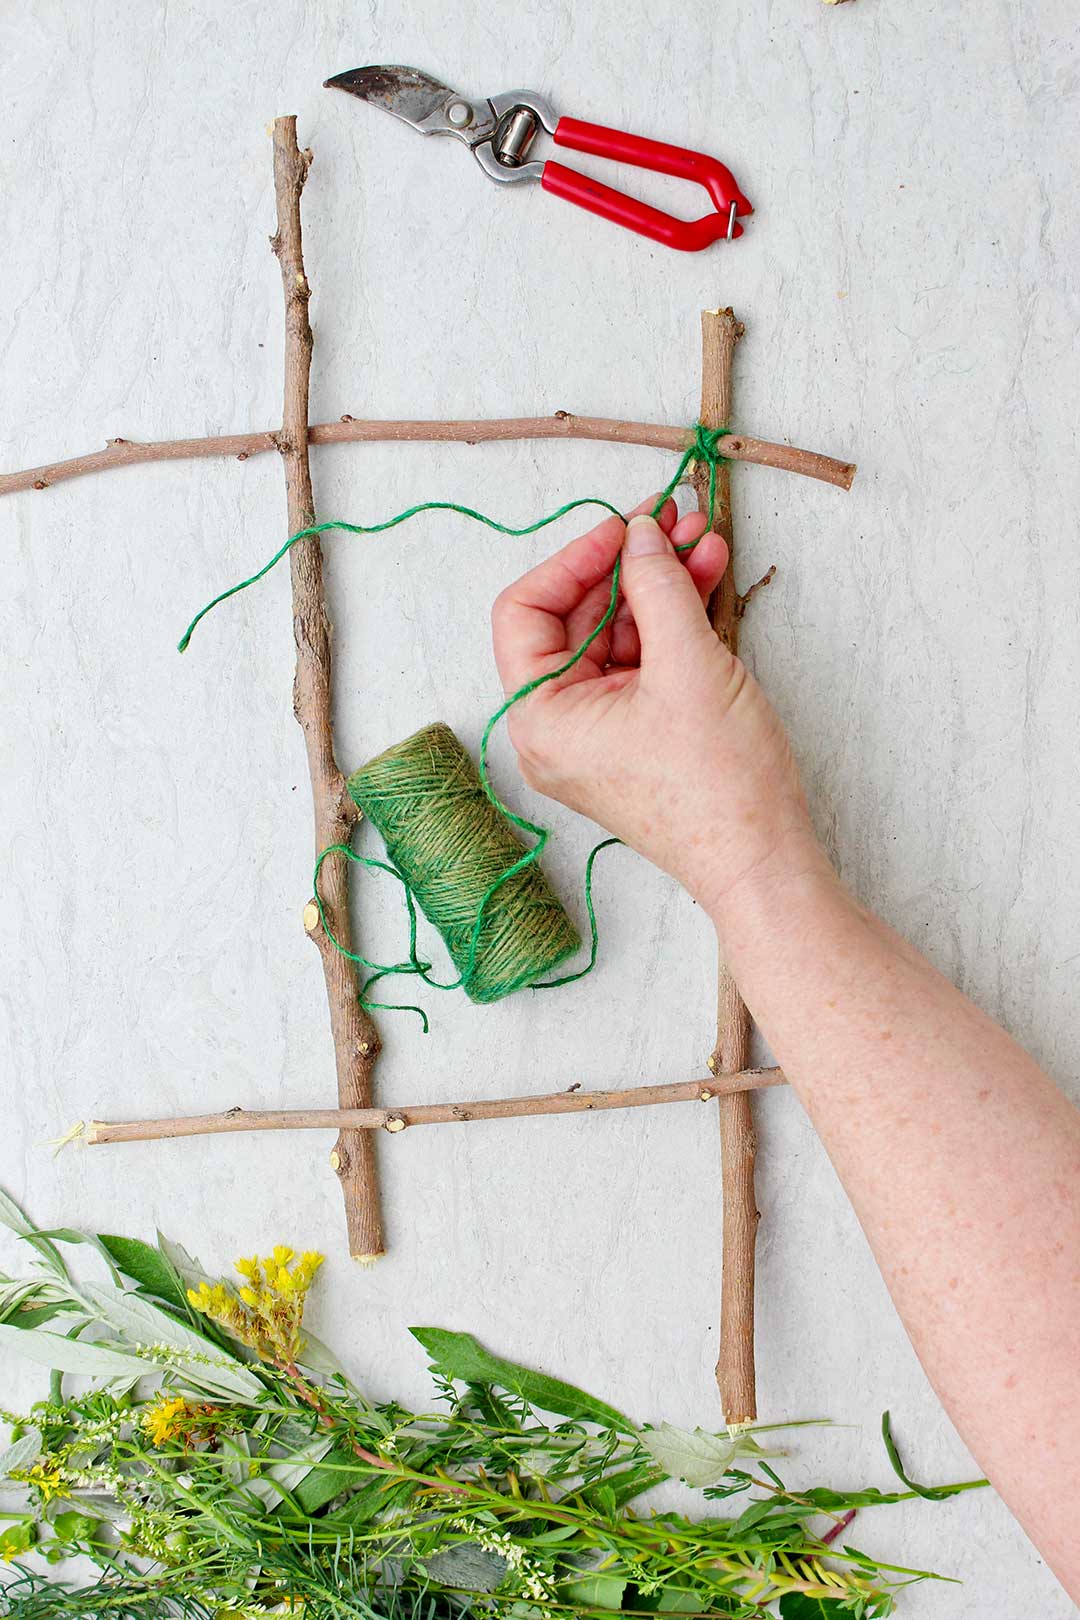
Nature weaving frame-Lash the sticks together
Lay the 4 sticks in a rectangle (or square) and use the string (yarn or twine) to lash the sticks together. Use a figure 8 wrapping where two sticks cross. Keep wrapping until the corner feels firm and then tie it off well and clip the string.
Repeat this on all four corners of the loom.

Note: If I made this again, I would lash the sticks together with more rounds of string. The loom wasn’t as firmly lashed as I would have liked, and it didn’t stay square.
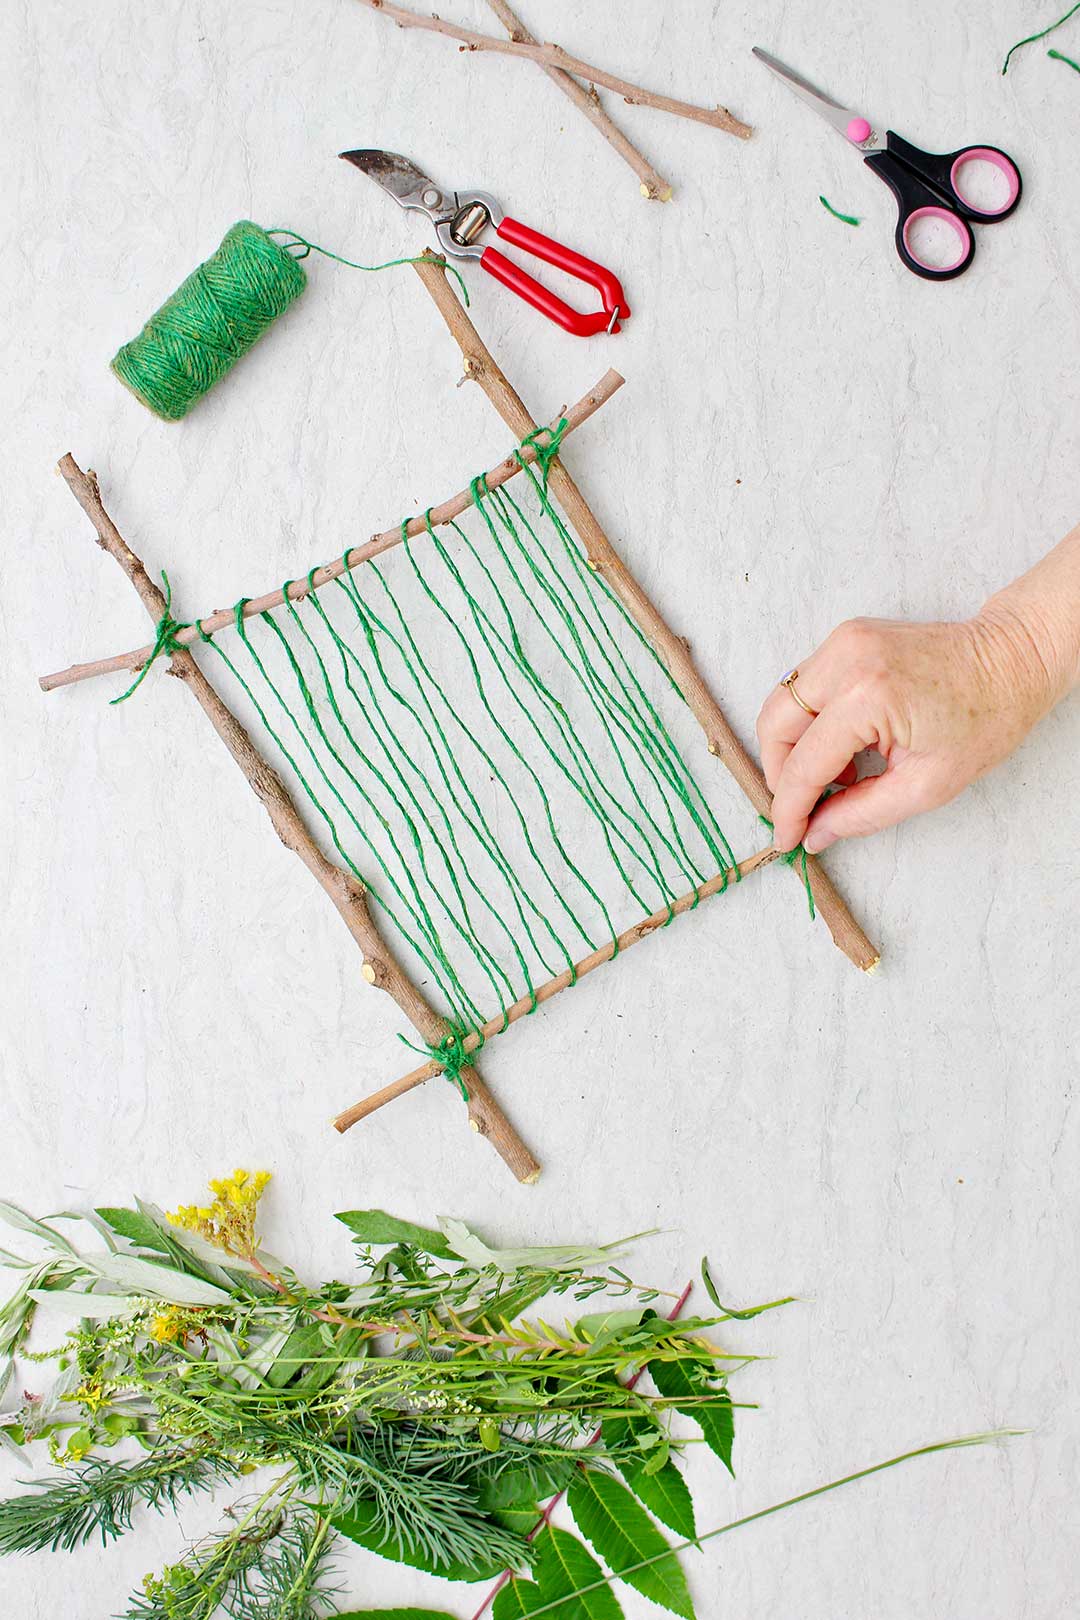
Now tie the string on one cross bar of the loom and wrap it around and around between the two cross bars until you have your desired number of “warp” yarns. Tie it off and clip the end. This is where you will do your weaving.
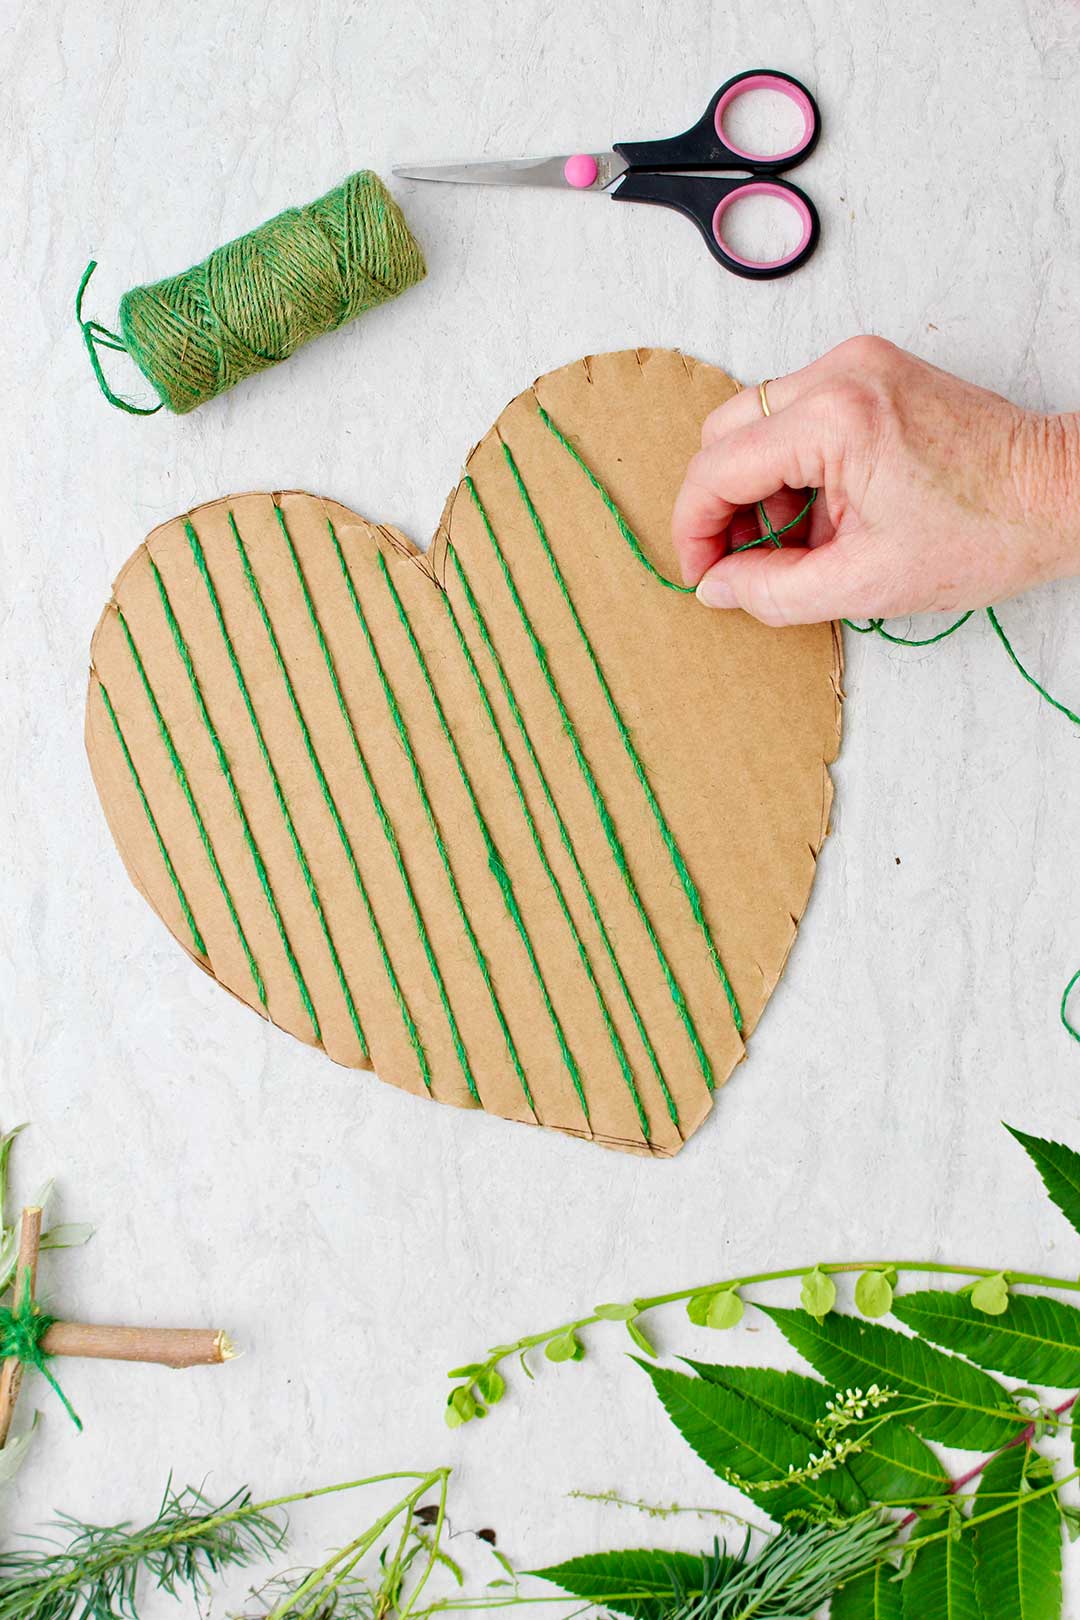
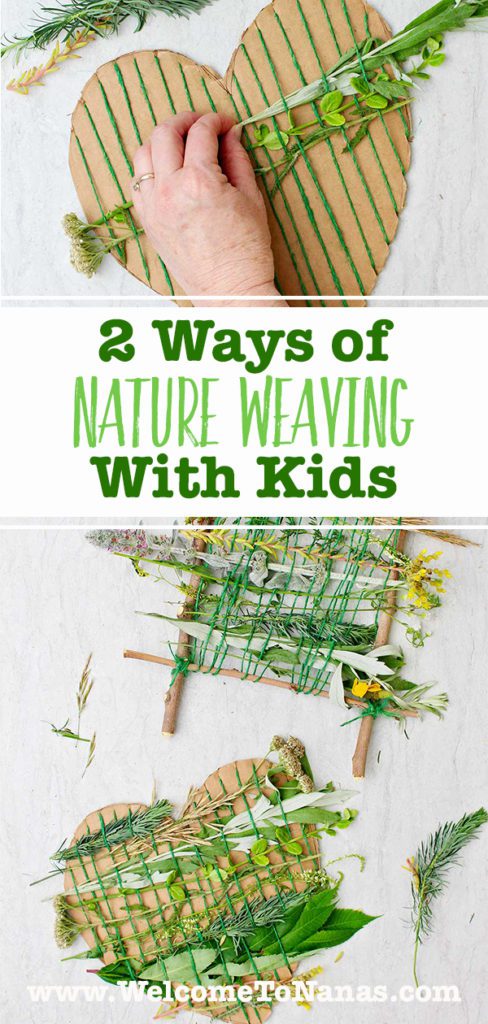
2nd Way of Nature Weaving with Kids- Cardboard Loom
This is a simple way to make a loom if you would rather not lash together sticks.
Use a piece of heavy cardboard, like a flap from a large shipping box.
Draw and then cut out a shape from the cardboard.
I made a heart shaped loom, but you can make a rectangle, square, or other shape of your choice.
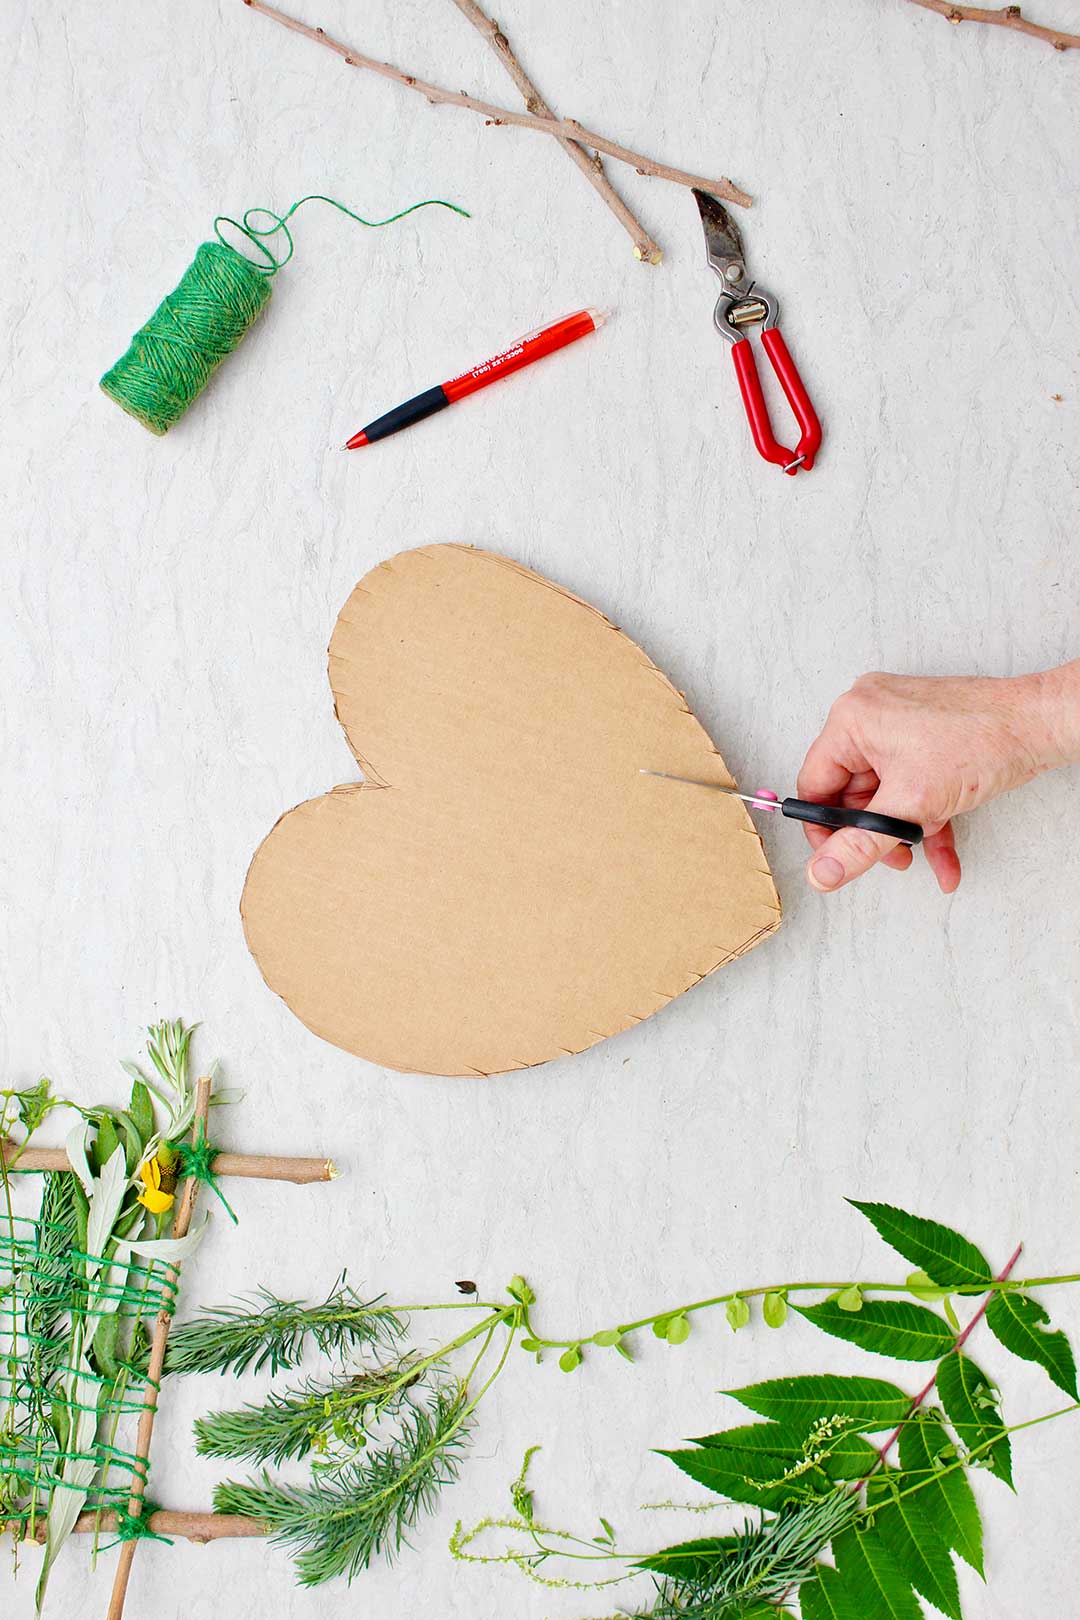
I thought it would be cool to make a crown that fit the child’s head. After doing the weaving you could staple it in a circle and the child could wear it for fun!
Cut small slits in the cardboard to hold the string (yarn or twine). Make the same number of slits on the top and bottom.
Wrap the string around the cardboard, going through the slits on top then bottom, etc. Don’t pull it too tight or you won’t have room to weave your stems through it.
Tape the ends of the string on the back of the loom.
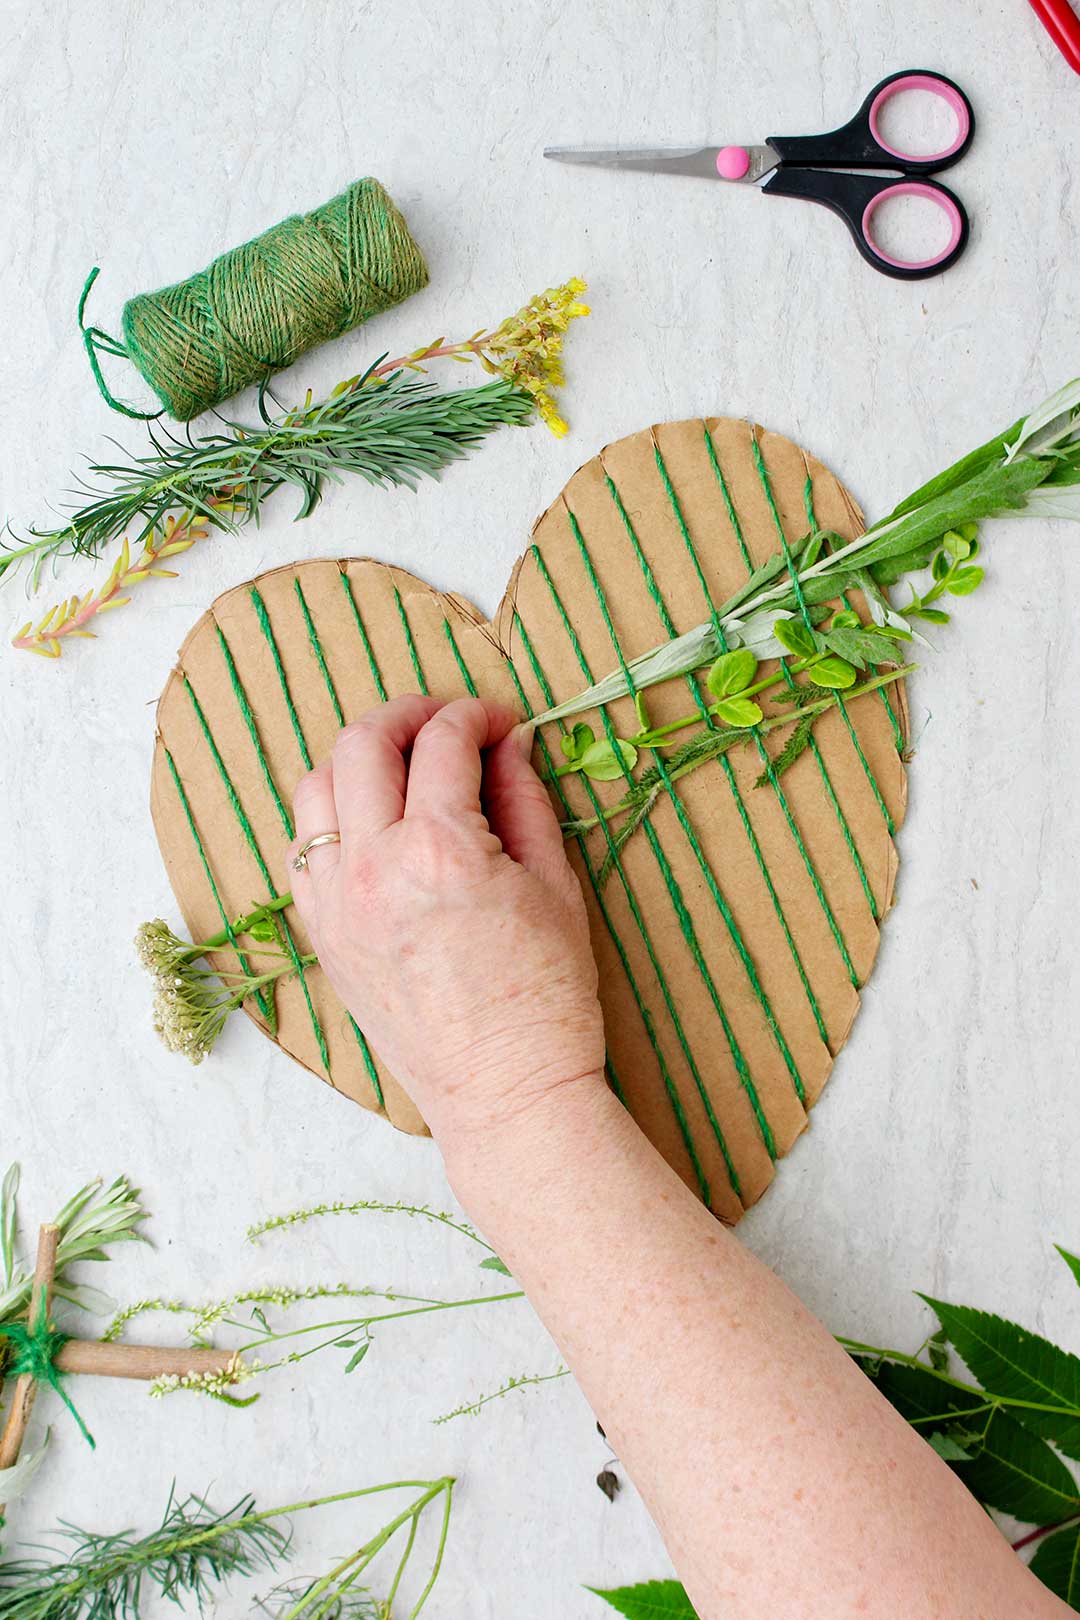
How to do nature weaving?
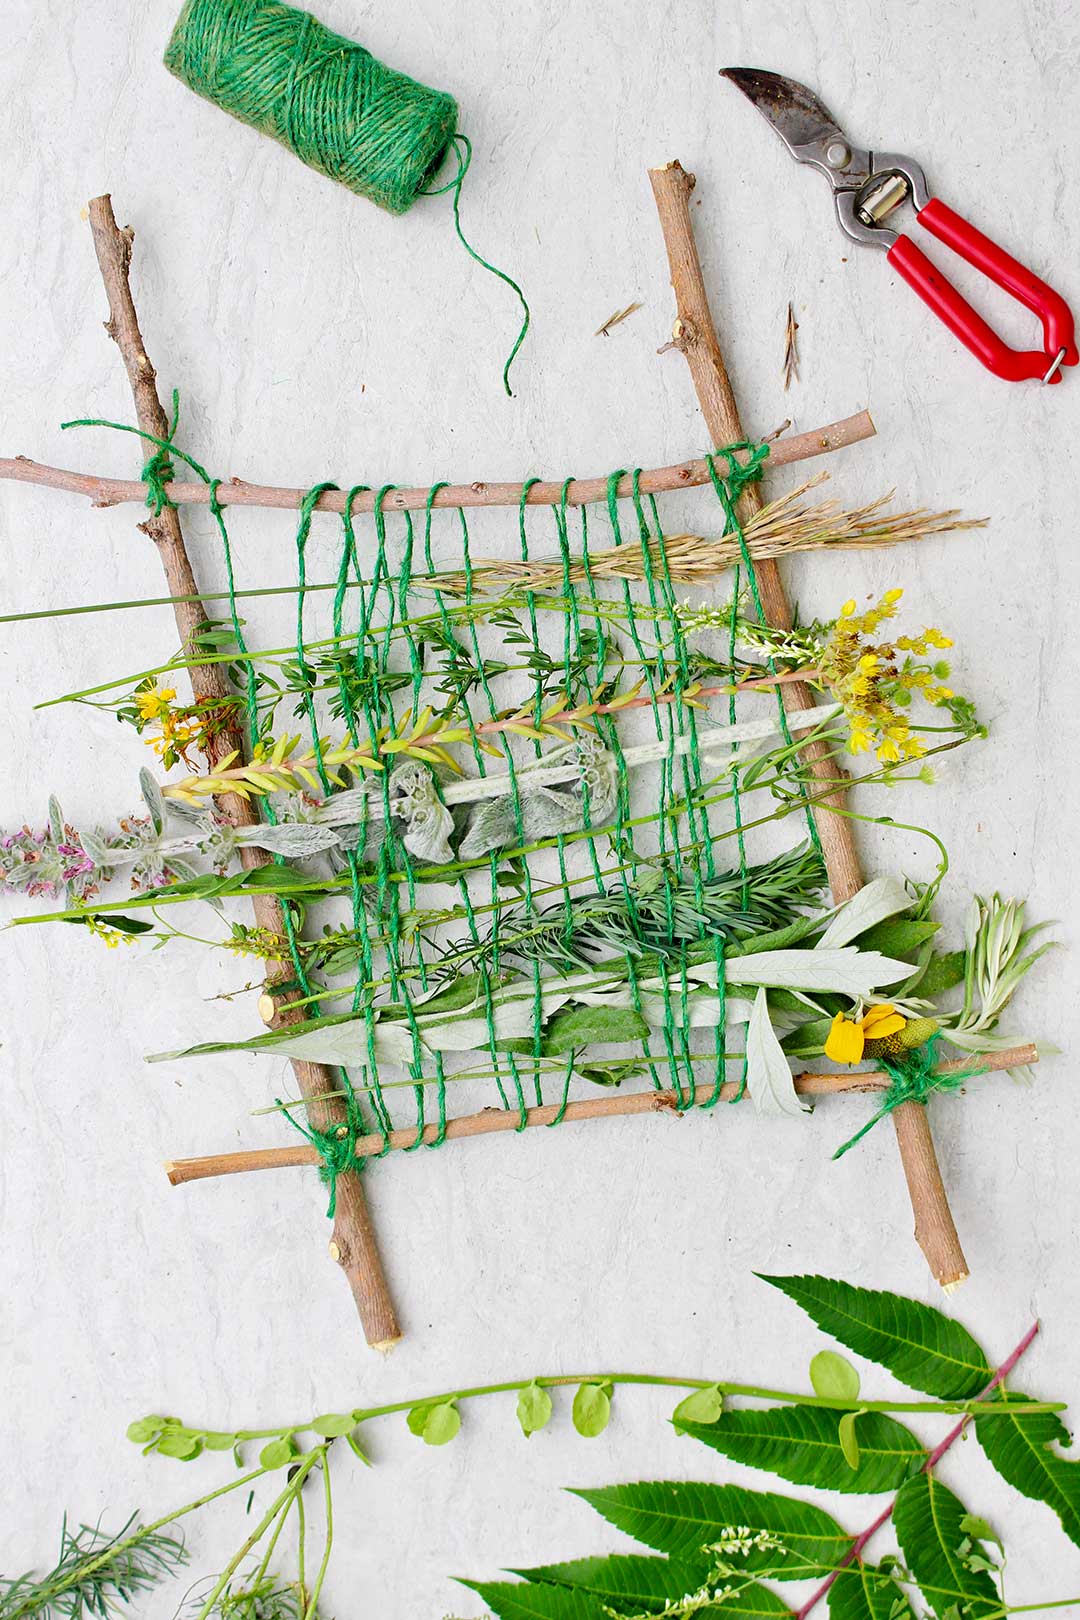
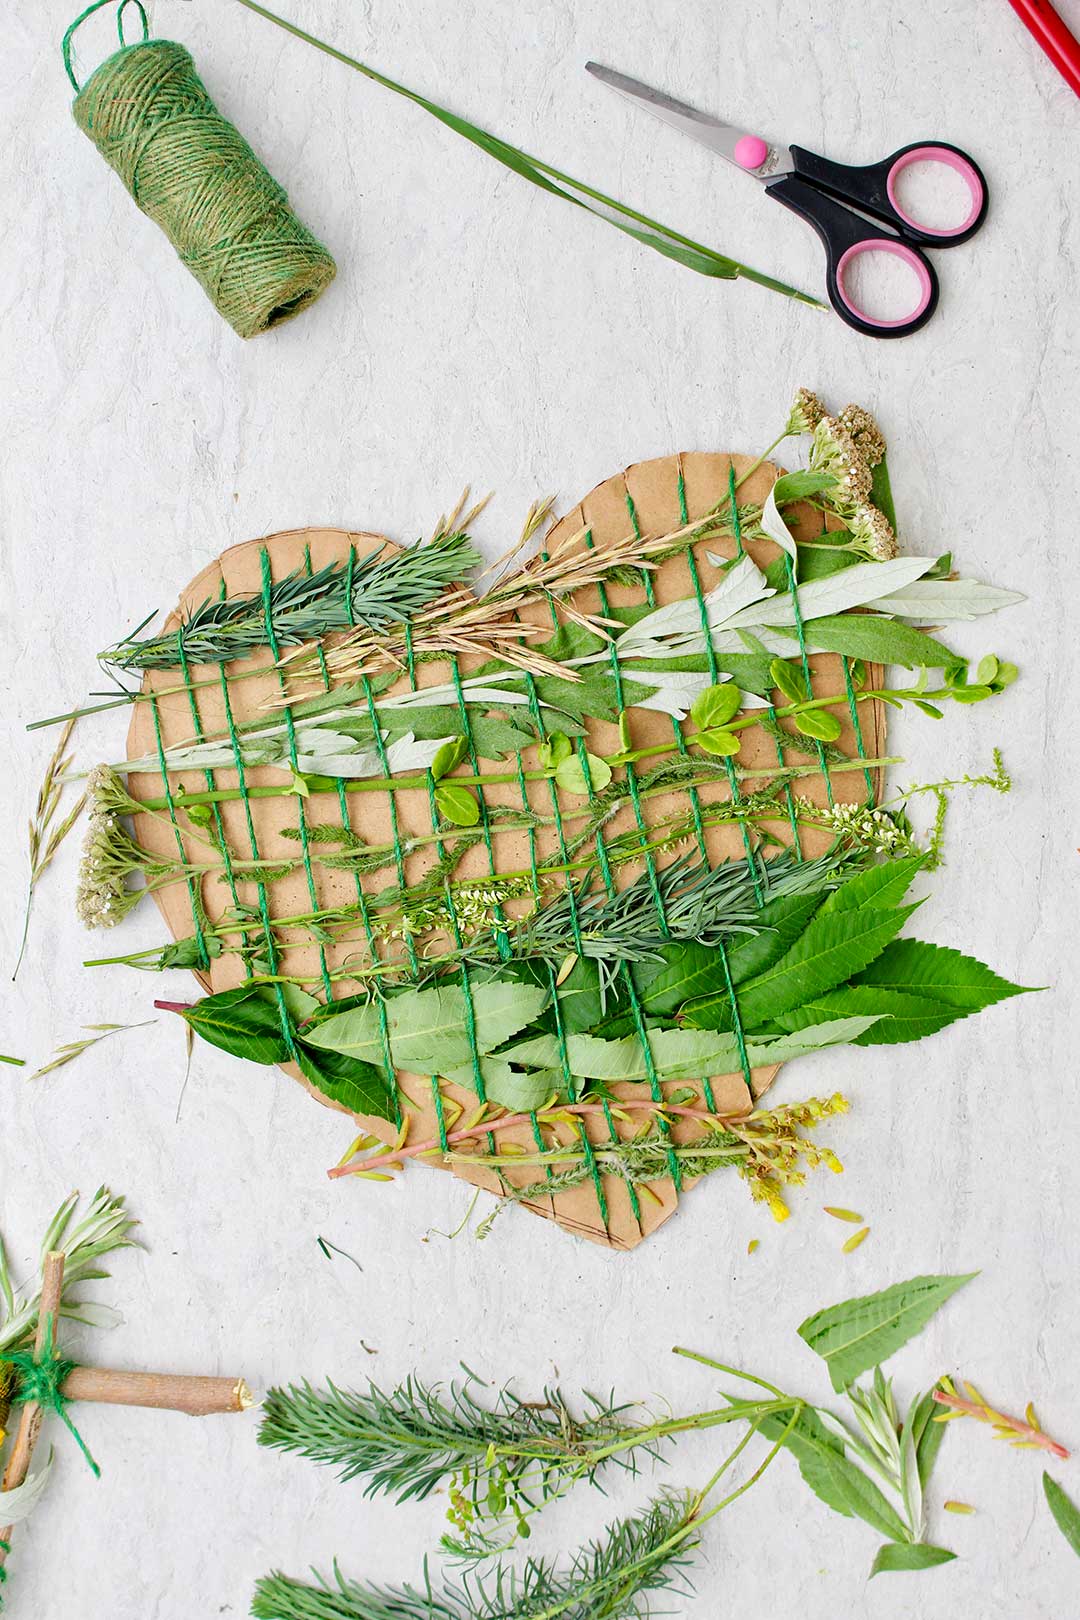
Select one of your nature items and use it to weave across the yarns on your loom.
Use an over and under pattern on the first stem. Then use an under and over pattern with the second stem. Continue going back and forth with this pattern.
Use a variety of nature items to make your weaving interesting and attractive. Which are your favorites? I love the flower stems but also the leafy green stems.
It’s kind of hard to weave with some bulkier stems. Be sure to start your weaving with the base of the stem first. That will make it easier to weave.
Clip the long ends of the plants that are sticking out farther than you would like after you are done.
Did you have some weaving fun?
What do you think? Isn’t that fun?
I hope you enjoy weaving, which did you use, the stick framed loom or the cardboard loom? Why not try the other one too?
I really enjoyed this project and plan on making it with some of my grands when they come this weekend.
Nature weaving ideas- Extra ideas for looms
I have a very large grapevine wreath in my garage that we may use as a loom when the grands come. It would sit well on the large stick easel sitting in the side yard that we made in a previous post. That would be an easy loom for the older grands to use and would dress up the easel.
Another loom idea would be the frame from an old window or photo.
Hey, here is another idea. Try this project in the fall and see how different your weaving will look with the nature items you find in a different season of the year!
Leave your ideas and pictures in the comments. I’d love to see what you create.
Oh and if you are a YouTube fan, here is the link: YouTube 2 Ways of Nature Weaving with Kids
More nature craft ideas from Welcome To Nanas
Are you enjoying being outside? Here are a few other ideas for you to try as you spend time outdoors.
- DIY Tabletop Easel From Twigs (I used this idea to make a larger one for my yard)
- DIY Botanical Wall Art with Spray Paint
- Tree Leaf Identification Nature Journal
- Hammered Flower Prints on Fabric
- Giant Ice Cube Archeology Fun
Enjoy!
If you try this craft, let me know! Go ahead and leave a comment, rate it, and tag a photo with #WelcometoNanas wherever you post.
Come join the fun at https://welcometonanas.com
2 Ways of Nature Weaving with Kids
Equipment
- Scissors
- Garden clippers
Items Required
- Nature items that you collect
- 4 straight sticks OR a piece of heavy cardboard
- String (OR yarn, OR light twine)
Instructions
- Plan a walk with your children and take along a basket or a tote and a garden clipper of some sort to collect the nature items you will need for your project.You are looking for a variety of nature items that would work for weaving so they need to be long and slender. Look for things that can be easily clipped off and not hurt the bush, tree or flower.
- There are two loom possibilities described in this post that you can make. One loom is made of sticks and the other of heavy cardboard.The stick loom is best for older kids that can tie the sticks together themselves unless an adult or older child is willing to help the younger child. The cardboard loom may work better for younger kids if you cut the heavy cardboard for them.Choose which you would like to try and go to the instructions that follow for that loom type.
- Stick LoomWith the stick loom you will need several straight sticks in the size you would like for your loom. I used two 12 inch and two 8-inch sticks in the loom you see in these pictures. But the loom can be larger or smaller if you would like.All of these sticks came from a tree branch that fell during a rain storm last week. It had several branches that could be clipped off and the branches were about ½ inch thick. See what you can find.Clip off any extra little branches on your sticks and then cut them to your chosen length.
- Lay the 4 sticks in a rectangle (or square) and use the string (yarn or twine) to lash the sticks together. Use a figure 8 wrapping where two sticks cross. Keep wrapping until the corner feels firm and then tie it off well and clip the string. Repeat this on all four corners of the loom.Now tie the string on one cross bar of the loom and wrap it around and around between the two cross bars until you have your desired number of “warp” yarns. Tie it off and clip the end. This is where you will do your weaving.
- Cardboard LoomUse a piece of heavy cardboard, like a flap from a large shipping box. Draw and then cut out a shape from the cardboard. I made a heart shaped loom, but you can make a rectangle, square, crown, or other shape of your choice. Cut small slits in the cardboard to hold the string (yarn or twine). Make the same number of slits on the top and bottom. Wrap the string around the cardboard, going through the slits on top then bottom, etc. Don’t pull it too tight or you won’t have room to weave your stems through it.Tape the ends of the string on the back of the loom.
- Nature weavingSelect one of your nature items and use it to weave across the yarns on your loom. Use an over and under pattern on the first stem. Then use an under and over pattern with the second stem. Continue going back and forth with this pattern.Use a variety of nature items to make your weaving interesting and attractive. Which are your favorites? I love the flower stems but also the leafy green stems.It’s kind of hard to weave with some bulkier stems. Be sure to start your weaving with the base of the stem first. That will make it easier to weave.Clip the long ends of the plants that are sticking out farther than you would like after you are done.What do you think? Isn’t that fun?
Video
Notes
Supplies for 2 Ways of Nature Weaving with Kids
- Nature items that you collect
- 4 straight sticks OR a piece of heavy cardboard
- String (OR yarn, OR light twine)
- Scissors
- Garden clippers


Leave a Reply