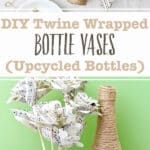
DIY Twine Wrapped Bottle Vases are both trendy & vintage, bringing back memories from the 70’s. Great vases for Mother’s Day flowers & decorations!
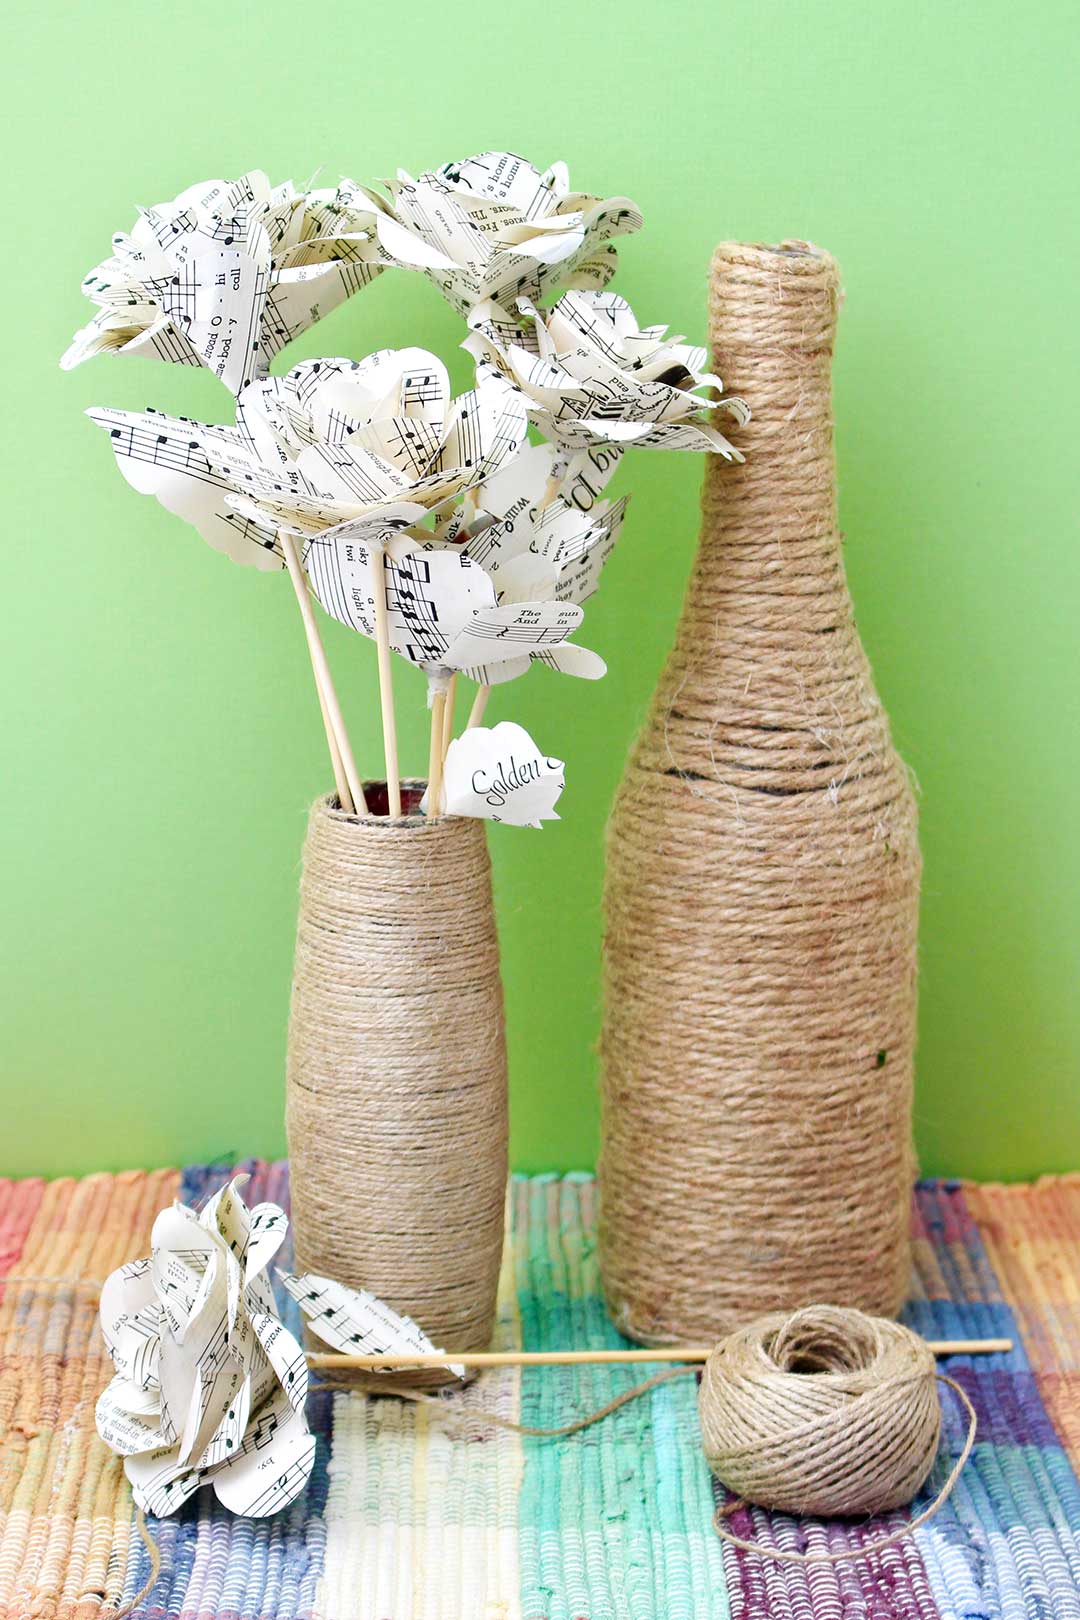
DIY Twine Wrapped Bottle Vases
This DIY Twine Wrapped Bottles Vase is a kickback to the 70s for me. This craft is both trendy and vintage and I see it at weddings and in peoples homes.
I thought it would be a great vase to make for Mother’s Day! You could put the Book Page Roses in it or any flowers of your choice!
Upcycled bottle preparation
If you make more than one, they make a nice grouping on the shelf, if they are in a variety of shapes and sizes.
You can upcycle any type of glass bottle that you would like. it can be a beverage bottle, a food bottle, a wine bottle, or an old vase like I did. Oh and don't forget that you can make a Mason jar wrapped in twine as well.
Take the time to scrub the label off your bottle before adding the twine. This is an optional step, but I highly recommend it. There are usually a little cracks between the twine where you can see through, and a colored label would be able to be seen.
If you soak the bottle in warm water for a while, the label usually comes off fairly easily. I use a product called Goo Gone to take off the remaining rubber or sealant. You probably have your own trick for that!
When your bottle is clean and dry, you are ready to go! I love upcycled craft ideas, don't you?
Twine choice for wrapped bottles
The jute twine that I used is pretty small in diameter. I had it on hand so I went ahead and used it which is kind of my motto right now. Use up what you have on your shelf before you buy something else! Know what I mean? 🙂
But twine is available for purchase at lumber yards, craft stores and online.
You can purchase twine in various sizes or diameters I should say. The larger diameter makes his craft go much more quickly. And if you’re doing it with children that would hold their attention longer. They could cover the bottle more quickly and it still looks very nice.
Note: A larger number on the twine means it has a larger diameter. It may also be described by mm in diameter so a larger diameter would be a thicker twine.
Full length video option
If you would like to watch the full length tutorial for this craft click this link: DIY Twine Wrapped Bottles Vase Full Length Tutorial.
Starting your twine wrapping
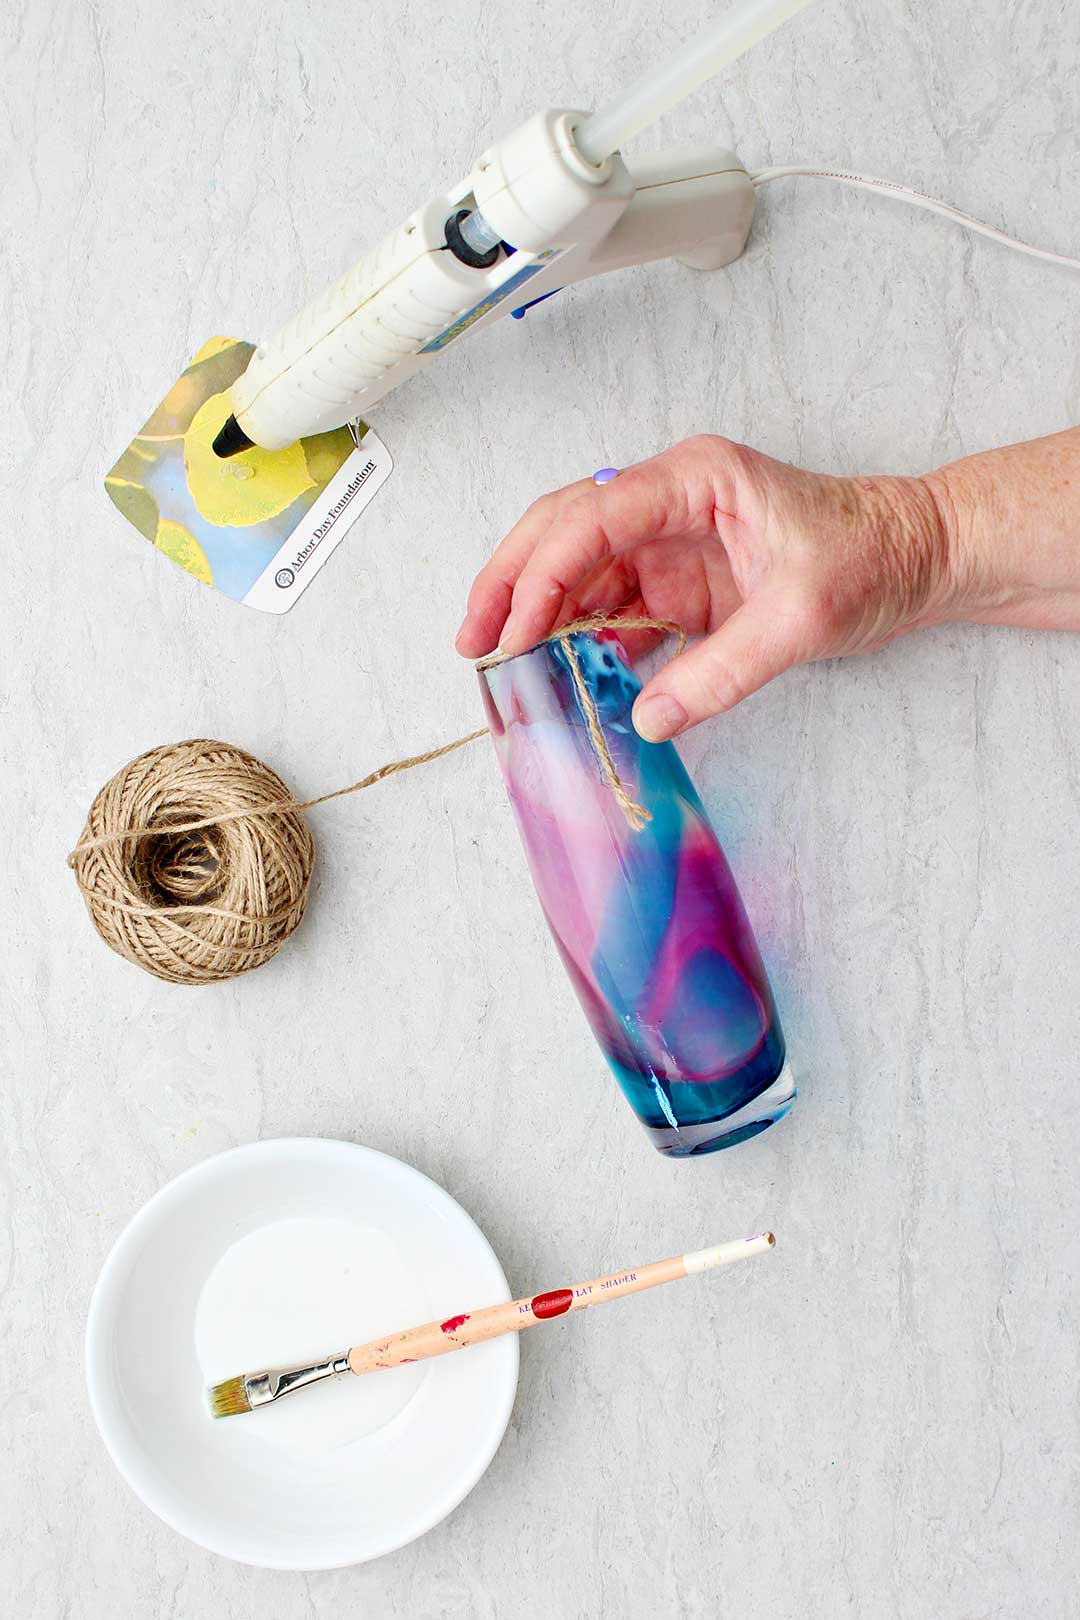
I always start at the top of my bottle and work downward. I’m sure it would work either way, but this is the way I’ve always done it. 🙂
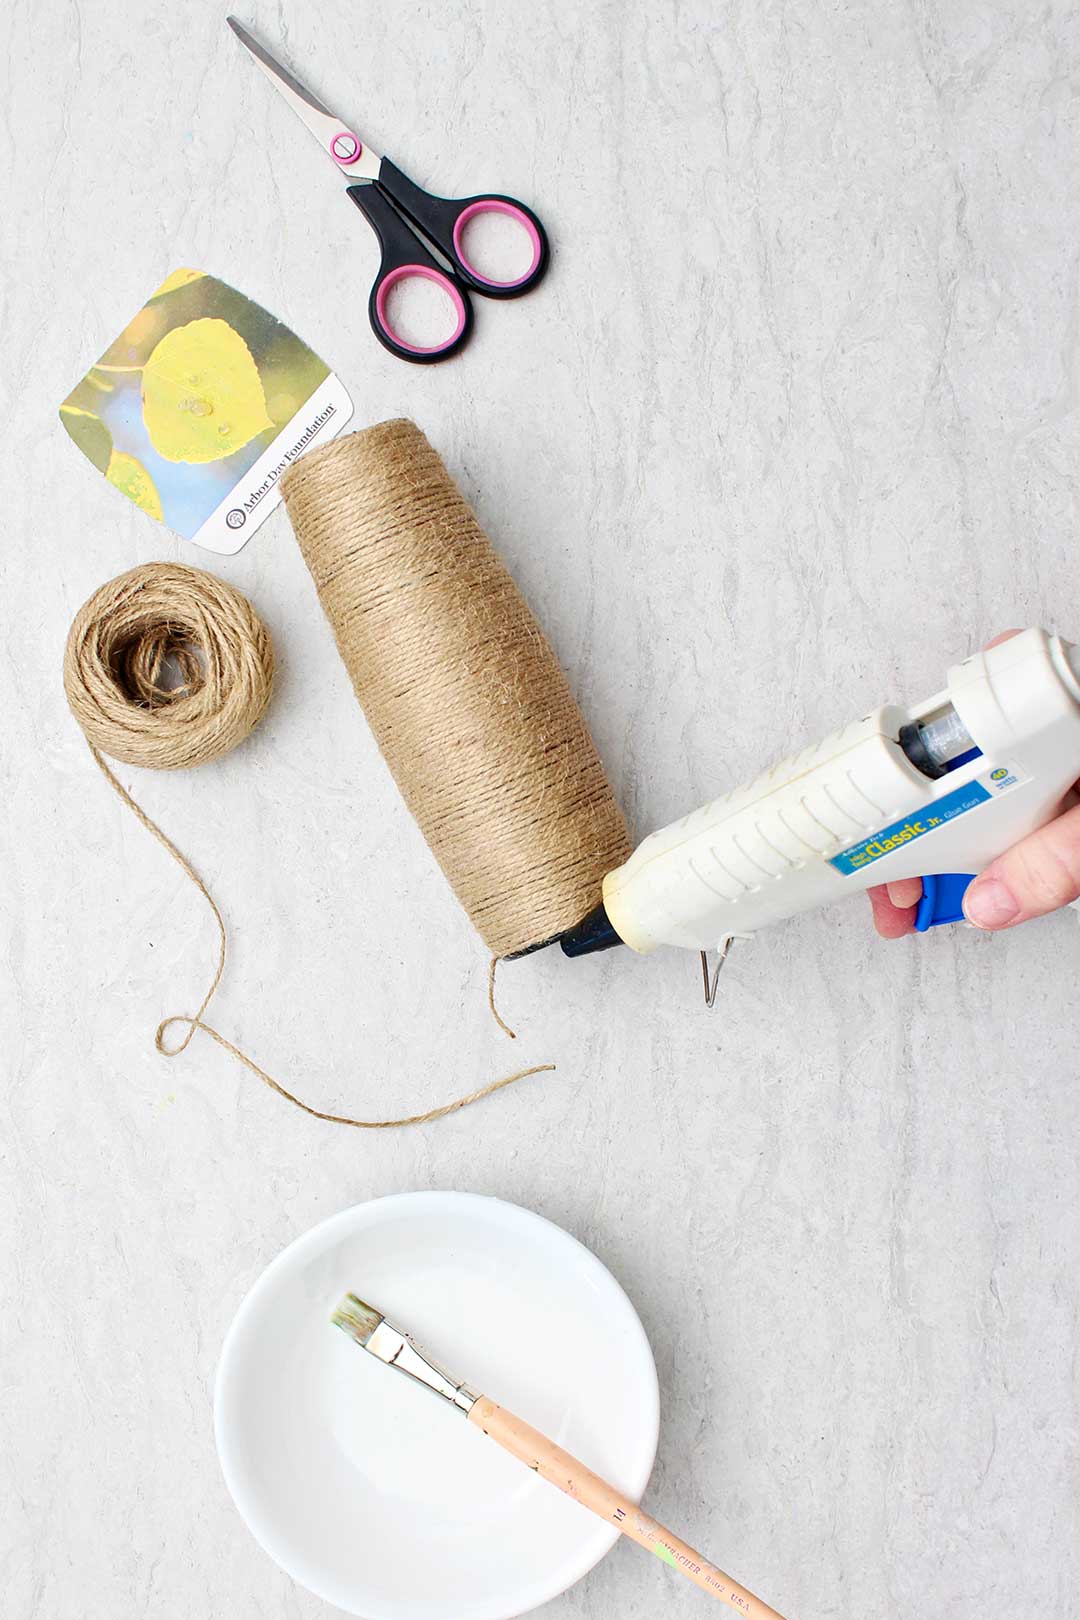
I take about a 2 inch piece of the twine and stick it down to a bead of hot glue that runs up and down a couple inches from the top of the bottle.
This holds the twine in place as you get started wrapping the bottle with it. Be careful not to touch your fingers into the hot glue.
I like to place the twine around the mouth of the bottle next. I put down small amounts of hot glue on the lip of the bottle or vase and glue about a quarter of the way around the top and then lay the twine in it the hot glue.
Then repeat that all the way around the lip of the bottle. If I go the whole distance around the lip of the bottle with the glue, the glue tends to cool before I can get the twine placed properly. Again, be careful of your fingers with the hot glue.
Wrapping twine around the bottle
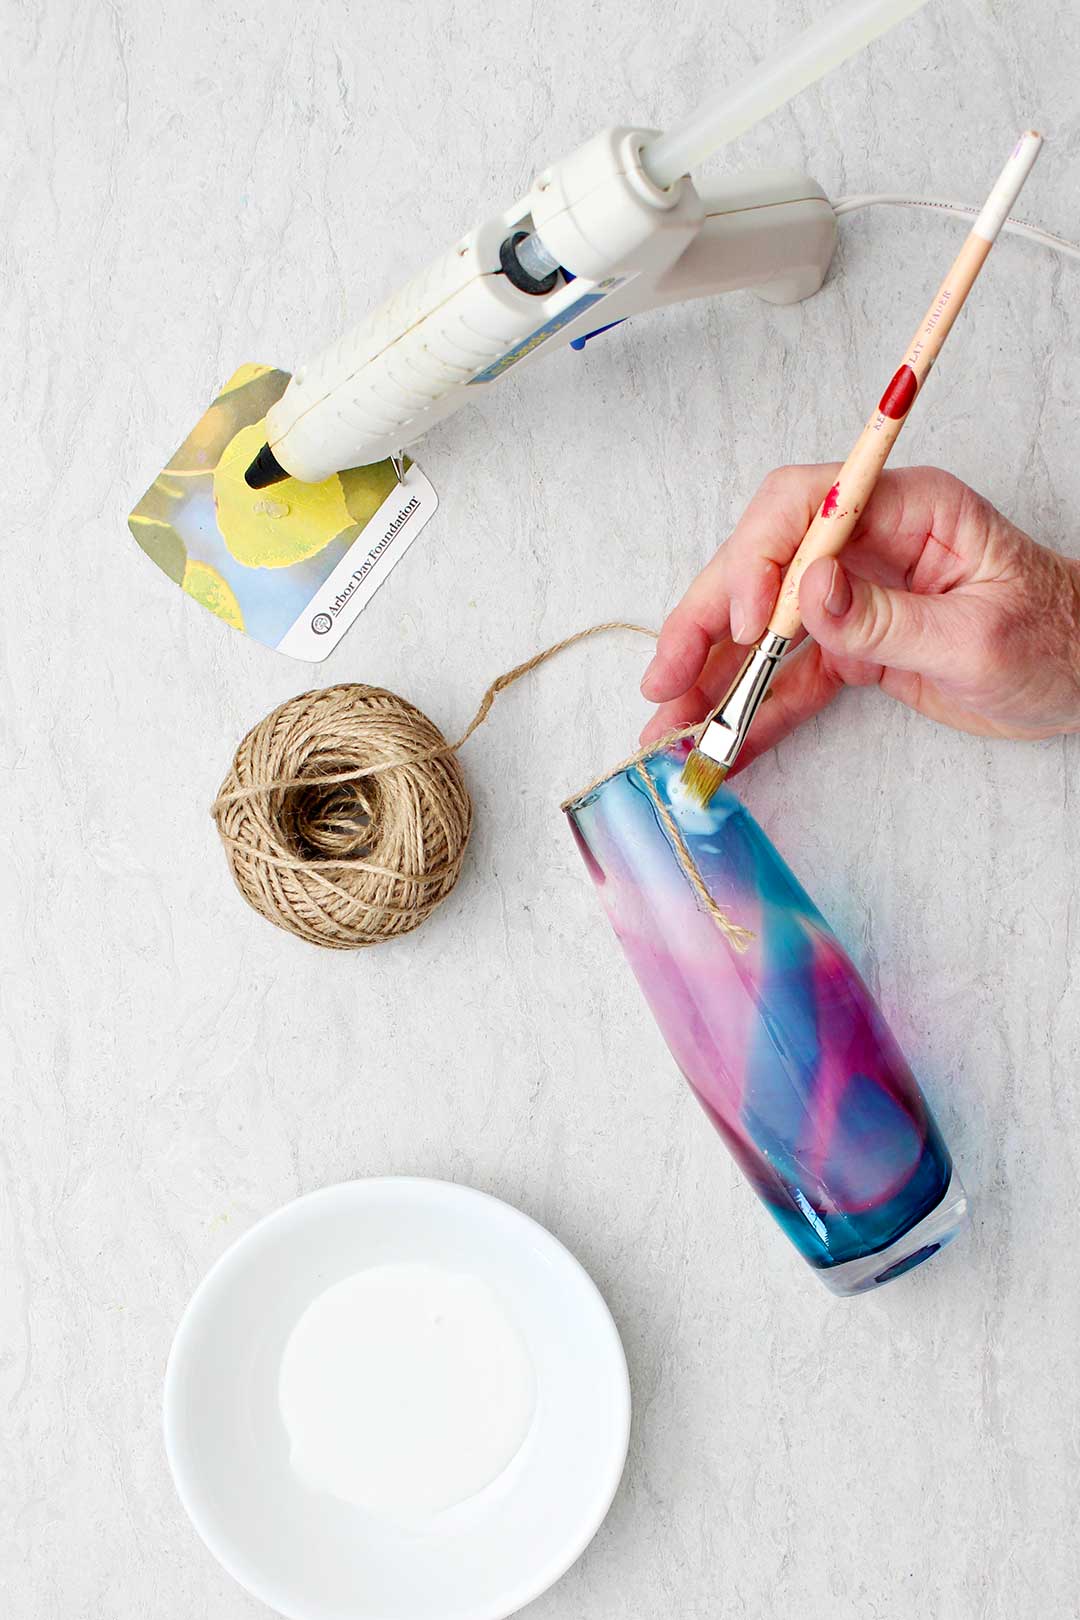
Now set the hot glue gun aside. Place some tacky glue in a small bowl and get out an old paintbrush.
We are going to brush glue onto about an inch of the bottle at a time and put the glue and put the twine down in it as we wrap.
This is also an optional step, but I find that it holds the twine in place much more nicely over time. The twine tends to stretch just a bit and slip down the bottle with gravity. And that leaves wider gaps between the twine. This glue will help hold that in place. I think it’s worth the trouble to do.
So take your paintbrush, and paint a little glue about an inch down the neck of the bottle.
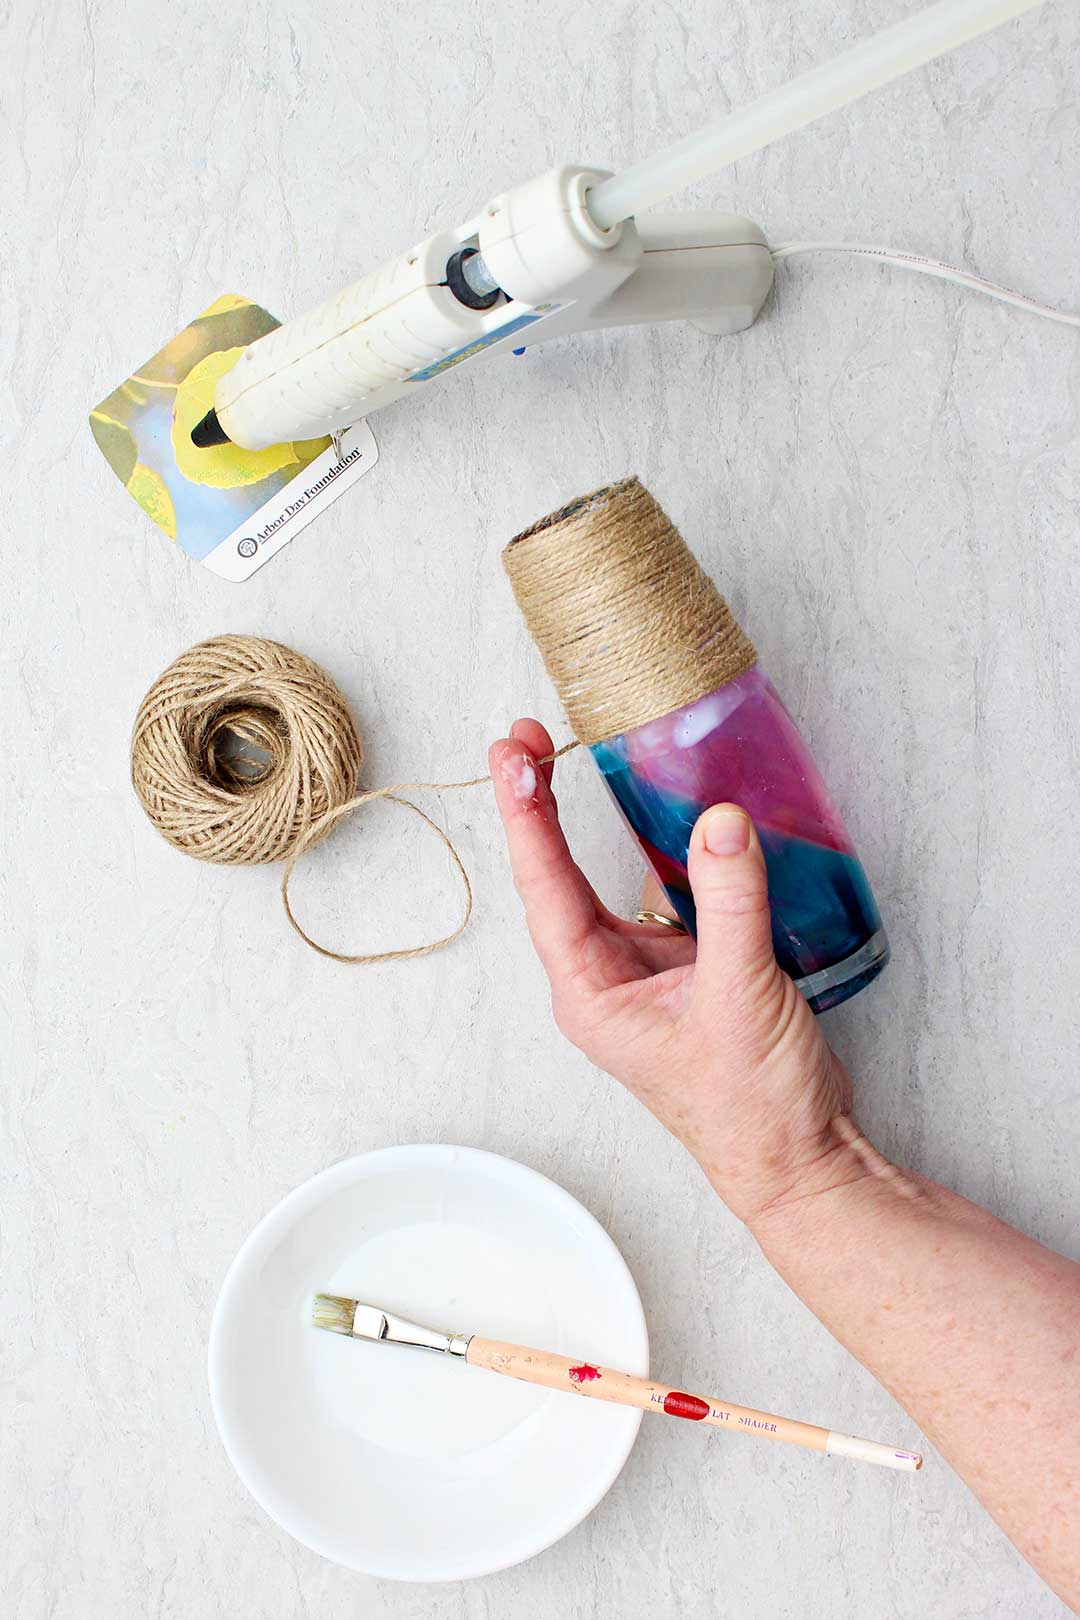
And now the winding begins
Hold the twine in one hand, and the bottle in the other. The bottle so that the twine comes off of the roll, through your fingers, and onto the bottle as it turns.
This way, your fingers will guide the twine onto the bottom, so that it does not kink up or overlap itself accidentally.
Do you want the twine to lay as close to the last round of twine as you can.
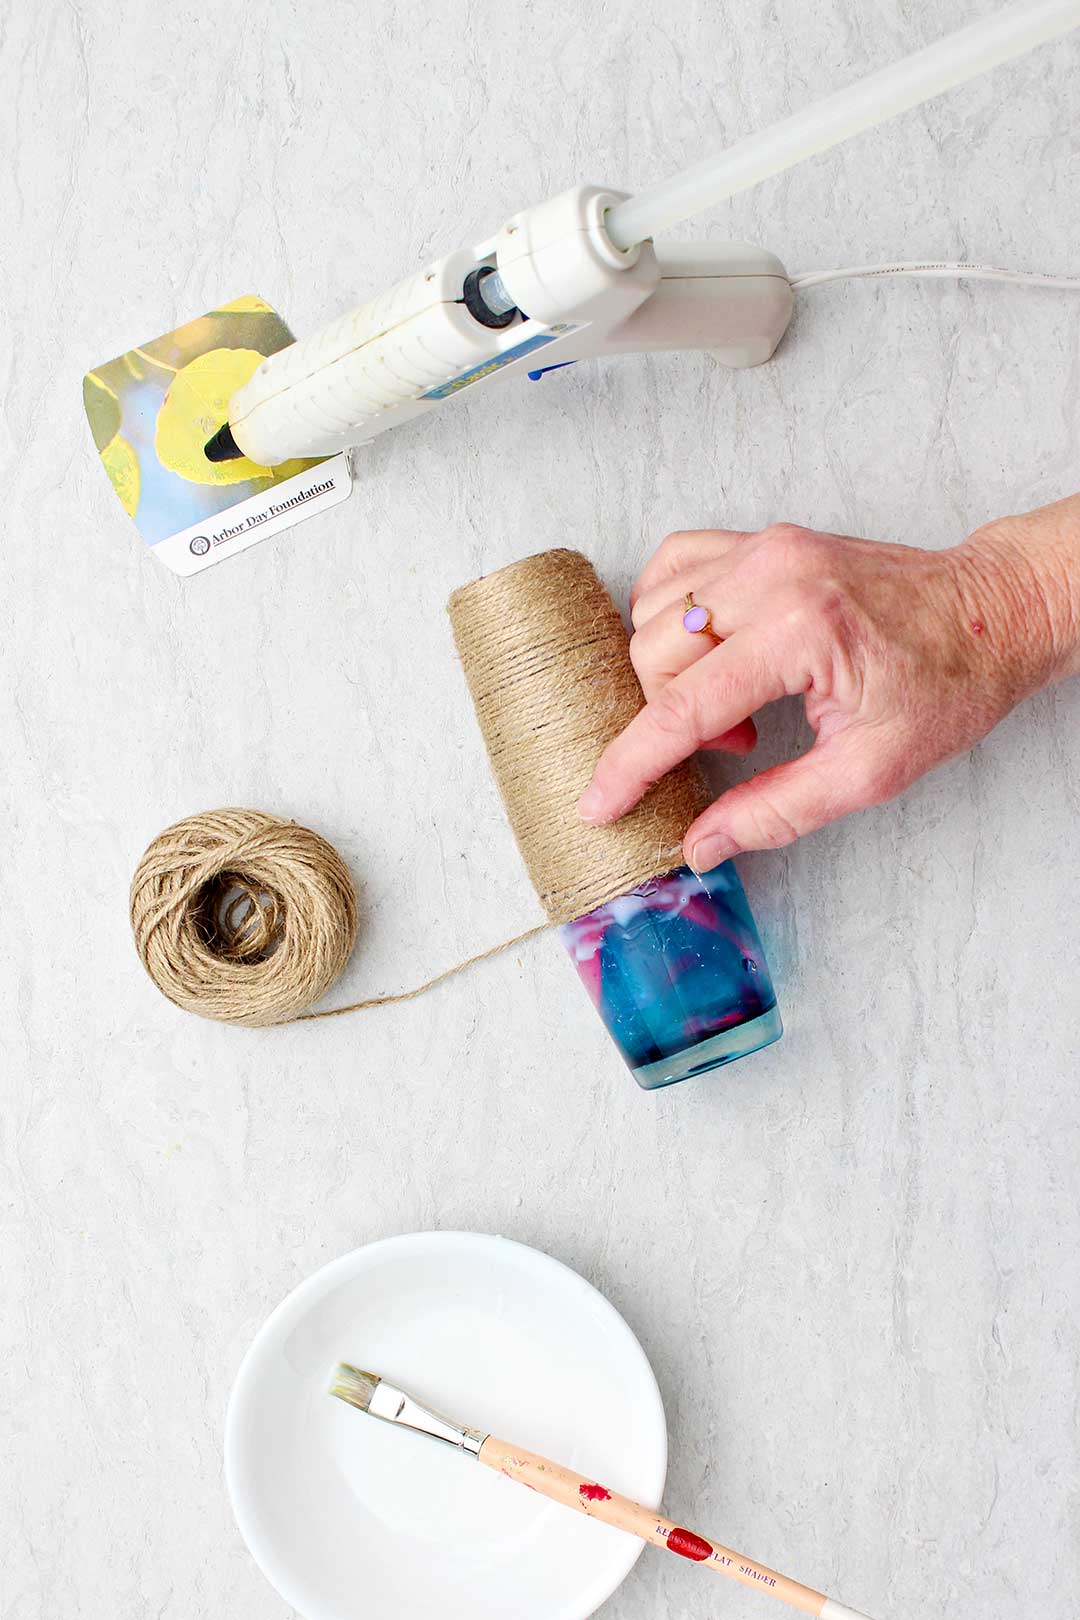
Stop occasionally and gently push the twine up on the bottle so that it is close together with no gaps and also horizontal across the bottle so that it is on as straight and neatly as possible.
Now, repeat that with the next inch of the bottle, and so forth, until you have covered the entire bottle!
Changing colors of twine for color patterns
It is possible to stop one color of twine and begin another color of twine so that you have a pattern on your bottle.
If you would like to do this, you would need to purchase two colors of twine. I’ve seen lighter and darker twines and I’ve also seen a green twine. I’m sure there are other colors as well. Those may have to be purchased online.
Note: Oh my goodness, I just found these colored twines online. Too cool. Link: Colored twines.
Yarn wrapped bottles
It is possible to do the same with yarn. Yarn is very small and it takes a long time to cover the bottle with yarn. But you are if you are patient, it has a really nice result.
And then you can use lots of different colors if you want, and it gives a whole different appearance. Kids would really like the results but they would probably need to be older to be patient enough to wrap and wrap the bottle with a small diameter in the yarn.
If you do change colors, just cut the yarn twine at the place you would like to change colors and put a small bead of hot glue under the very end to hold it in place.
Then put another beat of hot glue at the starting point of the next color and wind it as much as you’d like. Then clip it and repeat that process as you change back to your original color. This gives a nice pop of color.
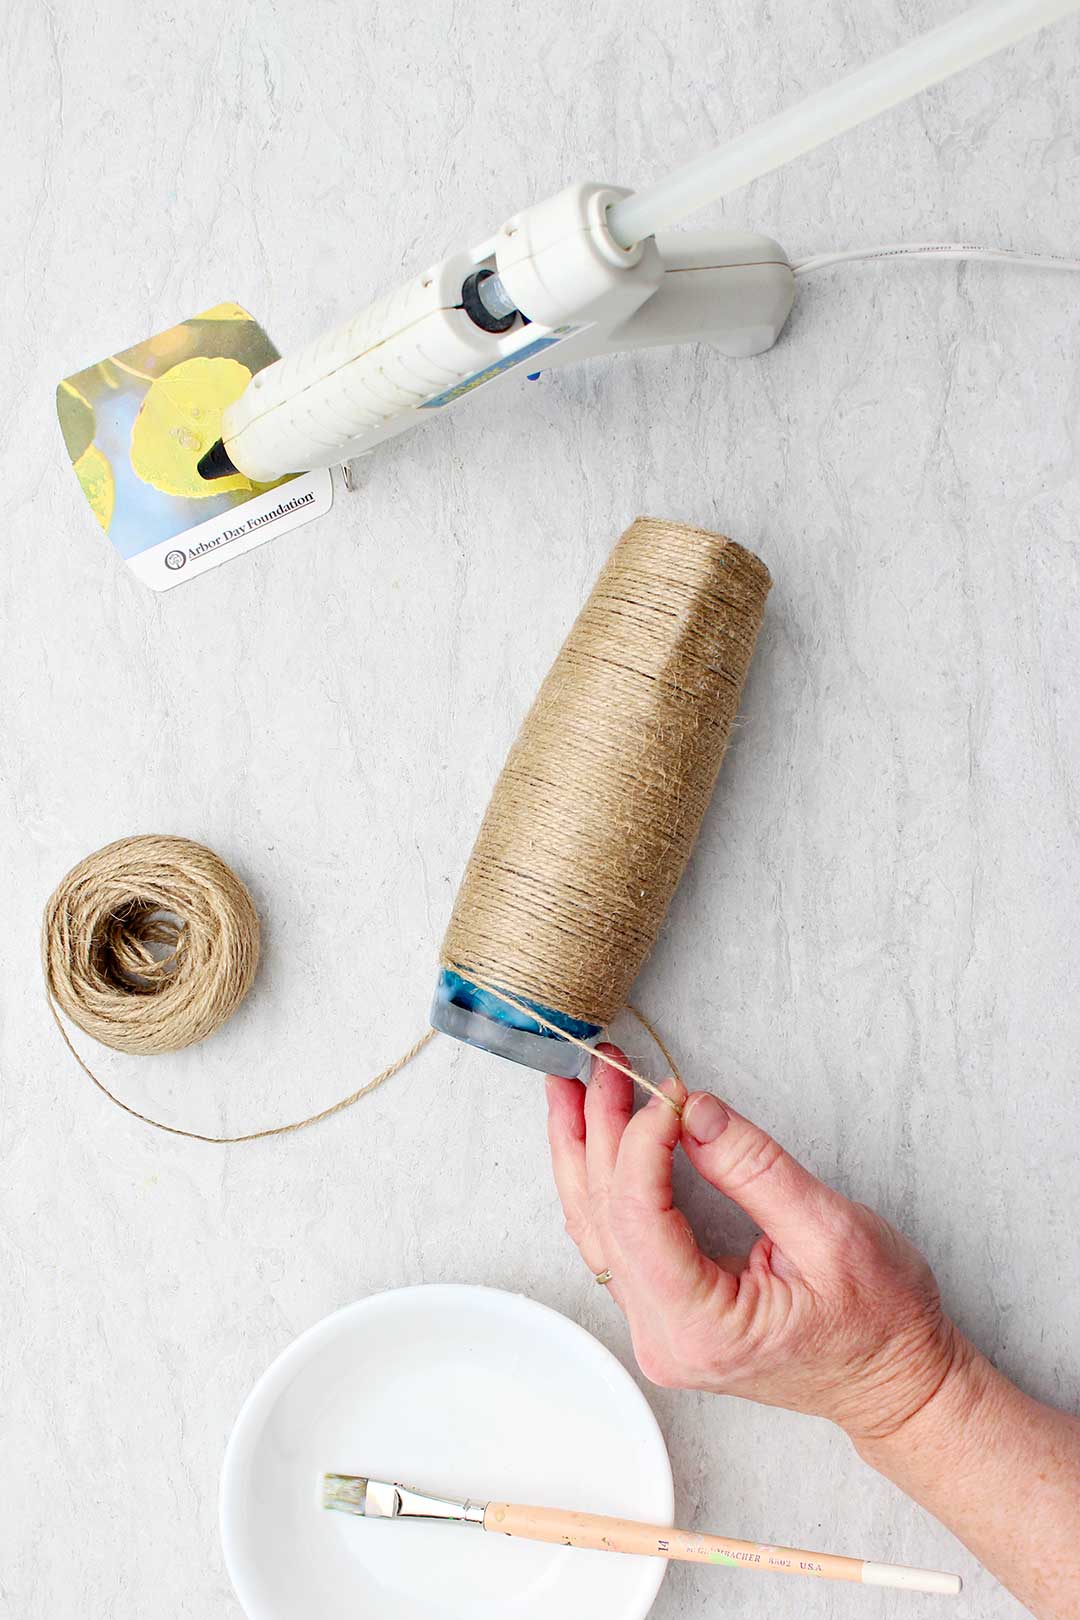
Ending the twine wrap
When you get down to the bottom of the bottle, you will want the end to be secured with hot glue.
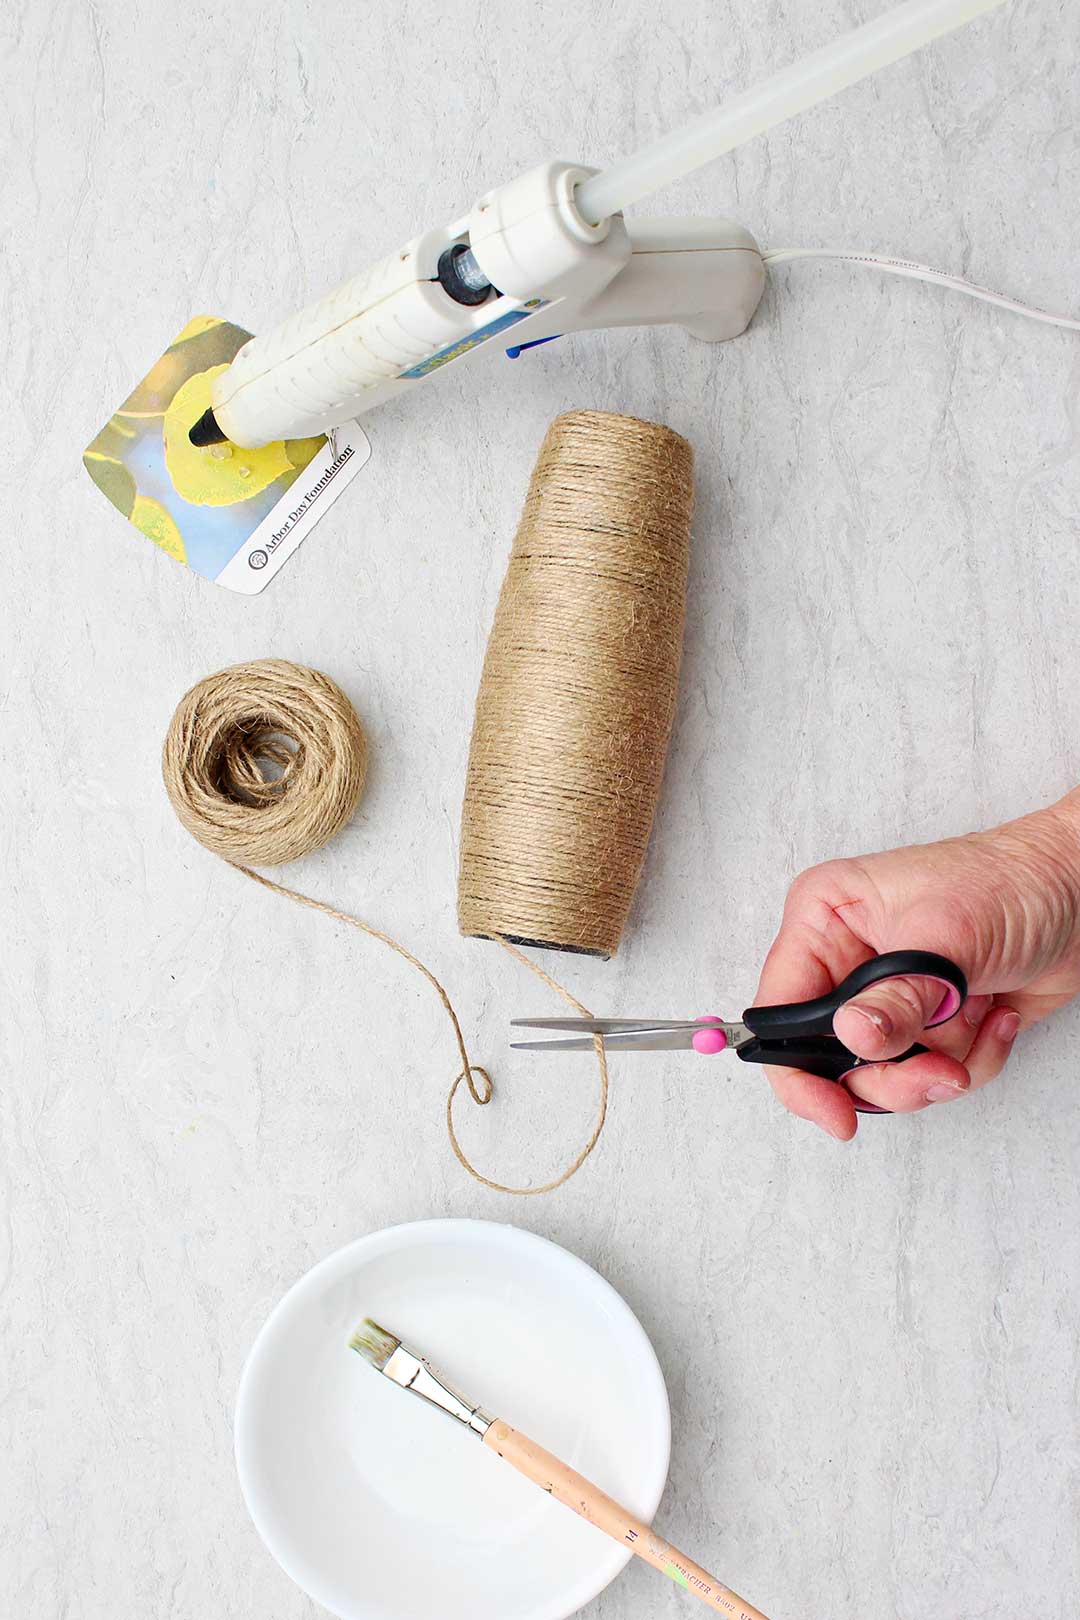
So wrap the twine around the bottle area covered in the tacky glue until it gets to the bottom end of the bottle. Clip your twine so that it will have a two or 3 inch piece that you will attach with hot glue.
Wipe off any excess tacky glue, and then place a line of glue in that area and lay the twine down into it carefully.
Before you’re done, clip off any excess twine and check to make sure that the bottle will sit flat on a table. If it doesn’t, quickly rearrange the twine in the Elmers glue, and you may need to repeat the process of the hot glue and reposition it the end of the twine so that the bottle will sit flat.
And that’s all there is to it. You're done!
Decorating a twine wrapped bottle
I've seen a variety of ways that these twine wrapped bottle vases are decorated if you want to add something more to them.
- Hanging objects around the neck of the bottle on twine or a cord- keys, cut out letters, a bow
- A wrapping around the bottle of burlap ribbon, lace, decorative paper
- Hot gluing on flowers, cutout letters, decorative objects
A group of three different upcycled bottles wrapped with twine are a great option as centerpieces at for a wedding reception. Personalize them with your own decoration ideas as mentioned above.
If you've got some recycled cans that you'd like to use instead of a bottle, try these cute upcycled tin can flower vases!
Home décor options
I mentioned earlier that it’s nice to have more than one vase if you want to make a grouping. If you do this, choose three different bottles with three different shapes to make the arrangement interesting.
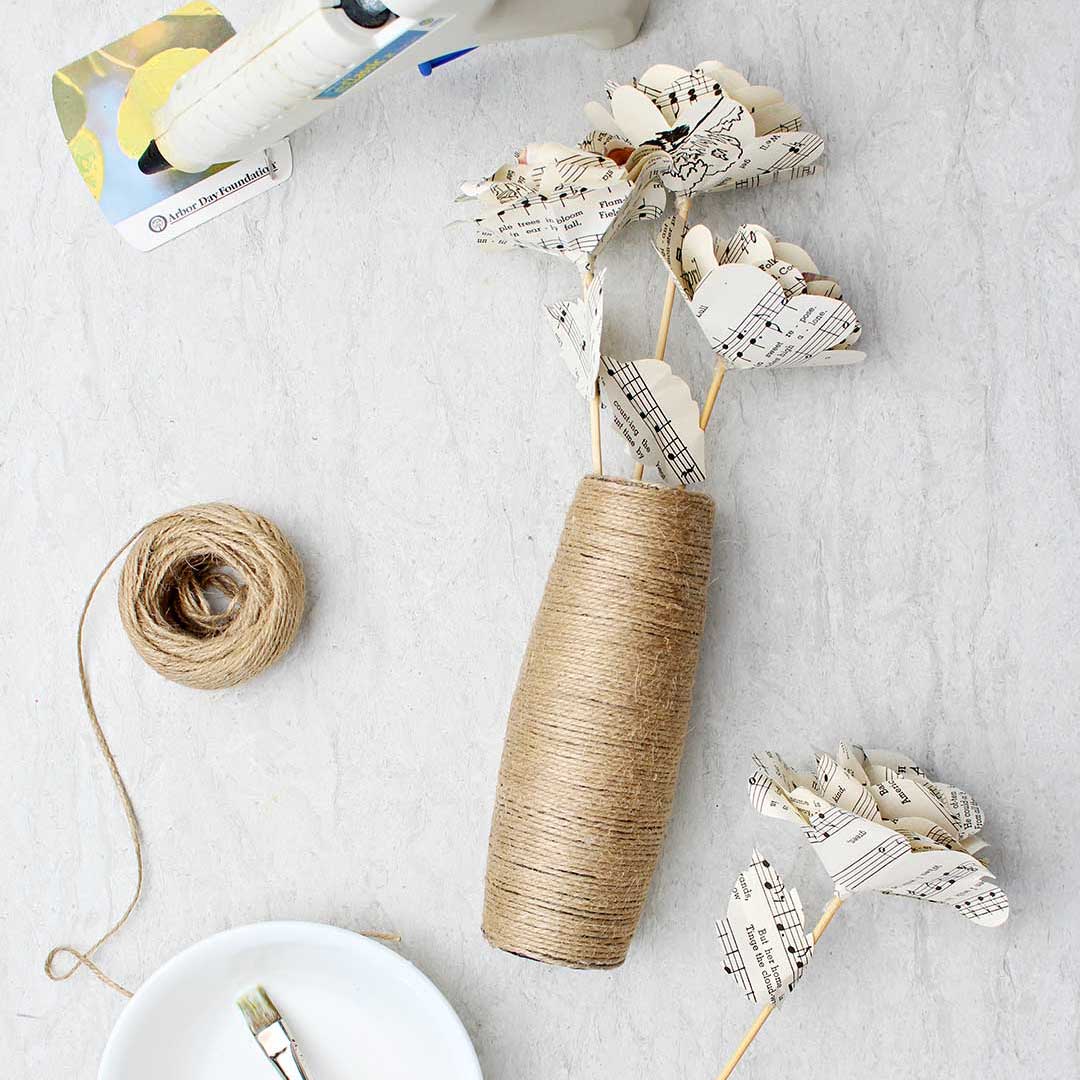
The vases look nice filled with a dried branch, real flowers, dried flowers or silk flowers.
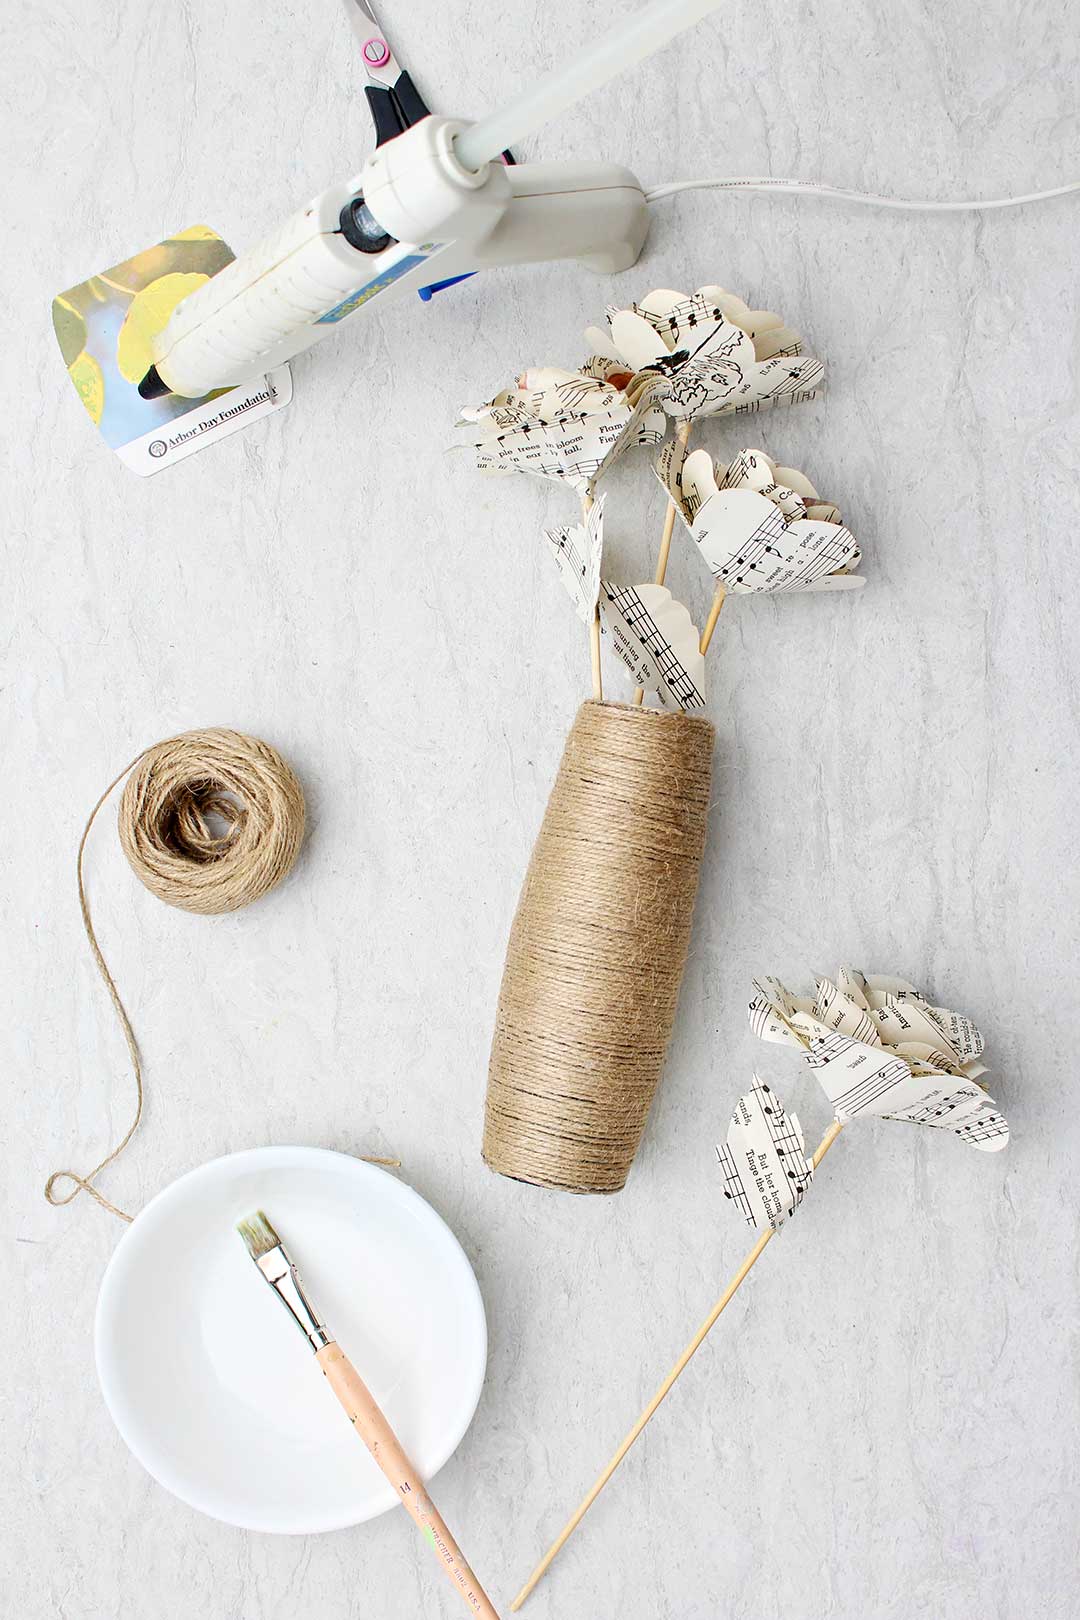
In another post, we made Easy Book Page Roses for Mother’s Day. The old book, Paige flowers look really nice in a twine, wrapped bottle or vase.
The roses look complicated, but they are not hard to make. They would complete a wonderful gift for someone such as your mother or Nana :-). Make three or five of them depending on the size of the opening of your bottle. Of course, fresh flowers are always beautiful as well.
If you would like to watch the full length tutorial for this craft click this link: DIY Twine Wrapped Bottles Vase Full Length Tutorial.
Creating a twine wrapped bottle is super easy, making it a fun decoration or perfect DIY gift! Start with some super glue to secure the twine end, then start spreading tacky glue over the glass. Wind the twine down the glass as you go, and finish with a bit more hot glue to secure the end. Nice and simple!
Attaching twine to a glass bottle is simple to do with the right materials. All you will need is some hot glue and tacky glue, or even Elmer's glue could work! Secure the ends with hot glue, and use the tacky glue down the sides of the bottle as you wrap. Such a simple DIY decoration or gift!
More Mother's Day craft ideas:
If you are on the lookout for more simple DIY gift ideas for the kids to make for mom, we've got you covered! Check out these cute and simple ideas that kids of all ages can create:
- DIY Book Page Roses for Mom
- Mother's Day Handprint Flower Dish Towel
- Mother's Day DIY Recipe Card Holder
- DIY Corsage for Mom
Enjoy!
If you try this craft, let me know! Go ahead and leave a comment, rate it, and tag a photo with #WelcometoNanas wherever you post.
Come join the fun at https://welcometonanas.com
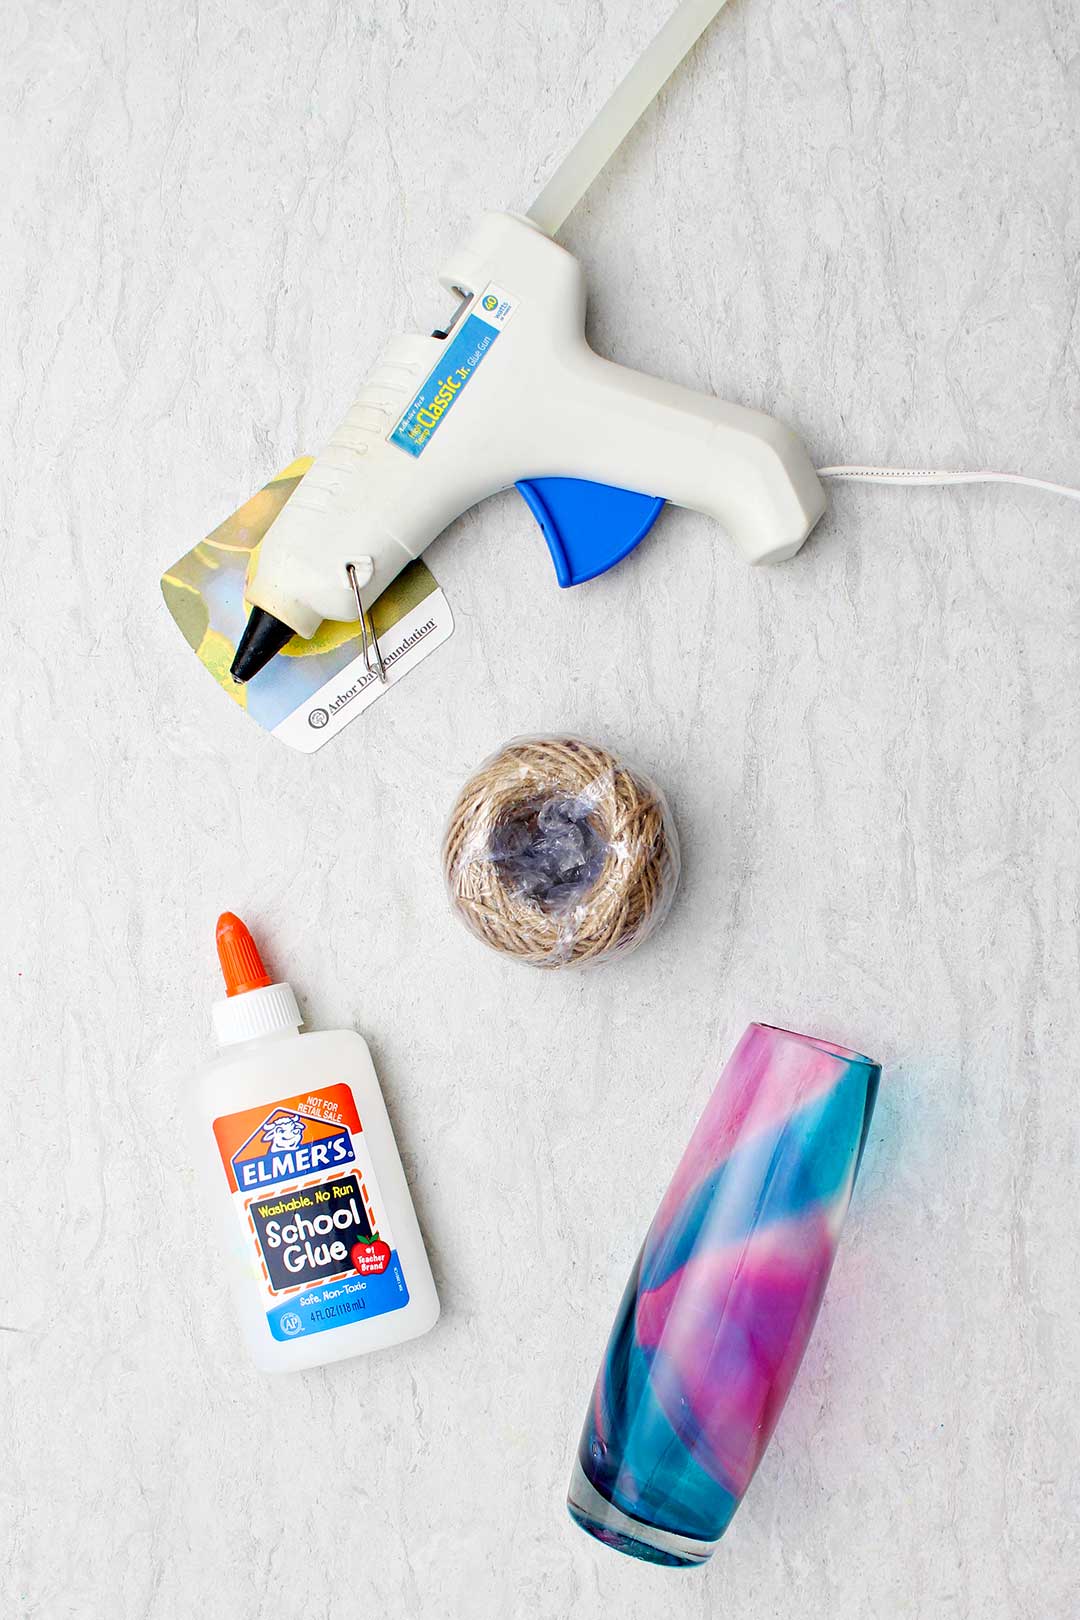
Supplies for DIY Twine Wrapped Bottles Vase
- Bottle(s) of any size and shape- label removed, clean and dry
- Goo Gone- to remove labels, optional
- Twine- in a diameter size of your choice
- Colored Twine- optional
- Hot glue gun and glue
- Tacky glue or Elmer's glue
- Scissors
DIY Twine Wrapped Bottle Vases (Upcycled Bottles)
Equipment
- Hot glue gun and glue
- Scissors
Items Required
- Bottle(s) of any size and shape- label removed, clean and dry
- Goo Gone- to remove labels, optional
- Twine- in a diameter size of your choice
- Colored Twine- optional
- Hot glue gun and glue
- Tacky glue or Elmer's glue
- Scissors
Instructions
- You can upcycle any type of glass bottle that you would like.Take the time to scrub the label off your bottle before adding the twine. This is an optional step, but I highly recommend it. If you soak the bottle in warm water for a while, the label usually comes off fairly easily. I use a product called Goo Gone to take off the remaining rubber or sealant. You probably have your own trick for that!When your bottle is clean and dry, you are ready to go! I love upcycled craft ideas, don't you?
- I always start at the top of my bottle and work downward. I’m sure it would work either way, but this is the way I’ve always done it. 🙂I take about a 2 inch piece of the twine and stick it down to a bead of hot glue that runs up and down a couple inches from the top of the bottle.This holds the twine in place as you get started wrapping the bottle with it. Be careful not to touch your fingers into the hot glue.I like to place the twine around the mouth of the bottle next. I put down small amounts of hot glue on the lip of the bottle or vase and glue about a quarter of the way around the top and then lay the twine in it the hot glue.Then repeat that all the way around the lip of the bottle. If I go the whole distance around the lip of the bottle with the glue, the glue tends to cool before I can get the twine placed properly. Again, be careful of your fingers with the hot glue.
- Now set the hot glue gun aside. Place some tacky glue in a small bowl and get out an old paintbrush.We are going to brush glue onto about an inch of the bottle at a time and put the glue and put the twine down in it as we wrap.So take your paintbrush, and paint a little glue about an inch down the neck of the bottle.This step is optional- but helps hold twine in place over time.
- Hold the twine in one hand, and the bottle in the other. The bottle so that the twine comes off of the roll, through your fingers, and onto the bottle as it turns.This way, your fingers will guide the twine onto the bottom, so that it does not kink up or overlap itself accidentally.Do you want the twine to lay as close to the last round of twine as you can.Stop occasionally and gently push the twine up on the bottle so that it is close together with no gaps and also horizontal across the bottle so that it is on as straight and neatly as possible.Now, repeat that with the next inch of the bottle, and so forth, until you have covered the entire bottle!
- When you get down to the bottom of the bottle, you will want the end to be secured with hot glue.So wrap the twine around the bottle area covered in the tacky glue until it gets to the bottom end of the bottle. Clip your twine so that it will have a two or 3 inch piece that you will attach with hot glue.Wipe off any excess tacky glue, and then place a line of glue in that area and lay the twine down into it carefully.Before you’re done, clip off any excess twine and check to make sure that the bottle will sit flat on a table. If it doesn’t, quickly rearrange the twine in the Elmers glue, and you may need to repeat the process of the hot glue and reposition it the end of the twine so that the bottle will sit flat.


Leave a Reply