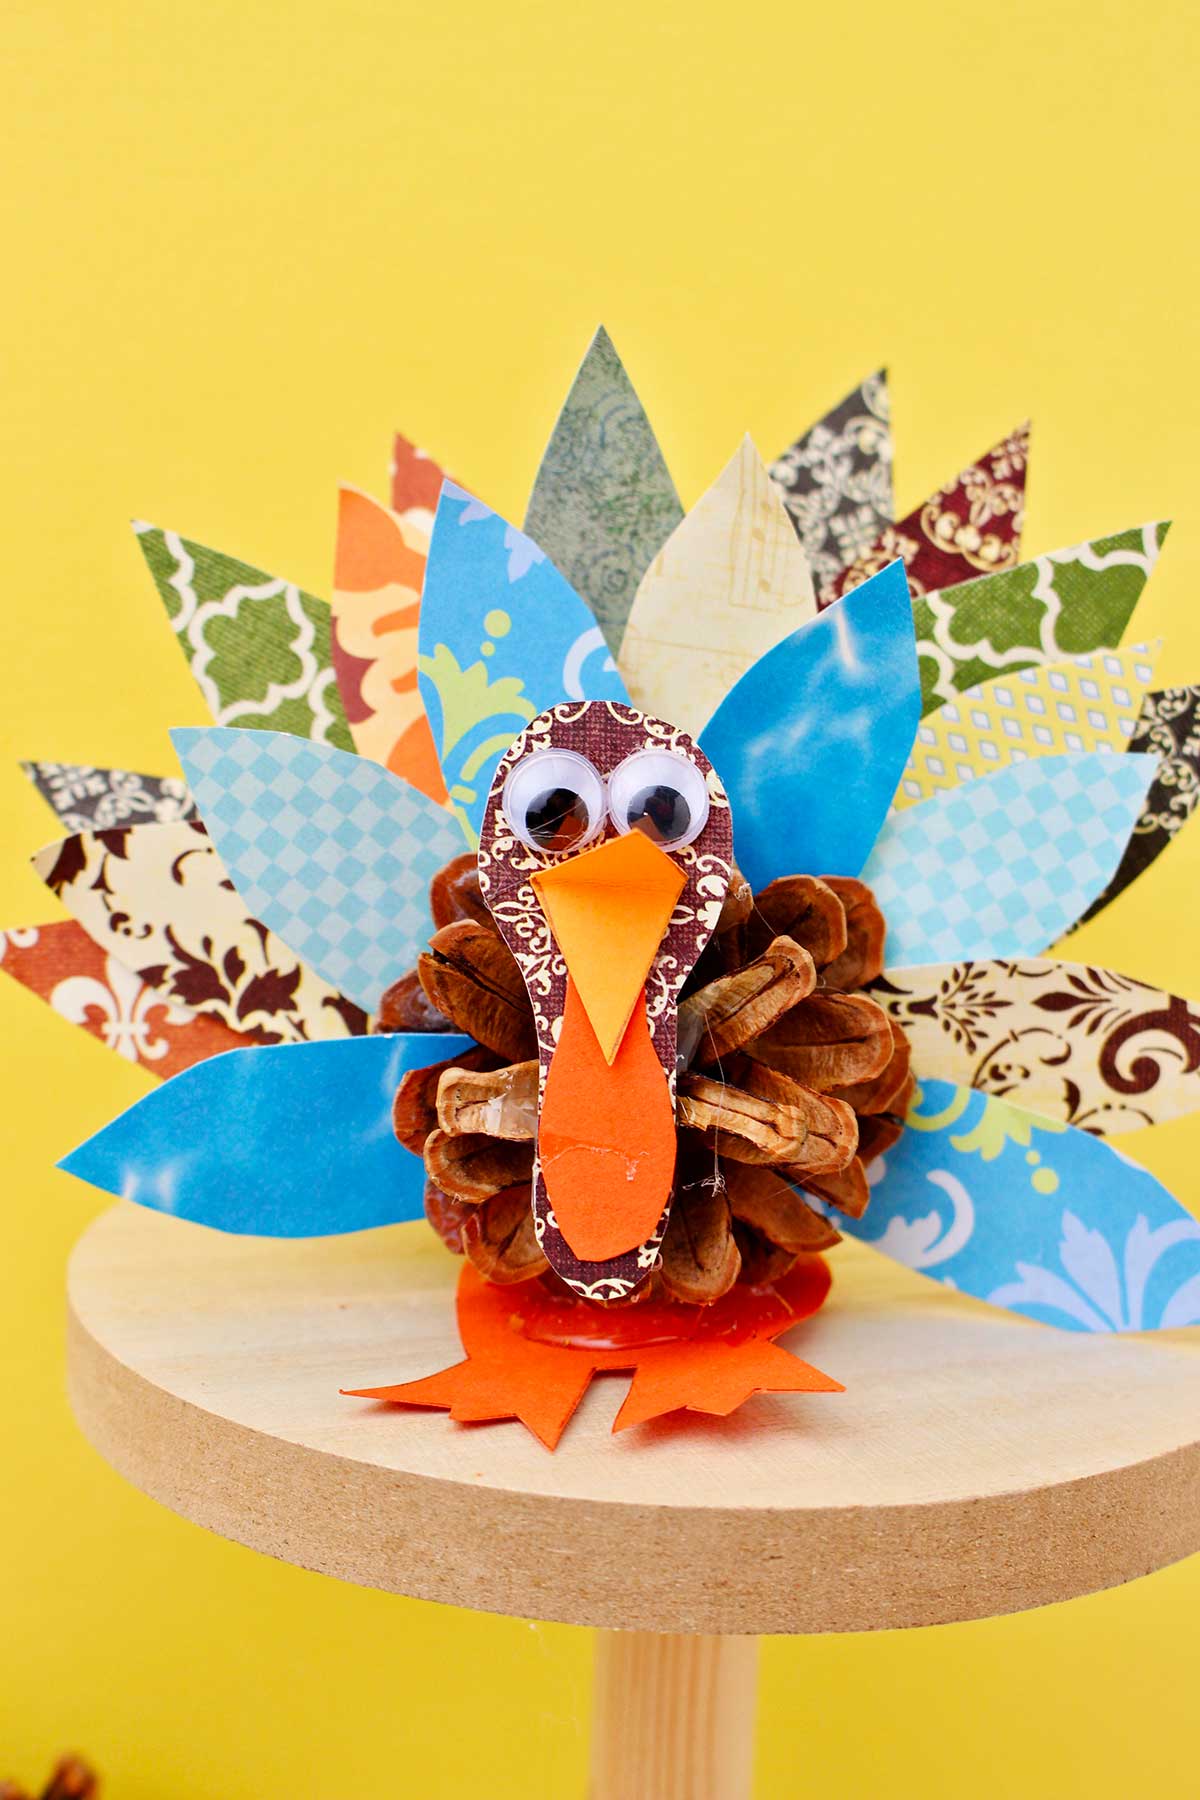
A Pinecone Turkey for Thanksgiving is a classic craft for kids! Follow the free pattern and tutorial to turn a cute fanned tail and a pinecone into a turkey.
Jump to:
- Cute Craft Alert: Check out this Pinecone Turkey
- Supplies for a Pinecone Turkey Craft
- Steps to Make a Pinecone Turkey Craft with Feathers
- Craft Tips for Turkey Pinecones
- Variations in Making Pine Cone Turkeys
- FAQ
- More DIY Thanksgiving Crafts for Kids
- Come join the fun at WTN!
- How to Make a Pinecone Turkey for Thanksgiving
Cute Craft Alert: Check out this Pinecone Turkey
I can't believe that we haven’t made a post on this craft already. The free pattern makes this easy craft even easier!
I made a pinecone turkey when I was young and am eager to share this simple but fun craft with you. I hope your kids love it like I did when I was a kid.
Take your family on a walk to gather some pinecones. Then use the free pattern and scrapbook paper to fashion your own turkey. Maybe you will think of other pine cone crafts for Thanksgiving. If so, be sure to share your ideas with us.
Supplies for a Pinecone Turkey Craft
Look at this easy supply list!
- Pinecones- Forage pinecones while on a nature walk. Choose fresh, well-formed pinecones. You need one turkey craft pinecone per turkey.
- Various scrapbooking papers- Use pieces of scrapbooking paper from other crafts if possible.
- Hot glue gun and glue- A hot glue gun and glue makes this craft easier.
- Googly eyes- Googly eyes make this turkey look like he’s got a joke to share.
- Free pattern- Use this free hand drawn pattern to cut the pieces from paper.
Steps to Make a Pinecone Turkey Craft with Feathers
Cutting out the pinecone turkey pieces
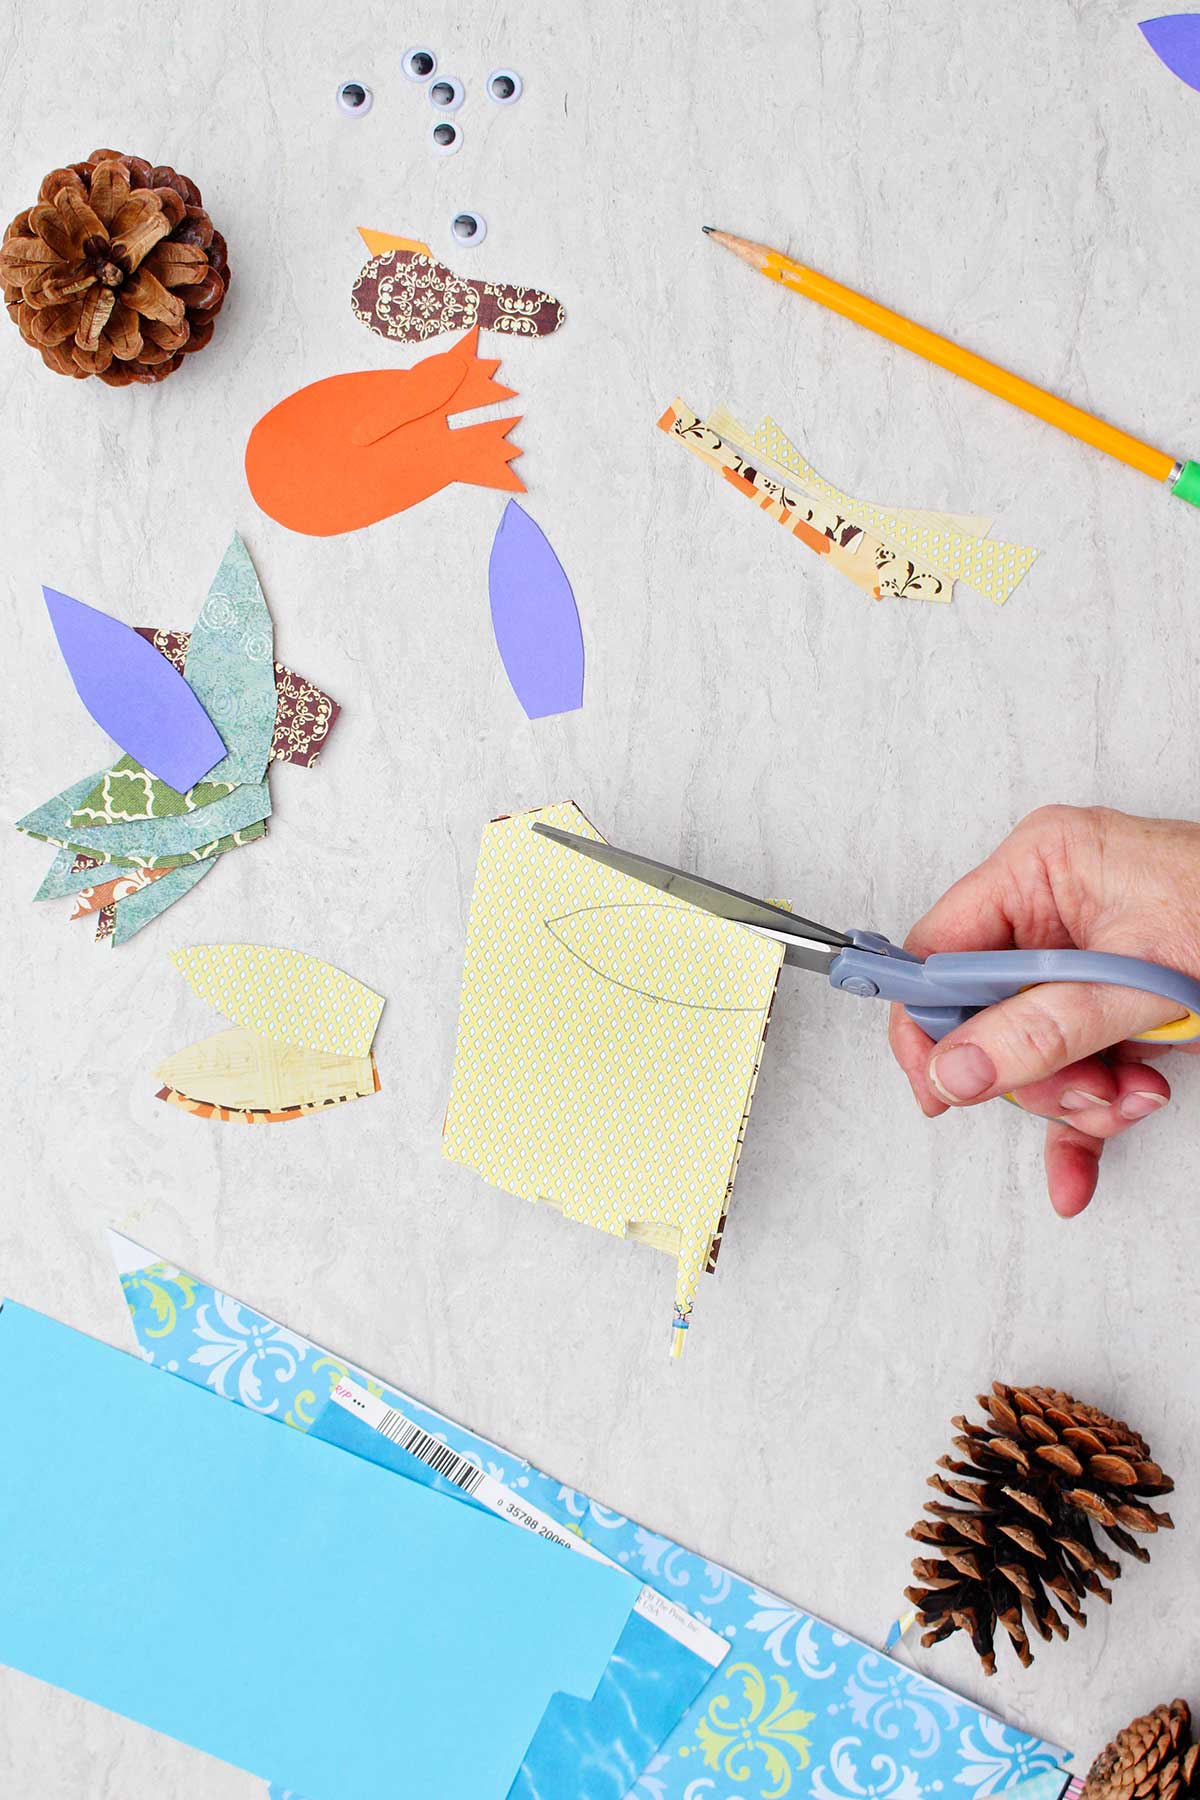
Copy the free printable page on card stock paper. Cut out each of the pieces. Use scrapbooking paper to cut out about eight of each of the tail feathers. It looks nice if they're all different patterns of papers.
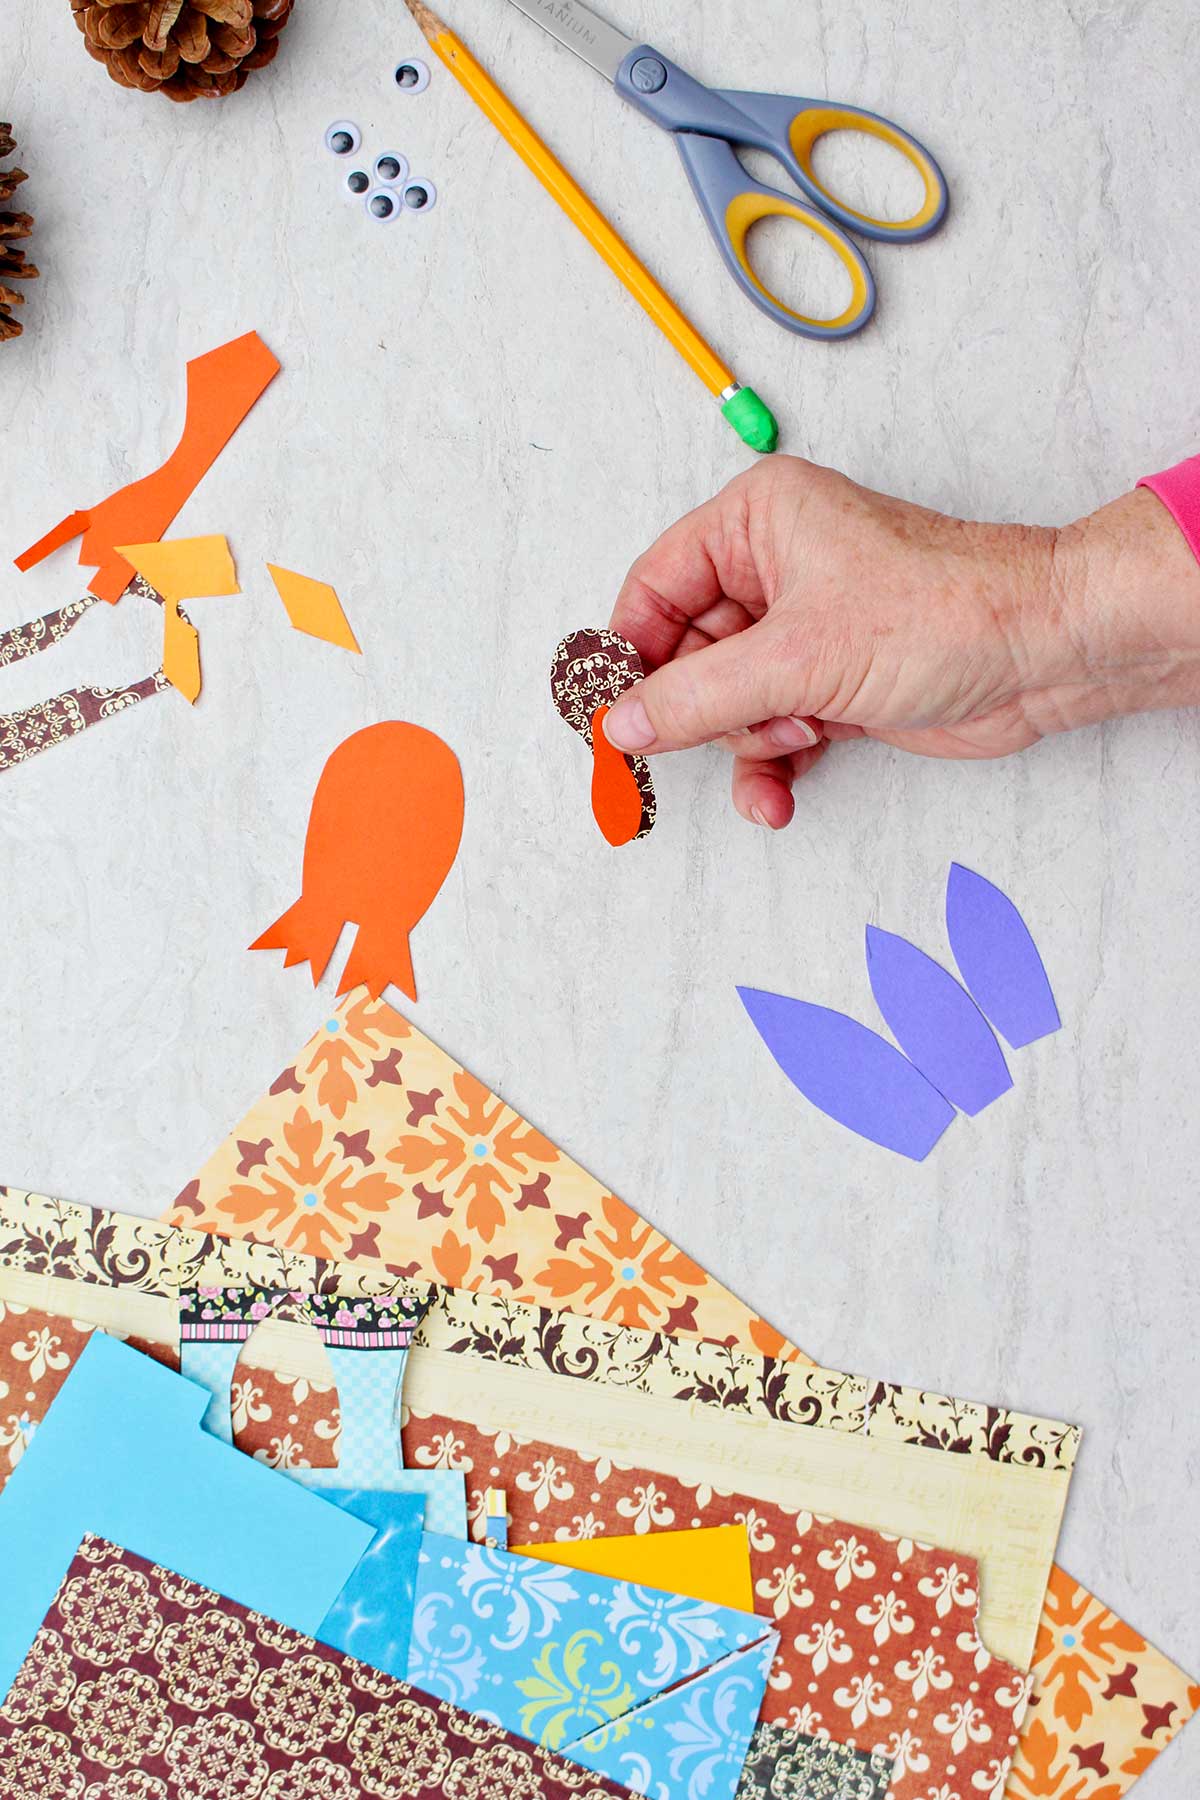
Trace and cut out the head, waddle, beak, and base of the Turkey. Choose colors that you like for each of these things. The waddle is often in the red range and the beak is often an orange color. Use your imagination!
Making the base of the turkey
Set down a piece of scrap paper on your work surface so the glue does not drip.
Using a hot glue gun, put a large amount of hot glue on the base paper. Lay the pinecone on it's side and place it on that glue with the small end towards the feet.
Assembling the head section
Place the paper turkey head on your work surface. Hot glue the waddle onto the head with the top part of the waddle being the flat edge. Place that flat edge about halfway down the rounded head section of the paper.
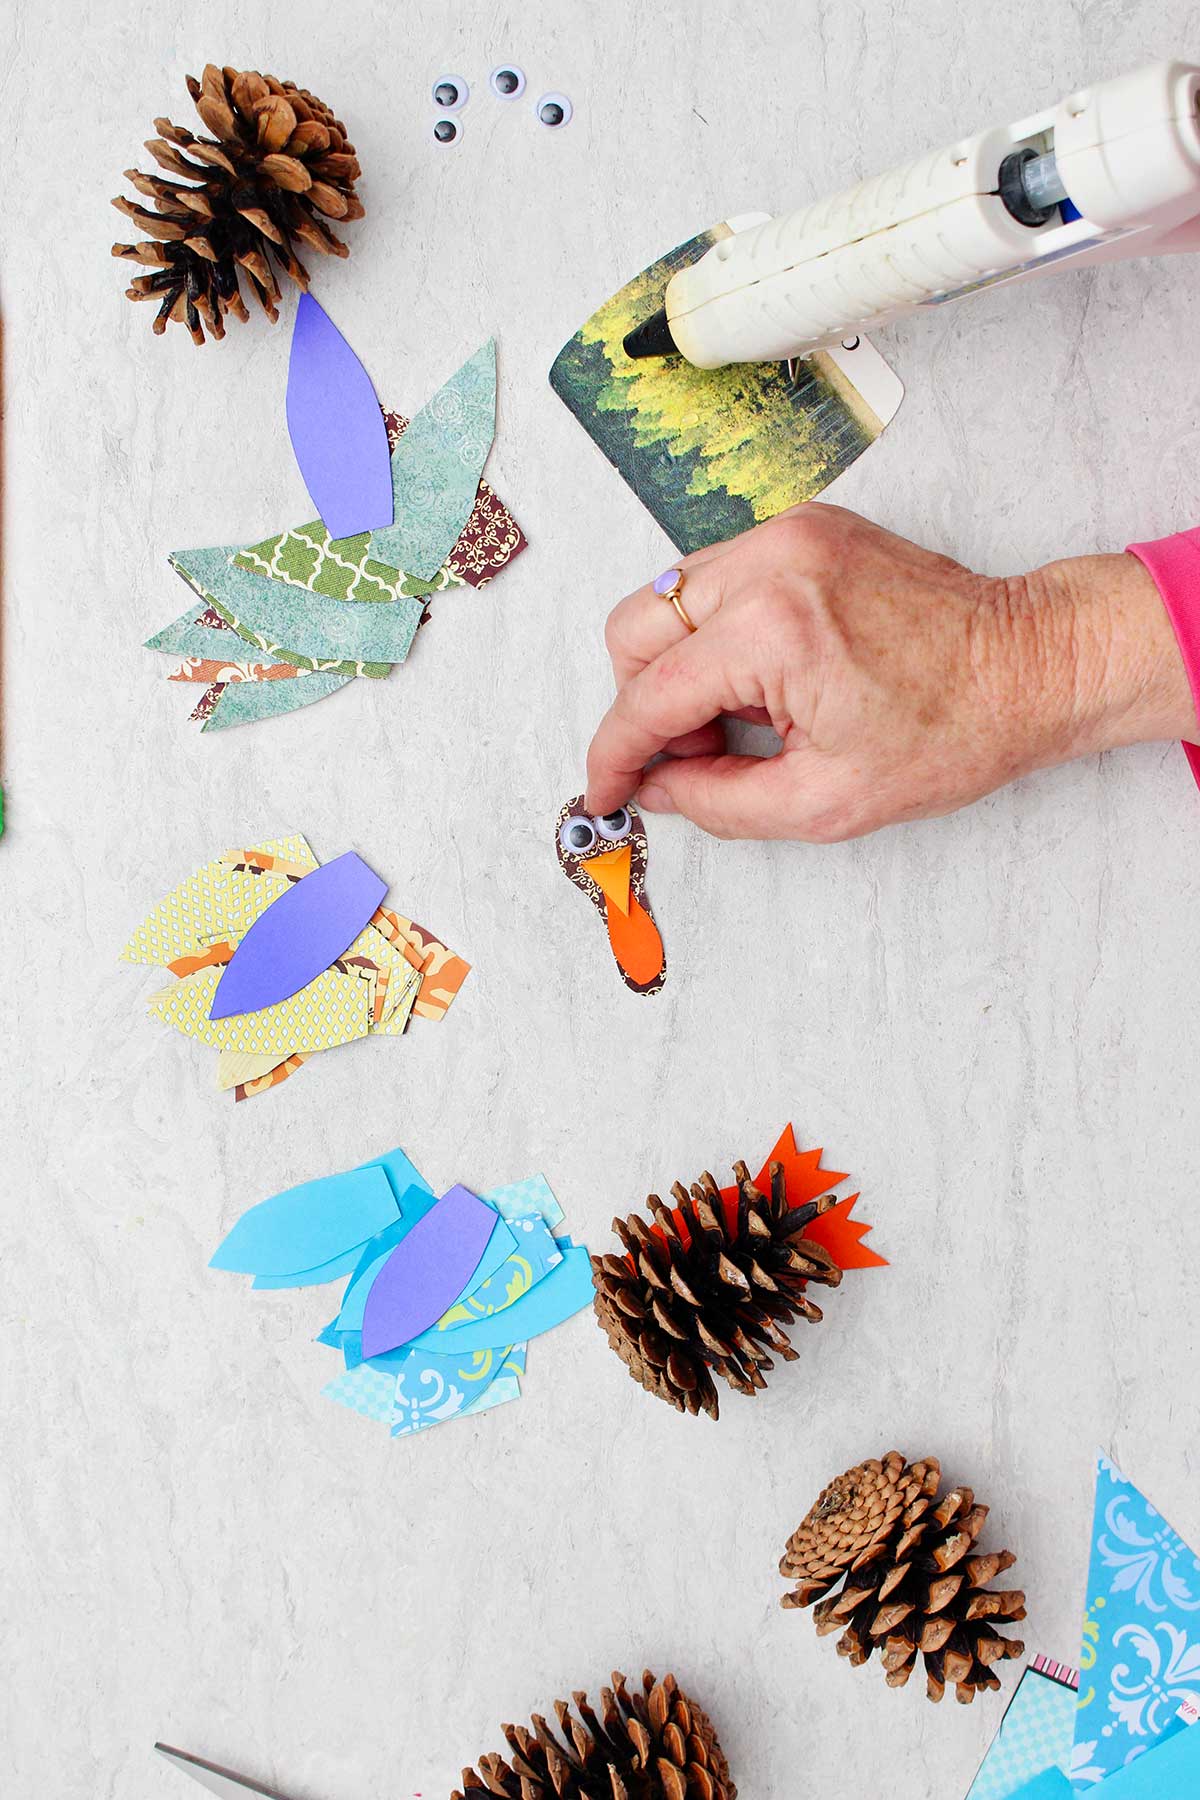
Fold the beak in half. Place a small amount of hot glue on one of the triangle sections of the beak and glue it on top of the waddle. The beak will stay open and be 3D.
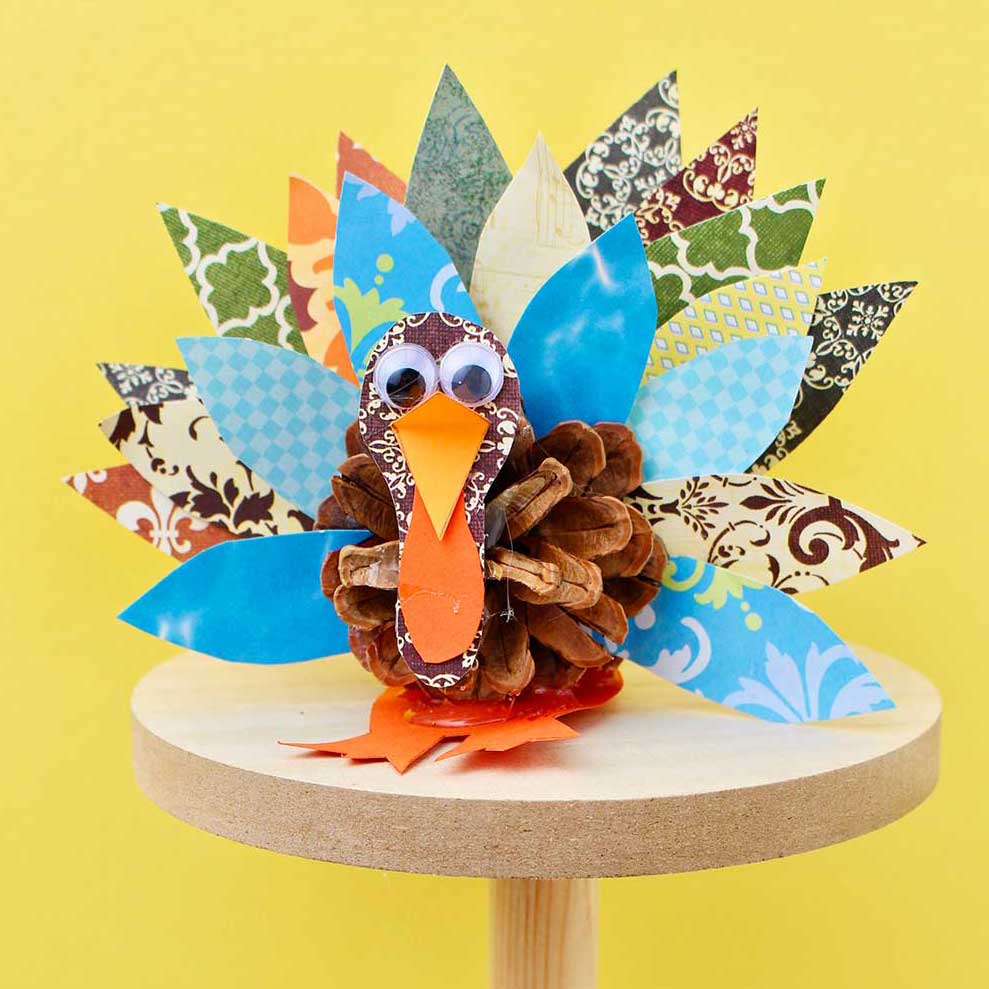
Glue on two googly eyes to finish the turkey's face.
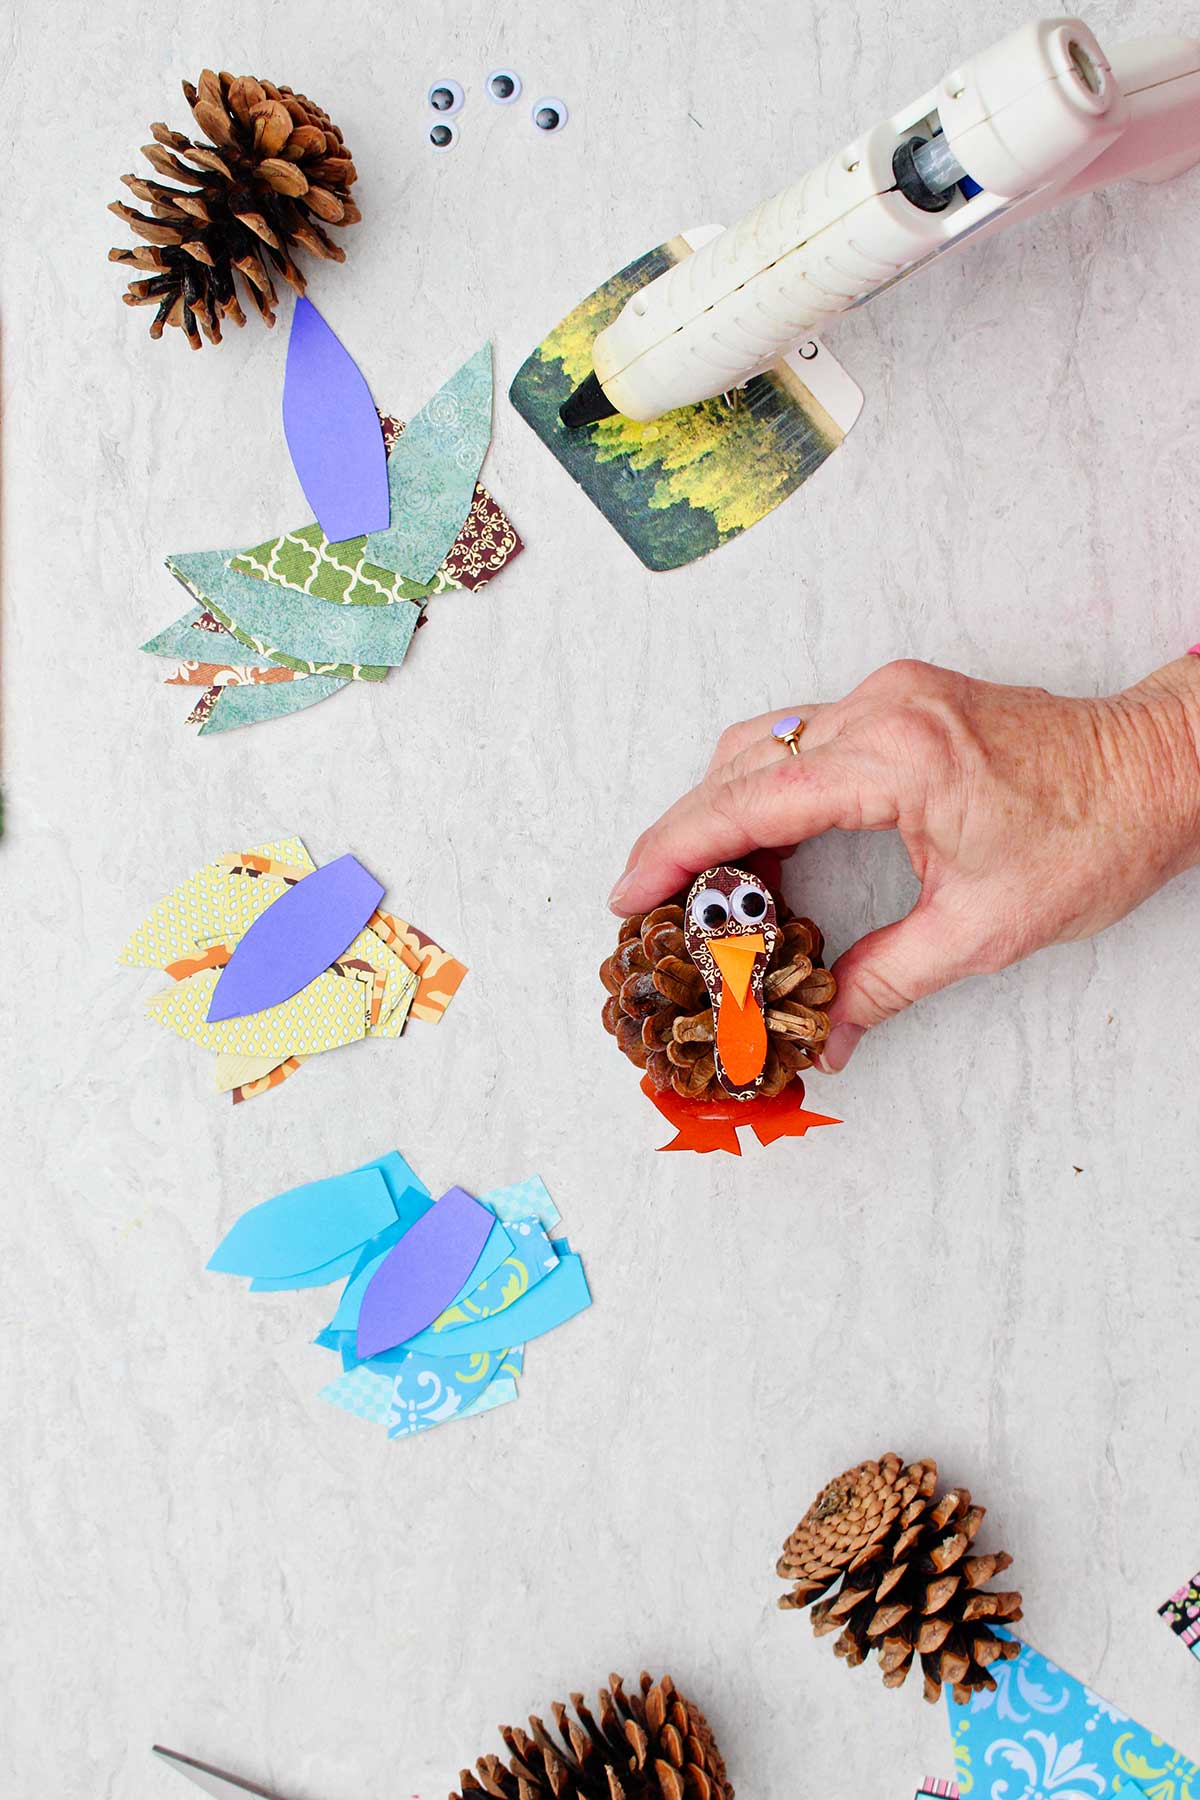
Break off one top point of the pinecone so that you can glue the head piece on.
Place hot glue on the front end of the pinecone where it looks as if it can make contact with the flat paper head section. Carefully press the head onto this hot glue area. Let it cool for a moment and then look to see that it adhered well. Place a couple small spots of glue on the back to make better contact with the pinecone if necessary.
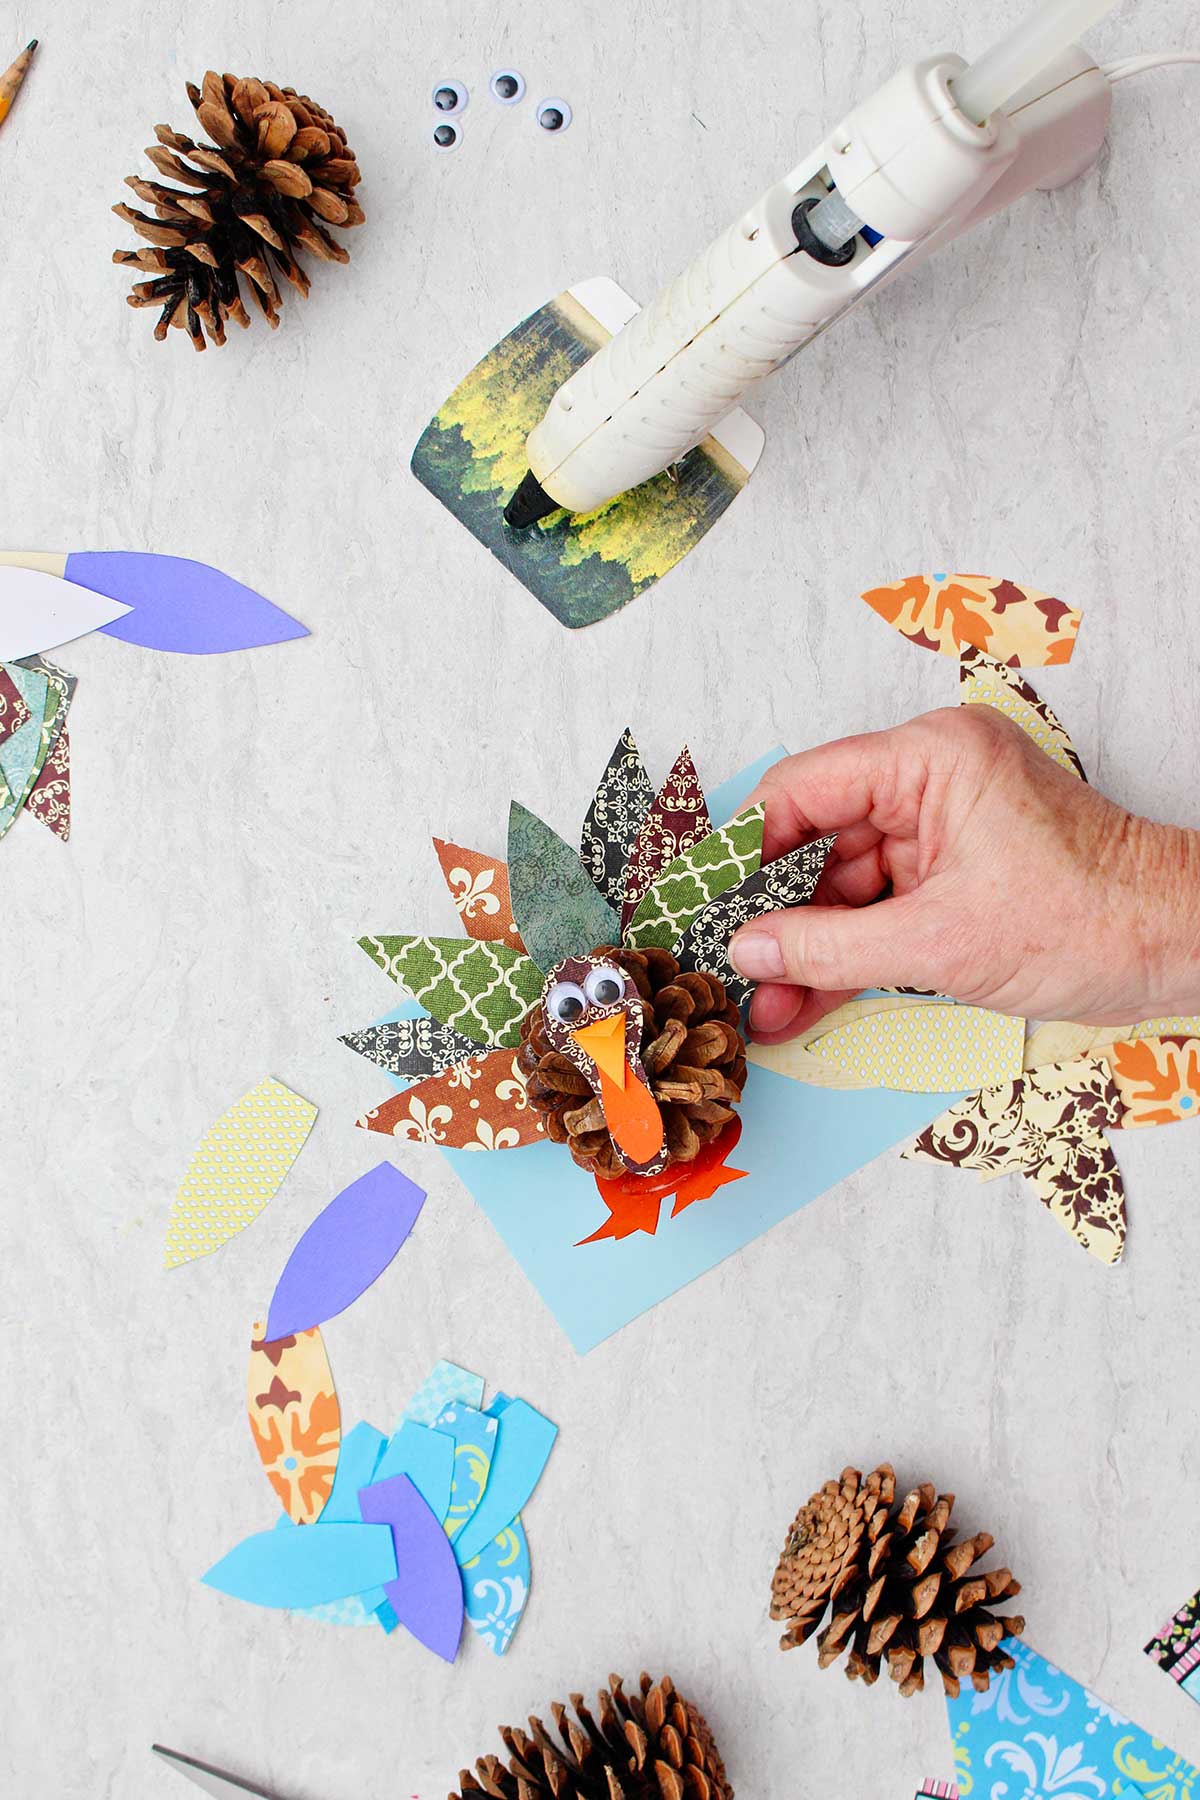
Adding the fanned tail to the Turkey
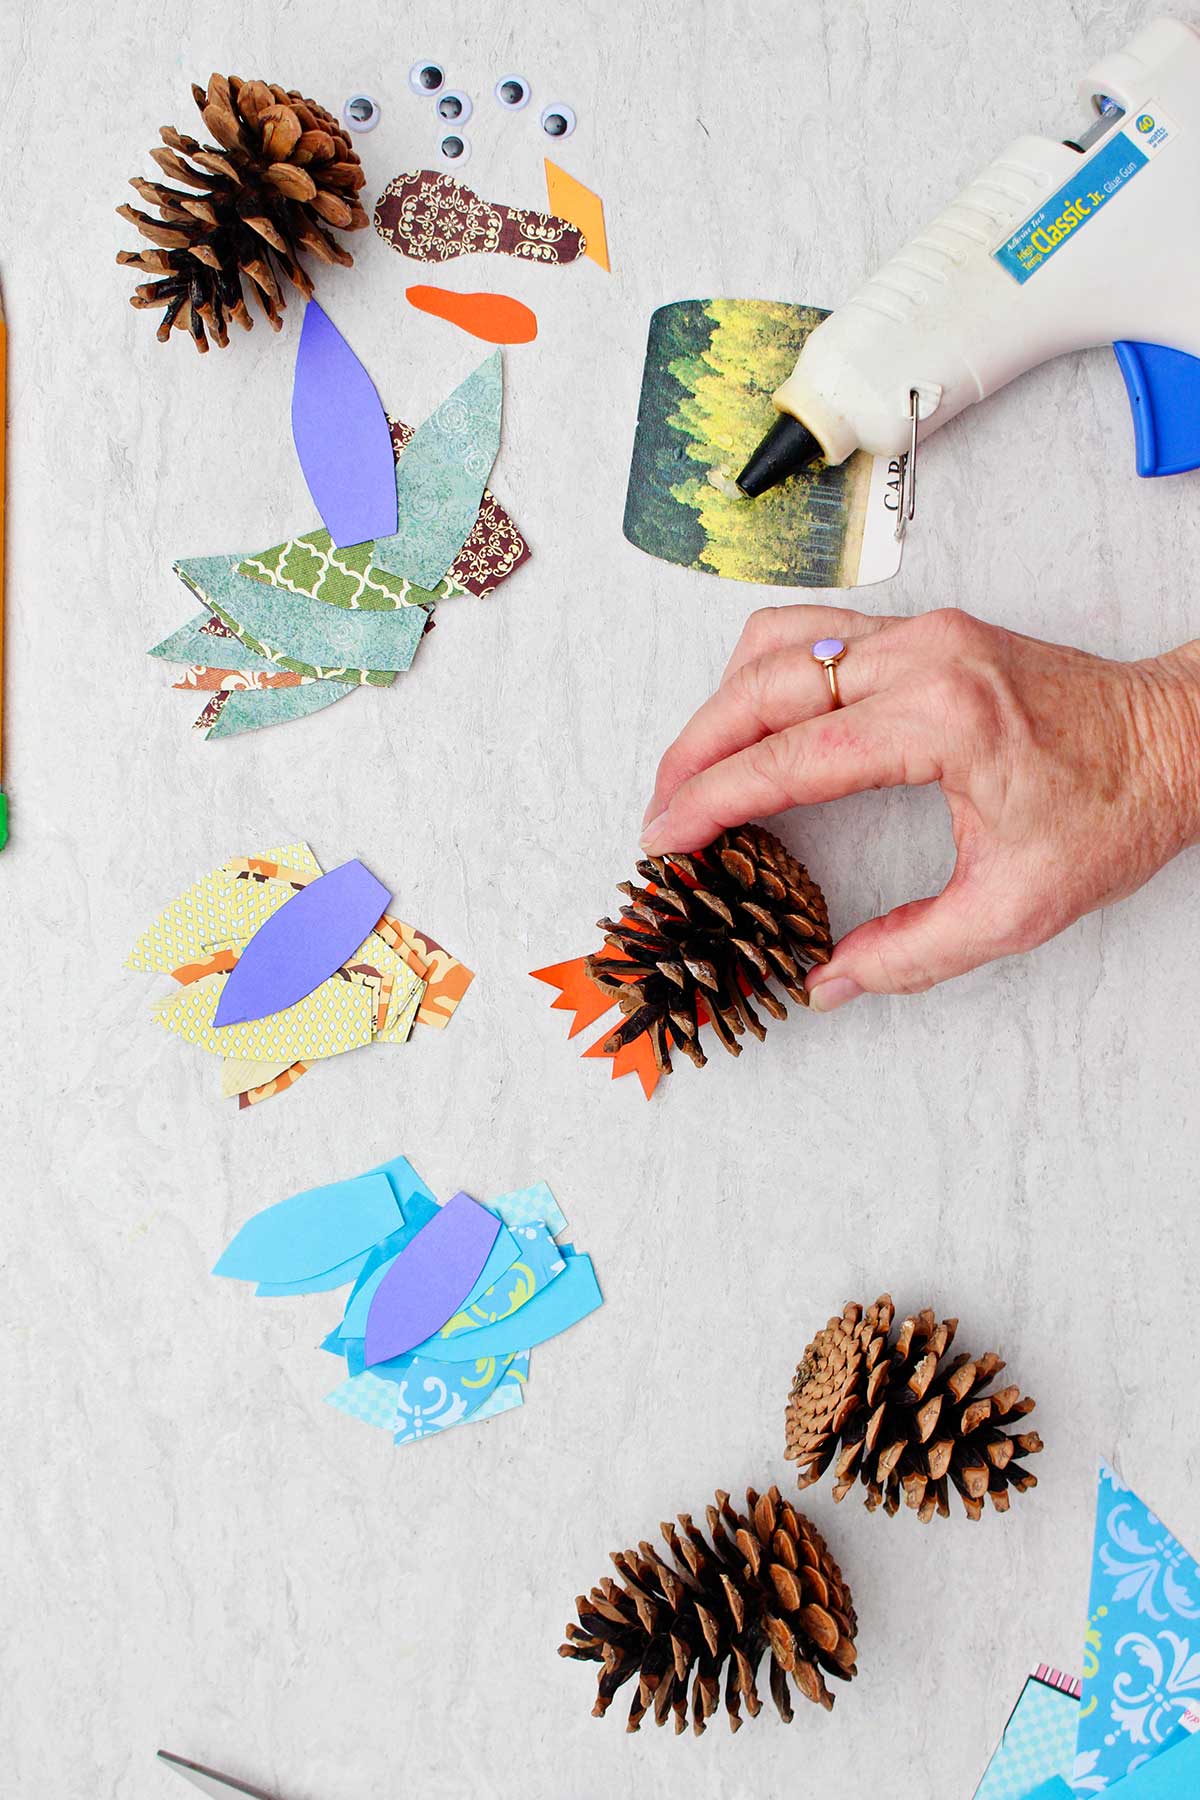
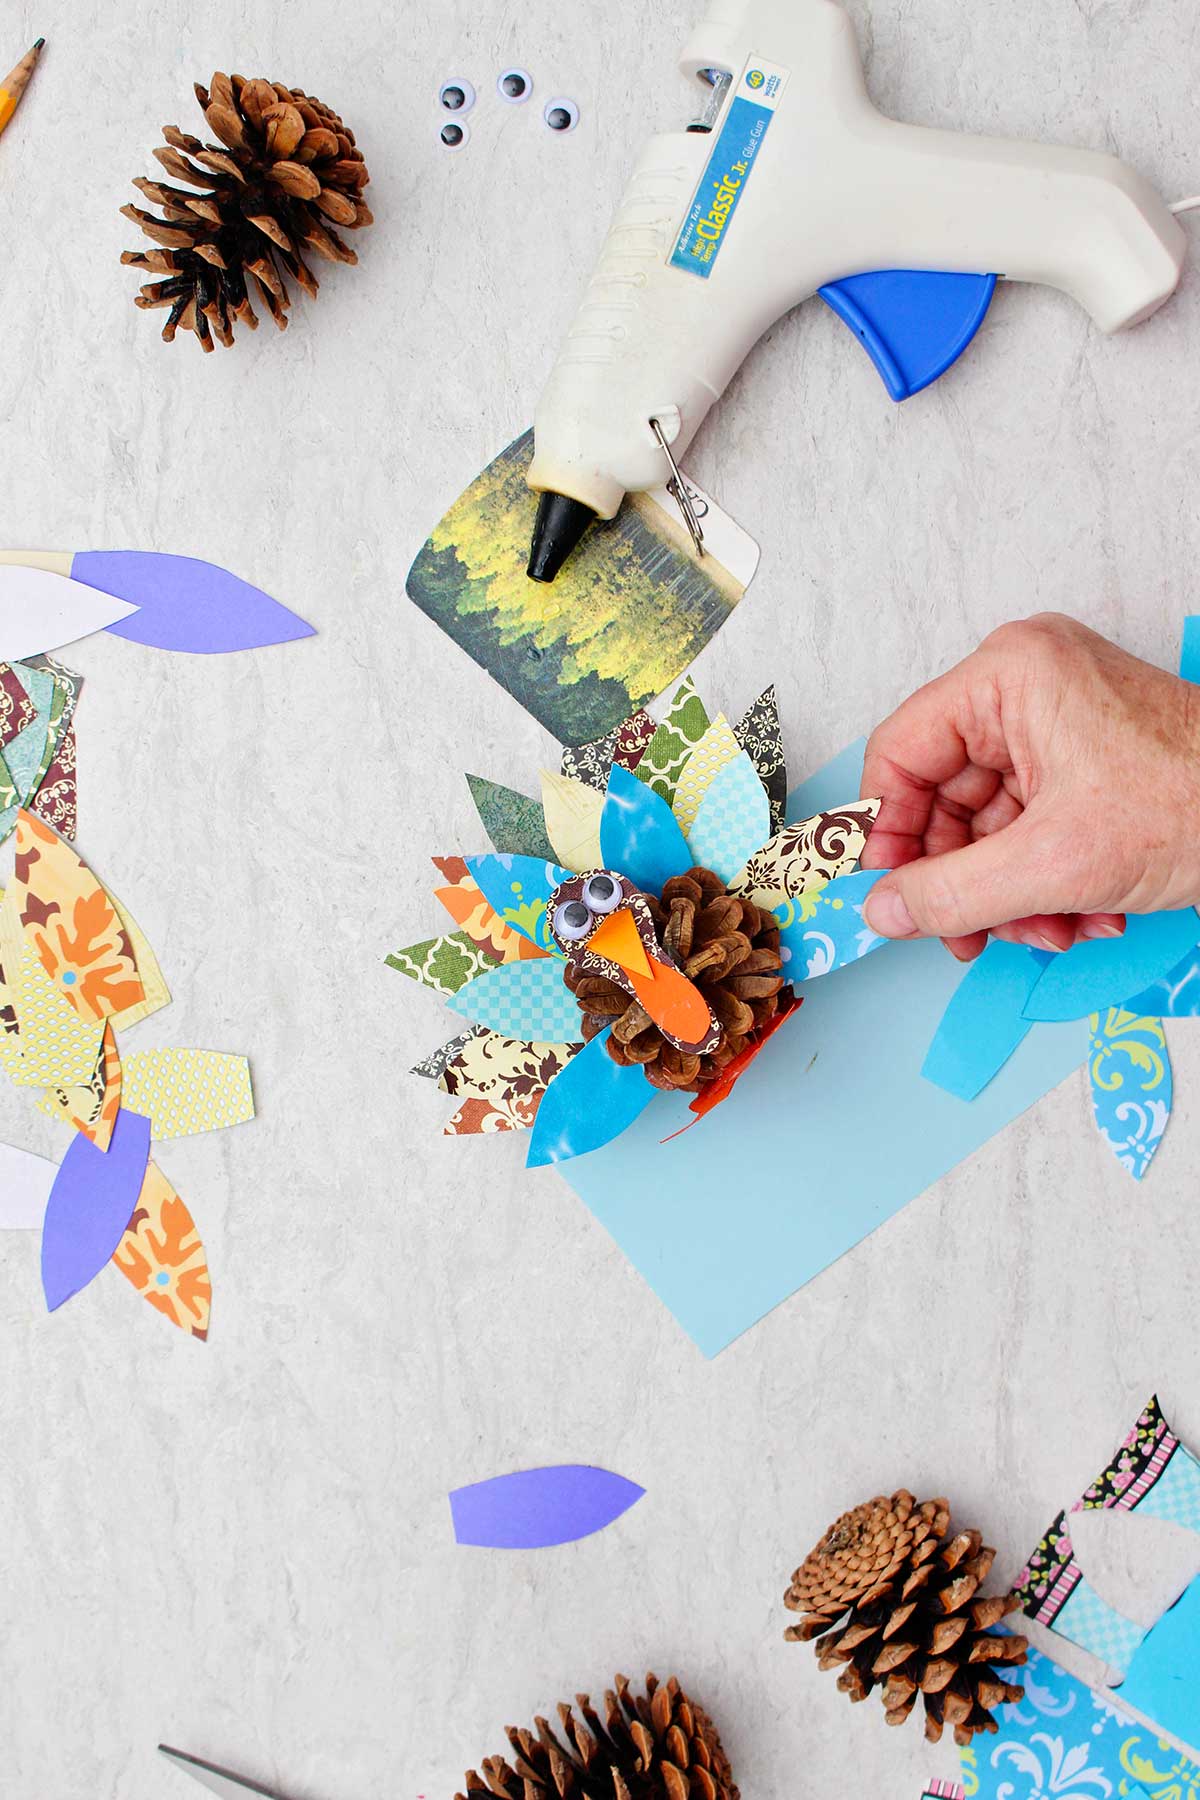
Start making the fanned tail by adding the largest feathers first. Place a small amount of hot glue on both sides of the bottom of the feather (the straight edge). Stick the feather down between the pinecone scales of the pine cone at the far back of your pine cone turkey.
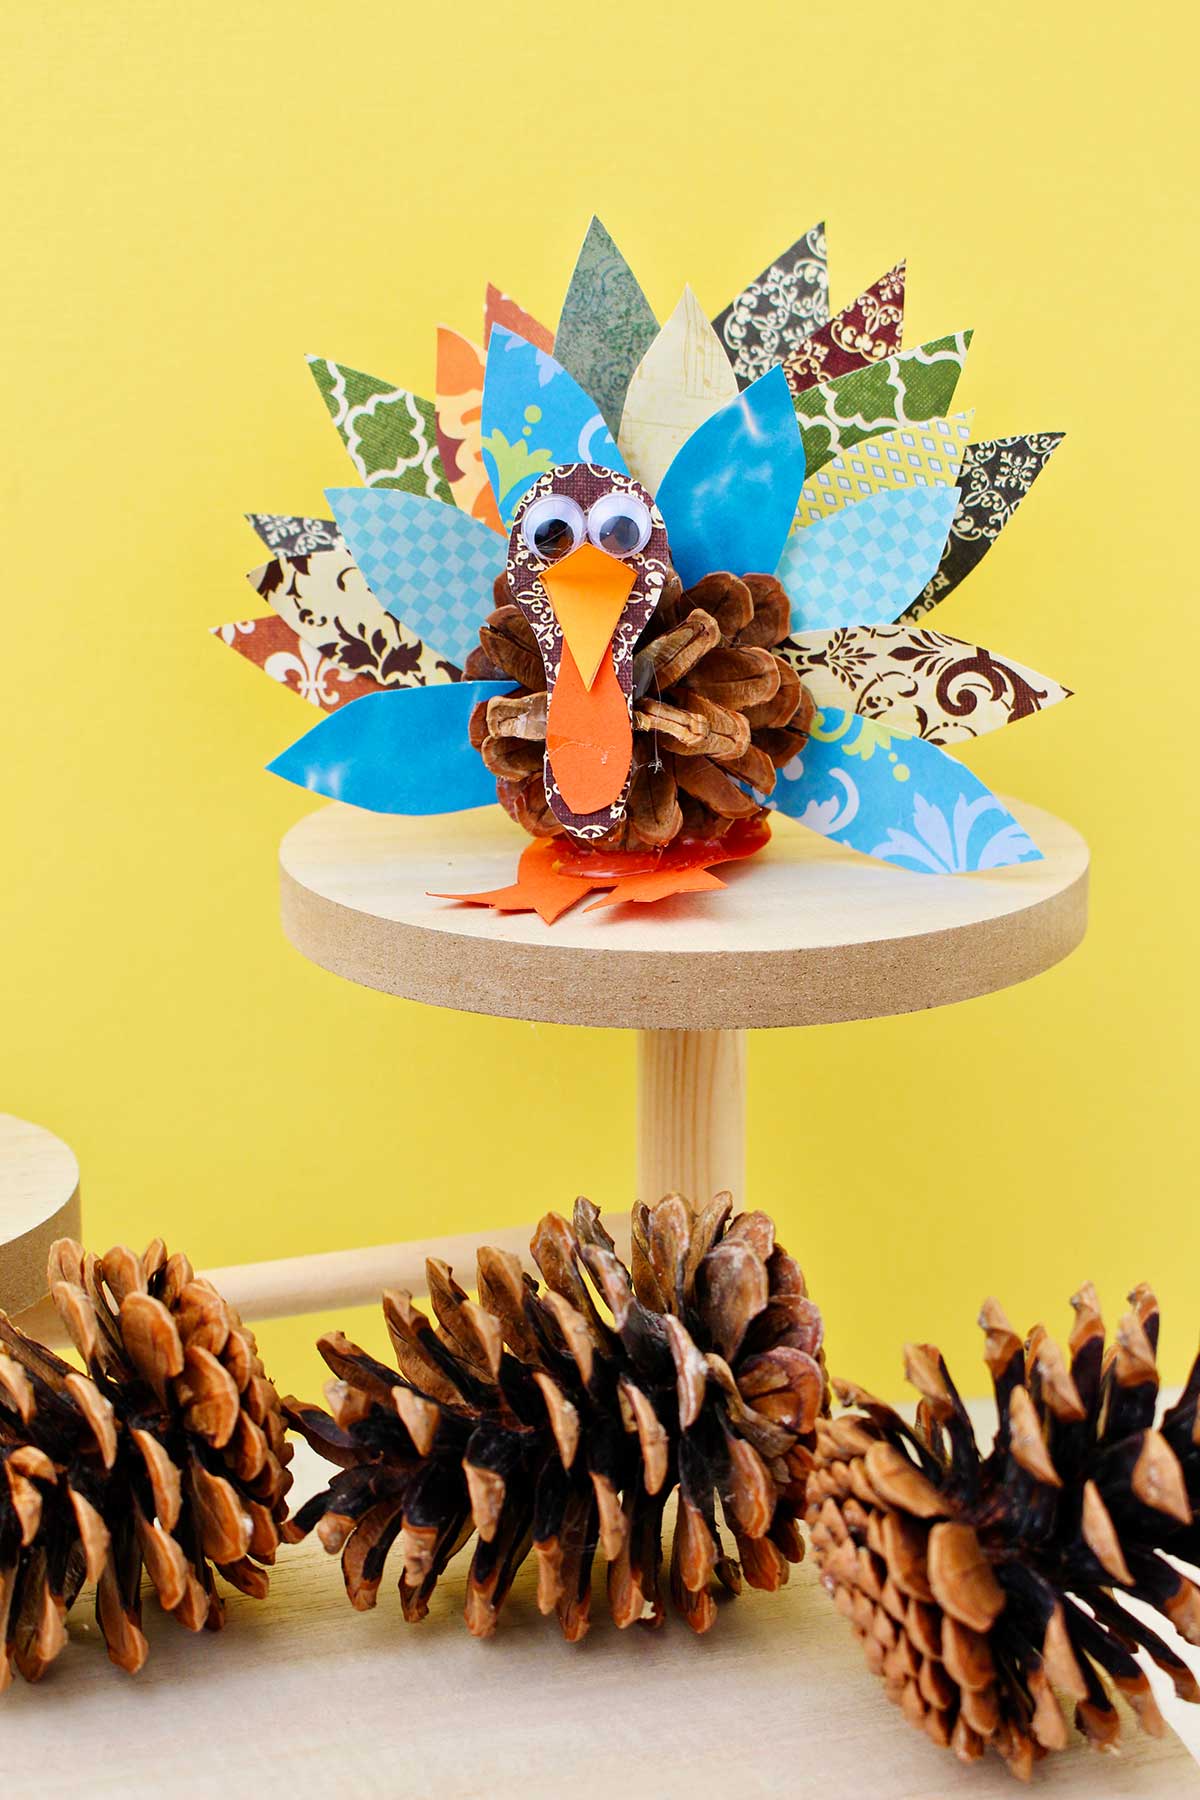
Continue to add the large Turkey feathers to the back of the Turkey until you are satisfied that they make a full fan shape. See the picture.
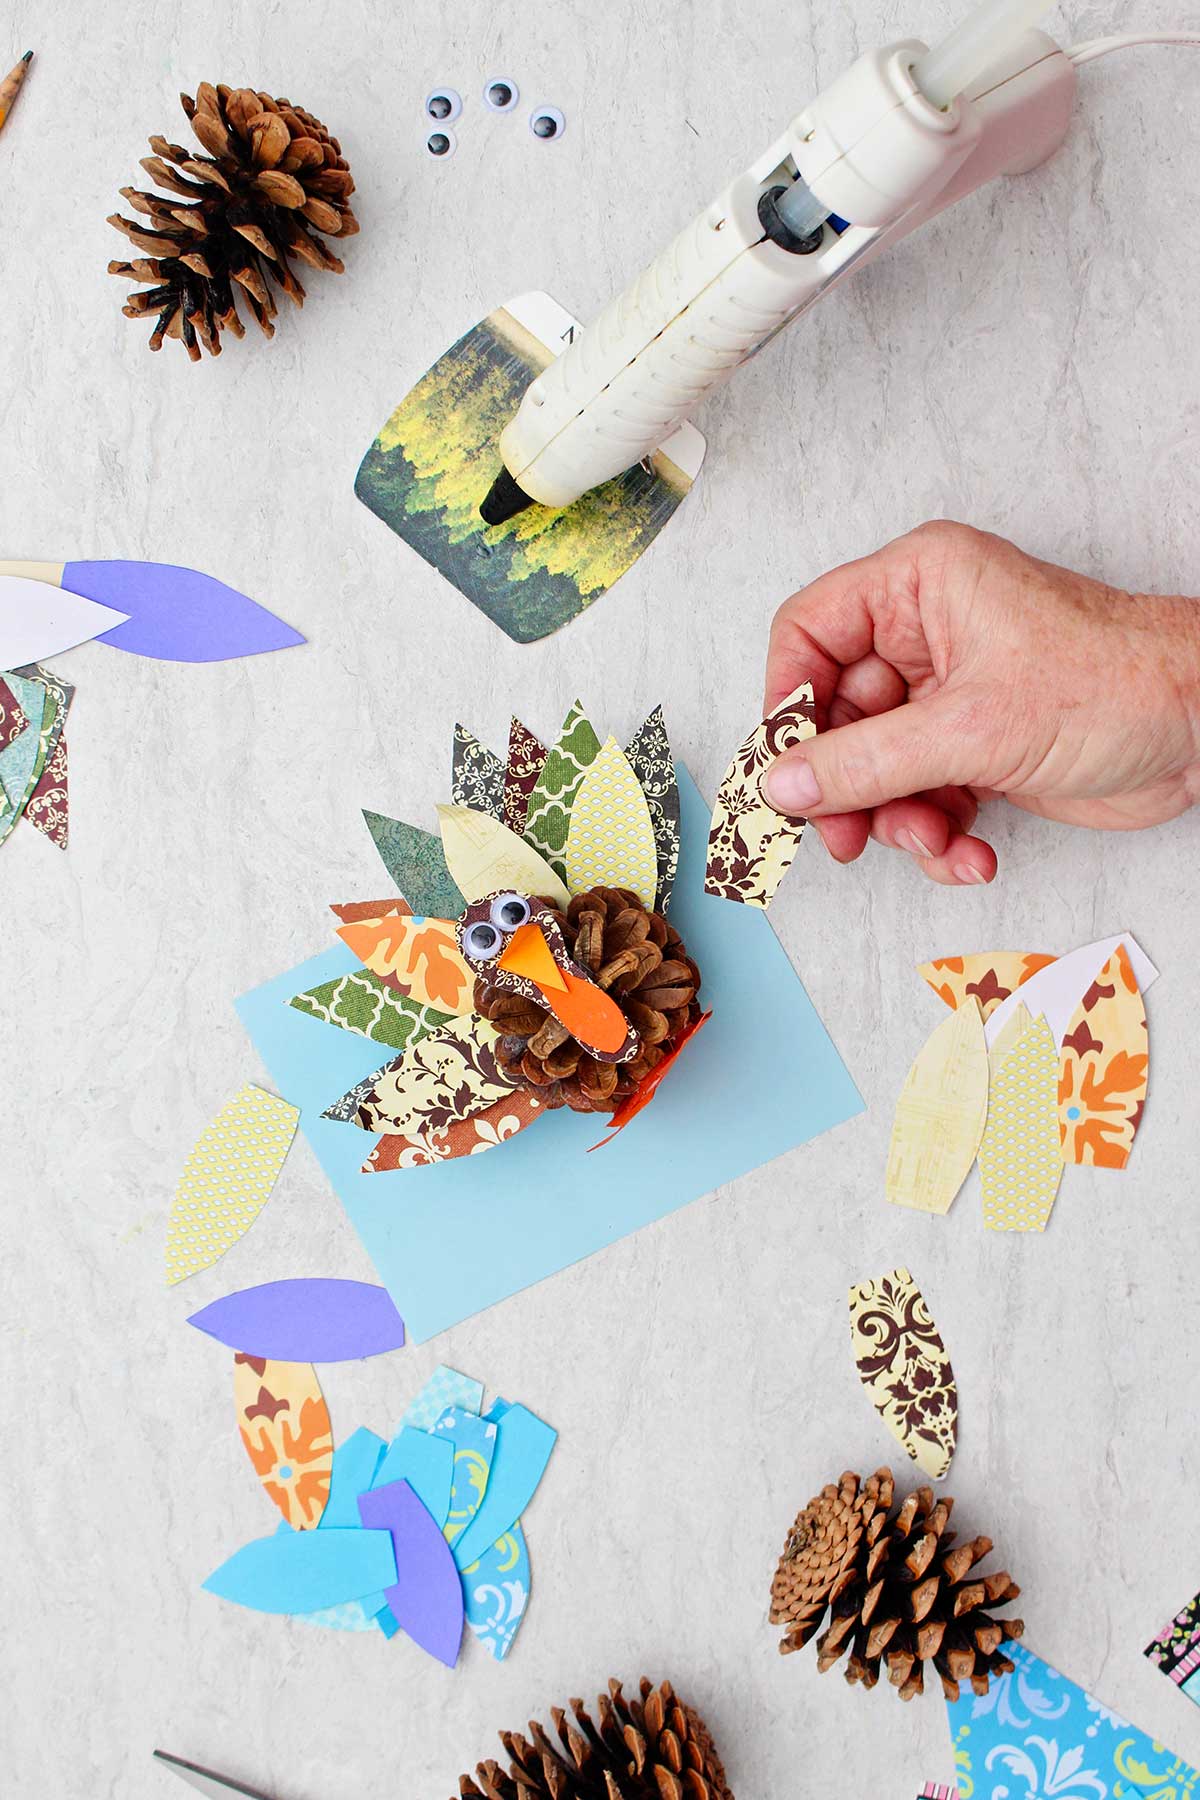
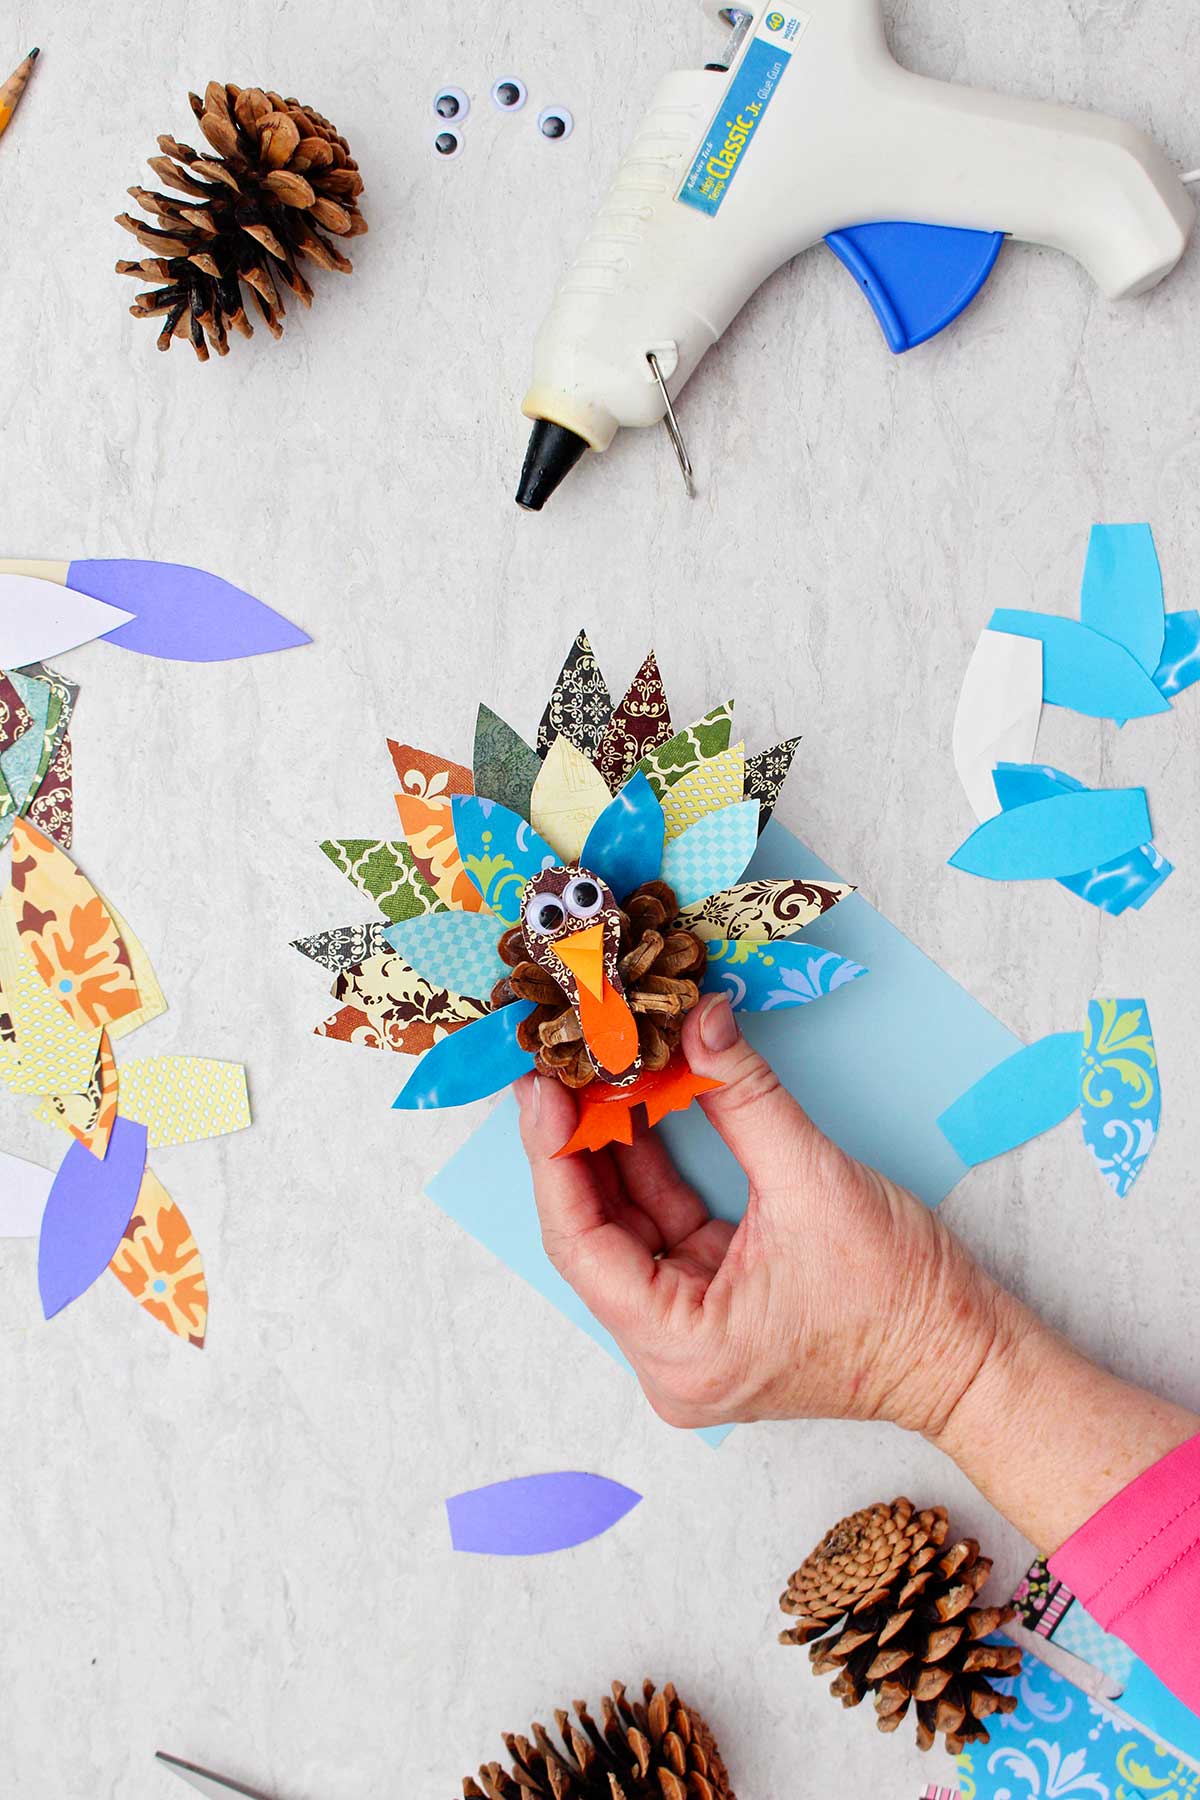
Then take the medium feathers and make a second row of these feathers in front of the larger feather fan of the pinecone. Use the same gluing technique.
Repeat this process with the smaller feathers.
This is one good looking pinecone turkey!
Craft Tips for Turkey Pinecones
- Time saver- To make this craft faster, you can cut the tail feathers out ahead of time and let kids choose several for their turkey craft.
- Tacky glue- A tacky glue could work for younger children but takes longer to dry and there is more dripping.
- Scrap paper- Place a piece of scrap paper under the turkey as you work to prevent glue from dripping on your work surface.
- Free pattern- Using the free pattern makes this craft fast and easy. Enjoy!
Variations in Making Pine Cone Turkeys
- Paper fan tail- Make a paper fan for the tail and glue it to the end of the pinecone.
- One row of feathers- Only cut the larger tail feathers and glue them on. Skip the other sizes of feathers.
- Recycle paper- Use recycled paper from envelopes, packaging, magazines, or ads.
- Table favors- Make one turkey to set by each dinner place setting as a Thanksgiving table favor or card holder.
FAQ
Yes you can. Purchase a bag of feathers in a craft store. Glue them into the pinecone the same way we did the paper feathers as described in this post.
Purchase pinecones at a craft store if you don’t have them in your area.
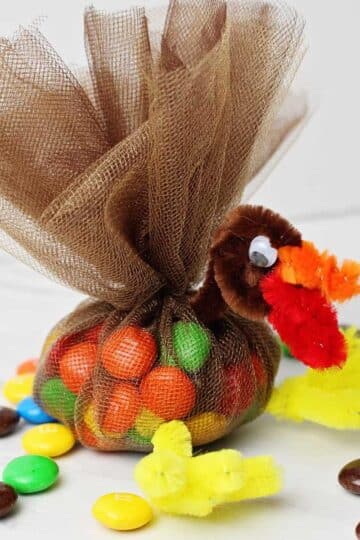
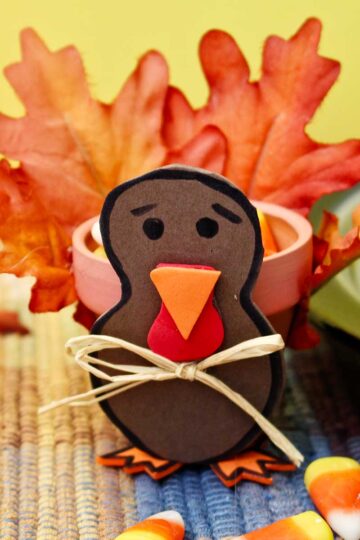
More DIY Thanksgiving Crafts for Kids
Looking for more great DIY Thanksgiving craft ideas for kids? Here are a few favorites for you to try:
Come join the fun at WTN!
Try this craft, leave a comment, rate it, and tag a photo with #WelcometoNanas wherever you post.
How to Make a Pinecone Turkey for Thanksgiving
Equipment
- Hot glue gun and glue
Items Required
- pinecones forage or buy at craft store- 3-4" long
- scrapbooking paper a variety of colors and patterns
- hot glue gun and glue
- Googly eyes
- Free pattern- Use this free hand drawn pattern
Instructions
- Cut out each of the pieces from the free hand drawn pattern . Use scrapbooking paper to cut out about eight of each of the tail feathers sizes.Trace and cut out one of the head, waddle, beak, and base of the Turkey.
- Set down a piece of scrap paper on your work surface so the glue does not drip.Using a hot glue gun, put a large amount of hot glue on the base paper. Lay the pinecone on it's side and place it on that glue with the small end towards the feet.
- Hot glue the waddle onto the head with the top part of the waddle being the flat edge. Place that flat edge about halfway down the rounded head section of the paper.Fold the beak in half. Place a small amount of hot glue on one of the triangle sections of the beak and glue it on top of the waddle. The beak will stay open and be 3D.Glue on two googly eyes to finish the turkey's face.Break off one top point of the pinecone so that you can glue the head piece on. Place hot glue on the front end of the pinecone where it looks as if it can make contact with the flat paper head section. Carefully press the head onto this hot glue area. Let it cool for a moment and then look to see that it adhered well. Place a couple small spots of glue on the back to make better contact with the pinecone if necessary.
- Start making the fanned tail by adding the largest feathers first. Place a small amount of hot glue on both sides of the bottom of the feather (the straight edge). Stick the feather down between the pinecone scales of the pine cone at the far back of the turkey.Continue to add the large Turkey feathers to make a full fan shape. See the picture. Then take the medium feathers and make a second row of these feathers in front of the larger feather fan of the pinecone. Use the same gluing technique.Repeat this process with the smaller feathers.


Leave a Reply