
Thanksgiving Favors for the Table!
Making these easy Flowerpot Turkey Thanksgiving Favors for the Table was fast and fun. That makes it the perfect holiday season craft! I’m planning to use them as Thanksgiving dinner favors that I’ll use on the table at for the Thanksgiving meal.
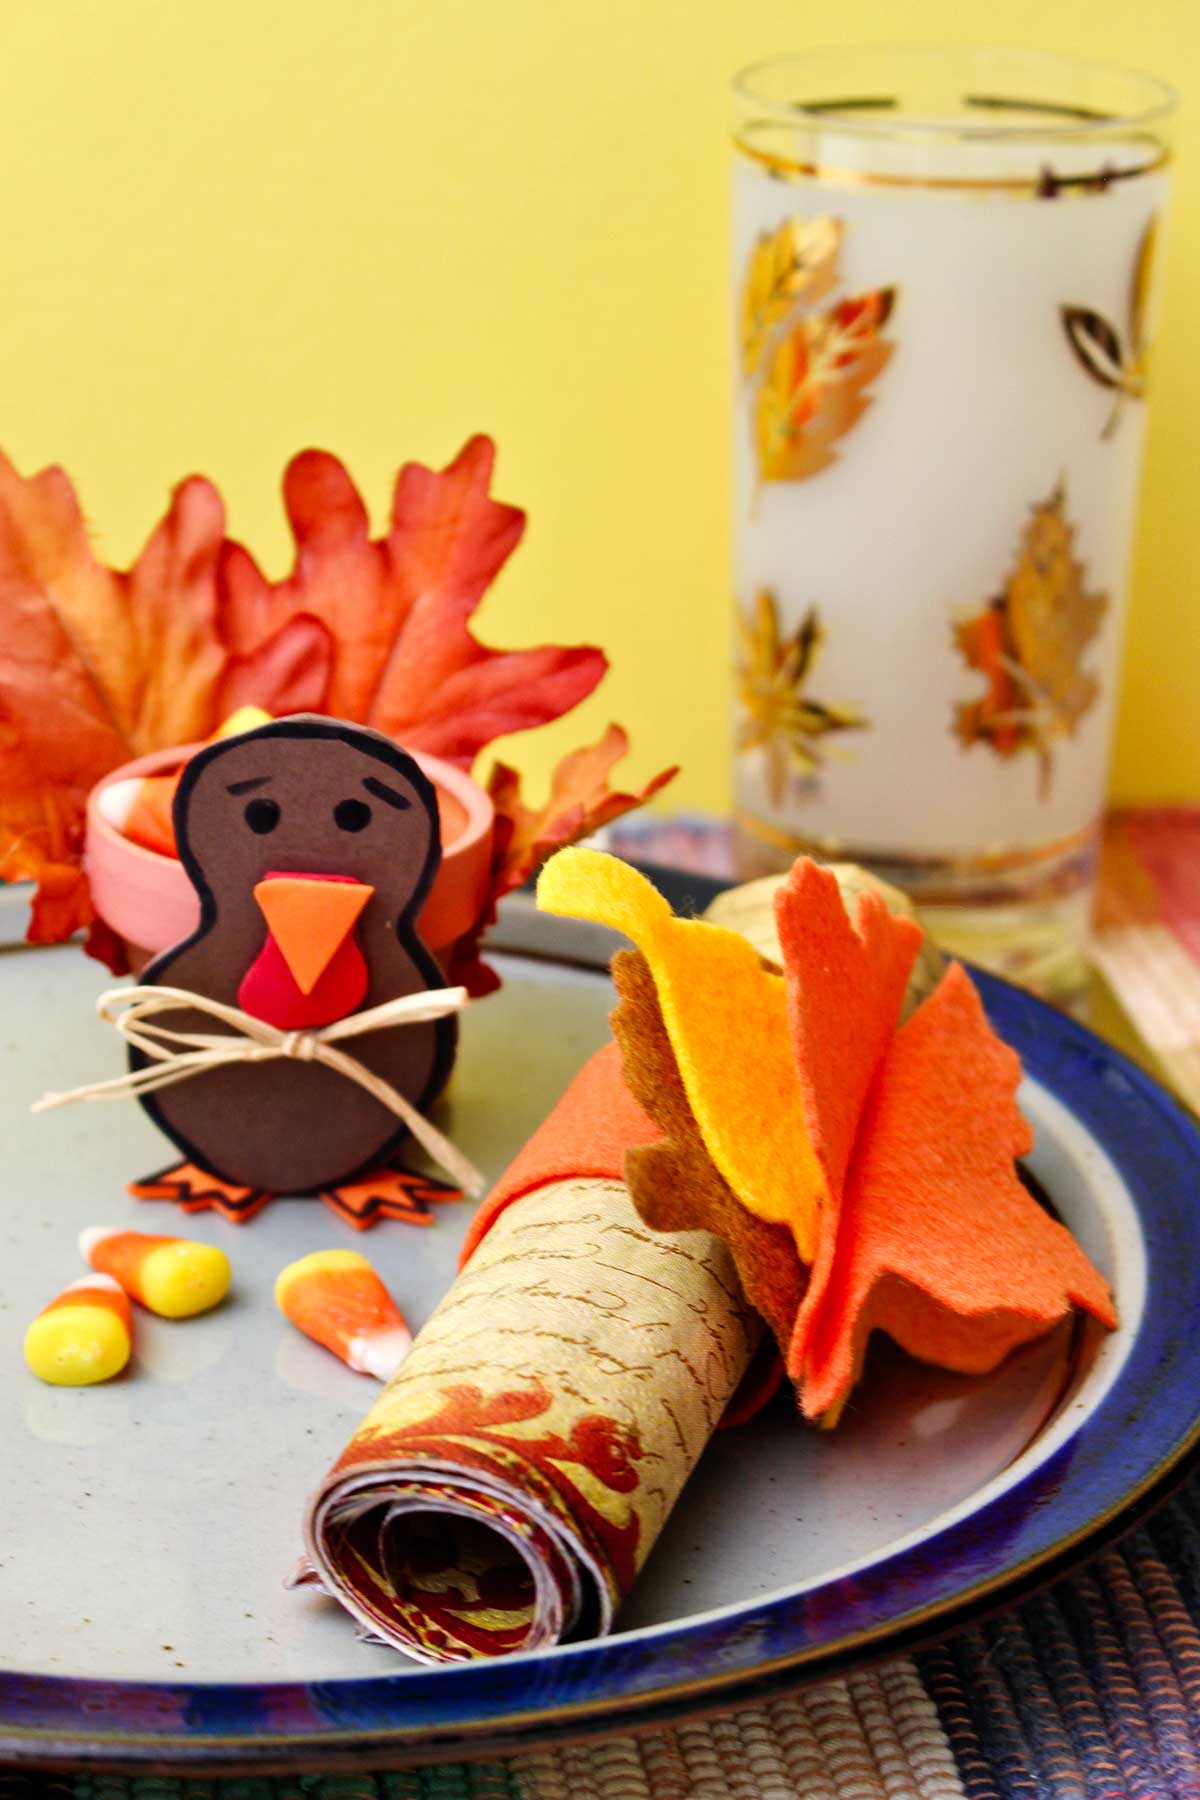
Won’t these little guys look cute, having one next to each plate at the table? All the dinner guests can take them home after the meal, maybe even refilling them with some sweet treats before they go. They are just the best Thanksgiving party favors and I hope they will be a big hit!
A friend gave me a larger version of this flowerpot turkey a few years ago for a Thanksgiving gift. I kept it thinking it was so cute and could someday make a great party favor. When I saw it the other day, I had the idea to make smaller versions and decided to make these little mini flowerpot turkeys.

Homemade thanksgiving party favors
Full length step by step tutorial video
If you would like to follow along with me as I make the flowerpot turkey favor, here is a link to the YouTube tutorial video!! Link: Flowerpot Turkey Thanksgiving Favors for the Table Tutorial Video. I'd be glad to have you with me! 😉
The body of the flowerpot turkey favor
The small mini flowerpots are only about 2 inches tall and hold a perfect amount of candy corn. I have made table favor bags in the past, but I thought the flower pots were a unique and great idea for holding treats!
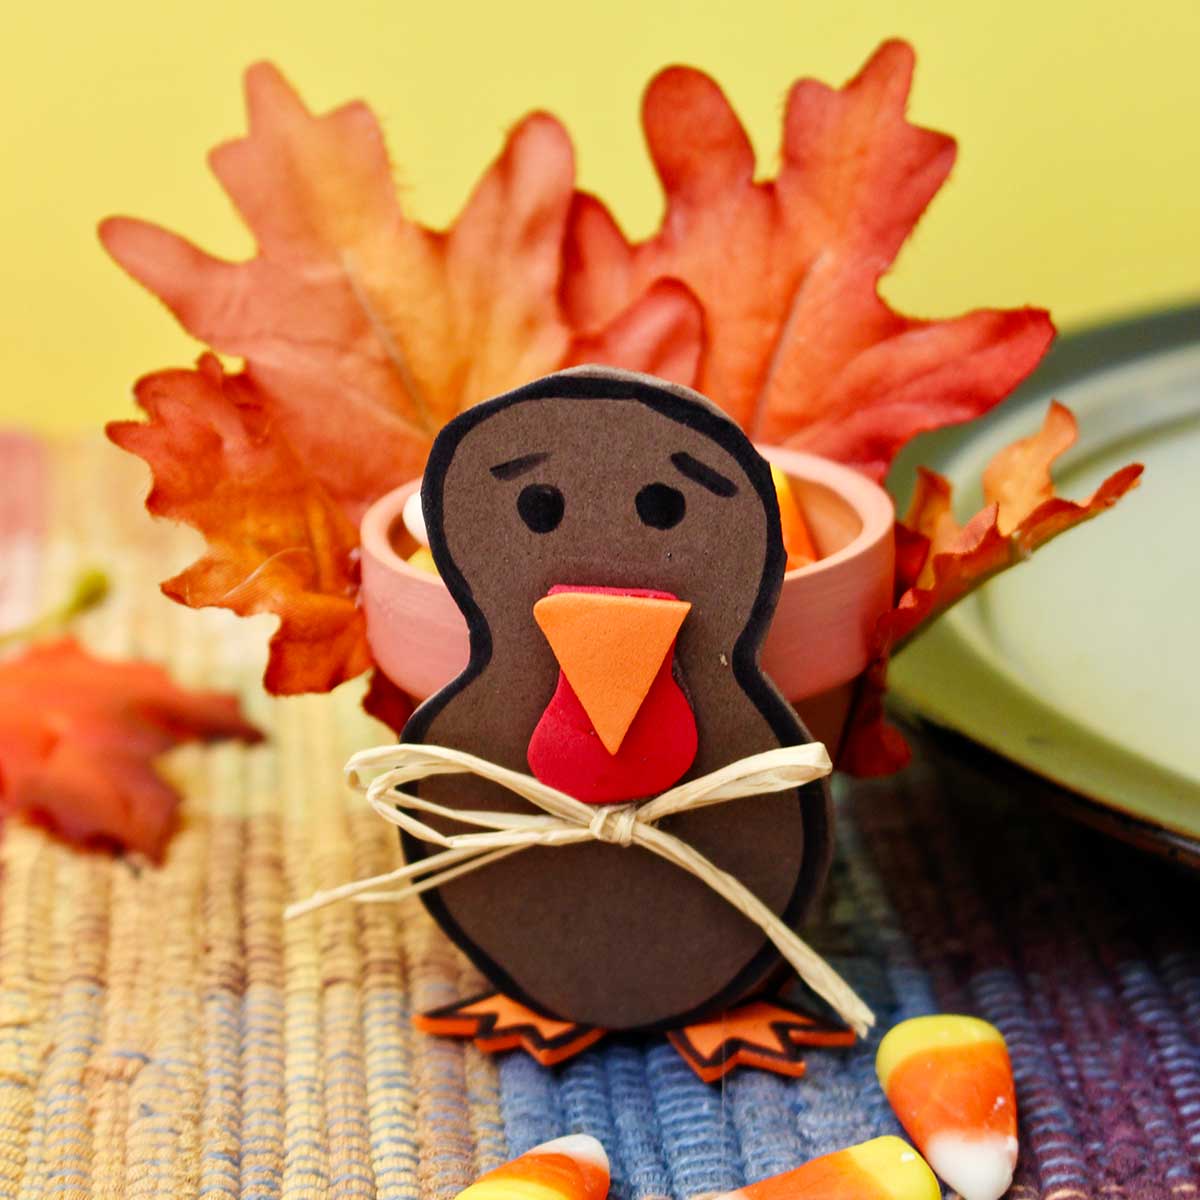
I used craft foam to make the body, features, and feet of the turkey. You could probably use felt as well but the craft foam has more body (that is punny!), so it holds up the head well.
I’d be concerned that felt head would flop over the top of the flowerpot. And who wants a floppy turkey? Ha!
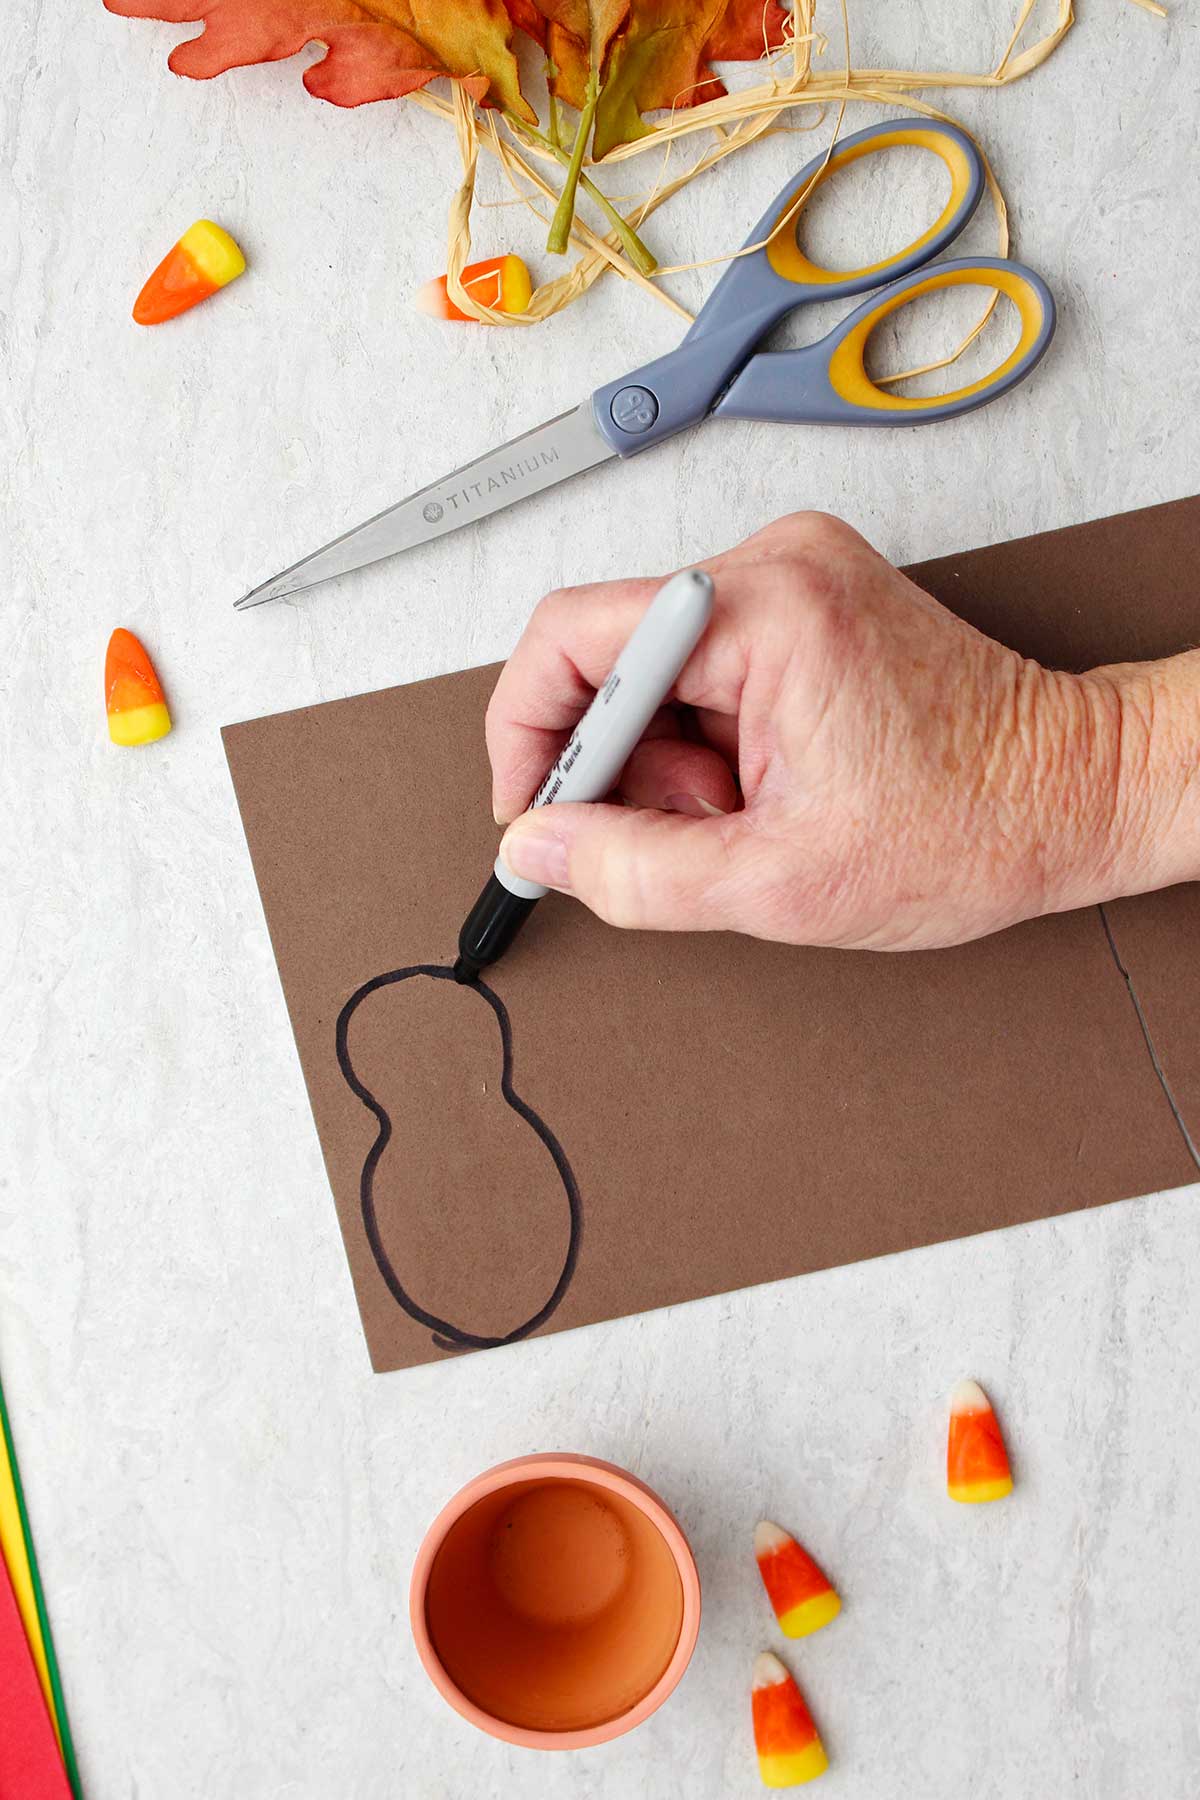
I used a black magic marker to draw the turkey’s body. You’ll note that it’s shaped like a peanut! The height of the body about is drawn to be ½ to ¾ an inch taller than the flowerpot so it’s about 2 ½ inches tall.
Use the pieces as patterns...
Note: Once you have one of each pattern piece drawn, cut it out and use it as a pattern to draw around it to make as many as needed. Believe me, this is especially helpful if you are making a DIY Thanksgiving party favor for each member of a large group!
Cut out the body along that black line.
I cut the Turkey body out along the outside edge of that black line so the black line remained on the foam. I thought it gave it kind of a crisper edged look.
Beak and wattle- helpful tip
The beak of the turkey is a small triangle of orange craft foam. That’s easy to make!
Before you cut out the wattle, here is a bit of info to help.
When it’s glued together, the beak will sit on top of the red wattle. So the top edge of the wattle is the same as the top edge of the beak and it will be about a quarter inch longer than the beak so that you can see it.

With that in mind, draw and cut out a little red wattle, or hanging down part, whatever you call it, out of red craft foam. It’s just a little U-shaped piece and doesn’t have to be particular symmetrical. Remember, it has a flat edge along the top edge the same size as the top of the beak and is to be about a quarter inch longer than the beak so that you can see it.
DIY Turkey favor FEET!
I set the bottom of the mini flowerpot on top of the orange craft foam and drew a circle around it with a black pen. Move the flowerpot and draw on 2 chicken feet poking out on the edge of the circle (attached to the circle).
I draw chicken feet with three pointed toes each, pretty simple. You could draw the feet like little round semi-circle shapes if you prefer that or if it’s easier for the younger kids to cut out.
Cut out the round circle and feet all in one piece.
I like that the round shape will fit completely underneath the flowerpot and will prevent any scratching of a surface by the bottom of the flowerpot. They’re kind of rough and this is a fun way to protect the table.

Bringing the Easy Thanksgiving favors together
Once all of these parts are cut out, then it’s time to hot glue them together!
Are younger kids helping with this fun DIY project?
If so, you will definitely want to help with the hot glue. It would also be a good idea to trace out all the pieces and then kids can just cut them out if they’re younger.
Older kids can help and do this all by themselves. I’m hopeful that the adults can too, ha!
Making the Turkey decoration for Thanksgiving
So I started by laying out the red wattles, and then hot gluing the orange beaks on top of of them.
Then I glued the red wattle and beak part on the center of the face of each turkey.

Eyes for our turkey decoration- a worried turkey?
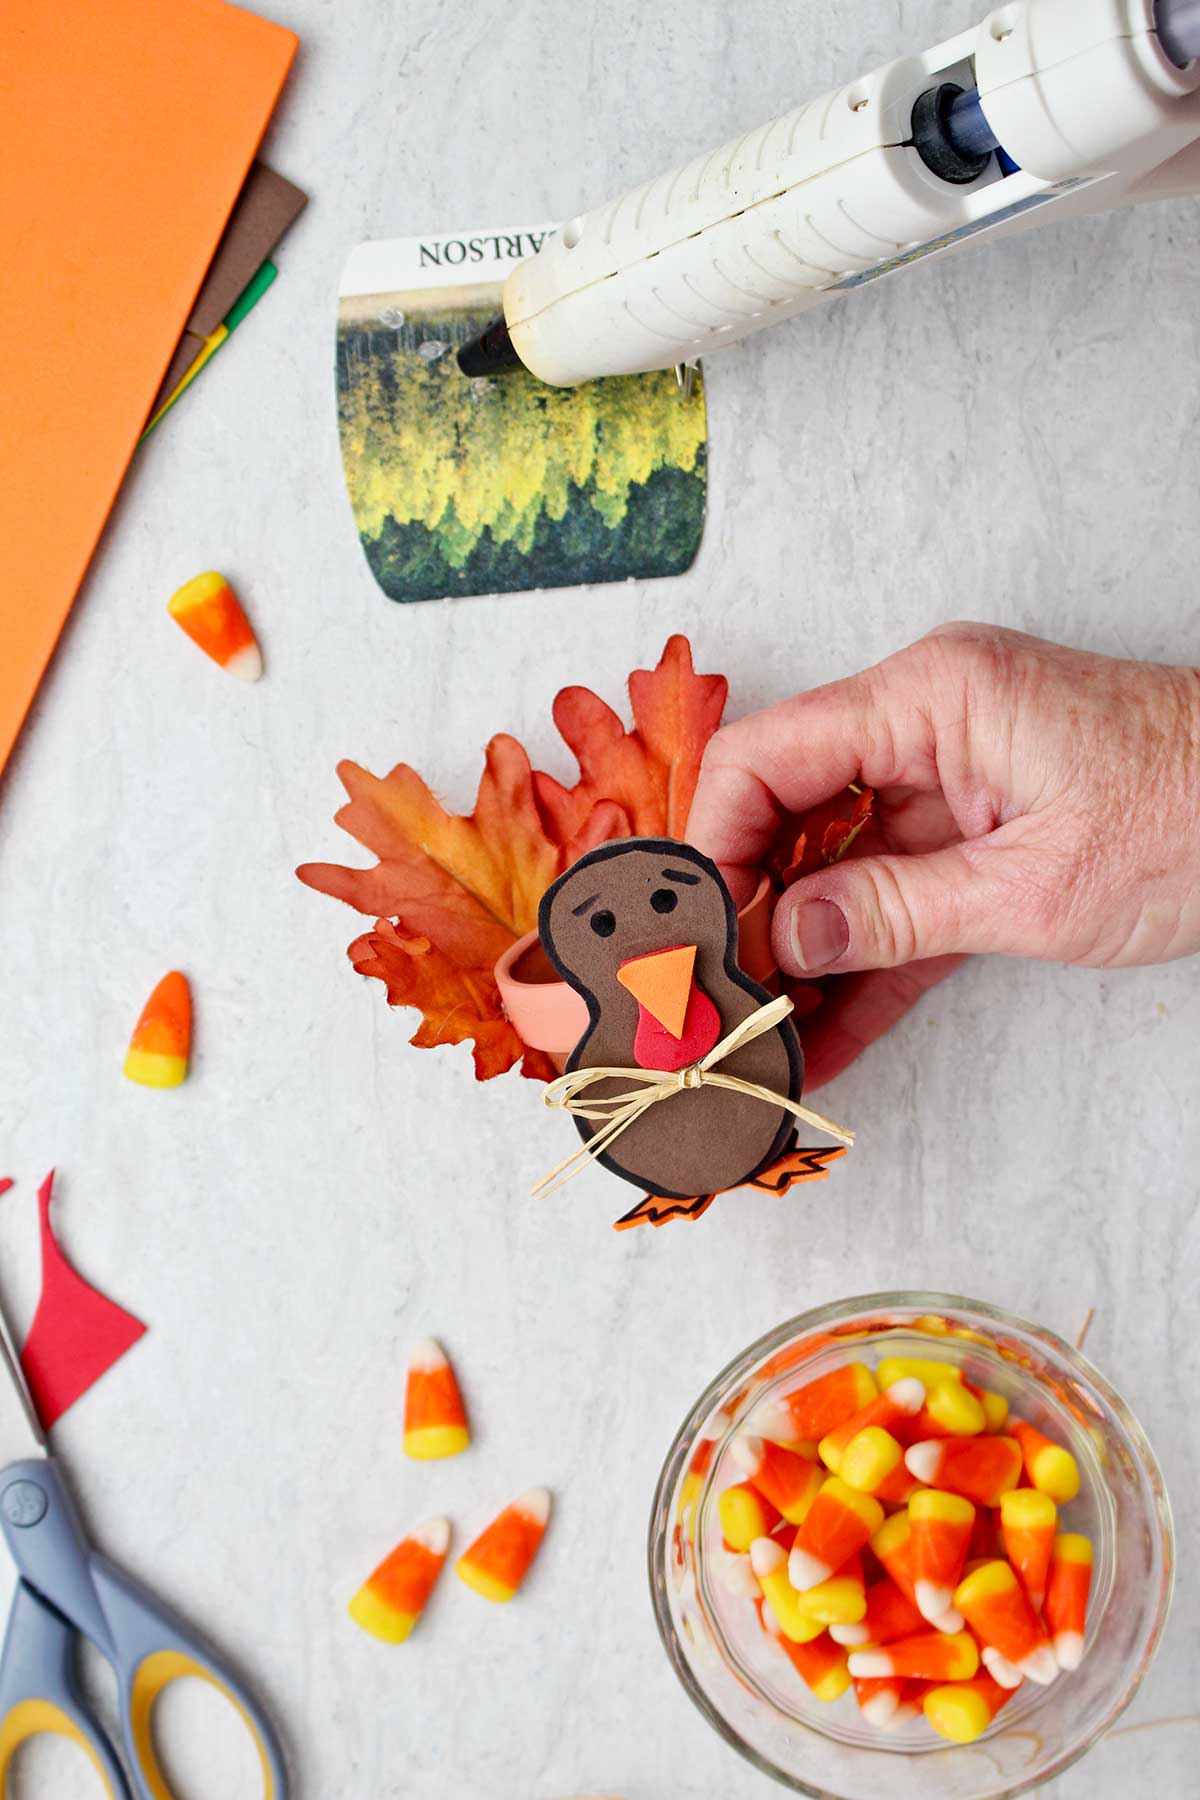
I stopped and drew 2 little circle eyes on the face of the turkey above the beak. You can draw eyelashes on the eyes if you want to, but I went ahead and put eyebrows above the eyes.
I think it makes my turkey look kind of worried, don’t you? That wasn’t my intention but it kind of made me chuckle a bit because I think a turkey should be worried on Thanksgiving!
You could also try using googly eyes if you'd like!
Glue on the feet
Next, hot glue the feet underneath the flowerpot. I just put glue on the bottom of the flowerpot and set it down onto the round circle part of the feet.
The body is glued on
Finally, put a strip of hot glue up and down on the flowerpot, going directly up from the between the 2 feet. This glue will start at the bottom of the flowerpot and go all the way up to the rim.
Gently press the turkey body onto that hot glue area. Whenever you’re using hot glue be very careful so that you don’t accidentally get any on your hands.
The tail for the Flowerpot Turkey
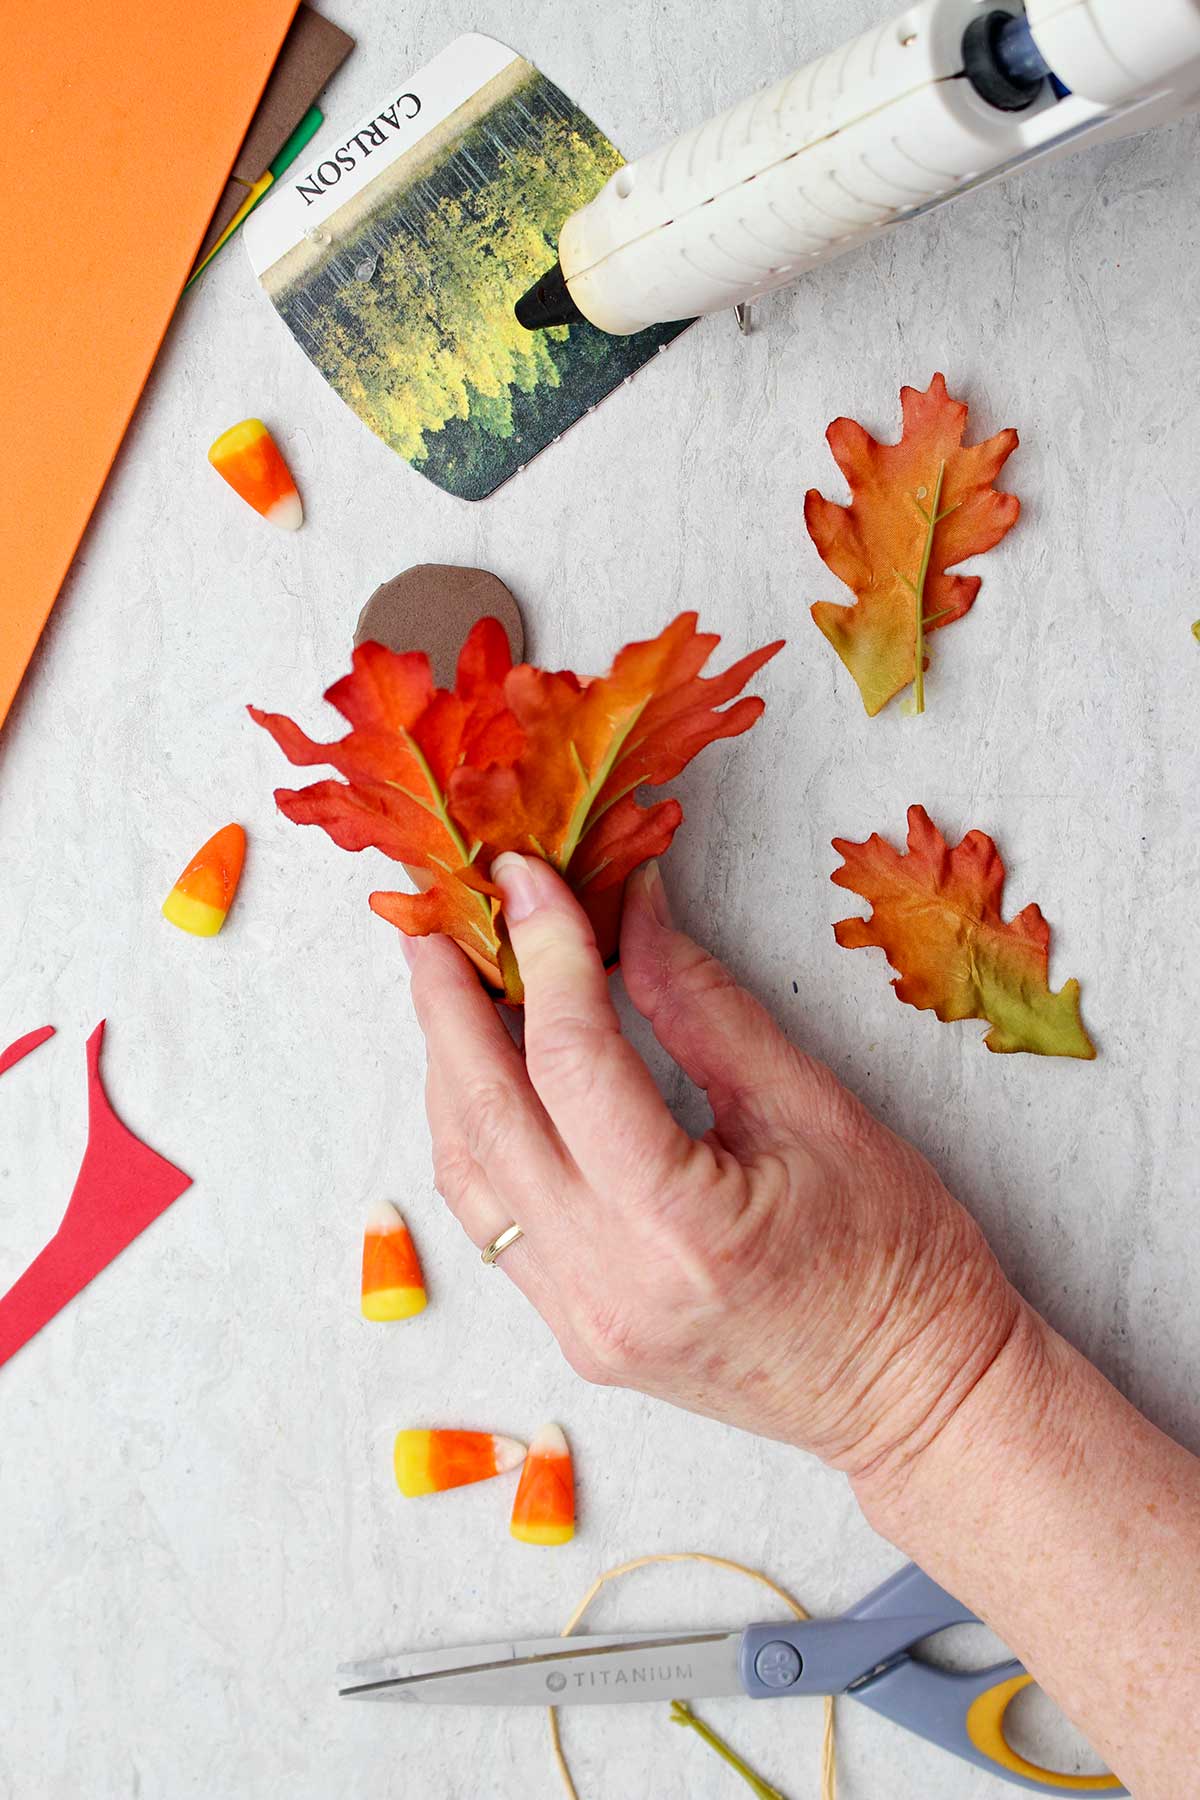
The tail is made with some artificial leaves. Mine were orange silk leaves that I had from a project a while back. They were on a stem, so I just cut off four leaves.
I like the way the two larger leaves overlap in the center with one slightly smaller one to either side of the tail. You can use more or less leaves if you want.
Take a moment to hold the leaves on the back of the turkey to see where to place them. You may want to move them together a bit or move them up or down a bit. You want them to fan out like a turkey tail does!
Tip: You will see the leaves from the front of the turkey, and you don’t want the back of the leaf showing. So place each leaf with the right side of the leaf against the flowerpot.
Glue on the tail leaves
Take your hot glue on the back of the turkey and put a strip of glue down the back of the flowerpot. Place your first leaf against the flowerpot in the position that you decided upon.
My two larger leaves went side-by-side on the center back of the turkey.
Note: Remember to glue your leaves on with the front part of the leaf facing the flowerpot.
Continue gluing on the leaves on the back part of the turkey until all are glued in position.
Let the glue cool.
"Dressing" the turkey
I added a little Raffia bow on the front of the turkey. You could use twine if you’d prefer. I thought it was kind of cute as it looked like he was dressing up for his Thanksgiving feast. The bow is optional, but a fun special touch.
Isn’t he cute?

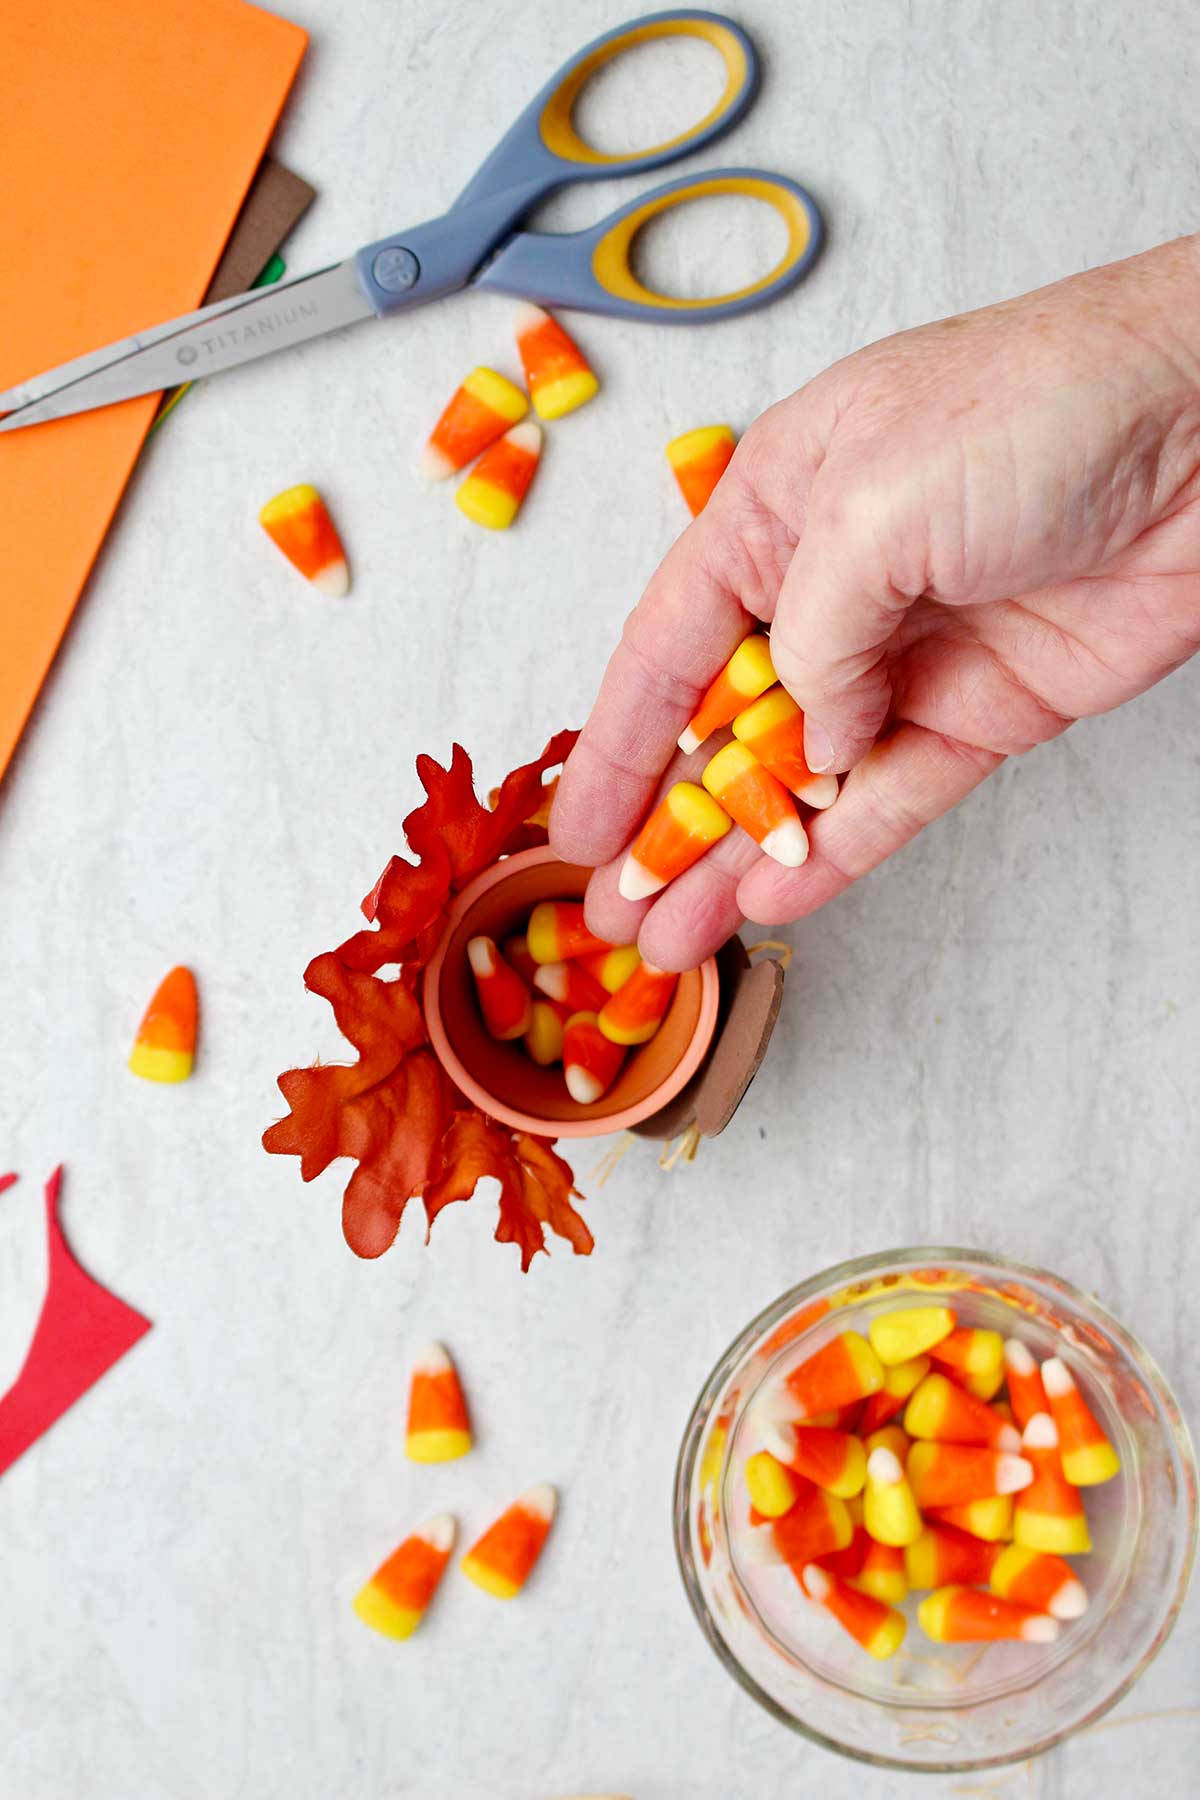
Sweet treat for the table
When it’s time for your meal, you can set your turkeys next to the place settings and fill them with candy. This is a great way to involve the kids while you set up! You can choose any delicious treat you like, but I love candy corn or Reese's pieces for a festive fall look. You could also add the candy to a cello bag and set inside the pot, or place tissue paper in the pot before filling.
You weren’t watching me as I did this, but I did tend to pop one or two candy corns in my mouth :-). As you are gathering your thanksgiving party supplies, be sure you buy extra candy for this very reason!! The great thing about having a bit of leftover candy is that you can give some more yummy treats out before everyone heads home.
If you'd like, you could also add a place card for your Thanksgiving guests next to each favor. This is a great addition to make the settings even more personal for friends and family members.
I love the way these fun Thanksgiving party favors turned out. They looked very cute next to the table settings of my dishes on the table, perfect for a special occasion like Thanksgiving day.
Thanksgiving table favors
When your guest see these Turkey Flowerpot Candy Corn Thanksgiving Favors for the Table it will make them feel very special! And of course, it's a perfect way to satisfy their sweet tooth as they wait for the meal to begin.
Of course, I am one of those people that eat the candy as an appetizer instead of a dessert :-). I hope you and yours have a very happy Thanksgiving!
I love giving something edible, that a guest can enjoy either at the party, or at home! That makes containers like these flower pot turkeys, or treat bags, absolutely perfect. Check out more favor ideas from the blog in the list below.
More Easy Thanksgiving favors to make
Looking for more great Thanksgiving party favors and fun ideas? You can find additional simple ideas for any Thanksgiving event, including more crafted turkey favor ideas, a Thanksgiving decoration or two, fall centerpieces, and even a few recipes in these following posts from around the blog.
- No-sew Felt leaf napkin rings (seen in the photo above)
- Mini pumpkin candleholder
- Cute Turkey Thanksgiving favors (turkey treat bag from netting gift bags and pipe cleaner)
- Candy Turkey Thanksgiving favors
- Nana's Perfect Pumpkin Pie
- Yummy Caramel Apples on a Stick
Come Join the Fun!
If you try this craft, let me know! Go ahead and leave a comment, rate it, and tag a photo with #WelcometoNanas wherever you post.
Supplies for Turkey Flowerpot Thanksgiving Favors
- Mini flowerpots- about 2" tall
- Colored craft foam (brown, red, orange)
- Black permanent marker
- 4 artificial fall leaves
- Raffia- small piece (optional)
- Hot glue gun and glue
- Scissors
- Candy Corn or other type of candy
Easy flowerpot Turkey Thanksgiving Favors for the Table
Equipment
- Hot glue gun and glue
- Scissors
Items Required
- Mini flowerpots- about 2" tall
- Colored craft foam (brown, red, orange)
- Black permanent marker
- 4 artificial fall leaves
- Raffia- small piece (optional)
- Candy Corn or other type of candy
Instructions
- I used a black magic marker to draw the turkey’s body. You’ll note that it’s shaped like a peanut! The height of the body about is drawn to be ½ to ¾ an inch taller than the flowerpot so it’s about 2 ½ inches tall. I cut the Turkey body out along the outside edge of that black line so the black line remained on the foam. I thought it gave it kind of a crisper edged look.
- The beak of the turkey is a small triangle of orange craft foam. That’s easy to make!Before you cut out the wattle, here is a bit of info to help.When it’s glued together, the beak will sit on top of the red wattle. So the top edge of the wattle is the same as the top edge of the beak and it will be about a quarter inch longer than the beak so that you can see it. With that in mind, draw and cut out a little red wattle, or hanging down part, whatever you call it, out of red craft foam. It’s just a little U-shaped piece and doesn’t have to be particular symmetrical. Remember, it has a flat edge along the top edge the same size as the top of the beak and is to be about a quarter inch longer than the beak so that you can see it.
- I set the bottom of the mini flowerpot on top of the orange craft foam and drew a circle around it with a black pen. Move the flowerpot and draw on 2 chicken feet poking out on the edge of the circle (attached to the circle). I draw chicken feet with three pointed toes each, pretty simple. You could draw the feet like little round semi-circle shapes if you prefer that or if it’s easier for the younger kids to cut out. Cut out the round circle and feet all in one piece.
- So I started by laying out the red wattles, and then hot gluing the orange beaks on top of of them. Then I glued the red wattle and beak part on the center of the face of each turkey.
- I stopped and drew 2 little circle eyes on the face of the turkey above the beak. You can draw eyelashes on the eyes if you want to, but I went ahead and put eyebrows above the eyes.
- Finally, put a strip of hot glue up and down on the flowerpot, going directly up from the between the 2 feet. This glue will start at the bottom of the flowerpot and go all the way up to the rim. Gently press the turkey body onto that hot glue area. Whenever you’re using hot glue be very careful so that you don’t accidentally get any on your hands.
- Take your hot glue on the back of the turkey and put a strip of glue down the back of the flowerpot. Place your first leaf against the flowerpot in the position that you decided upon. My two larger leaves went side-by-side on the center back of the turkey. Note: Remember to glue your leaves on with the front part of the leaf facing the flowerpot. Continue gluing on the leaves on the back part of the turkey until all are glued in position. Let the glue cool.
- I added a little Raffia bow on the front of the turkey. You could use twine if you’d prefer. I thought it was kind of cute as it looked like he was dressing up for dinner. The bow is optional.
- When it’s time for your Thanksgiving meal, you can set your turkeys next to the plate and fill them with candy. This is a great thing to ask the kids to do!


Shelly says
Hey Christine! If you'd like the step by step, you can press the "Print" button located above the instructions here near the bottom of the post. However the body of the turkey is not a pattern, just a free-hand drawing in the shape of a peanut!
Shelly says
There should be no need to download or subscribe to my website. But you do need to go to the post on the website to find the link to the printable. The pattern is there with just a link to click.