Learn how to make your own DIY Safe Solar Eclipse Pinhole Projector with this step-by-step tutorial! It's easy to pull together, and only takes a few items to make.
Jump to:
- DIY Shoebox Pinhole Projector
- DIY Easy-Shmeasy Pinhole Camera
- Cutting the box
- Creating the pinhole projection
- The viewing area
- Using the box projector
- Solar Eclipse Pinhole Projector Options
- Locations for the full solar eclipse
- Try It Out!
- Solar Eclipse Safety
- More Retro and recycled crafts for kids!
- Enjoy!!
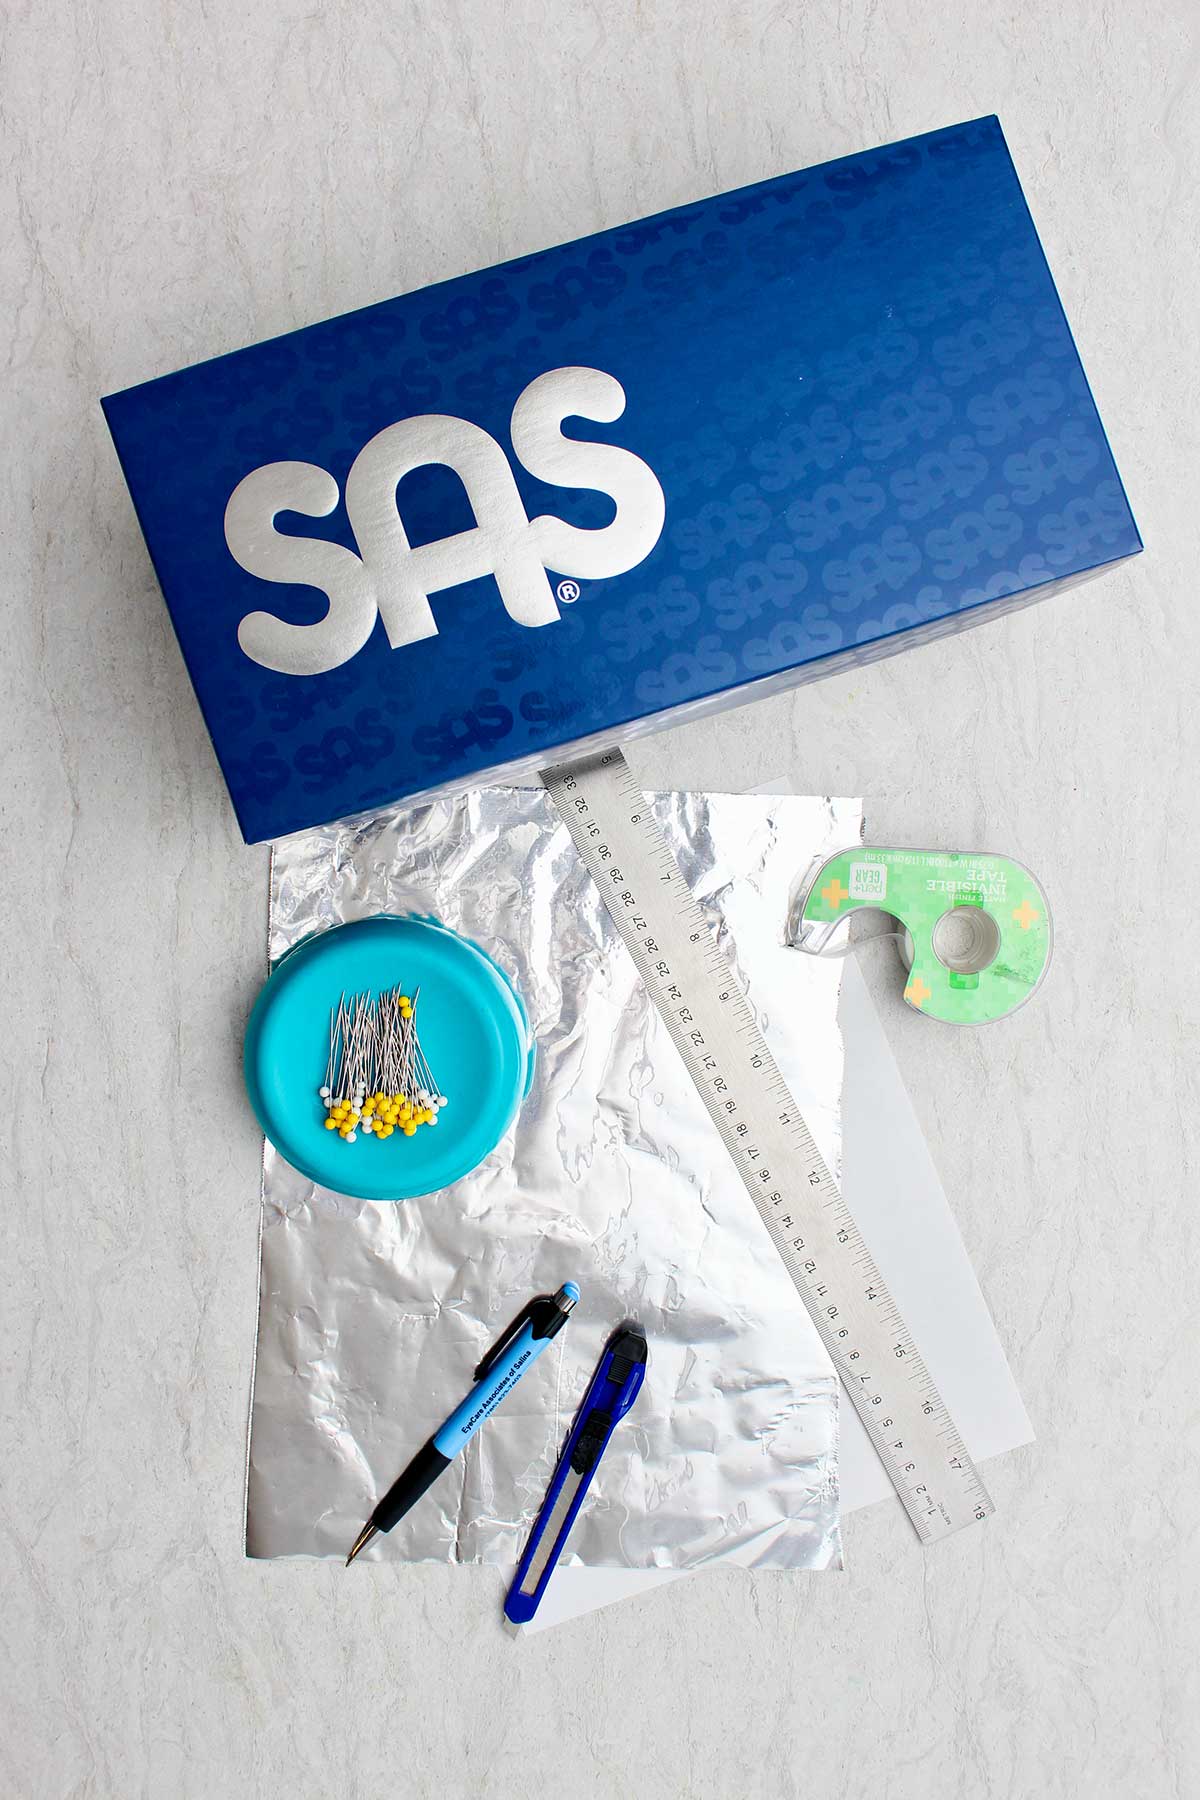
- Supplies You'll Need for a Solar Eclipse Pinhole Projector:
- DIY Safe Solar Eclipse Pinhole Projector (From a Box)
DIY Shoebox Pinhole Projector
If you haven’t purchased the special eclipse glasses for viewing the eclipse, help the grands make their own solar eclipse pinhole projector instead! It is safe and it's easy to make from a box and other simple supplies you have around the house!
Who, besides me, is excited about the solar eclipse that is happening in North America on April 8, 2024? I’ve been told a full eclipse won’t happen again until August 23, 2044! That’s 20 years from now.
We had a partial eclipse when I was in about 5th grade (think 1970!). That was my first time to learn about and experience an eclipse. It was before Google (gasp), so someone showed us how to make our own shoebox solar eclipse pinhole projector so we had a safe way to see the progress of the eclipse without hurting our eyes.
DIY Easy-Shmeasy Pinhole Camera
This is a fast and simple craft. A few cuts and a bit of tape and, "Bam!", you are done! The steps below explain the process.
You will need to find a long box as the main part of the eclipse pinhole projector. I used a shoe box and that works nicely. An empty cereal box can also work. The length of the cardboard box is important so avoid short boxes if you can.
The longer the box or tube, the larger the dot of light will be from the sun on the viewing screen. Experimenting with this could be fun.
If you would like to watch a full length video of making this pinhole projector, here is a link on YouTube: DIY Safe Solar Eclipse Pinhole Projector Full Length Video.
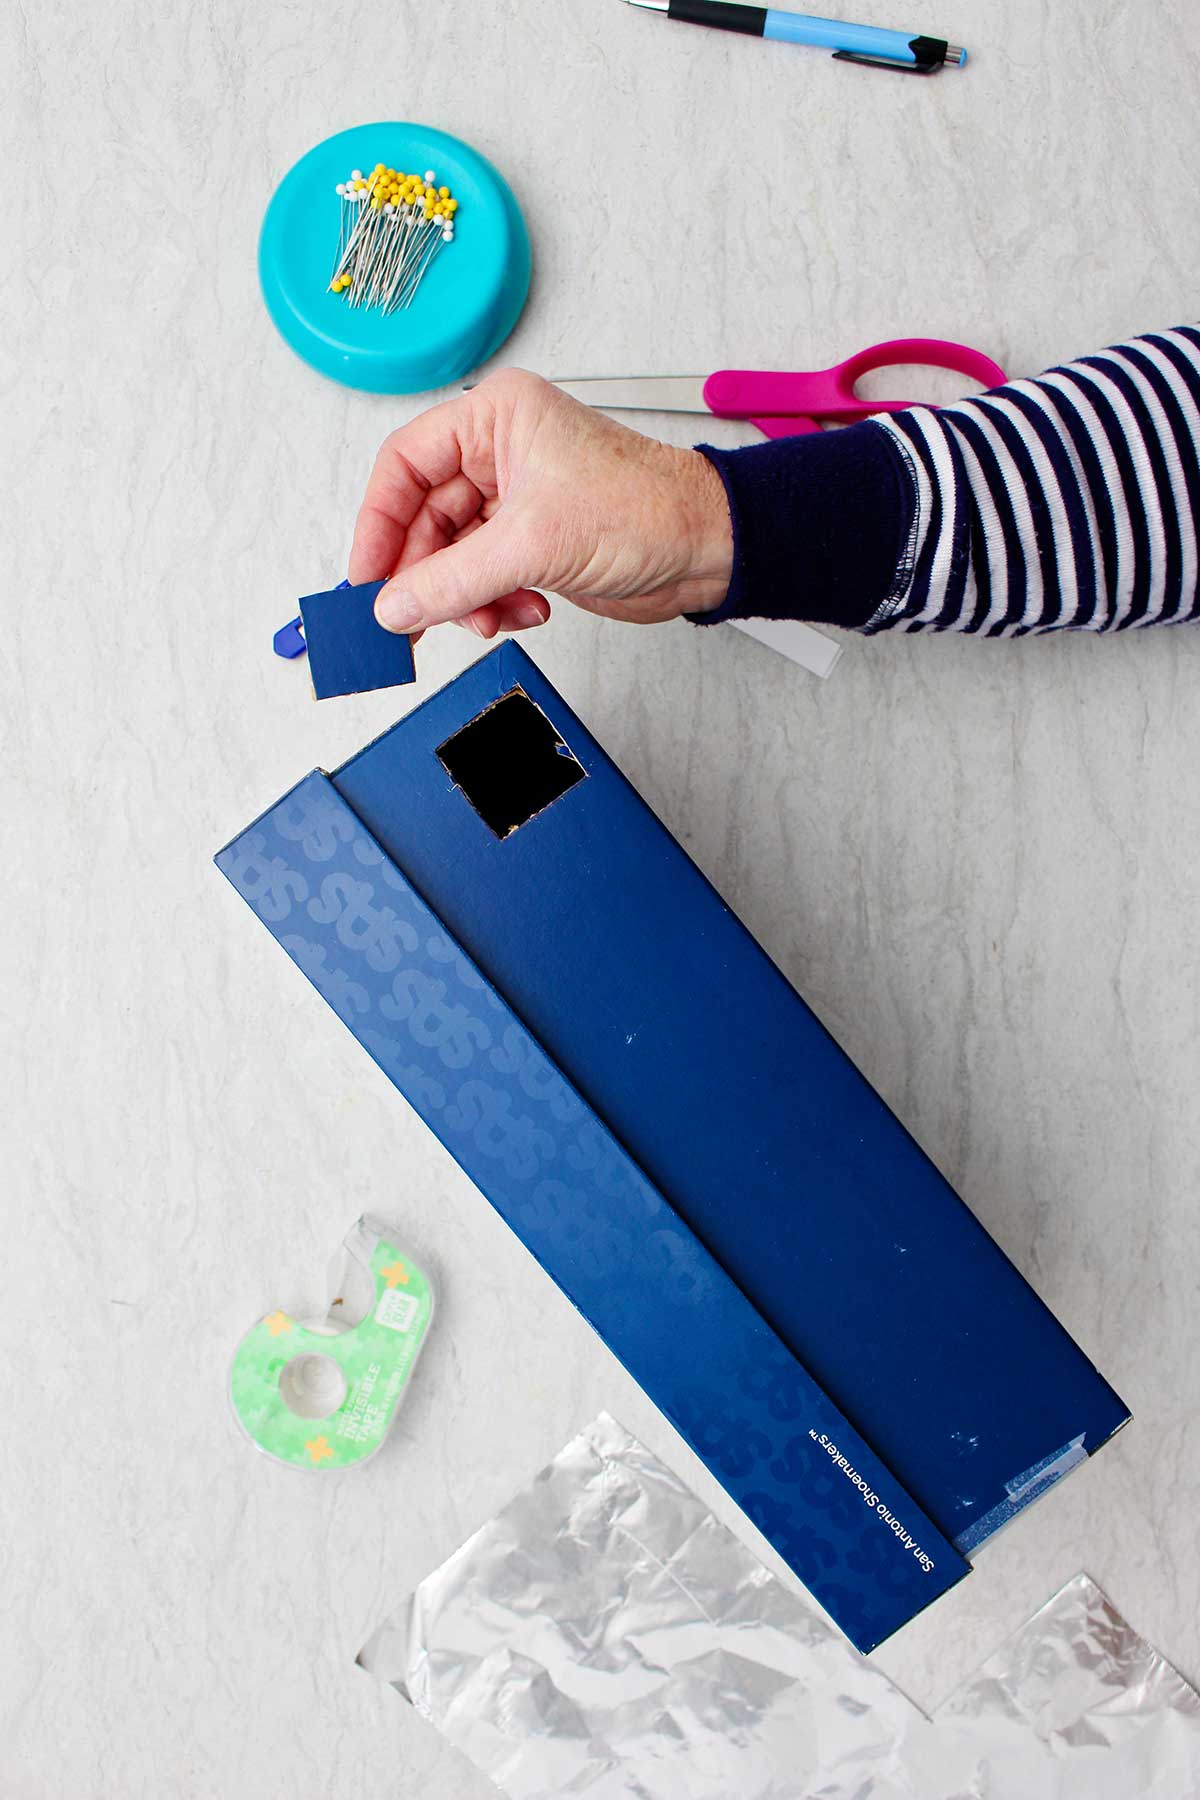
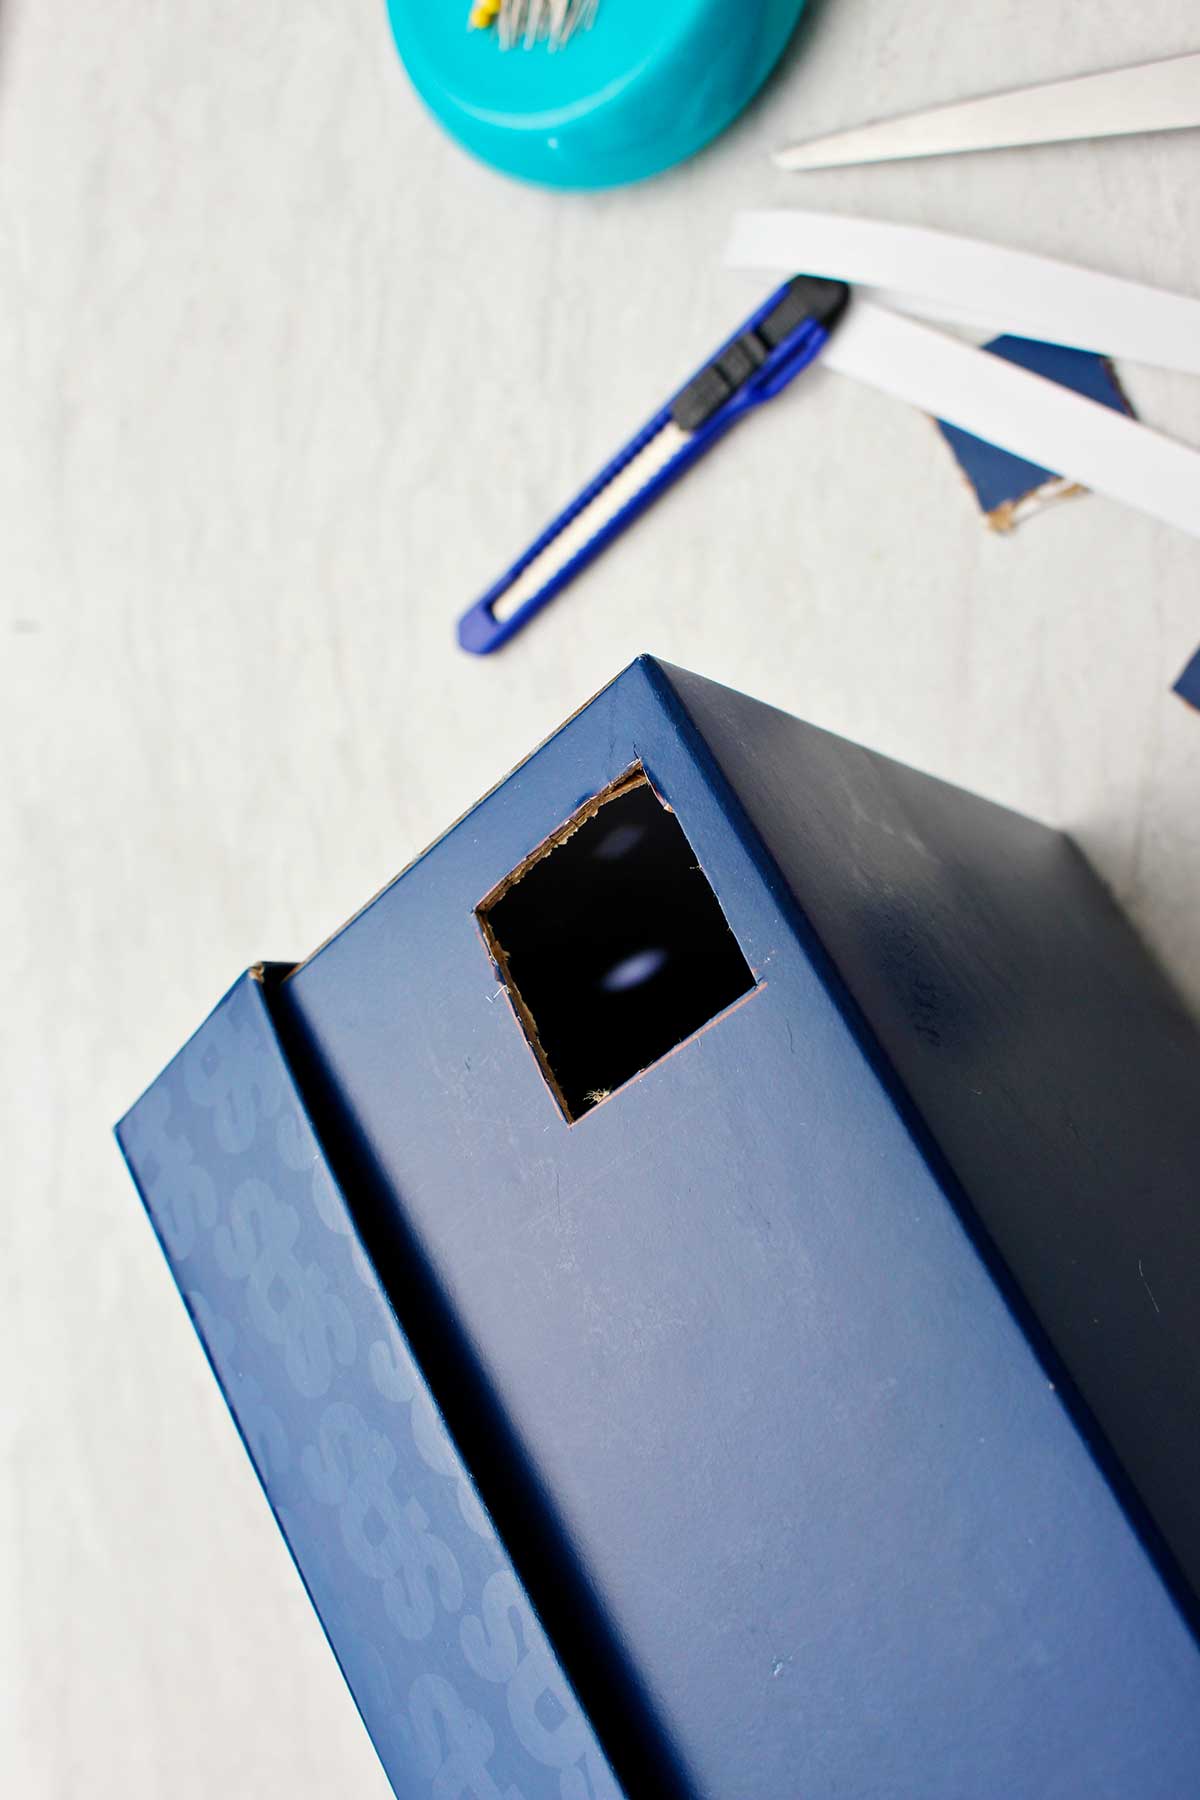
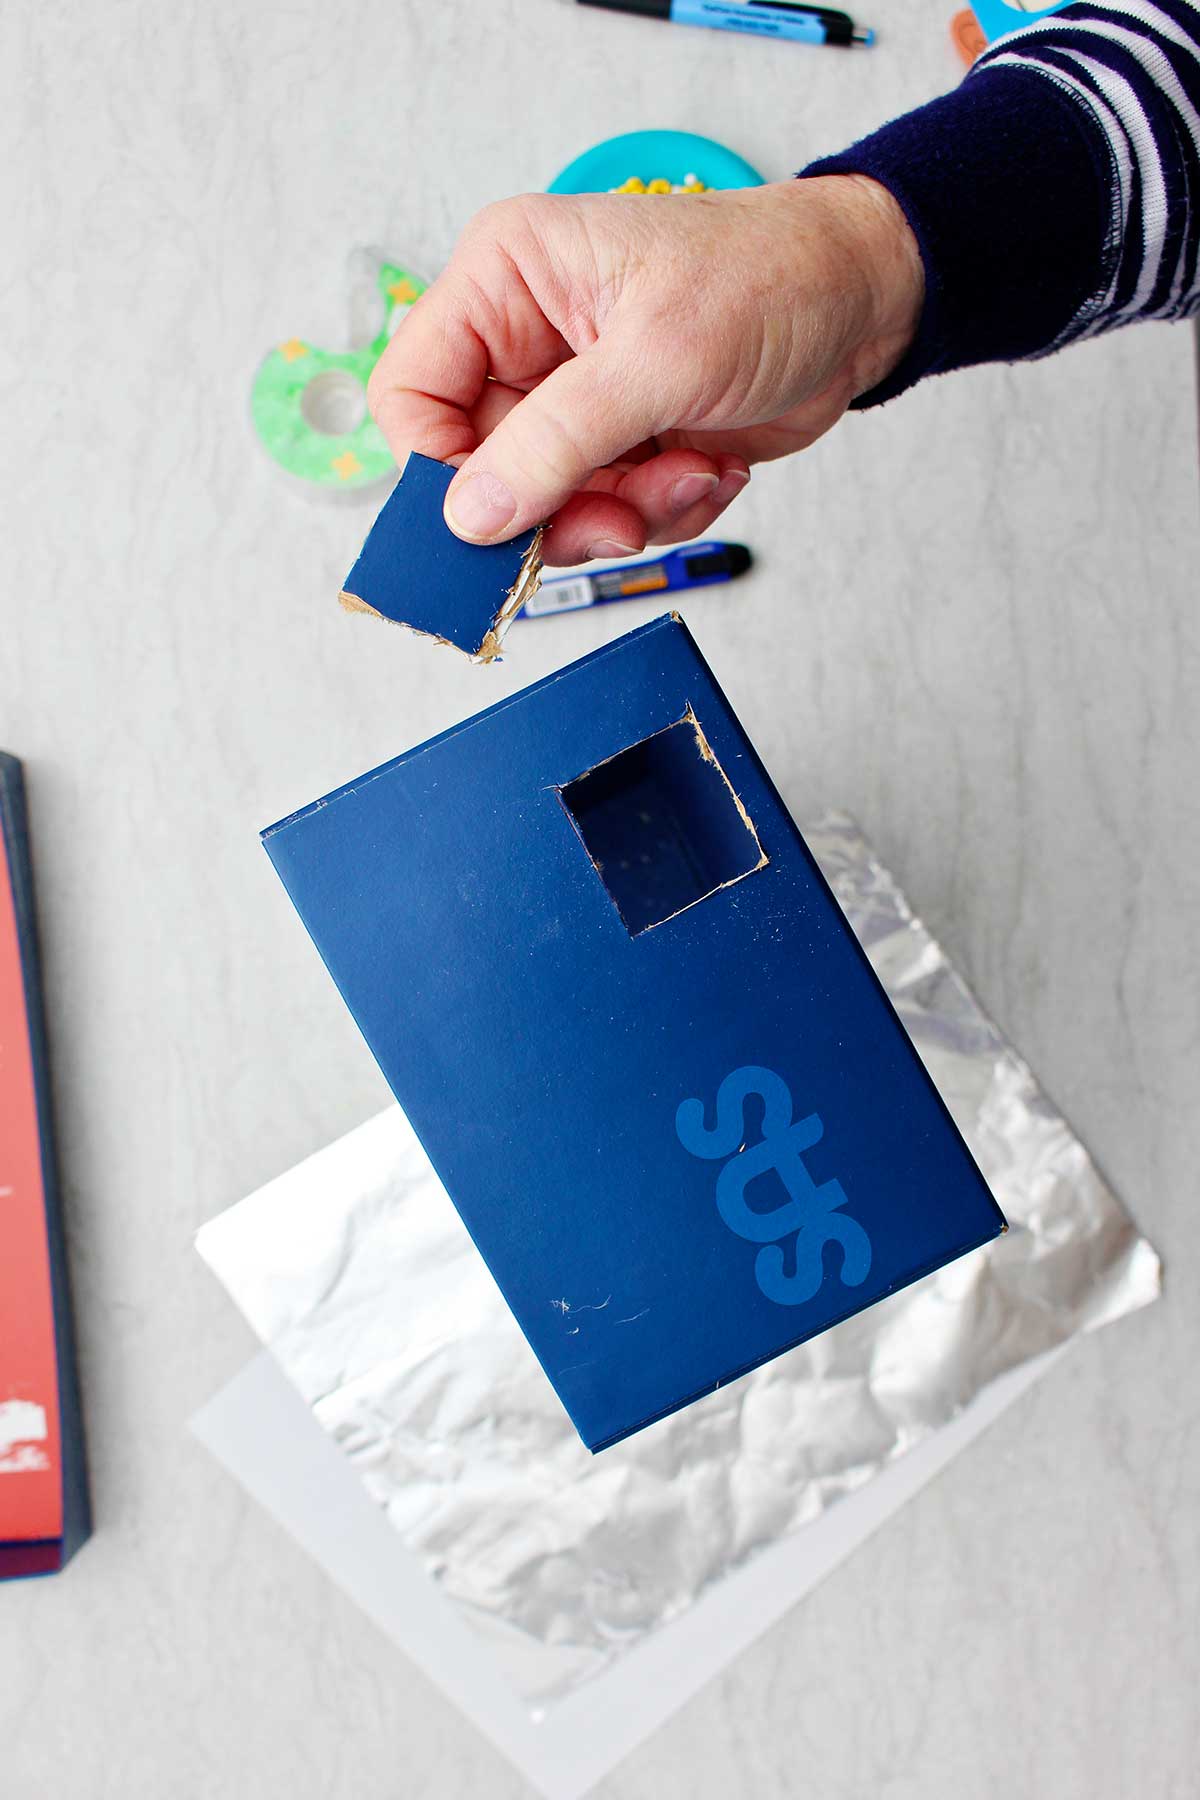
Cutting the box
Begin by marking a 1” square hole in the bottom right area of one end of the shoe box.
Carefully poke an Xacto knife down into the cardboard over and over to make the cut. That is easier than trying to pull the blade through the cardboard. Don’t place your fingers inside the box as you cut.
Note: Use care if you are letting the grands use the Xacto knife, be sure to keep little scientist’s fingers safe!
Creating the pinhole projection
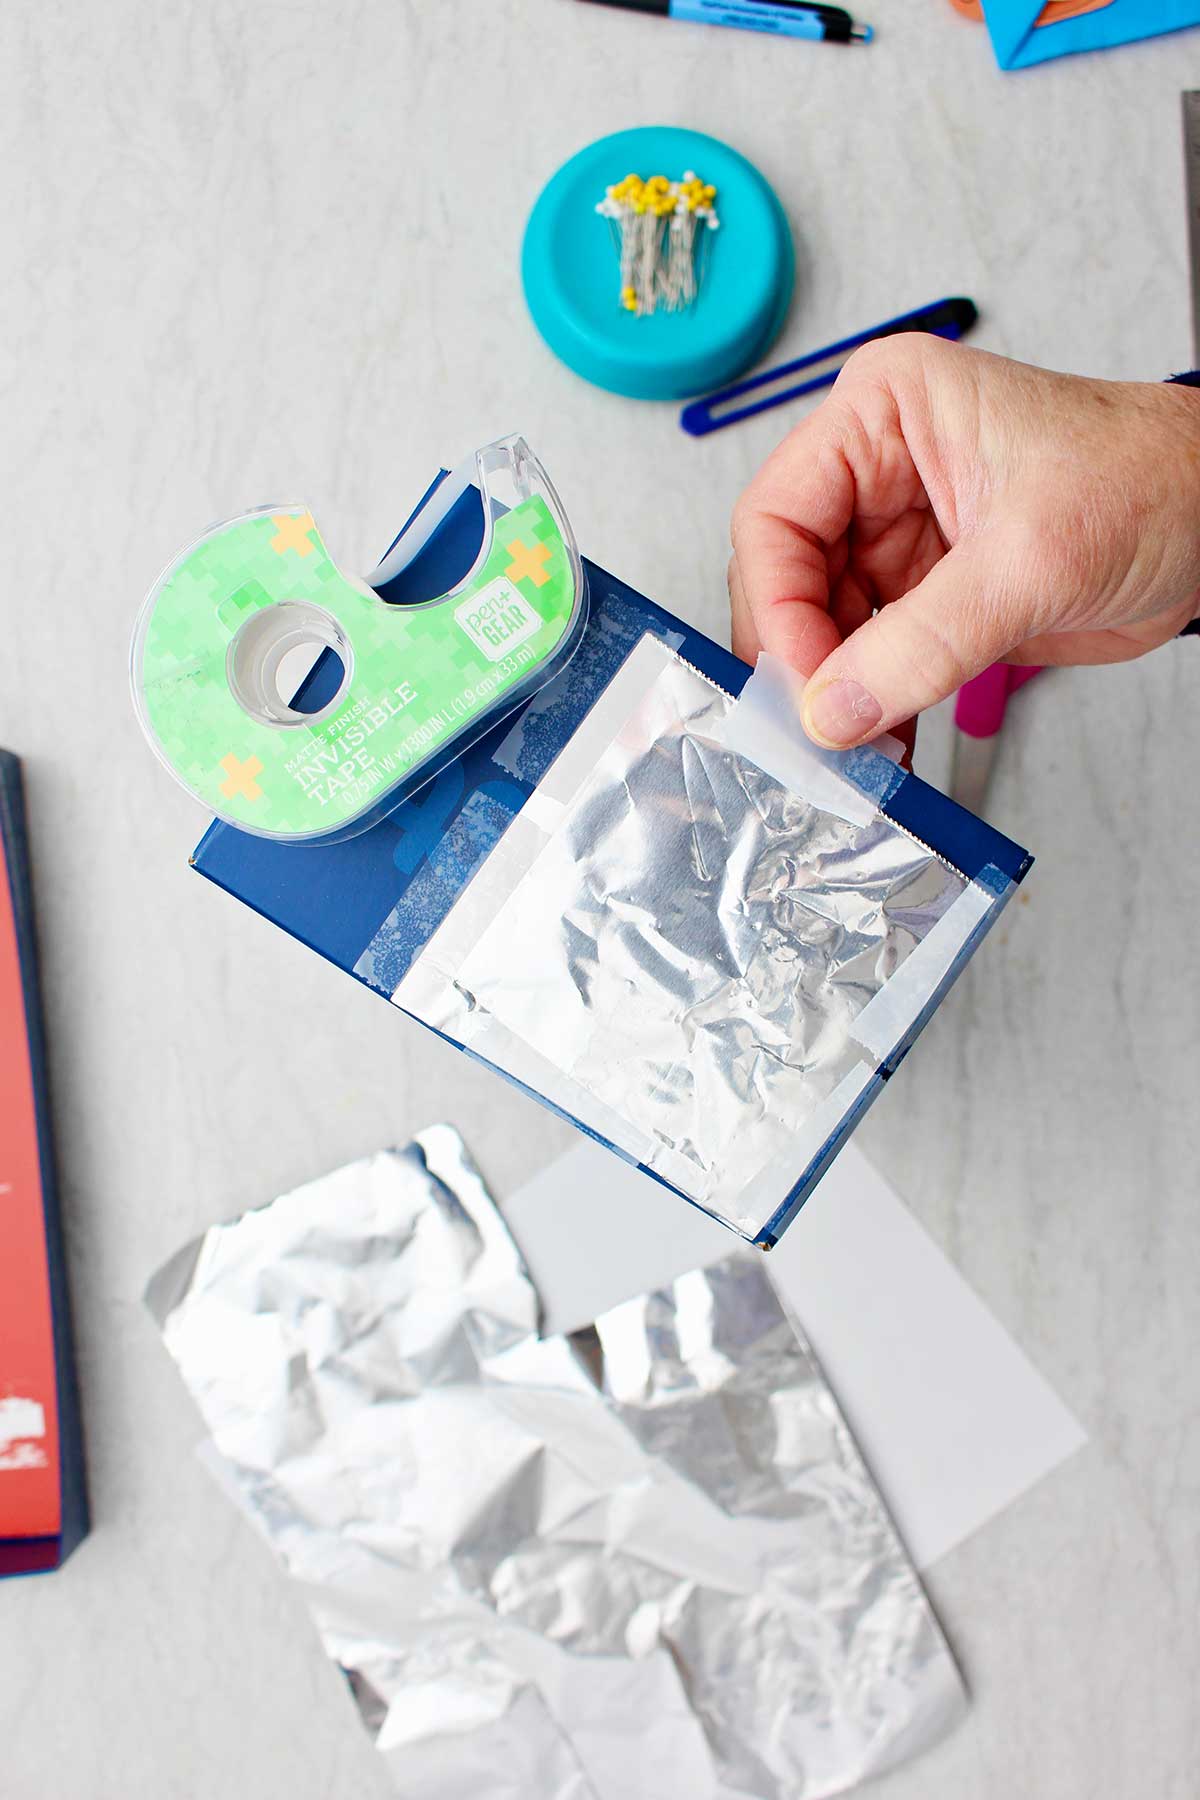
Tape a piece of aluminum foil over the opening so it is completely covered. The foil should be about 3 inches by 3 inches in size.
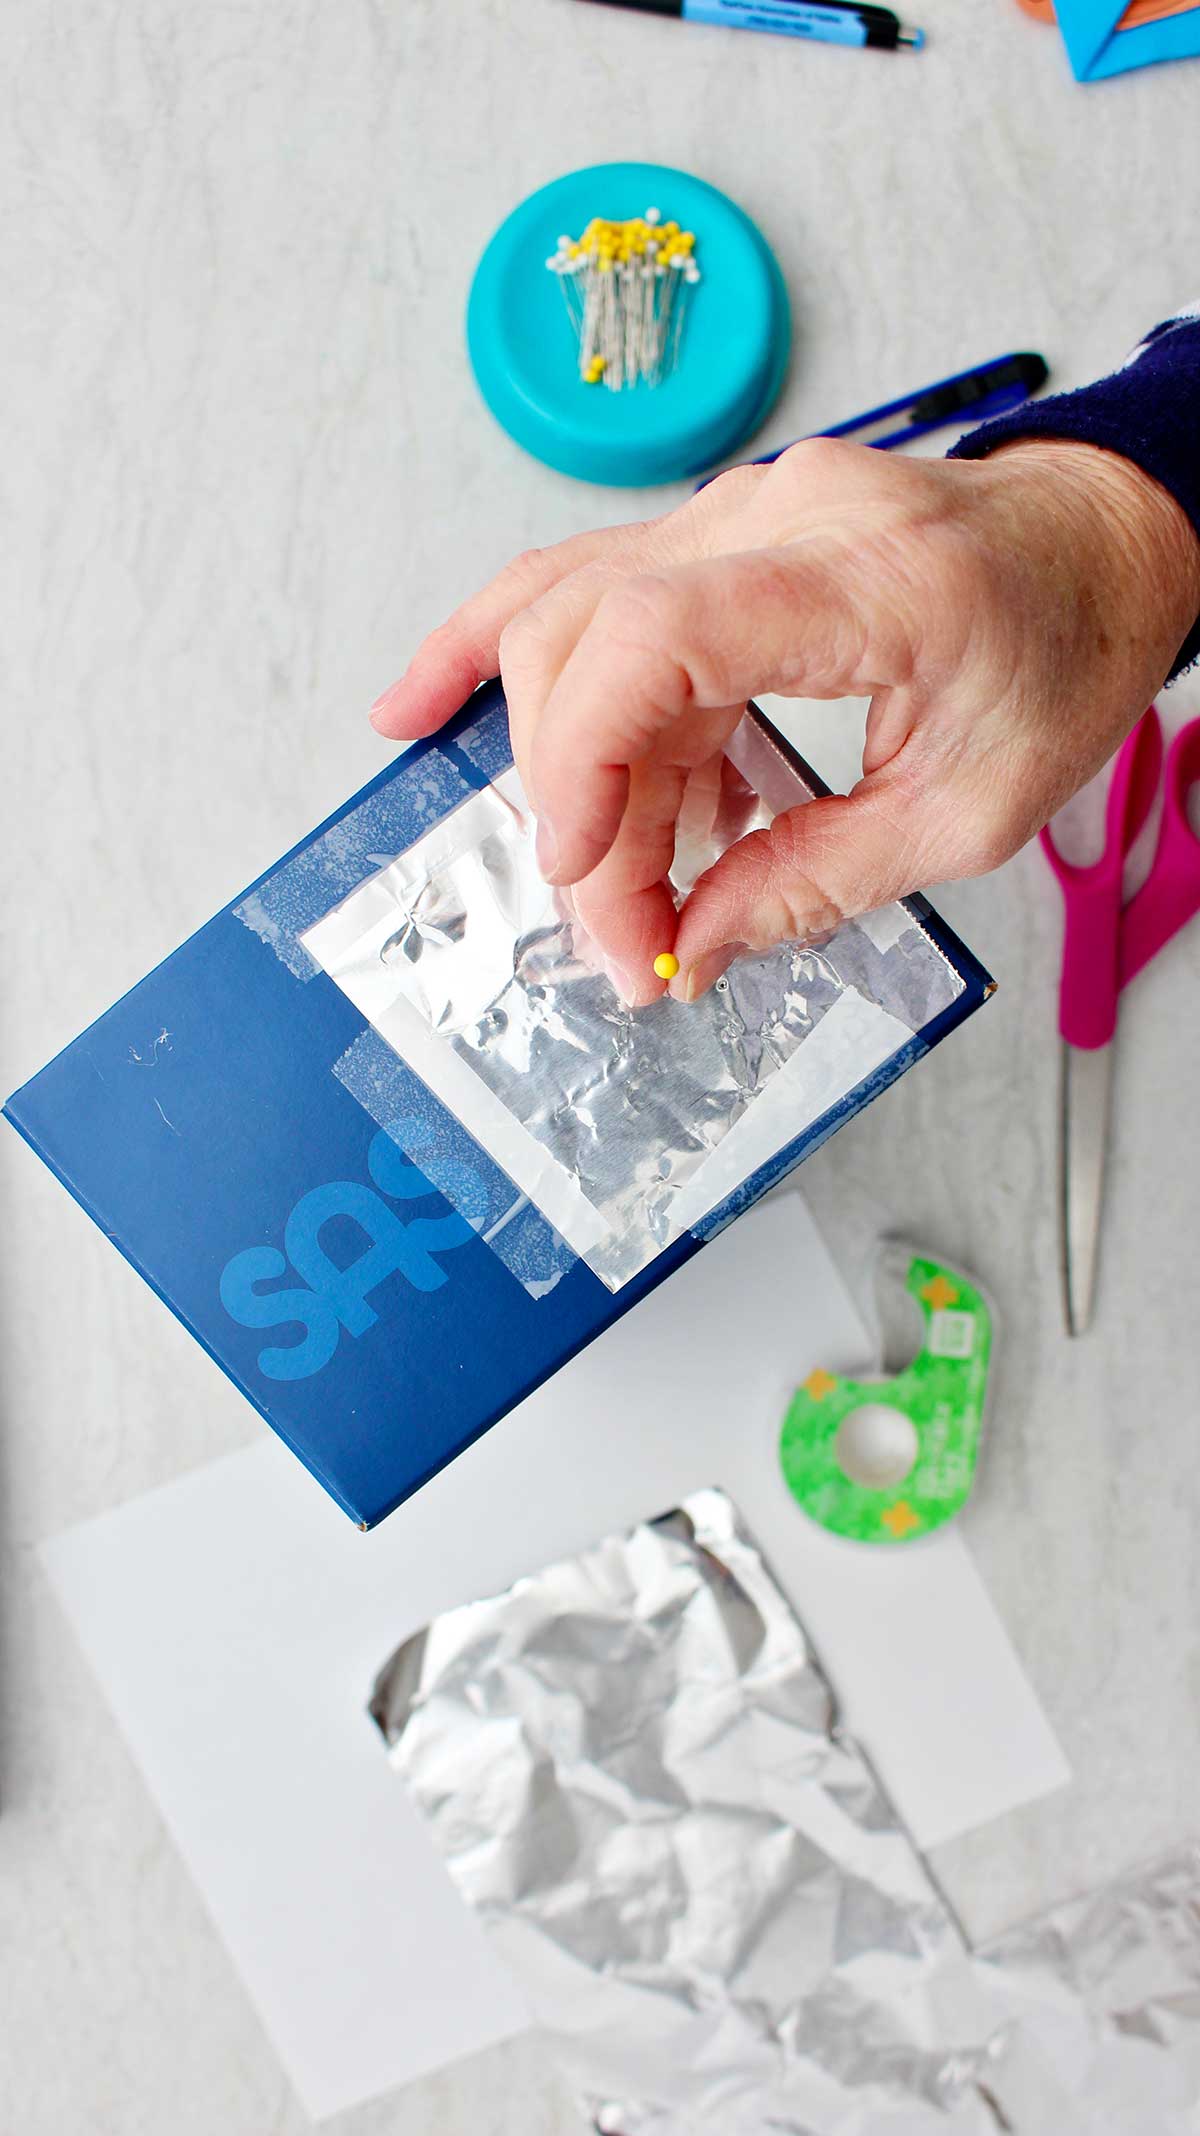
Use a pin or a needle to poke a small hole in the center of the foil.
Tip: The smaller the hole you poke in the foil, the clearer and crisper the dot of light will be on the viewing screen. This may take more than one try with young grands!
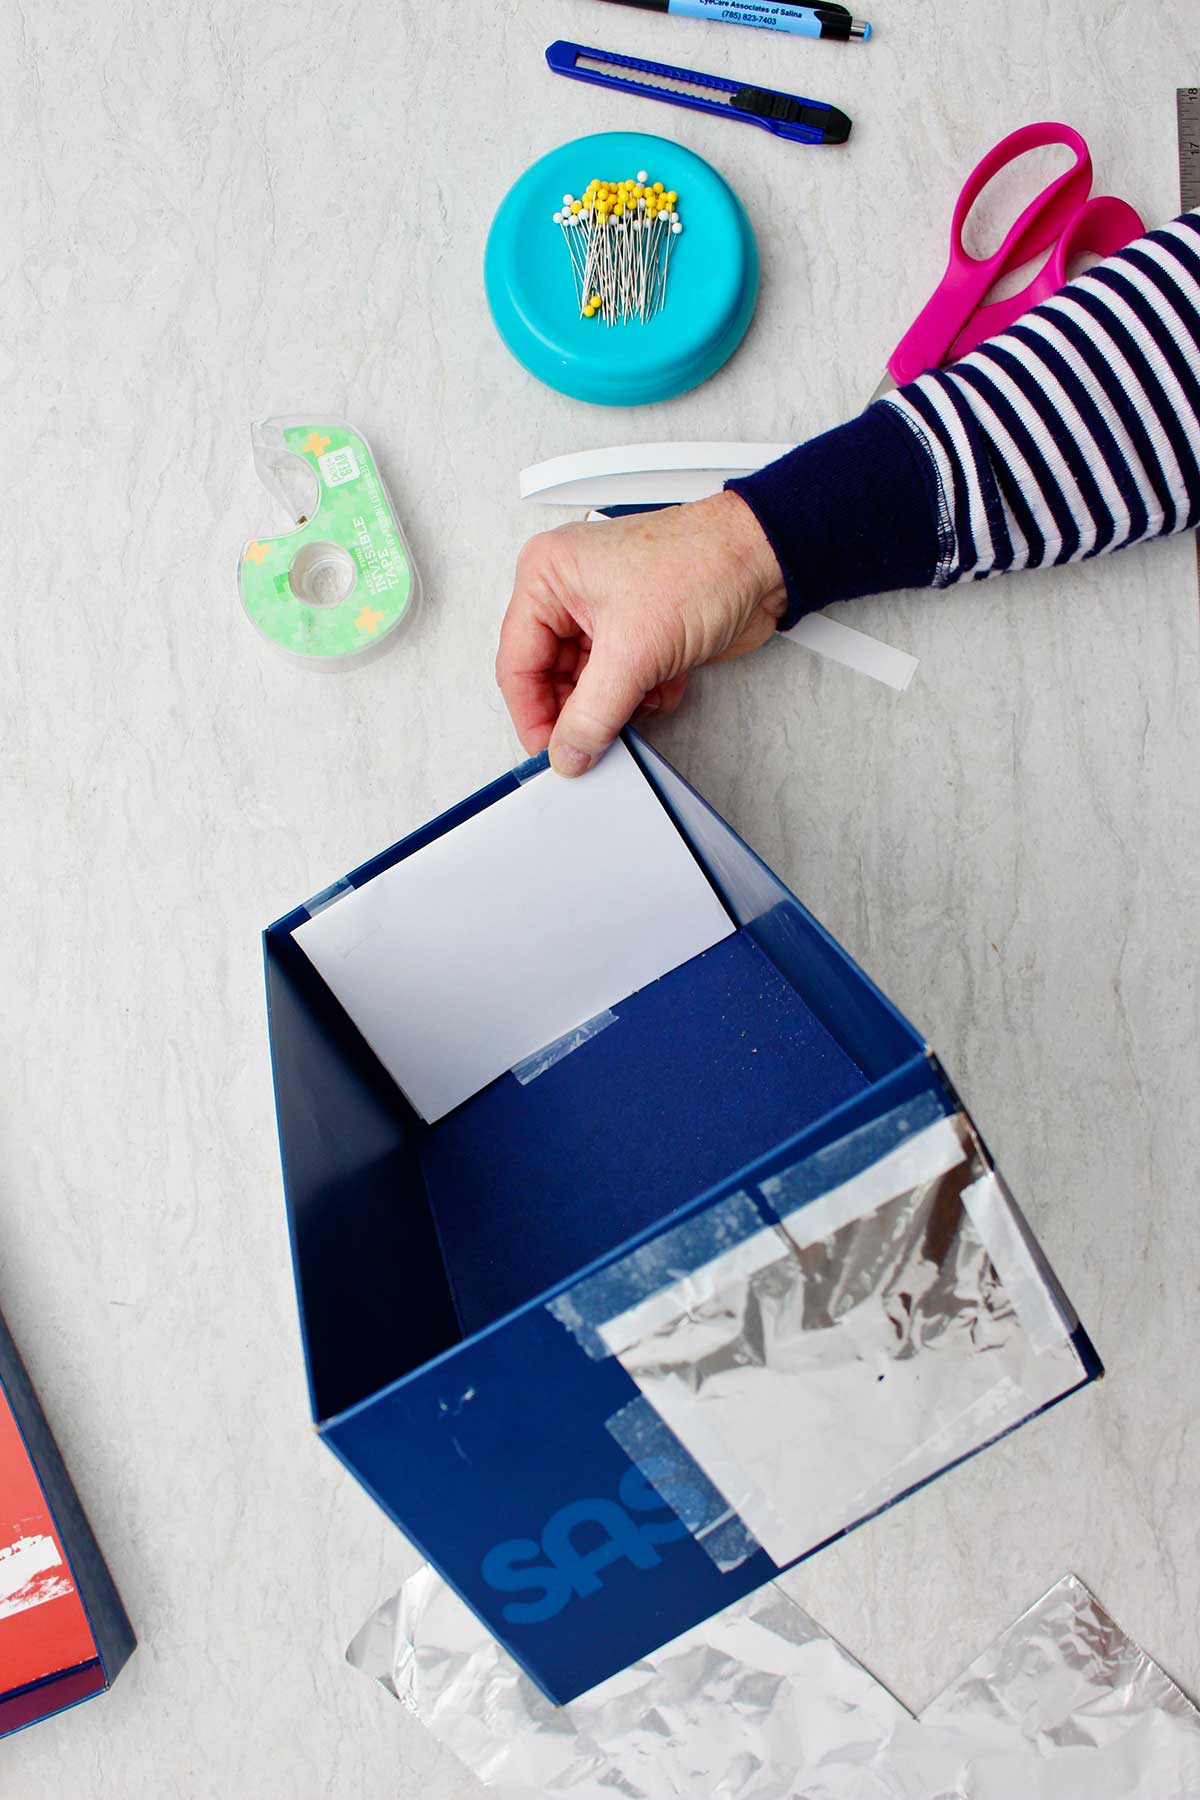
Tape a white piece of paper (copy paper or a piece of card stock paper) on the inside of the box on the opposite end of the shoe box from the aluminum covered cut opening.
This is your viewing screen. The sun's light will come down through the pinhole and shine a solar image onto this white sheet of paper.
The viewing area
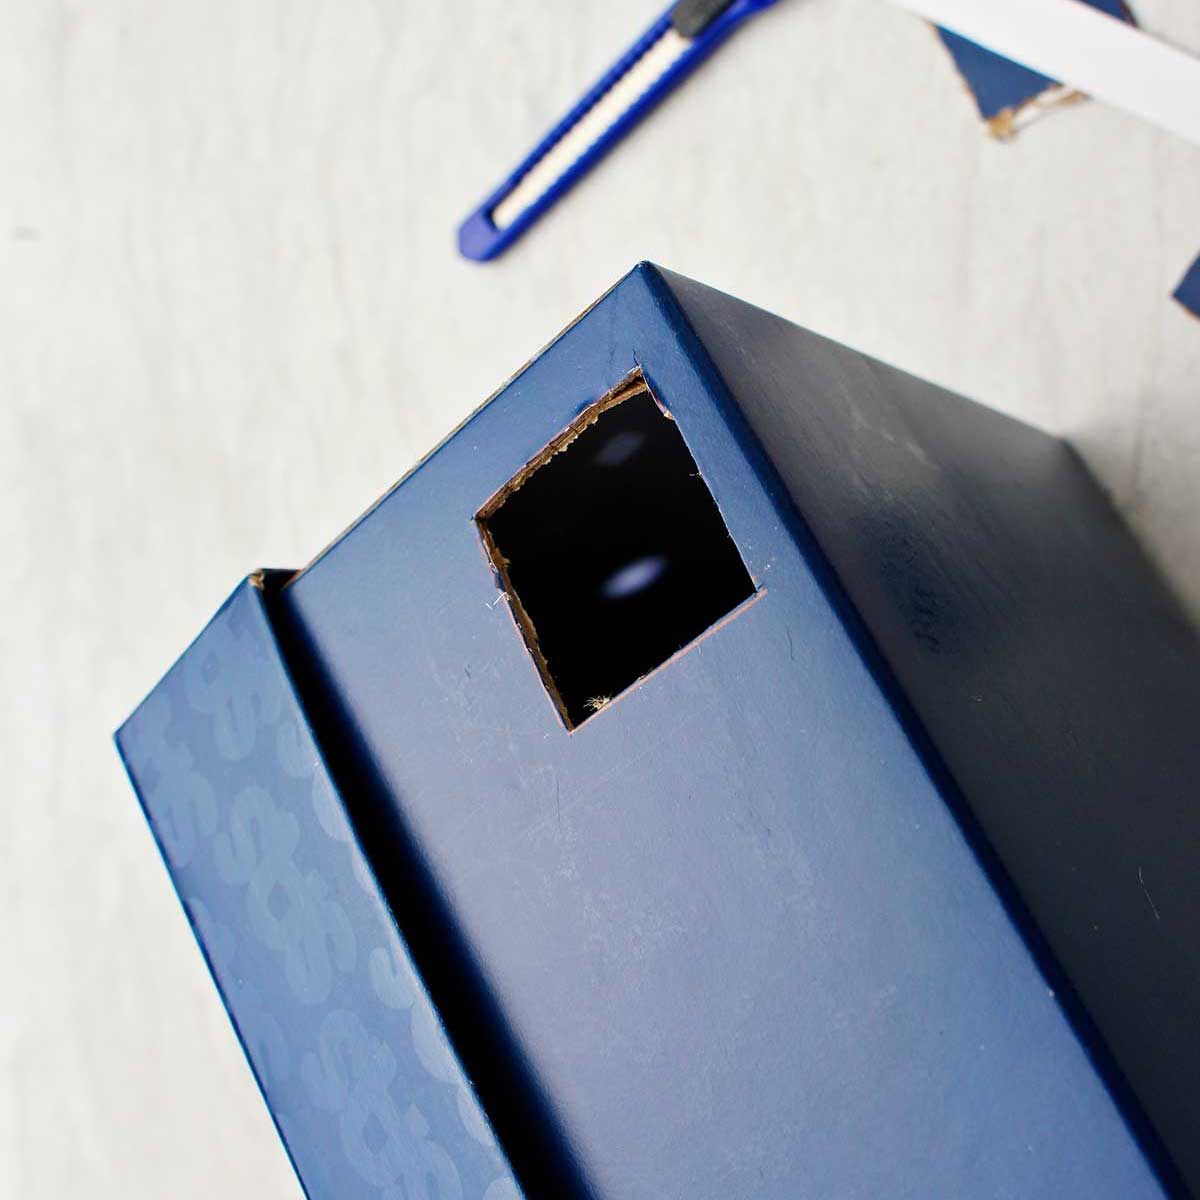
Mark another 1” square hole in the long side of the box close to the end where the white paper was taped inside the box. Cut this out with the Xacto knife.
This is your viewing hole. You will look through this opening and be able to see the sun shape on the white paper.
Note: There is nothing cut or taped to the top of the box, the bottom of the box, or one side of the box. Just both ends and one side of the box.
Using the box projector
Stand with your BACK to the sun.
Hold the box so that the sun's rays hit the aluminum foil end of the box. The sun will stream through the pinhole in the foil and the projected image will go down onto the white paper viewing screen inside the box showing a white dot of light on that white paper.
You can see this white dot by looking through the viewing hole in the side of the box.
This white dot begins as a circle (like the shape of the sun) and will change shape in the same way the sun changes during the eclipse.
Remember, DO NOT look directly at the sun with the naked eye at any point during a solar eclipse as it can damage your eyes.
Solar Eclipse Pinhole Projector Options
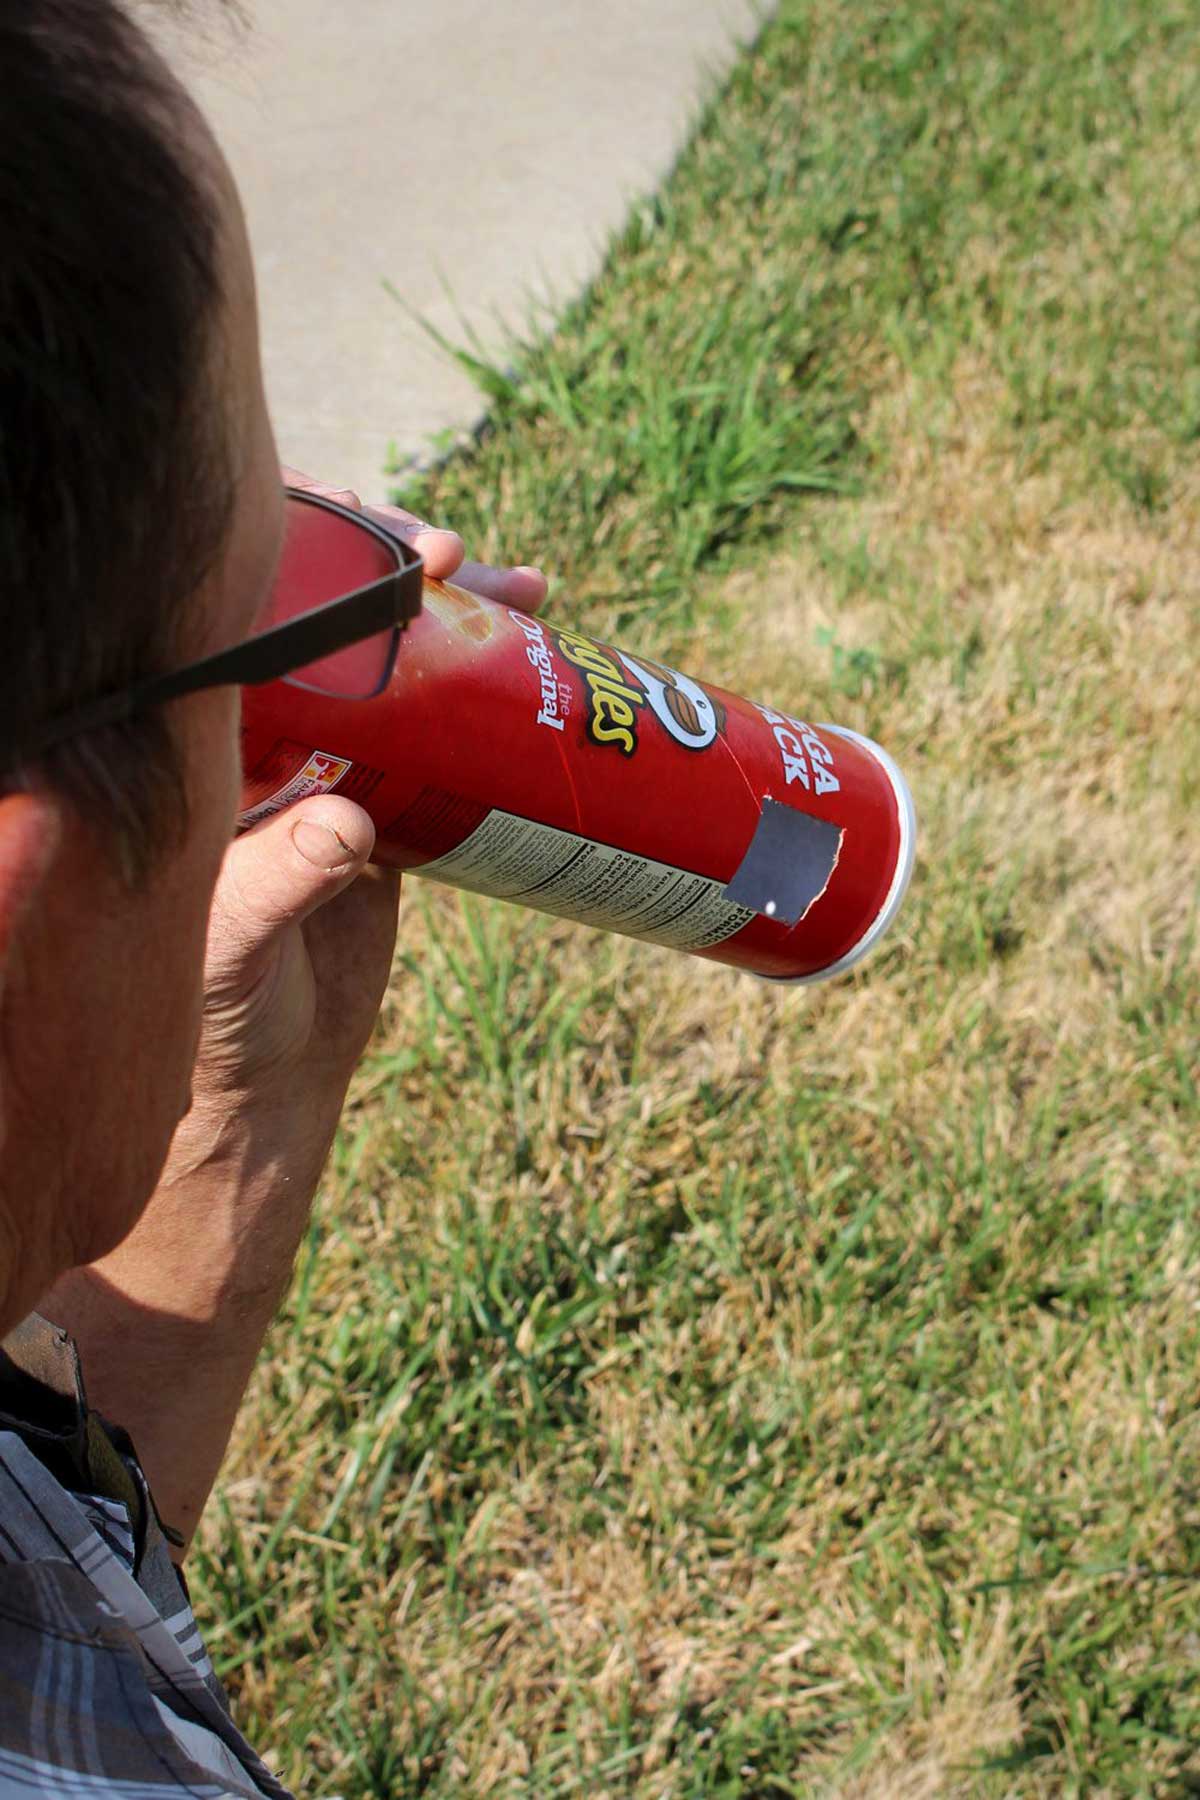
Cardboard tube
You can also make a projector out of a cardboard tube potato chip container.
Just use a hammer and a round, very small nail to poke a tiny hole in the tin end of the container.
Place white paper inside the lid for the viewing screen and cut a viewing hole in the side, close to the viewing screen end of the tube.
Paper with holes
If you can’t get a box and supplies, just use paper plates or cut a piece of cardboard or cardstock into a 5.5x 8.5 size. Use a hole punch to make some holes around the edge.
During the eclipse, hold this paper a few inches over a flat surface. Look underneath the paper to see the sun shine circles on the surface. These circles will change shape during the eclipse as the sun does.
Do not look up at the sun during an eclipse, just at the surface and the sun circles.
Locations for the full solar eclipse
Most of the United States will see at least a partial solar eclipse. But there is a 115-mile-wide path of totality that will run through areas of Mexico, Texas, Oklahoma, Arkansas, Missouri, Indiana, Ohio, Pennsylvania, New York, Maine and Quebec Canada.

Try It Out!
This is Papa trying his hand at using the Solar Eclipse PinHole Projector. This is a good thing to do before the solar eclipse so you can see how to look at an angle through the viewing hole to see the light on the viewing screen.
Geek alert: This is a great moment to get a book or go online to discover more about the sun and how a solar eclipse takes place.
Here are a few reputable online sources of info from the NASA website:
- 2024 Total Solar Eclipse: https://science.nasa.gov/eclipses/future-eclipses/eclipse-2024/
- Total Solar Eclipse Safety: https://science.nasa.gov/eclipses/future-eclipses/eclipse-2024/safety/
- 2024 Total Eclipse (Where & When): https://science.nasa.gov/eclipses/future-eclipses/eclipse-2024/where-when/
Solar Eclipse Safety
Stand with your BACK to the sun and use your Solar Eclipse Pinhole Projector Camera to experience the solar eclipse. DO NOT look directly at the sun at any point of a solar eclipse. It can permanently damage your eyes.
I know a lot of people traveling to where the solar eclipse will be a complete eclipse of the sun. That would be so amazing, but even seeing a partial eclipse is really cool.
Cut a square in your shoe box, then cover it with aluminum foil. Use a needle to poke a hole in the foil, and tape some white paper to the inside of the box as a viewing screen. Cut a second square for your viewing hole and your DIY pinhole projector is finished and ready for use during the eclipse!
You can see the sun represented in a pinhole projector or camera as a white dot. This is from the sun streaming through the pinhole in the foil, projecting down onto the viewing screen. By looking through a pinhole projector or camera, you'll be able to watch the shape of the sun change as it does during an eclipse.
As long as you follow all guidelines correctly, pinhole projectors are very safe! Stand with your back to the sun and watch the eclipse safely on the projector's viewing screen. DO NOT look directly at the sun at any point of a solar eclipse!
More Retro and recycled crafts for kids!
I'm going to call my Solar Eclipse Pinhole Projector RETRO and oh yea, it is a recycled project, too! If you want more fun recycled projects, check out these craft ideas!
- How to Make a Recycled Plastic Bottle Bird Feeder
- Tin Can Carnival Bean Bag Toss Game
- How to Easily Make Recycled Paper
- DIY Recycled Tin Can Stilts
- DIY Cute Purse from a Book Cover
Enjoy!!
If you try this craft, let me know! Go ahead and leave a comment, rate it, and tag a photo with #WelcometoNanas wherever you post.
Come join the fun at https://welcometonanas.com
Supplies You'll Need for a Solar Eclipse Pinhole Projector:
DIY Safe Solar Eclipse Pinhole Projector (From a Box)
Equipment
- Exacto knife
- Scissors
Items Required
Instructions
- Carefully use the exacto knife to cut a 1” square hole in the bottom right area of one end of the shoe box.
- Tape a piece of aluminum foil over the opening so it is completely covered.
- Use the needle to poke a hole in the center of the foil.
- Tape white paper on the inside of the box on the opposite end of the shoe box from the aluminum covered cut opening. This is your viewing screen.
- Cut another 1” square hole in the long side of the box close to the end where the white paper was taped inside the box. This is your viewing hole.
- Stand with your BACK to the sun. Hold the box so that the sun hits the aluminum foil end of the box. The sun will stream through the pinhole in the foil and down onto the white paper viewing screen inside the box showing a white dot of light on that white paper. You can see this white dot by looking through the viewing hole in the side of the box.This white dot begins as a circle (like the shape of the sun) and will change shape in the same way the sun changes during the eclipse.
- Remember, DO NOT look directly at the sun at any point during a solar eclipse as it can permanently damage your eyes.
Video
Notes
This post was originally published in August 2017 and has been updated to add more relevant and detailed content.


Laura says
We'll be watching the eclipse this year! What a great way for kids to safely see it happen.