These cute DIY Animal Masks are an easy craft for kids that only require a few supplies to make! Choose from 16 different animal ideas on the free template and guide and create a quick costume for Halloween, a birthday party, or imaginative play!
Jump to:
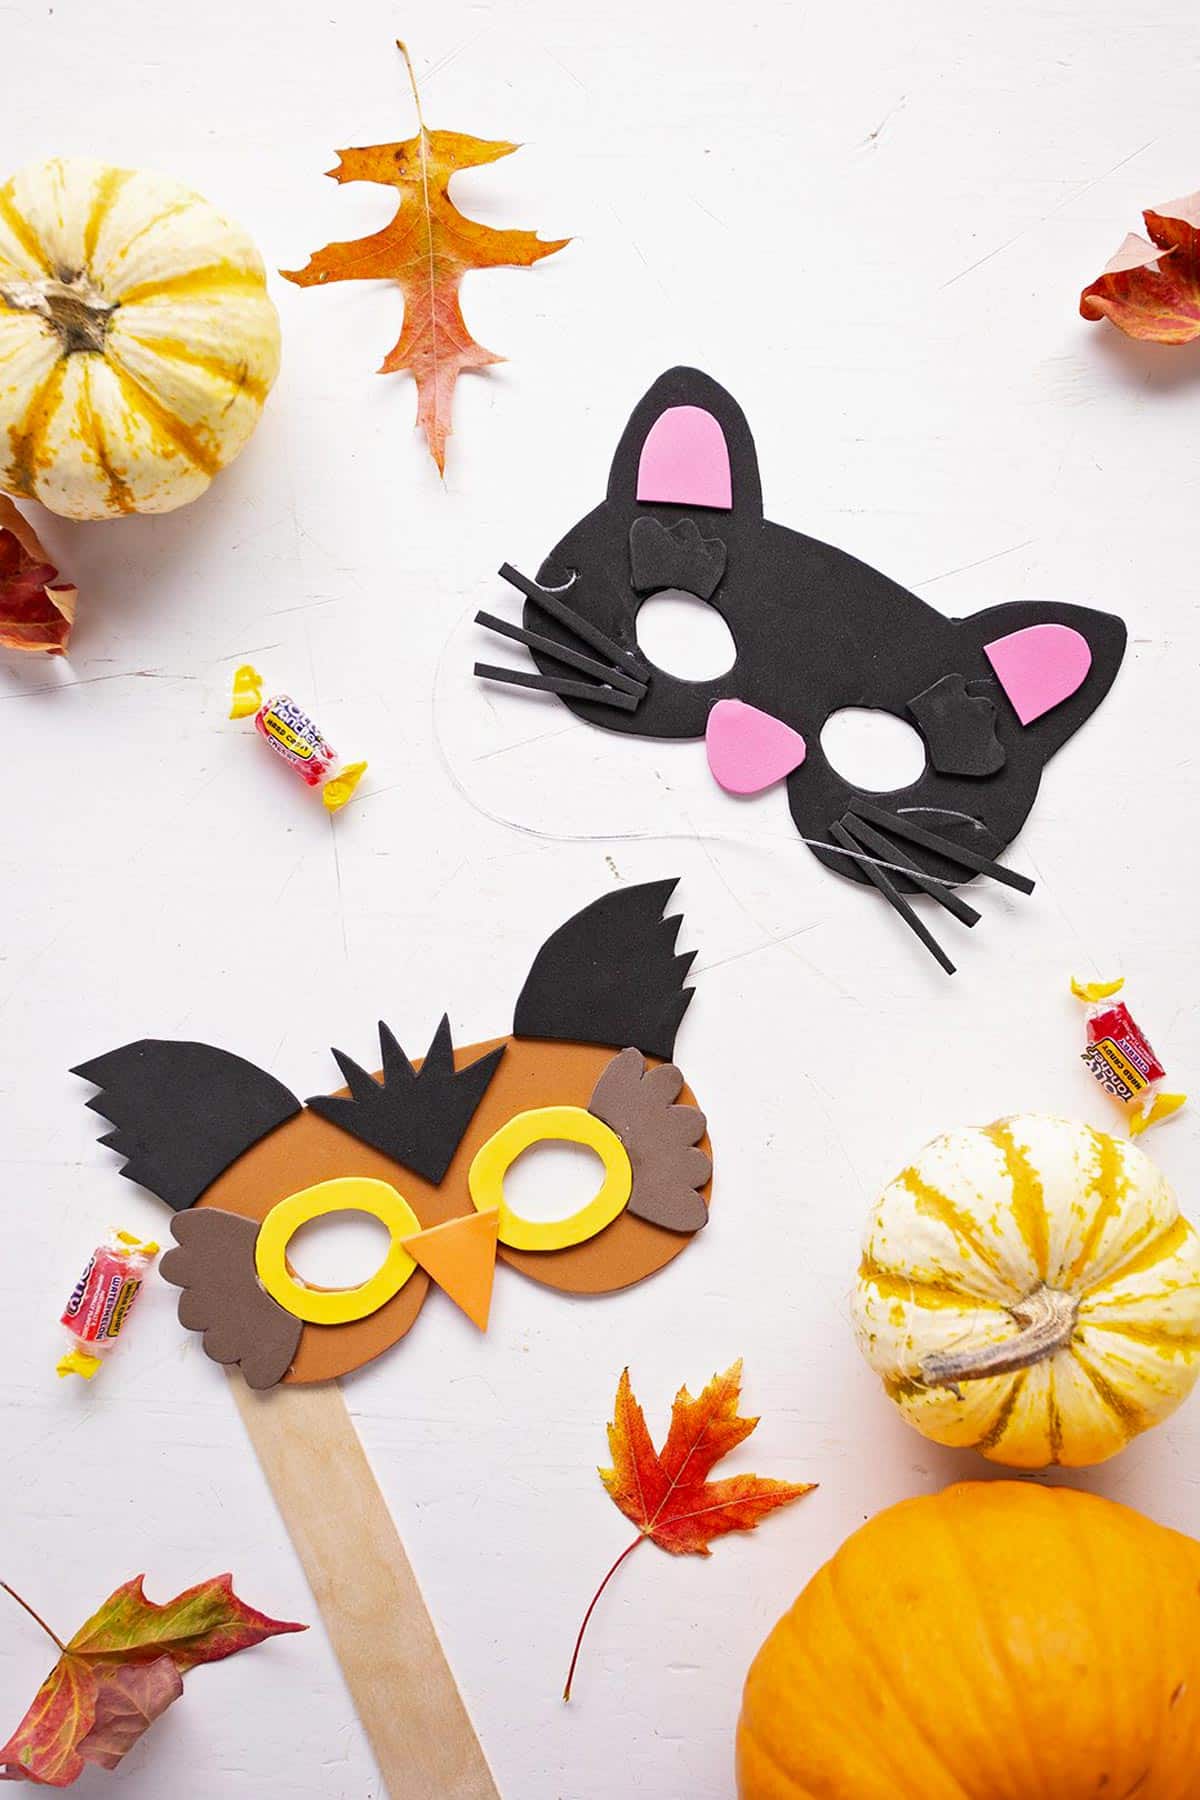
Cute Craft Alert: DIY Animal Masks!
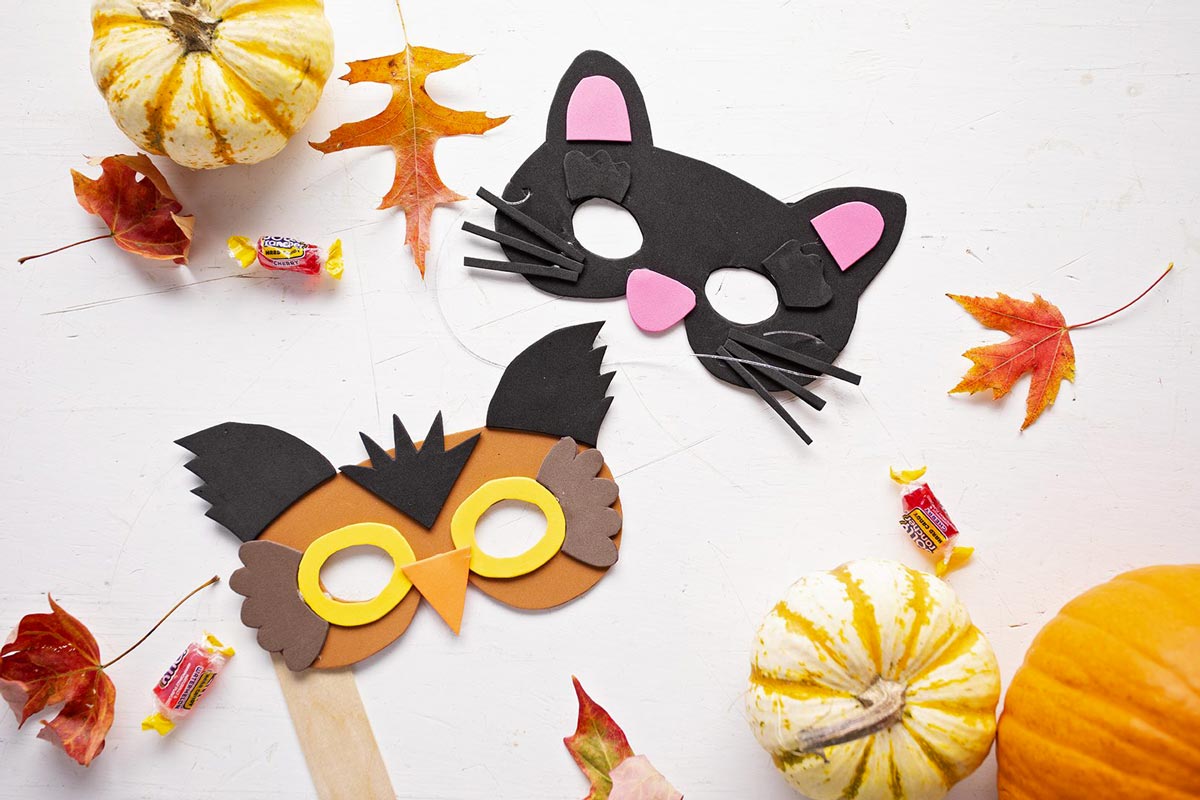
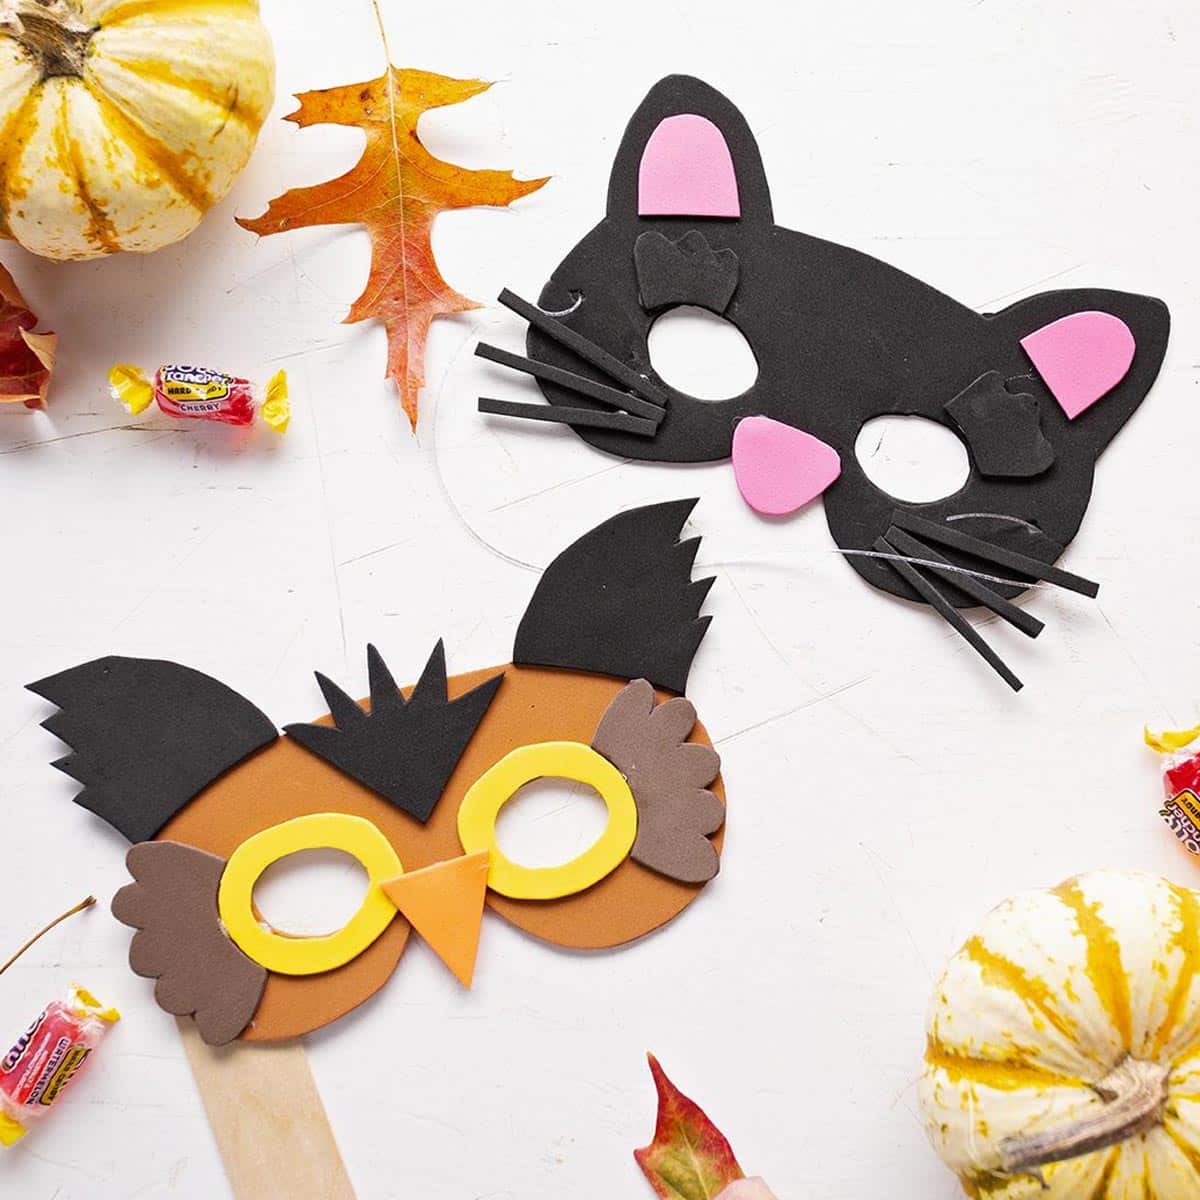
Who let all these animals loose? I see jungle animals, farm animals and woodland animal masks everywhere!
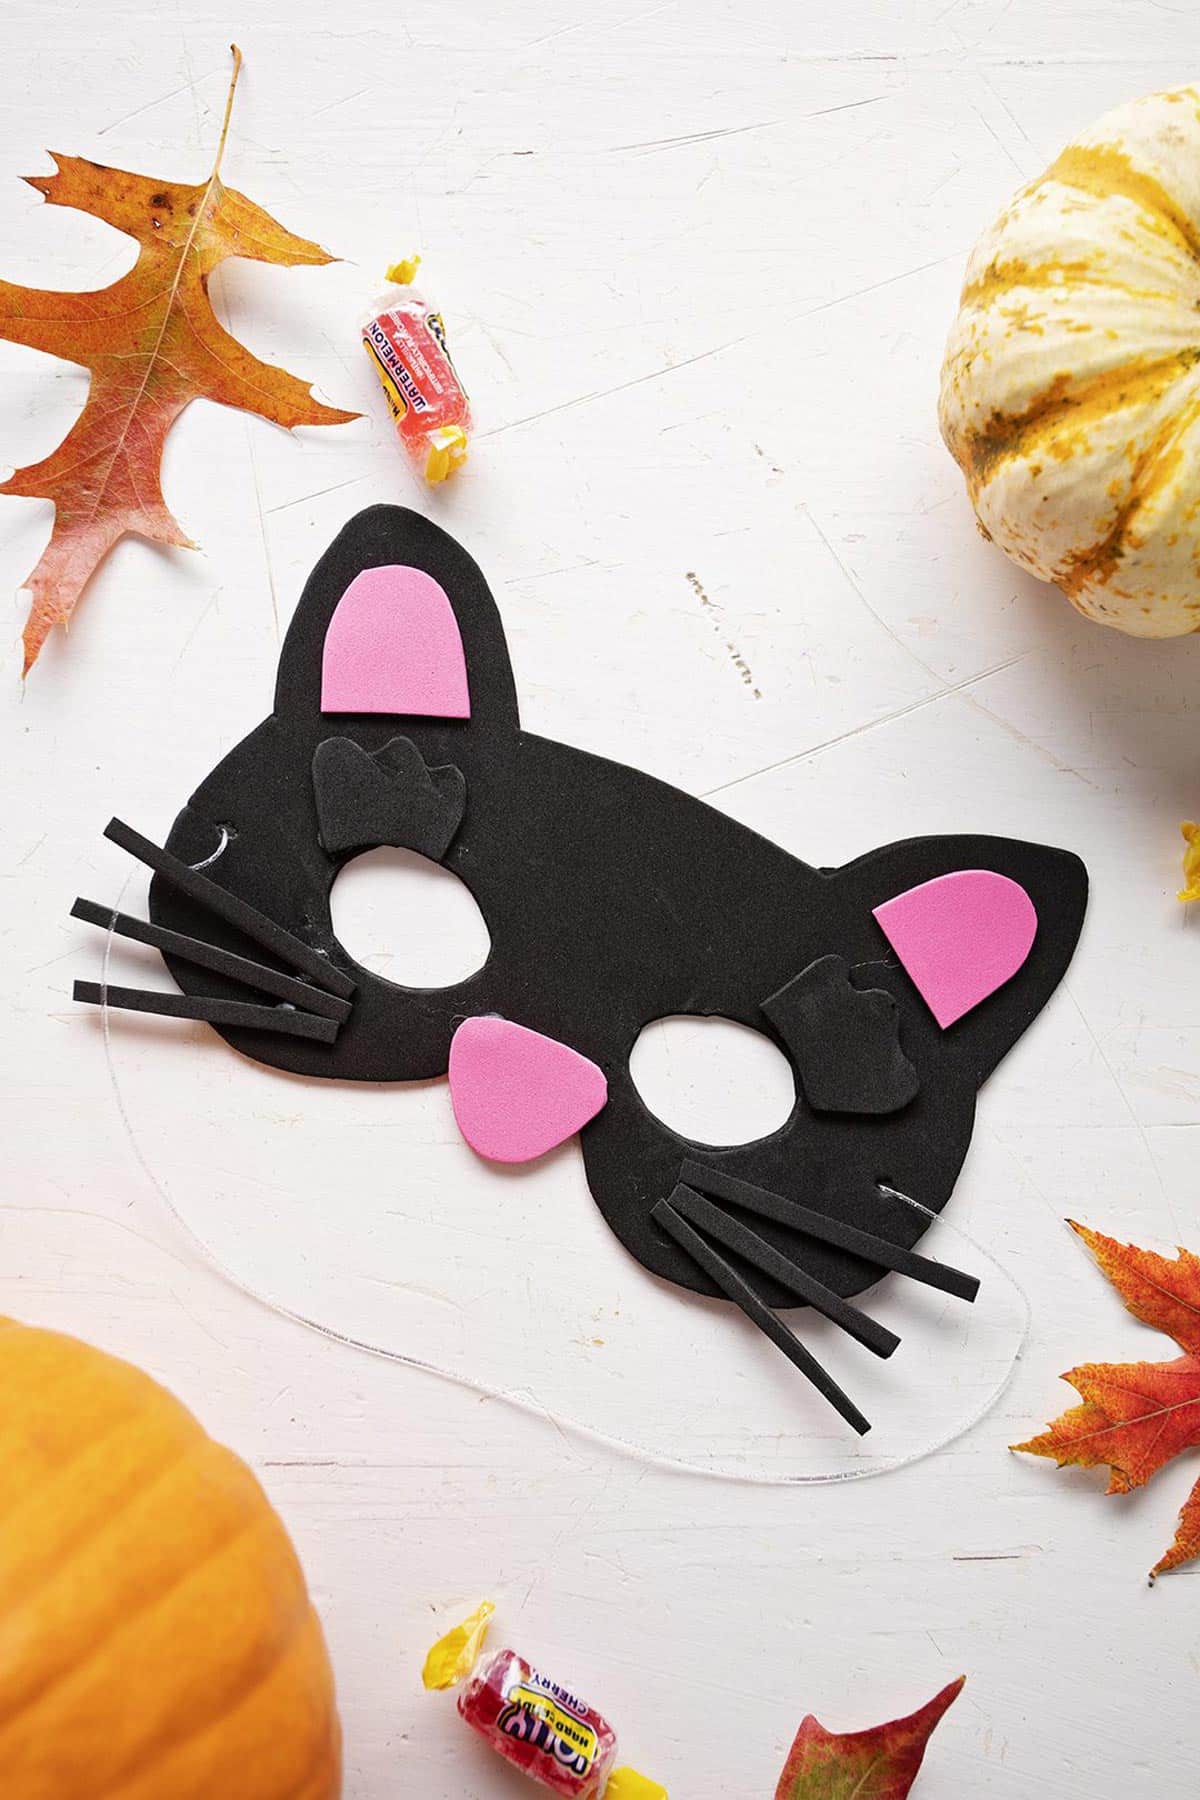
These easy DIY Animal Masks from Craft Foam are quick to make, and so much fun for imaginative play. They are perfect for a Halloween party, a quick Trick-or-Treating costume addition, or they'd be so much fun to make for an animal themed birthday party!
Choose from 16 unique ideas to create your child's new favorite animal mask! What animal strikes your child’s fancy?
DIY Animal Mask Video
Watch how you and your kiddos can make your favorite animal masks from the free pattern and enjoy all the imaginative play that comes along with a new costume piece!

Supplies to Make Animal Masks for Kids
You don't need much to bring these cute animal masks to life!
- Easy DIY Animal Masks from Craft Foam Template and Guide: Print out two copies of the mask templates - one for the mask shape and one for the extra little pieces for different animals. You'll find the free patterns for the mask (one child-sized, one adult-sized), as well as drawing examples for 16 different animals kids can create!
- Craft foam: I was pondering what material to make these masks out of and remembered some craft foam down in my craft stash from a project long ago. The foam handled so nicely and glued together easily. Why haven’t I used this more often in projects? I’m excited for you to try it too! I found a great stack of craft foam in a package. The package had craft foam in a variety of colors. There were 80 Bright Foam Sheets in 5.5 x 8.5 inches in size. The foam comes in larger sheets but this size was perfect for the masks.
- Elastic Cord (optional): If the child wants to wear the mask around their head, you'll want some heavy duty elastic cord. This will be attached to the sides of the mask through a hole made with a paper punch.
- Jumbo Popsicle Stick (optional): The other option is to hold the mask in front of your face. For this you'll need a large paddle pop stick (popsicle stick) to attach to the back of the mask. A small wooden dowel could work as well!

Steps to Make DIY Animal Masks
The kids can start by choosing the kind of animal they'd like to make. Cut a mask from the basic mask pattern out of the base color of the animal you have chosen.
For example, the lion mask might be orange and the pig mask would be light pink. This basic mask will act as a base on which to glue the additional decorative pieces.
Draw the additional pieces for the animal mask on the second printed pattern. Sketch the larger ears, inner ears, noses, circles around the eyes, lashes, and other extras.
Cut these pieces out of the designated colors of craft foam. Set them on the base mask to make sure they fit well and look as you would like.
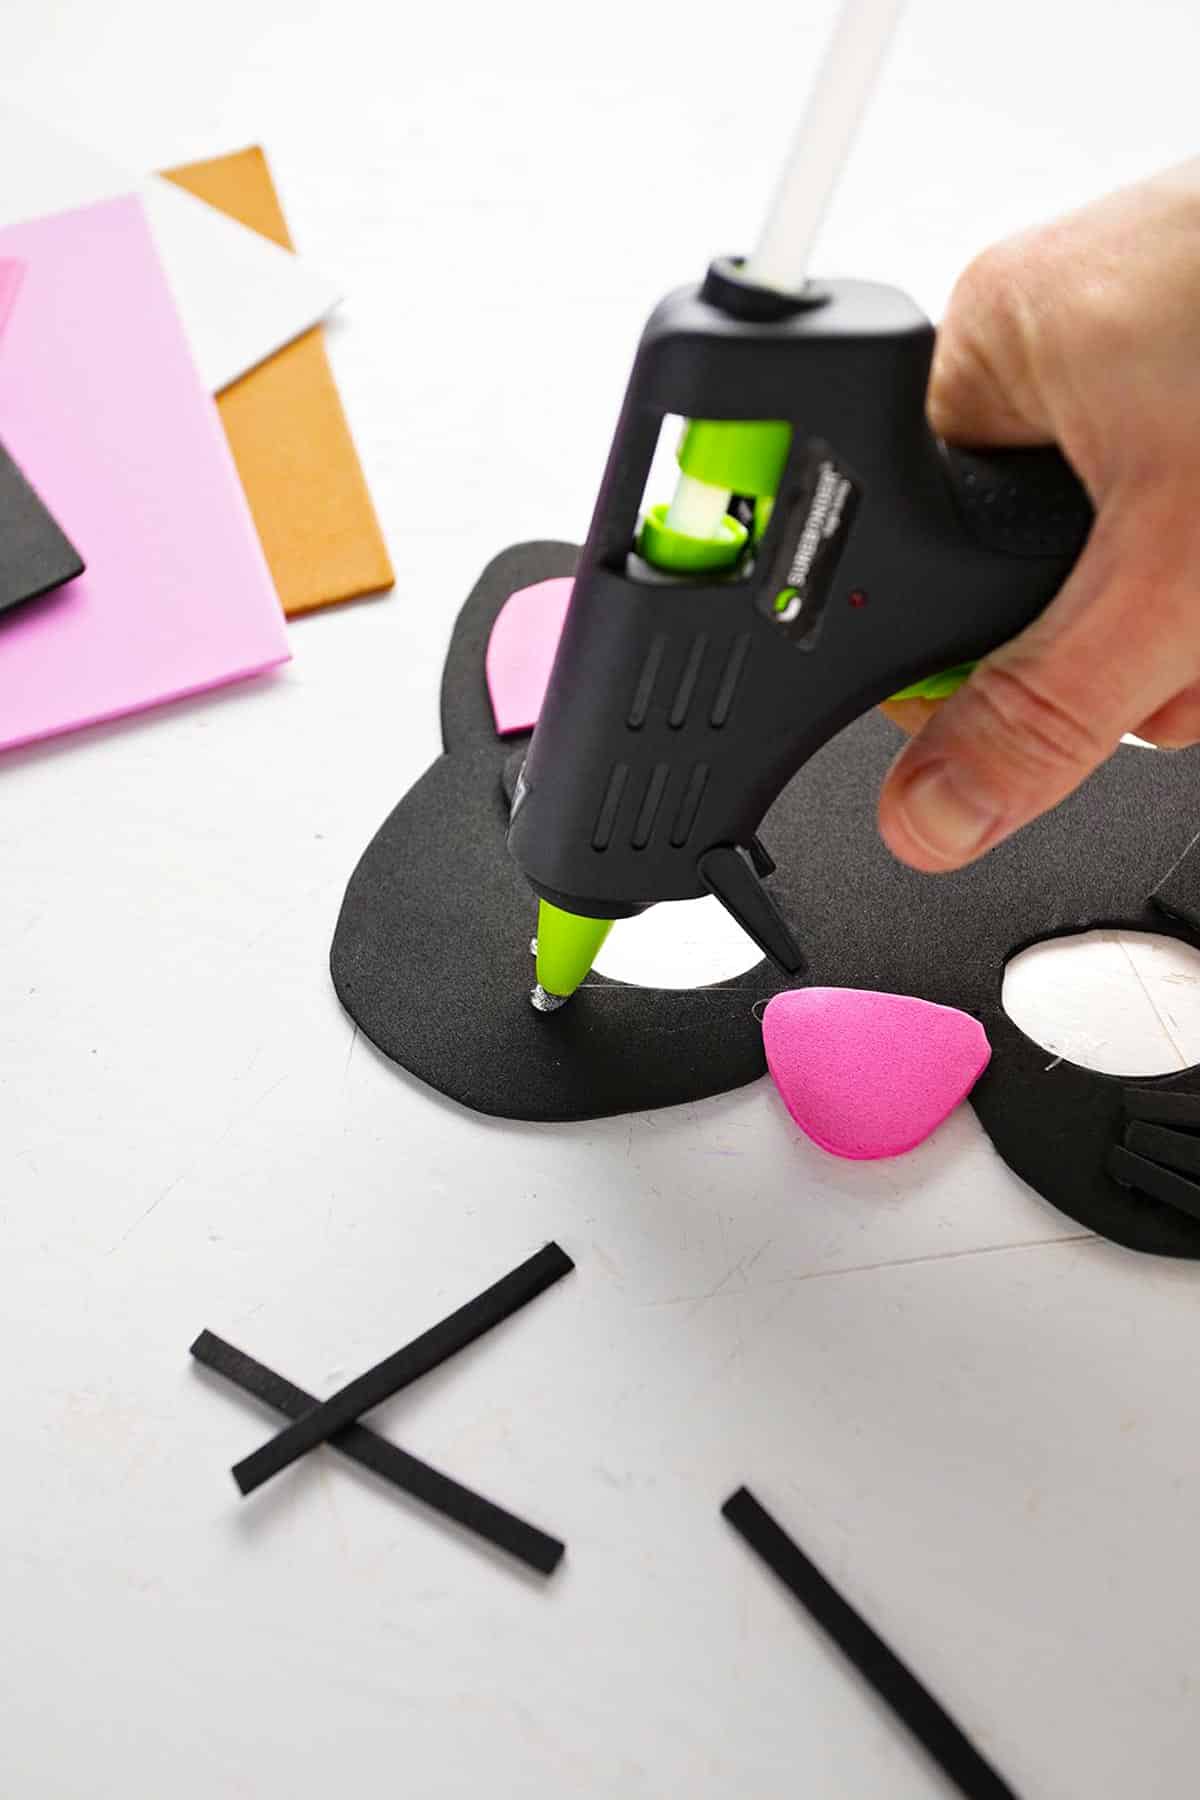
Glue the additional pieces on the base mask using hot glue. Sometimes there will be a layer of foam on top of a layer of foam on top of the base mask. The layers give the mask some dimension. Feel free to add extra touches of your own to the mask you are making!
Choose how you want to wear your mask, either secured with an elastic cord or held with a popsicle stick in front of the face. These masks come together fast, so you might make more than one!
Craft Tips
The full recipe instructions can be found below, but here are a few tips to help you along the way!
- Hot Glue Help: Of course, using hot glue may be something you do for younger children, if they aren’t old enough to handle the glue gun themselves. Watch your fingers as you push the pieces together in case some hot glue squishes out the side!
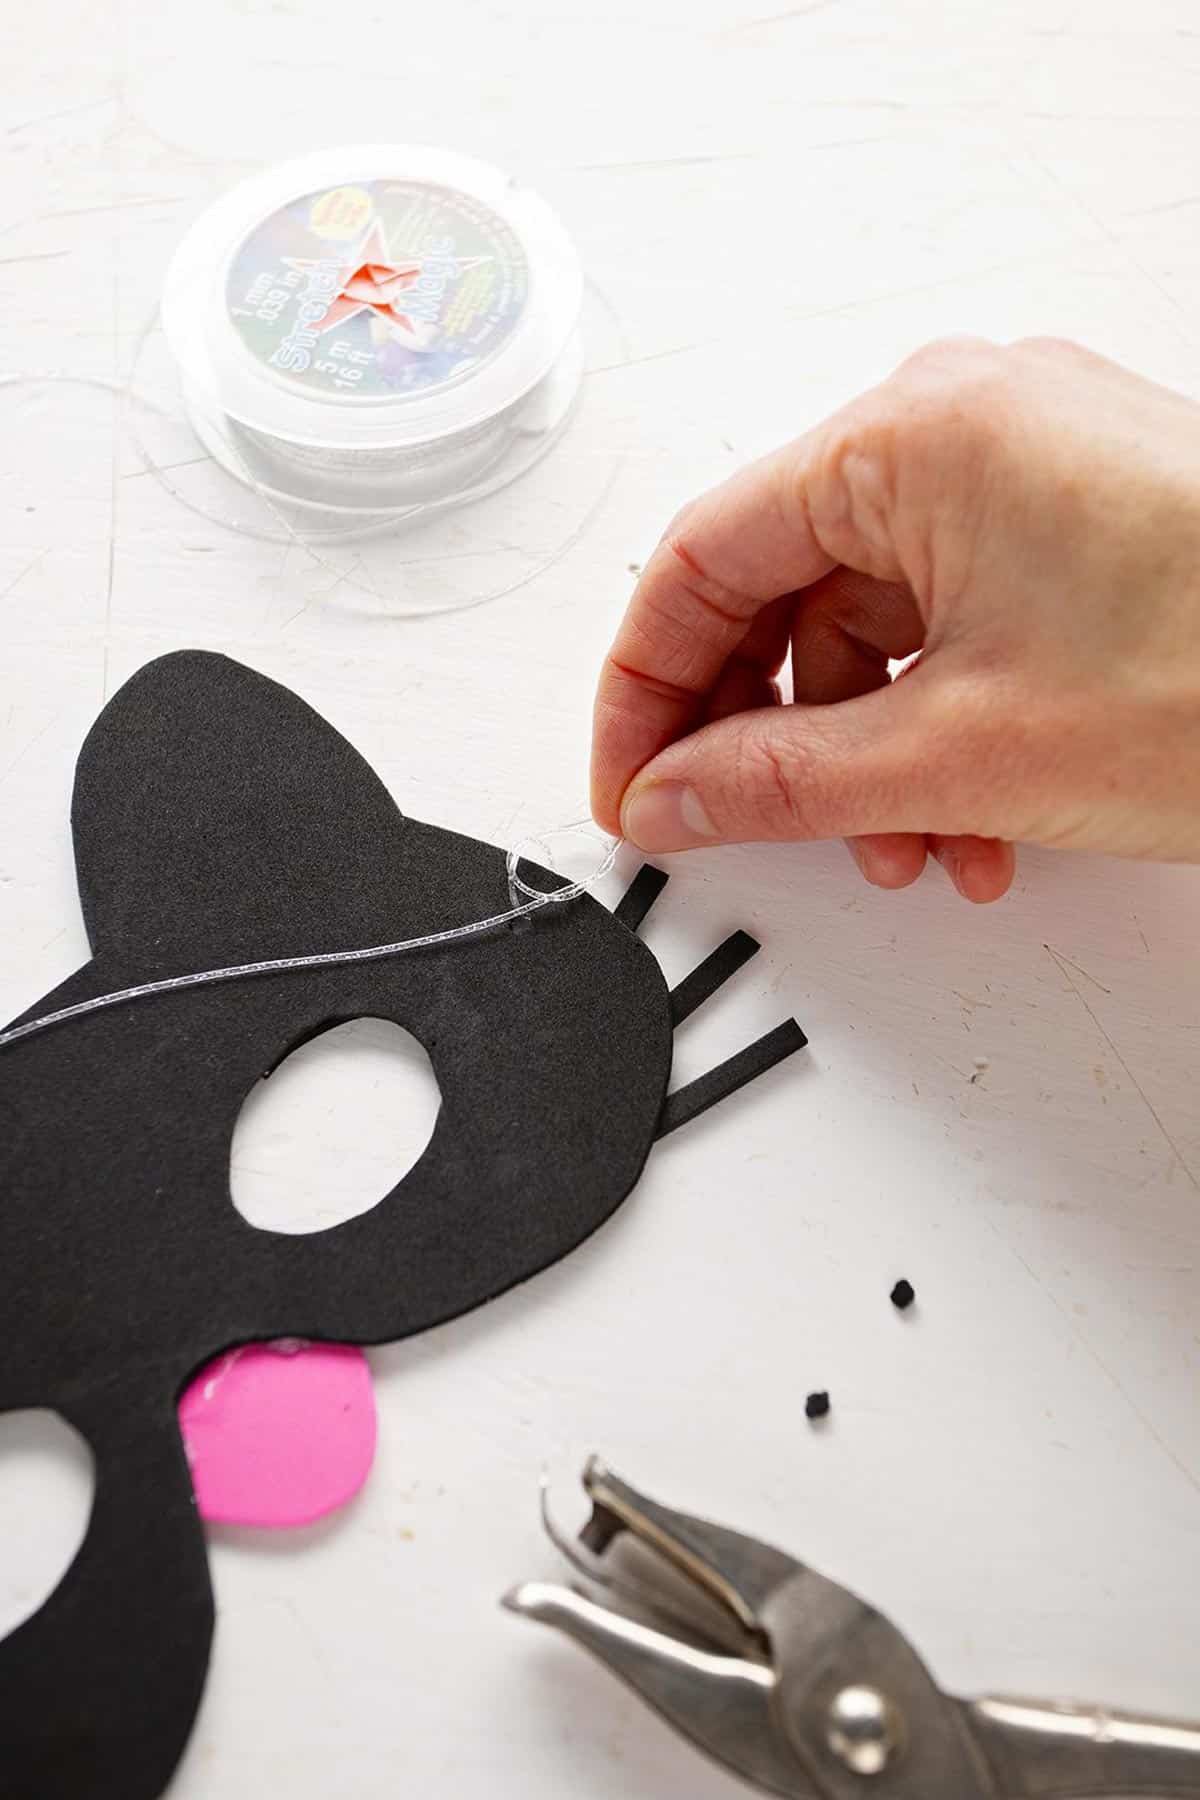
- To Secure the Mask Around the Head: The first way to wear your mask is to attach elastic strings that goes around the back of the head. Make a hole in the base mask on either side, about ½ inch from the edge (we used a handheld paper hole punch). Use a heavy weight craft elastic to tie on one side of the mask, go around the back of the head and tie on the other side of the mask. Be sure to fit the elastic bands to your child’s head size so it stays on and is comfortable.
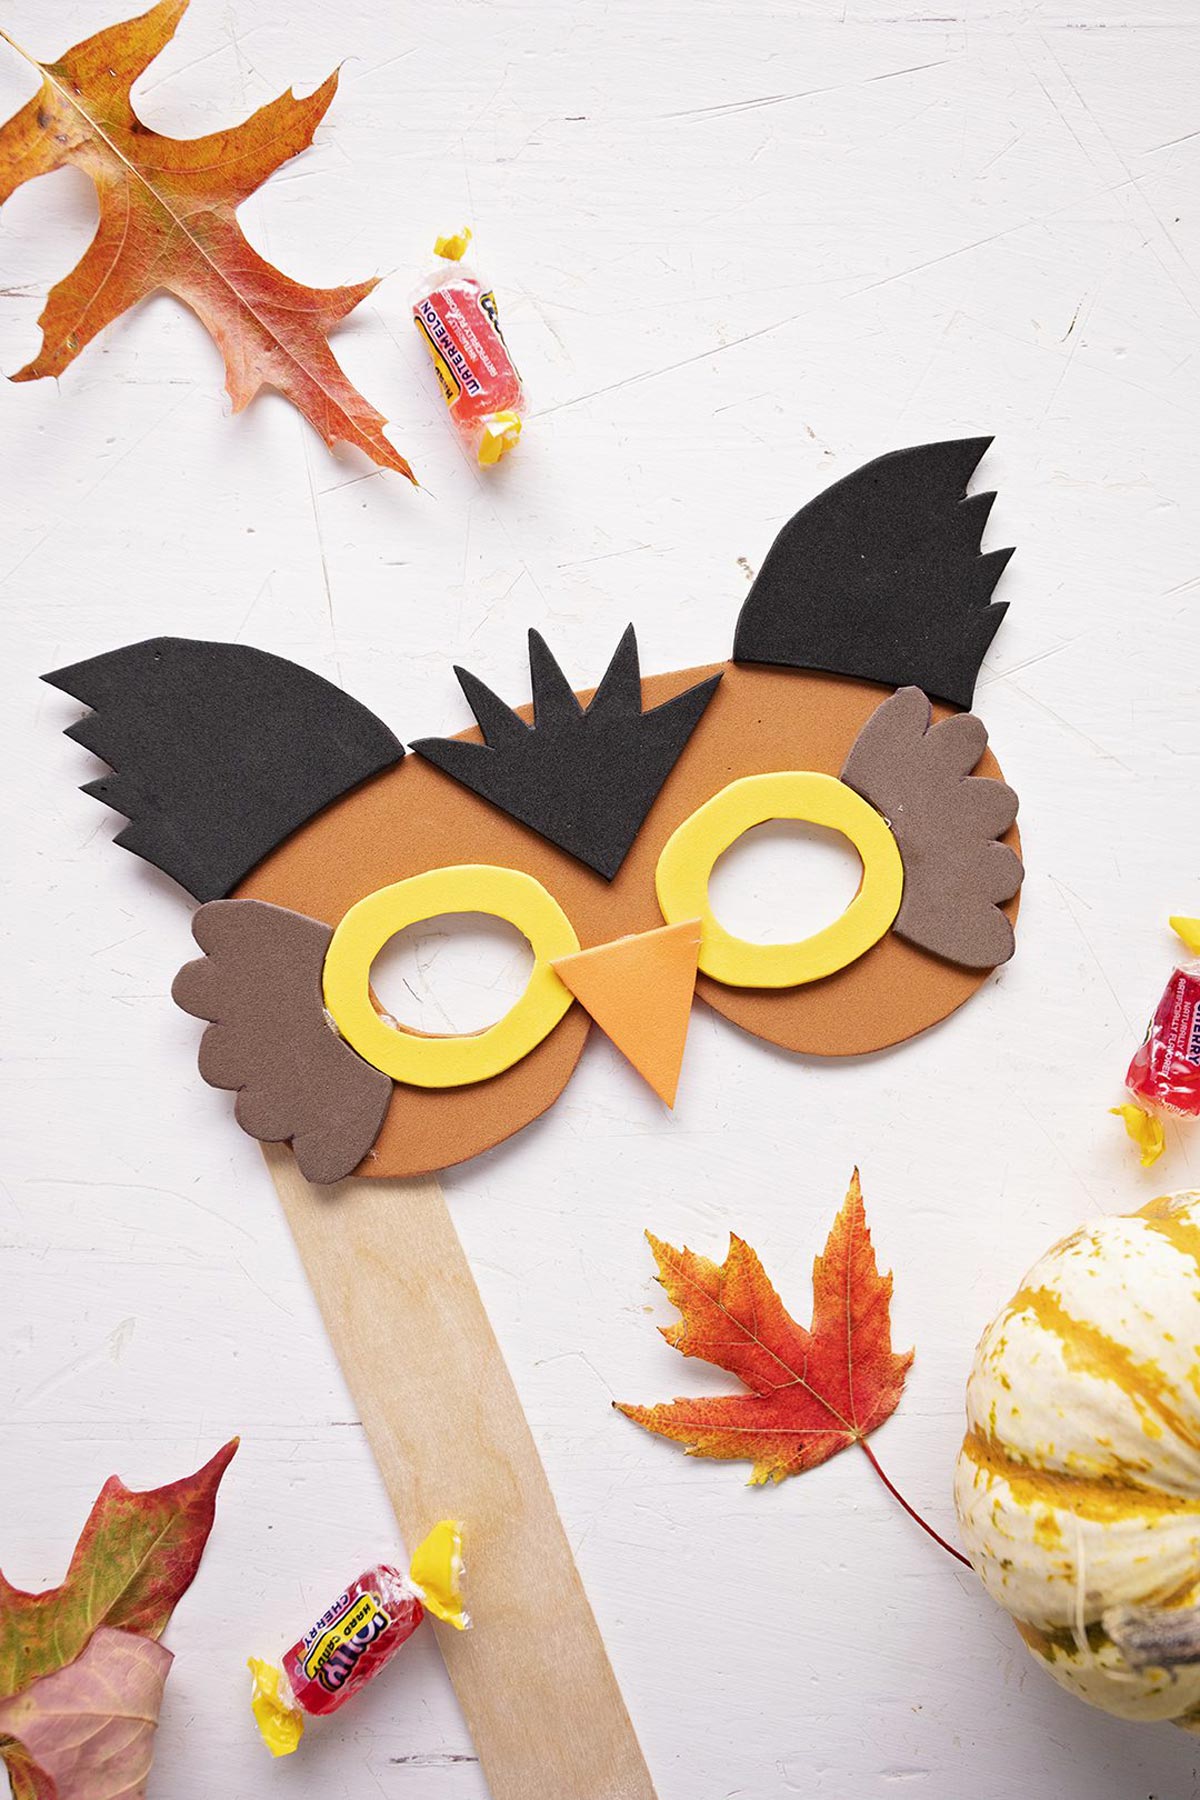
- To Hold the Mask: The second way to wear the mask is to staple a large popsicle or craft stick to one side of the mask and just hold the mask in front of the face. This is an easy way to use the masks without having to put something on the top of the head, for example if you want to use the masks as props in a photo booth!
Craft Variations
Want to switch things up? Here are a few ways you can customize and play with this craft.
- Decorate Away!: Feel free to go off script with the decorations, these fun masks are just waiting for a child's imagination! Why not add stickers, pom poms, glitter, or googly eyes?
- Adult Sized Mask: I included an adult sized mask as well as a child’s sized mask. You may want one of your own you know!
- Matching Costumes: It would be so cute to create matching costumes for play or Halloween! How about a fox and a hound? Or a mouse and an elephant mask?
- Choose Your Own Animal: Don't see your favorite animal on the list? Create your own pattern! A tiger mask would be so cute, or how about making a horse instead of a zebra?
- Masks for a Play: These masks can be used for acting out a story (The Three Little Pigs, or Chicken Little perhaps) as well as for Halloween or free play. Why, the masks could even work to do a Christmas play with the nativity scene, perhaps with the song about the Friendly Beasts. So many possibilities!
- Don't Have Craft Foam?: You can make these masks with different materials if you don't have craft foam! How about using construction paper, or cutting out paper plate masks to decorate instead?
FAQ
Creating animal face masks is so simple using craft foam and this free template and guide! Choose from 16 different animal ideas, then cut a mask shape from foam using the printed template. Draw and cut the extra pieces for your favorite animal, then glue to the mask shape. Attach elastic bands or a popsicle stick to use the mask - so easy!
These DIY animal masks are super simple to make with minimal materials. Print off the template and guide, then choose your favorite mask from 16 different animal ideas. Begin by cutting out the base shape, then add the extra pieces and decorations. Choose from elastic bands secured around your head, or holding a mask with a popsicle stick in front of your face.
More DIY Costumes for Kids
Looking for more great DIY costumes for kids? Here are a few favorites for you to try:
- How to Sew a Simple Super Kid Cape
- DIY Black Cat Costume
- DIY Buckskin Halloween Costume
- Easy Woodland Deer Costume
- Woodland Owl Halloween Costume
Enjoy!
If you try this craft, let me know! Go ahead and leave a comment, rate it, and tag a photo with #WelcometoNanas wherever you post.
Easy DIY Animal Masks from Craft Foam
Equipment
- TopElek Mini Glue Gun Kit with 30pcs Glue Sticks, High Temp
- Scissors
- Pen or pencil
- Hole punch
Items Required
- 2 copies Nana's Easy DIY Animal Masks from Craft Foam Template and Guide
- Craft foam in various colors, depending on the chosen animal mask
- Elastic Cord for Masks, ⅛ inch Elastic (optional)
- 1 Jumbo Popsicle Sticks (optional)
Instructions
- Print out two copies of the mask pattern. You will use one for the mask and the other to cut pieces to make the animal mask you choose to create. You can copy the Easy DIY Animal Masks from Craft Foam link here.
- Cut a mask from the basic mask pattern out of the base color of the animal you have chosen to make.
- Draw the additional pieces for the animal mask on the second printed pattern.
- Cut these pieces out of the designated colors of craft foam. Set them on the base mask to make sure they fit well and look as you would like.
- Glue the additional pieces on the base mask using hot glue. Feel free to add extra touches of your own to the mask you are making!
- To wear your mask with an elastic band: Make a hole in the base mask on either side, about ½ inch from the edge. Use a heavy weight craft elastic to tie on one side of the mask, go around the back of the head and tie on the other side of the mask.
- To hold your mask: Staple a large popsicle stick to one side of the mask to hold the mask in front of your face.
Video
Notes
This post was originally published in October 2020 and has been updated to add more relevant and detailed content.


Laura says
You're right, these would make a cute birthday party craft!