
DIY Simple Super Kid Cape
Every kid wants a super kid cape to be a princess or a super hero! Here are three ways to sew a simple cape to help your grands use their imagination to the fullest! Whether the capes go to the dress up box or trick-or-treating for Halloween, they are sure to be a hit.

Cape 1: Up-cycled Princess Cape
The first cape I made for one of my grands was up-cycled from a window curtain panel. It was so very easy. The curtain came from a second hand store and the shiny, light blue fabric was perfect for a princess. A ruffle on the top edge of the curtain was a bonus feature! It was probably a smaller bedroom curtain panel in its previous life. Old curtain panels of many colors are pretty easy to find second hand and fairly inexpensive to buy new in a discount store.
Tip- if you purchase a new set of curtain panels to make capes you will have two panels to make two capes for two grands! That doubles the fun!
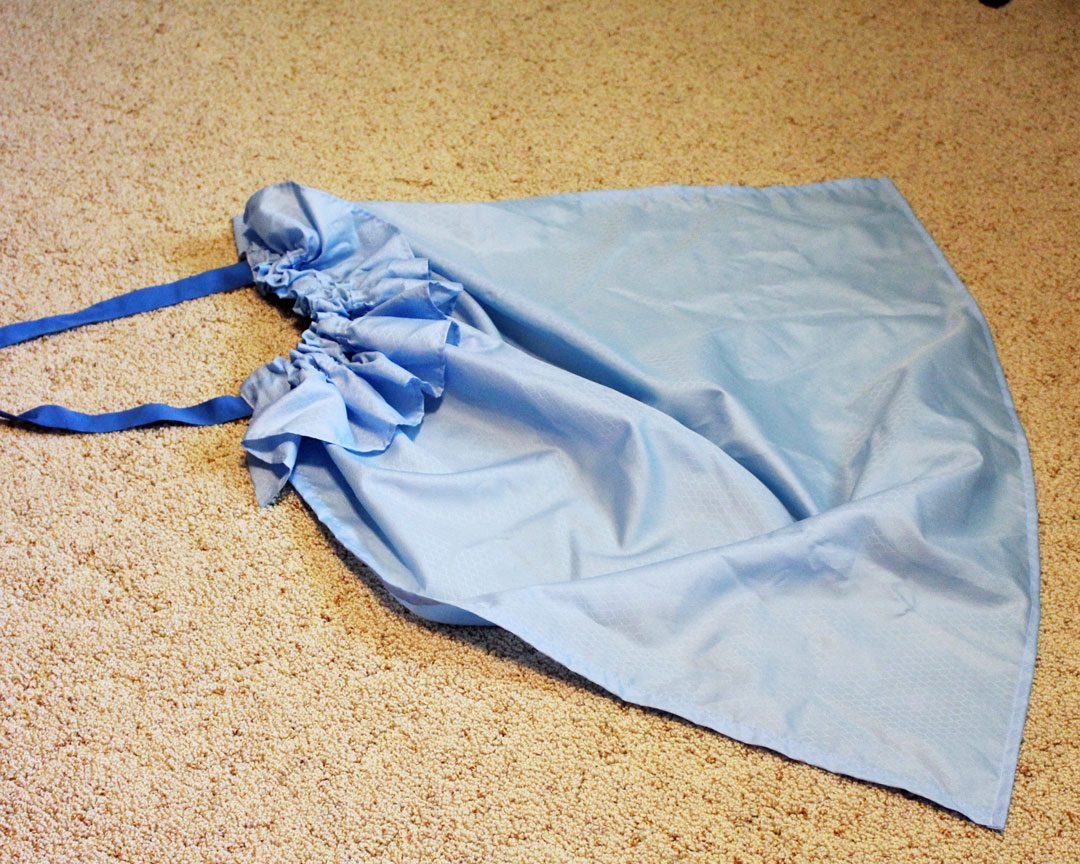
A ribbon fits through the casing where you would typically place the curtain rod. I gathered the fabric up to about one foot wide and zig zagged the rod pocket openings shut, stitching through the ribbon too so that the ribbon wouldn't slide out.
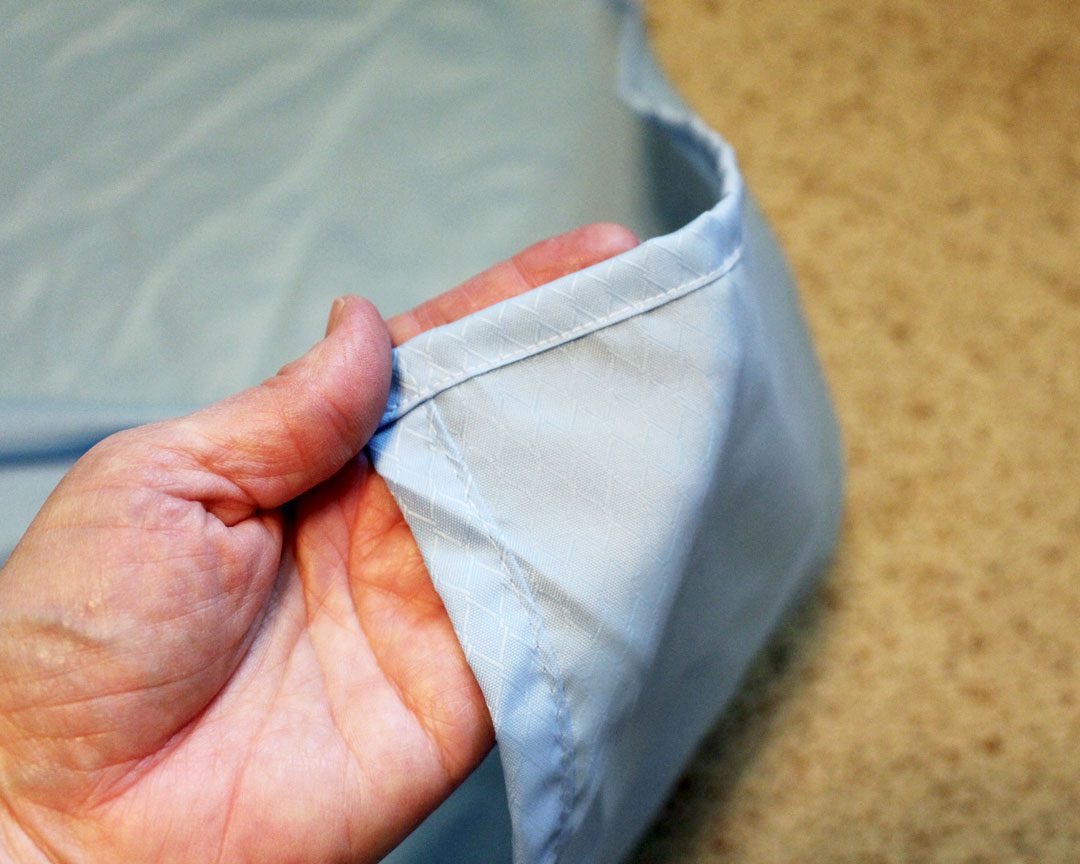
The last step was cutting the length of the curtain to about the ankle length of the grand. I used what is called a shirt tail hem to finish the edge. All the other edges are already finished!
Geek alert: A shirt tail hem is made by turning up the hem ¼ inch to the wrong side of the fabric and pressing. Then turning up the hem another ¼ inch and pressing again. Stitch along the edge of the hem to hold it in place.
The only disadvantage of this cape design is that the ribbon had to be tied in a bow to hold it on around the neck and mom had to do the tying each time it was worn. The same grand requested a super hero cape and a new idea was hatched to solve this neck tying issue.
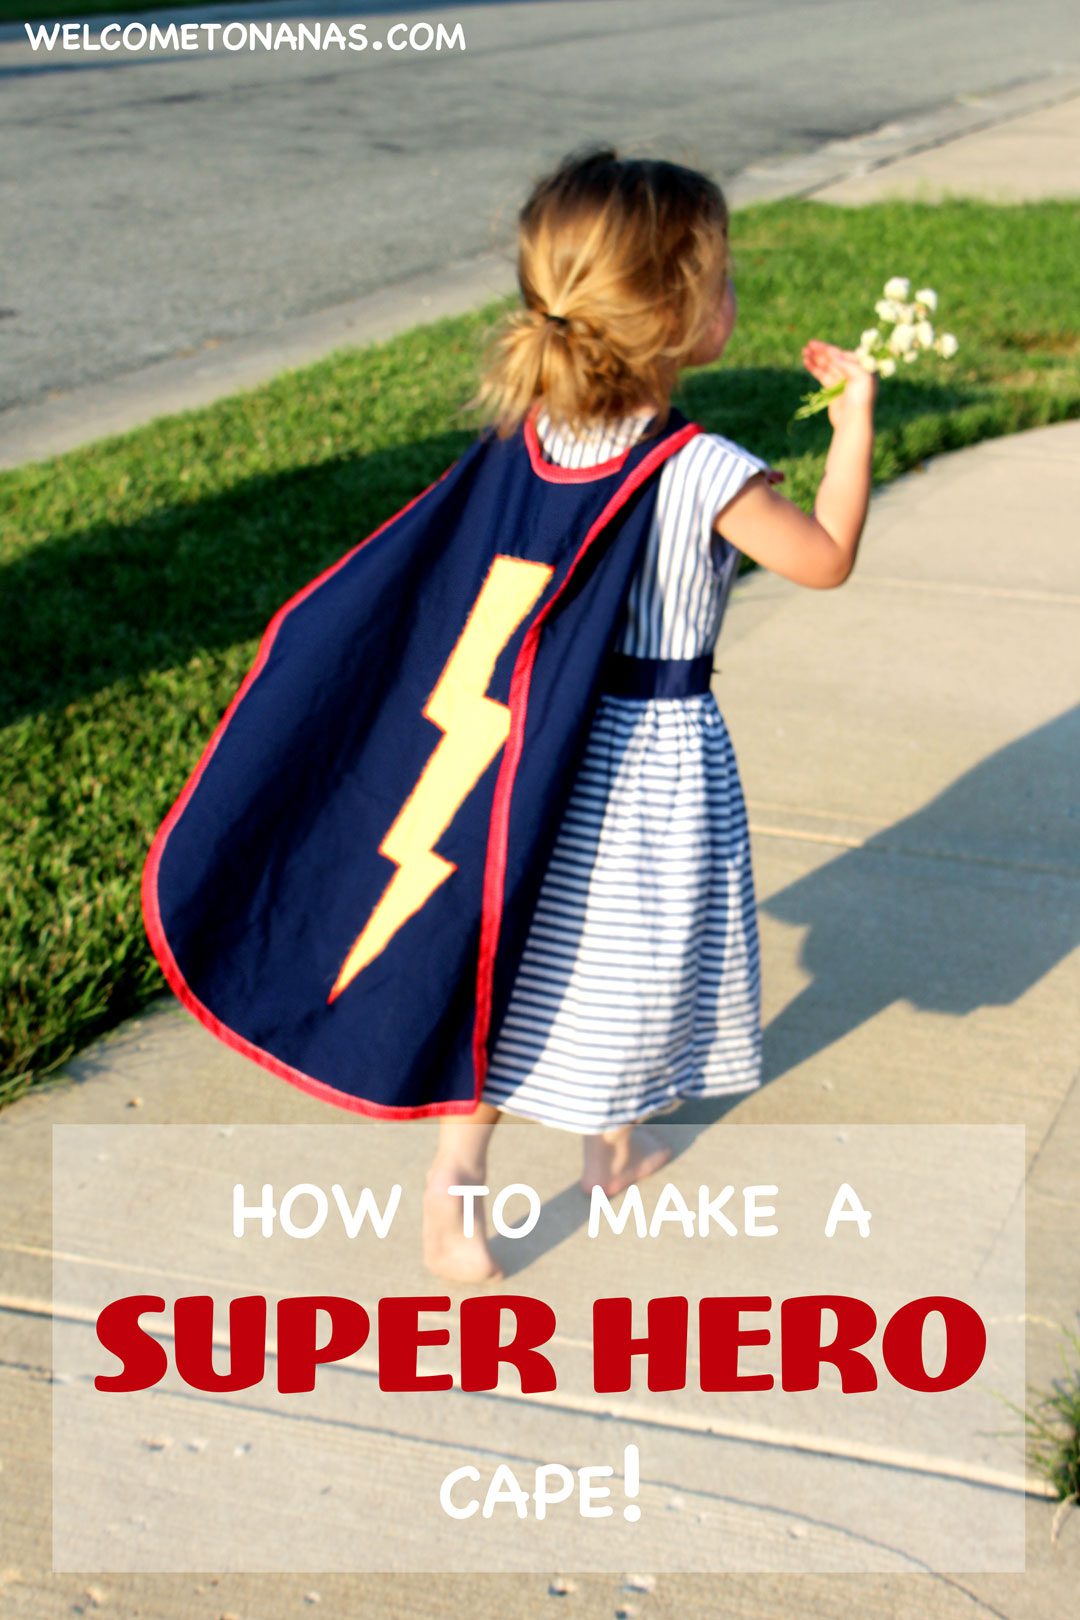
Cape 2: Super Kid Cape
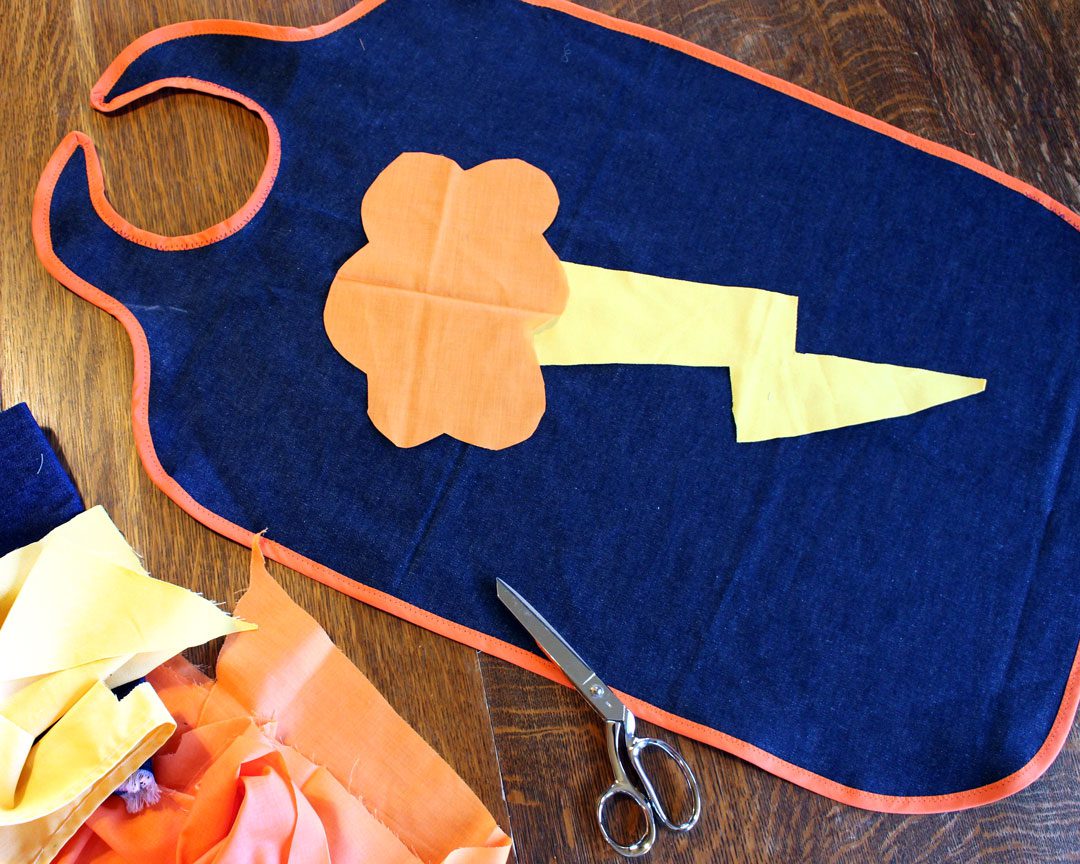
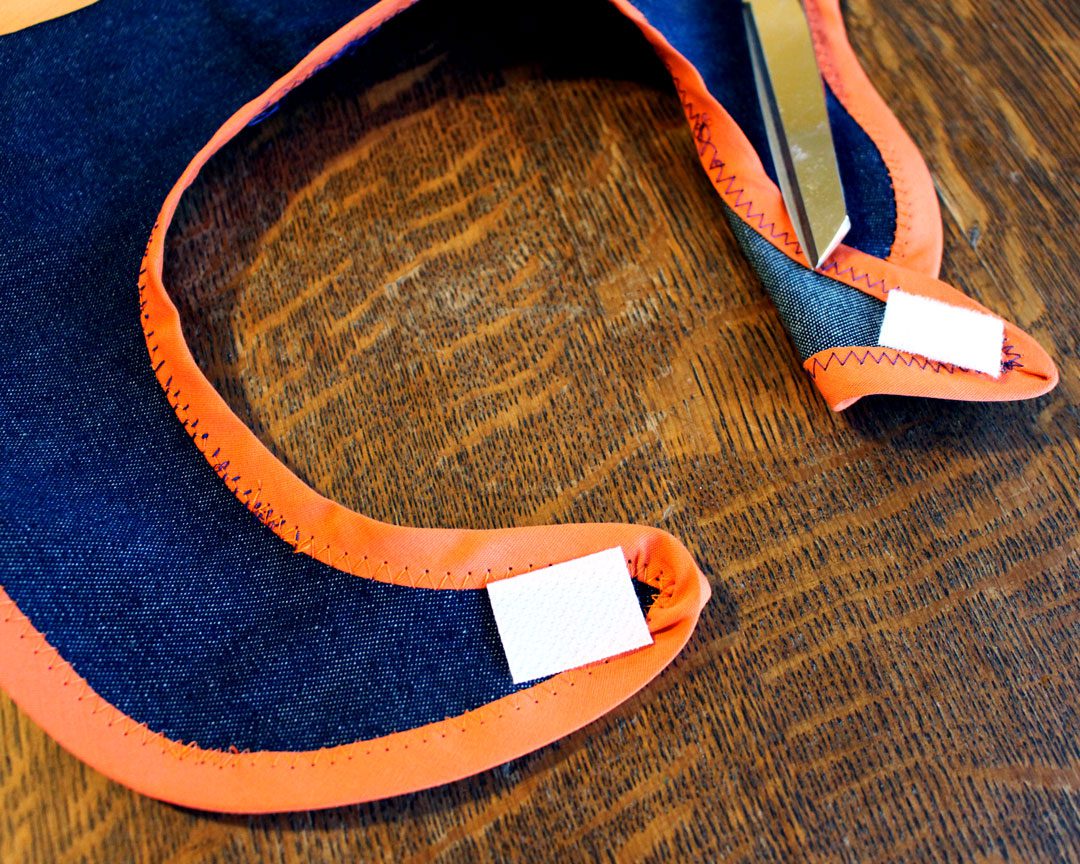
From the fabric stash came the navy blue, background fabric for the cape. If purchasing new fabric, ⅔ yard of fabric is plenty. To make a kid friendly neck closure, I used a bib from my drawer as a pattern to draw and then cut a round neck hole with flaps. Velcro will be used for the closure. The bib neckline size fits a toddler just fine, but if making this for an older grand, cut the neckline hole about 1 inch deeper to fit around their larger necks.
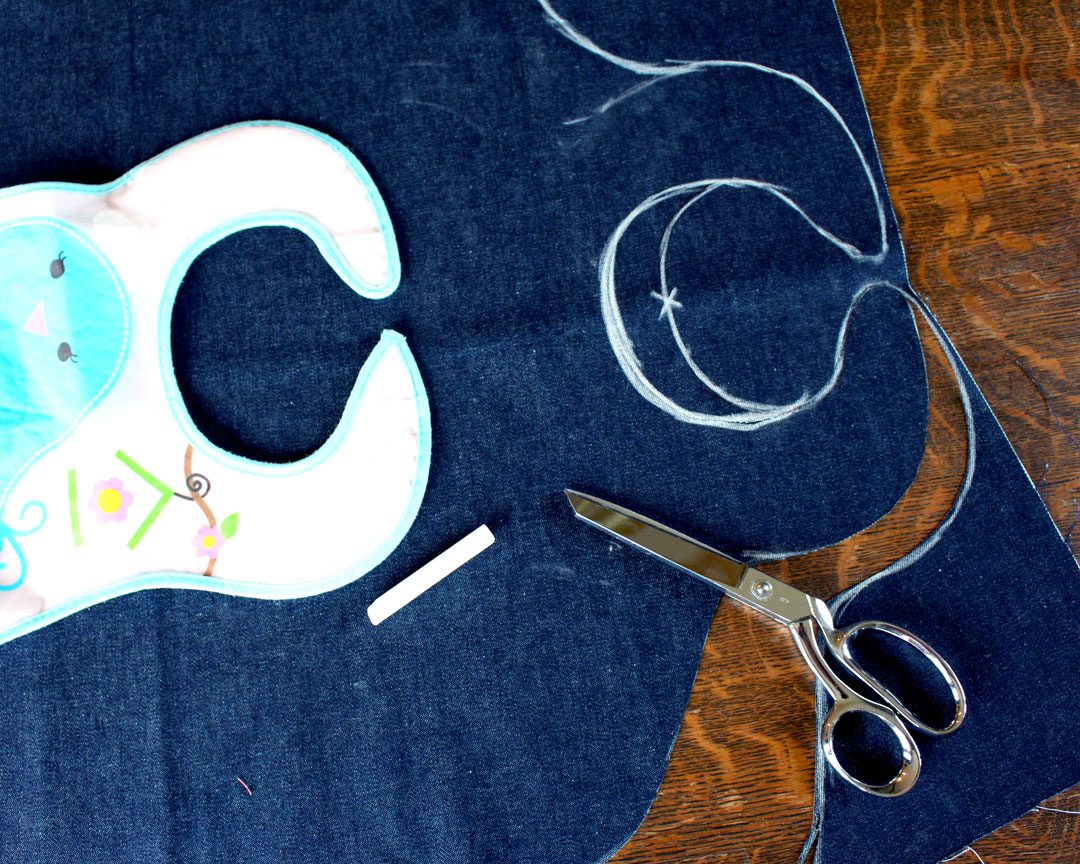
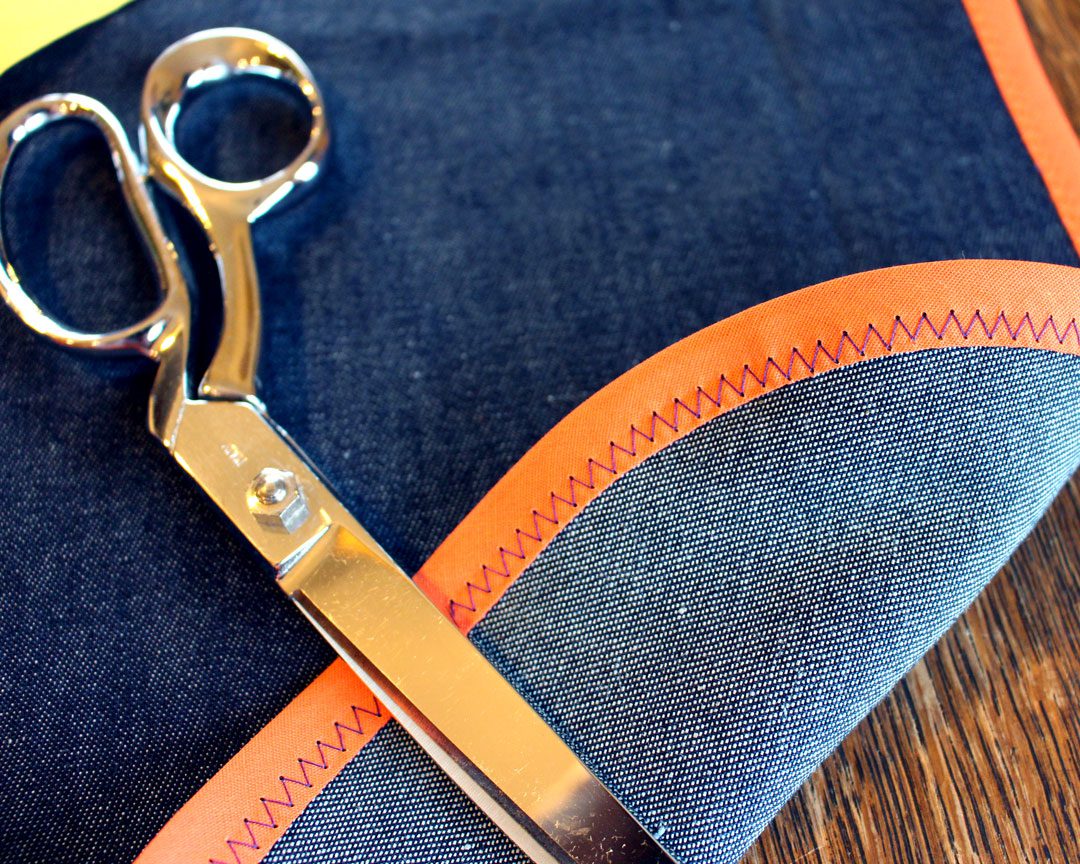
Round off the corners of the cape to give it a more stream lined look! Extra wide bias tape in a contrasting color is sewn all the way around the edge of the cape (even the neckline and flaps). This finishes the edge and adds the zing of a colorful boarder for the cape.
Tip: I use a zig-zag stitch while sewing on the bias tape. This makes it easy to catch the bias tape edges on the front and the back of the trim.
Velcro squares are sewn on the neck flaps (like the bib), and voila, a neckline the grands can fasten and unfasten themselves! Yea.
The finishing touch was a cloud and lightning shape that were cut out, placed on the cape, pinned down and zigzagged on. This is called an appliqué technique. You can use any color fabric you desire and make any shape you want. The grand can design their own personal design to personalize it if you want.
Cape 3: Bird Wing Cape
The third cape making technique is a variation of the last one. This is for a semi circle shaped cape. I'm not personally into the "scarier" types of costumes, but this would be great for a Dracula cape or could be used to look like bird wings.
The neckline is made in the same way as cape #2, using a bib as a pattern to make the neck opening and flaps. But instead of cutting the cape in a rectangle shape straight down from the neckline, a semi circle is made from the fabric under the neckline. The size of the semi circle will be larger for older grands then the younger. If you purchase 1 yard of fabric your cape can be about 33" long from the neck to the bottom of the cape.
My fabric happened to be a type that didn't need the edges finished but you can use the bias tape again to finish the edges to prevent raveling.
Sew velcro squares on the flaps for the neck closure and you are done. A design may be appliquéd to the cape if desired.
Happy Halloween or happy dress up!
Enjoy!
You'll Need:
Cape 1:
- 1 curtain panel at least 2'x3'
- 1 yard of ribbon
- Thread
Cape 2:
- Bib with velcro neck closure to use as a pattern
- ⅔ yard navy fabric
- 2 packages bias tape
- Fabric scraps for design on cape
- 1" Velcro for closure at neck
- Thread
Cape 3:
- Bib with velcro neck closure to use as a pattern
- 1 yard fabric
- 2 packages bias tape
- 1" Velcro for closure at neck
- Thread
Instructions:
Cape 1:
- Run the ribbon through the rod pocket of the curtain panel
- Gather the cape on the center of the ribbon to about 1 foot in width.
- Sew over the end of the rod pocket openings through the ribbon so ribbon doesn't slip out.
- Cut the cape to length for your grandchild.
- Make a shirt-tail hem at the bottom.
Cape 2:
- Place and center the bib on the narrow edge of the fabric
- Draw around the bib neck opening and flaps as a pattern for the neck of the cape
- Increase the neck hole about 1" if for a larger child
- Cut out neck opening and flaps, round off the four corners of the cape
- Sew the seam binding around the entire edge of the cape
- Sew velcro pieces on the two neck flaps in the same way they are sewn on the bib
- Cut out the desired shapes for decorating the cape
- Pin them in place on the right side of the cape
- Use a short zig-zag stitch around the entire shape to hold it in place
Cape 3:
- Place and center the bib on the wide edge of the fabric
- Draw around the bib neck opening and flaps as a pattern for the neck of the cape
- Increase the neck hole about 1" if for a larger child
- Cut out neck opening and flaps
- Fold the cape in half and cut it into a semi circle shape as shown above
- Sew the seam binding around the entire edge of the cape
- Sew velcro pieces on the two neck flaps in the same way they are sewn on the bib
Welcome to Nana's! Where there’s fun things to do with your “grand” kids!
Come join the fun at www.WelcomeToNanas.com


Leave a Reply