This Cute Paper Plate Bunny Craft for Easter provides ideas for fast and easy Easter crafts for kids. You can use them to hang on a garland, make a mask, or give as a card and spread Easter cheer!

Jump to:
Paper Plate Crafts Galore!
I love having a couple simple craft ideas for kids to pull out in a minutes notice. Using paper plates is always a great supply to have on hand for this purpose.
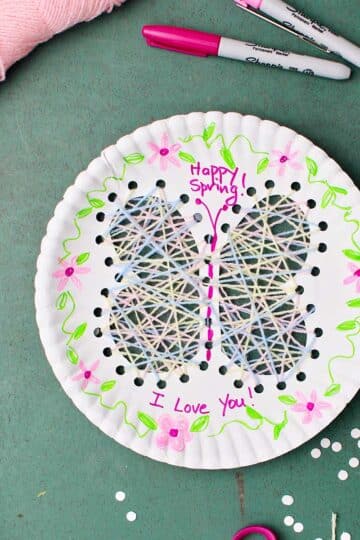
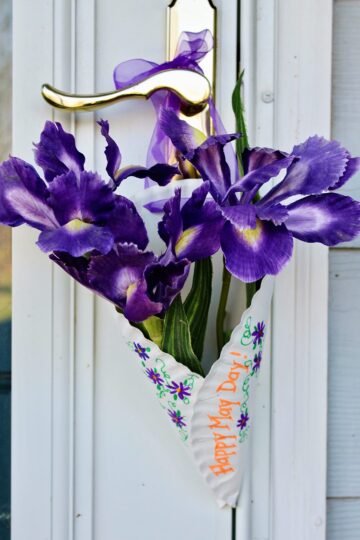
We've made pretty woven butterflies and May baskets from paper plates before. And today, they provide the perfect base for our bunny face craft!
Follow the step-by-step tutorial to make two different cute bunnies from paper plates. One is just a face, the other is a whole bunny. I'm thinking that your kids can come up with a hundred variations!

Supplies
You don’t need many supplies to bring these cute paper plate Easter crafts to life! You'll have most of them on hand!
- Paper plates- The star of the show is a white dinner sized paper plate or it can be a dessert sized paper plate as well. Plain paper plates with no wax coating is the easiest to use on this kids craft.
- Markers- You will use washable markers for coloring details on the bunny crafts.
- Googly eyes- I love googly eyes, so I used them on the bunny.
- Cotton balls- The large sized cotton balls work well for a bunny tail.
- Pom-poms (optional)- Use pom-poms for a nose or cheeks on your bunnies.
- Colored paper- I used scrapbooking paper for details on the bunnies. You can use colored paper such as construction paper too.
- Other supplies - Scissors, stapler, craft glue, jumbo craft stick (optional for mask), pipe cleaners (optional for whiskers).


Steps to Make a Bunny Rabbit Paper Plate Craft
Easter bunny #1: A Cute Face!
One white paper plate will be used to be the face of the bunny. Make ears by cutting a second plate in half.
Let the child choose whether they use washable markers to color the inside of the ears pink. Or if they cut a piece of pink paper and glue it onto the ears to make the inside of the ear.
Then you’ll staple the ears to the top of the bunny face with the flat sides to the center.


Make the face of the bunny
Cut two round circles from pink scrapbook paper using a cup to trace around. Place these side by side in the center of the plate as part of the nose of the bunny.
Glue on a pom-pom or draw a triangle nose towards the top of those two circles. Then draw a small smile below the nose and draw a line down from the nose to the smile.
Make eyes by gluing on large googly eyes or by drawing black circles with black dots inside. You can add eyelashes by drawing small lines from the sides of the eyes.


Add the bowtie
Make a bowtie or add a hair bow to your bunny. Make two triangle pieces of paper that are about 3 inches long and one and a half inches wide. Also cut a circle of paper that’s about 1 inch diameter.
Glue the two triangles tip to tip onto the bunny at the chin for a bowtie or up on the top of the head for a hair bow. Glue the round circle at the center of those two triangles to complete the bow.
The child can add any other designs to the bunny face if desired!

Easter bunny #2: The Whole Bunny!
One dessert sized paper plate will be the body of the bunny. A second dessert sized paper plate will be the head of the bunny. A third plate will be the ears.
Complete the face of the bunny or the head of the bunny in the same way that you did for bunny number one. If you’re using a smaller plate each of the pieces will be smaller, but the arrangement is still the same.
Attach the head onto the body plate by stapling it together.
Glue a cotton ball to the end of the second body plate for a tail.
The full length video tutorial is found at this link: Cute Paper Plate Bunny Craft for Easter Tutorial


Craft Tips
These tips will help you make your paper plate bunny rabbit craft more easily.
- Cut slits- Cut slits on the plate edges of the ears to make them lay flat and be easier to staple on. Do the same thing on the body of the second bunny.
- Color the ears- For a young child, let them color the inside of the ear pink. Then staple them to the top of the mask with the flat side of the ear ears to the inside.
- Bowtie- Draw the bowtie in one piece and cut out.

Craft Variations
Here are a few variations you’re welcome to try with these paper plate Easter crafts:
- Mask- Make the bunny face into a mask. Cut two holes about the size of quarters where the eyes are so that the child can look through the mask. Attach a jumbo craft stick to the bottom of the mask with packing tape or hot glue. The child can use this to hold the mask up to his or her face
- Bunny garland- Make several bunny faces from dessert plates. Attach them to a ribbon and make a garland.
- Flowers- Add flower cutouts near the bunny ears instead of a bow.
FAQ
An Easter bunny craft paper plate is a simple paper plate craft kids will love. The face is a plate with features drawn on or cut from scrapbooking paper and glued on. A pom-pom is a cute nose option and googly eyes are a must. A second plate is cut in half for ears. Staple these onto the top of the face. The post has specific directions and more variations!
These adorable paper plate crafts are perfect for kids and use supplies you have on hand. Create the face of a bunny with a plate (draw on the features or use scrapbook paper cutouts). Cut a second plate and cut it in half for the ears. Color the insides pink and staple to the top of the face. You can add a third plate with a cottontail tail for a body. The craft can be made out of salad sized plates too and used as cards or put on a ribbon for a garland.

More DIY Paper Plate Crafts for Kids
Looking for more easy paper plate crafts to try? Here are a few of our favorites:
Come Join the Fun at WTN!
Try this craft, leave a comment, rate it, and tag a photo with #WelcometoNanas wherever you post.
Want More Crafts?
Love getting crafts straight to your inbox? Sign up to receive a weekly email and get a free craftsy gift!


Cute Paper Plate Bunny Craft for Easter
Equipment
- none needed
Items Required
- easter bunny craft(s) paper plate or dessert sized paper plate
- washable markers
- googly eyes
- large sized cotton balls
- pom-poms optional
- scrapbooking paper or construction paper
- Other supplies - Scissors, stapler, craft glue, jumbo craft stick (optional for mask), pipe cleaners (optional for whiskers)
Instructions
Easter bunny paper plate craft number one
- One white paper plate will be used to be the face of the bunny. Make ears by cutting a second plate in half. Let the child choose whether they use washable markers to color the inside of the ears pink. Or if they cut a piece of pink paper and glue it onto the ears to make the inside of the ear.Then you’ll staple the ears to the top of the bunny face with the flat sides to the center.
Make the face of the bunny
- Cut two round circles from pink scrapbook paper using a cup to trace around. Place these side by side in the center of the plate as part of the nose of the bunny.Glue on a pom-pom or draw a triangle nose towards the top of those two circles. Then draw a small smile below the nose and draw a line down from the nose to the smile.Make eyes by gluing on large googly eyes or by drawing black circles with black dots inside. You can add eyelashes by drawing small lines from the sides of the eyes.
Bowtie on the bunny craft paper plate
- Make a bowtie or add a hair bow to your bunny. Make two triangle pieces of paper that are about 3 inches long and one and a half inches wide. Also cut a circle of paper that’s about 1 inch diameter.Glue the two triangles tip to tip onto the bunny at the chin for a bowtie or up on the top of the head for a hair bow. Glue the round circle at the center of those two triangles to complete the bow.
Bunny paper plate craft number two
- One dessert sized paper plate will be the body of the bunny. A second dessert sized paper plate will be the head of the bunny. A third plate will be the ears.Complete the face of the bunny or the head of the bunny in the same way that you did for bunny number one. If you’re using a smaller plate each of the pieces will be smaller, but the arrangement is still the same.Attach the head onto the body plate by stapling it together.Glue a cotton ball to the end of the second body plate for a tail.


Leave a Reply