Learn How to Make a Flip Book with Index Cards following this simple step-by-step tutorial! This art project for kids is so much fun, like creating your own short homemade animated cartoon!
Jump to:
Ready for a fun art project that will get the kids' imaginations flowing? Let's make our own "animated" flipbook!
A flipbook is a small book that will have a series of little pictures that you draw. The pictures are in a sequence of positions so it gives the idea that there is a movement happening when you flip the pages quickly. It’s like a little animated movie series.
This flipping book gives a nod to National Aviation Day as it shows a plane doing a loop and flying off into the sunset. Here's to all my relatives in the aviation profession (and there are a lot of them!).
Fun Art Project: How to Make a Flip Book!
Flip books go by several names- a flipbook, a flip book, a graph, or a flicker book. Each picture changes a little bit so that it looks like the drawings move when the pages are flipped quickly. The page flip effect creates an animated flipbook showing an object or character's movements.
I remember making a flipbook when I was young. I think it was of a flower growing or something like that.
We would draw small drawings on the edge of our notebook paper and then flip our notebooks to make it flip through the series of drawings.
Back then, there was very little if any computer animation- no computerized ways of doing such a thing. All of the animated movies that were coming out had much of the animation work done by hand.
This project gave us a small idea of how that process worked, it was an interactive experience with cartoons and animation.
You can make a small flipbook as well. It takes a little patience, but is so worth it. This would be a craft that works best with older kids.

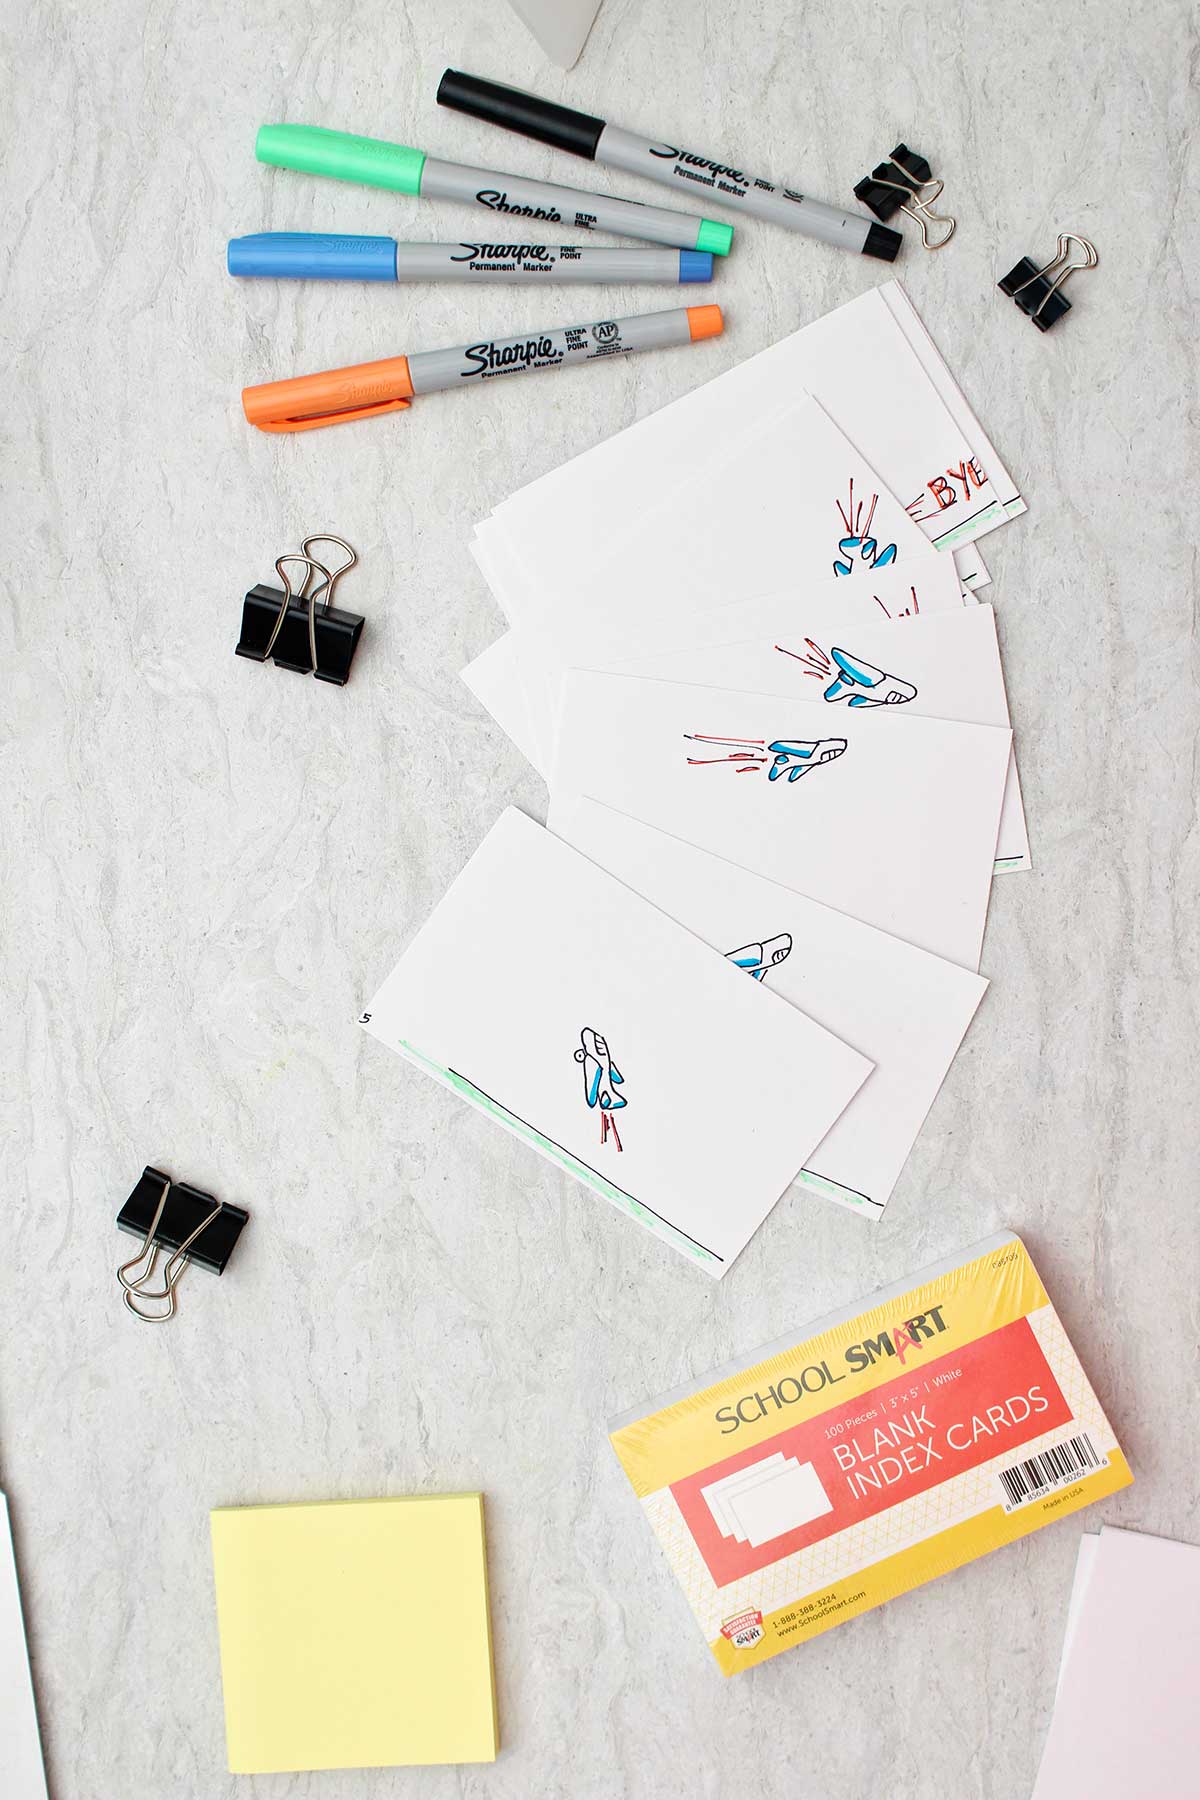
Supplies to Make a Flipping Book for Kids
You don’t need much to bring these cute homemade flip books to life!
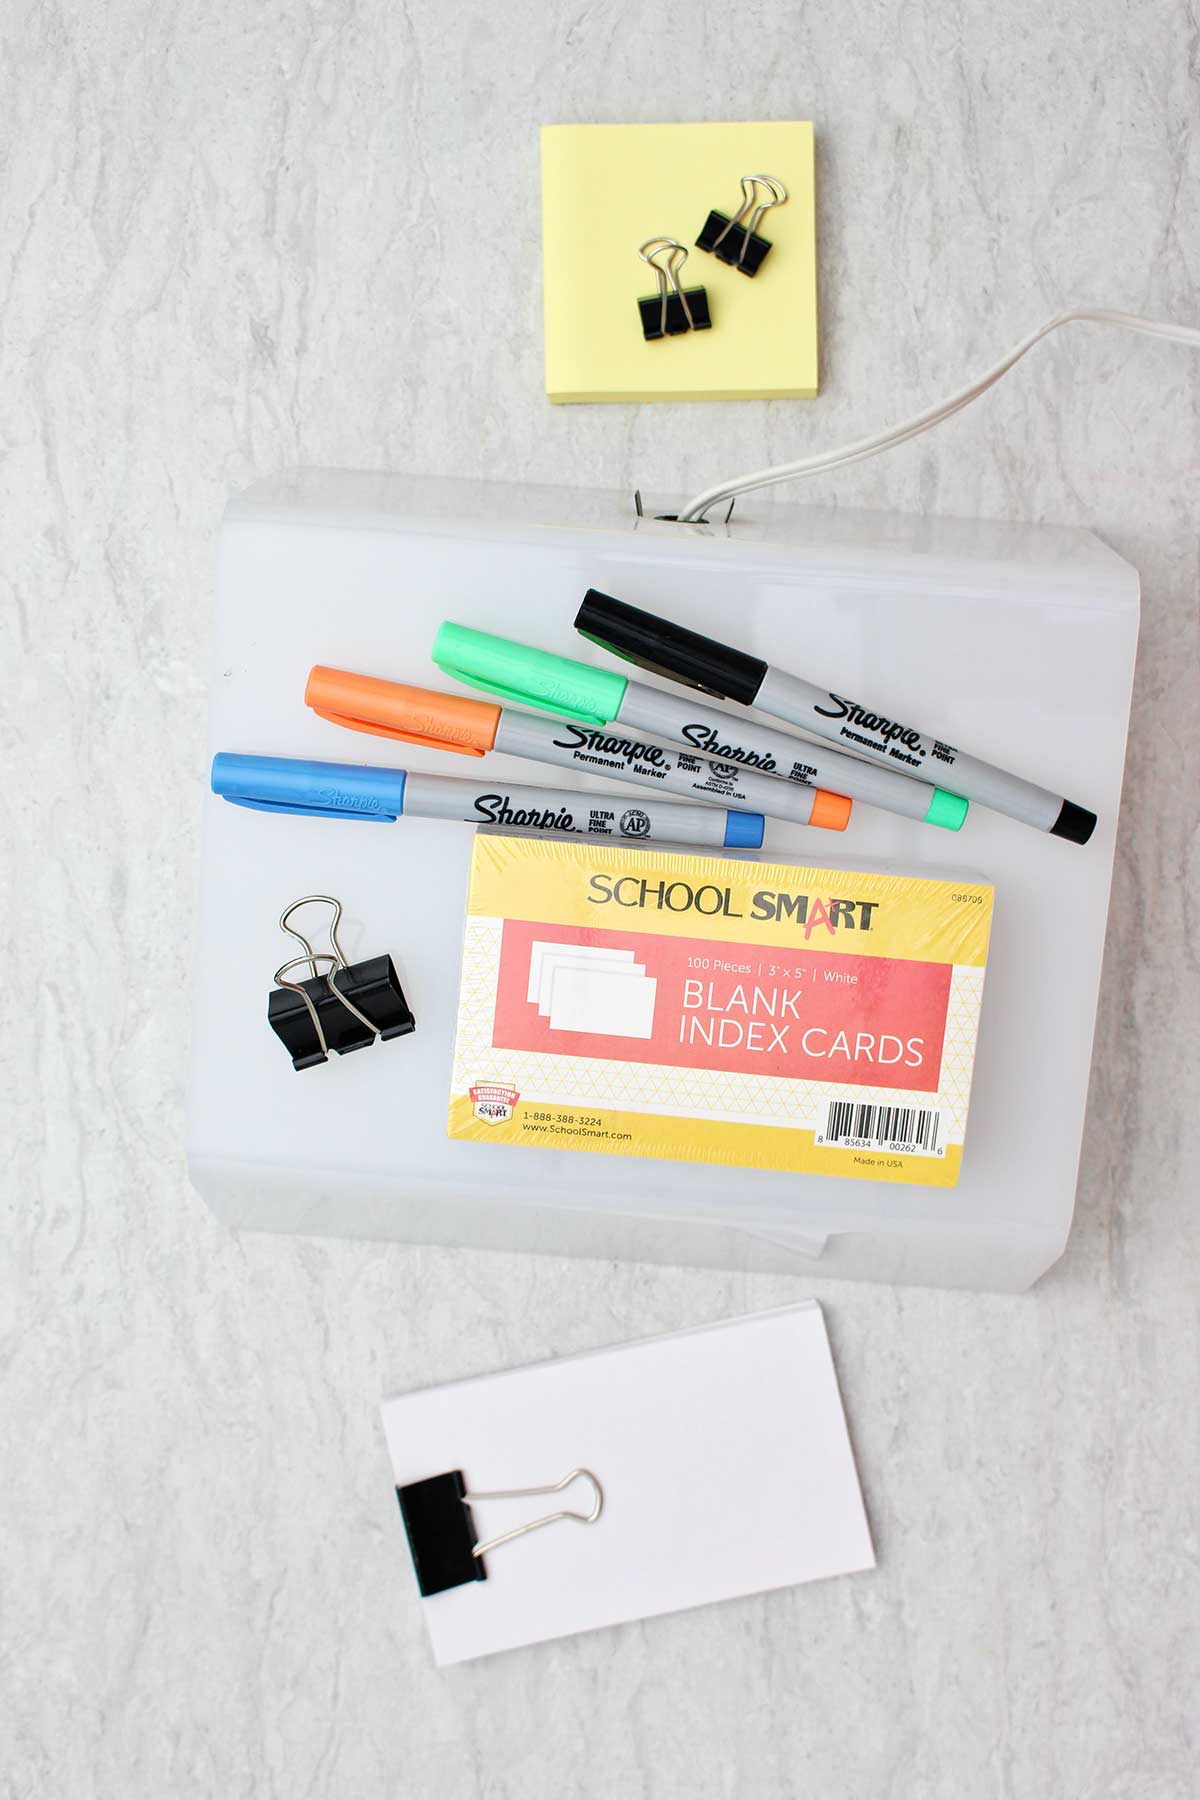
- Index cards: Typically a pack of index cards from the store has 100 blank or lined cards in it. I would choose the blank cards unless you have a special need for the lines. They are already cut to a great size and take no preparation time.
- Binder clip: A medium sized binder clip, which is about 1.25 inches in length, works well to hold the index cards together. This is my preferred way to bind a DIY flip book.
- Sharpie Ultra Fine Point Marker: This fine point marker is my go-to for drawing. They have a small, fine, black line. You are also welcome to use a pencil, colored pencils, crayons, or a ballpoint pen if you prefer.
Equipment
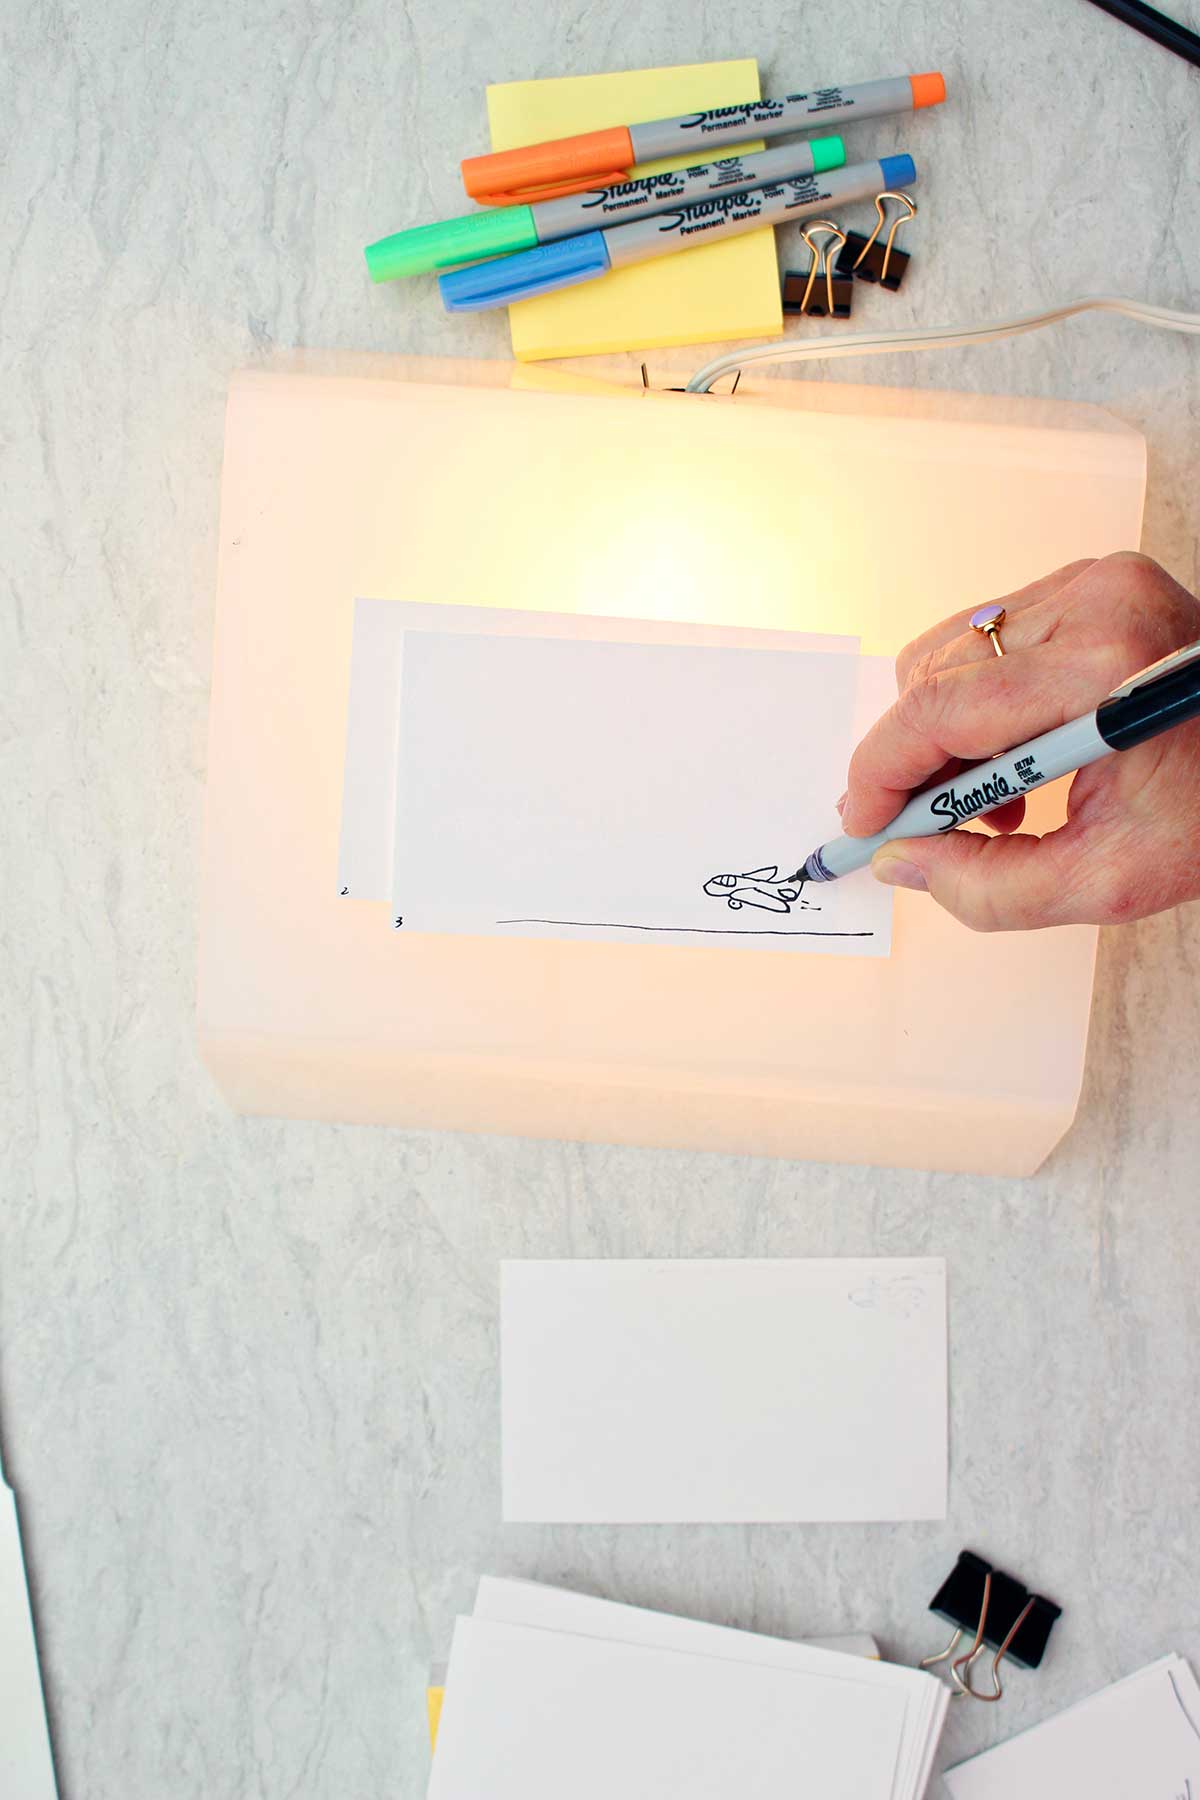
Light box (optional): A light box produces a light that can shine through your drawing and paper so that it is easier to trace. This is very helpful in making a flip book.
Steps to Make an "Animated" Flipbook
How to make a flip book step by step
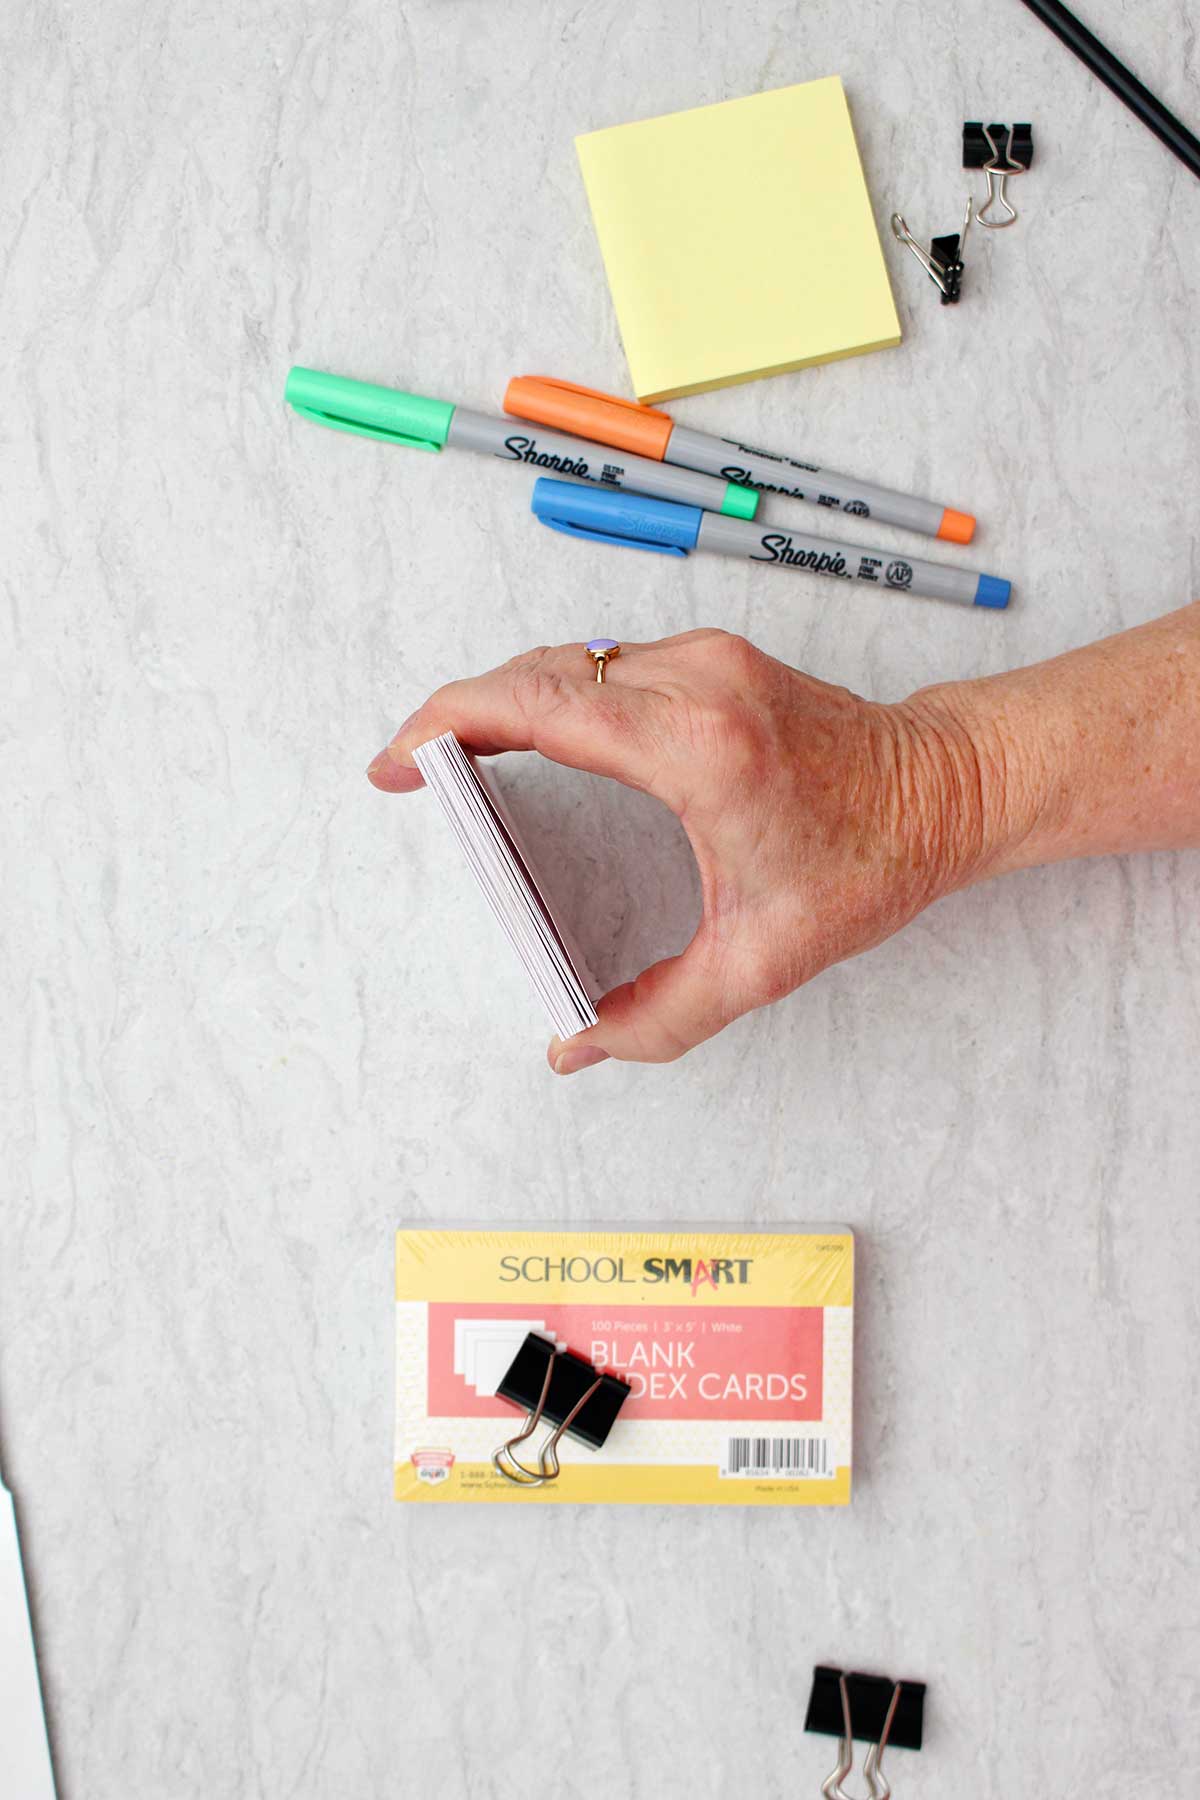
A good place to start with your first flipbook is with 25 index cards. First stack the cards landscape direction. Then number them from one to 25 with very small numbers in the bottom left-hand corner.
Plan the action steps
Plan your flipbook. What action do you want to see happen in your animation? Do you want to see a flower grow, an airplane take flight, or a basketball bounce? Think a little bit about how this action can be shown in 25 small step-by-step changing drawings.
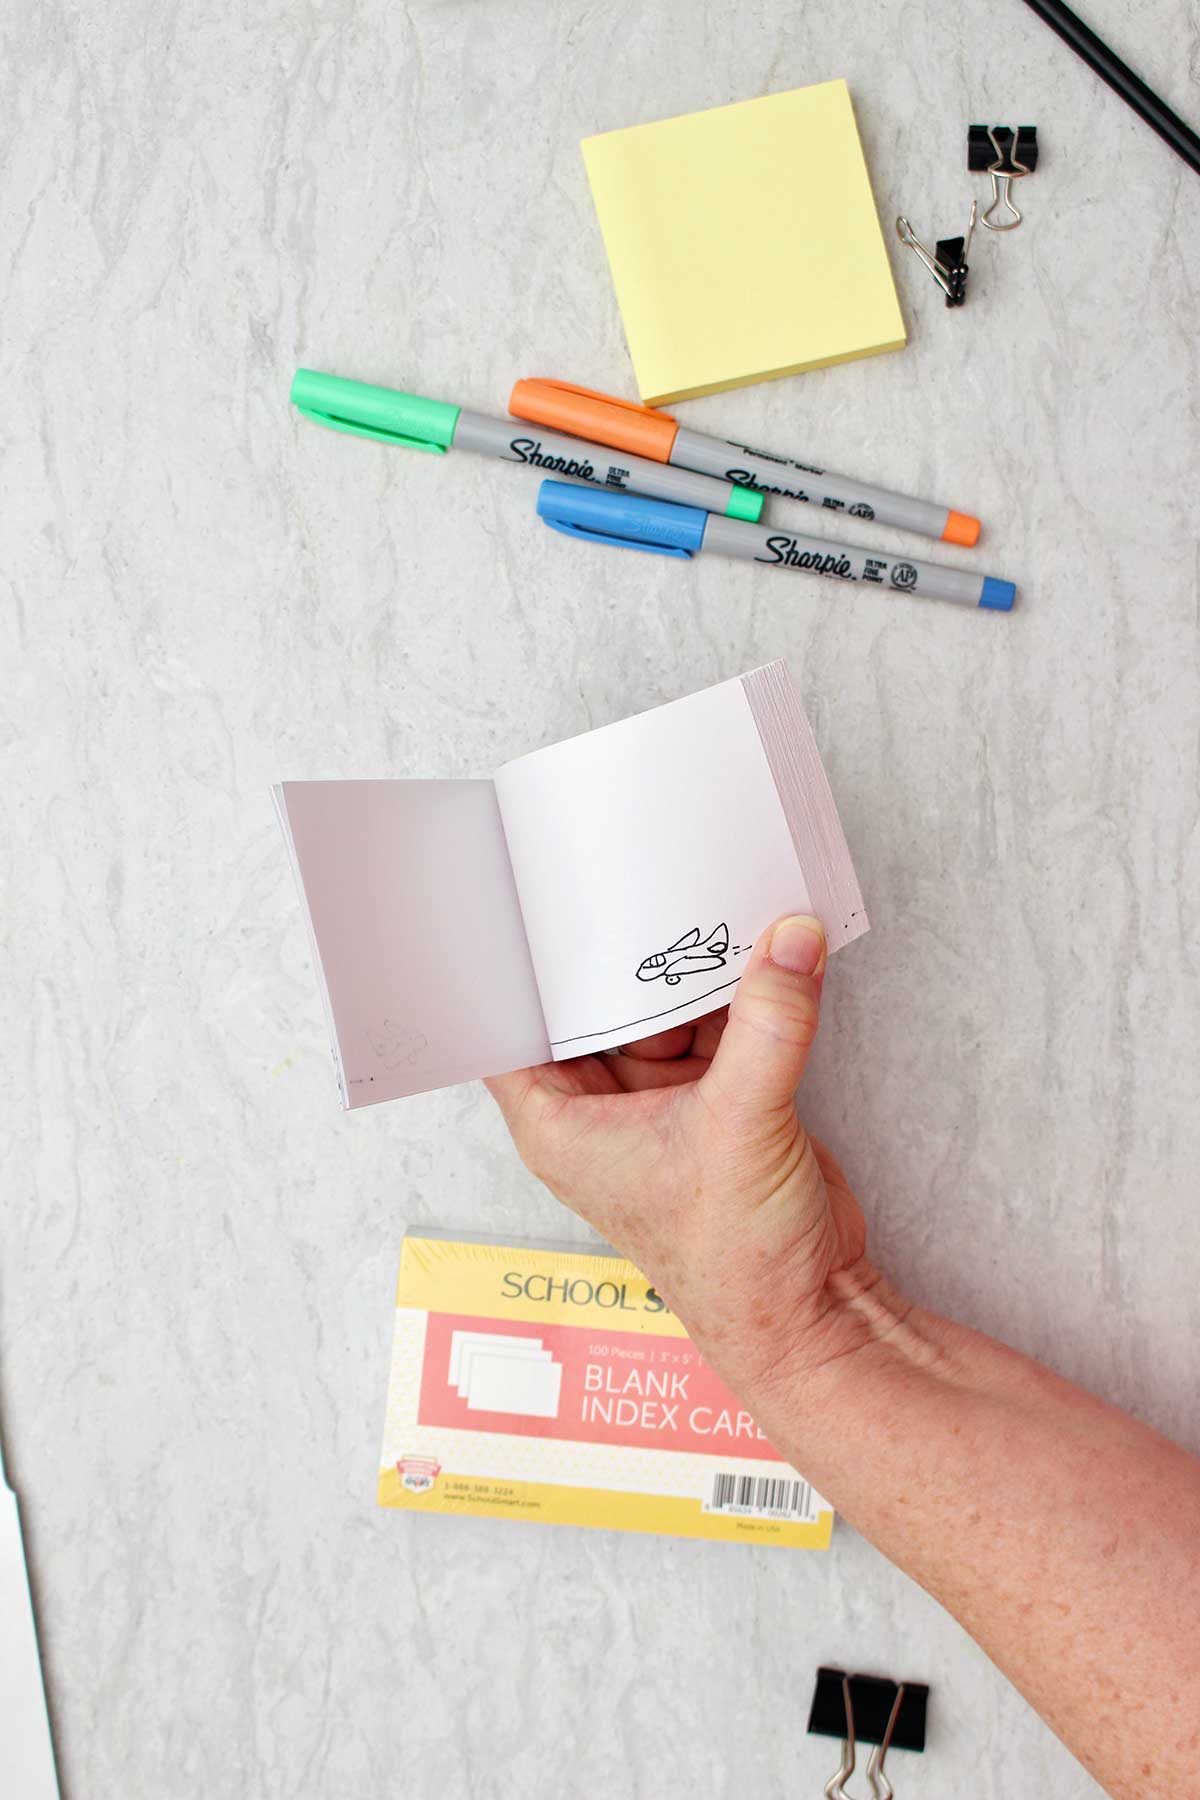
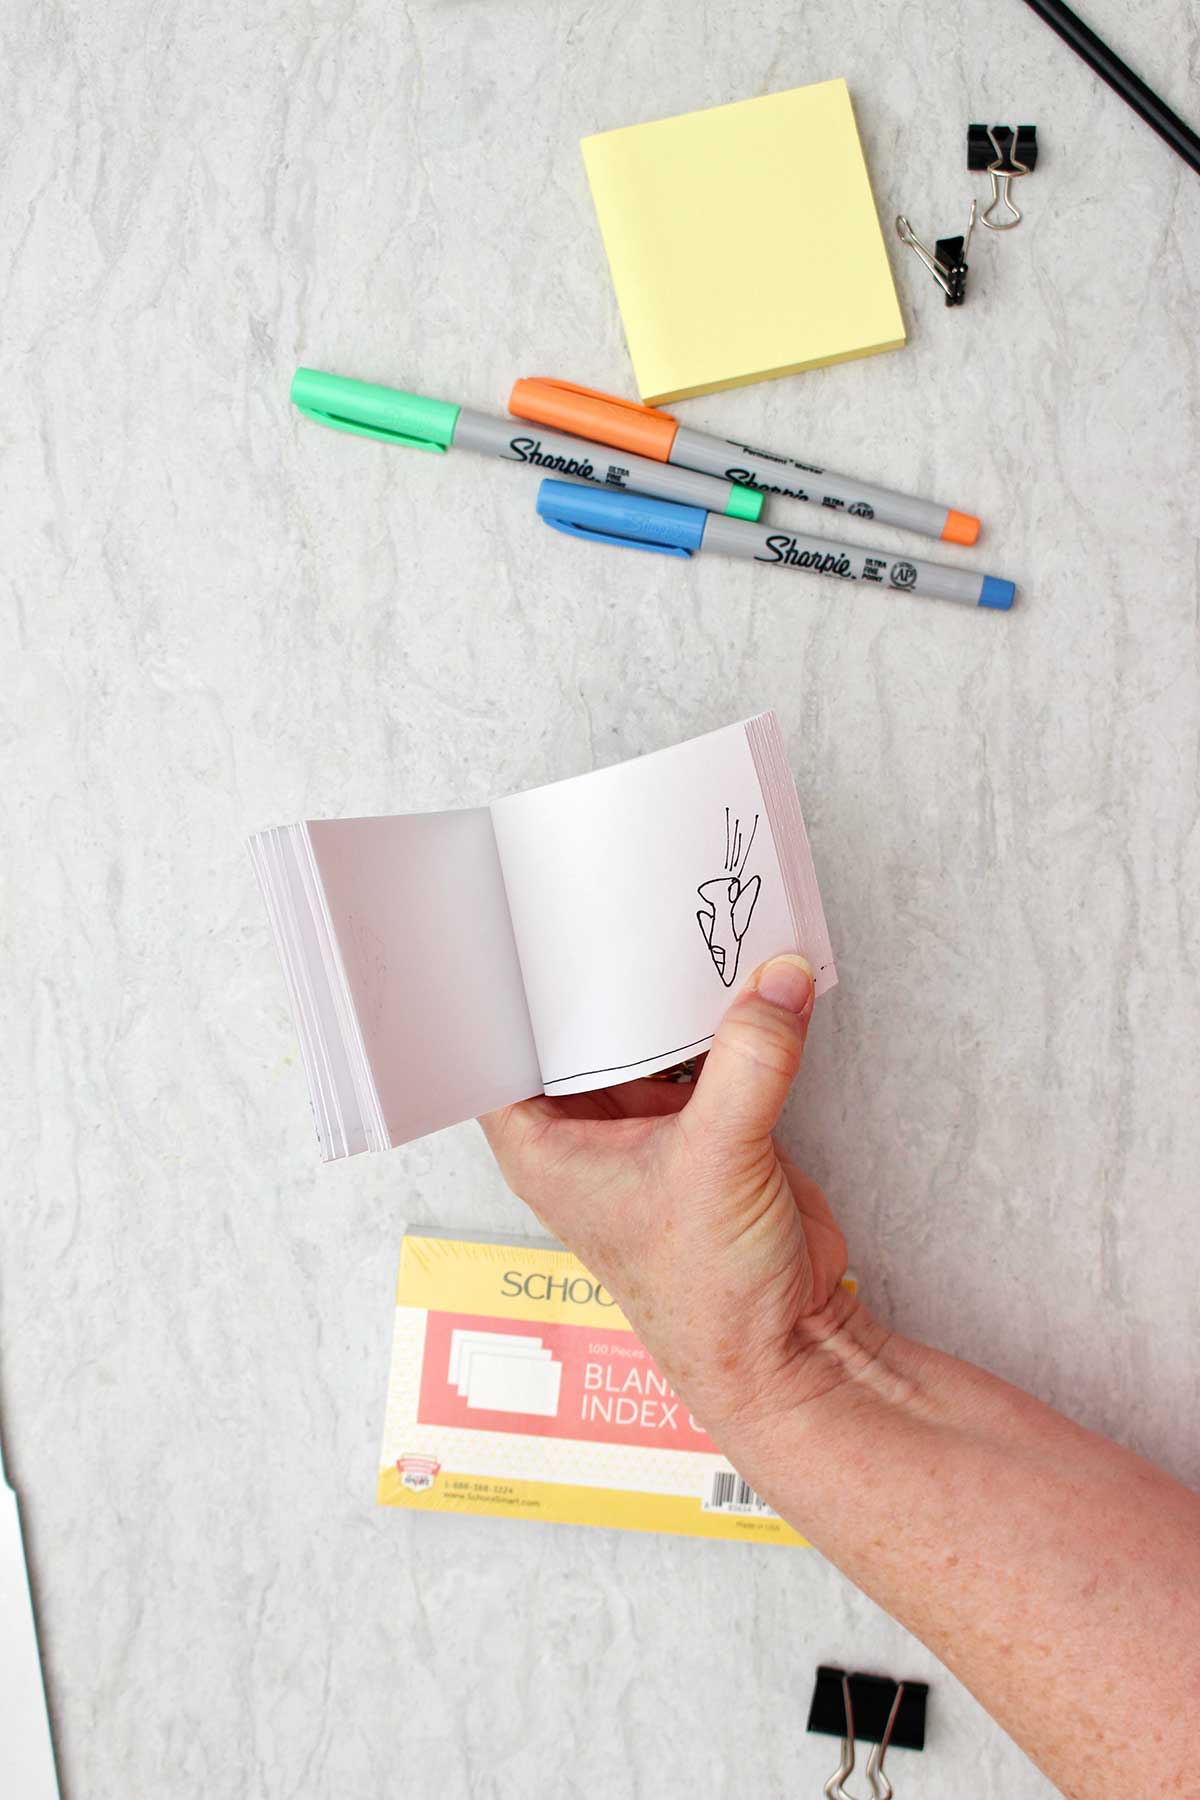
On a separate piece of paper, make a template of the main object you would like in your drawing. In my example, it was a small airplane. You could draw a stick person or a flower, or a basketball, whatever you would like to be the center of your action. Go over this object with a black pen so that it’s easy to see.
Use a light source
Take your index card number one and put it over your template and on top of a light source. I had a light box that we used for scrapbooking in years gone by to use for my light source. You could also put the cards up on a window so the sun shines through.
Drawing a sequence
You want to be able to see the template drawing through the card so that you can trace it. That way you don’t need to redraw your small object over and over again. Tracing gives you a starting place for drawing reoccurring patterns. Plus tracing takes less time as you draw the object on each page of your flipbook.
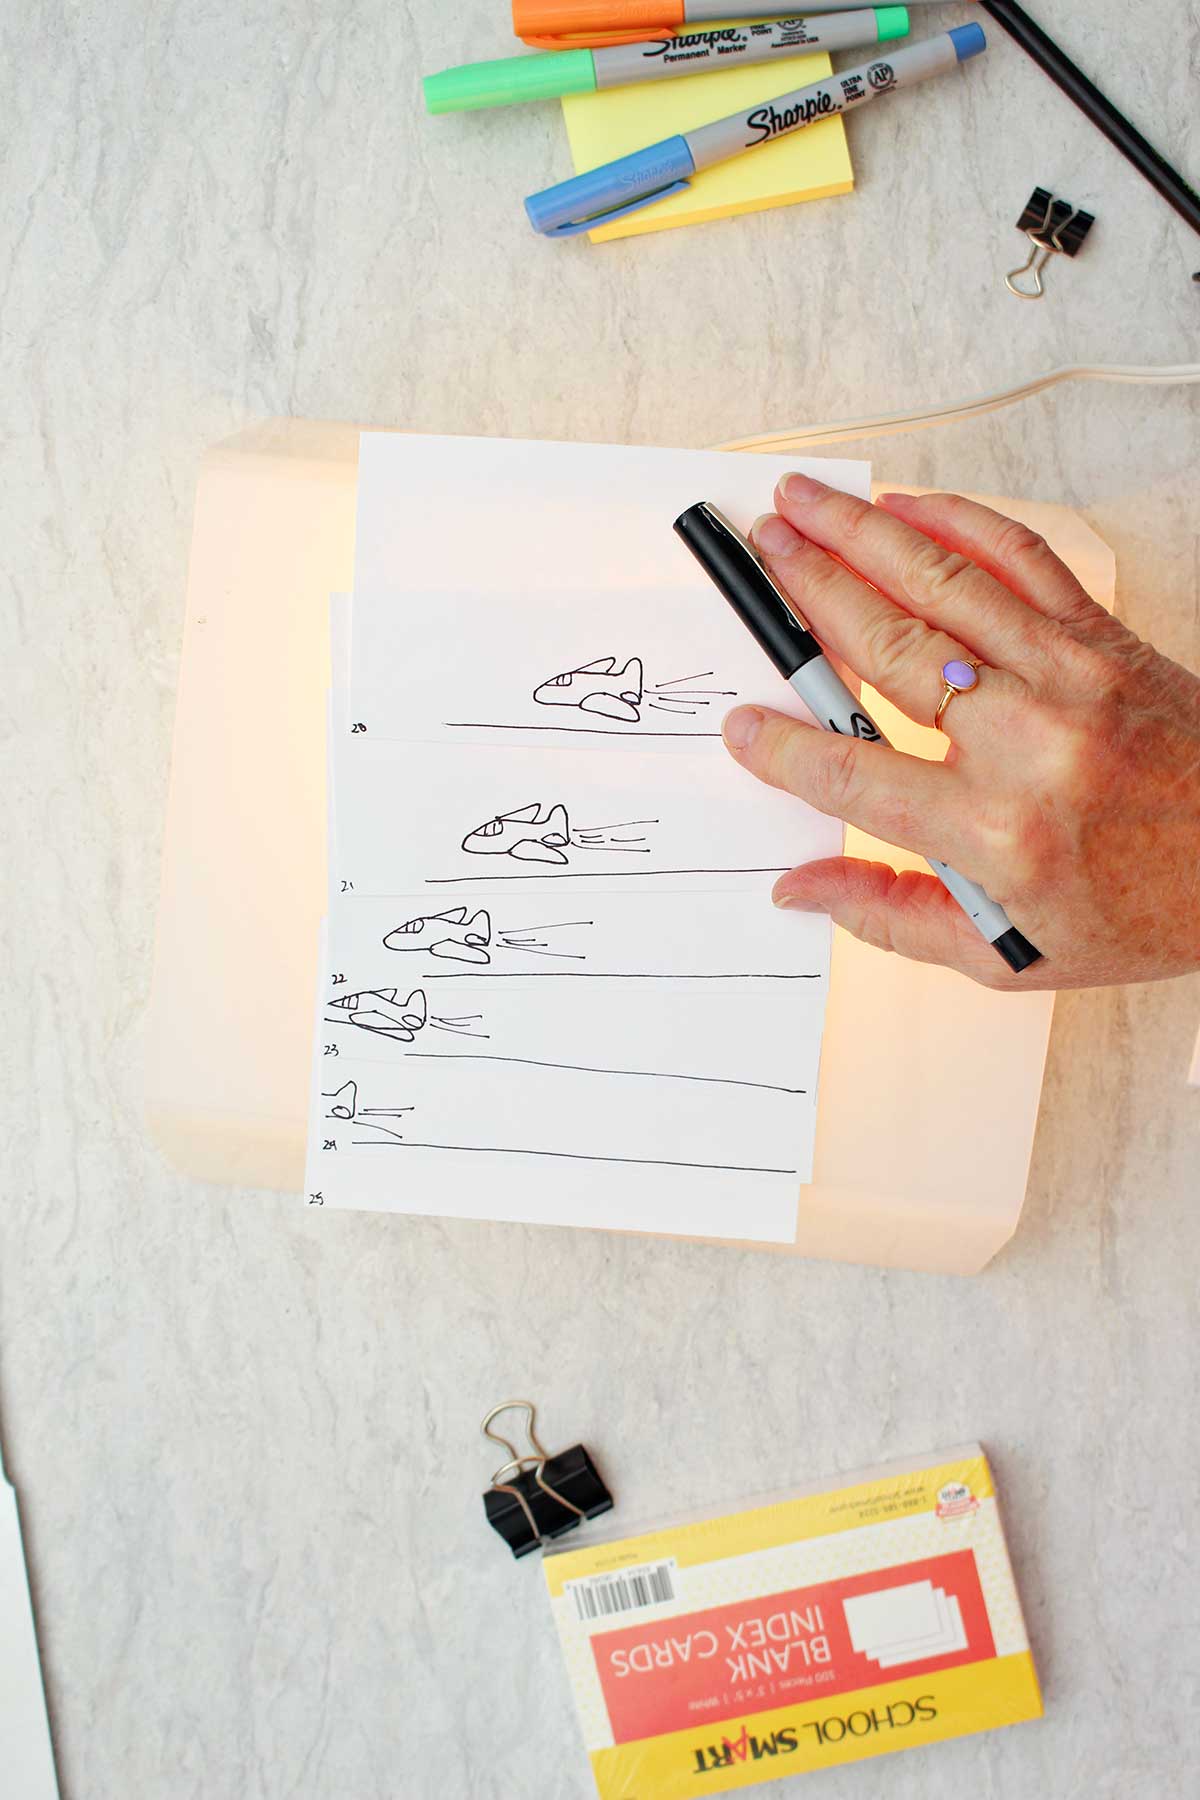
Draw your object in the first place it needs to be in in the series of action steps that you want to create. With 25 cards that’s 25 steps of movement. These do not have to be perfect. As the book flips your eyes will follow the movement. Just have fun with the process!
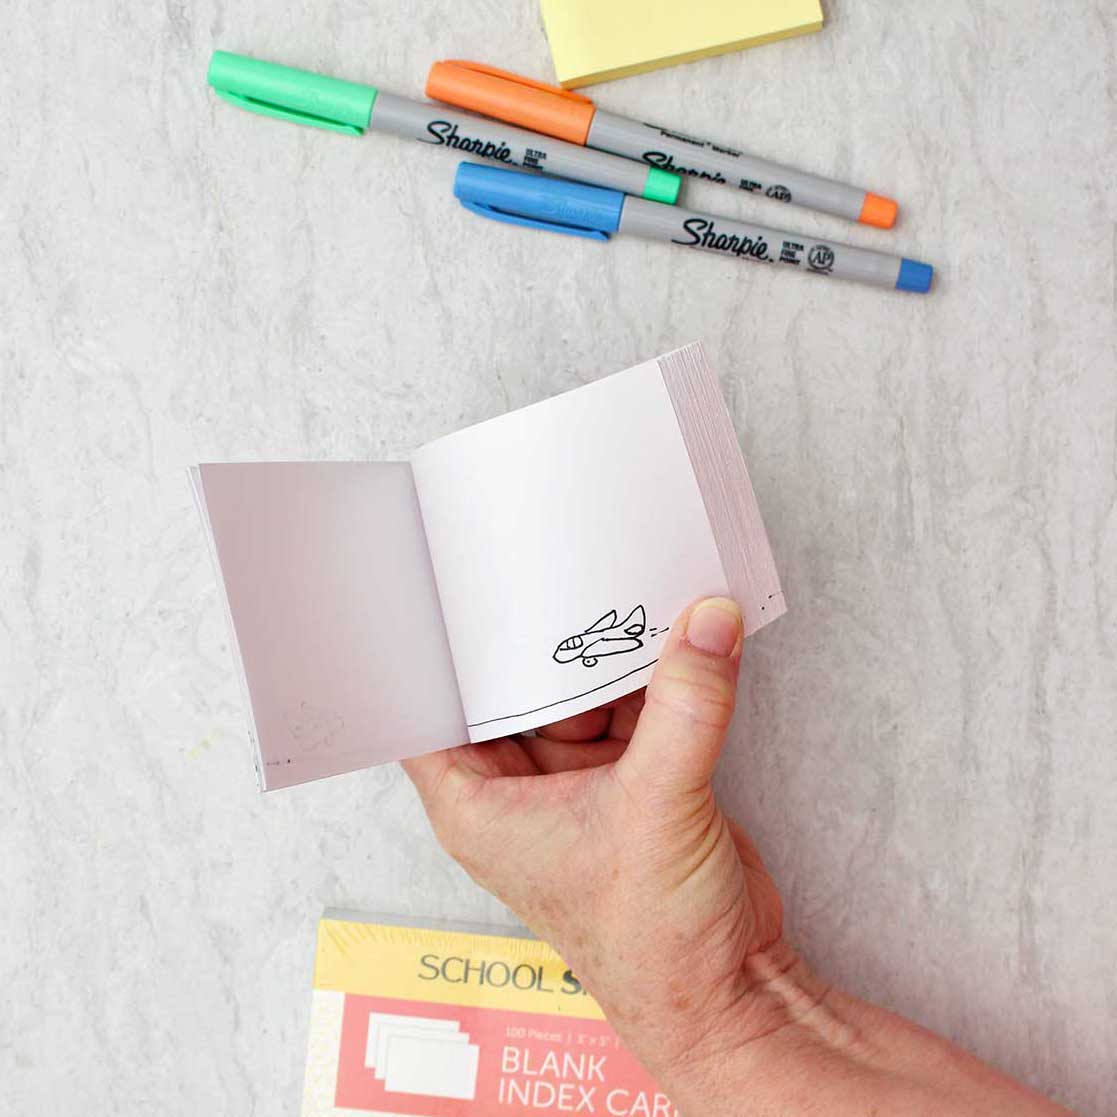
Now use card number one underneath card number two and shift the object slightly in the direction you would like it to go in your movement steps. For my airplane, I started the plane on the edge of the card to the right and moved it to the left and then upwards so that it made a giant loop.
The first drawing had the airplane to the bottom right hand side of the card. The second drawing was about a half an inch to the left of that.
So shift your second card over the first card and then trace your object number two and its second location or second step of movement.
Repeat and trace the object in its' third step of movement, fourth step of movement, and so on until you have moved and traced your object 25 times. Then your object goes from the first part of its' movement series to the last part of its' movement in that series of 25 steps.
Watching the video really helps to understand how this works.
Stack the index cards
Make sure your cards are in order from one to 25. Stack them up so the right hand side are even. Add about 5 to 10 extra blank cards at the back. This will make the book easier to flip.
The rest of the index card edges will look fairly even too, but kind of tap the cards on the table on the right hand side so that that it is the most even edge.
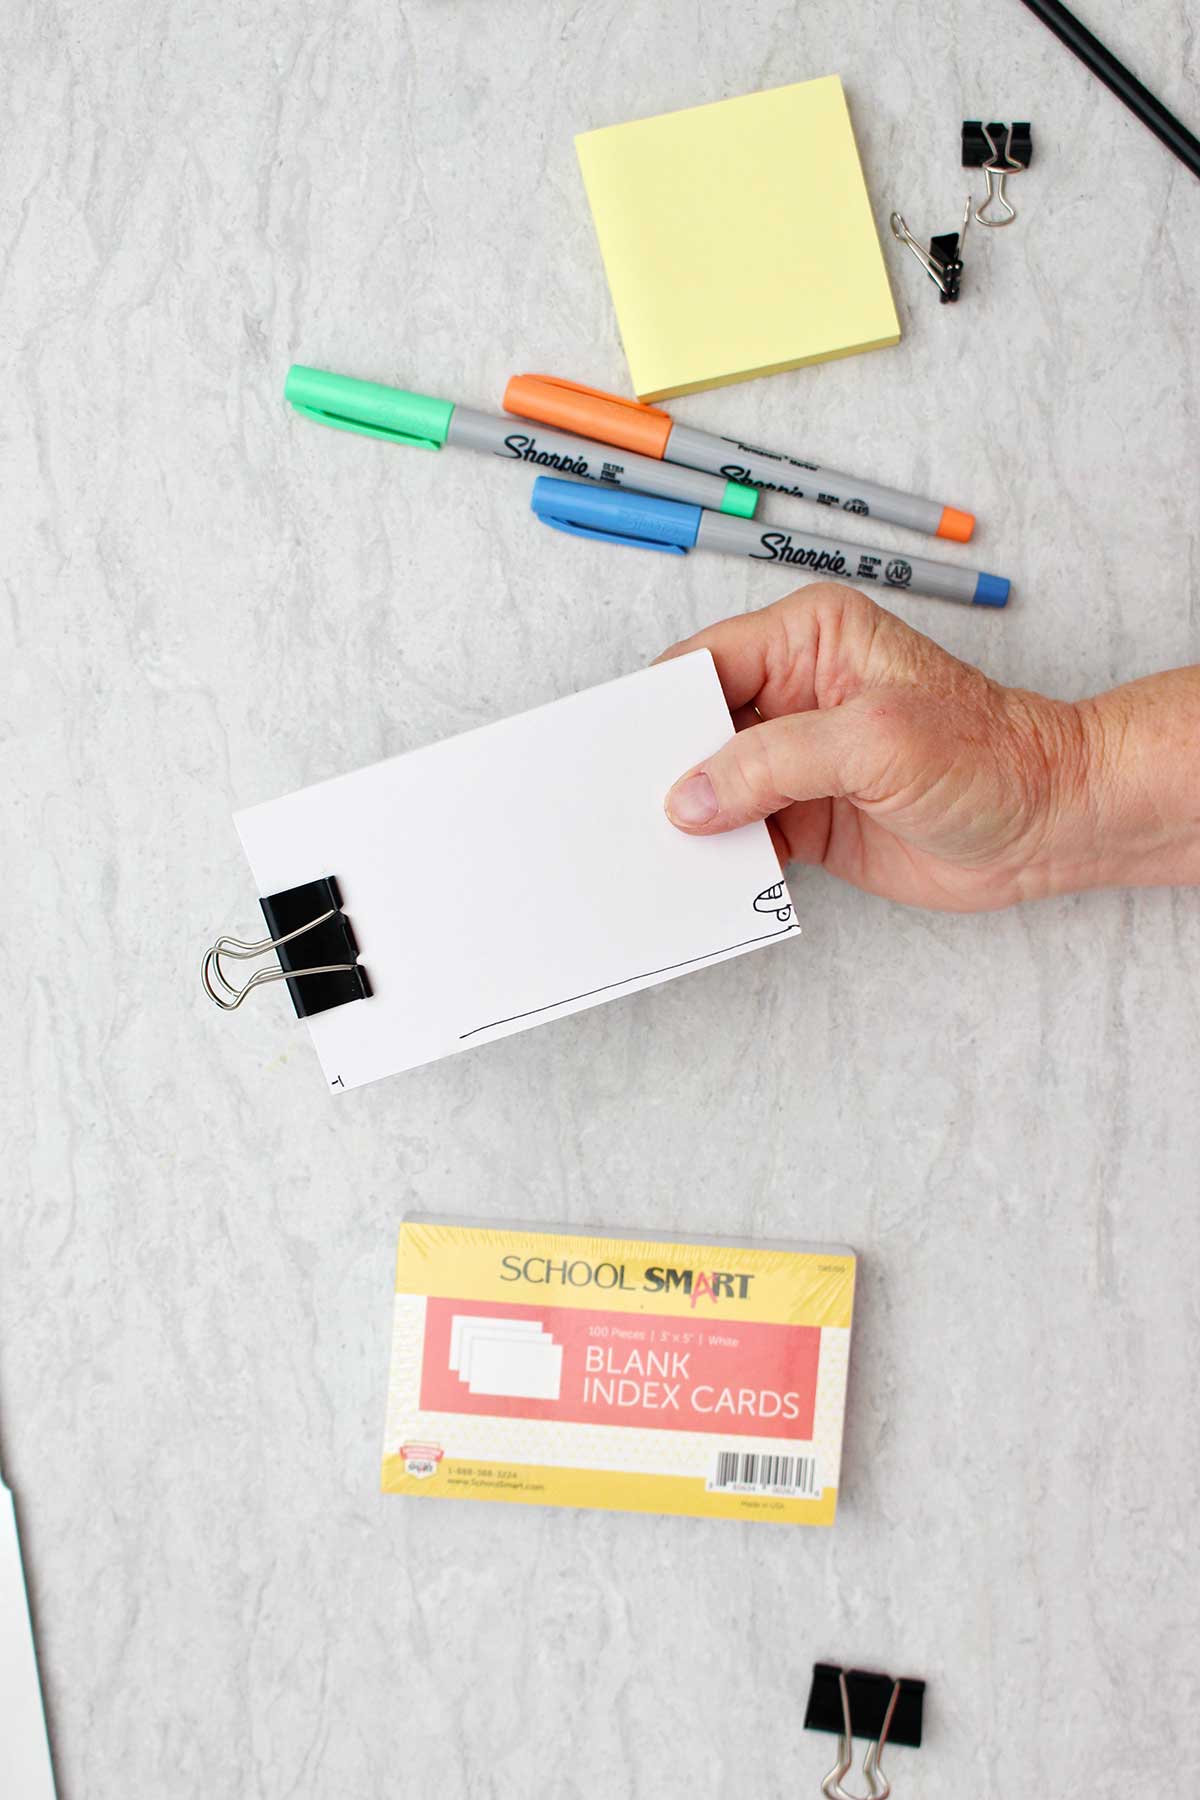
Place your binder clip on the left hand edge of the cards, carefully keeping the in this position. The binding clip is my preferred binding method because it does keep the cards firmly in place.
Making your flip book "flip"!
Finally, hold your booklet firmly with your left hand around the binder clip and use your right hand to flip the right hand edge of the index cards. I use my thumbnail to do the flipping.
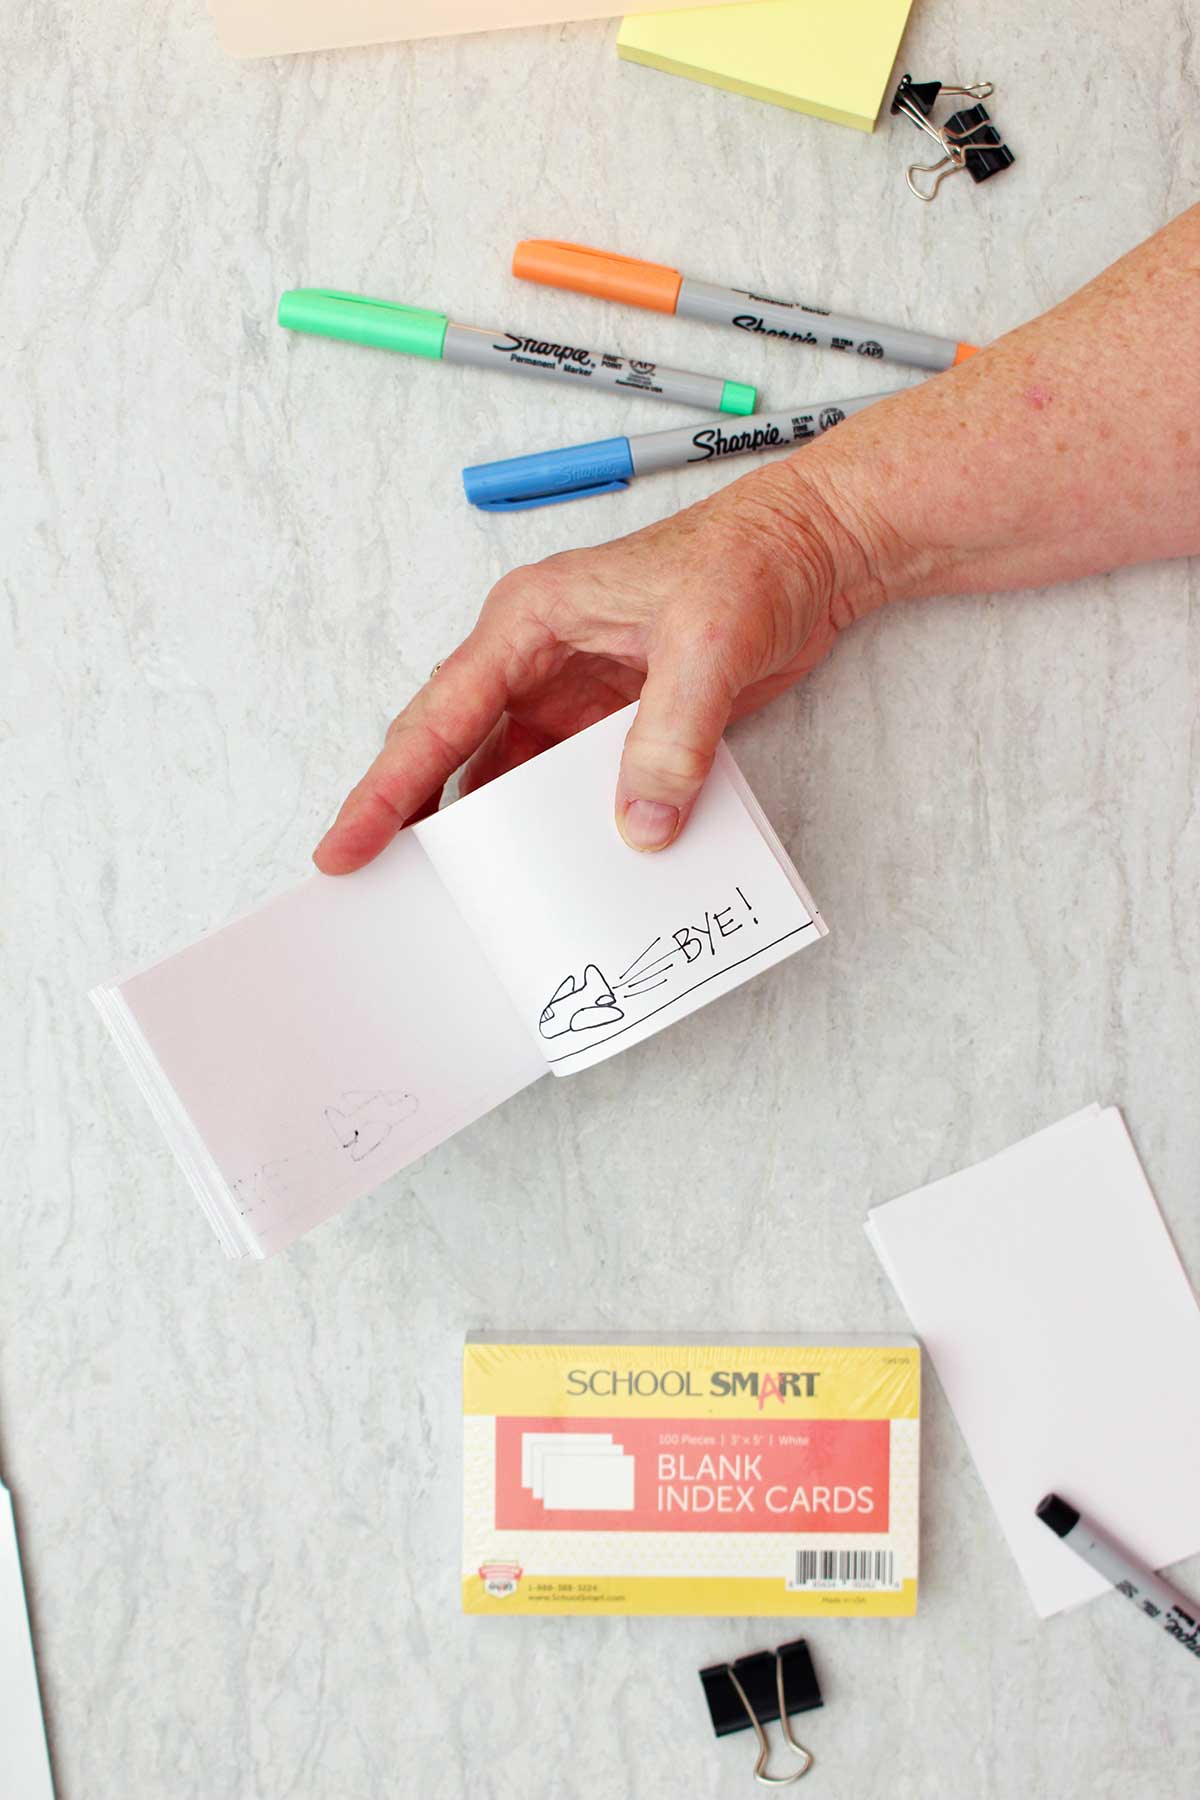
You did it! You made a simple animation. Isn't it so cool!
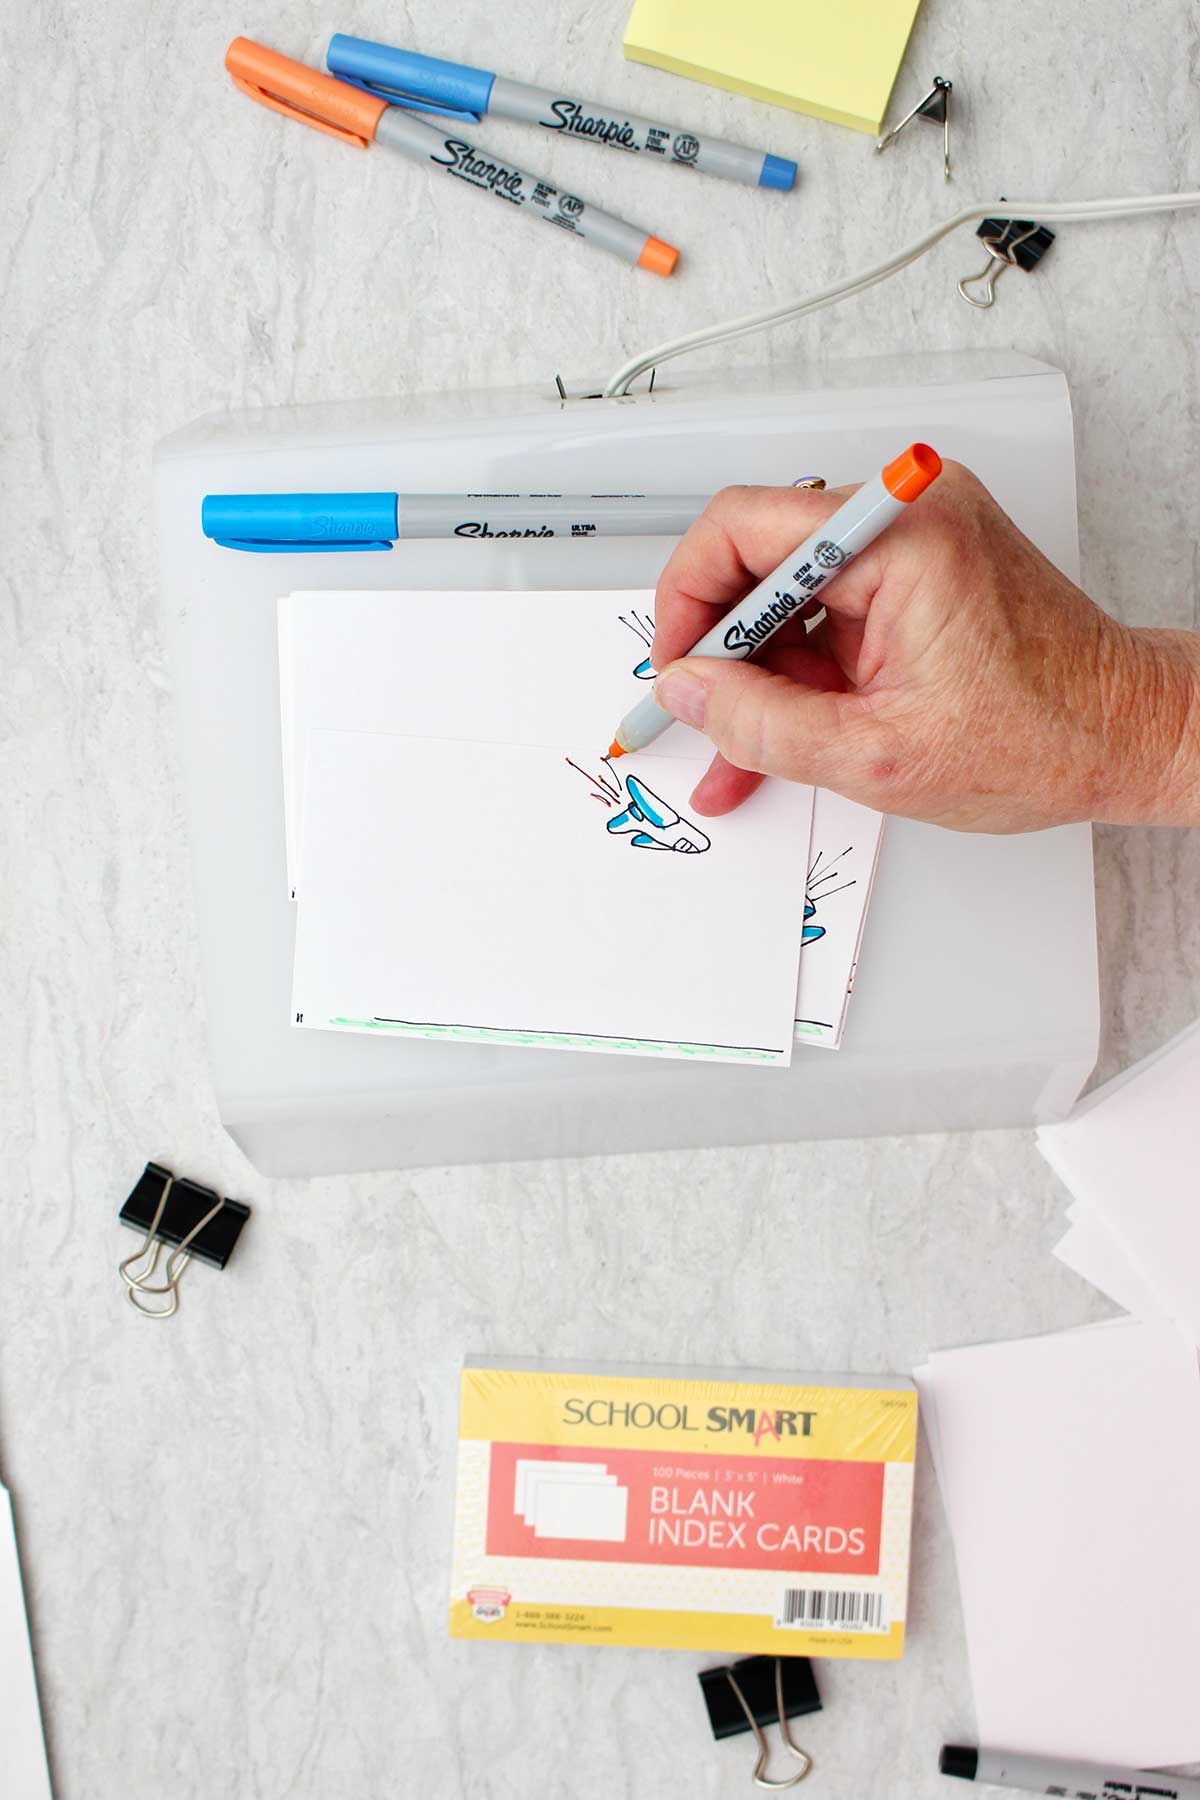
FIY, you can add color and more details to your drawings if you would like to. On mine, I added some color to the airplane and the word "BYE" that followed the airplane off the page.
More flipbook ideas
After you’ve tried it once you will probably have ideas for other flip books!
Easy flipbook ideas could be a ball bouncing, a stick figure walking across the page, a flower seed going into the ground and growing, a bird or airplane flying across the page, a spider building a web, the sun coming up and then shining a smiley face, someone eating an apple bite by bite. So many ideas, so little time!!
Craft Tips
- Extra cards: Add about 5 to 10 extra cards to the back of your booklet even if they are blank. It makes the book easier to flip all the way through if you have a few extra cards at the back.
- Animation leaps: What if you feel like there is too big a jump and movement as you flipped through the book and see something you don’t care for? You could always add an extra card where the animation leaps. Trace your template object so that it’s in the correct spot to bridge the movement leap. Restack your cards and try it again.
- More drawing details: Add extra details to your drawing after you see that it works all right. You could add color or add add an additional object- like a cloud moving through the sky or a bird flying by. Repeating the whole tracing process that you did before with the extra detail object, working around the first action series that you did. Now two things would be happening at once on your flipbook and you can have interactive elements!
- Start simple: It's a good idea to start with a simple main object and series of movements. Stick figures are a great option for people in your flip book, they work GREAT! Then advance to something more difficult if you want.
- Older kids: This is a a craft that works best with older kids. It takes some patience and problem solving.
Craft Variations
Want to switch things up? Here are a few ways you can customize and play with this craft.
- Colored index cards: Purchase index cards in a color.
- Sticky notes: Instead of using index cards, you could choose to use a pad of sticky notes. I like the 3“ x 3“ size. You would draw your drawings on the edge opposite of where the sticky notes are attached. Once your drawings are done they are already attached so you can flip through the book.
- Small notebook: A small little pocket size notebook could be another option for paper
- Cut paper: You can cut your own paper to make a flipbook. Fold an 8 ½ x 11 sheet of paper in half three or four times. So that you will get 8 or 16 pieces of paper from one sheet. If you’re going to staple these together, I would recommend only using two sheets of paper. If you use a binder clip, you could cut apart up to four or five sheets of paper, which would give you a nice number of pages. For the edge that you will flip use the outside uncut edges. These will line up better and flip better.
- Online flip book maker: You can find an online flip book maker if you want that option. My whole point is to try the hand made animation process so I didn't research an online flipbook maker or flipbook software. Let me know if you do and what you liked best. I do know there are a lot of paid and free options to make online flip books. I would recommend making a few by hand first so you get the fun and the full understanding of the process before making a flippingbook online.
FAQ
The number of pages is variable. You can start with as few eight or 10. But this would need to be a very simple action series. You could easily go ahead and use all 100 index cards in a series if you’d like. It does take some patients though because it takes so much time! But your action series could be much more complex, I recommend starting with 20 or 25 pages to start with
This is a personal choice and depends on what you have available to you. I chose the index cards as they are a nice weight and ready made. But you could even use copy paper if that’s what you have available. A set of sticky notes works great as well. We often have those on hand.
I think that the binder clip works very well. It is my favorite option. In a pinch you could use a rubber bands, but I will tell you that this comes apart much more easily. If you use only a few pages, you could staple through them if it’s a lightweight paper.
It took me about 30 minutes to make the flip book seen in this tutorial. A simple flipbook could take as little as 10 minutes to make and a complex one could take a long time, like many hours. Adjust your flipbook idea to match the time you would like to spend on it.
Easy flipbook ideas could be a ball bouncing, a stick figure walking across the page, a flower seed going into the ground and growing, a bird or airplane flying across the page, a spider building a web, the sun coming up and then shining a smiley face, someone eating an apple bite by bite. You’ll think of 1 million ideas for your own flipbook once you get started!
More Simple Art Projects for Kids
Looking for more great DIY crafts for kids? Here are a few favorites for you to try honoring National Aviation Day:
- Watercolor Resist Painted Windsock
- Soft Pastel Ideas for Beginners
- How to Draw an Ice Cream Cone
- Upcycled Plastic Bottle Airplane Craft
- Plastic Bottle Painted Fish
Enjoy!
If you try this craft, let me know! Go ahead and leave a comment, rate it, and tag a photo with #WelcometoNanas wherever you post.
Come join the fun at https://welcometonanas.com
How to Make a Flip Book with Index Cards
Equipment
- Light box (optional)-
Items Required
- Index cards- without lines, can be any color
- Binder clip in a medium size
- Sharpie Ultra Fine Point Marker-
- Light box (optional)-
Instructions
- A good place to start with your first flipbook is with 25 index cards. First stack the cards landscape direction. Then number them from one to 25 with very small numbers in the bottom left-hand corner.
- On a separate piece of paper, make a template of the main object you would like in your drawing. Take your index card number one and put it over your template and on top of a light source.
- Draw your object in the first place it needs to be in in the series of action steps that you want to create. With 25 cards that’s 25 steps of movement.
- Now use card number one underneath card number two. Shift your second card over the first card and then trace your object in its second location or second step of movement.
- Repeat and trace the object in its' third step of movement, fourth step of movement, and so on until you have moved and traced your object 25 times. Watching the video really helps to understand how this works.
- Stack the cards from 1-25 so the right hand side are even. Add about 5 to 10 extra blank cards at the back.Tap the cards on the table on the right hand side so that that it is the most even edge. Place your binder clip on the left hand edge of the cards.
- Finally, hold your booklet firmly with your left hand around the binder clip and use your right hand to flip the right hand edge of the index cards. I use my thumbnail to do the flipping.


Leave a Reply