Springtime is here and with it comes beautiful butterflies and springtime crafts! Follow the steps to fold an Easy Origami Butterfly for Kids. Then use the paper butterflies to add to cards, hang by strings, or make into garlands to brighten the day!

Jump to:
Cute Craft Alert: Origami Butterfly Easy Craft
Spring and Origami are two of my favorite things. I love that we combine them in this easy folded Origami Butterfly craft!
We just had a family weekend. This was a fun activity to pull out and do with the grandkids of a variety of ages. Plus it was easy to pack paper when traveling.
The kids learned how to make an origami butterfly easily, now I want to show you how too! Follow the steps to fold a beautiful butterfly in the paper color of your choice.
If I had packed a bit of thread or string it would have been fun to make a mobile. We could tie each butterfly up and then hang the mobile where we can all enjoy it.
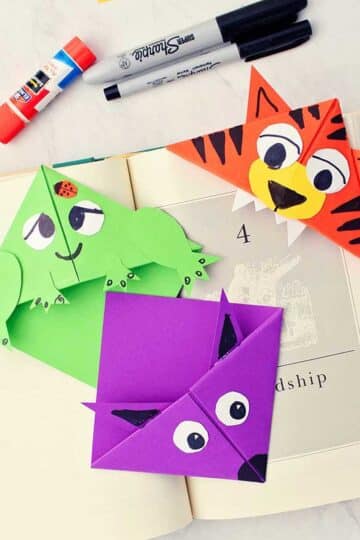
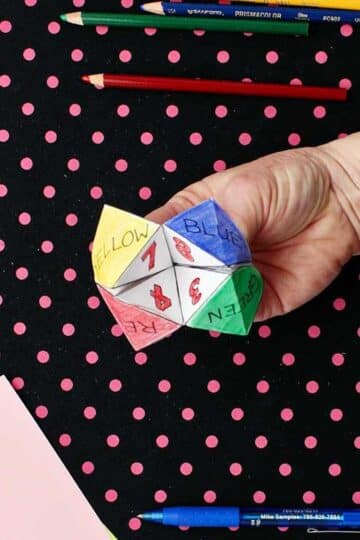
Origami is such a fun craft that only requires one item to make - paper! If your kiddos are on a roll and don't want to stop folding, try making some cute Animal Bookmarks or folded Lucky Stars!

Supplies
You don’t need much to bring these cute origami butterflies to life!
- Paper- I used colored copy paper to make these butterflies. You could also use origami paper or scrapbooking paper.
- Scissors- We used paper scissors to cut our paper into squares.
- String (optional)- String, thread, or ribbon can hang the butterflies from the ceiling, a mobile, or a garland.


Step by Step Origami Butterfly
Be as accurate with each step as possible so your origami butterflies turn out well! It helps to watch the tutorial video as you follow these origami butterfly instructions.
Cut your paper (I used colored copy paper) into a square.
Fold the square paper corner to corner into a triangle. Unfold and fold corner to corner the other way.
Unfold and turn the paper over. Fold the square in half into a rectangle. Unfold and fold into a rectangle the other direction.
Tuck each folded corner of the rectangle inwards, tucking them inside creating a triangle.


Fold this triangle in half along the center vertical fold line.
Use a scissors to cut and round the ends of the set of tips on the triangle. These will create the rounded tips on the end of the origami butterflies wings.
Unfold into the larger triangle again, hold it so it looks like a mountain.
Fold the top of the two right hand bottom flaps of the triangle up- so what was the bottom edge lines up with the center fold.
Do the same thing with the top left hand flap.


Take the top corner of the triangle in your hand and turn the triangle over while bringing the top corner to the bottom. Now it is an upside down mountain!
Bend that same corner of the triangle back up to the top without creating a fold. That corner will stick up over the flat edge. Bend this part of the corner down and behind the butterfly origami.
Turn the butterfly over and bend the butterfly in half on the center line, pinching it tightly where the small triangle folds over. This should hold the butterfly in place. See the tips below if the folds don’t stay folded.
The butterfly origami is in a 3D shape and so graceful looking.


Craft Tips
These tips can help making an easy origami butterfly even easier!
- Use a glue stick- Use a glue stick to add glue under the head to glue it down if the fold doesn’t hold it in place.
- Follow the video- Watch the origami butterfly step by step video tutorial while folding your paper. The video will be very helpful as you make your simple craft.
- Change the size- An origami butterfly can be made out of any size square of paper. It is best to start with a larger square when learning.


Craft Variations
Want to switch things up? Here are a few ways you can customize and play with this craft.
- Dollar bill origami butterfly- Try making a money origami butterfly. Don’t cut the bill, just fold it into the square shape.
- Post it note origami butterfly- A post it note is already in a square. It would make a small butterfly.
- Butterfly mobile- Here’s how to make origami butterfly mobiles. Use two sticks, dowels, or popsicle sticks and tie them together in the center. Make a hanging loop and then hang the butterflies down from the sticks at various locations and with various lengths of thread. The goal is to get them to balance. Hang it up and enjoy the flying butterflies!

FAQ
The directions are laid out in this post. Start with a square piece of paper and fold according to directions. The result is a graceful looking paper butterfly.
Follow the directions for folding an origami butterfly found in this post WHILE watching the video. Stop the video to complete each step. Seeing it makes it much easier!
I used colored copy paper to make these butterflies. You could also use origami paper or scrapbooking paper.

More DIY Origami for Kids
Looking for more great DIY origami for kids? Here are a few favorites for you to try:


Come Join the Fun at WTN!
Try this craft, leave a comment, rate it, and tag a photo with #WelcometoNanas wherever you post.
More Crafts Please!
Love getting crafts straight to your inbox? Sign up to receive a weekly email and get a free gift!


Easy Folded Origami Butterfly for Kids
Equipment
- none needed
Items Required
- colored copy paper You could also use origami paper or scrapbooking paper.
- paper scissors
- String, thread, or ribbon (optional)
- a glue stick (optional)
Instructions
- Cut your paper (I used colored copy paper) into a square.Fold the square paper corner to corner into a triangle.Unfold and fold corner to corner the other way.Unfold and turn the paper over.
- Fold the square in half into a rectangle.Unfold and fold into a rectangle the other direction.Tuck each folded corner of the rectangle inwards, tucking them inside creating a triangle.
- Fold this triangle in half along the center vertical fold line.Use a scissors to cut and round the ends of the set of tips on the triangle. These will create the rounded tips on the end of the origami butterflies wings.Unfold into the larger triangle again, hold it so it looks like a mountain.
- Fold the top of the two right hand bottom flaps of the triangle up- so what was the bottom edge lines up with the center fold.Do the same thing with the top left hand flap.
- Take the top corner of the triangle in your hand and turn the triangle over while bringing the top corner to the bottom. Now it is an upside down mountain!Bend that same corner of the triangle back up to the top without creating a fold. That corner will stick up over the flat edge. Bend this part of the corner down and behind the butterfly origami. Turn the butterfly over and bend the butterfly in half on the center line, pinching it tightly where the small triangle folds over. This should hold the butterfly in place. See the tips section if the folds don’t stay folded.


Leave a Reply