Welcome To Nana's

  • All Crafts
  • Arts & Crafts
    • Drawing
    • Painting
    • Sewing
    • Paper craft
    • Nature
    • Recycled
    • Coloring Book
    • 3-D Project
  • Activities
    • Indoor
    • Outdoor
    • Science
    • Trip Activities
    • Recipes
  • Holiday
    • Christmas
    • Thanksgiving
    • Halloween
    • Easter
    • Fourth of July
    • Father's Day
    • Flag Day
    • May Day
    • Midsummers Day
    • Mother's Day
    • New Years
  • About
menu icon
go to homepage
  • All Crafts
  • Arts & Crafts
    • Drawing
    • Painting
    • Sewing
    • Paper craft
    • Nature
    • Recycled
    • Coloring Book
    • 3-D Project
  • Activities
    • Indoor
    • Outdoor
    • Science
    • Trip Activities
    • Recipes
  • Holiday
    • Christmas
    • Thanksgiving
    • Halloween
    • Easter
    • Fourth of July
    • Father's Day
    • Flag Day
    • May Day
    • Midsummers Day
    • Mother's Day
    • New Years
  • About
search icon
Homepage link
  • All Crafts
  • Arts & Crafts
    • Drawing
    • Painting
    • Sewing
    • Paper craft
    • Nature
    • Recycled
    • Coloring Book
    • 3-D Project
  • Activities
    • Indoor
    • Outdoor
    • Science
    • Trip Activities
    • Recipes
  • Holiday
    • Christmas
    • Thanksgiving
    • Halloween
    • Easter
    • Fourth of July
    • Father's Day
    • Flag Day
    • May Day
    • Midsummers Day
    • Mother's Day
    • New Years
  • About
×
Home » Arts & Crafts » Paper craft

Watercolor Resist Painted Windsock for Kids

Published: Mar 18, 2021 · Modified: Mar 27, 2025 by Shelly · This post may contain affiliate links · Leave a Comment

A brightly colored Watercolor Resist Painted Windsock for Kids with streamers.

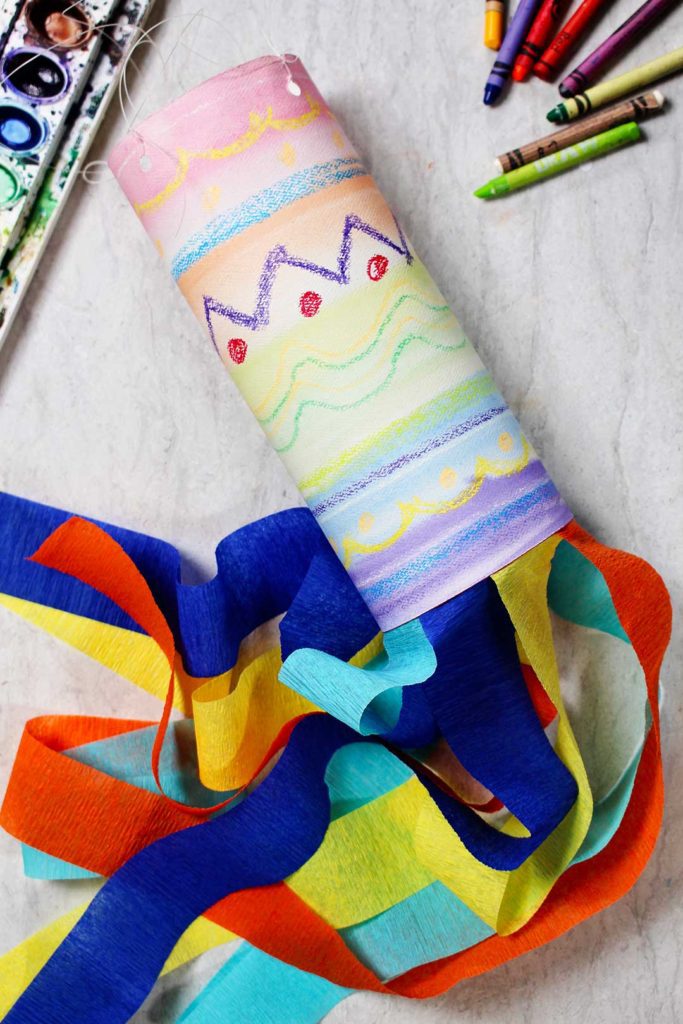
Catch the breeze with a windsock

A wonderful Watercolor Resist Painted Windsock for Kids is perfect to catch some of the breeze on a windy March day. Wonderful Watercolor Resist Painted Windsock for kids…I couldn’t help putting in all of those “W”s- gotta’ love an alliteration.

Streamers, crayons, paper, paint brushes, watercolor paints, and a hole punch.

March, please go out as a lamb

They say if March comes in as a lion it will go out as a lamb. Well I sure hope so! The transition from winter to spring this year has been pretty rough weather wise in the Midwest of the U.S.. Making something beautiful is just the spring perk we need. Let's do it!

Watercolor resist technique

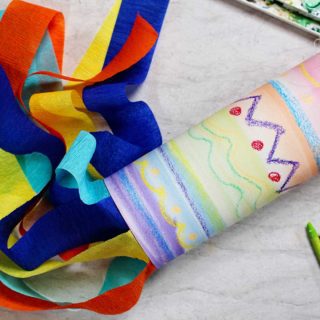
This watercolor resist technique makes the windsock beautiful as well as providing the chance to learn an art technique. The blended watercolors makes it look like an Easter egg, don’t you think? You are going to love how easy this is to make.

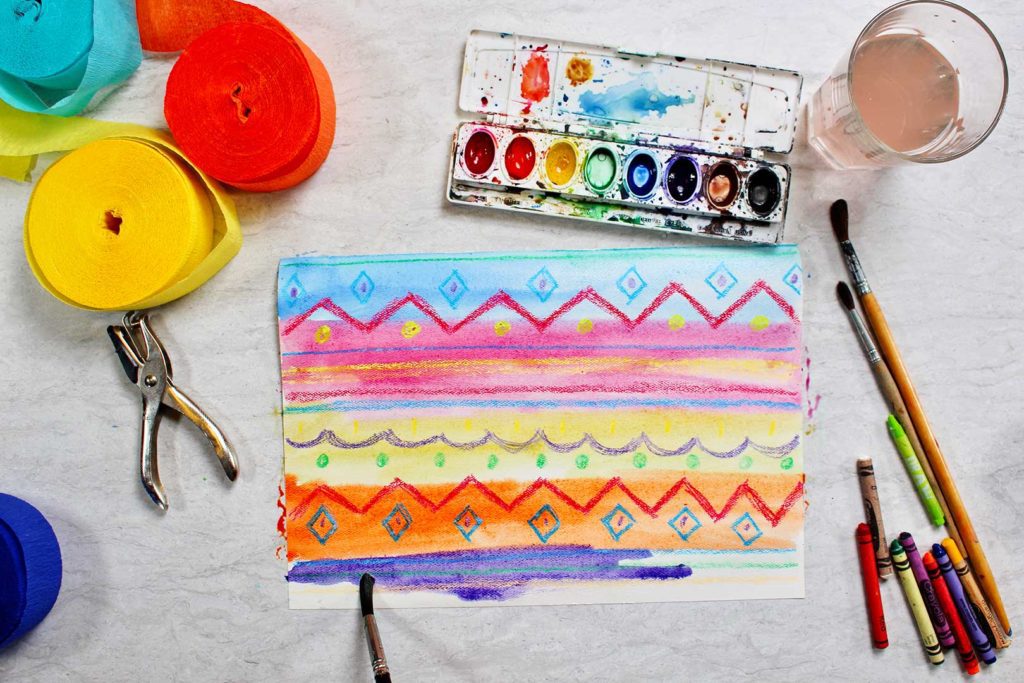
First, you'll color with wax crayons to create a pattern. When you apply watercolor paints, the wax will "resist" the water! Now when you paint the paper, anywhere on the paper where there’s wax the watercolor will not add color.

Once you get the hang of it, the watercolor resist technique is fun to use for other art projects too. You can use it to make this fun 4th of July Rocket picture, as well as this cool Paper Batik Art!

Coloring zigzag lines with a red crayon, surrounded by watercolor paints, paintbrushes, and streamers.

Watercolor paper

I recommend using 9x12” Watercolor Paper for this craft. There are pads of inexpensive 9x12” Watercolor Paper for kids projects in the craft stores and online. Watercolor paper is made for, well, water and holds up better when doing a watercolor wash. It is heavier and won’t curl and wrinkle as much. 

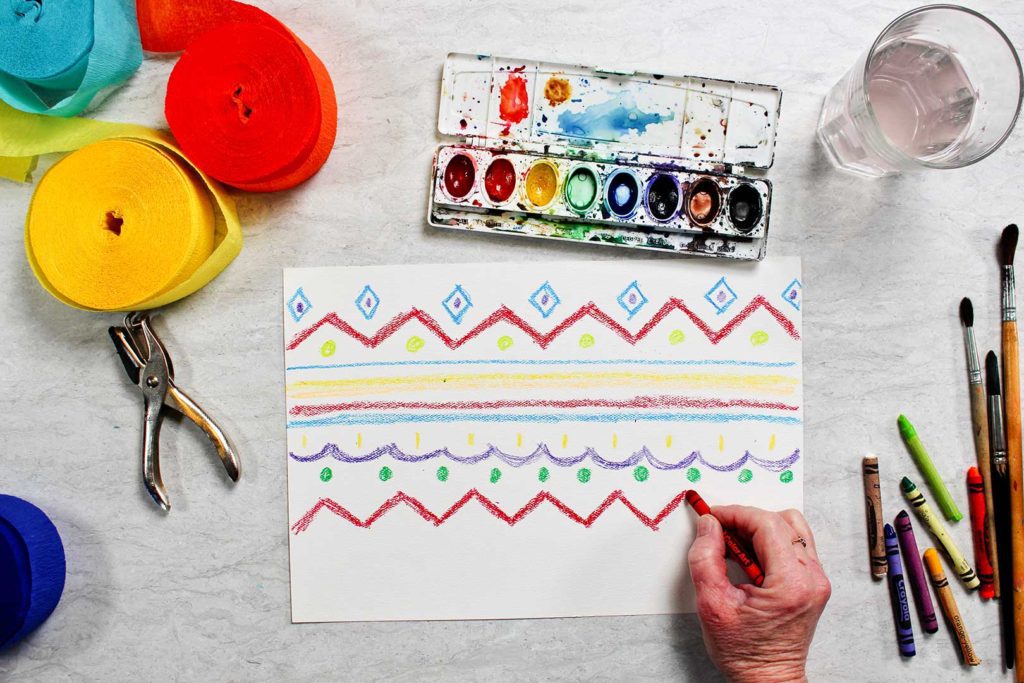
Crayon (wax) colored design

Place the 9x12" 9x12” Watercolor Paper “landscape” direction, as shown and color a design on the paper with wax Crayons. It is important that this is done with Crayons as they are made from wax and will not bleed colors into the watercolor paint. The design doesn’t have to stretch across the paper and could be a picture as well as a design. No rules here except to use Crayons and to have fun!

Blue watercolor paint being painted onto a colorful picture, surrounded by watercolor paints, paintbrushes, and streamers.

Wet the paper for the wash

Use the paintbrush to wet the whole surface of the paper. This helps the paint to spread out and cover the whole surface in this watercolor wash technique. The water is what makes the paint “wash” across the paper.

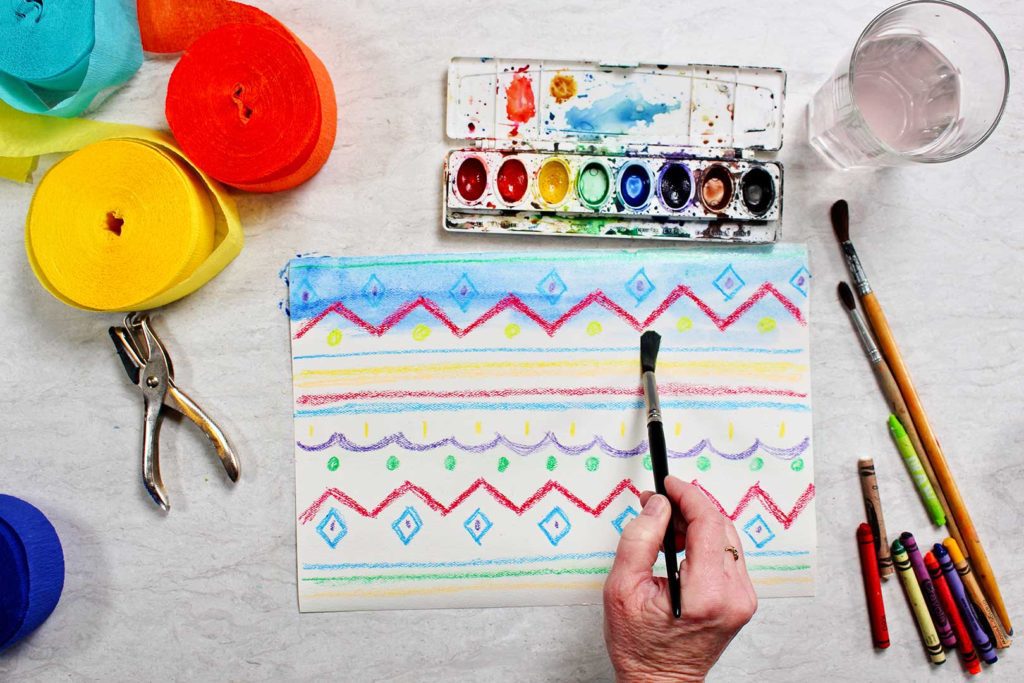
Watercolor paint wash...so pretty

Load the paintbrush with one color of Watercolor Paints and then brush the paint across the paper. If it drips elsewhere don’t worry about it.

Wash the paint brush out in a cup of water and repeat with another Watercolor Paints color. Continue to do this until the paper is covered with paint.

Yellow watercolor paint being painted onto a colorful picture, surrounded by watercolor paints, paintbrushes, and streamers.

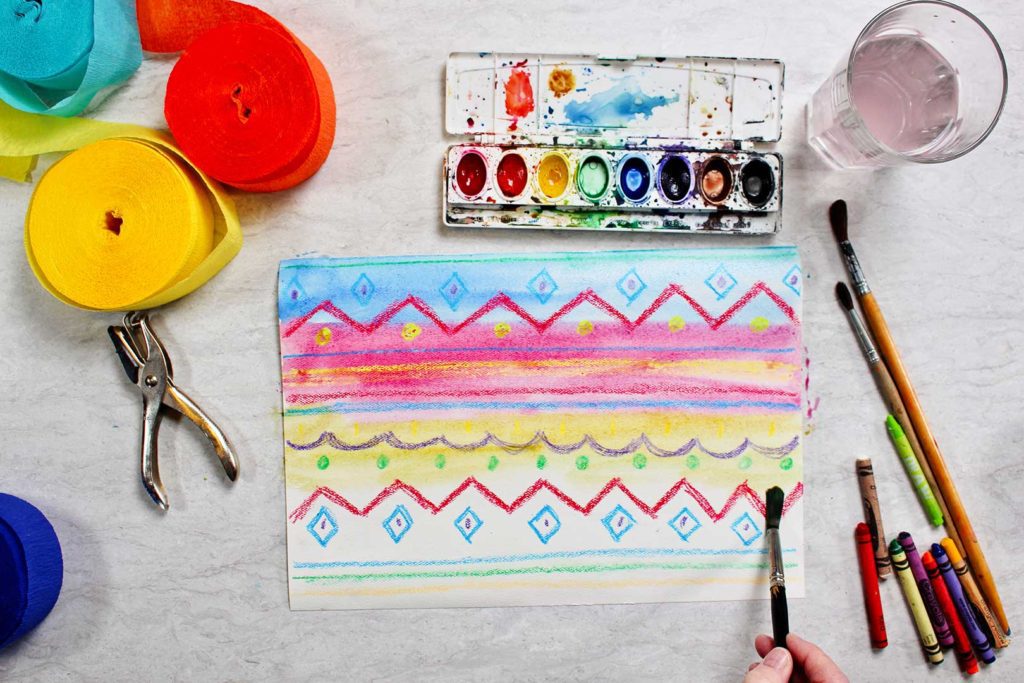
Let the paint spread into the water and blend

The Watercolor Paints will blend out on the paper where there is water, add water to wet the surface of the paper as needed. Try not to put paint on top of paint in the wash, or it gets “muddy” in color. The paint will do the work for you, just paint it on and let it spread and blend.

Tip: This is hard for people that want to control things. It is tempting to get into the paint with the brush and keep brushing. Resist the urge, help the kids to resist the urge!! Just see what happens, it is so cool.

Let the paper dry

Allow the paper to fully dry.

Purple watercolor paint being painted onto a colorful picture, surrounded by watercolor paints, paintbrushes, and streamers.

Cut the streamers

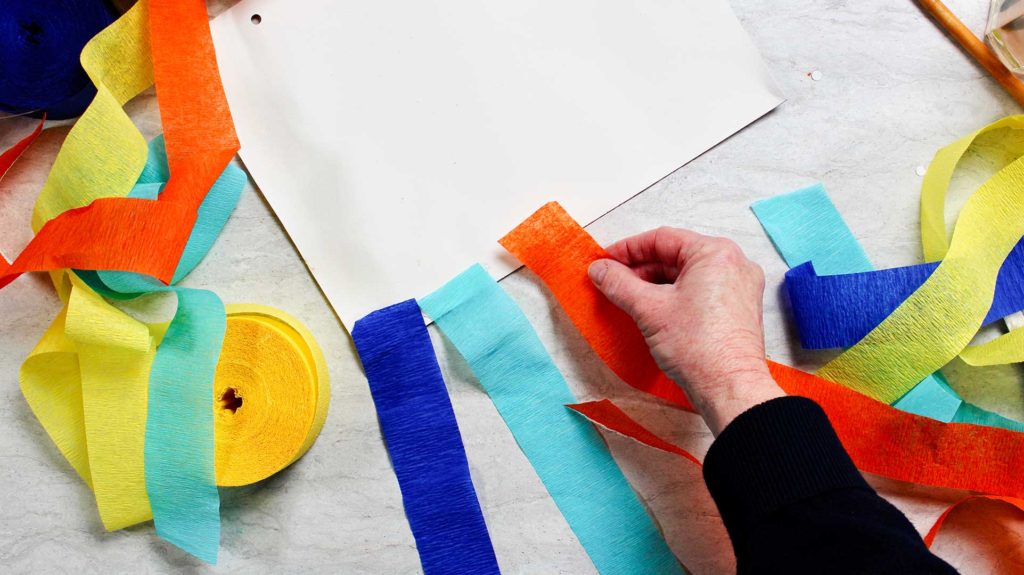
Cut 8- two foot long pieces of Crepe Paper. Turn the paper over, face down, and glue the Crepe Paper streamers along the bottom edge. Be very careful with the hot glue. For younger grands it may be wise to use Tacky Glue instead. The down side to Tacky Glue is it takes longer to dry.
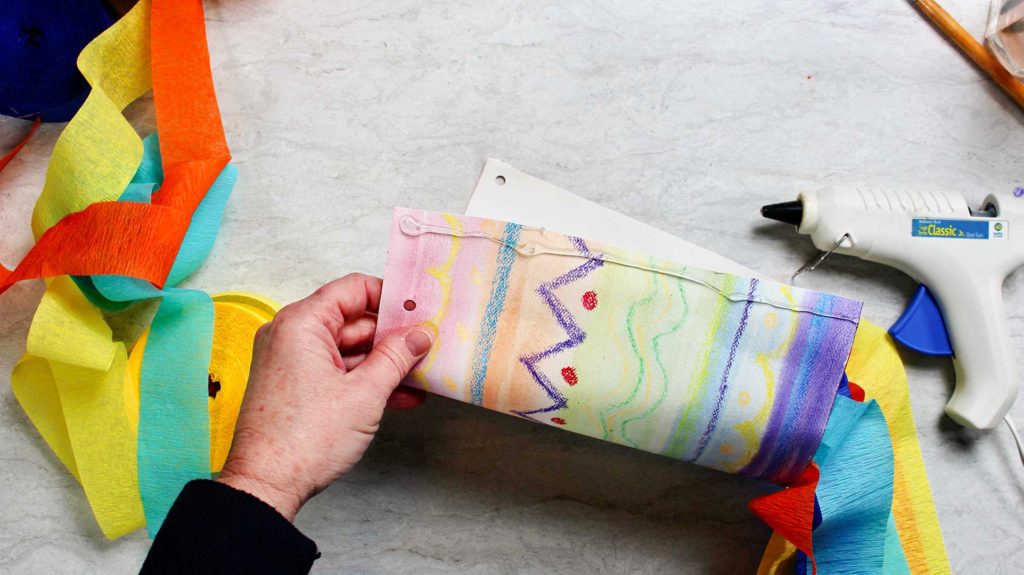
Make a tube

Roll the watercolor paper into a tube (so streamers flow downward) and glue the tube together along the edge that overlaps. This step made me smile as the Watercolor Resist Painted Windsock for Kids came to shape. All of the colors just make me happy. I hope you all feel the same way.

Orange, teal and blue streamers being attached to a piece of paper.

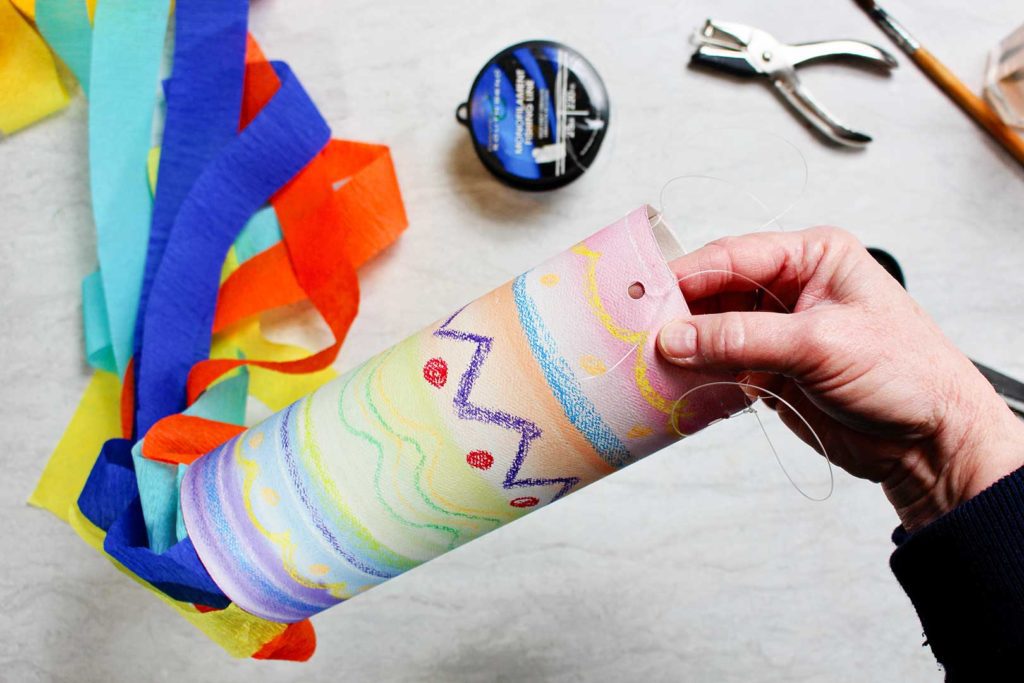
Punch holes and tie the fishing line

Grab your Round Hole Punch and punch four holes as equally distanced apart on the top edge of the windsock as you can make them. It works best for me when I punch two holes directly across and then the punch the other two holes half way between the first holes. It is easier to eyeball it that way.

We are almost done! Cut 2 pieces of Fishing Line that are about 2 ½ feet long. Overlap the two strings and fold them in half together. Tie a loop where they fold that you can use to hang the windsock when you are done. 

There are four ends of the Fishing Line dangling down from the loop. Tie one of the ends to each hole on the top of the windsock using a double knot. Smaller grands may have a challenge with this step but it is great to learn how to tie a double knot if they are able.

Hot glue added to a colorful watercolor resist painted windsock.

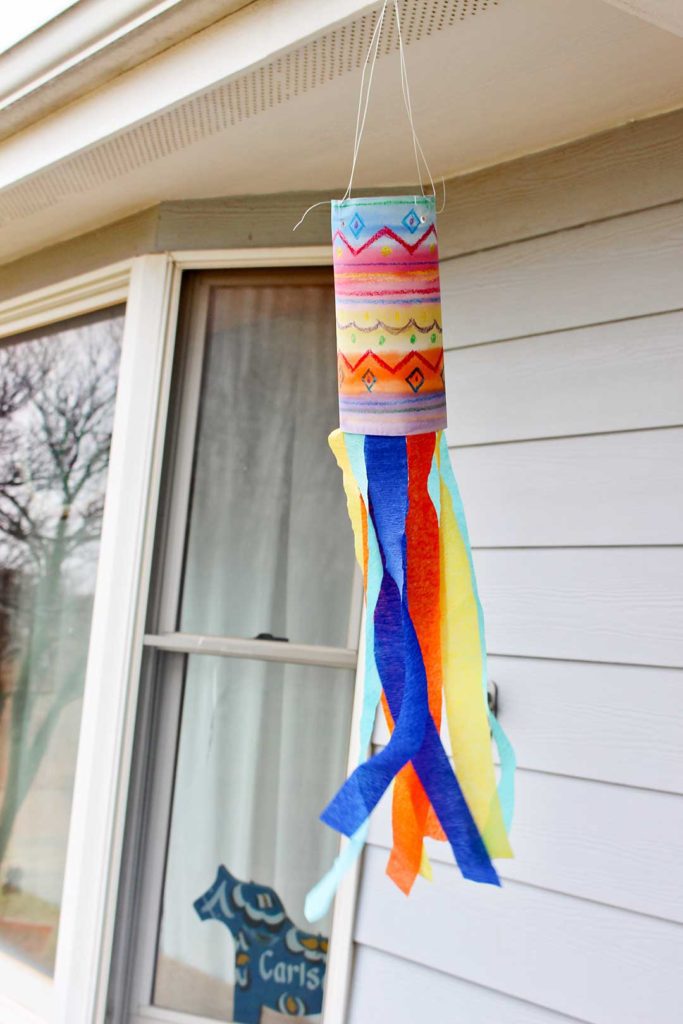
Hang up the Watercolor Resist Painted Windsock for Kids

There you have it! I hung mine on the front porch and it was a real heart happy boost to see it dancing on the breeze. 

Originally windsocks were put up at airports to help with the weather information needed to be safe when flying an airplane. The wind really blows here on the prairie where we live so a windsock is sure to tell the direction of the wind as it floats and flaps. It isn’t waterproof though so you may want to keep it inside most of the time.

Note- I didn’t remember to bring mine in last night and it rained. Wet crepe paper is not redeemable, just saying. But, I’m heading to the grands house and we are going to make some more Watercolor Resist Painted Windsocks for Kids. I’m so excited to see our grands and may make another windsock for myself at the same time. I’ll keep it inside this time.

String tied to the top of a Watercolor Resist Painted Windsock for Kids.

Watercolor Resist Easter Eggs too!

The windsock would be a pretty decoration to have up for Easter.

If you would like to make Easter eggs with the same watercolor resist technique you may want to check out the “Egg Extravaganza” post on Welcome To Nanas where we make Wax Resist Dyed Easter Eggs. That’s the main way that I made Easter eggs when I was young. They are really pretty.

Supplies for Watercolor Resist Painted Windsock for Kids:

  • 9x12" Watercolor Paper
  • Crayons
  • Watercolor Paints
  • Paint Brushes Set
  • TopElek Mini Glue Gun Kit with 30pcs Glue Sticks, High Temp
    and glue
  • OR Tacky Glue and binder clips
  • Crepe Paper (several colors is nice)
  • Fishing Line
  • OR String
  • Round Hole Punch
A brightly colored Watercolor Resist Painted Windsock for Kids with streamers, waving in the breeze..

Enjoy!

Welcome to Nana’s! Where there’s fun things to do with your “grand” kids!

Come join the fun at www.WelcomeToNanas.com

A brightly colored Watercolor Resist Painted Windsock for Kids with streamers.

Watercolor Resist Painted Windsock for Kids

Shelly
The Watercolor Resist Painted Windsock for Kids is beautiful as it floats in the breeze and teaches an art technique.
Print Pin
Cook Time 30 minutes mins
Total Time 30 minutes mins
Yield 1 windsock

Equipment

  • Paintbrush
  • Hole punch
  • Scissors

Items Required
  

  • 9 by 13" Watercolor paper
  • Watercolor paints
  • Crepe paper (several colors is nice)
  • Fishing line
  • OR String
  • Hot glue gun and glue
  • OR Tacky Glue

Instructions
 

  • Place the watercolor paper landscape direction.
  • Color a design on the paper with wax crayons.
  • Use the paintbrush to wet the whole surface of the paper.
  • Load the paintbrush with one color watercolor paint and spread across the paper.
  • Wash brush out and repeat with another color and so forth till paper is covered.
  • Allow the paper to dry.
  • Cut 8 two foot long pieces of crepe paper.
  • Turn the paper face down and glue the crepe paper streamers along the bottom edge.
  • Roll the paper into a tube (so streamers flow downward) and glue along the edge.
  • Punch four holes equally distanced apart on the top edge of the windsock. 
  • Cut 2 pieces of fish line, fold in half together and tie a loop where they fold.
  • Tie the ends of the fish line to the holes of the windsock with a double knot.
Keyword Children's Artwork

More Paper craft

  • Person showing a Father's Day card with red flowers and a windmill against a sunset with type saying "Happy Father's Day"
    A Kind Word Magazine Collage Card for Father’s Day
  • Three colorfully colored straw rockets.
    3 Cool Ways to Make Straw Rockets (Free Straw Rocket Template)
  • Four origami butterflies in pastel shades of blue, yellow, orange and pink.
    Easy Folded Origami Butterfly for Kids
  • A person coloring in flowers pink on the Arbor Day coloring page which is in a clip board resting on a plaid placemat surrounded by colored pencils.
    Printable Tree Coloring Page for Arbor Day

Leave a Reply Cancel reply

Your email address will not be published. Required fields are marked *

Recipe Rating


This site uses Akismet to reduce spam. Learn how your comment data is processed.

Hello there! I'm Shelly (Nana), an artist, previously homeschooling mother of 3, and now proud grandma (Nana) of 6. I love sharing artistically inspiring, hands-on crafts for kids of all ages. Let's go have some fun!

More about me →

Popular Crafts

  • Hand squeezing the a completed batch of light blue fluffy slime.
    How to Make the Best Fluffy Slime Recipe for Kids

  • Completed colorful tissue paper flowers, a purple and pink one resting on a glass cake stand with others underneath.
    How to Make Easy DIY Giant Tissue Paper Flowers (2 Ways!)

  • Overhead views of two different sprouts growing in glass containers.
    How to Grow a Tree from a Pine Cone

  • A sunset picture created with sharpies and alcohol on canvas, surrounded by bright sharpie markers..
    Cool Sharpie and Alcohol Painting on Canvas

Footer

↑ back to top

Privacy Policy

As an Amazon Associate I earn from qualifying purchases.

Copyright © 2025 Brunch Pro on the Feast Plugin