Why You'll Love Learning to Draw a 3D Cube
Learning how to draw a cube gives you the ability to draw so many objects around you. Look around and notice how many items are basically a cube or box shape. They are taller, shorter, wider, or narrower, but still a box shape!
This skill adds a 3D aspect to your sketches, so they look more real and in perspective. Give it a try!

How to Draw a 3D Cube
Grab a couple cube shaped objects around you and study them for a minute. Look at a book, a stack of sticky notes, your phone, the refrigerator or a cabinet of some sort. Almost everyone has a shipping box handy- ha!
They may be taller, shorter, wider, narrower, but these objects start with a basic cube shape.
Now take one of these items in your hand (I suggest the book, not the refrigerator!).
First look straight down at the object. What is the shape you see? Basically, it’s either a square or a rectangle, right?
But what if you tip it various ways? That square or rectangle becomes a diamond shape, and you can often see two of the sides of that object. A cube!
That is what we are going to learn to draw, step by step.
If you ever took geometry and asked the teacher, “when will I ever use this?”, the time is now.
A cube is drawn with a few parallel lines and a few angles. It’s just a matter of knowing how to draw those parallel lines and angles.
And that is a skill you can learn and practice! All you need is paper, pencil and an eraser (or at least I need an eraser!)
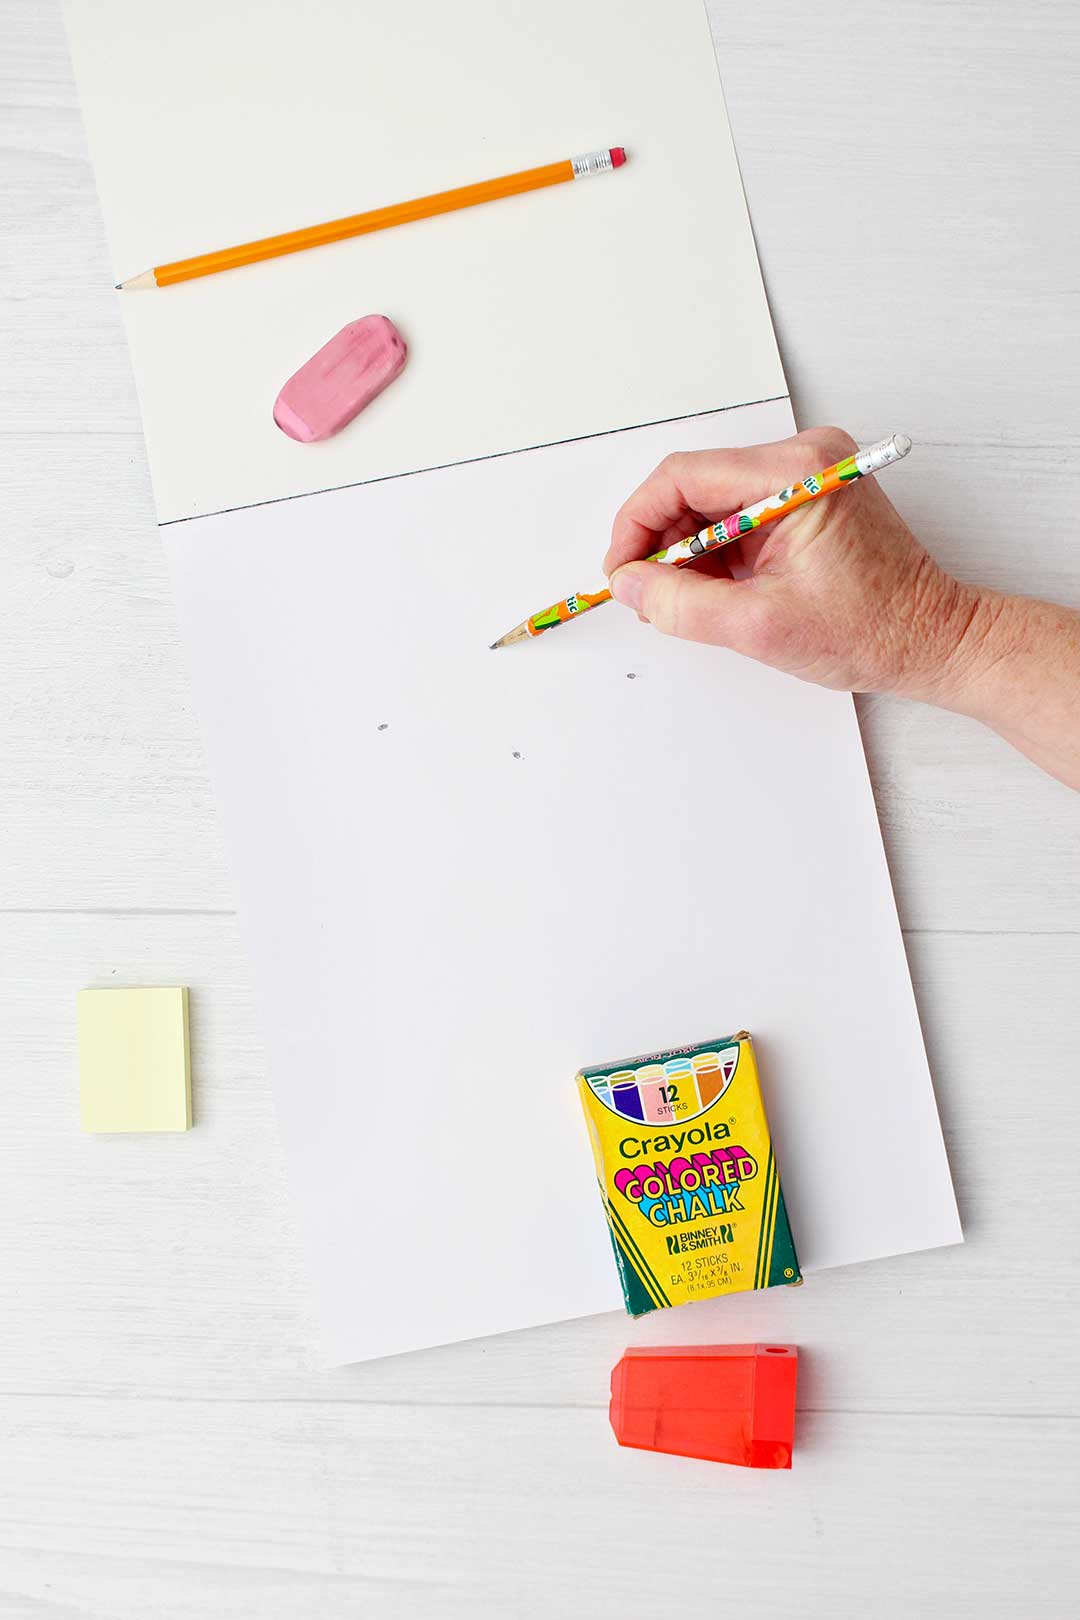
How to draw a cube step by step
Keep that box or object you held close by so you can see it.
Set it so that you can see the top and two of the sides and actually see what I am attempting to describe with words and pictures in this post.
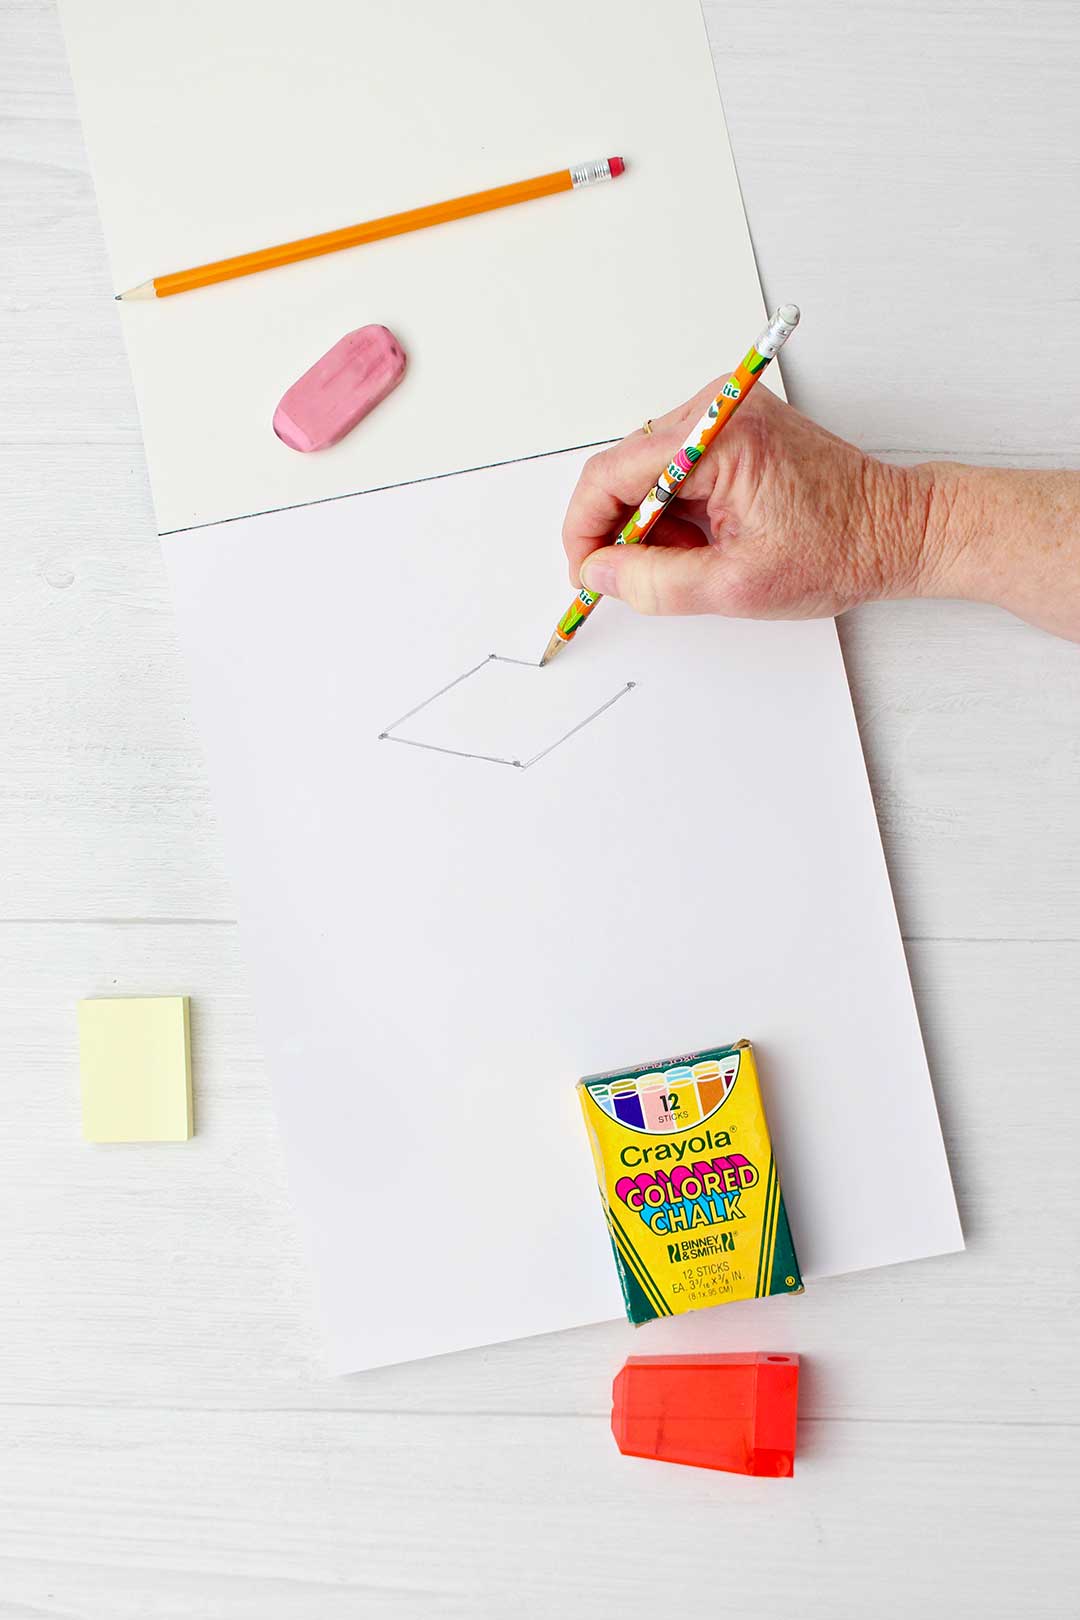
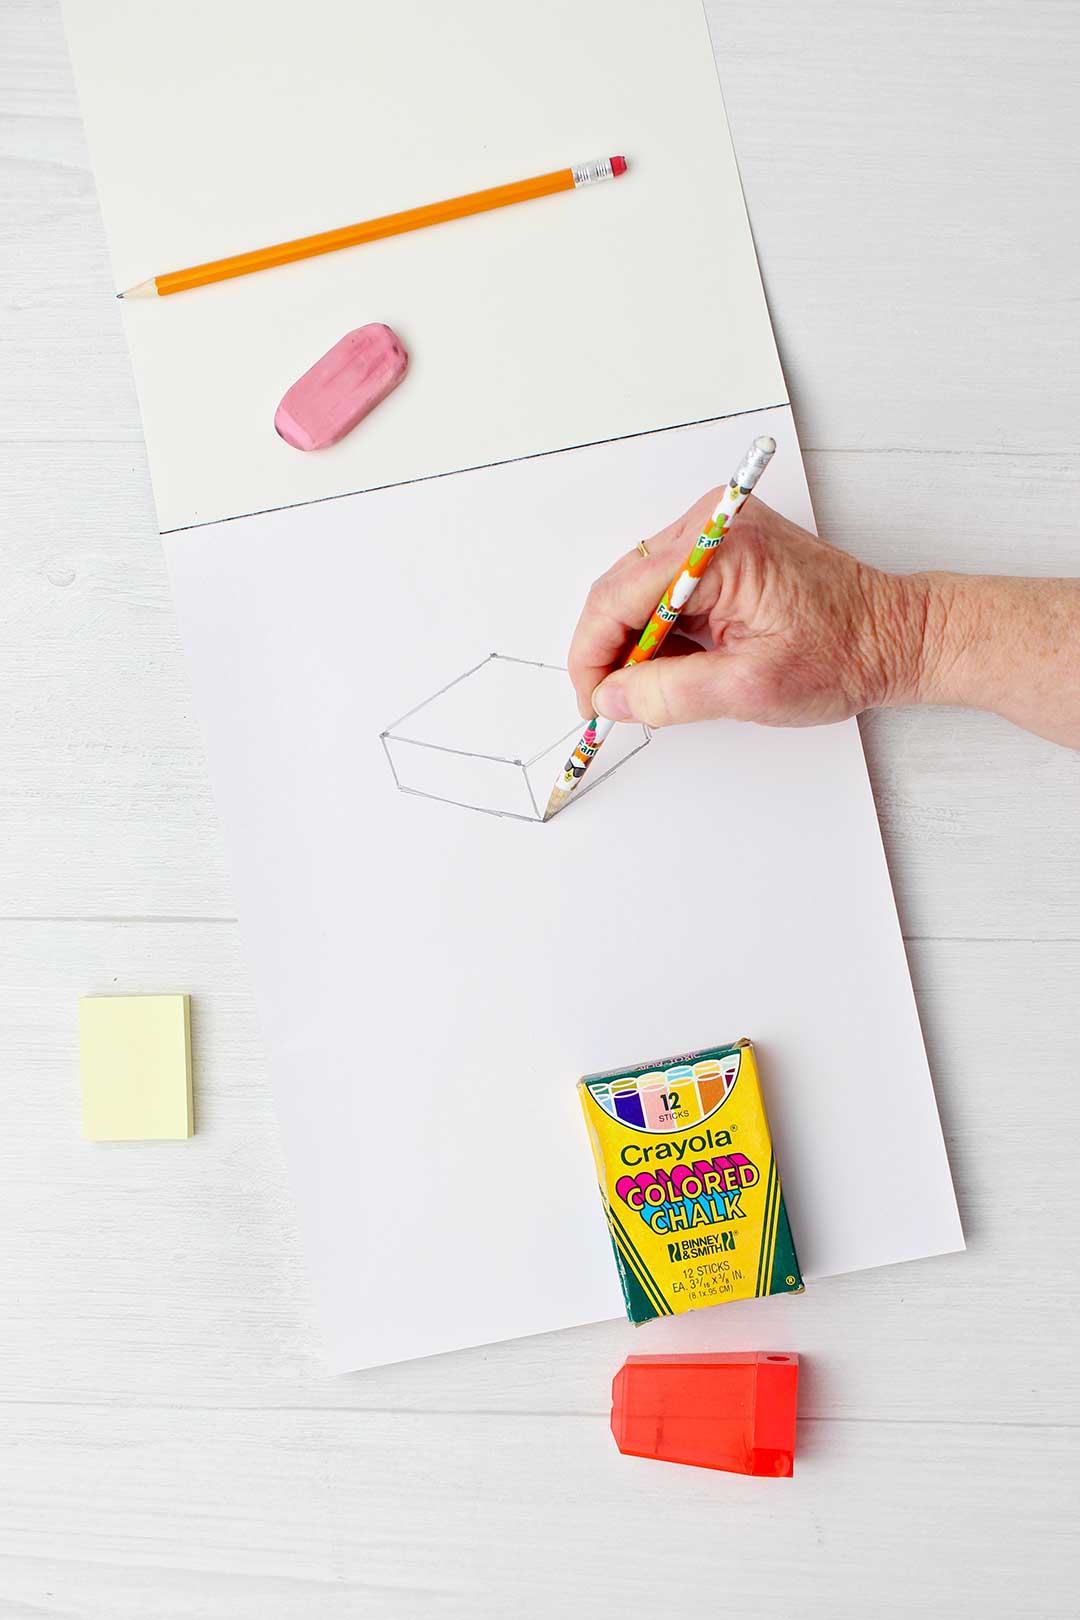
We start by drawing a diamond shape.
If it helps in drawing a diamond, draw two side by side dots that are about four inches apart.
At the halfway point between those dots, draw two dots that are about 1 ½ or 2 inches apart. But the second set of two dots are above and below the imaginary line that runs between the first two dots you drew.
Connect these four dots to make a diamond shape.
This should create two sets of parallel lines. Go over your lines a bit until you are happy with the look of the diamond.
As you practice this step you will learn to draw a diamond without making the dots. You will also learn how to shift the angles of the diamond shape, so it looks as if the object is being seen from different angles. It is so cool!
This is the top of a cube shaped object that is tilted away from you so you can see two of its sides.
How to draw a cube in perspective
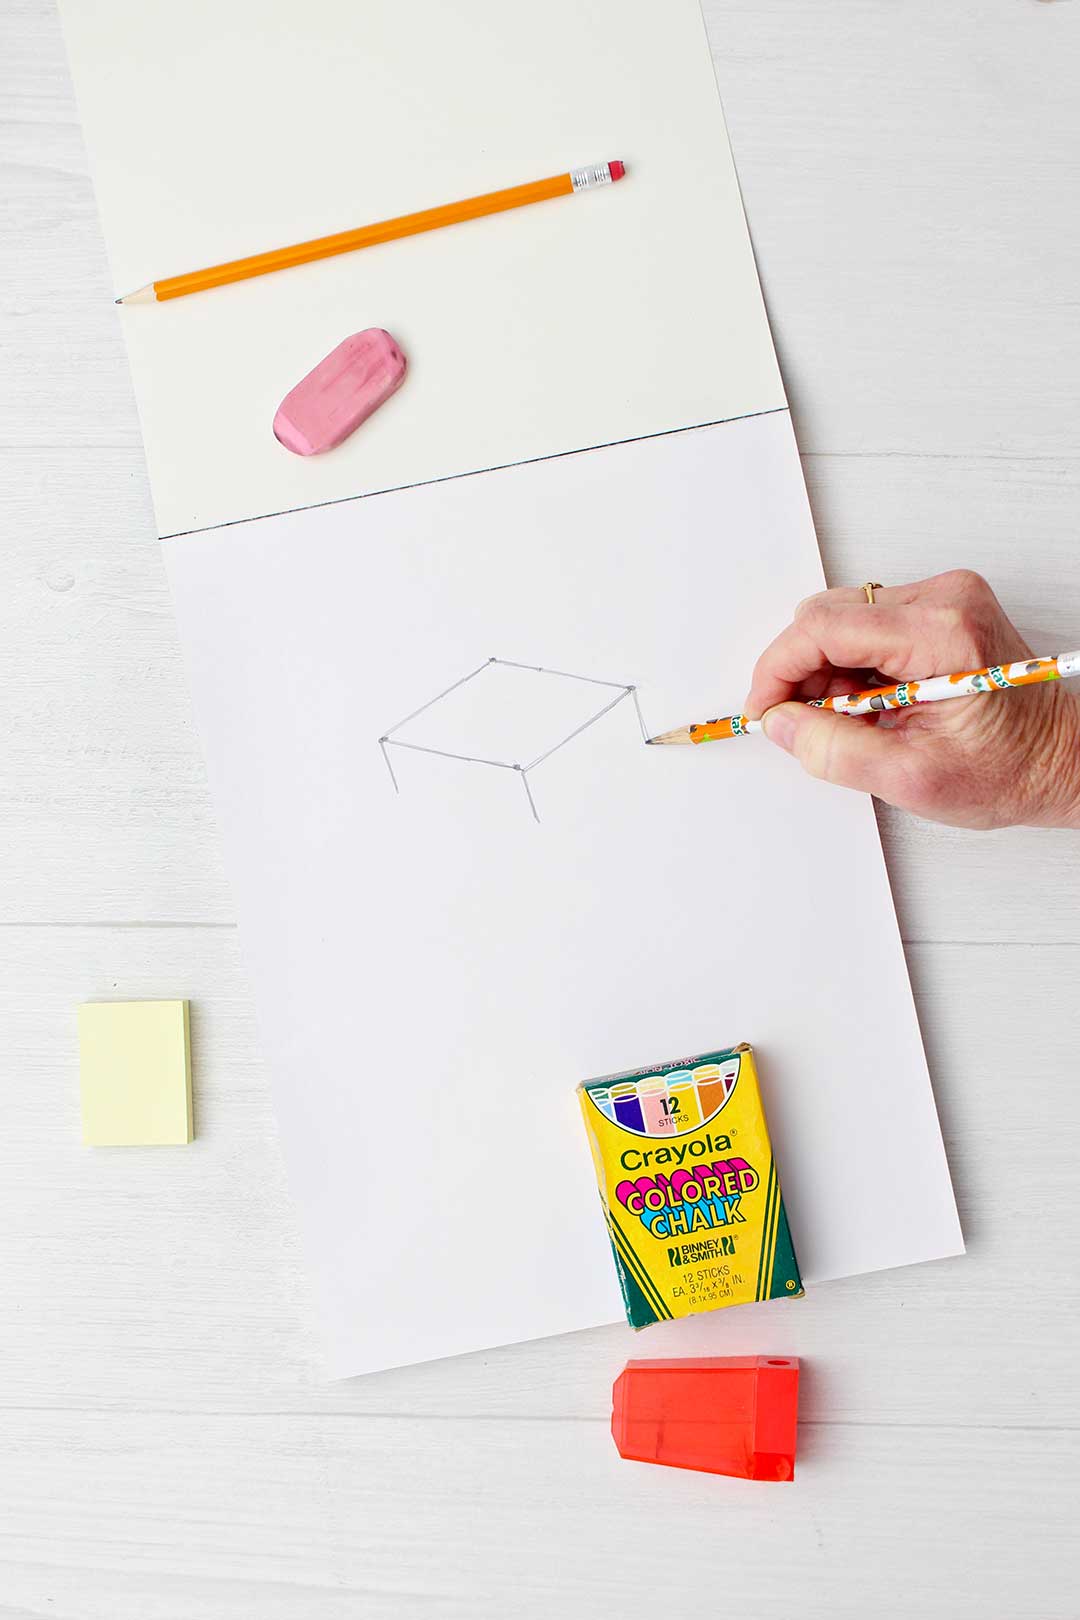
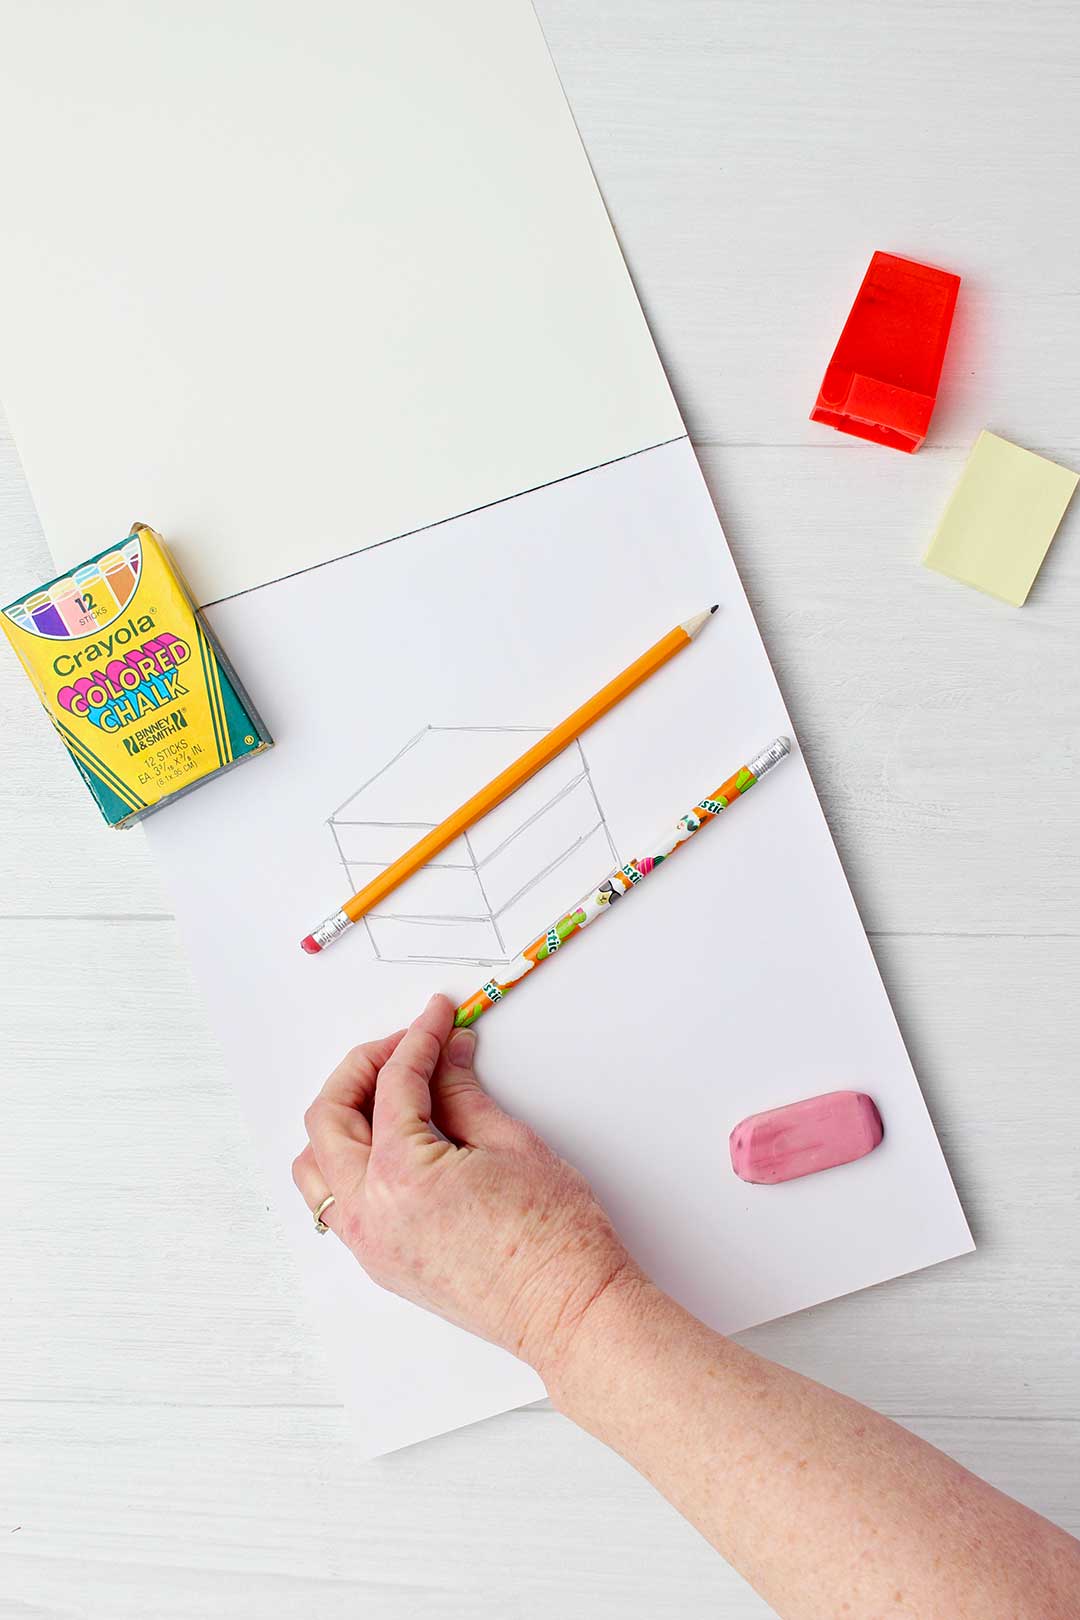
Now draw three lines of equal length that go straight down from the lower three dots of the diamond shape.
It kind of looks like a table, doesn’t it? And that is a starting point for drawing a table…but we will save that for another lesson!
Making these three lines equal and parallel is one of the keys to learning to draw a cube!
You can make the lines short or make them longer to make the size of the cube different.
Now connect the bottom three ends of the three lines. This should create a set of two lines that are parallel to the bottom two lines of your diamond.
See all the sets of parallel lines in your cube? Keep going over your lines until you are happy with how they look.
You will improve and get faster at drawing a cube as you practice.
I’ve doodled hundreds of cubes in the margin of my paper at meetings and such. You can listen and practice drawing at the same time!
How to draw a box
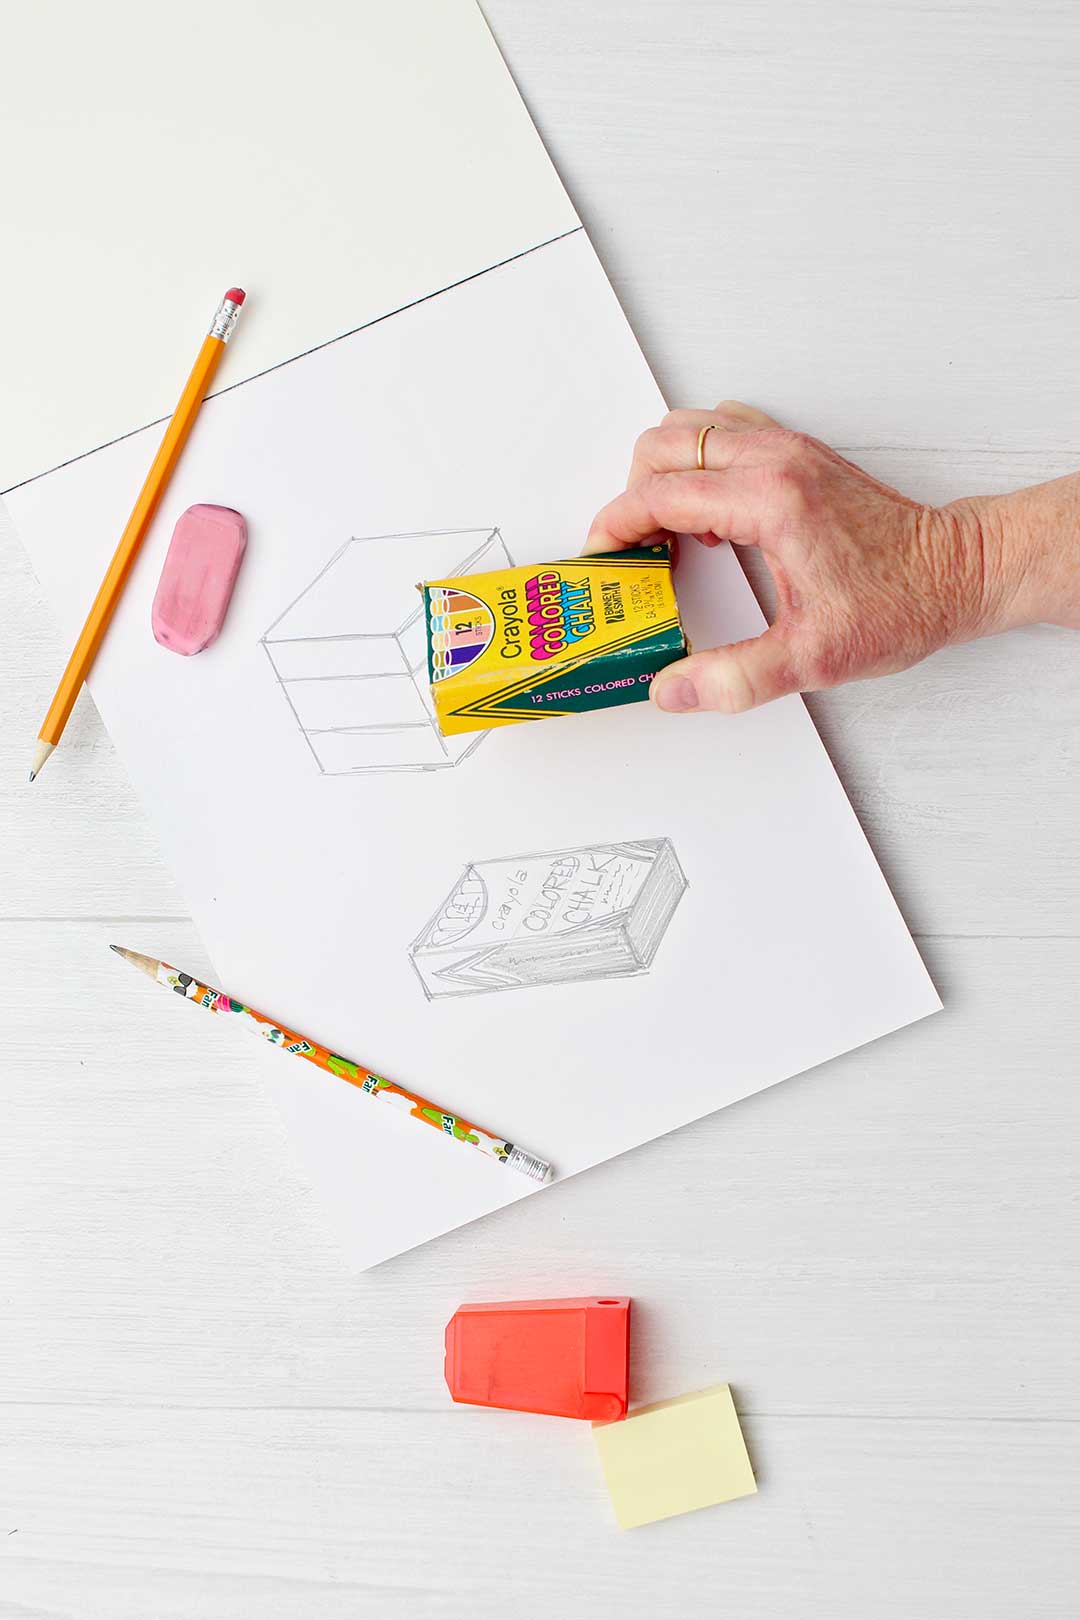
I’m going to apply the cube shape drawing steps to drawing this box that contains chalk. It was on my shelf of art supplies.
The first step is drawing a diamond to look like the top of the box (cube shape).
My diamond shape is still two sets of parallel lines, but they are tilted to the side a bit. When drawing the second set of dots I made the top dot slightly to the right and the bottom one slightly to the left.
Next I drew 3 short, equal length lines going straight down from the three bottom points of the diamond shape.
The box is short so these three lines will be short.
I connected the ends of those three lines and go over the lines till I’m happy that the lines are parallel looking to the upper ones.
How to Draw Designs on the Cube
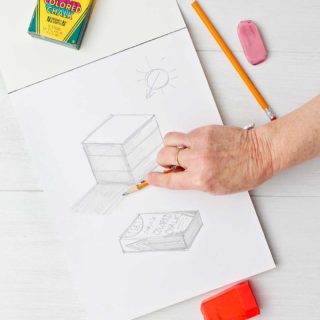
It’s fun to practice drawing some designs on the cube shape that is drawn so it looks more like the object that is used as the model.
It is helpful to draw a few light parallel lines on the top or sides to help get the angles of the designs and lettering the right direction for perspective.
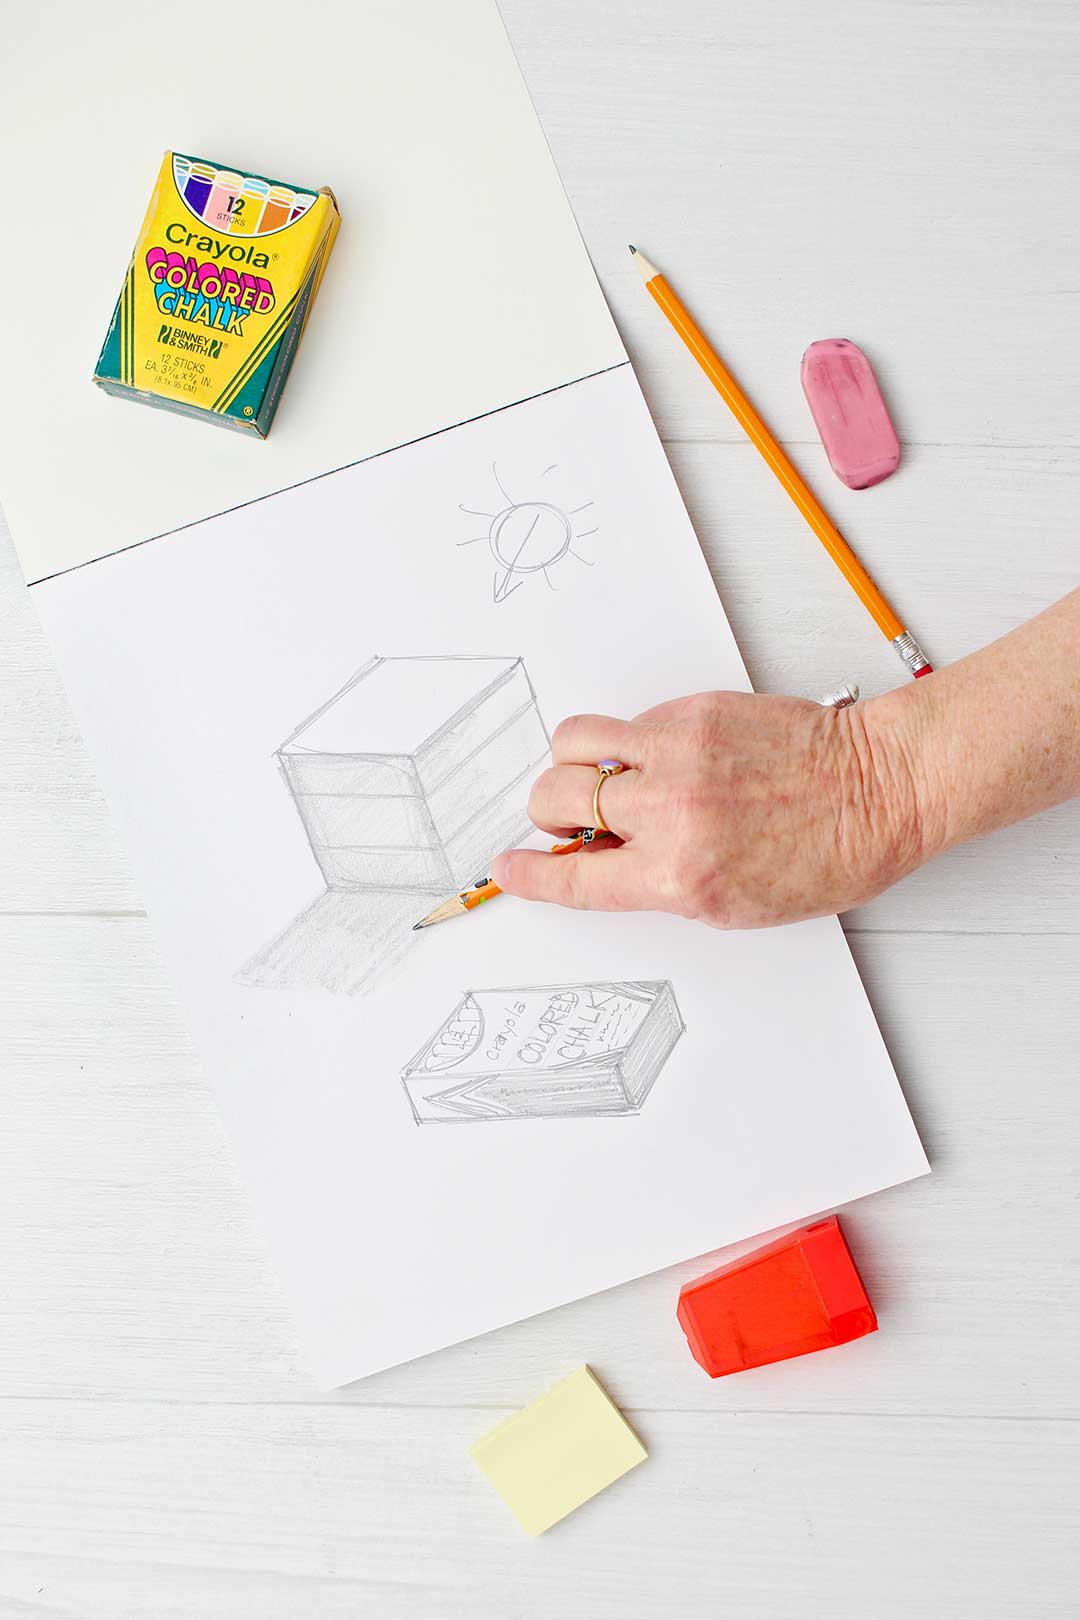
What do you think? It's just a fast sketch, but the drawing resembles the chalk box and is in perspective.
How to Add Shading and Showing
Lastly, let’s add some shading.
Pretend that there is a light source to the upper right of your object. Imagine the light coming down on the cube.
Add some shading to the side that is away from the light.
Do this by tilting your pencil to the side and rubbing the side of the lead on the paper instead of the point. This creates a softer and wider marking that looks more like a shadow. Cool, huh?
Also add some shading on the surface that is away from the light (imagine that your object is sitting on a table). This is the shadow that the object would cast on the surface when it blocks the light.
Do you see that the cast shadow is kind of shaped like the object?
Do a bit of smudging with your finger and the shadow looks smoother and more blended.
Practice makes perfect!
Practice, practice, practice, and your skills will improve! It is so much fun to draw and there are many skills you can learn.
Want more drawing tutorials?
Check out these other drawing tutorials.
- How to draw a Christmas Present (which is a cube shape!)
- How to draw a Sphere
- How to draw a Baseball
- How to draw a Pumpkin
- How to draw a Wedding Cake
Come Join the Fun!
If you try this craft, let me know! Go ahead and leave a comment, rate it, and tag a photo with #WelcometoNanas wherever you post.
How to Draw a Cube
Equipment
- none needed
Items Required
- Paper or drawing pad
- Pencil
- Eraser or kneadable eraser
- Box, cube shaped object optional
Instructions
- We start by drawing a diamond shape.If it helps in drawing a diamond, draw two side by side dots that are about four inches apart.At the halfway point between those dots, draw two dots that are about 1 ½ or 2 inches apart. But the second set of two dots are above and below the imaginary line that runs between the first two dots you drew.Connect these four dots to make a diamond shape.This should create two sets of parallel lines. Go over your lines a bit until you are happy with the look of the diamond.
- Now draw three lines of equal length that go straight down from the lower three dots of the diamond shape.Making these three lines equal and parallel is one of the keys to learning to draw a cube!You can make the lines short or make them longer to make the size of the cube different.
- Now connect the bottom three ends of the three lines. This should create a set of two lines that are parallel to the bottom two lines of your diamond.See all the sets of parallel lines in your cube? Keep going over your lines until you are happy with how they look.
- It’s fun to practice drawing some designs on the cube shape that is drawn so it looks more like the object that is used as the model.
- Shading: Pretend that there is a light source to the upper right of your object. Imagine the light coming down on the cube.Add some shading to the side that is away from the light.Do this by tilting your pencil to the side and rubbing the side of the lead on the paper instead of the point.
- Also add some shading on the surface that is away from the light (imagine that your object is sitting on a table). This is the shadow that the object would cast on the surface when it blocks the light. The cast shadow is kind of shaped like the object.Do a bit of smudging with your finger and the shadow looks smoother and more blended.
Video
Supplies for How to Draw a Cube:
- Paper or drawing pad
- Pencil
- Eraser or kneadable eraser
- Blending tools
- Cube shaped object- optional


Sheila K. says
Oh MY, it looks great! Can't wait to cook em this Sunday!