Learn how to make a bird nest for spring out of string or twine, glue, and a balloon! Make it look natural, or make it fun colors for Easter or spring decorations.
Jump to:
So how do you make a bird nest out of string? This DIY bird nest activity is so much fun for you and the kids to make. It creates a perfect centerpiece addition for spring, Easter, or anytime. So cute made from yarn, string, or twine.
Let’s learn how to make an easy bird nest!
A nature walk craft inspiration
We live in a rural area and I’m very fortunate to be able to take walks down roads where I’m not even able to see another house.
It’s been really windy in the past week so as I was walking I came across an abandoned birds nest that had been knocked out of the tree by the wind.
This allowed me to take a closer look at a real nest and see the hard work this bird had done in creating it. I will return it to under the tree after observing it a bit.
I am always amazed when I look at a birds nest and all of the delicate work that they go into to make a safe place for their babies!
The wild birds make so many different types of nests. There are different sizes, different materials, and different ways they go about the construction. Just amazing.
DIY Bird's Nest
Well, I got to thinking...how do you make a birds nest? I mean how could we imitate the process so we can make our own bird nest?
It dawned on me that perhaps we could use the method of wrapping string around a balloon that we had used in our string Easter eggs craft!
Well, my brain was off and running and I just thought perhaps you’d want to do this with me!
This would be a great way to do a nature craft with you kids, or make a gift, or to create a table decoration this spring. You could add it into a wreath on the front porch or set it on a branch for table decor.
Truthfully, when the idea came it didn’t matter what I used it for, I was just excited to try it. That's the way a lot of these posts happen. The idea sweeps me away and I want you to come too!
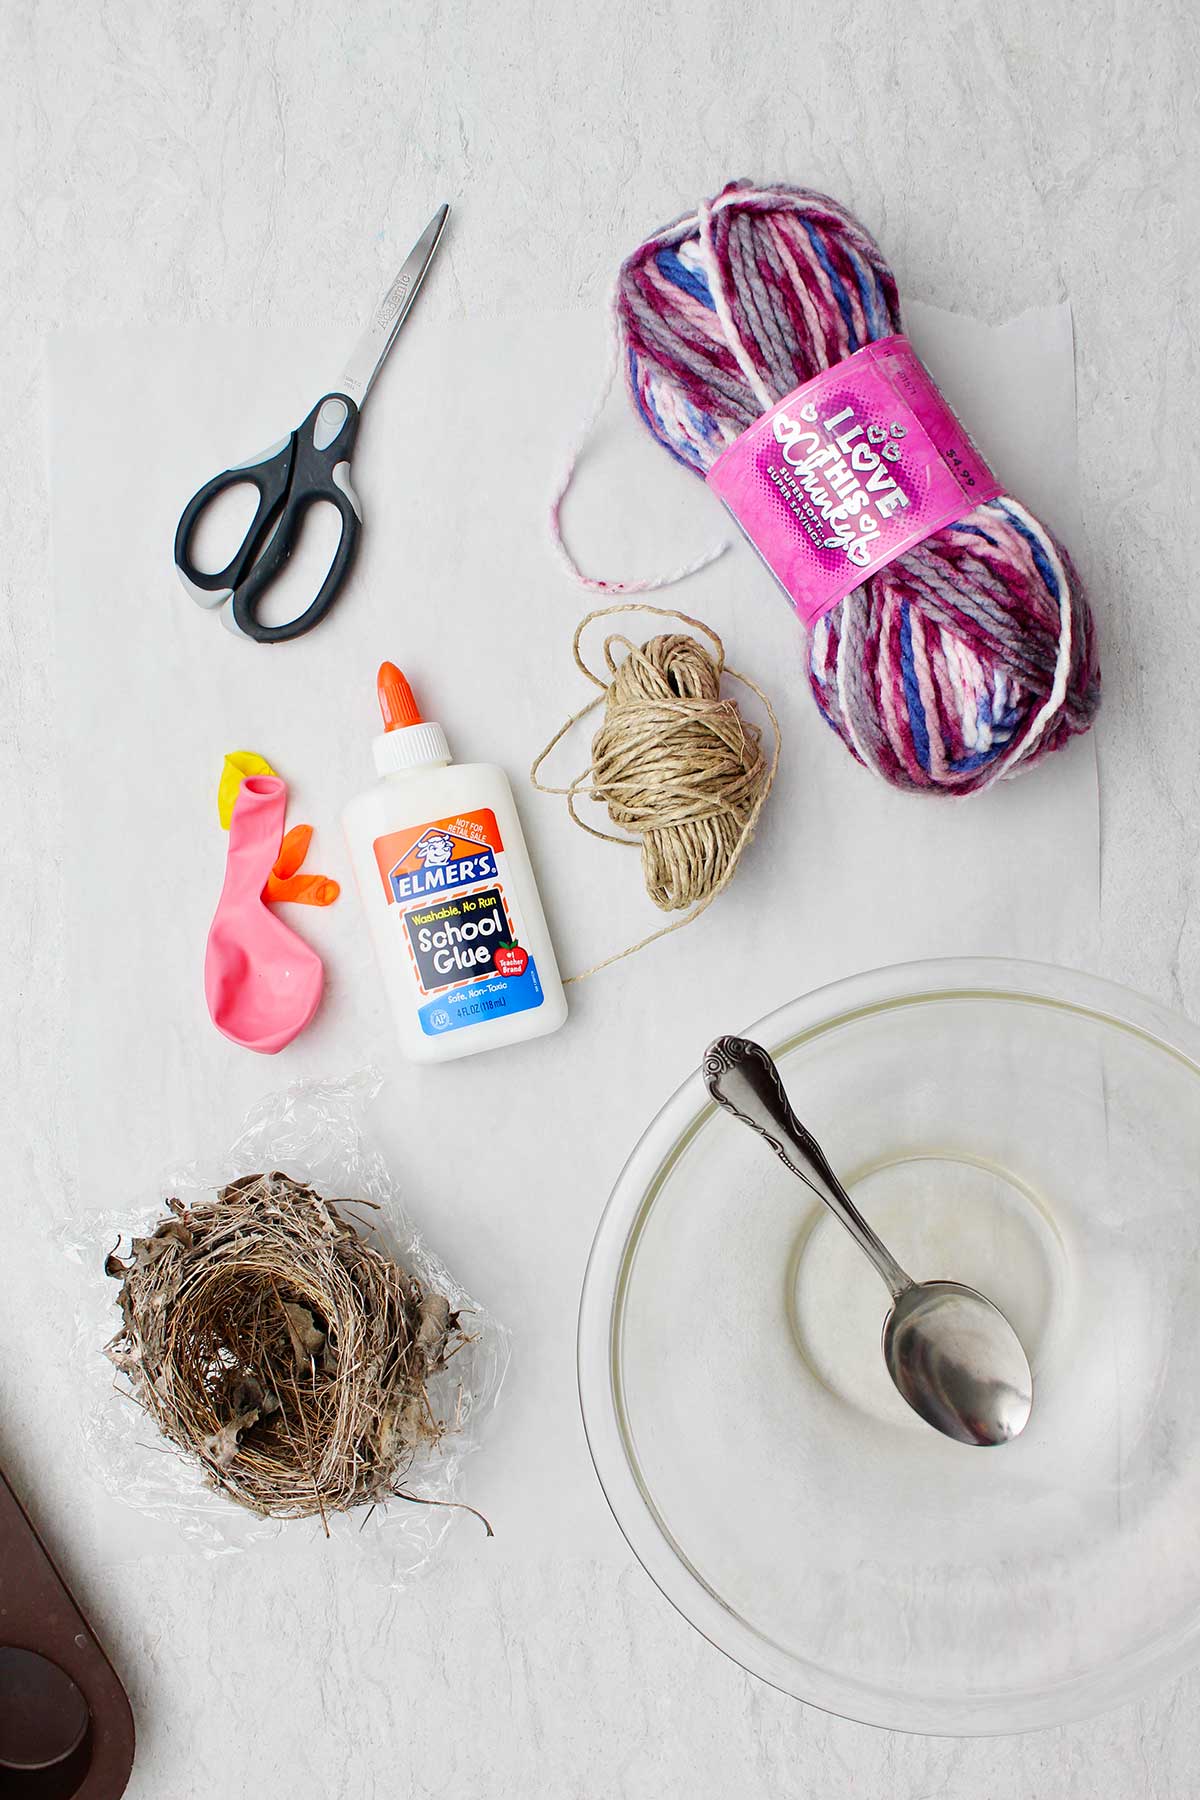
Supplies to make a nest
Technique
So this is a very similar technique to what we did for our string Easter eggs in a previous post. We will make a few variations, but it is very much the same thing.
If you would like to see the entire step-by-step process for making a nest, check out the YouTube video at this link: Make a Bird Nest From String Full Length Tutorial. You can follow along with me on the video as I break the process down into easy steps to make our own nests.
String, yarn, twine...oh my!
I tried making this nest from two types of string. The first nest was made with yarn, the second was made with a brown string that was a twine type of material.
I had both supplies in my stash, so I don’t have an exact name for what I used, but there will be links below to something similar.
Let’s get started. Ready to have some fun?
Balloons for the form
To form the nest, it seemed best to use a water balloon. They are smaller in size than the bigger party balloons.
When looking at the nest that I found, a water balloon was almost exactly the size of the nest. I wanted this nest to be similar in shape and size, so it was a perfect starting spot.
I blew the balloon up to about the size of my fist.
The binder
Next I poured about a cup to a cup and a half of white glue into a bowl. Some people like to use Mod Podge for this type of project, but I find the glue to work well and it is less expensive.
I purchase my glue in a gallon container because I use it so often and it is much less expensive when there is a need for a larger quantity like this project.
Keep adding more glue to the bowl as needed during the project.
Oh, and it's a good idea to use a table covering like waxed paper or parchment paper as this project can get messy!
Make a nest of yarn
The first attempt at making tiny nests was with yarn, because I wanted to use it for Easter.
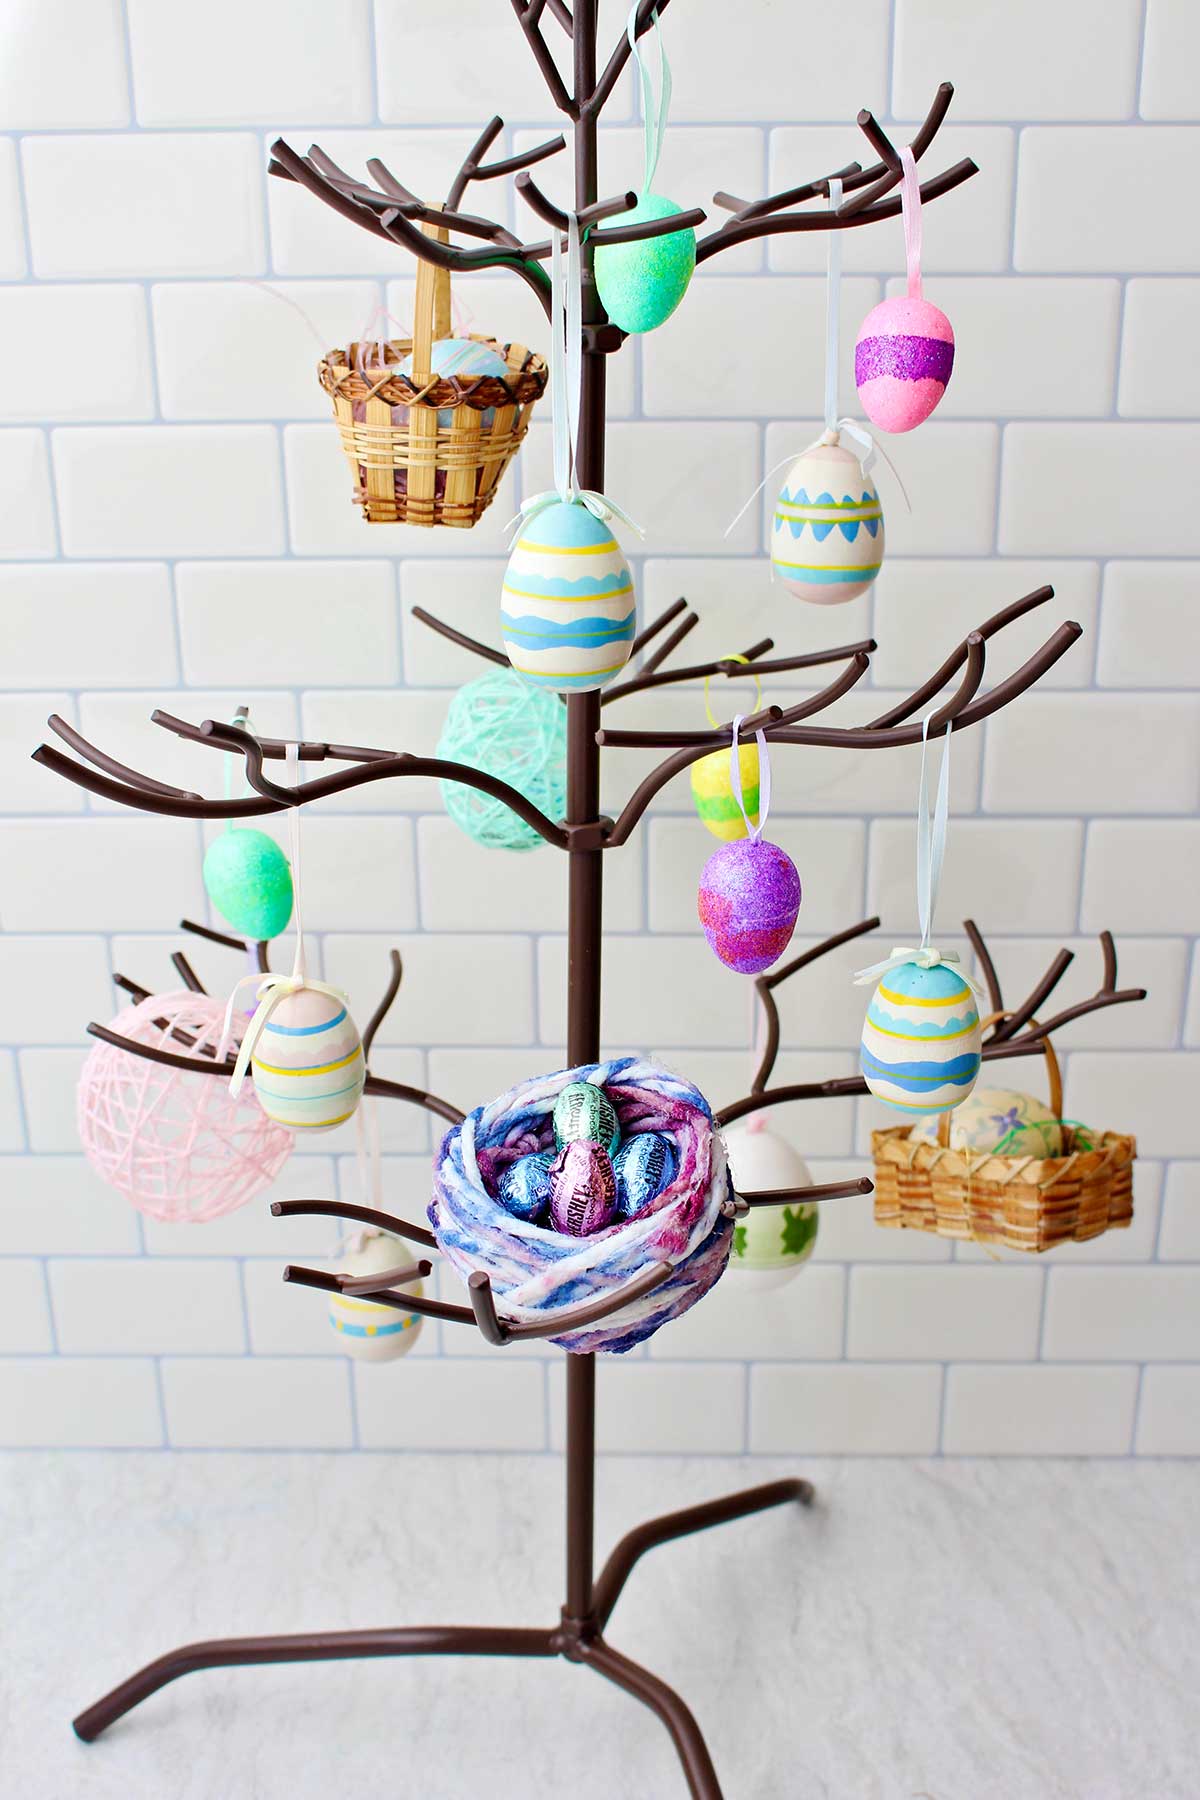
I just purchased a wire ornament display tree that I’m planning to use for displaying crafts here on the blog as well as for a decoration in our home. This nest will sit in a branch of that tree for Easter.
So from the yarn stash, I chose a variegated pastel yarn (one yarn that is different colors). The yarn color changes from blue to lavender to pink to white.
This yarn was a little bit thicker, and I will tell you now that it did not dry very quickly! :-). But it did work fine.
Loopy looping yarn into the glue
Pull out about 10 yards of yarn out of the skein. Let it gently loop on the floor next to you and hold onto the end that you clip.
By the way, I measured the yards by pulling the string out the length of my arm, and measuring from my finger to my nose. You can use a yardstick if you would like. 🙂
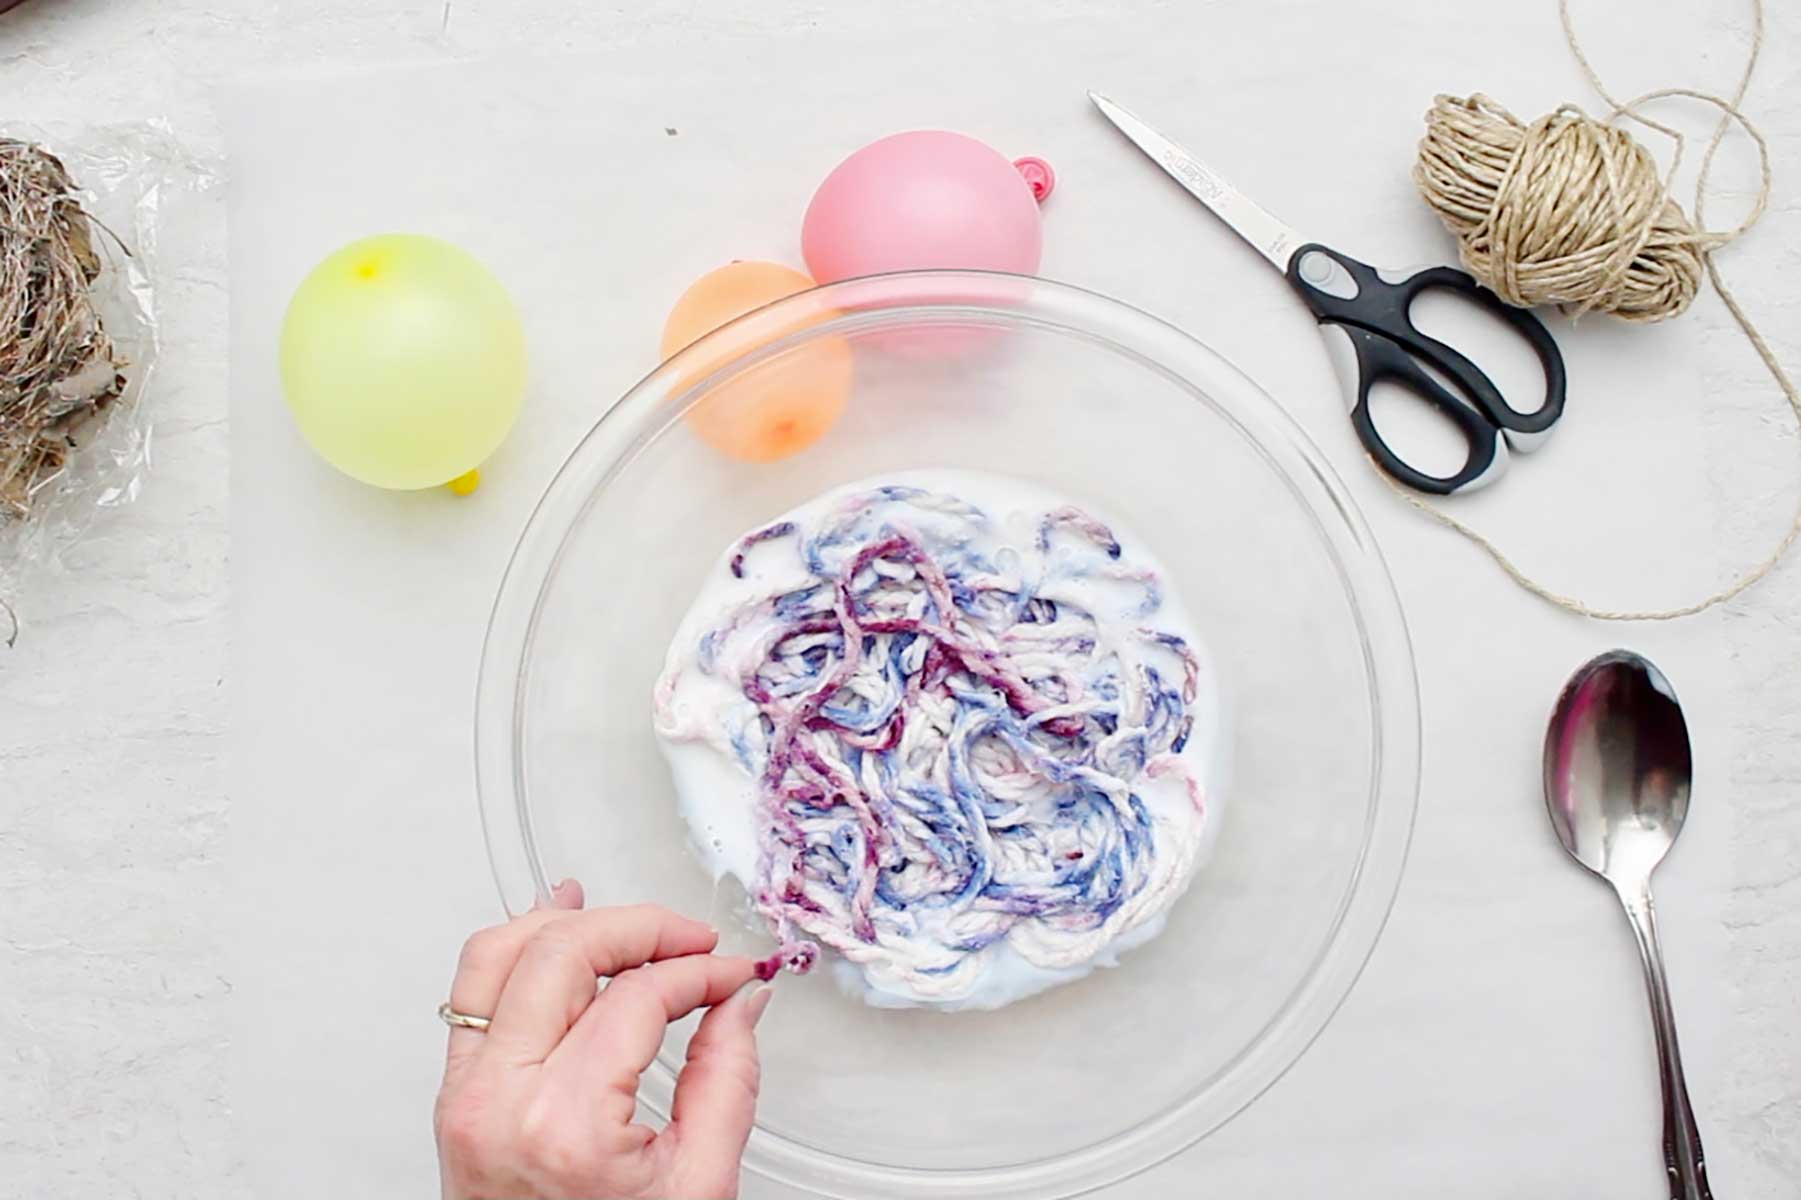
Move the yarn up into the bowl by taking the end you still have in you hand and looping it on top of the glue in the bowl.
It’s very important that you do not tangle this string by stirring it, or just bunching it up from the floor and sticking it in the bowl.
Loop the string gently into the bowl until it is entirely looped and setting on the glue.
Be sure to hold onto the end of the string as you finish looping it into the bowl.
Now press the yarn down into the glue with a spoon.
Again, do not stir the yarn, or it will be one big tangled mess. I know this from experience, trust me :-).
Wind the yarn
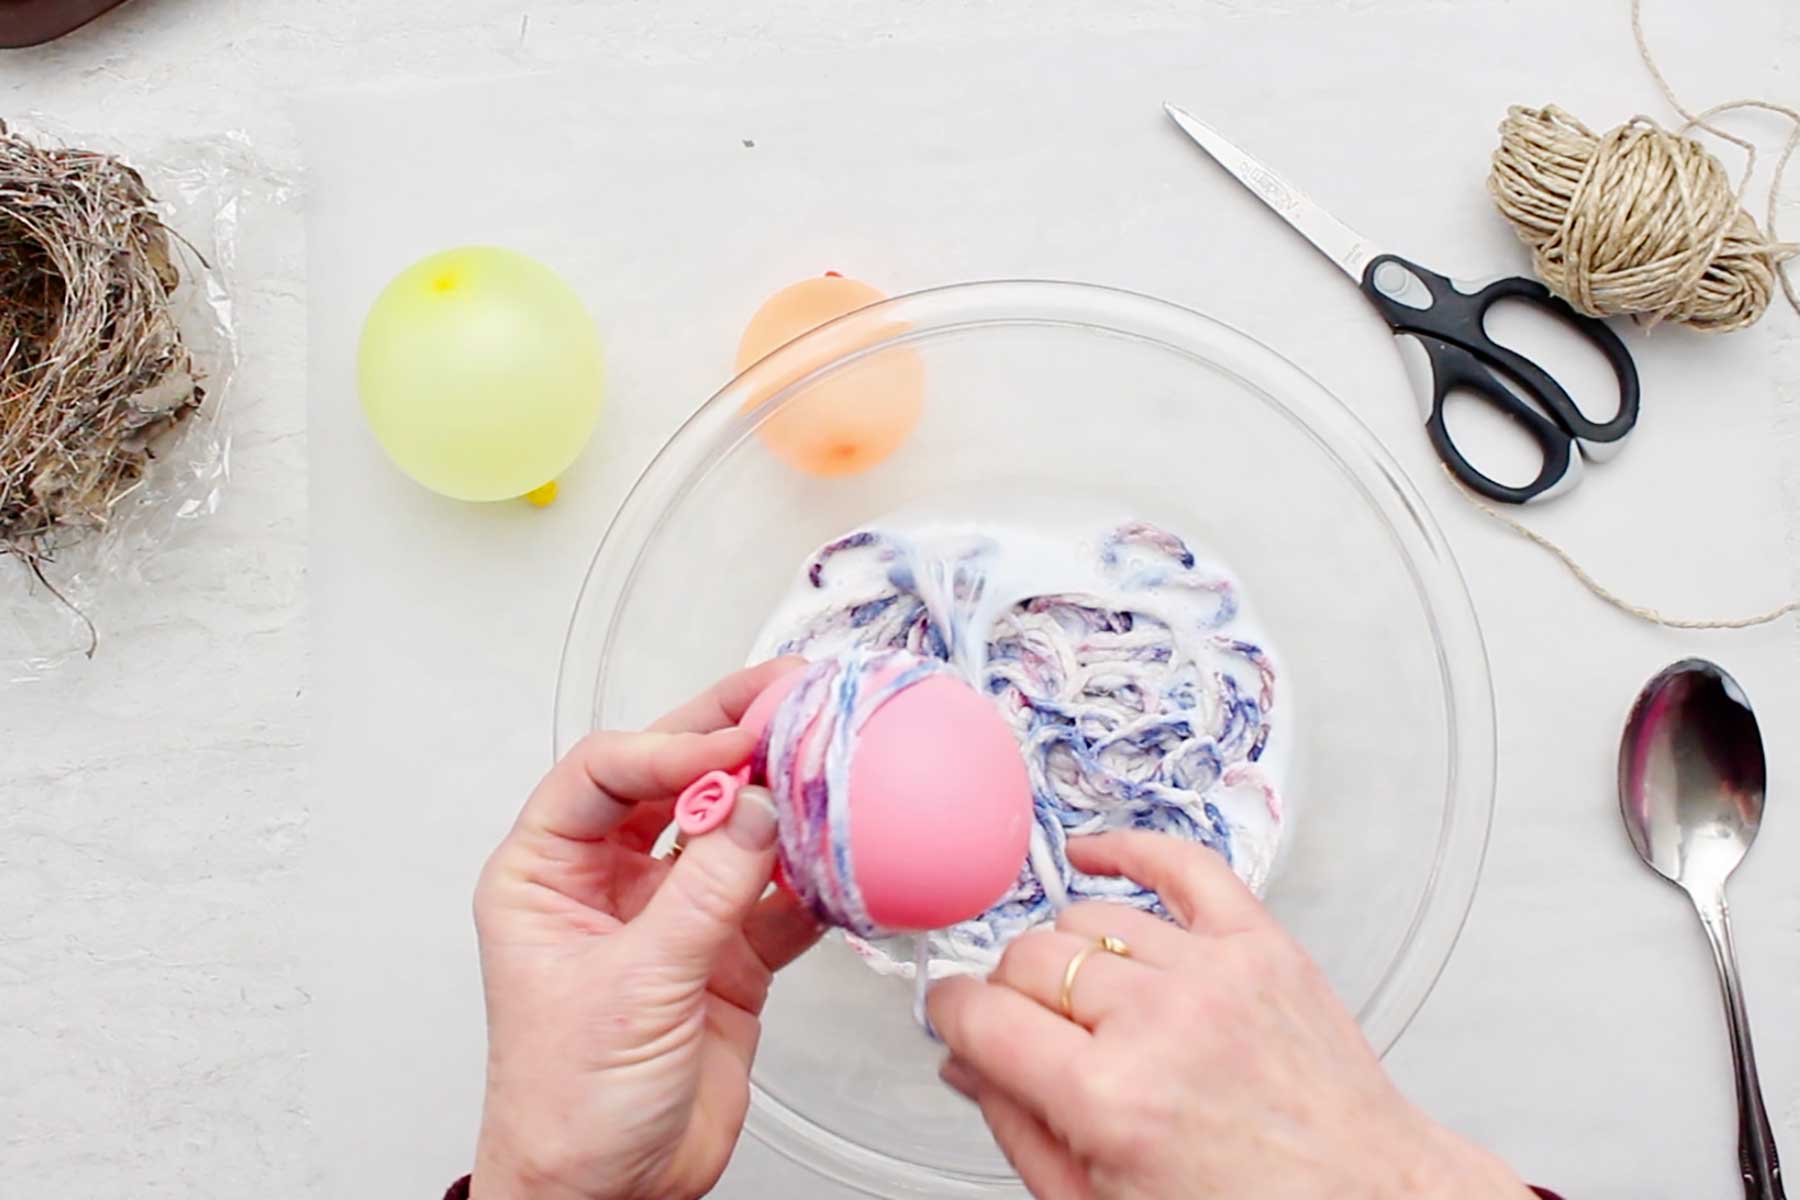
Next take your balloon in one hand, along with the end of the string that you held onto. Older children will have an easier time of this than the younger- so be ready to help as needed.
With the other hand begin to wind the glue covered yarn onto the balloon. Kind of pinch the yarn between your fingers and pull the yarn through your fingers before winding in order to get the excess glue off of the yarn.
Only wind the yarn onto the bottom half of the balloon. When making the string eggs, we covered the whole balloon in order to get the full egg shape.
Obviously, this time we’re wanting a nest shape so we will only cover half of the balloon.
The hardest part of this is covering the bottom or end of the balloon. This will be the bottom of the nest so it can't be open or the eggs will fall through.
I ended up making a few small loops with the yarn on the bottom of the balloon, and then attempted to kind of wind the yarn across this. I will tell you that this did work as the bottom of the nest.
If you don’t cover every little spot of the bottom of the nest that’s alright. It will still dry and hold up OK.
If you run out of yarn before you feel like you have the shape like you would like it, just cut another bit of yarn, put it into the glue, and keep covering the balloon until you have it the way you like it.
Let it dry
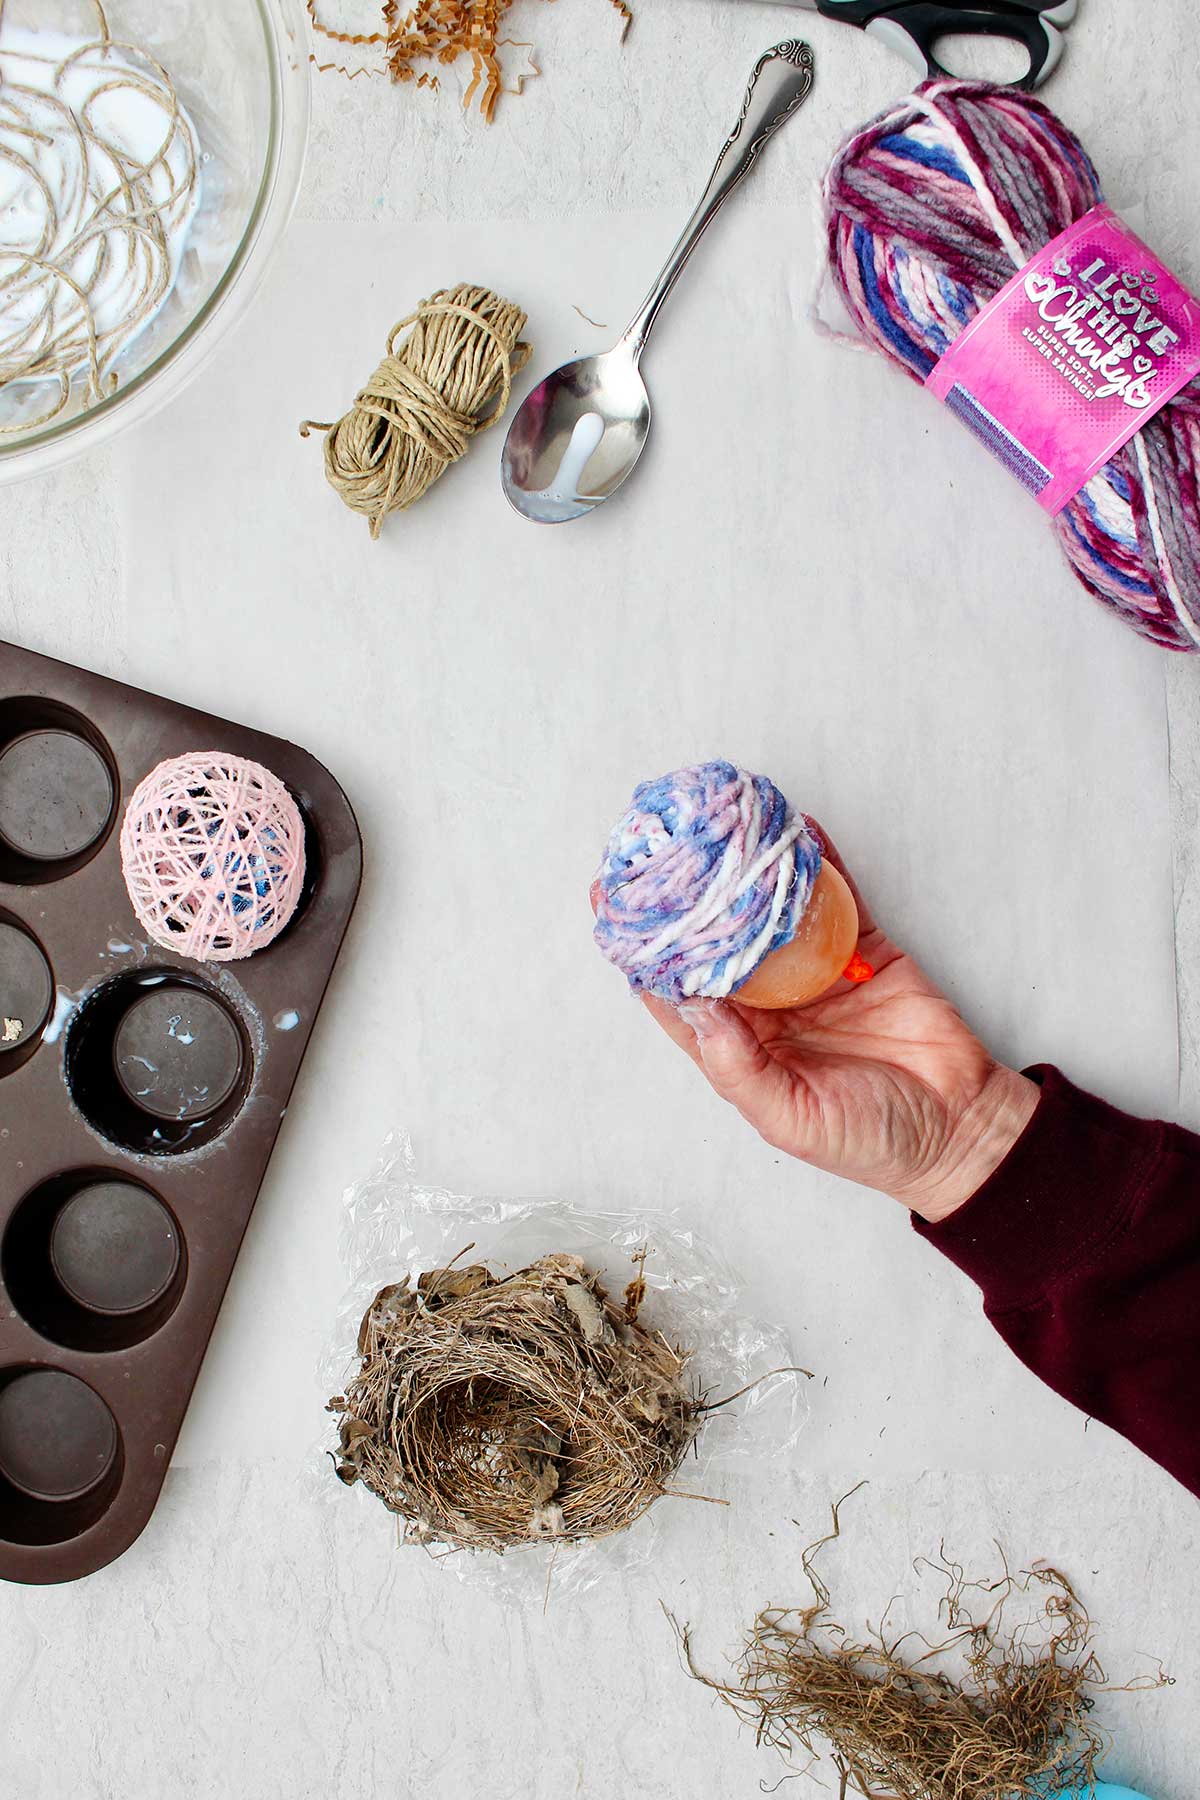
When you are finished wrapping the yarn, set the balloon and yarn nest in a muffin tin cup. Balloon side down.
Set this aside to dry for at least 24 hours. Because my yarn was thicker, it took it another full day before it was dry. So you do have to be patient. 🙂
The Make a Nest project reveal
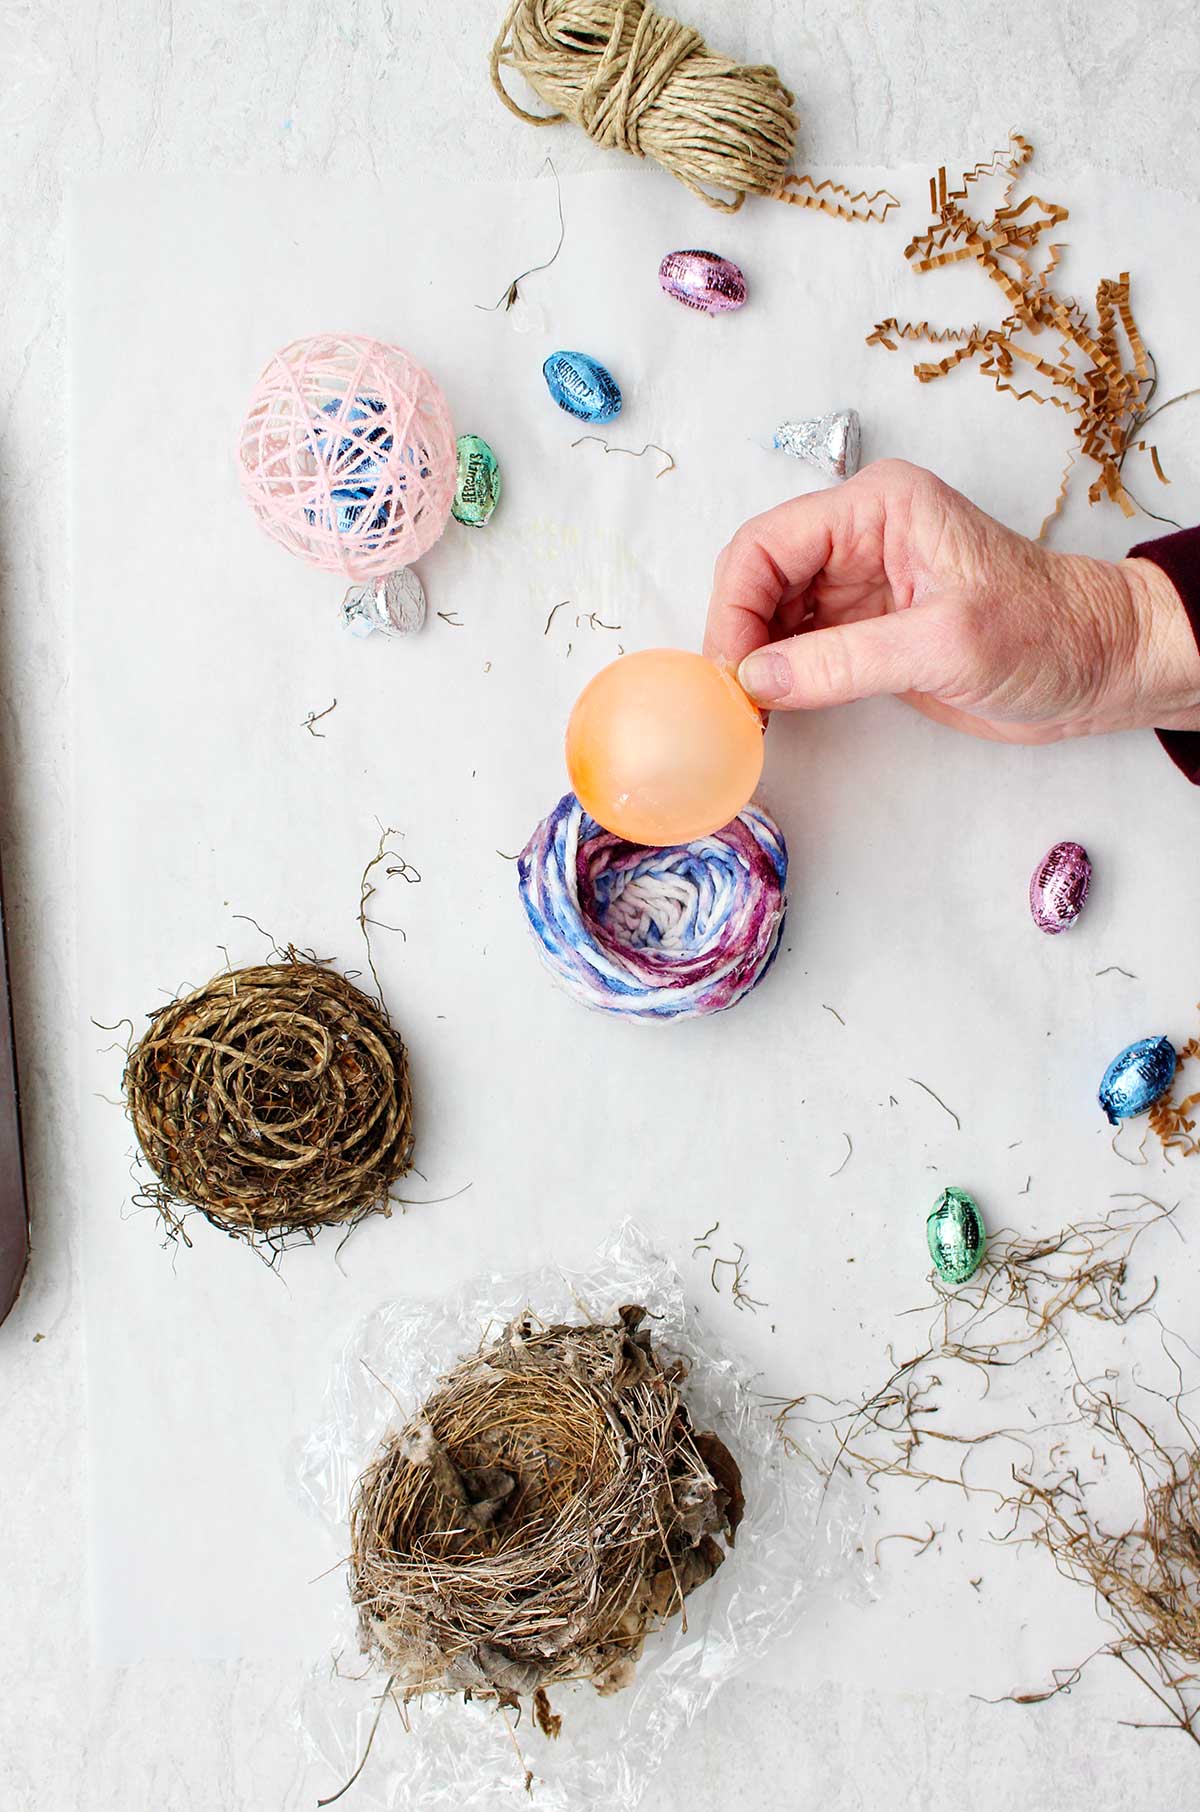
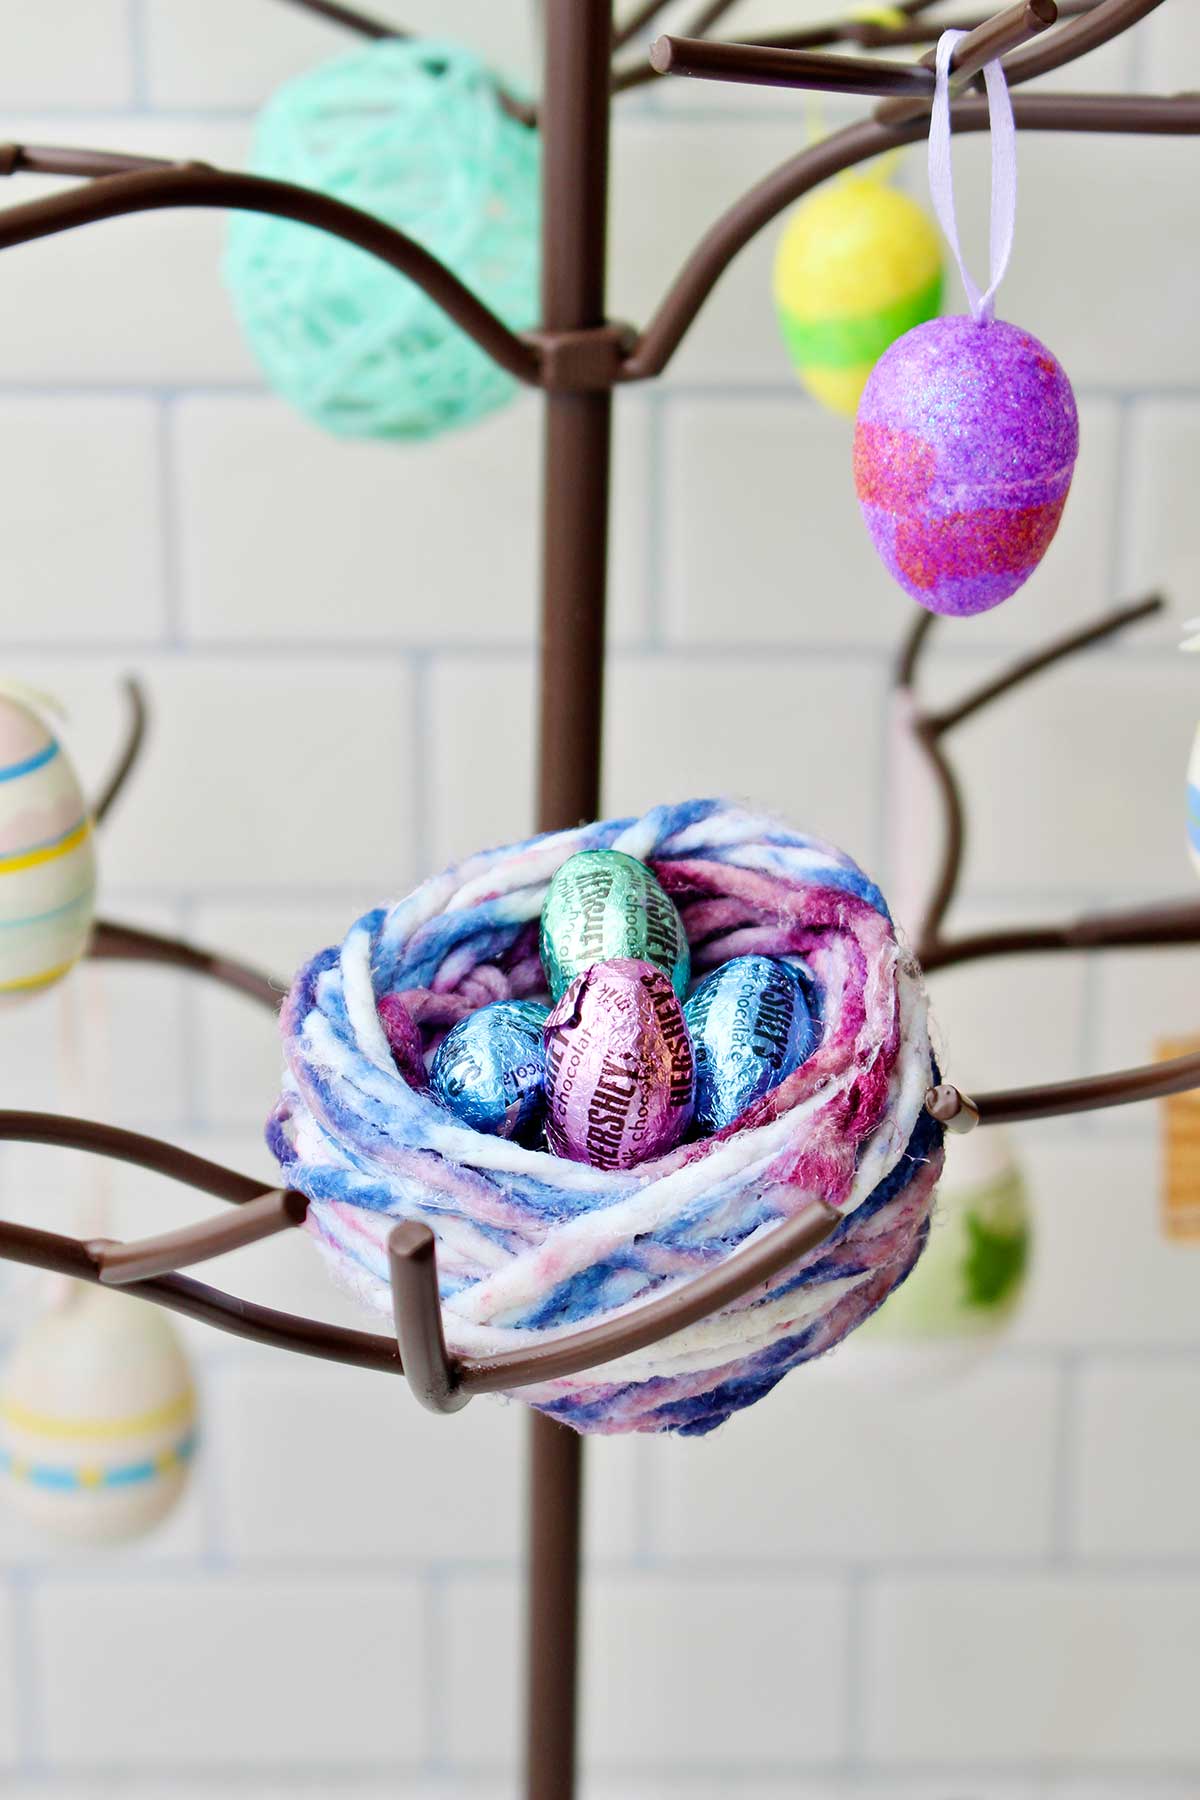
When the nest was dry, I just popped the balloon out of the yarn nest, I didn’t even need to pop the balloon. It left this nice cup shape in the middle of the nest.
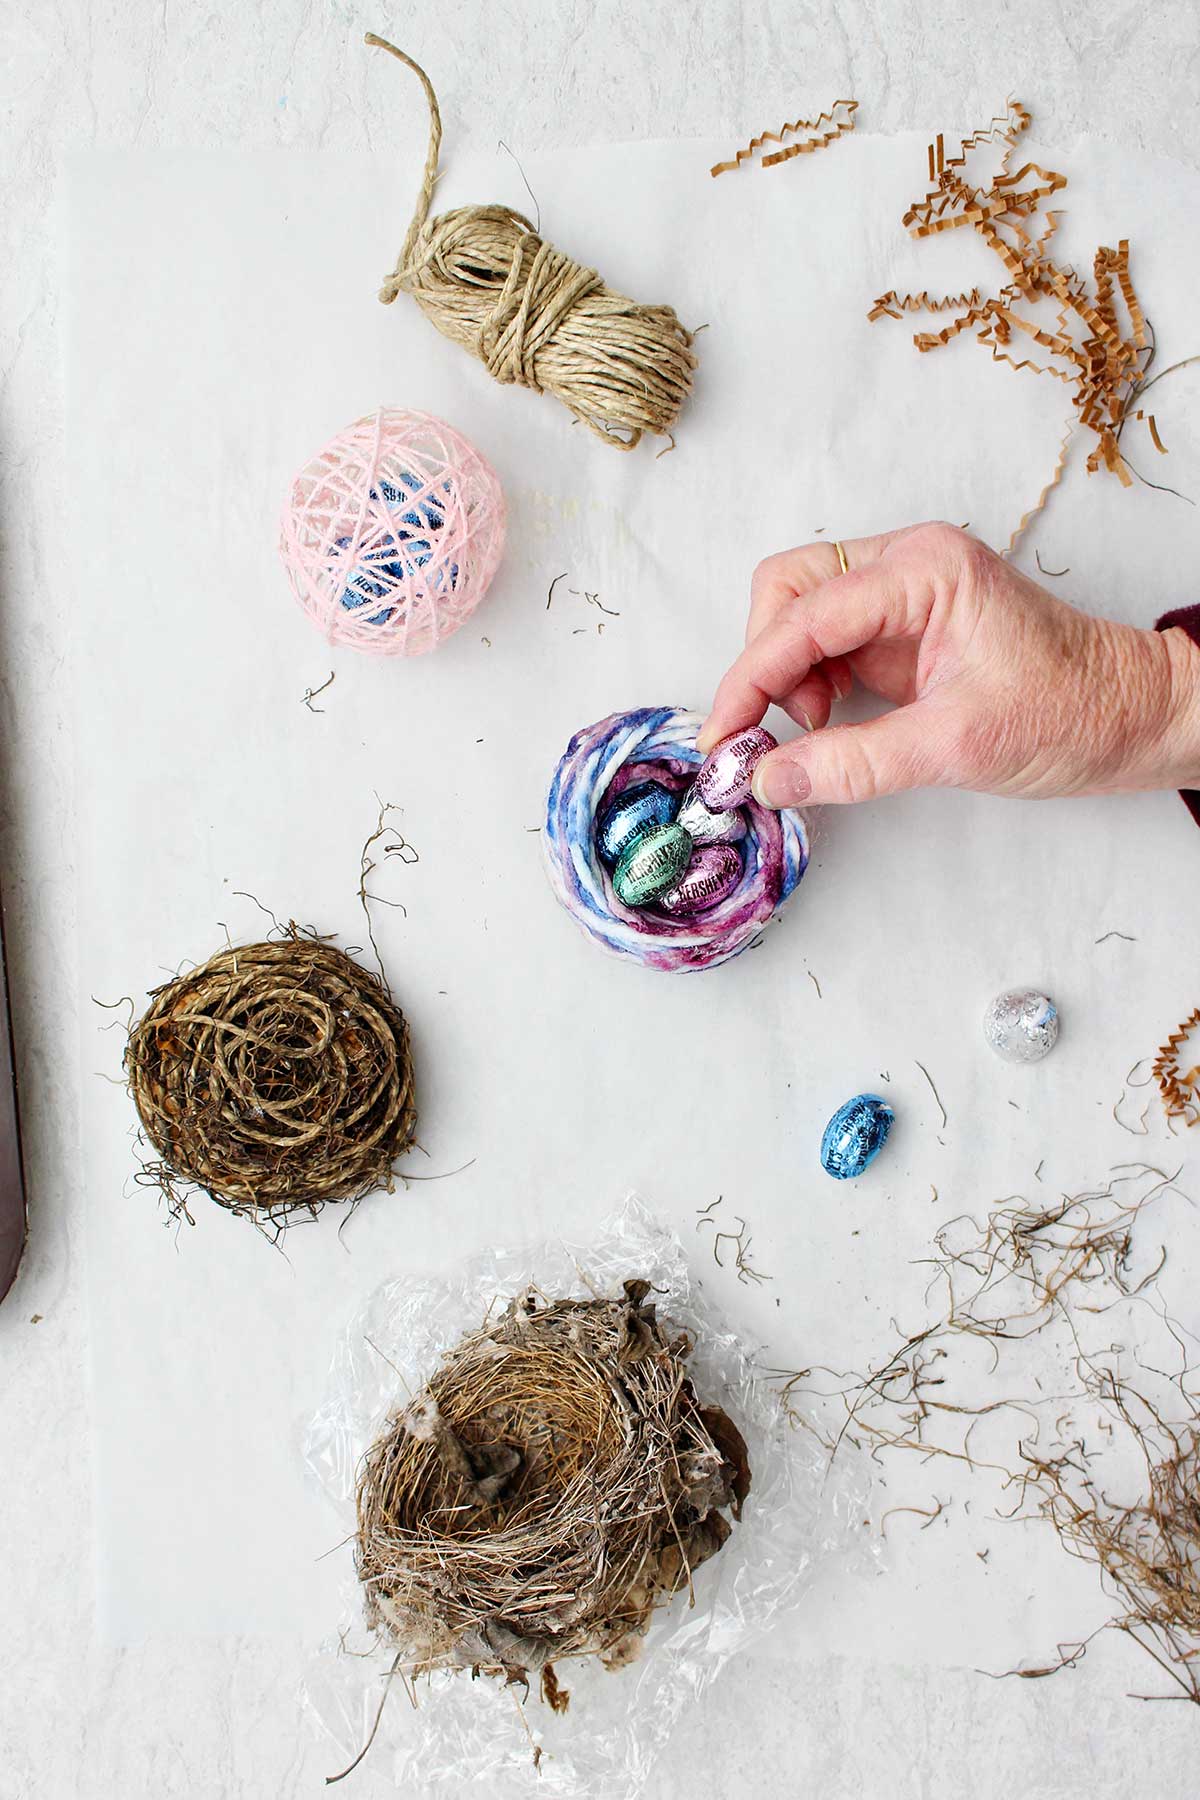
This little nest sat nicely on my Easter tree and several small chocolate eggs fit inside. It’s really cute.
Make a nest of twine
The second thing I tried was exactly the same technique except using twine.
I had never tried this before, so I had no idea if it would work or not. But I was so pleased with the results!
Same technique
So you use the exact same technique except this time you take off 10 yards of the twine. I gently looped it into the bowl of glue and began wrapping my small water balloon that I had blown up to fist size.
The string was stiff, so it was harder to work with so smaller kids that are doing this may need some help.
Tip for the bottom of the nest
This time I tried starting with the bottom of the nest, and then finishing wrapping the egg and trying to go over the bottom of the nest with the twine.
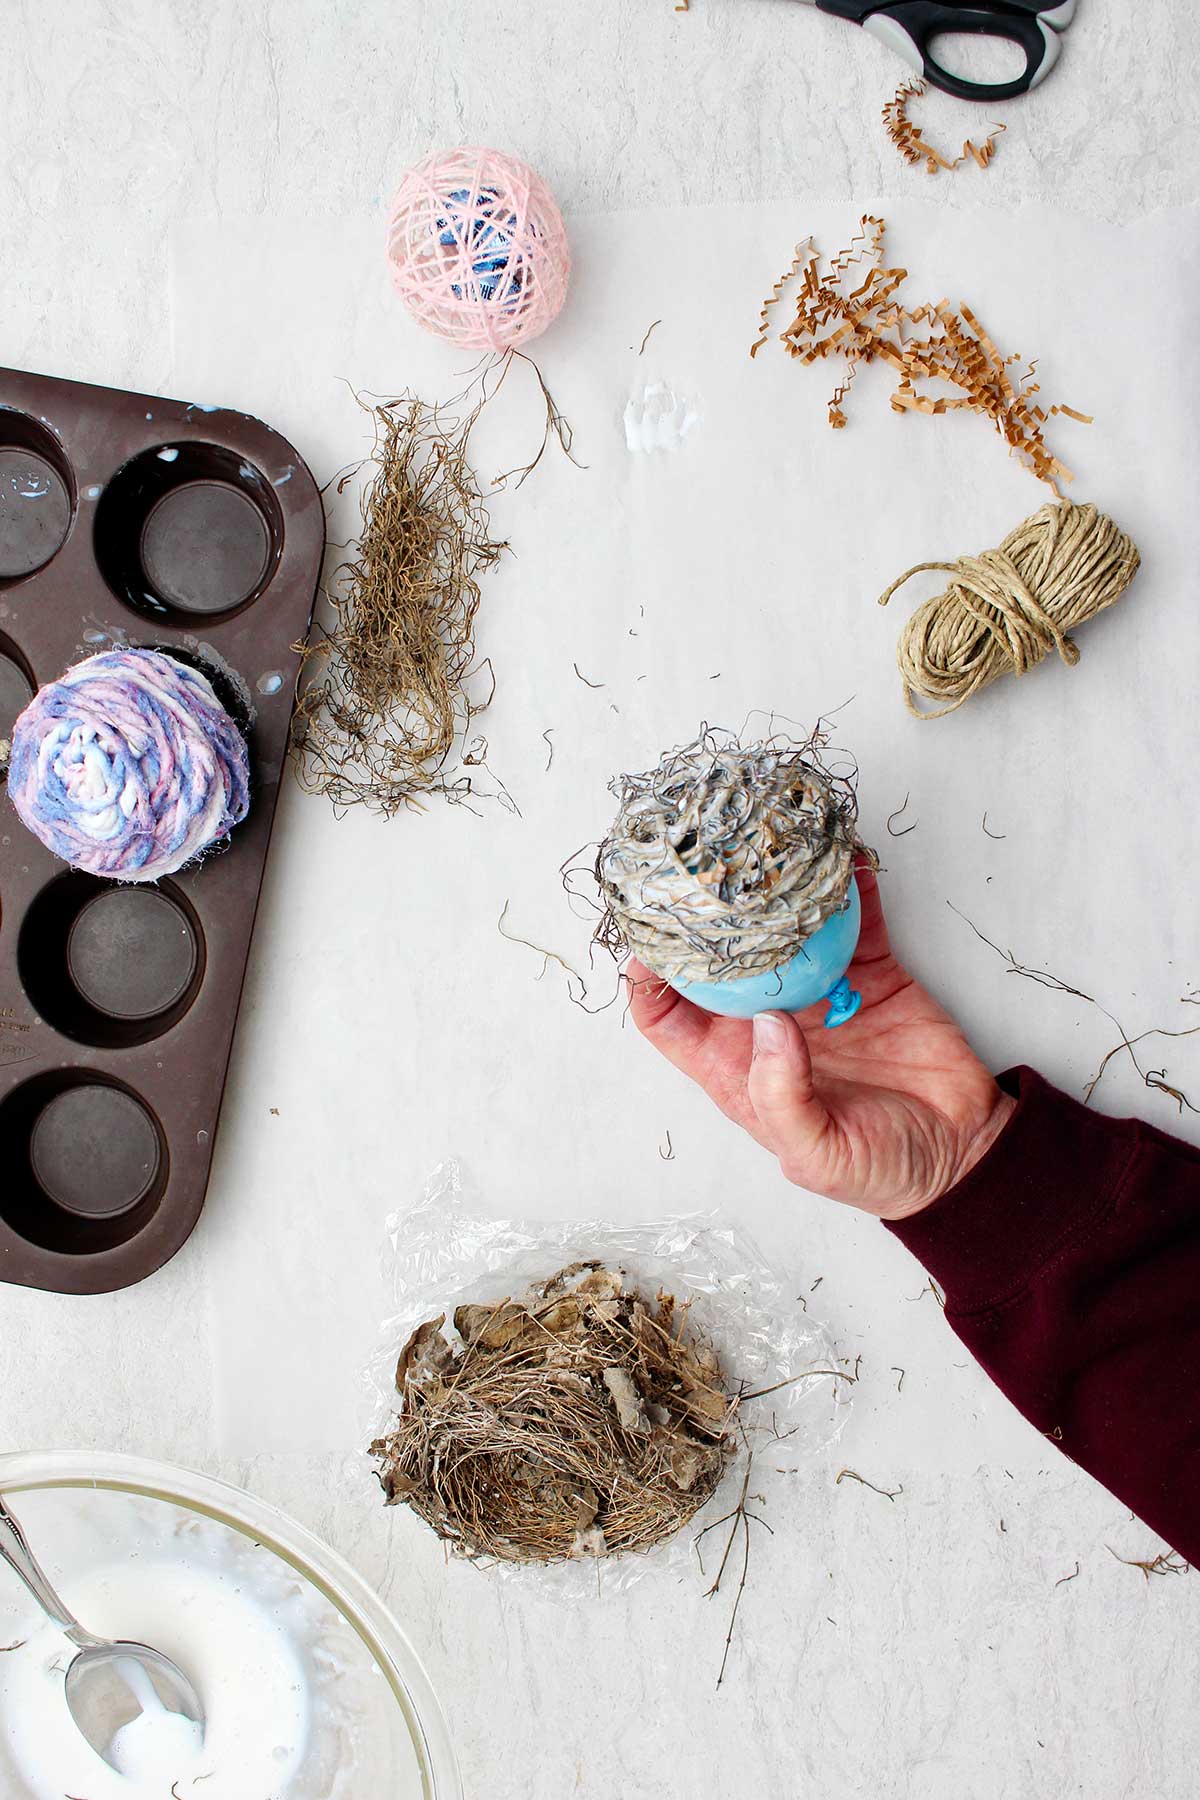
This worked pretty well. Don’t worry if you don’t cover every single bit of the bottom of the balloon. We will be putting some Spanish moss inside, and it will complete the bottom of the nest quite nicely.
So make a small spiral looping of the twine on the bottom of the nest and then continue to wrap the half of the balloon with the twine.
Nest materials
While I was wrapping the twine, I tucked in a little bit of Spanish moss into the sides of the nest now and then just to give it some different texture. It also helped fill in between the pieces of the twine because they are stiffer.
I also tucked in a few pieces of some brown packaging paper that I had from a gift that someone gave me. It’s ⅛th inch wide and about 2 inch long pieces of brown craft paper that are kind of wrinkled and provide a little packing material in the bottom of a gift box.
Both of these different types of materials are optional, so don’t worry about it if you don’t have them.
But it did make the texture of the nest unusual, and it reminded me of how the bird tucked leaves and grasses in the nest I had found.
You might think of other things you could use for this if you don’t have these two items. Perhaps some actual little pieces of dried grass from outside? Use your imagination!
Wrap the twine
If you run out of twine before you were happy with how your nest looks, then cut another piece and start again. Until you have the size you would like.
I think it will really help to watch the video to see exactly what I mean by this and visualize how I did the bottom of the nest.
Let it dry
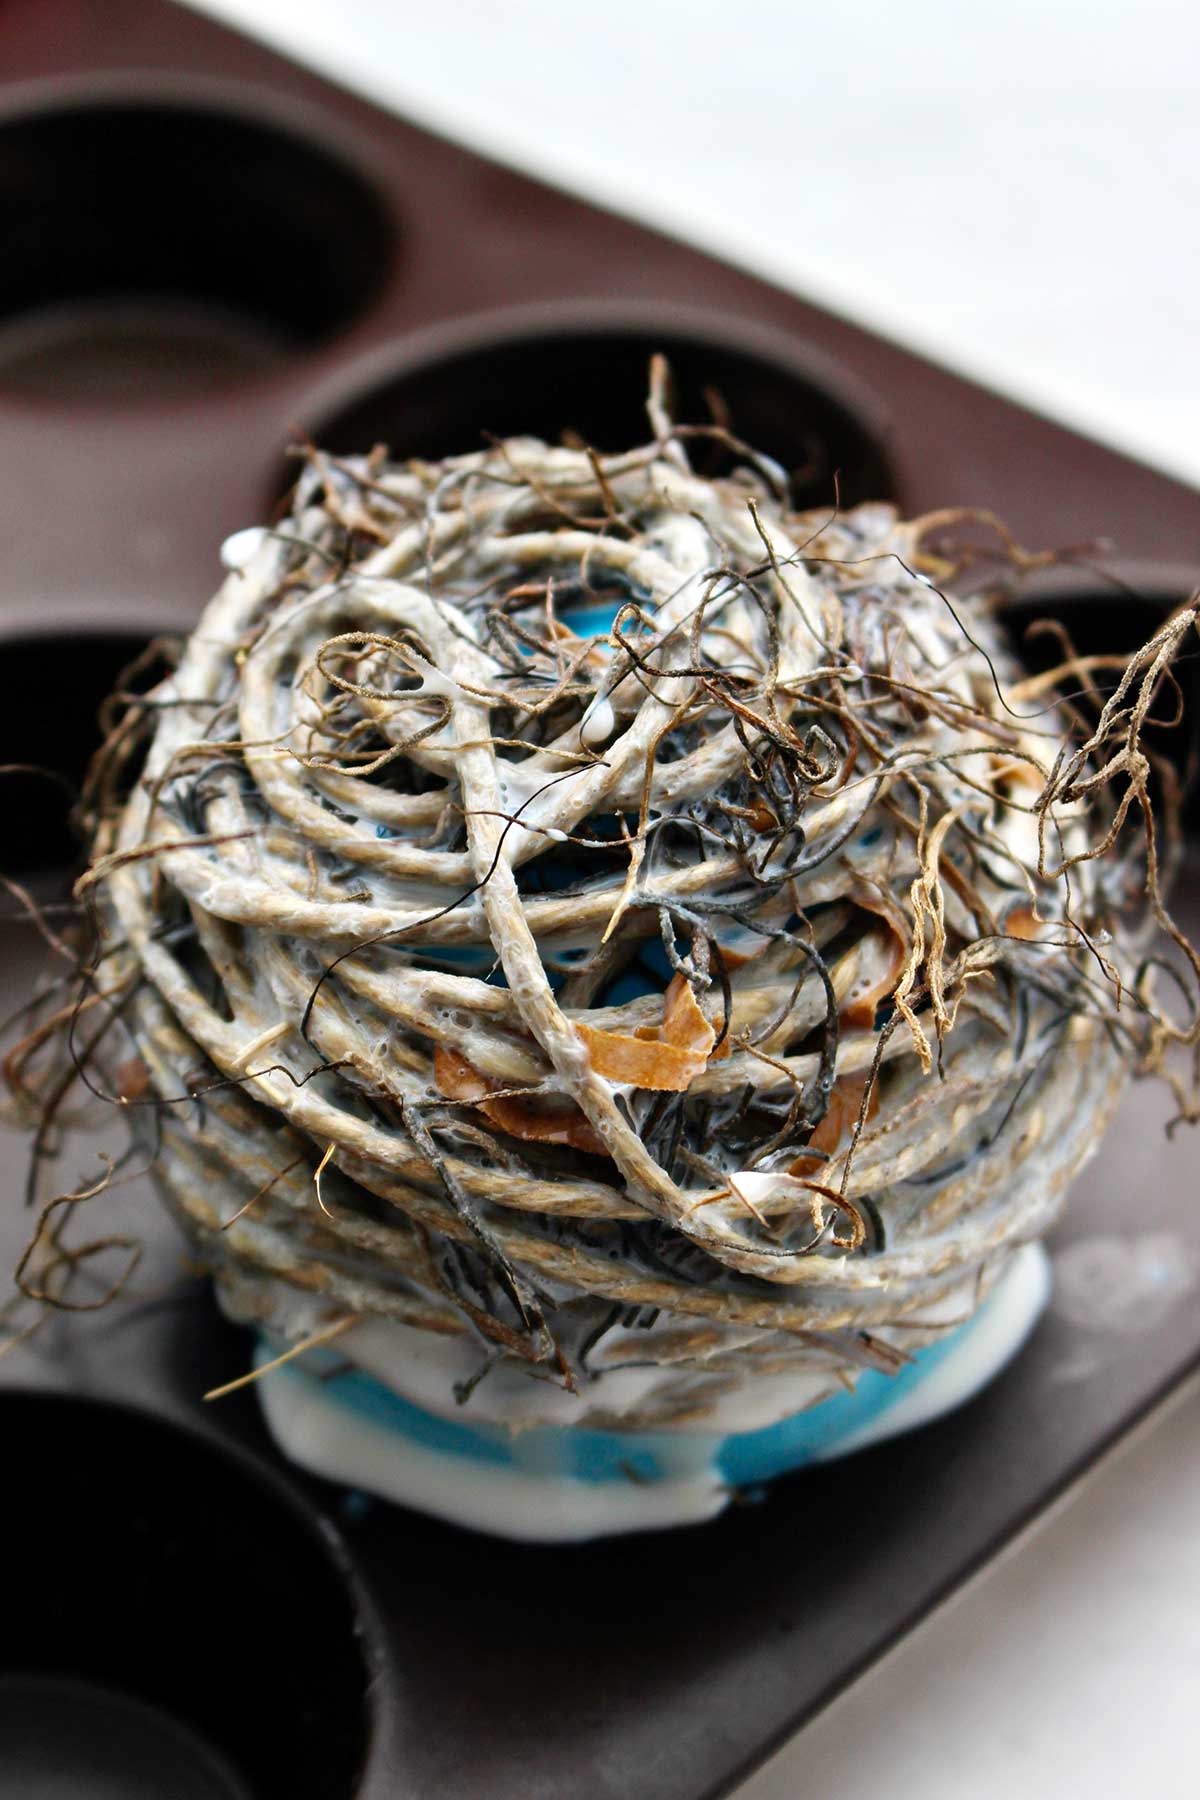
I tucked the end of the twine underneath another piece of the twine, and then set the balloon and the nest in a muffin tin to dry.
I thought the twine would take longer than the yarn to dry, but it was dried hard in 24 hours. And I mean hard, the twine is stiff like twigs. I was very pleased with the results.
The second even greater Make a Nest reveal!
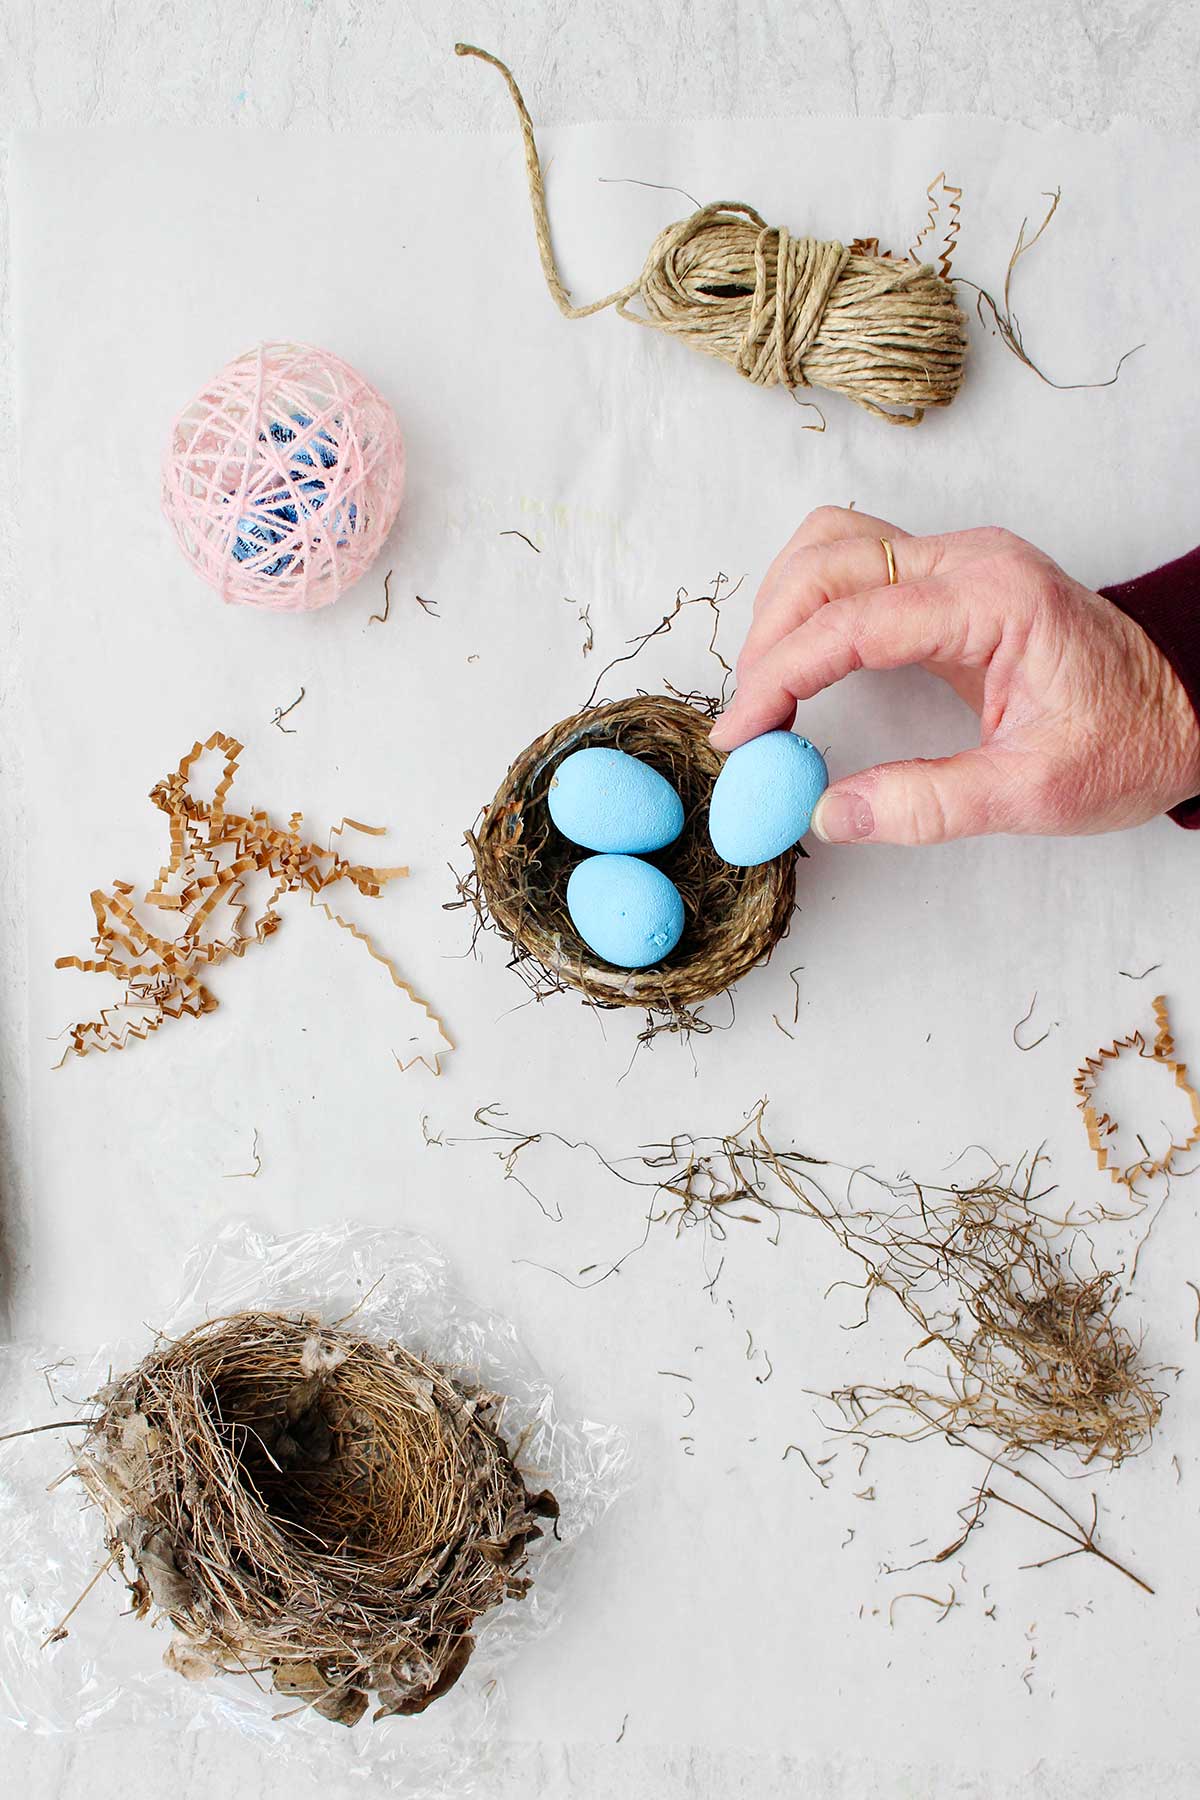
The twine nest popped right off of the balloon just like the yarn one did.
Set or pressed some Spanish moss in the bottom center of the nest to kind of line it. It will cover any small holes that you might have inside of the nest.
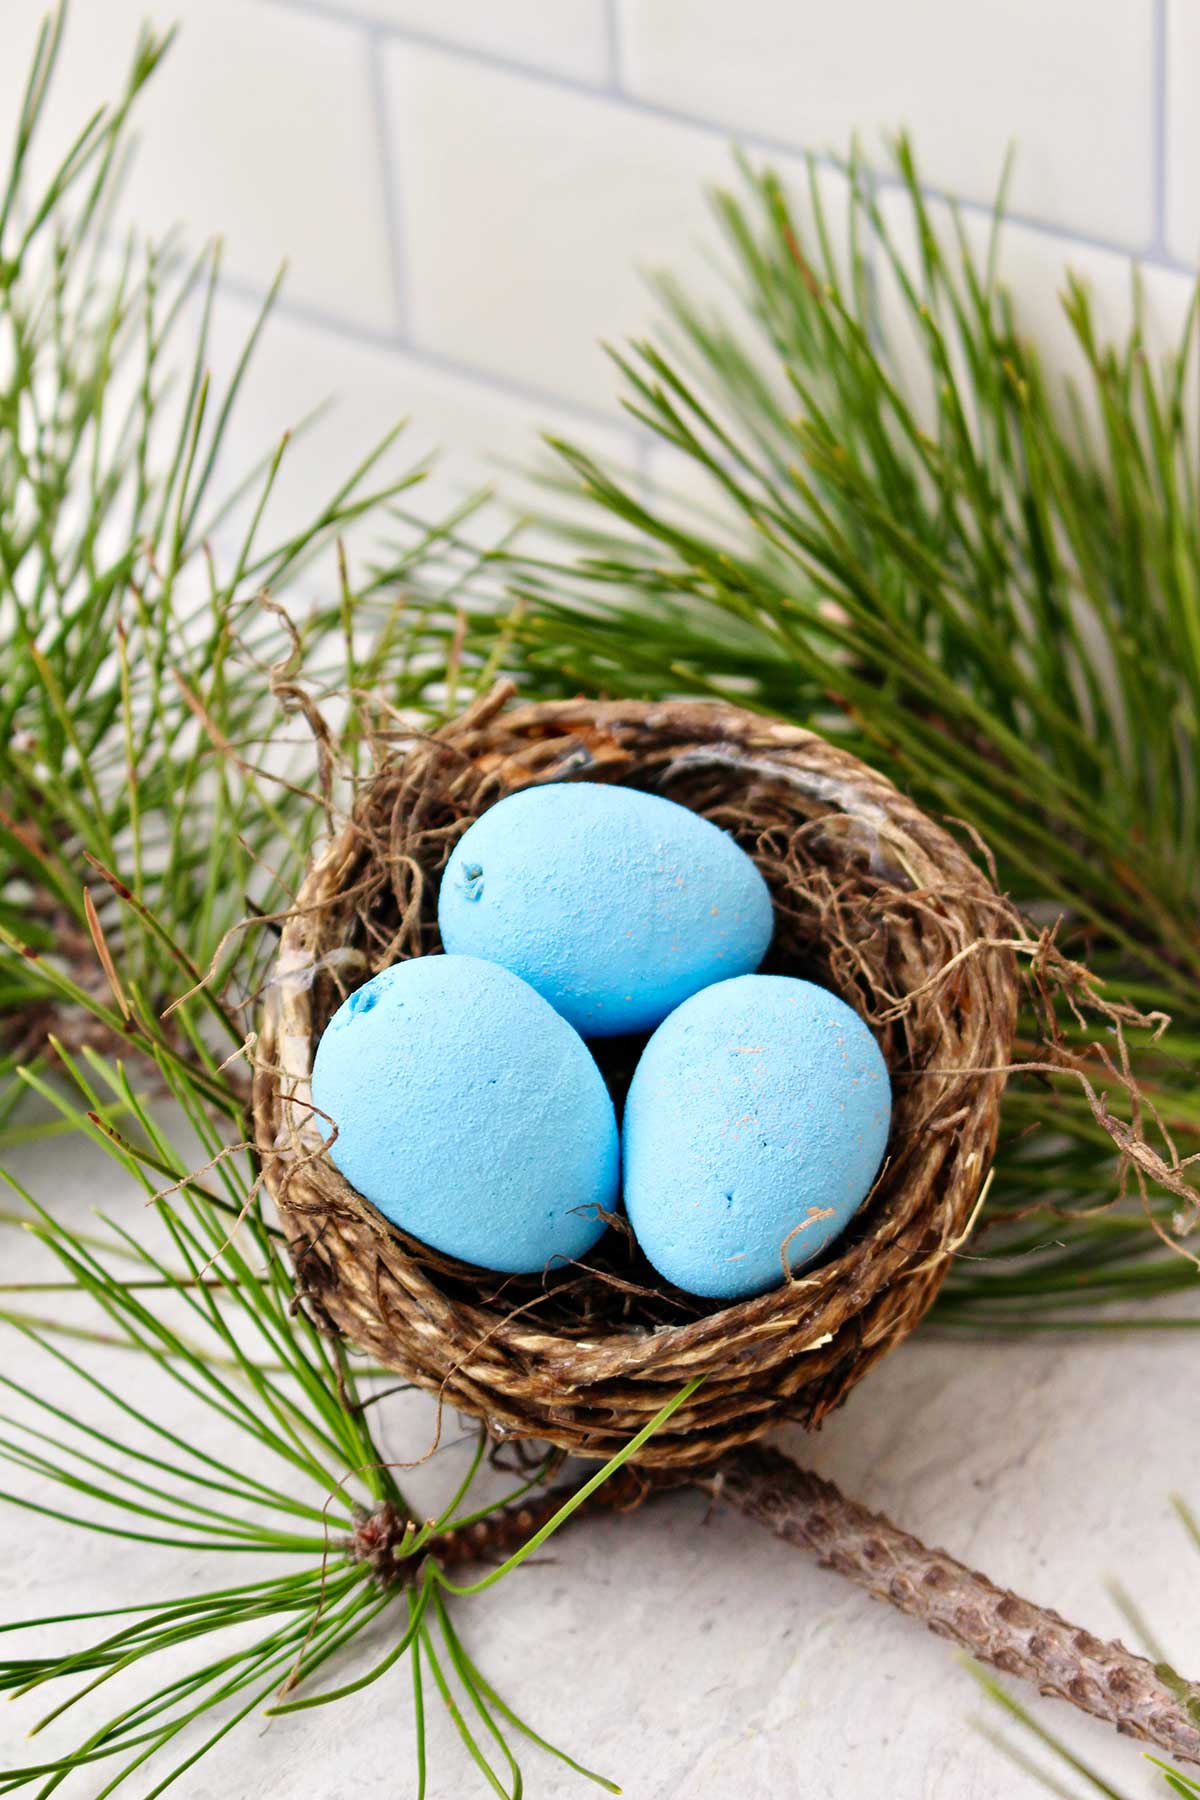
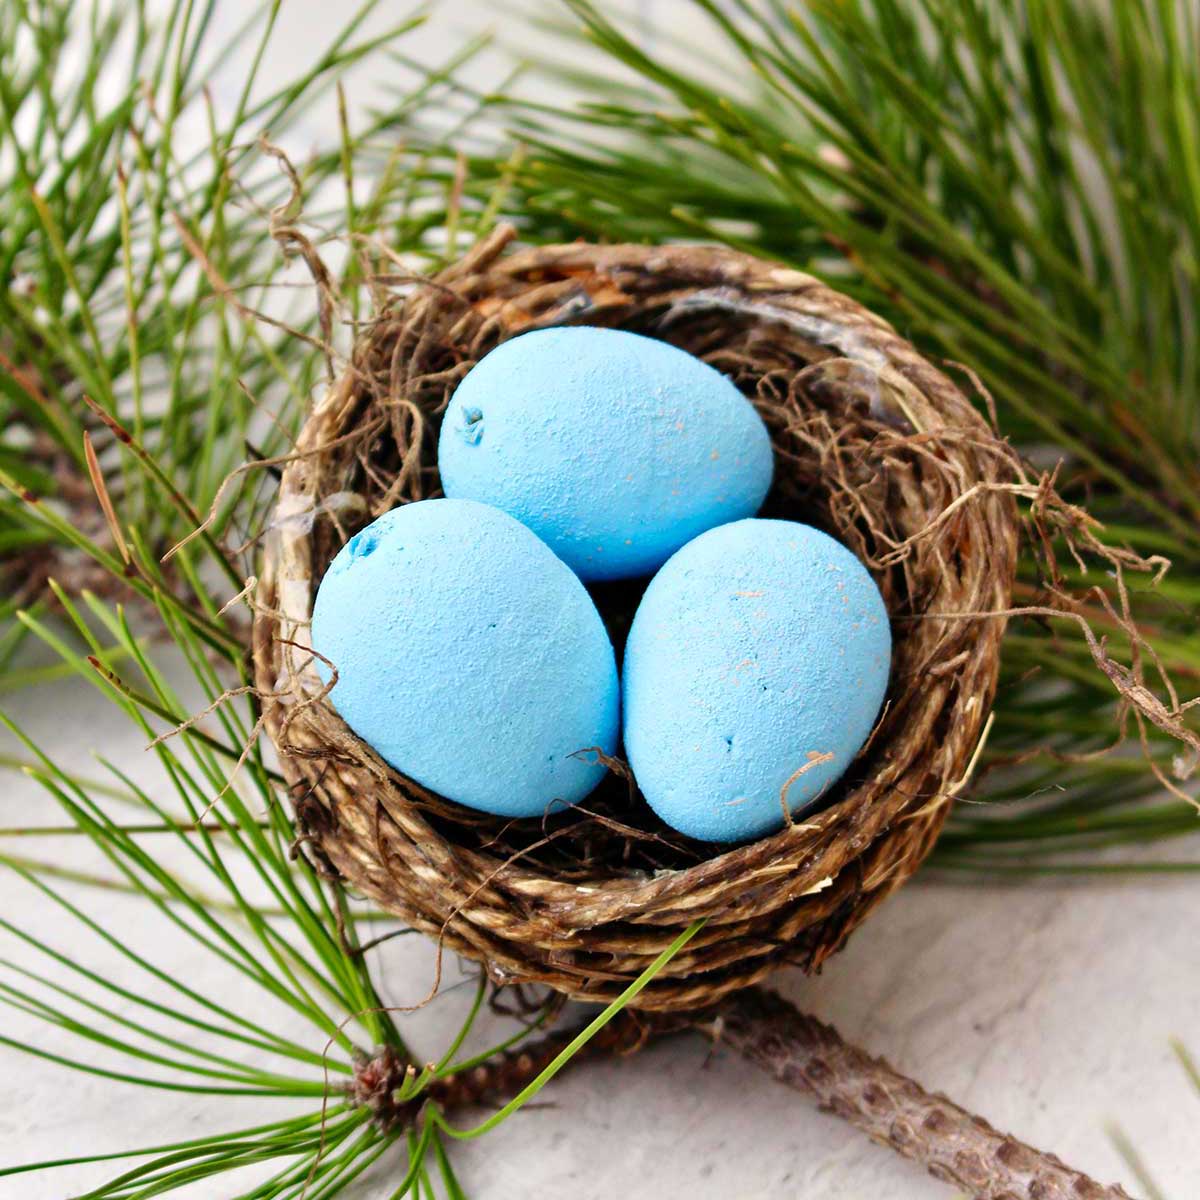
I had found a few small foam eggs for Easter that I painted kind of a turquoise like blue. Then I flicked a little bit of light brown paint on the eggs with a an old toothbrush. Just to give it a little bit of texture. I was pleased with how they turned out.
I looked in more than one store for some small wooden eggs, but didn’t find any in the craft stores like Hobby lobby where I live.
I cut off a branch from a cedar tree outside and set the nest in the branch. It almost looks like a real birds nest don't you think?
Full length tutorial video option
Again, if you would like to watch the full length video of this process and follow along step-by-step, here is the link: Make a Bird Nest From String Full Length Tutorial.
I think this would make a great project for kids. It would be a fun way of doing some thing for the fair or for a school project or as a gift for someone who is a birdwatcher.
They may need a bit of help with this as it takes some coordination, holding both the balloon and winding the twine or string or yarn. But, I think it’s worth it!
I had been planning on trying a birds nest out of natural, long grasses and twigs, but this one turned out so well I postponed that till later. I still am going to try DIY bird nests out of natural materials too but this one will suffice for now. 🙂
PS- I will put the bird's nest back outside where it came from. It was a fun inspiration.
More nature crafts
If you would like some other nature, crafts, here are a few ideas:
- How to Make a Cute Yarn Bird
- Two Ways of Nature Weaving for Kids
- Tree Leaf Identification Nature Journal
- Kids Quick Pinecone Bird Feeder
Making this bird nest is super easy and only requires items you probably already have in your house! Start by measuring out your yarn, winding it carefully into some glue, the wrapping it gently around a balloon. Wait for it to dry before removing the balloon and there you have it, your own little easy bird nest!
Birds use all kinds of materials to make their nests, including twigs, grass, leaves, and mud. To make our own little bird nest, we are going to use string or twine, glue, and a balloon to hold the shape! Choose your favorite color of yarn or string, or use a twine for a more natural look.
Enjoy!
If you try this craft, let me know! Go ahead and leave a comment, rate it, and tag a photo with #WelcometoNanas wherever you post.
Come join the fun at https://welcometonanas.com
Supplies for How Do I Make a Bird Nest from String?:
- Balloons (water balloons, larger balloons)
- String- crochet thread, embroidery thread, yarn, twine
- Spanish moss, packing paper (optional)
- White glue (or Mod Podge)
- Bowl, spoon
- Table covering or waxed paper/parchment paper
- Muffin tin (something to set wet eggs on)
- Scissors
- Extras- small candy, small bird eggs, ornament tree (optional)
How Do You Make a Bird Nest Out of String for Spring?
Equipment
- Bowl, spoon
- Muffin tin (something to set wet eggs on)
- Scissors
Items Required
- Balloons (water balloons, larger balloons)
- String- crochet thread, embroidery thread, yarn, twine
- Spanish moss, packing paper (optional)
- White glue (or Mod Podge)
- Bowl, spoon
- Table covering or waxed paper/parchment paper
- Muffin tin (something to set wet eggs on)
- Scissors
- Extras- small candy, small bird eggs, ornament tree (optional)
Instructions
- To form the nest, it seemed best to use a water balloon. They are smaller in size than the bigger party balloons.When looking at the nest that I found, a water balloon was almost exactly the size of the nest. I wanted this nest to be similar in shape and size, so it was a perfect starting spot.I blew the balloon up to about the size of my fist.
- Next I poured about a cup to a cup and a half of white glue into a bowl. Some people like to use Mod Podge for this type of project, but I find the glue to work well and it is less expensive. I purchase my glue in a gallon container because I use it so often and it is much less expensive when there is a need for a larger quantity like this project.Keep adding more glue to the bowl as needed during the project.Oh, and it's a good idea to use a table covering like waxed paper or parchment paper as this project can get messy!
- I tried making this nest from two types of string. The first nest was made with yarn, the second was made with a brown string that was a twine type of material. Choose which you would like to use.Yarn: So from the yarn stash, I chose a variegated pastel yarn (one yarn that is different colors). The yarn color changes from blue to lavender to pink to white.Twine: The second thing I tried was exactly the same technique except using twine.Note: The instructions will use the word yarn or string but this also refers to the twine as well.
- Pull out about 10 yards of yarn out of the skein. Let it gently loop on the floor next to you and hold onto the end that you clip.By the way, I measured the yards by pulling the string out the length of my arm, and measuring from my finger to my nose. You can use a yardstick if you would like. 🙂Move the yarn up into the bowl by taking the end you still have in you hand and looping it on top of the glue in the bowl. It’s very important that you do not tangle this string by stirring it, or just bunching it up from the floor and sticking it in the bowl.Loop the string gently into the bowl until it is entirely looped and setting on the glue.Be sure to hold onto the end of the string as you finish looping it into the bowl. Now press the yarn down into the glue with a spoon.
- Next take your balloon in one hand, along with the end of the string that you held onto. Older children will have an easier time of this than the younger- so be ready to help as needed.With the other hand begin to wind the glue covered yarn onto the balloon. Kind of pinch the yarn between your fingers and pull the yarn through your fingers before winding in order to get the excess glue off of the yarn.Only wind the yarn onto the bottom half of the balloon. When making the string eggs, we covered the whole balloon in order to get the full egg shape.Obviously, this time we’re wanting a nest shape so we will only cover half of the balloon.The hardest part of this is covering the bottom or end of the balloon. This will be the bottom of the nest so it can't be open or the eggs will fall through.I ended up making a few small loops with the yarn on the bottom of the balloon, and then attempted to kind of wind the yarn across this. I will tell you that this did work as the bottom of the nest. If you don’t cover every little spot of the bottom of the nest that’s alright. It will still dry and hold up OK.If you run out of yarn before you feel like you have the shape like you would like it, just cut another bit of yarn, put it into the glue, and keep covering the balloon until you have it the way you like it.
- While I was wrapping the twine, I tucked in a little bit of Spanish moss into the sides of the nest now and then just to give it some different texture. It also helped fill in between the pieces of the twine because they are stiffer. I also tucked in a few pieces of some brown packaging paper that I had from a gift that someone gave me. It’s ⅛th inch wide and about 2 inch long pieces of brown craft paper that are kind of wrinkled and provide a little packing material in the bottom of a gift box. Both of these different types of materials are optional, so don’t worry about it if you don’t have them.
- When you are finished wrapping the yarn, set the balloon and yarn nest in a muffin tin cup. Balloon side down.Set this aside to dry for at least 24 hours. Because my yarn was thicker, it took it another full day before it was dry. So you do have to be patient. 🙂
- When the nest was dry, I just popped the balloon out of the yarn nest, I didn’t even need to pop the balloon. It left this nice cup shape in the middle of the nest.This little nest sat nicely on my Easter tree and several small chocolate eggs fit inside. It’s really cute.
- The twine nest popped right off of the balloon just like the yarn one did.Set or pressed some Spanish moss in the bottom center of the nest to kind of line it. It will cover any small holes that you might have inside of the nest.I had found a few small foam eggs for Easter that I painted kind of a turquoise like blue. Then I flicked a little bit of light brown paint on the eggs with a an old toothbrush. Just to give it a little bit of texture. I was pleased with how they turned out. I looked in more than one store for some small wooden eggs, but didn’t find any in the craft stores like Hobby lobby where I live.I cut off a branch from a cedar tree outside and set the nest in the branch. It almost looks like a real birds nest don't you think?


Leave a Reply