Fast Upcycled Picture Frame-a Holiday Photo Project!
The holiday time is a great time to make a Fast Upcycled Picture Frame Holiday Photo Project. It takes minutes to turn a used frame into a photo board using string and burlap…or only string! Photos are held in place with clothespins.
You can quickly have a Holiday Photo Project done that can be a focal point the whole holiday season. It’s a place to clip up pictures or quotes that encourage GRATITUDE.
Put up pictures of your family or have guest bring photos to add to the board.
Upcycled picture frames
I have a couple large picture frames underneath the stairs in my home that I pull out and use in various projects. They have been used often and are upcycled picture frames for sure!! I love to use them as a photo taking prop for example.
I want to use this frame again and don’t want to do anything that will permanently damage it, so this is a Holiday Photo Project that uses duct tape and baling wire instead of glue! That’s farm talk in case you didn’t know.
You can pick up a large frame from a thrift store or at a garage sale for just a few dollars. Of course there are new frames in any home décor or craft store. This frame has a 16x20 inch opening in the frame.

Clothespin Photo Display
There will be three ways you can make this very fast project.
Let me show you the easy one first and the even easier other two options last!
How do I make a picture frame with string and clothespins?
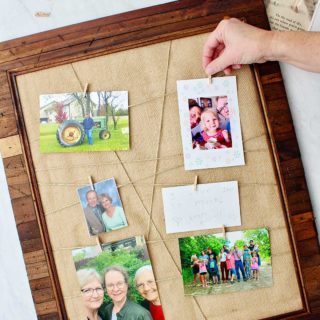
The first Holiday Photo Project has a burlap inset with a twine wrap.
It sounds like I’m describing a model on the runway! Ha!
Prep frame, cut a backing board
If your frame has an inset board and glass, take those out and set them aside.
Cut a piece of heavy cardboard or foam board to ¼-3/8-inch smaller size than the frame size to give room for tucking burlap and wrapping string or twine. You may have to trim this off a bit smaller if it doesn’t fit in the frame.
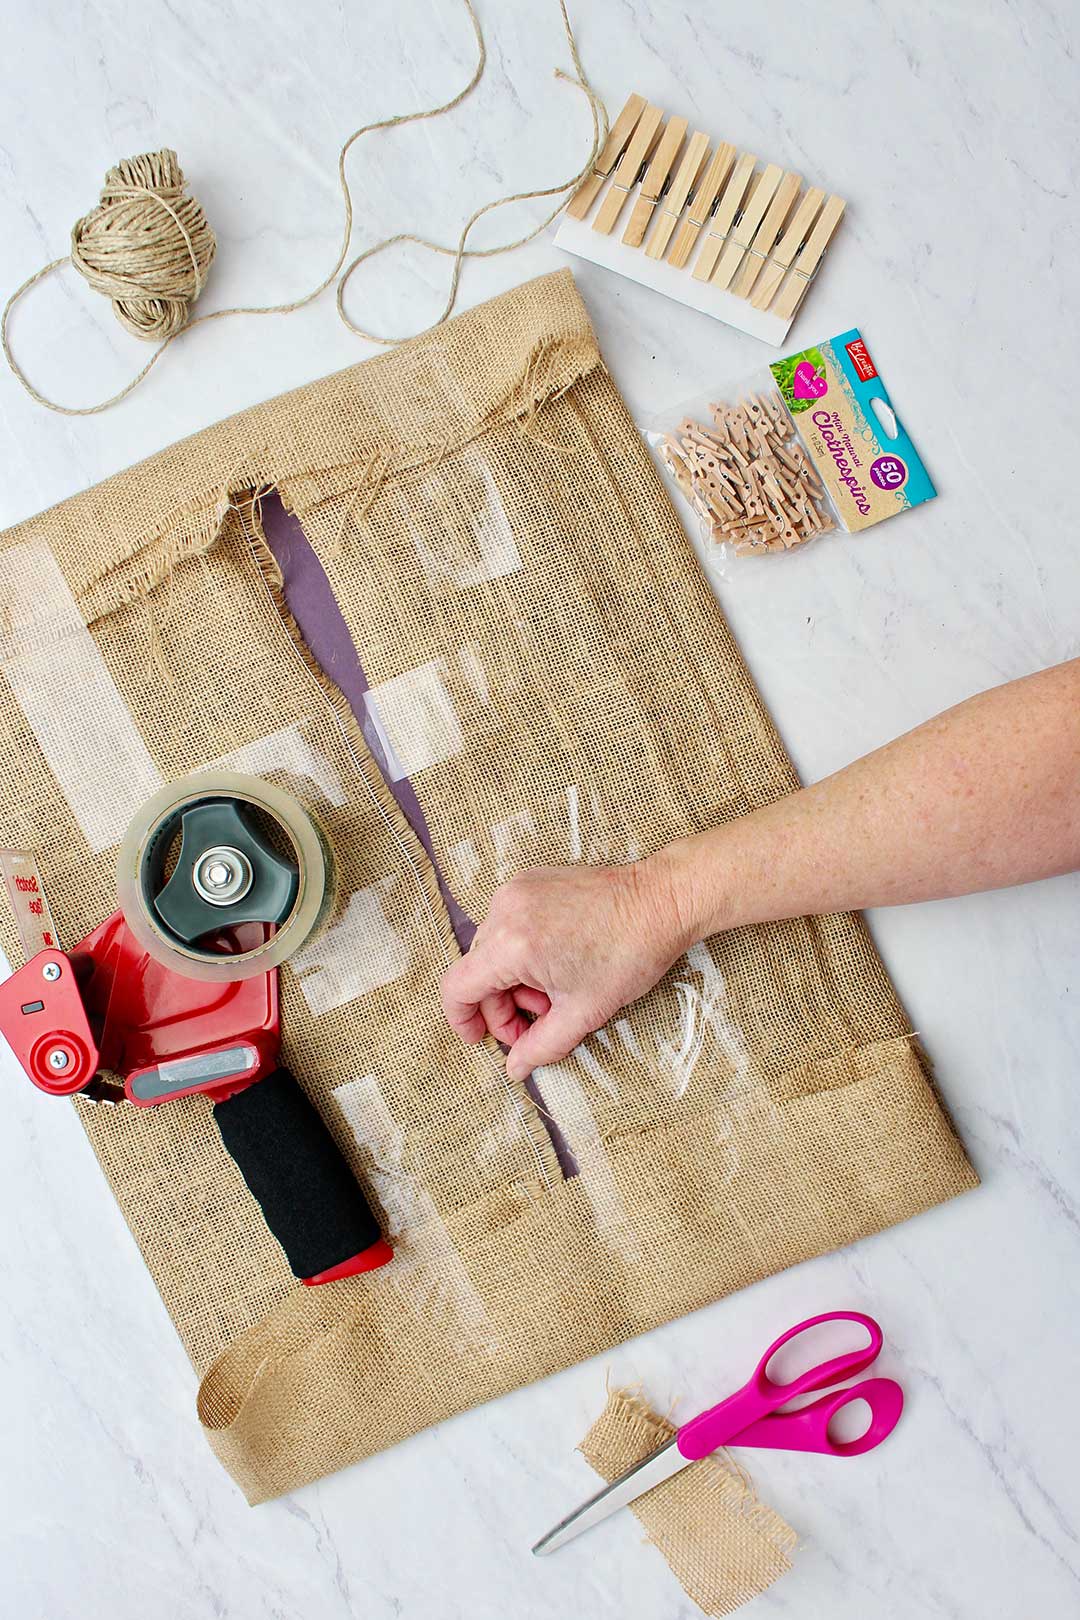
Cut burlap
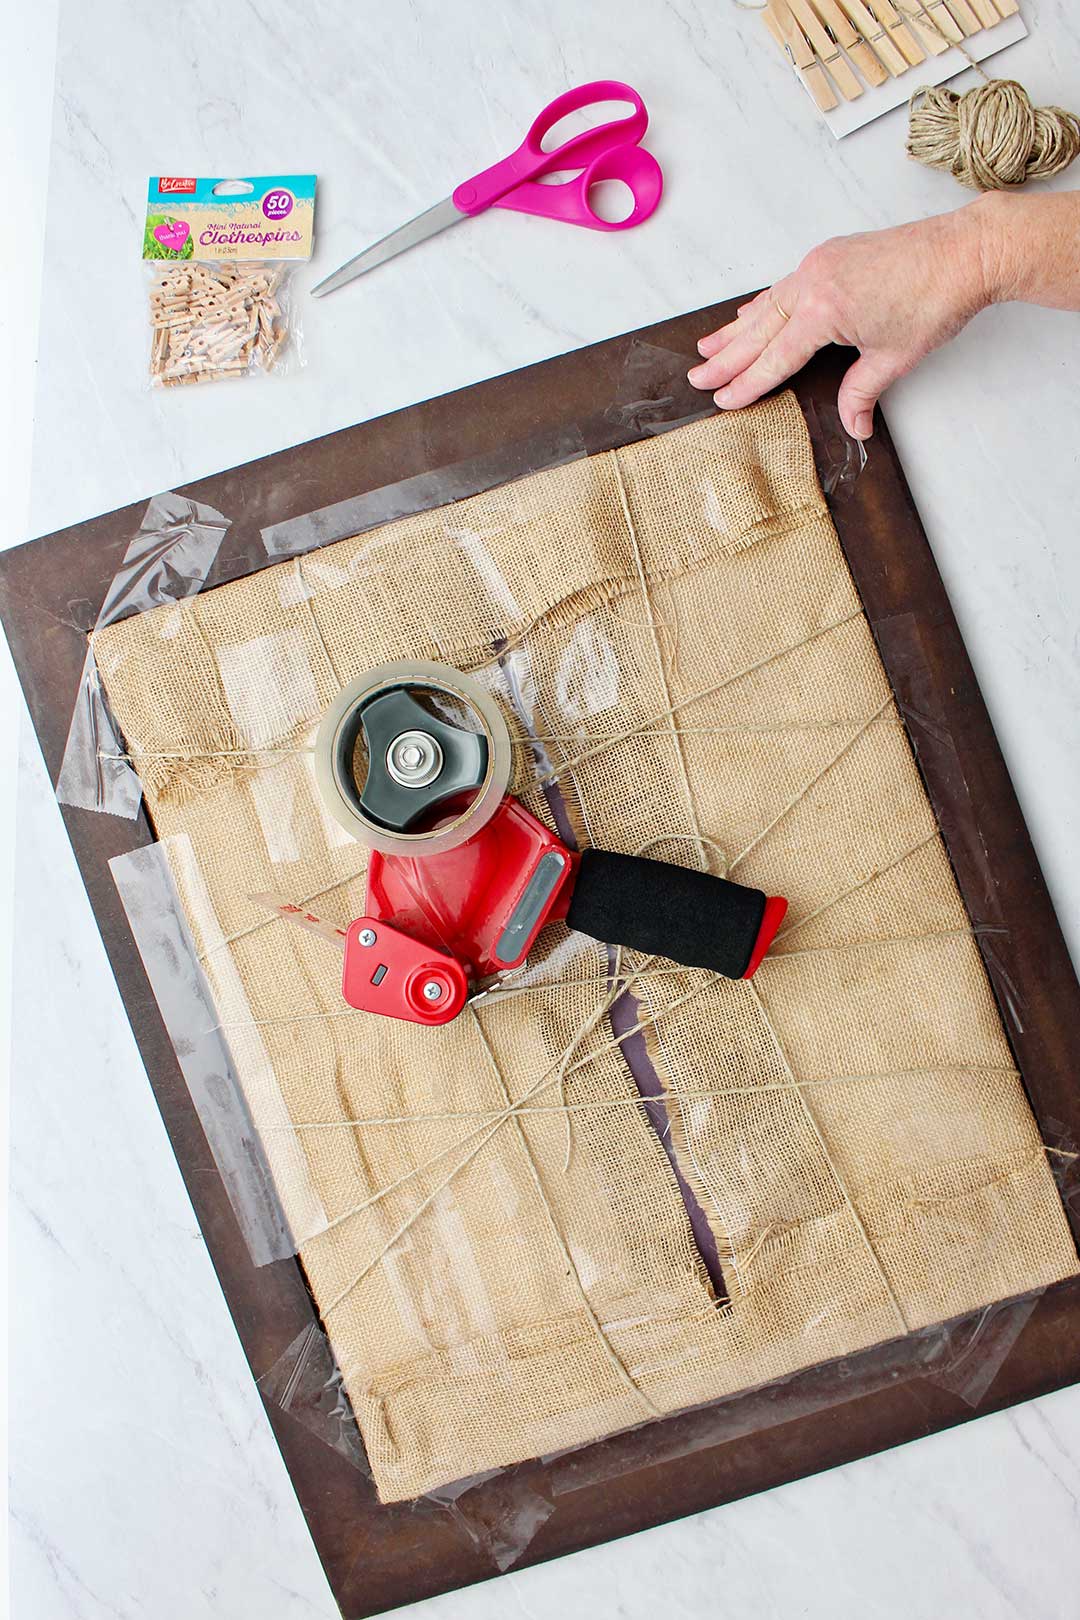
Lay this cardboard on top of the burlap and cut the burlap several inches larger.
Tuck the burlap to the back of the cardboard. Gently stretch it and use the packing tape to tape it to the back.
Note: If you want to make this a permanent project, cut the burlap to the size of the cardboard and glue it to the front of the cardboard. Give the glue time to dry before going to the next step.
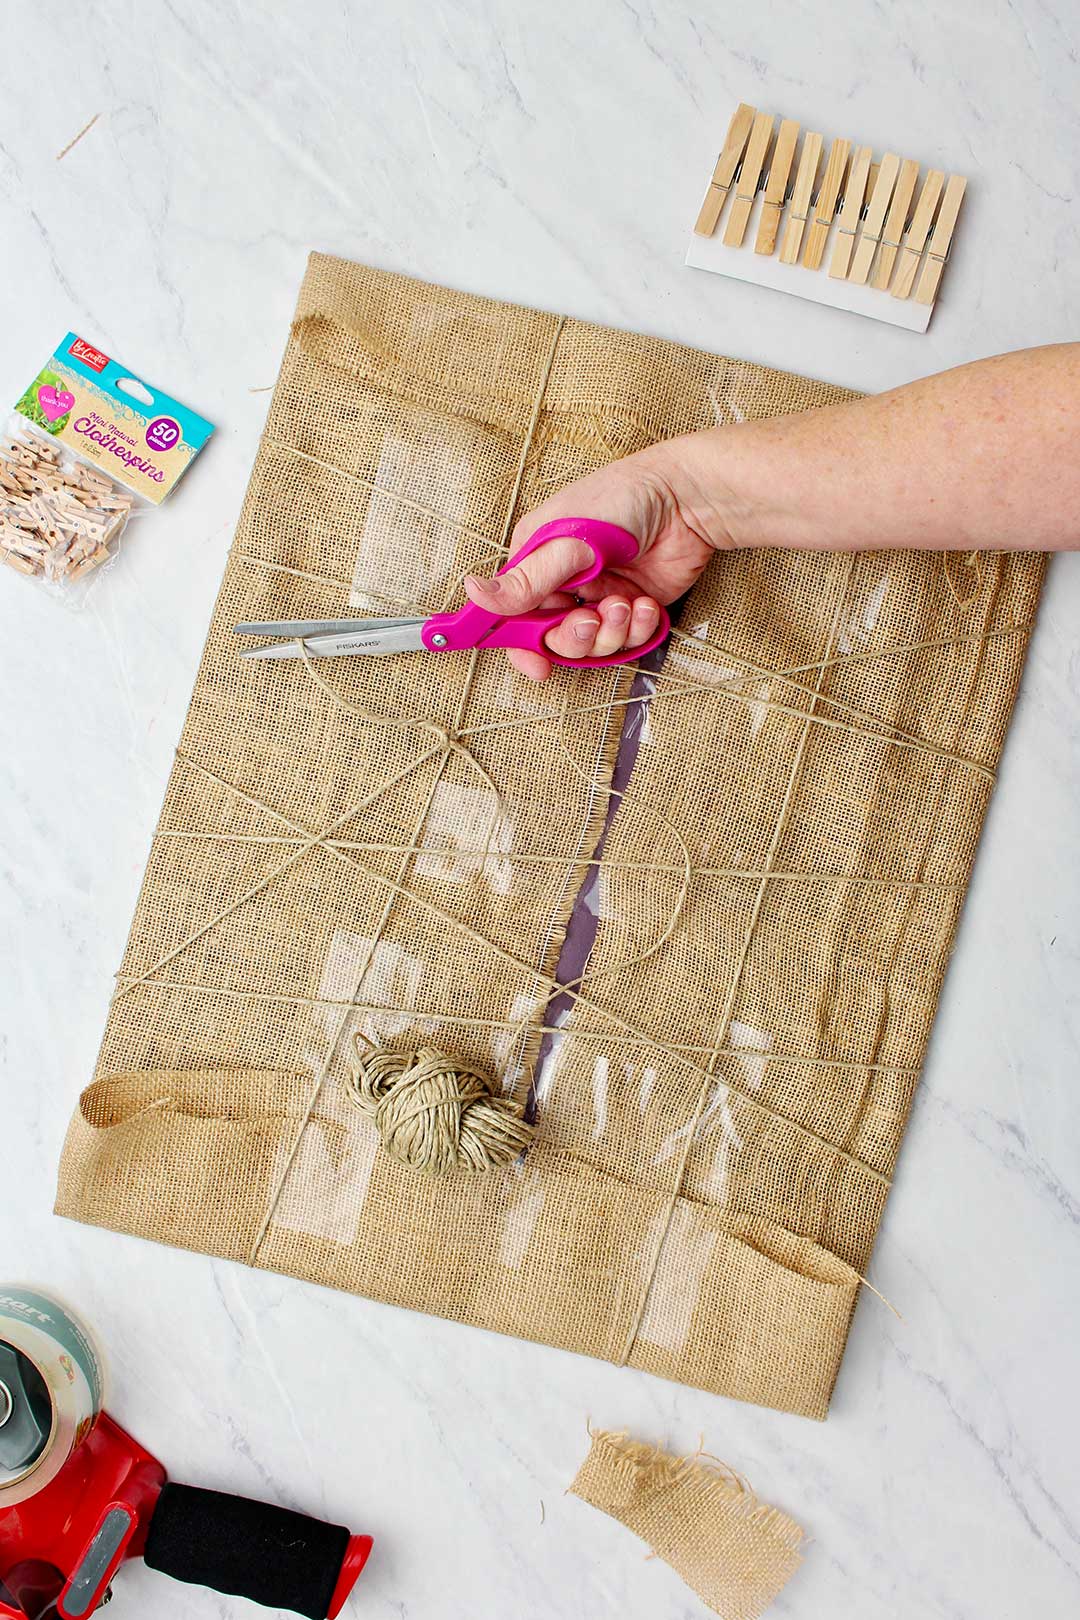
Wrap string/twine
Tape the end of the string or twine to the back of the board and begin to wrap it around the board. The string should be tight but not so tight that the board begins to bend.
I wrapped my twine lengthwise and crosswise.
Tip: Wrap the twine about 1 or 2 inches from the top of the board so that you can hang pictures close to the top of the board. Think about where you wrap the string so that it is on several levels that make picture hanging work well.
Cut the end of the string so that you can tie it to the first end of the string.
Put gratitude photo project together
Slip the cardboard piece into the frame and tape it to the back of the frame with the packing tape.
Note: If this is a permanent project, use the frame turn buttons that hold the cardboard in or push in some picture points (glazier points) to hold it in the frame.
That’s it!
That was easy. Do you want two even easier options?
Take the glass and backing board out of the frame.
Simple string wrapped method
The first even easier holiday photo board option is a simple wrapping method.
Wrap your twine around the entire frame over and over until you like the way it looks. Tie the two ends of the twine or string and boom you are done.
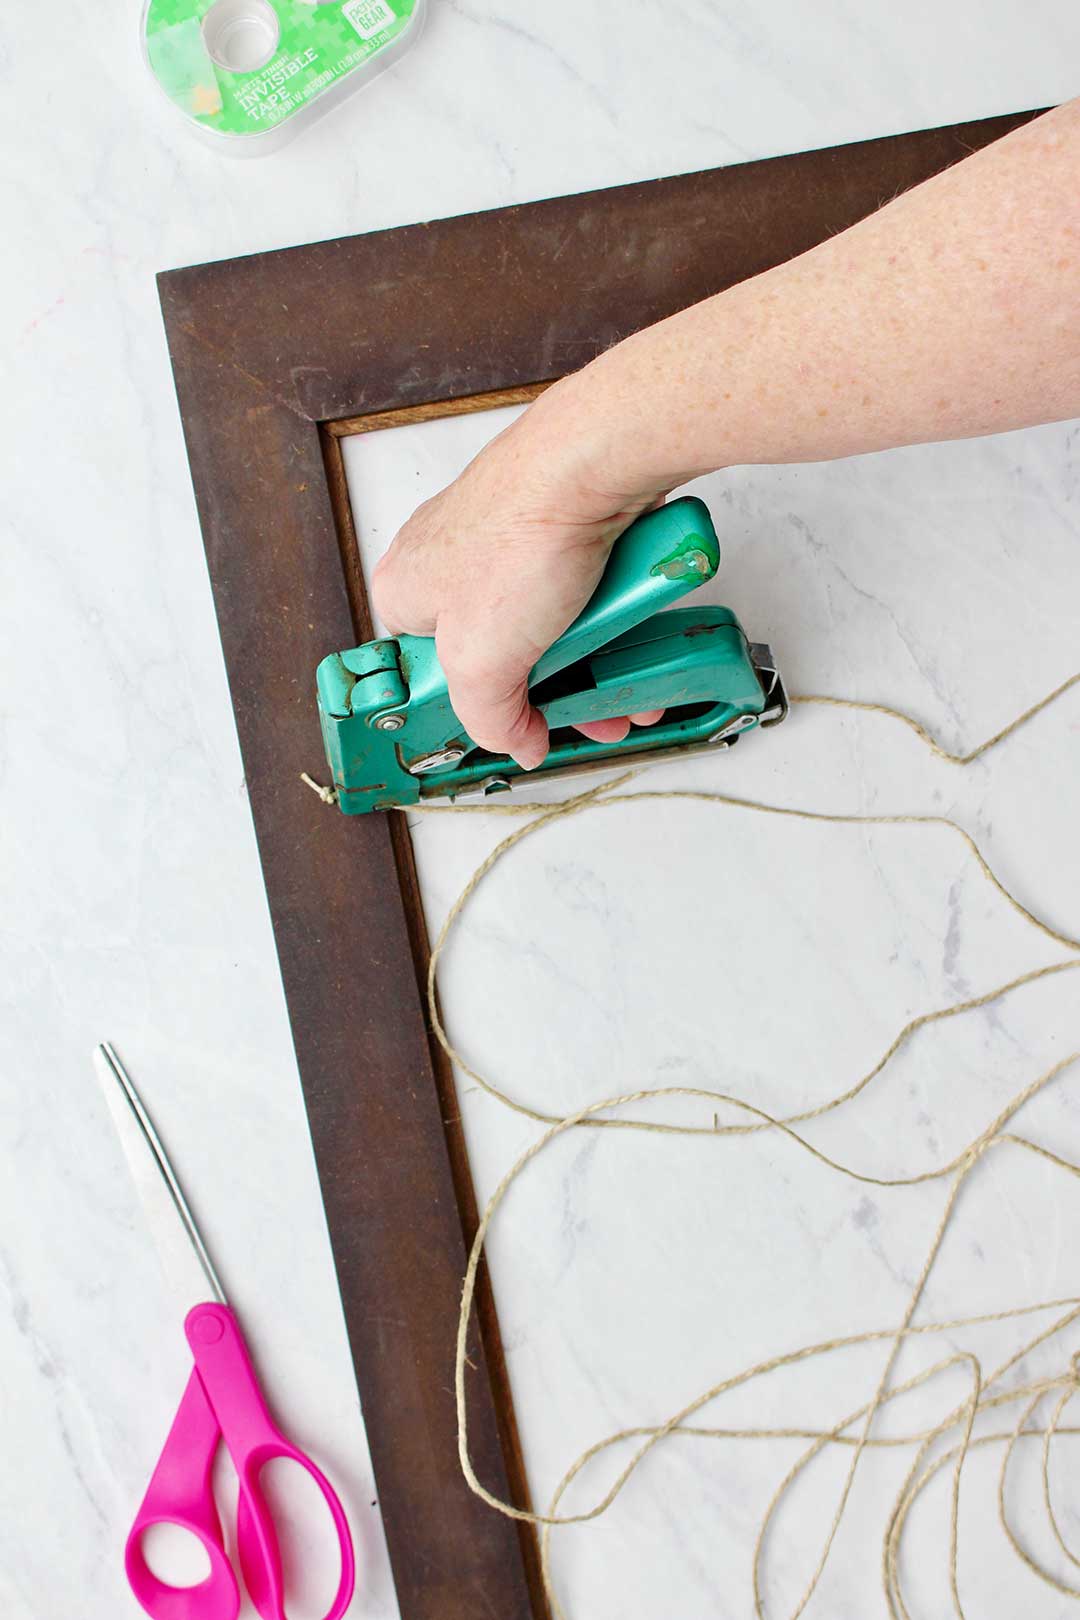
Simple stapled string method
The second even easier option is to staple the twine to the back of the frame.
Tie a knot in the string and staple it to the back of the board.
Pull the string to the opposite side of the board and staple it. Go back an forth across the frame and staple the string to each side until you are satisfied with how it looks.
Cut the string, tie a knot in it and staple it to the side of the frame.
You are done!
There, you have three easy options for your making your Fast Upcycled Picture Frame Holiday Photo Project! I love all three of them.
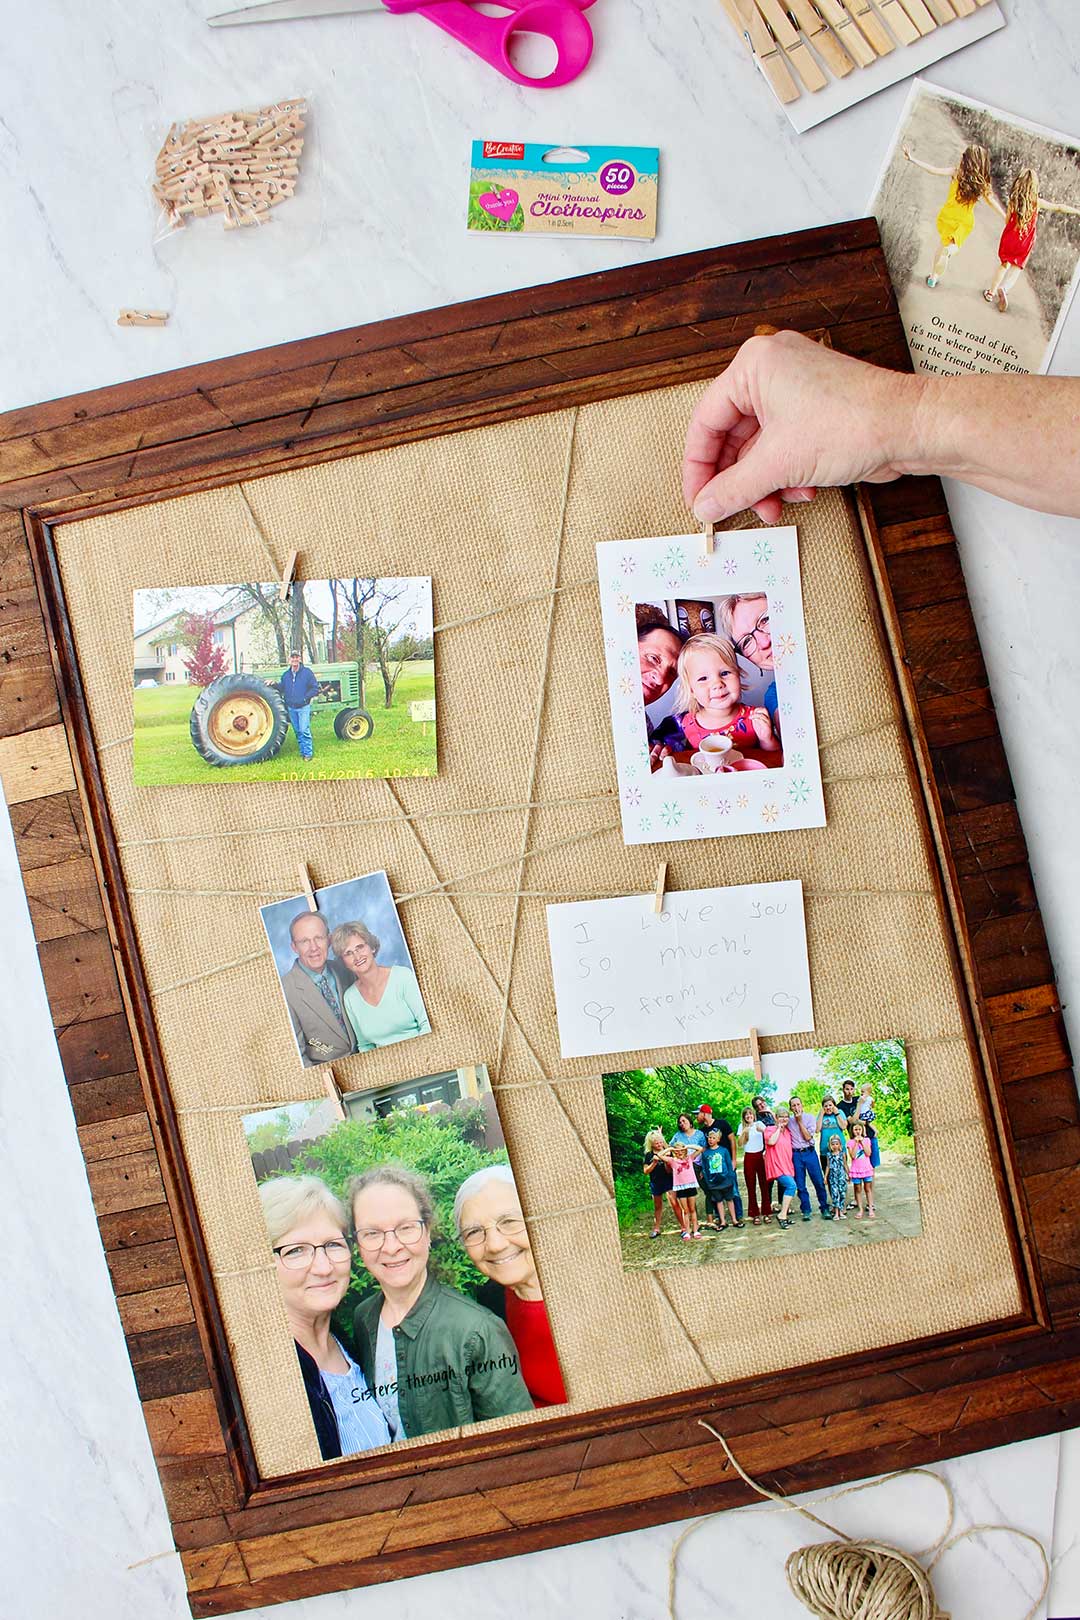
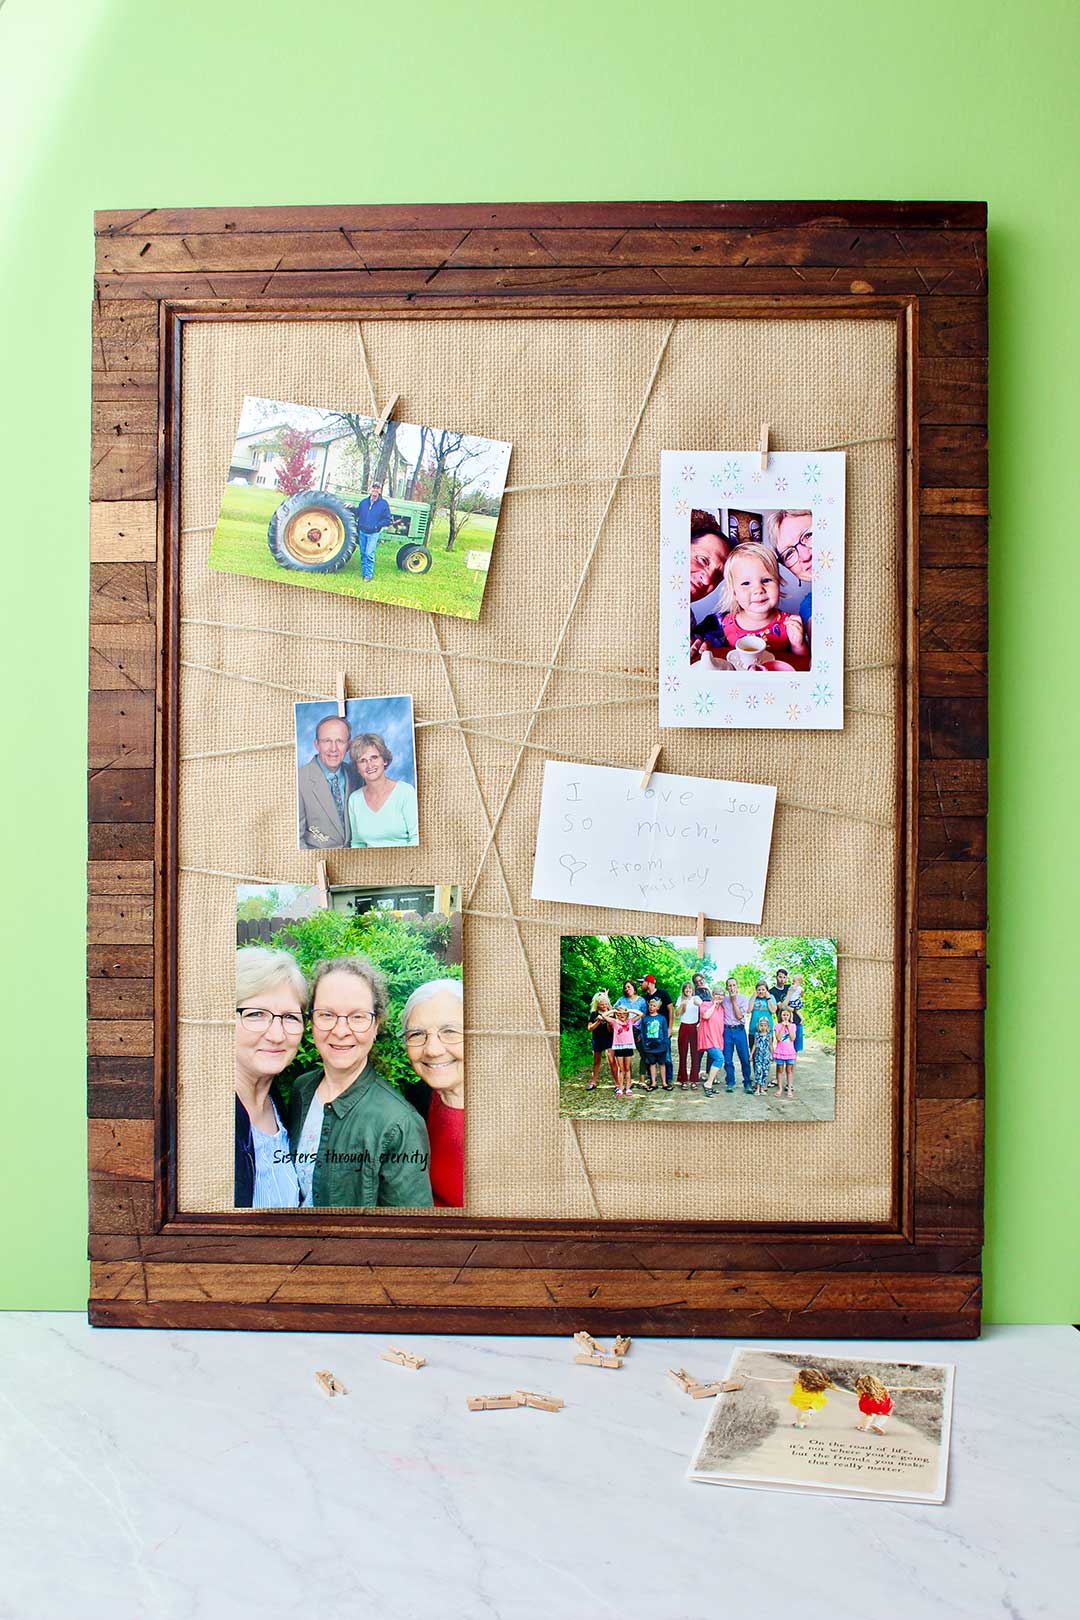
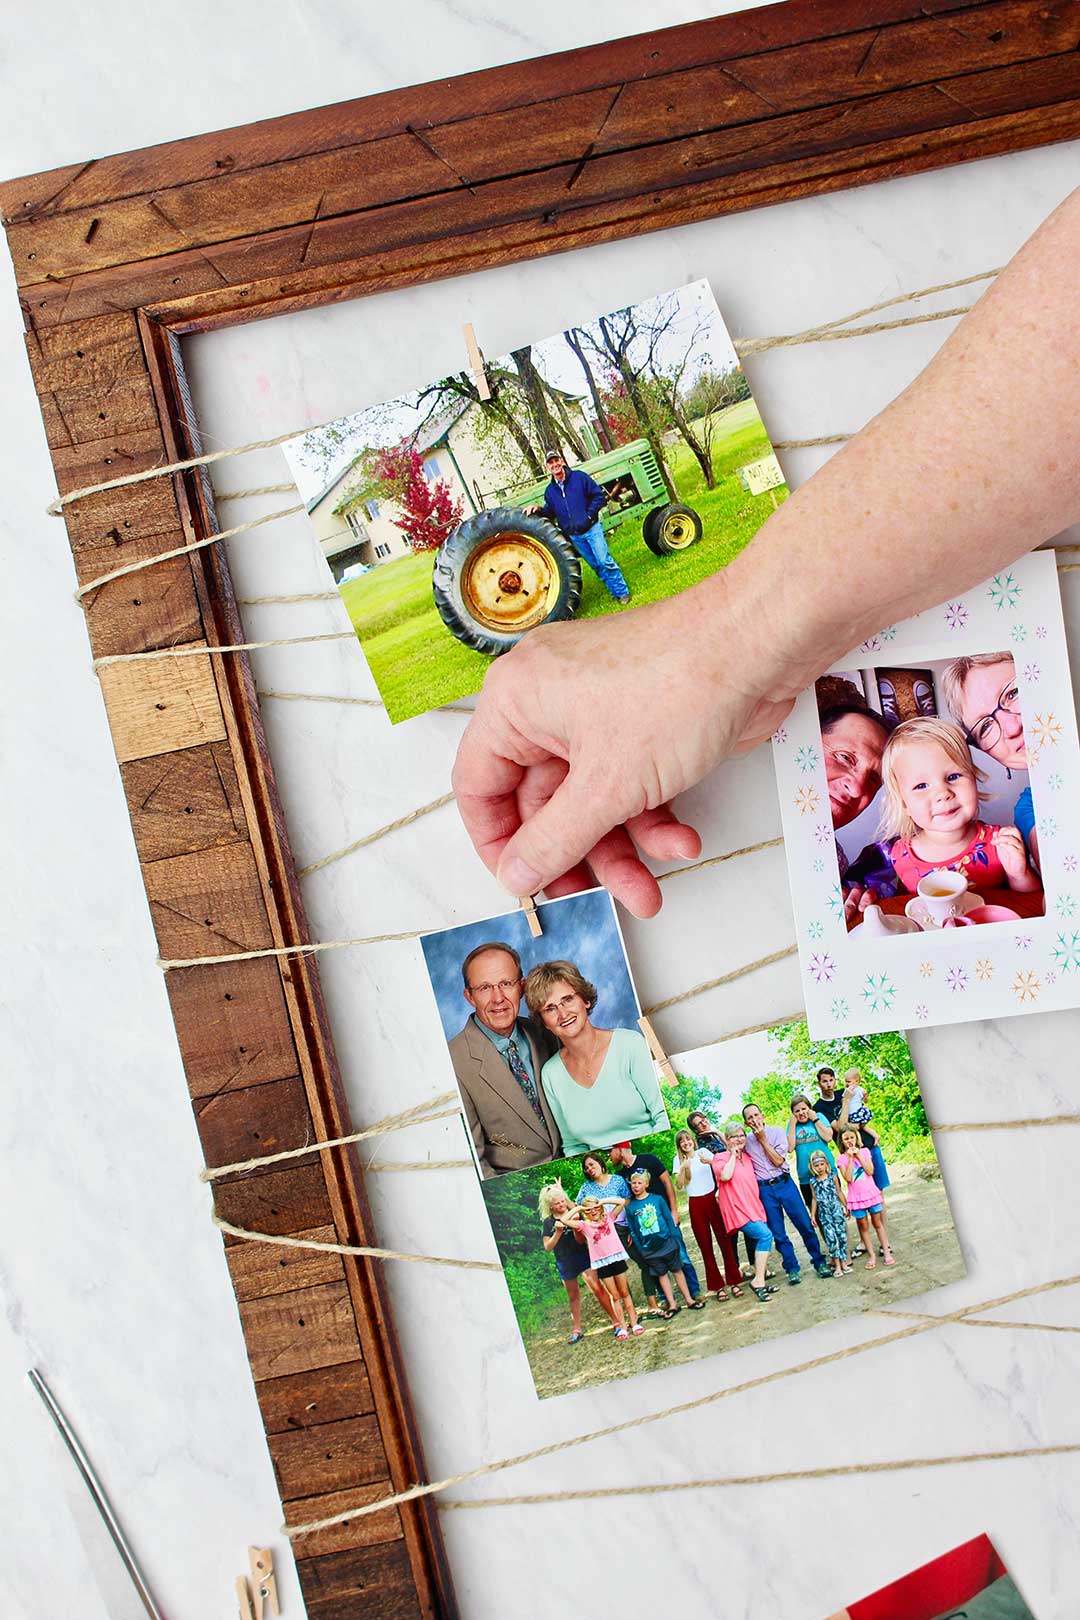
Hanging pictures with clothespins
Hang up your frame, set it on an easel or lean it against the wall on a shelf or piece of furniture. It looks so nice.
Use clothespins of whatever size you choose to clip the pictures onto the strings. You could also use paper clips (maybe shape them into paper clip hearts?).
Gratitude!!
Pull out your favorite photos of the things for which you are GRATEFUL: family, home, pets, friends…
You could ask your family to bring their favorite photo to add when they come over.
Christmas card display frame
Another great use for this versatile Upcycled Picture Frame Holiday Photo Project is to clip up those photos you get in cards from friends and family for Christmas!

Fast Upcycled Picture Frame Holiday Photo Project
I just love this Fast Upcycled Picture Frame Holiday Photo Project.
Three easy ways to make it happen!! You can do this in minutes.
Other photo project possibilities
Would you like other options for picture display? Here are a couple that I've enjoyed.
If you try this craft, let me know! Go ahead and leave a comment, rate it, and tag a photo with #WelcometoNanas wherever you post.
Come join the fun at https://welcometonanas.com
Enjoy!
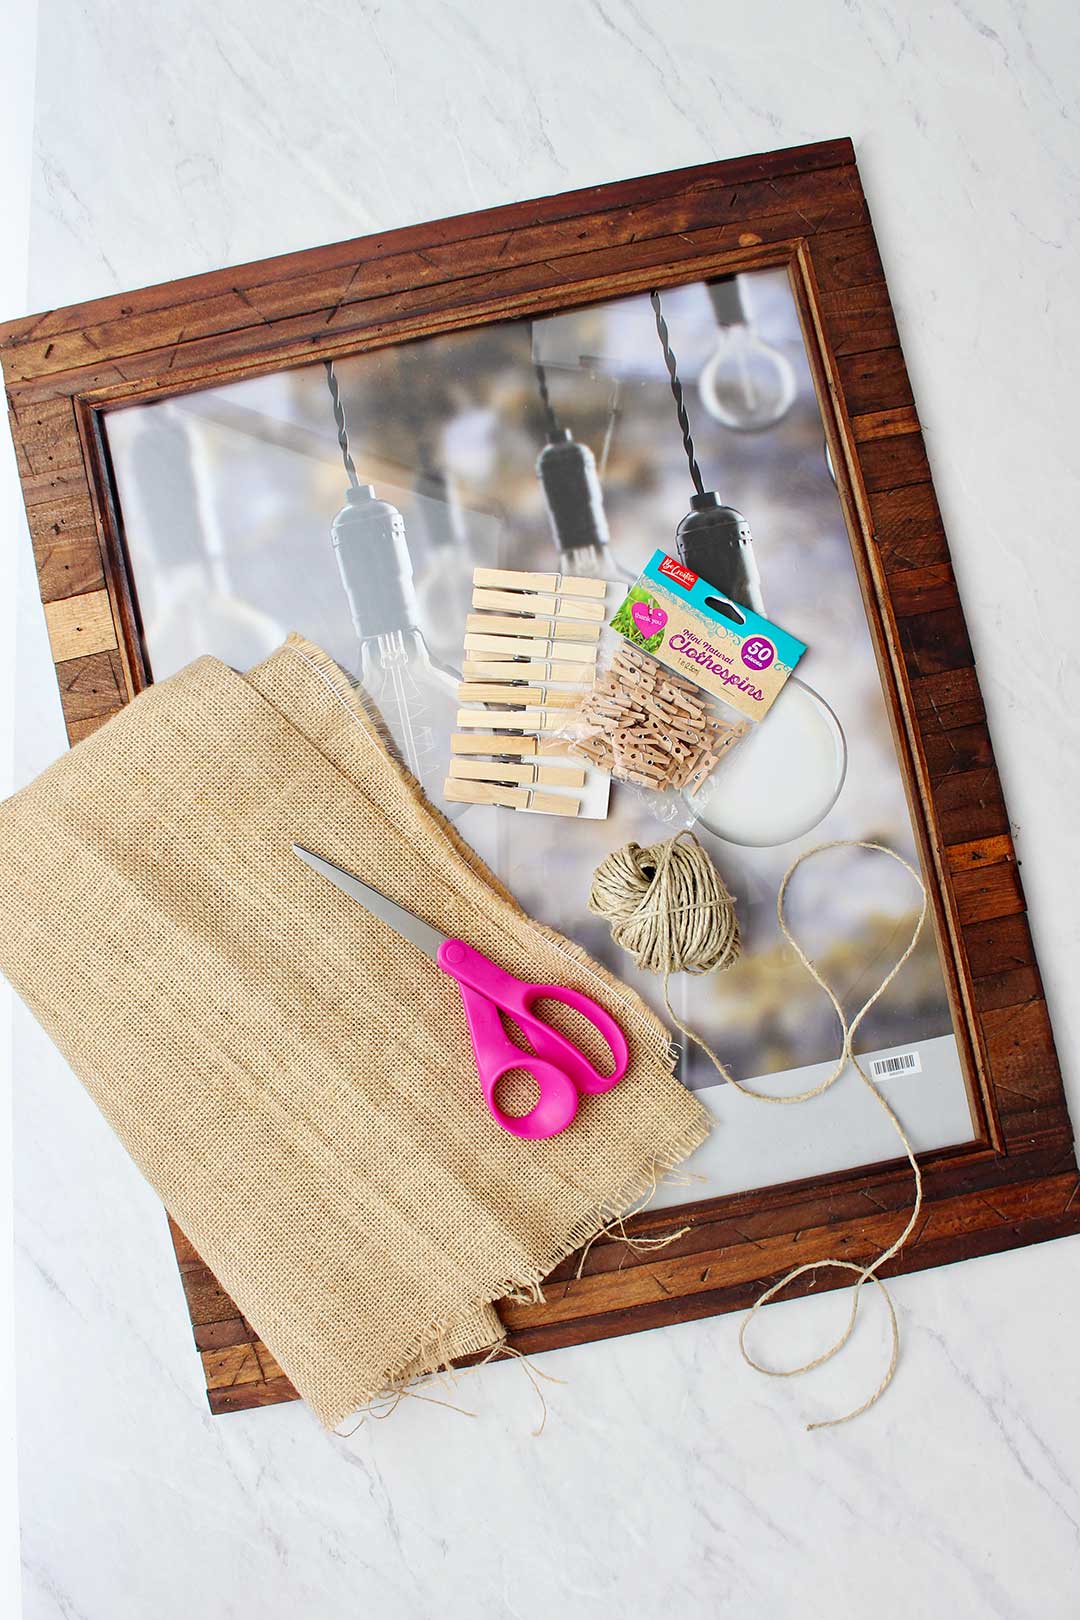
Fast Upcycled Picture Frame
Equipment
- Scissors
- Stapler (optional)
Items Required
- Picture frame (mine is 16x20 inches opening size)
- Piece of heavy cardboard or foam board
- Packaging tape
- Glue (optional)
- Burlap piece large enough to fit the frame plus a couple inches
- Twine or string
- Clothespins (the little ones are cute but the larger size work well too)
- Picture points (also called glazier points) (optional)
Instructions
- If your frame has an inset board and glass, take those out and set them aside.
- Cut a piece of heavy cardboard or foam board to ¼-3/8-inch smaller size than the frame size to give room for tucking burlap and wrapping string or twine. You may have to trim this off a bit smaller if it doesn’t fit in the frame.
- Lay this cardboard on top of the burlap and cut the burlap several inches larger.Tuck the burlap to the back of the cardboard. Gently stretch it and use the packing tape to tape it to the back.Note: If you want to make this a permanent project, cut the burlap to the size of the cardboard and glue it to the front of the cardboard. Give the glue time to dry before going to the next step.
- Slip the cardboard piece into the frame and tape it to the back of the frame with the packing tape.
- Option 3: Tie a knot in the string and staple it to the back of the board.Pull the string to the opposite side of the board and staple it. Go back an forth across the frame and staple the string to each side until you are satisfied with how it looks. Cut the string, tie a knot in it and staple it to the side of the frame.
- For all 3 options: Hang up your frame, set it on an easel or lean it against the wall on a shelf or piece of furniture. It looks so nice.Use clothespins of whatever size you choose to clip the pictures onto the strings.
Video
Supplies for Fast Upcycled Picture Frame- a Gratitude Photo Project
- Picture frame (mine is 16x20 inches opening size)
- Piece of heavy cardboard or foam board
- Packaging tape
- Glue (optional)
- Burlap piece large enough to fit the frame plus a couple inches
- Twine or string
- Clothespins (the little ones are cute but the larger size work well too)
- Scissors
- Picture points (also called glazier points) (optional)
- Stapler (optional)


Leave a Reply