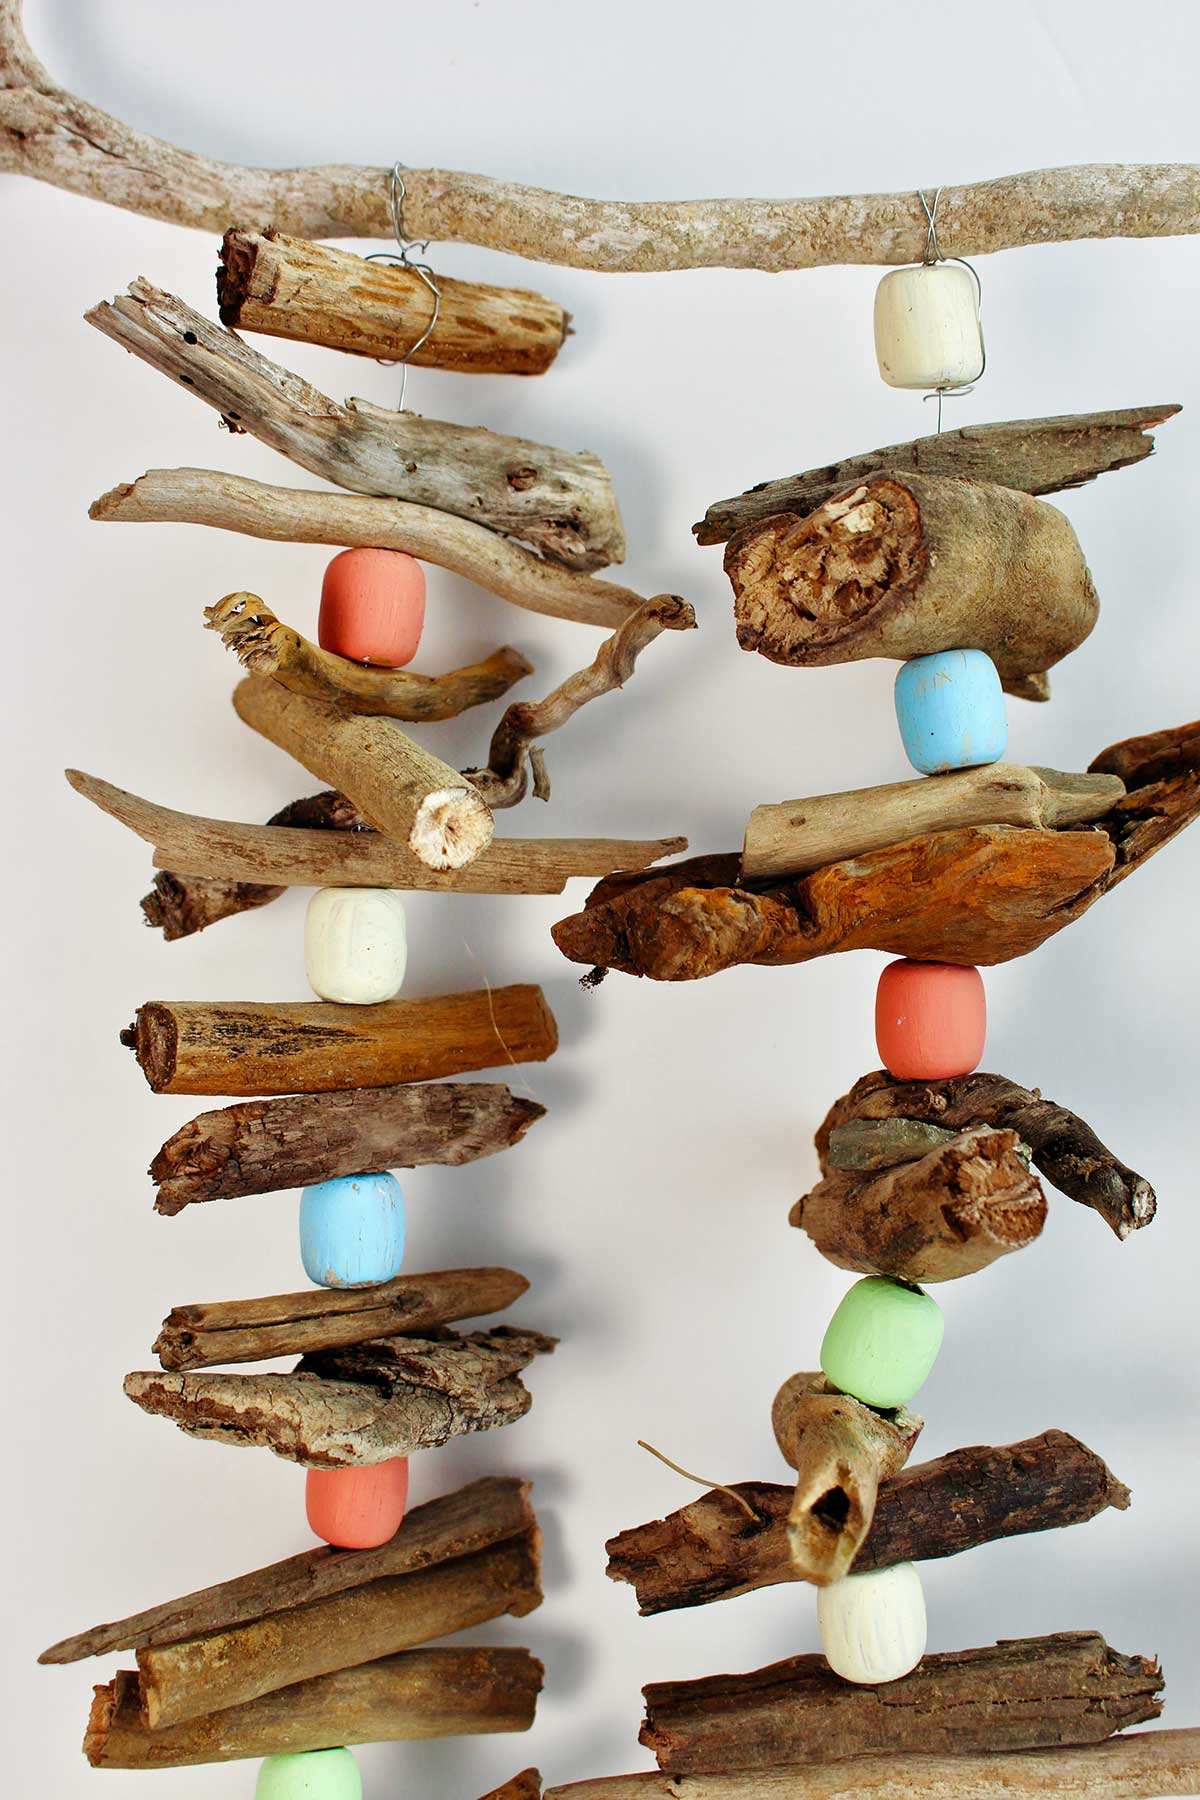
DIY crafts made from driftwood are the perfect end to summer days on the water or beach. Kids can use the driftwood that they've collected to make cute projects like a driftwood mobile, a driftwood garland, or driftwood wall art!
Jump to:
Fun Craft Alert: DIY Driftwood Projects
Papa and I took our new puppy named Tucker out to the lake for the first time a while back. We all loved the day together.
Of course I had to pick up bits of cool old beach wood that we found along the shore. Oh, and there were little rocks that I found that had holes in the middle of them!
I’m sure you and your kids can relate to picking up interesting little things you find while on vacation.
There’s gotta be some great way to use these artistic pieces of wood. Well, yes, there are. Lots of them! These crafts will bring back so many good memories of summer and also use up those little bits of things that the kids have collected.
Rustic beachwood can be used as it is to make a DIY project like wall art! It can also can be strung to make a garland or a mobile (with just a little bit of help from a drill).
I don’t usually use power tools in our crafts, but you have to try this one.
Kids can use the driftwood that you’ve collected using fun beachy home décor ideas for their room or for parties. Come on, let’s go have some fun!
Supplies to Make Beach Wood Crafts for Kids
Here are a few quick notes about the supplies you will need to make this craft:
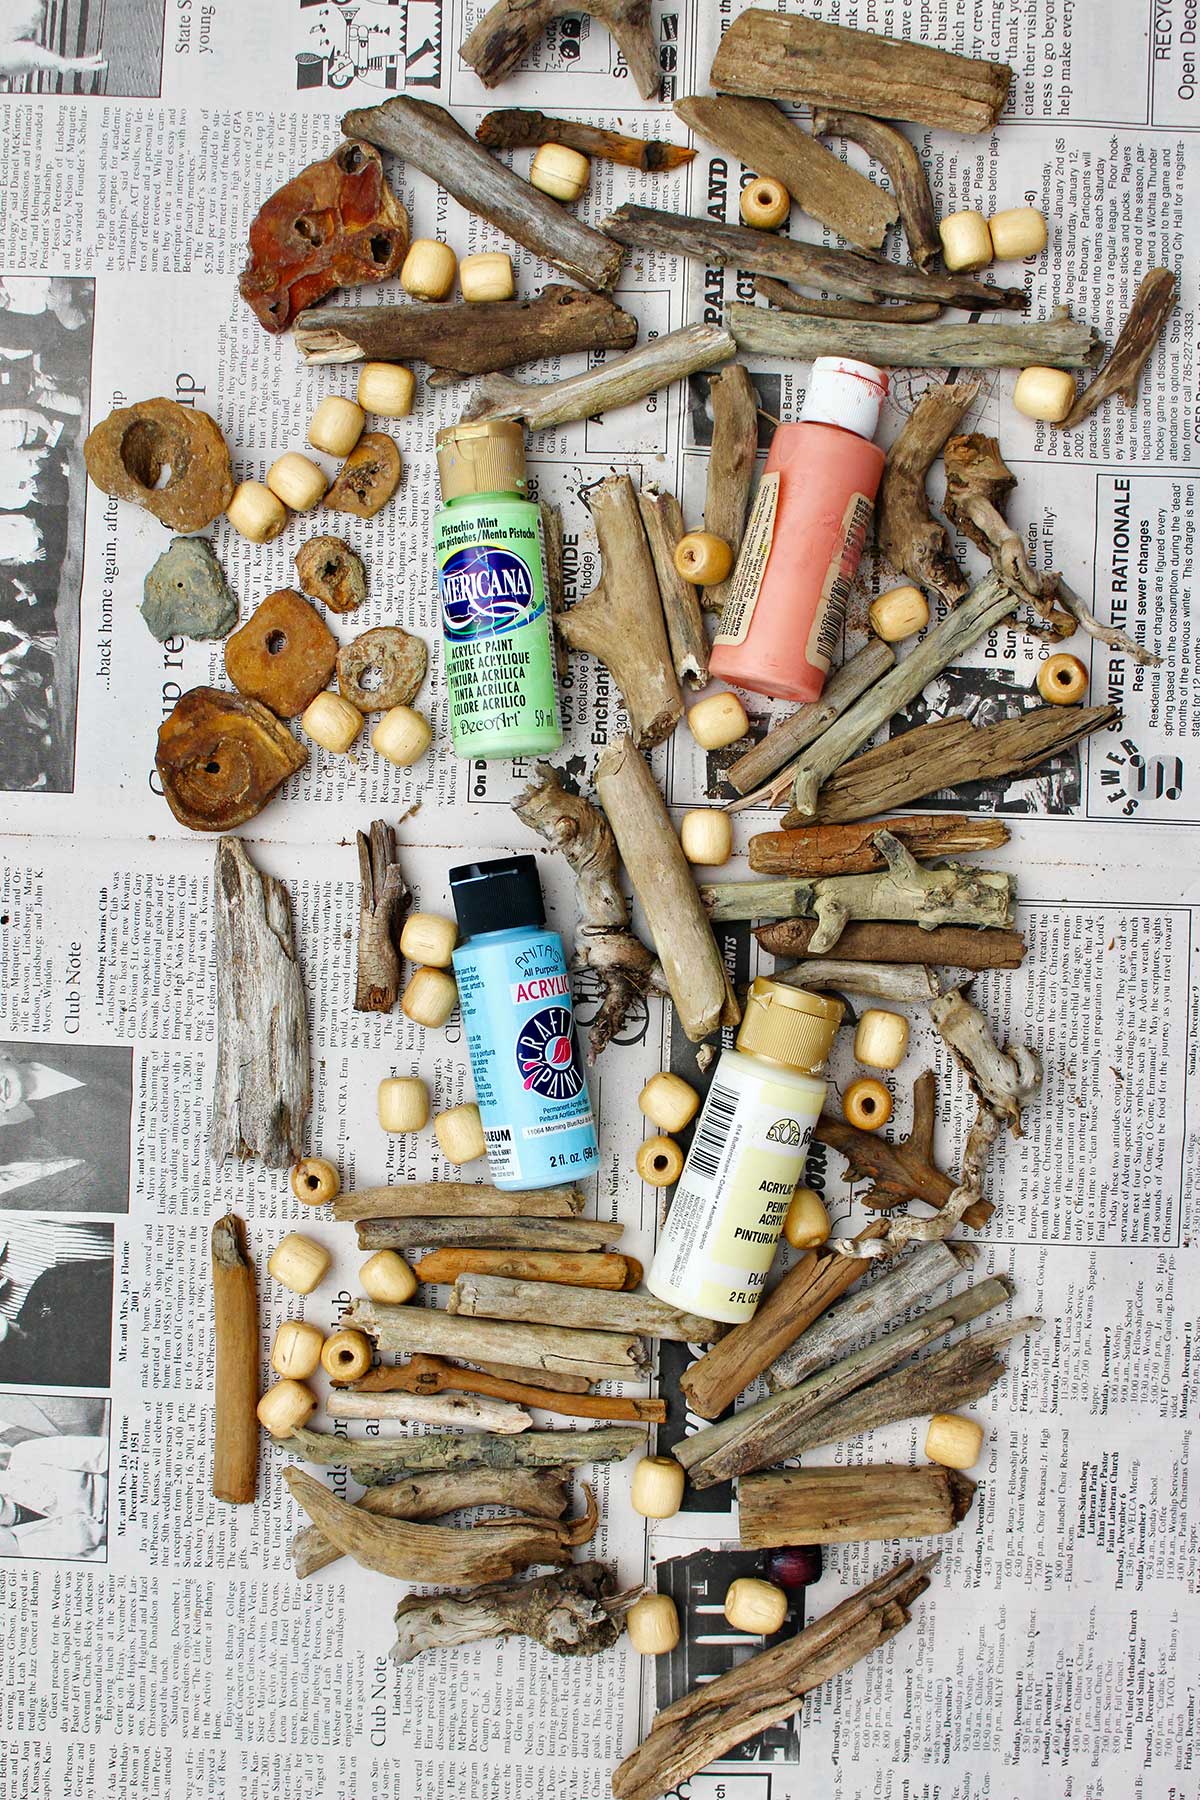
- Small driftwood pieces: Look for small pieces of driftwood that come up onto the beach around a body of water. This reclaimed beachwood is usually soft and worn smooth from being in the water and waves. I needed a lot of driftwood- at least 100 small pieces- to make the mobile seen in this post. It would take even more to make a longer garland, less to make a small wall art project. I was able to break larger pieces of driftwood down into more small pieces. You will also need a larger piece if you’re going to make a mobile.
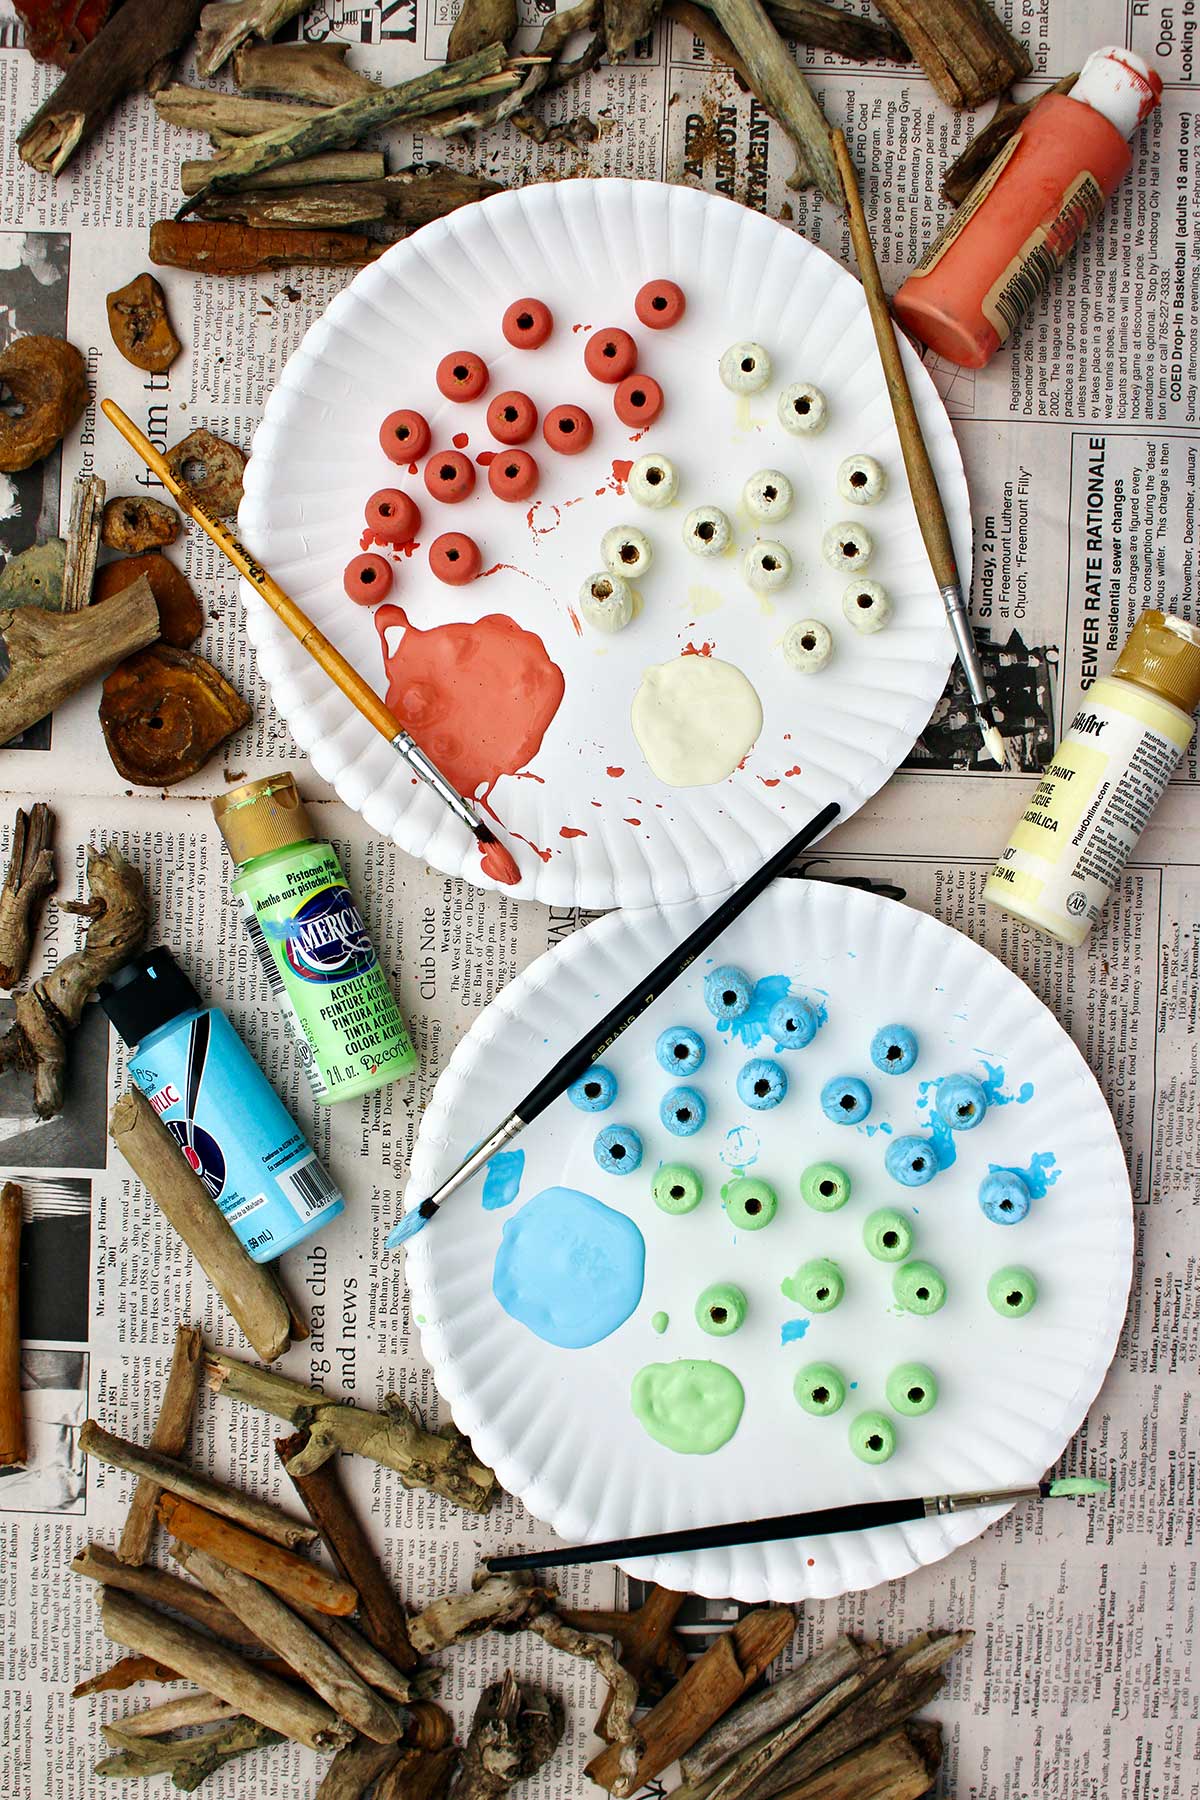
- Beads: I got these wooden beads from a garage sale. They came from a car seat cover that was made completely out of wooden beads. But beads can be purchased online or at craft stores and then painted to the colors that you want. You can even make your own easy paper beads if you'd like!
- Acrylic craft paints: I love working with acrylic craft paints as they are water-based and easy to clean up. You can buy a set of acrylic paints or purchase the colors that you want for your project. They are very inexpensive by the bottle at a craft store.
Equipment for Crafts Made from Driftwood
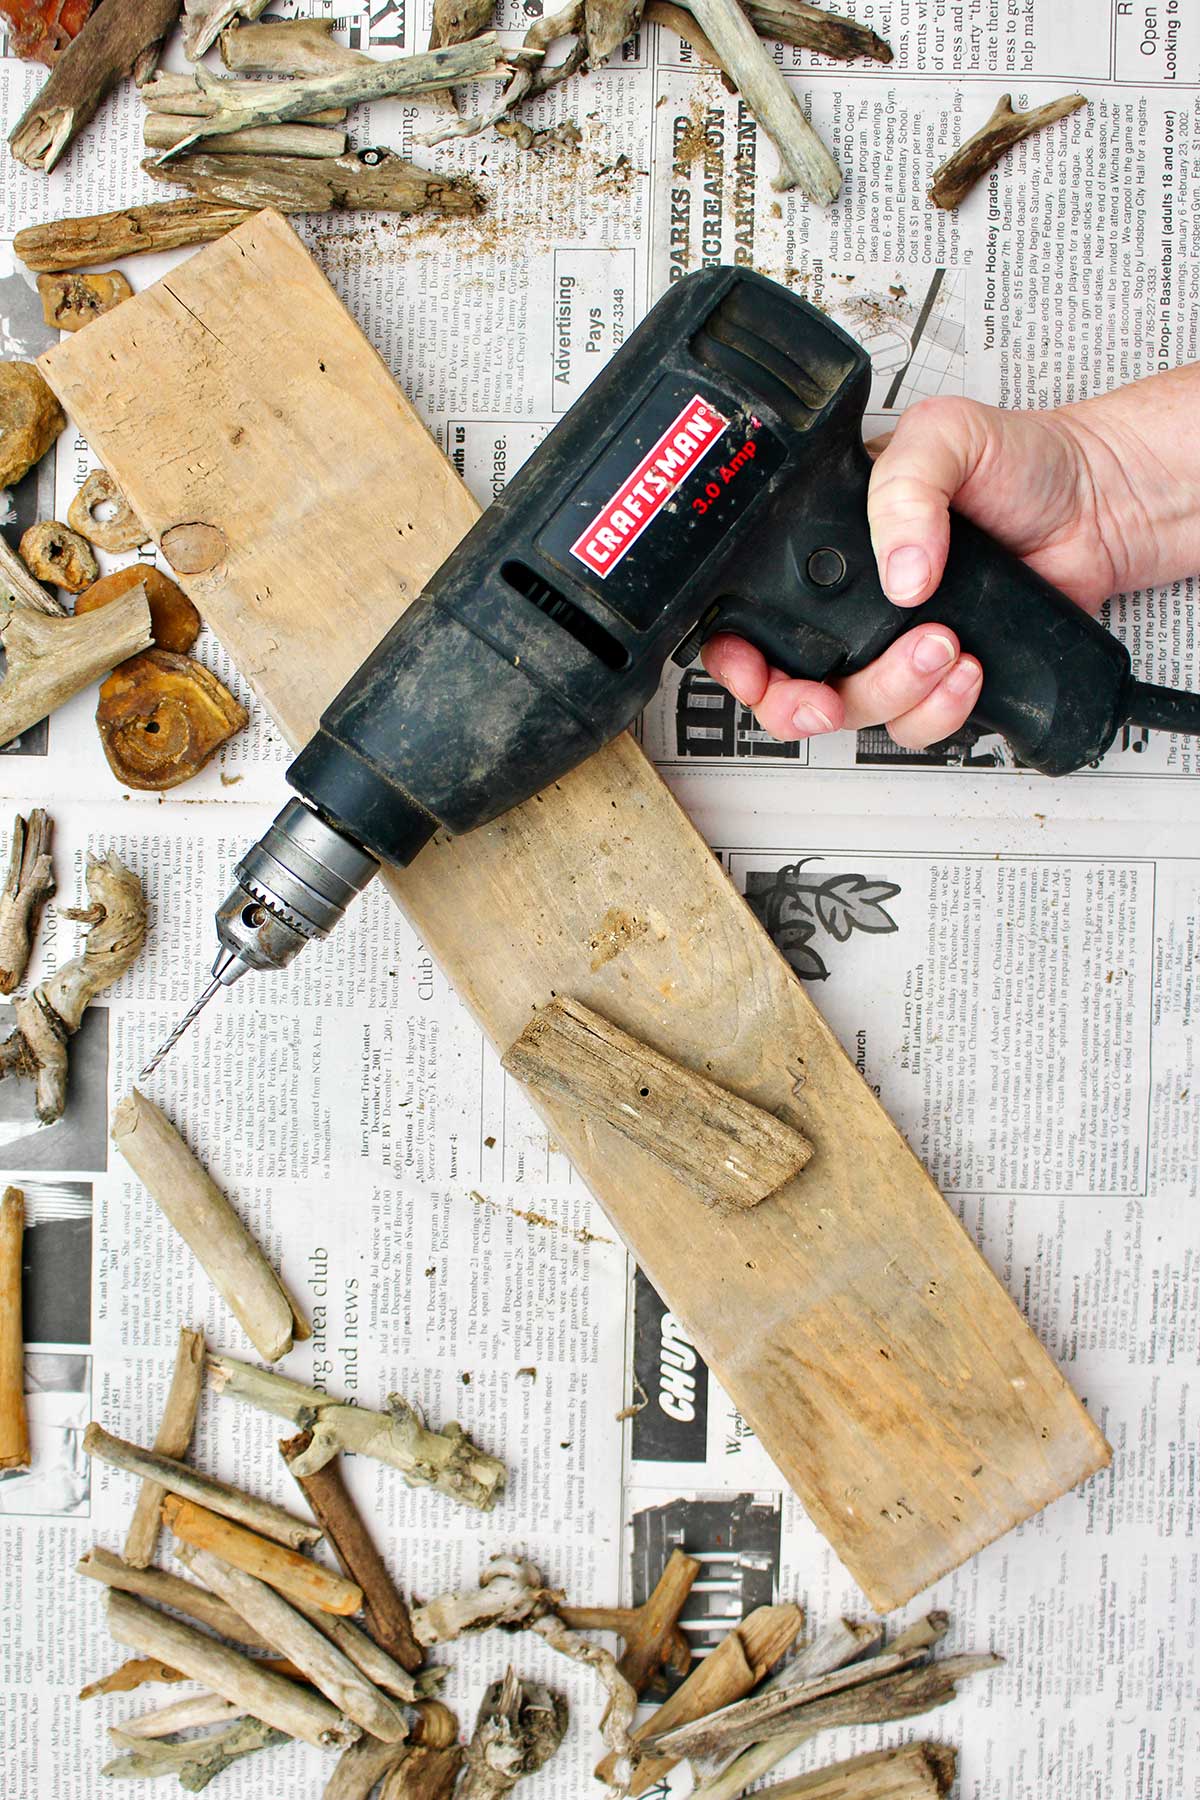
- Drill and a small bit: This is one of the few crafts on WTNs that takes a power tool! Driftwood is very lightweight so you may be able to bore a hole with a hand tool called an awl. But this would take such a long time. By using a drill with a small bit I was able to drill all of the holes in my wood in just a few minutes. Be sure to put a 2 x 4 scrap of wood underneath your work so you don’t drill down into your work surface. This step may be best to do outside. If you don’t own a drill bit, ask around to friends and see if they will help you with this step.
Steps to Make a Driftwood Art Project
The driftwood
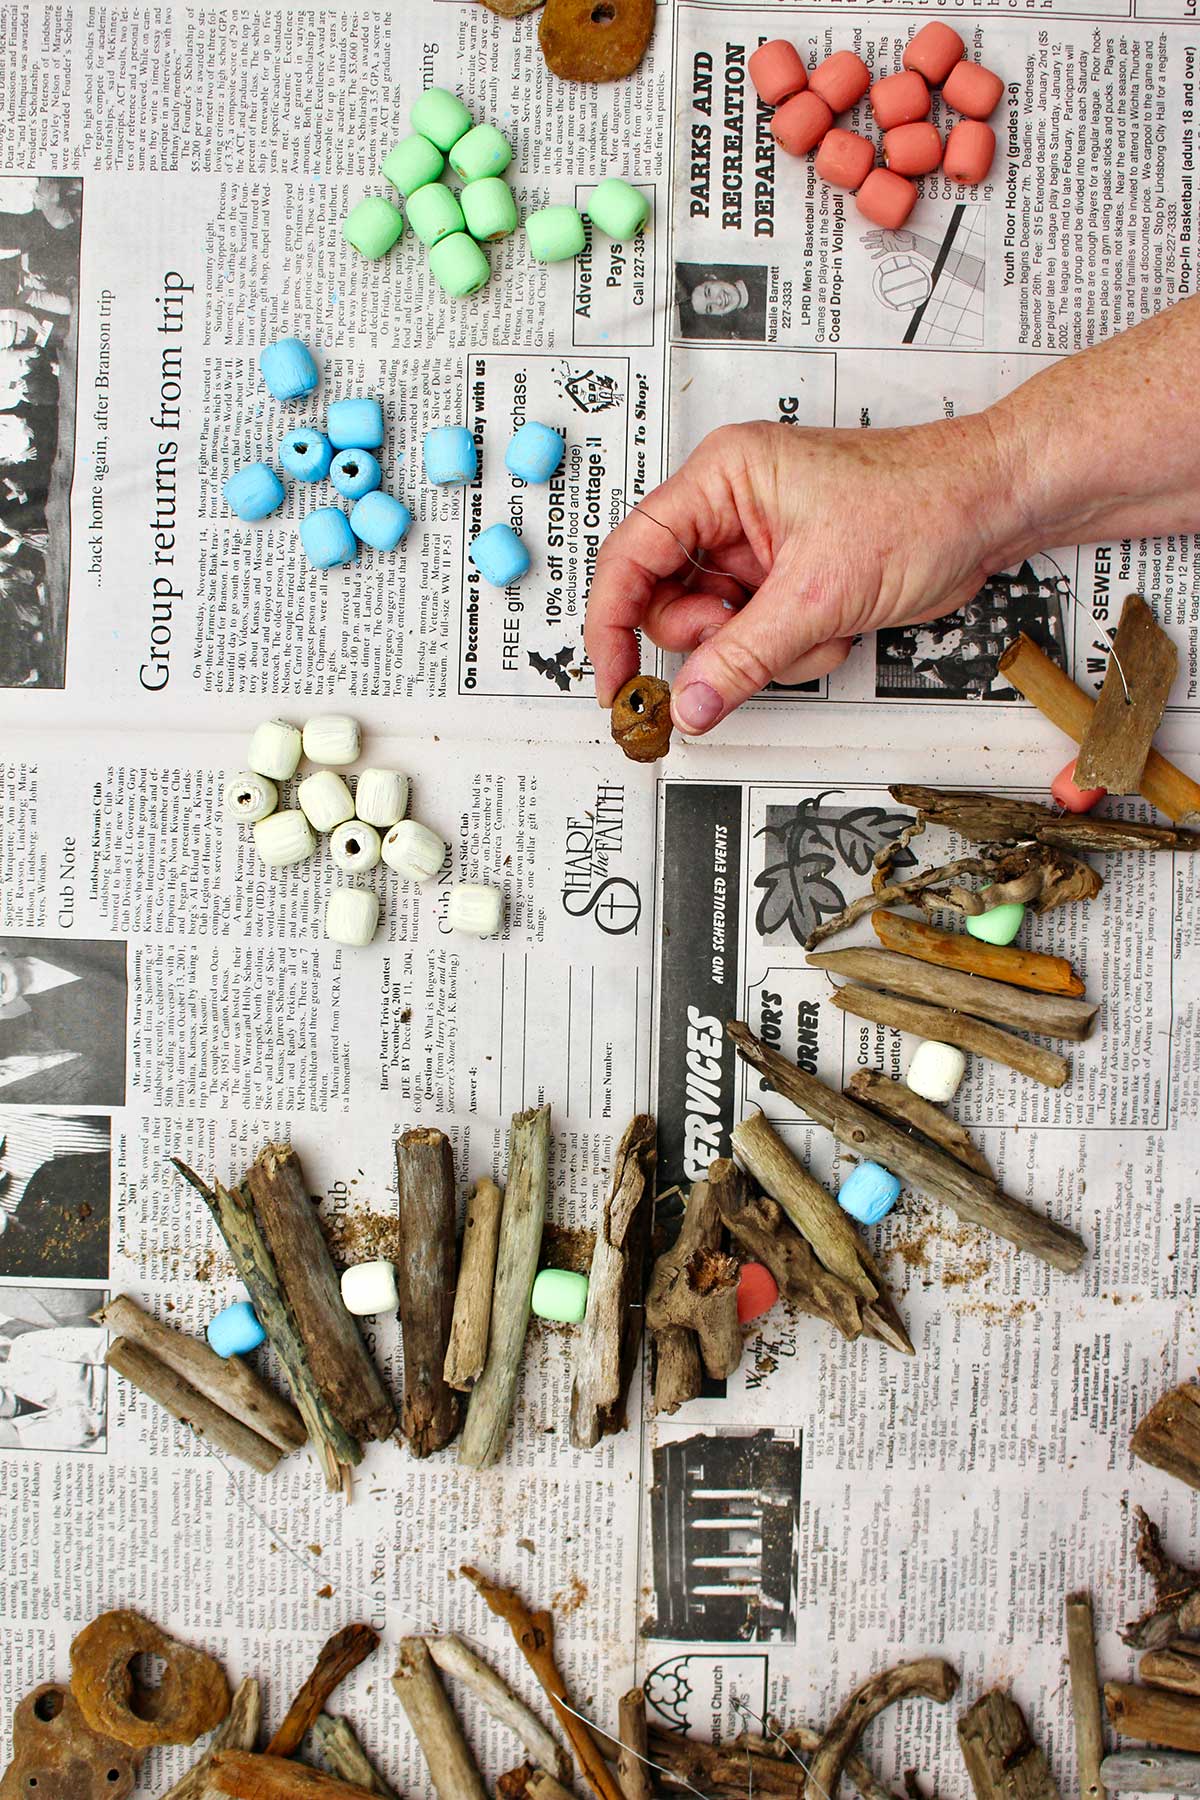
On a fun outing to the shore of a lake or the beach, bring along a sack and collect up lots of small pieces of driftwood. Look for rocks and shells with small holes in them as well.
Clean off the wood. Soak in bleach solution to clean and whiten if desired. See tips section.
Driftwood wall art project
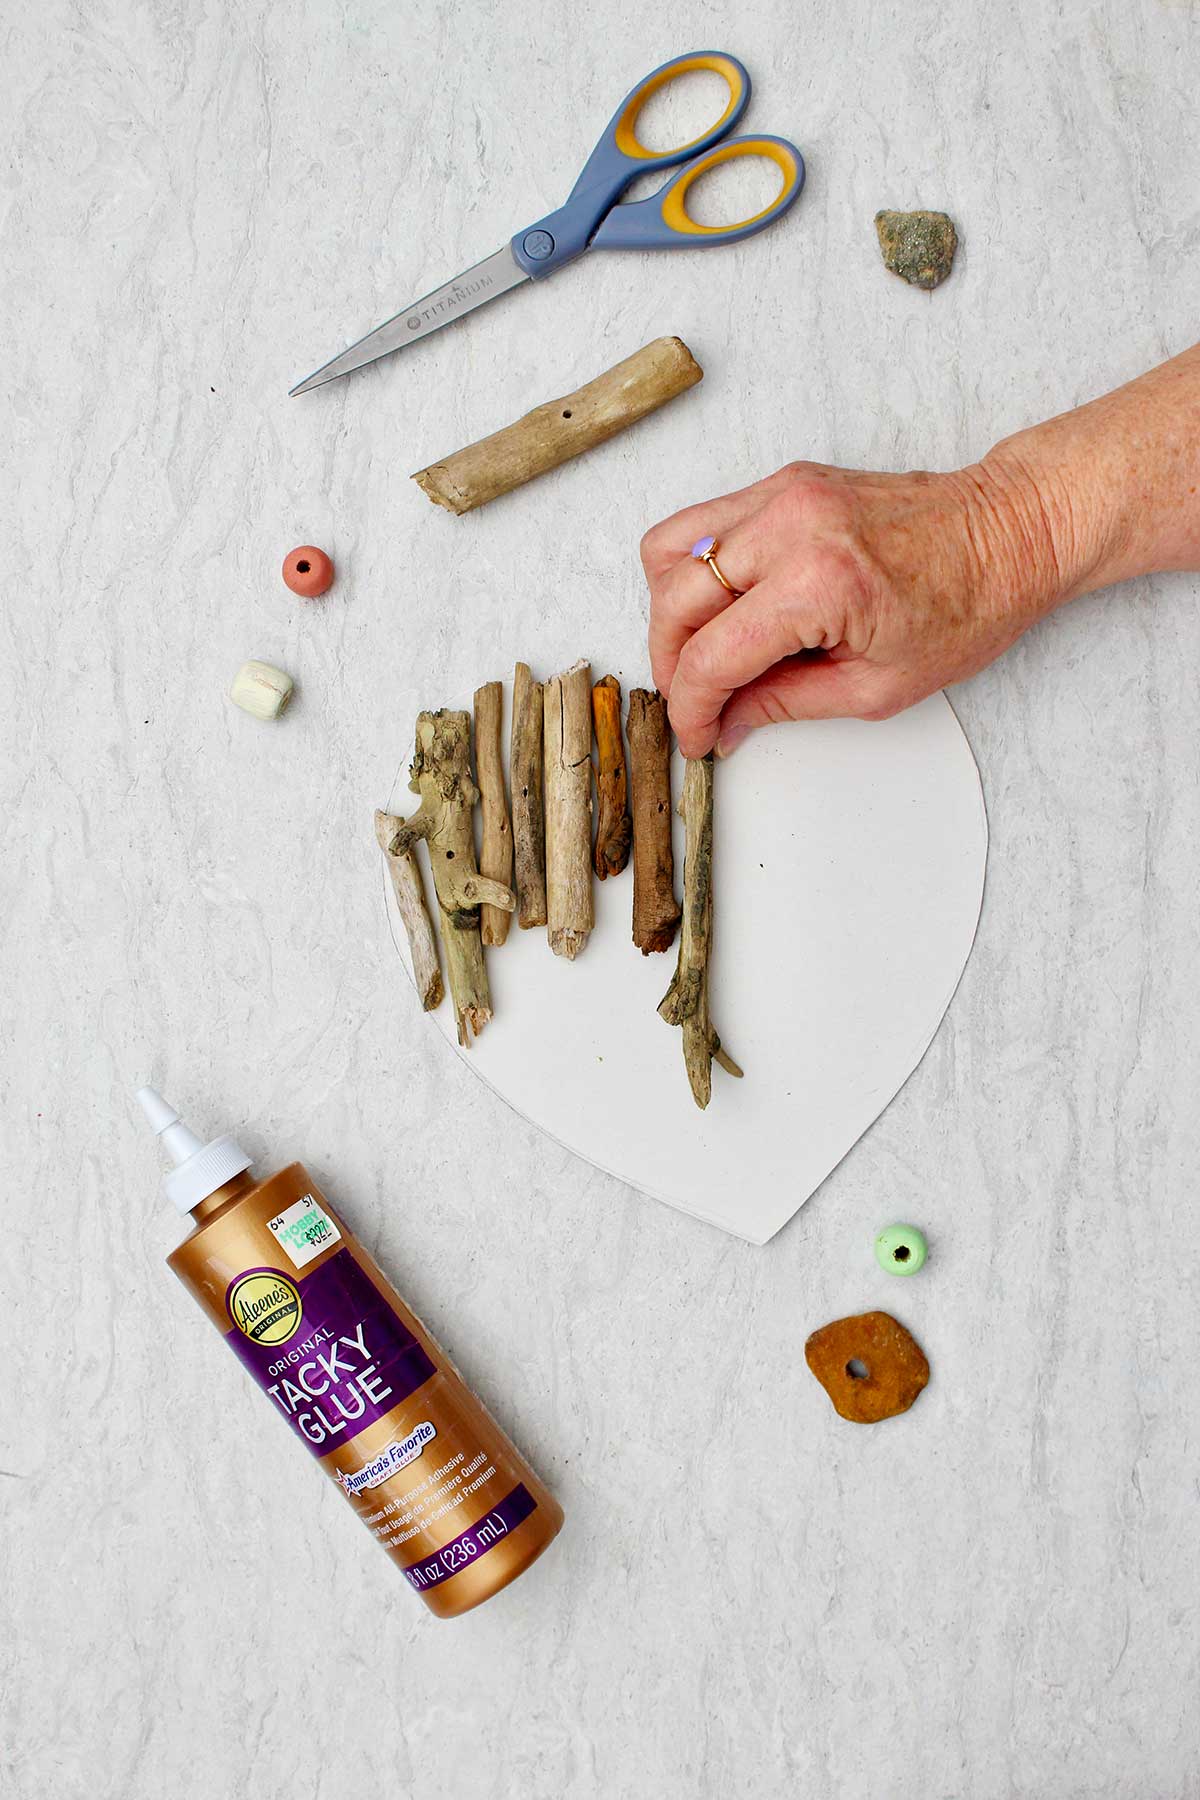
To make the driftwood heart art piece you only need pieces of driftwood. Cut your desired shape out of cardboard. You will be able to see this cardboard between the pieces of wood so paint it to the color you would like to see coming through. Light blue, sage, green, or pink would be good choices.
Glue your small pieces of driftwood to the front of this cardboard using tacky glue or hot glue. Cover the entire surface with wood, trying to match the edges of the cardboard with the edges of the driftwood pieces. You may need to break some pieces of driftwood to fit in certain spots.
Driftwood garland or mobile
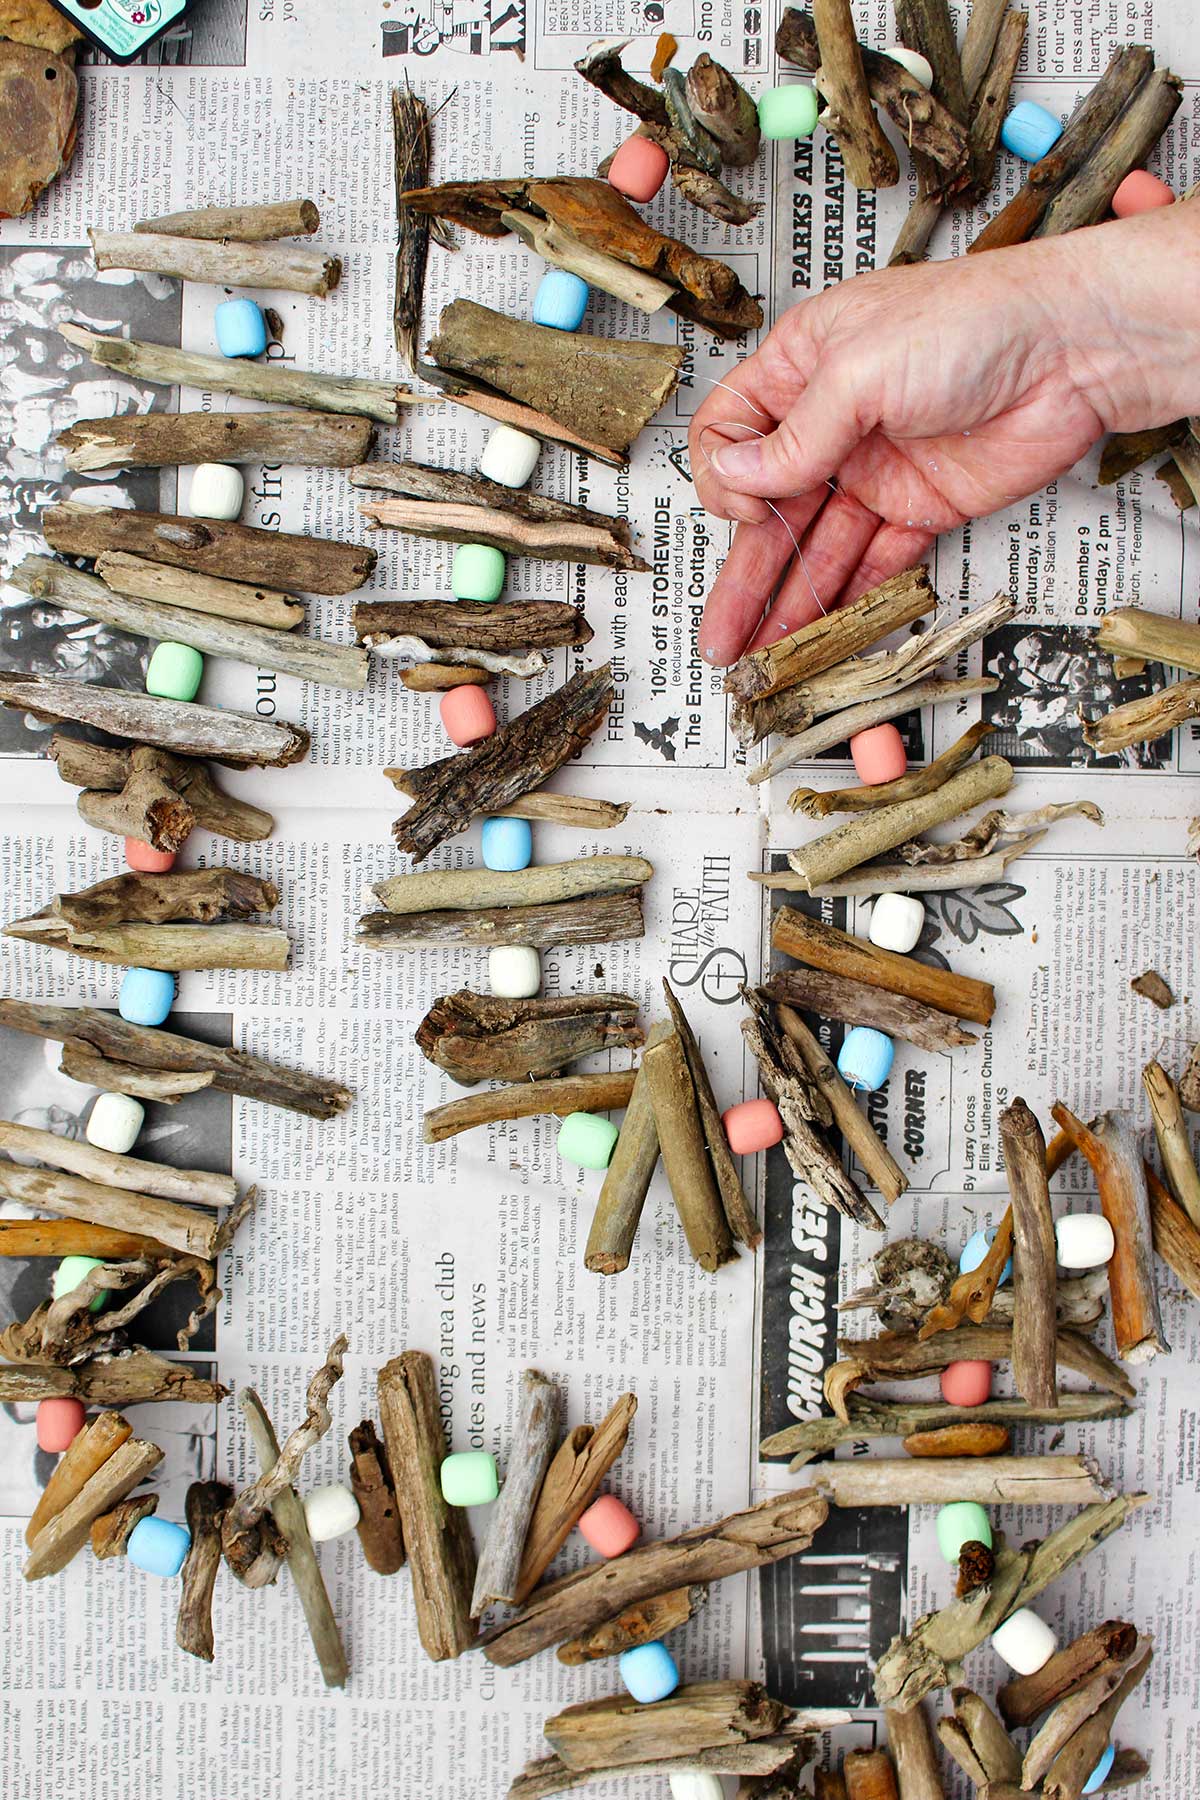
For the garland or mobile use acrylic craft paints to paint 48 beads in the color(s) that you want (i.e.-12 beads painted in four different colors). Set these aside to dry.
Break some of your pieces of driftwood down into smaller sizes if they are larger than about 3 inches long. I used a hand clipper to do this that I typically use for yardwork. Use a small drill bit in an electric hand drill to drill a small hole in the center of each of the small pieces of driftwood.
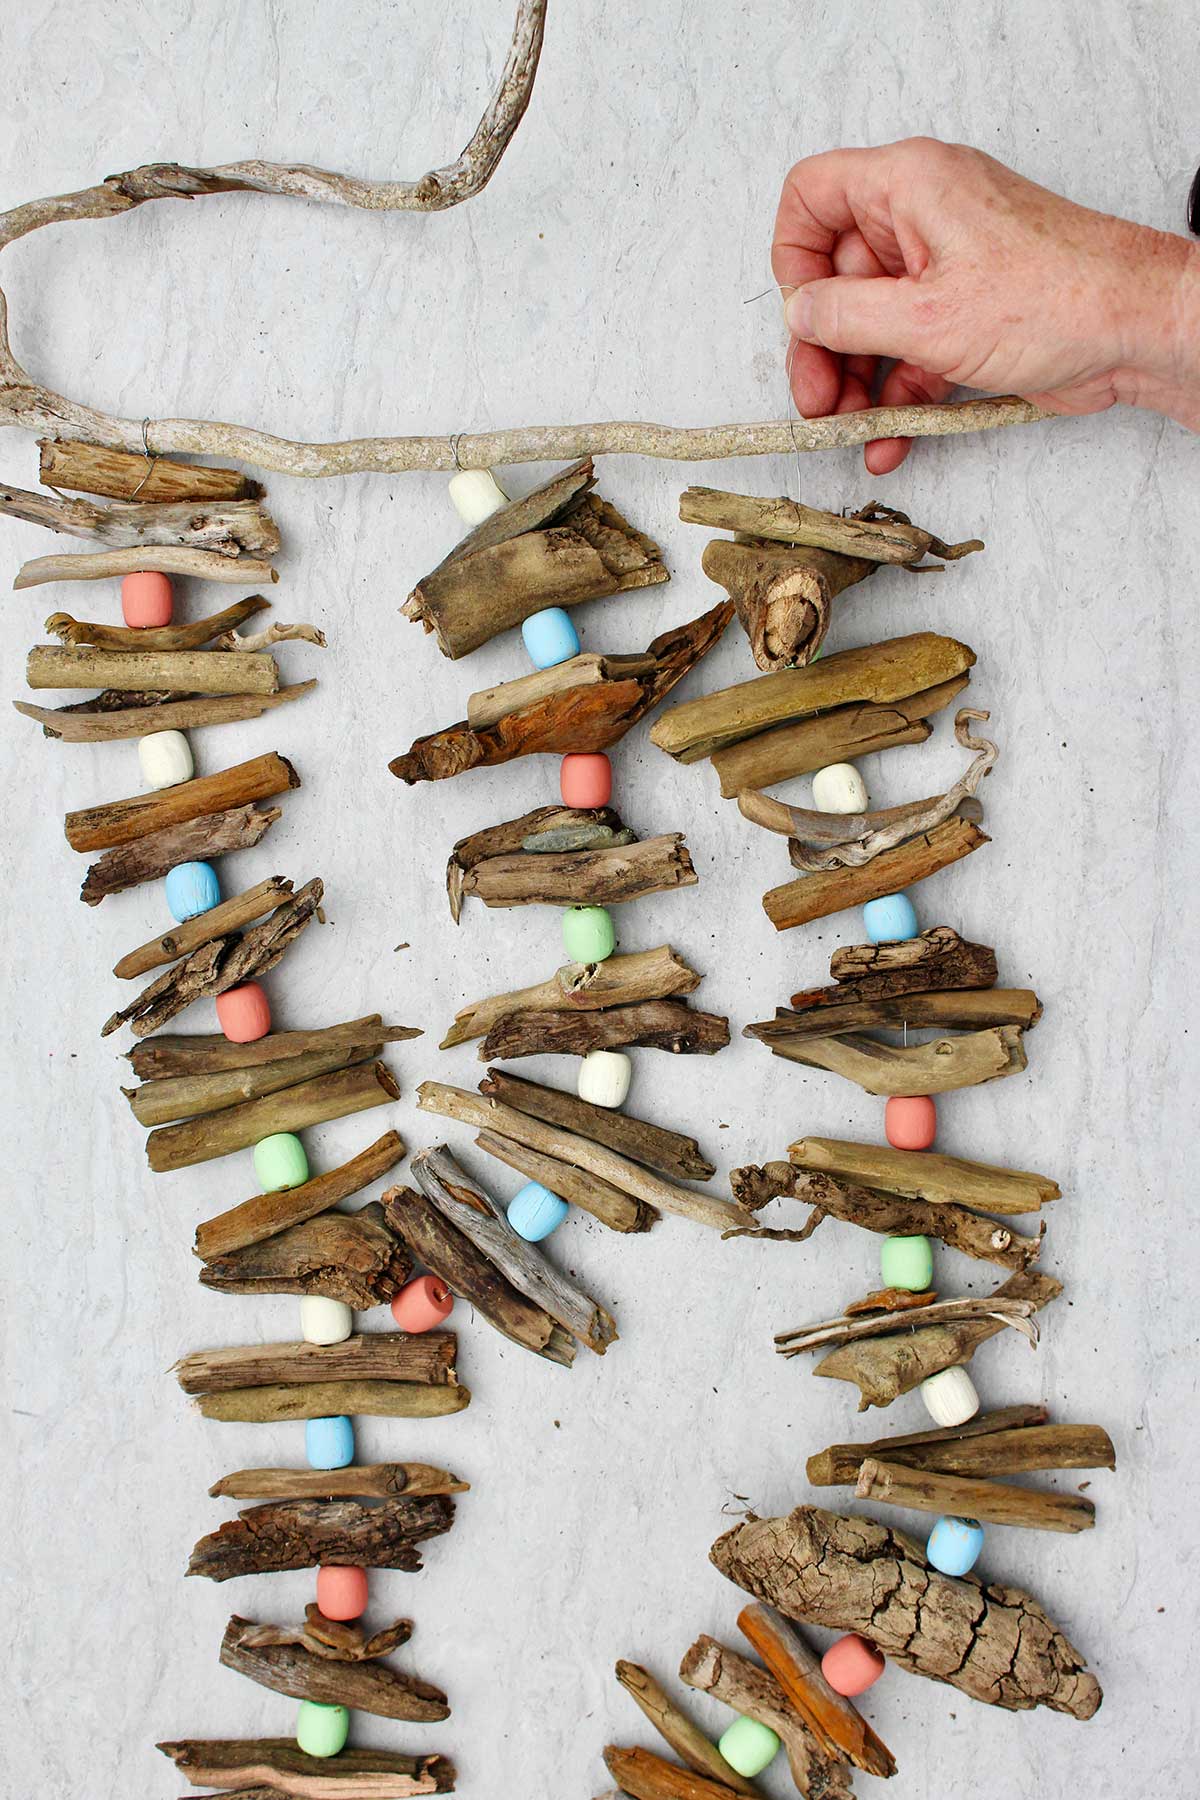
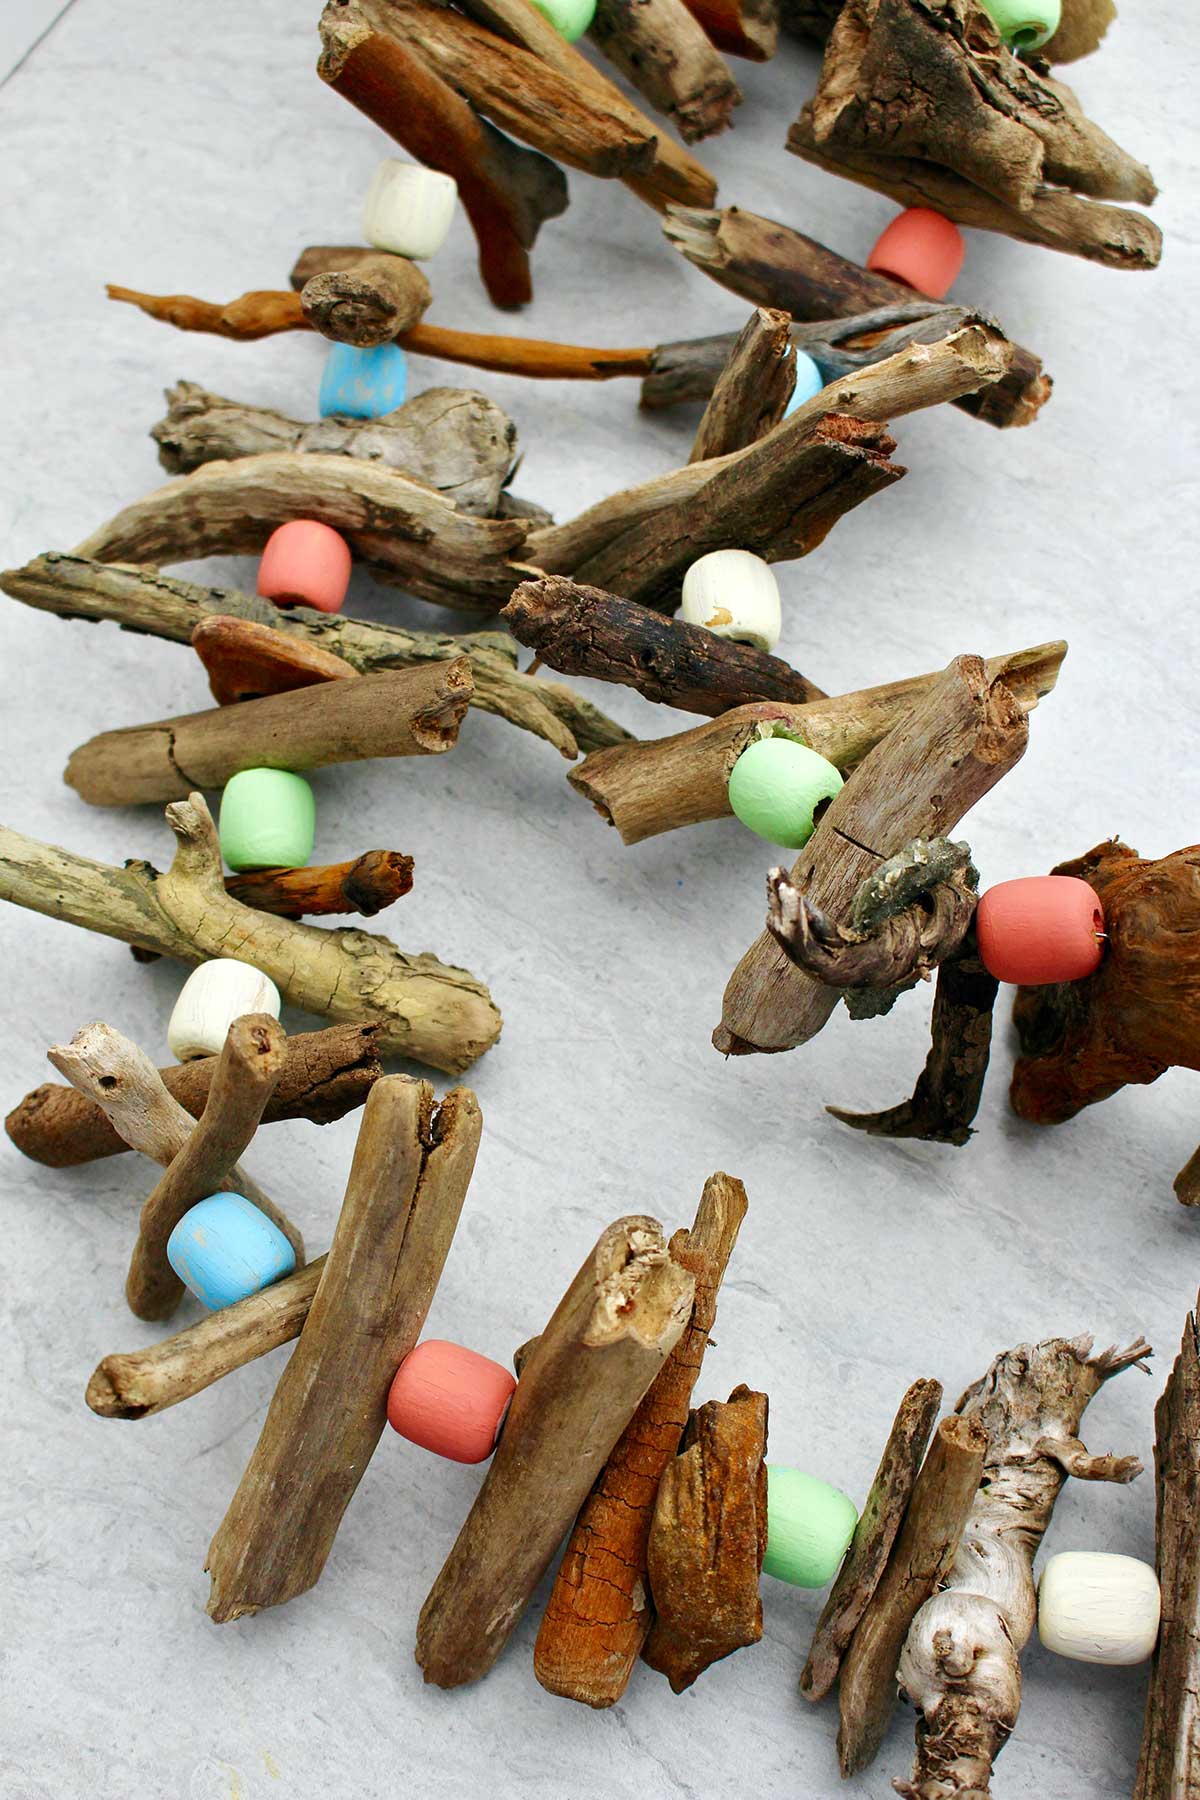
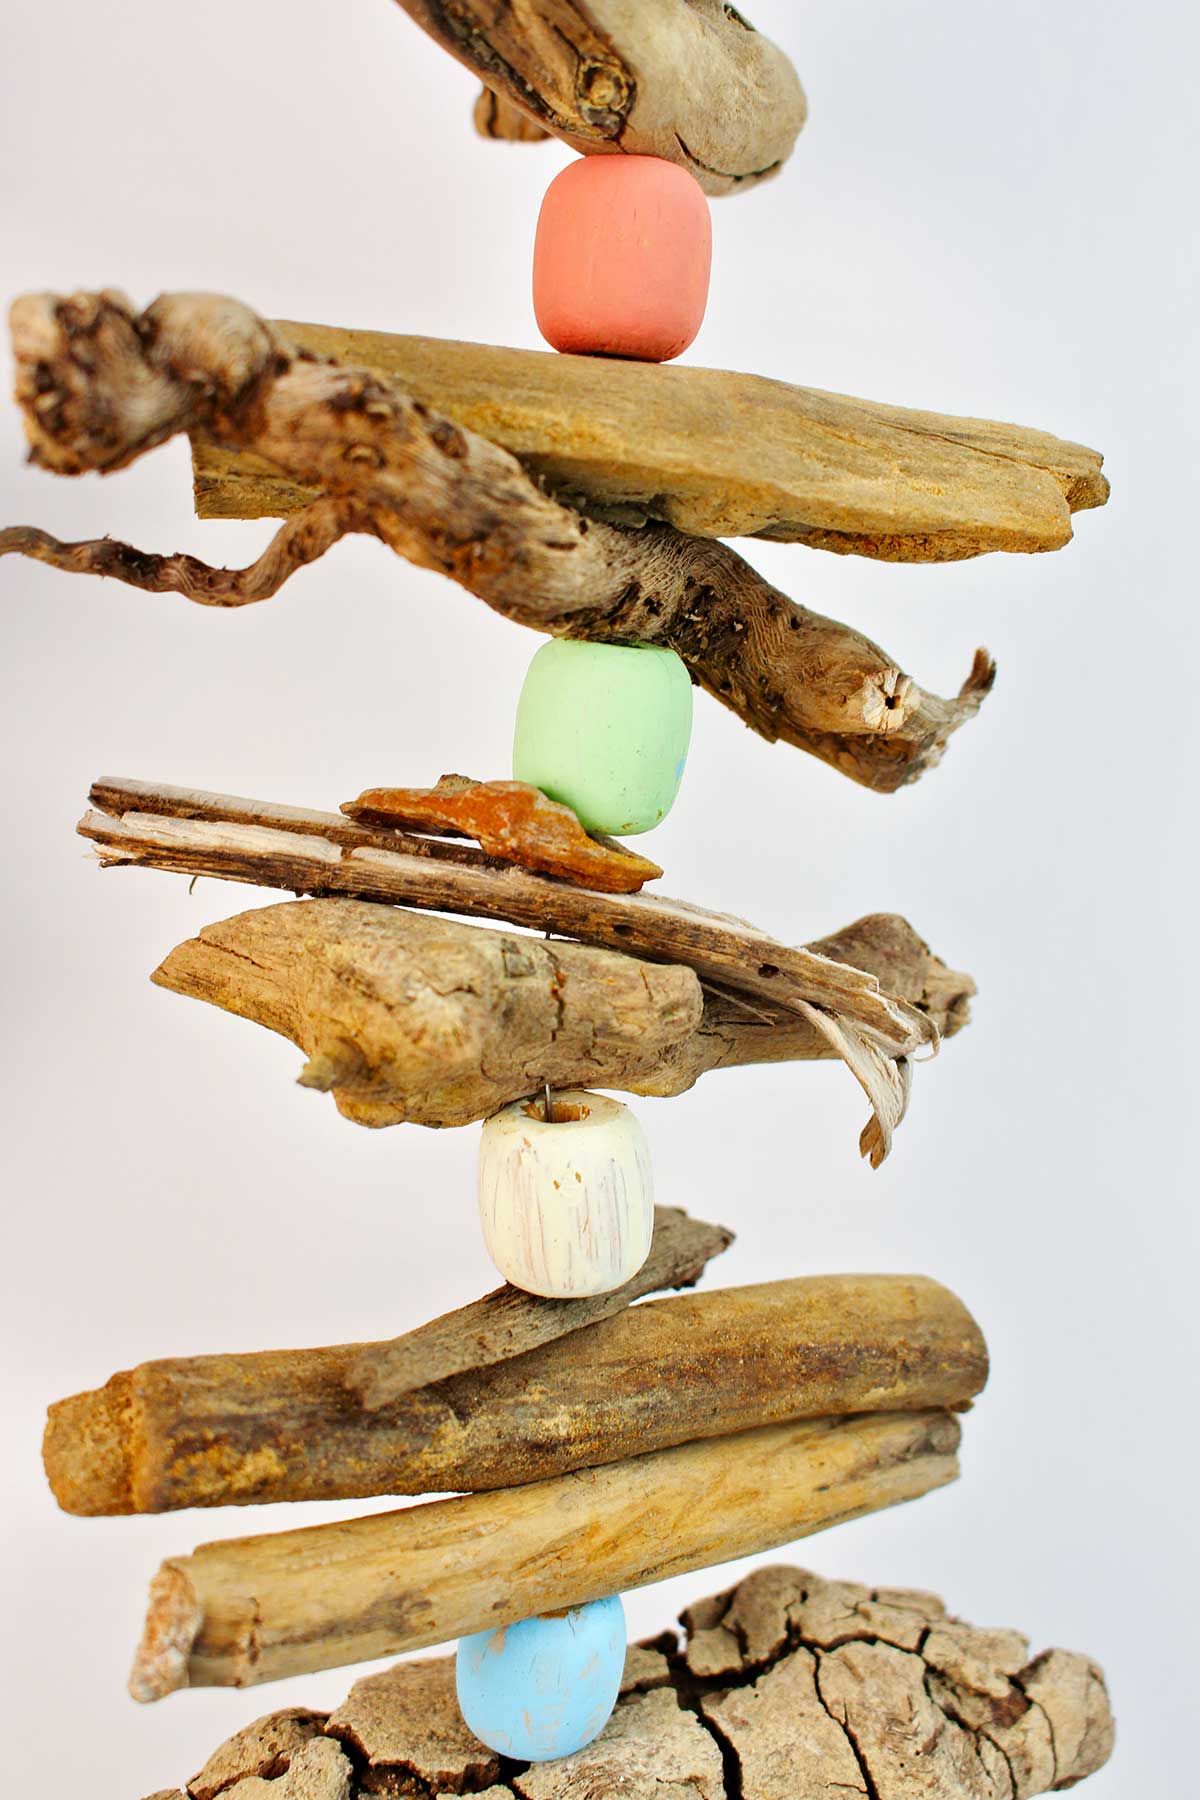
String your driftwood pieces and beads onto a lightweight wire, string, or fishing line. I used a pattern of stringing two or three pieces of wood then one bead (and alternated the colorful beads).
Driftwood garland
If you are making a garland, then you will just string these in one long string and tie them off on either end. Make a loop on each end to hang up your garland.
Driftwood mobile
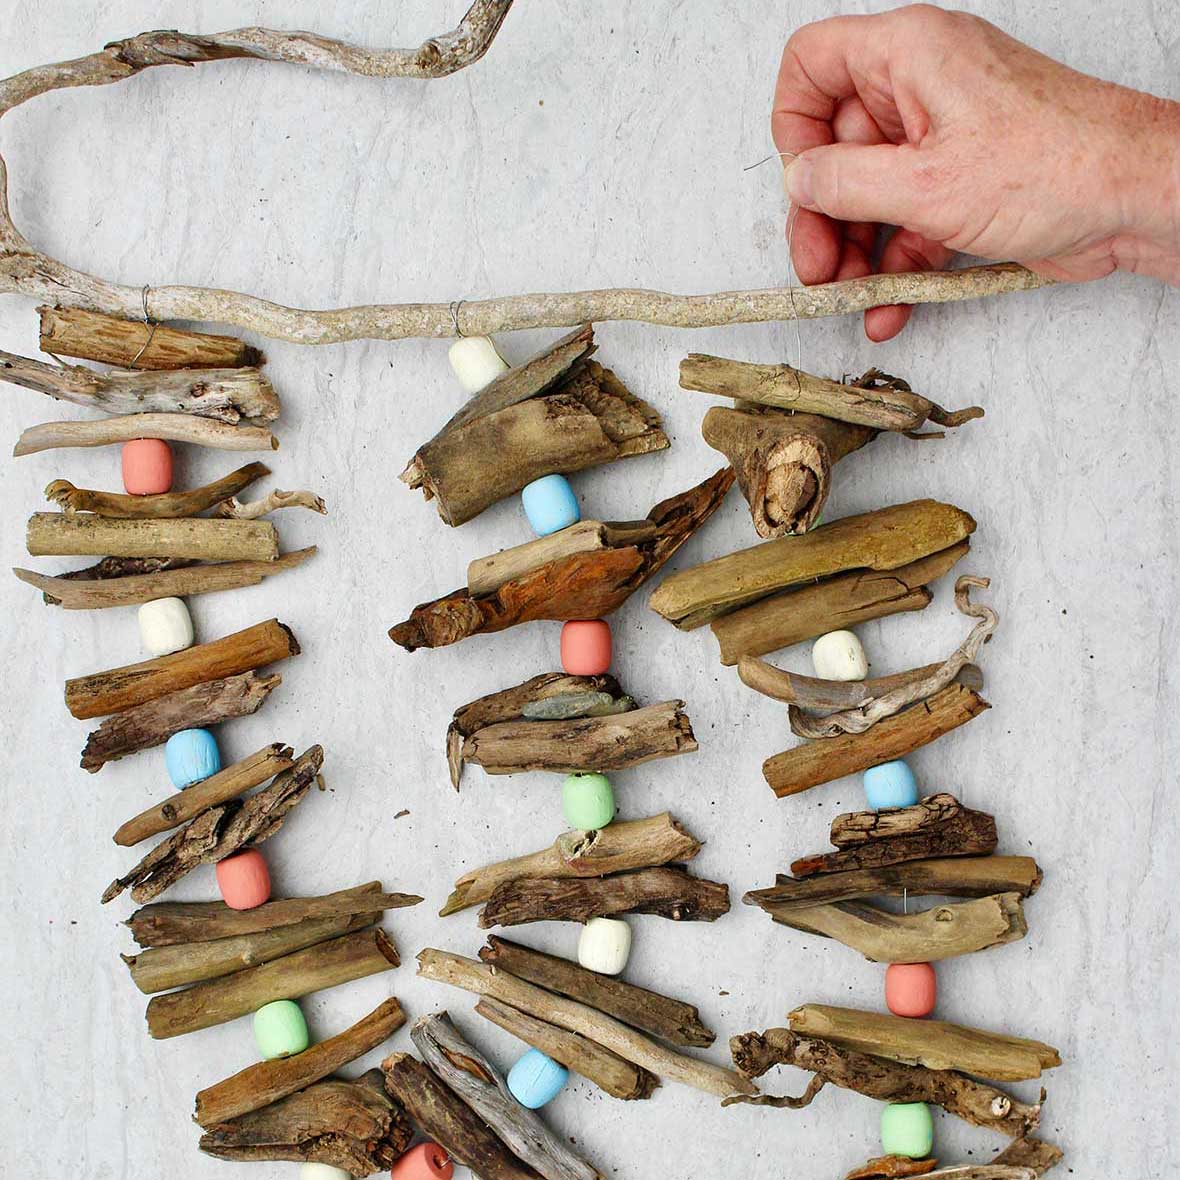
If you are making a mobile such as you see in the picture on this post, you will need three strings of wood and beads. My three were about 24 inches long, 18 inches long, and 12 inches long. Make your strands and tie each off at the bottom of each strand.
Then attach them to one larger piece of driftwood at the top and let them hang down. You will use another piece of wire or fishing line to make a hanger on the top, attaching it to both ends of the driftwood hanging piece.
Driftwood art picture
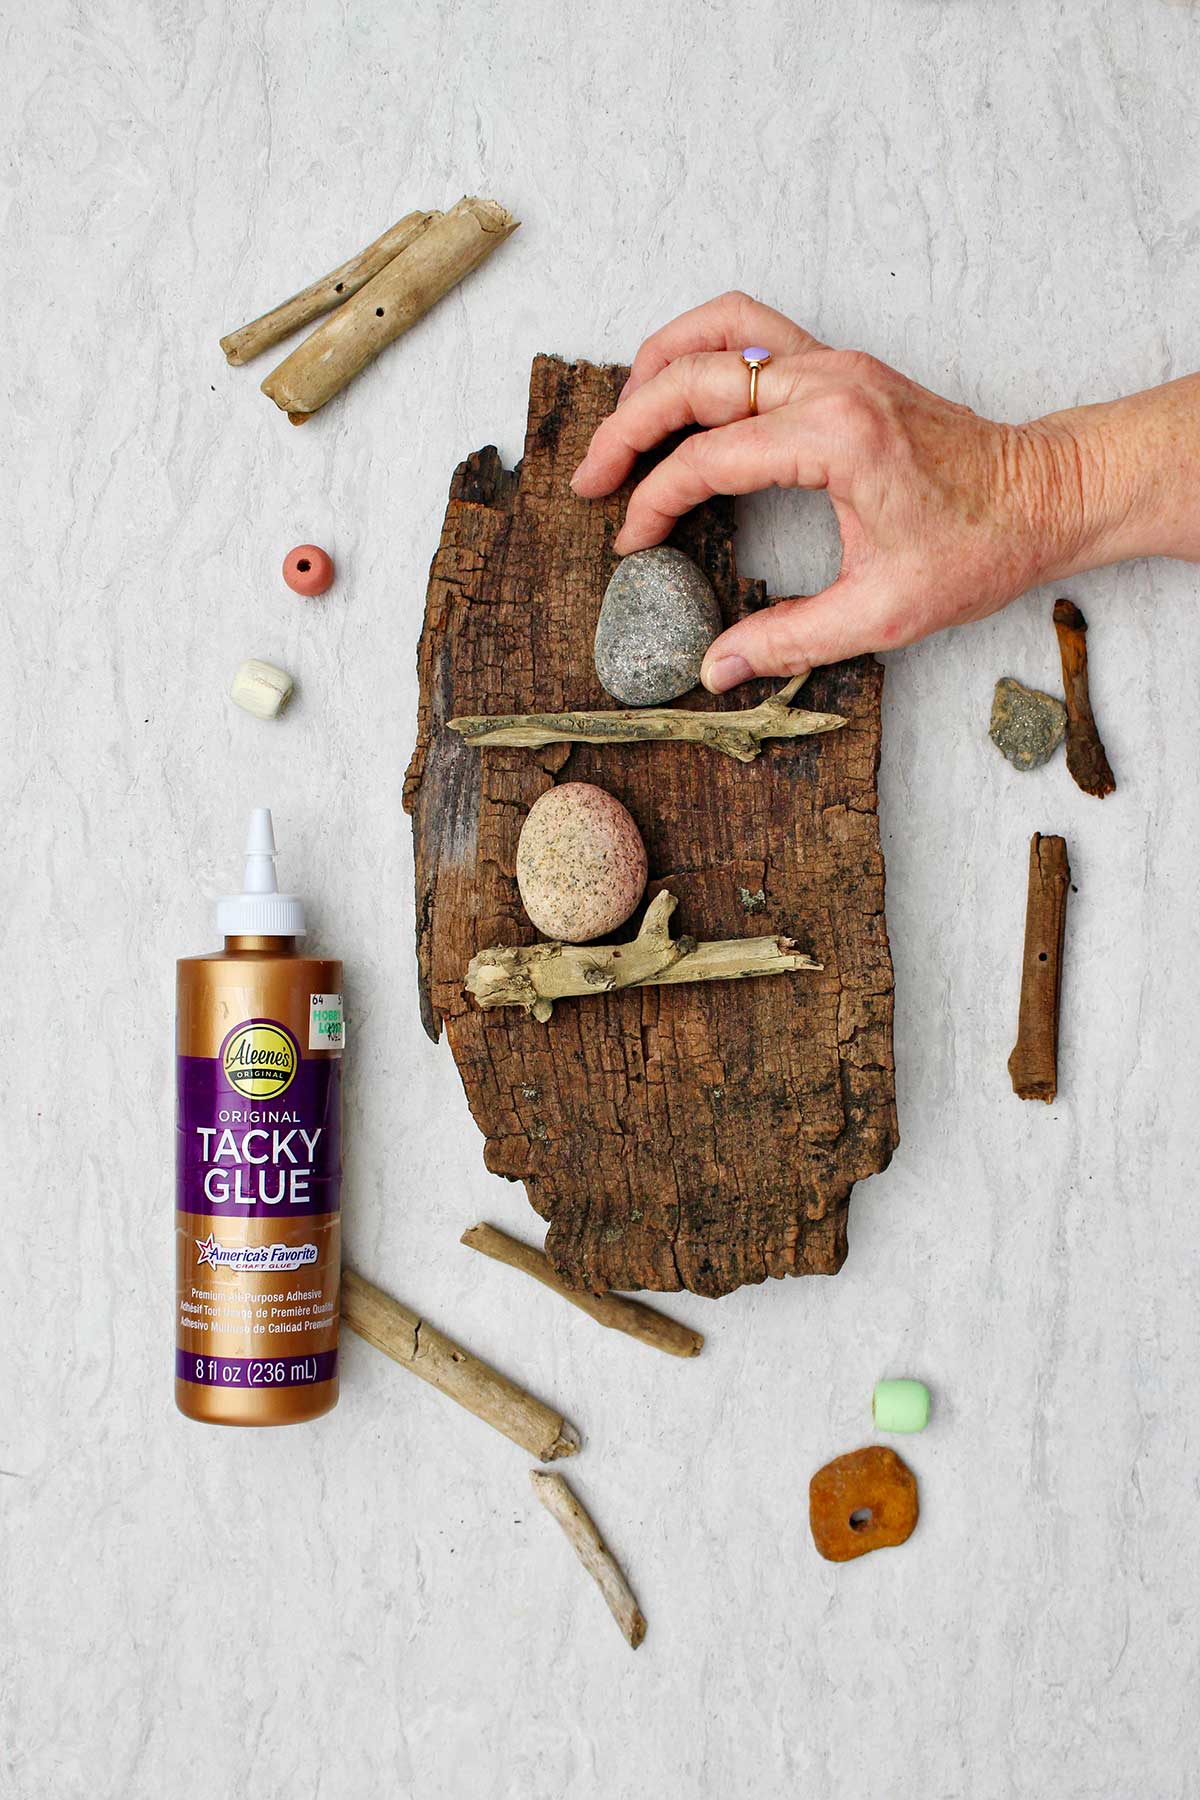
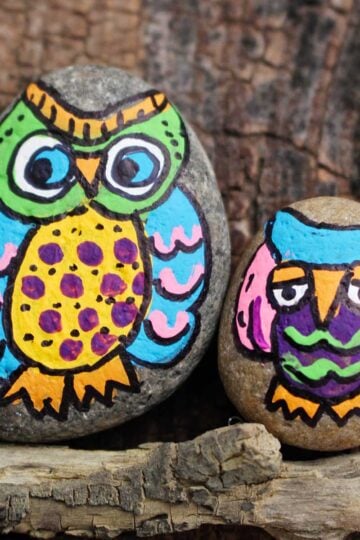
The Driftwood owl picture takes one large, flatter piece of driftwood or reclaimed wood. Find two or three flat oval stones that can be painted to be owls. Use your acrylic craft paint to paint on a triangle beak and either use googly eyes or paint on two eyes above the beak.
Glue two small pieces of driftwood to be branches (horizontally on your piece of driftwood). Glue the two stones above them as if the birds are sitting on branches. You can add more owls if you want.
Craft Tips
- Cut & prep driftwood: You can cut a longer piece of driftwood down into smaller pieces of different lengths using a garden tool like a shears. But most can be just broken with your hands because they’re so soft.
Soak your driftwood in a bleach solution (1 part bleach to 9 parts water) so that little critters and bacteria are taken care of and it will turn it whiter. - Paintbrush trick: Use a small paintbrush to stick into the hole of the bead so that you can paint it completely without getting your hands as messy.
- No drill and bits?: If you don’t own a drill, you may ask a friend if they would help you with the step of drilling small holes in your driftwood pieces. That is a step that takes adult supervision, of course. But it’s a great lesson in using a hand tool.
- Second hand materials: Look for wooden beads on garage sales or at secondhand stores. I found these beads in a beaded type of seat cover that people used to put on their car seats. Weird I know. I just took it apart, and I’ve used them for all kinds of craft projects.
- Beads with larger holes: The holes in the beads need to be large enough for your string or wire to go through.
- Think lake or river too: By the way, these natural materials just came from a lake in Central Kansas. You don’t have to go to the ocean to get driftwood! think local beaches or river banks.
Craft Variations
Want to switch things up on your crafts made from driftwood? Here are a few ways you can customize and play with these crafts made from driftwood.
- Seashells: many small seashells have a little hole in them. They could be used along with or instead of beads, which would really increase the beachy feel of the craft!
- Sticks, acorns, and other nature items: You could use small sticks and nature items that you find in a park or on a nature hike as well. They would look neat on a garland. Some of them could be painted if you wanted.
- Driftwood craft ideas: There are so many ideas for driftwood art projects- Covering a driftwood mirror frame, DIY driftwood wreath, driftwood planter, DIY driftwood lamp, driftwood shelf, driftwood sculptures, or driftwood candle holders.
- Driftwood wall art design ideas: For wall art, cut the cardboard into the shape of a driftwood Christmas tree, heart, cross, fish, bird, etc. Make a grouping of these pieces as the perfect way to add rustic charm to your living room.

FAQ - Go ahead and ask!
Use the wire or string at the end of the garland to make loops. Then hang them over small nails in your wall.
This craft could be done with sticks that you find in your yard. It is best if the bark is off and you cut it into small pieces. There are also finishes that you can purchase that could be rubbed onto sticks to make them look a little more worn.
Elmer wood glue would probably be the best. But at different times I used tacky glue and a hot glue gun and hot glue with good results as well.
How do I bleach or clean the driftwood? Brush off and or wash the driftwood to get off sand and dirt. It may be a good idea to soak your wood in a bleach solution of 9 parts water to 1 part bleach. This will help kill off any bacteria or critters that might be on the wood. It will also help bleach it.

More Easy DIY Nature Crafts for Kids
Looking for more great DIY nature crafts for kids? Here are a few favorites for you to try:
- DIY Table Top Easel from Twigs
- Treasure Hunt Nature Mobile
- Two Ways of Nature Weaving with Kids
- DIY Quill, Pen, and Ink
- Tree Leaf Identification Nature Journal
Enjoy!
If you try these crafts made from driftwood, let me know! Go ahead and leave a comment, rate it, and tag a photo with #WelcometoNanas wherever you post.
Come join the fun at https://welcometonanas.com
DIY Crafts Made from Driftwood
Equipment
- Drill and small bit
Items Required
- Beachwood in various sizes
- Lightweight wire, string, or fishing line make sure it fits through the hole of your beads
- Wooden beads
- Acrylic craft paints
- Paint brushes
- Paper plates to use as a pallet
- Drill and small bit
Instructions
- Collect up lots of small pieces of driftwood. Look for rocks and shells with small holes in them as well.Clean off the wood. Soak in bleach solution to clean and whiten if desired. See tips section.
Driftwood wall art project
- To make the driftwood heart art piece you only need pieces of driftwood. Cut your desired shape out of cardboard. You will be able to see this cardboard between the pieces of wood so paint it to the color you would like to see coming through. Light blue, sage, green, or pink would be good choices.Glue your small pieces of driftwood to the front of this cardboard using tacky glue or hot glue. Cover the entire surface with wood, trying to match the edges of the cardboard with the edges of the driftwood pieces. You may need to break some pieces of driftwood to fit in certain spots.
Driftwood garland or mobile
- For the garland or mobile use acrylic craft paints to paint 48 beads in the color(s) that you want (i.e.-12 beads painted in four different colors). Set these aside to dry.Break some of your pieces of driftwood down into smaller sizes if they are larger than about 3 inches long. I used a hand clipper to do this that I typically use for yardwork. Use a small drill bit in an electric hand drill to drill a small hole in the center of each of the small pieces of driftwood. String your driftwood pieces and beads onto a lightweight wire, string, or fishing line. I used a pattern of stringing two or three pieces of wood then one bead (and alternated the colorful beads).
- If you are making a garland, then you will just string these in one long string and tie them off on either end. Make a loop on each end to hang up your garland.
- If you are making a mobile such as you see in the picture on this post, you will need three strings of wood and beads. My three were about 24 inches long, 18 inches long, and 12 inches long. Make your strands and tie each off at the bottom of each strand.Then attach them to one larger piece of driftwood at the top and let them hang down. You will use another piece of wire or fishing line to make a hanger on the top, attaching it to both ends of the driftwood hanging piece.
Driftwood art picture
- The Driftwood owl picture takes one large, flatter piece of driftwood or reclaimed wood. Find two or three flat oval stones that can be painted to be owls. Use your acrylic craft paint to paint on a triangle beak and either use googly eyes or paint on two eyes above the beak.Glue two small pieces of driftwood to be branches (horizontally on your piece of driftwood). Glue the two stones above them as if the birds are sitting on branches. You can add more owls if you want.


Robert Stupack says
Hi there,
I came across your driftwood pieces and was genuinely impressed — your work has the kind of character and craftsmanship that buyers on my platform love.
I’m the founder of StickNations.shop, a fast-growing marketplace created specifically for collectors and buyers who only want driftwood, natural sticks, and wood art. We’re attracting a niche audience that a standalone site can’t fully target — people who visit every day just to discover new driftwood and stick-based pieces.
I'd love to invite you to list some of your work there.
⭐ Why you should consider trying it (zero risk)
No listing or membership fees — ever
You only pay 5% if a piece sells
This is simply another income stream
Driftwood and stick art is what our buyers specifically come to the site for
Many sellers report that niche platforms outperform standalone sites for unique pieces
⭐ Why it works
Unlike giant marketplaces, StickNations caters to a single, passionate niche — the same niche your work already appeals to. When buyers arrive, they’re not browsing millions of unrelated items…
They’re looking for exactly what you make. #officialstickreviews on Instagram has 3.2mm followers!
⭐ Quick and easy
Listing takes just a few minutes, and you can reuse your photos and descriptions. You can also include a 30-second video to help your piece stand out.
You keep full control over:
Pricing
Shipping
Return policies
Communication
If you’d like to explore the platform:
https:StickNations.shop
I’d love to see your pieces showcased there — and your first listings could be live today.
If you want help setting them up, just let me know. I’d be happy to assist.
Warm regards,
Robert Stupack
Founder — StickNations.shop
StickNations.shop@gmail.com