Making my own DIY quill pen and ink was a fun thing I remember trying when I was a kid. Who knows what sparked the idea, probably a book from the library or a history lesson at school.
What? No pens or pencils?
It’s hard to imagine life without a ball point pen or pencil available (we probably all have a drawer full).
A cool book called “The Diary of an Early American Boy” tells the story of a boy from the 1700s that wrote in a diary with his own quill pen and ink. The author actually found the diary, pen and inkwell between the logs of an old cabin. He wrote the story around the events recorded by this boy in his diary. How cool is that?
I’m not sure this book is still in print, but it would be a great read out loud book for a family, especially if there is a young boy in the mix. The illustrations (done in pen and ink of course) are outstanding.
What would you and your kids write in your diaries with pen and ink? How about making your own DIY quill pen and ink and giving it a try?
Ink can be made in a variety of ways.
Ink can be made out of the fruit from berries (which provides a variety of colors) or it can be made from soot. When I was young I made it from soot, but since the fruit berry ink doesn’t take starting fires we will try that method this time!
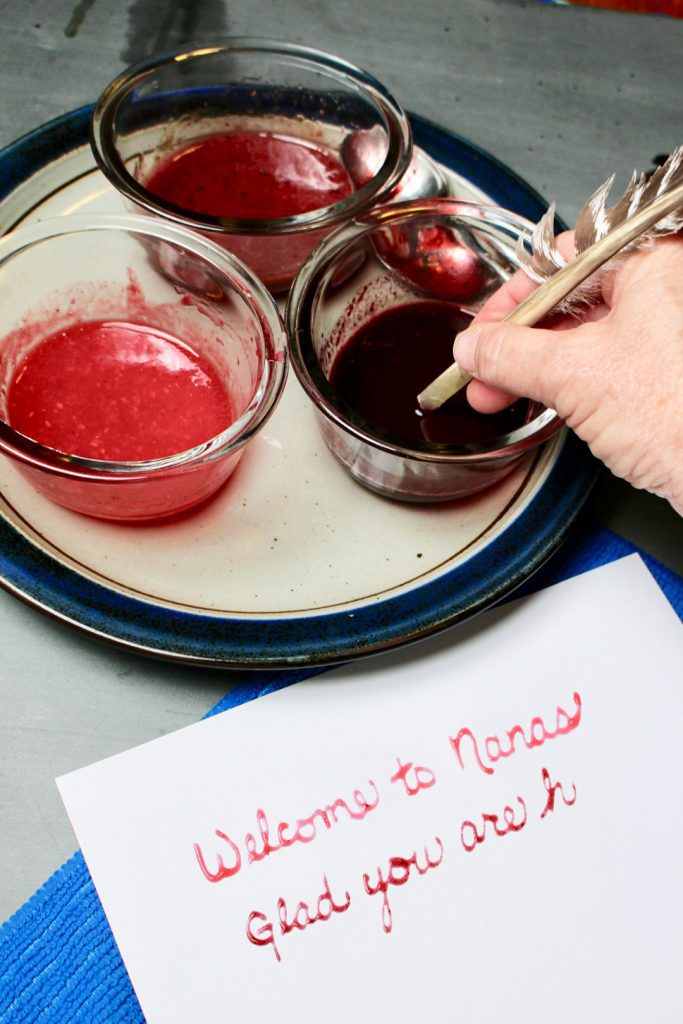
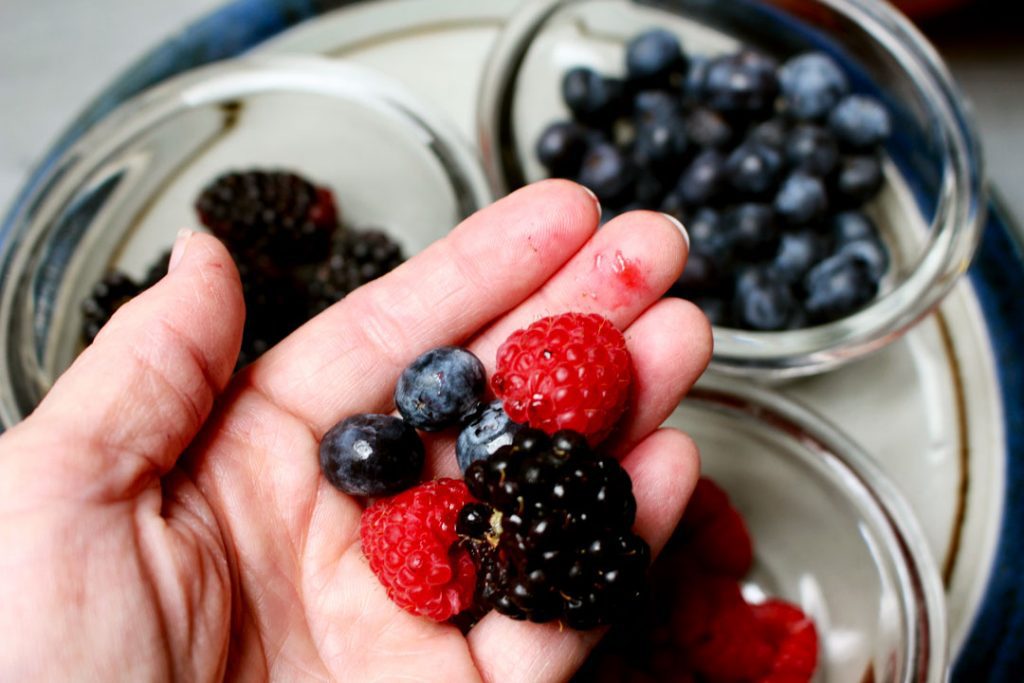
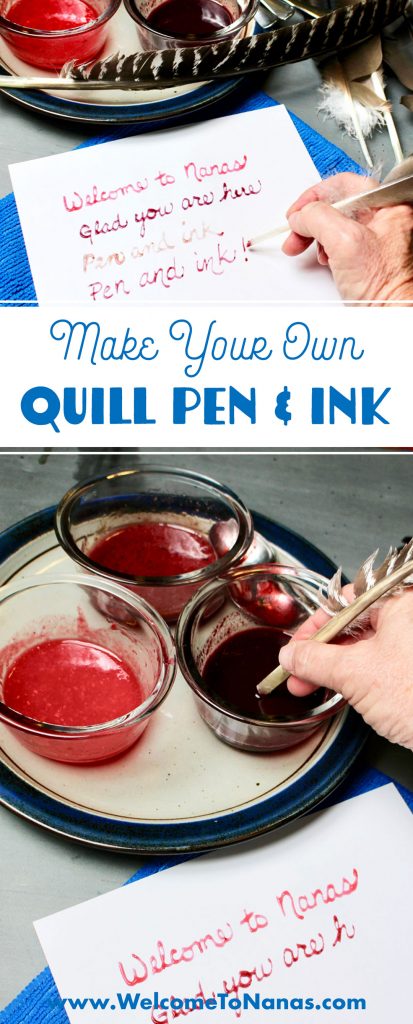
So we tried blackberry, raspberry and blueberry ink because all three containers of berries were side by side in the market. I was eager to see what color the ink would turn out to be!
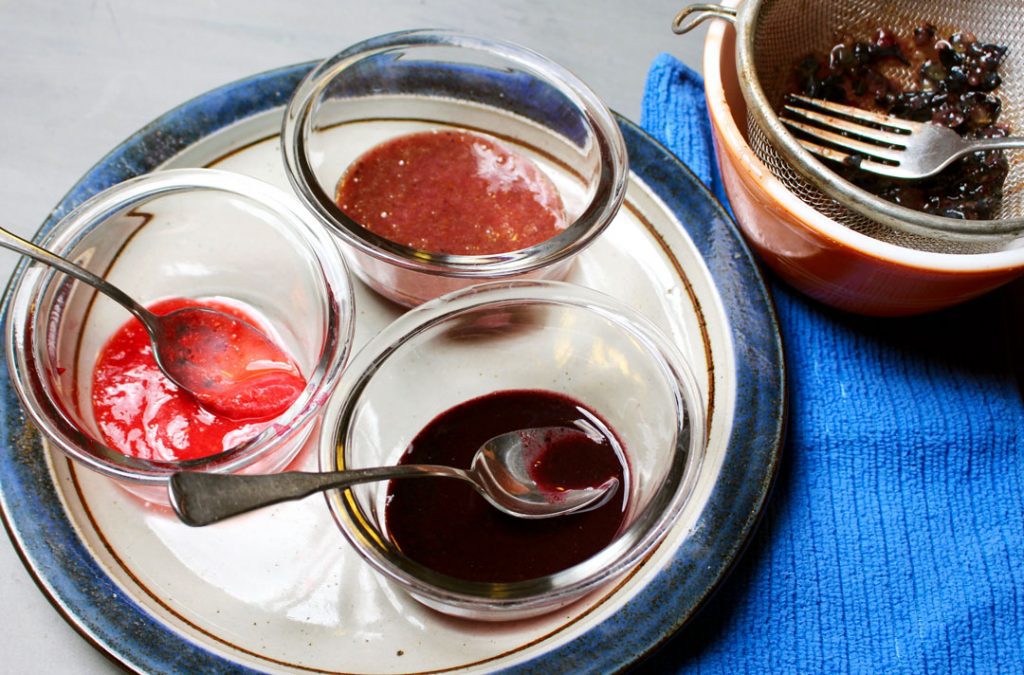
Take ½ cup of the berry and mash it in a small container. Place it in a fine strainer and let the juice run through into a small cup or ramakin. I must say the blueberry juice color was quite disappointing, very lightly colored, but the other two looked great. I pressed the fruit too hard in the sieve so I got too much pulp in the juice.
Add ½ teaspoon vinegar (to help the juice keep its color) and ½ teaspoon salt (to help preserve the juice).
You can store the juice in baby food jars in the fridge for awhile.
Now to make a quill pen.
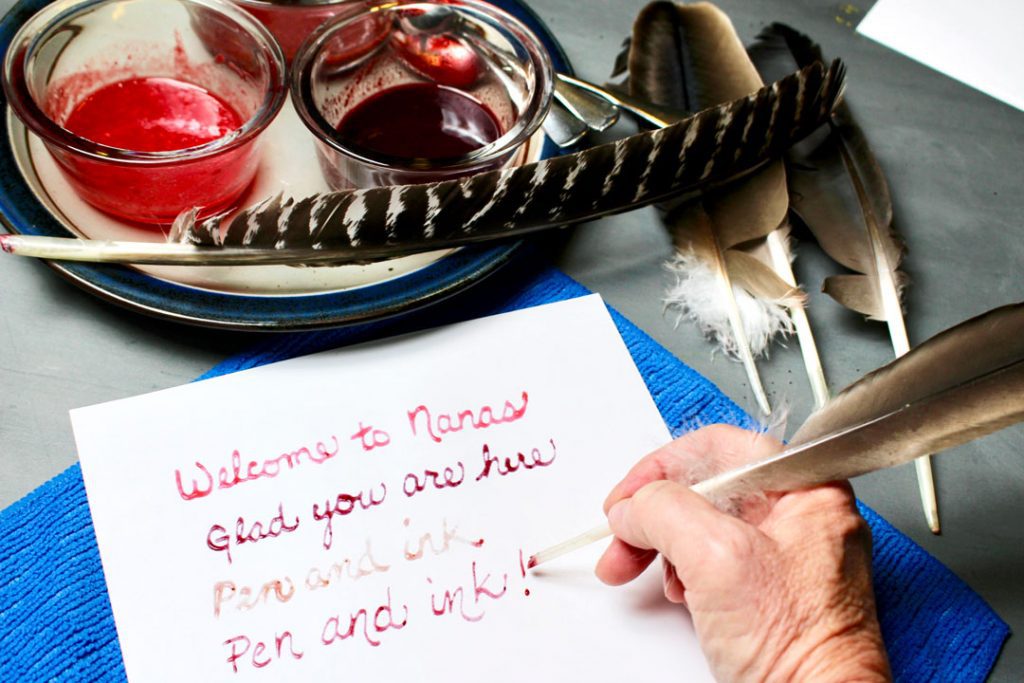
Turkey feathers make great quill pens as they are large and very strong. As weird as this is, there are wild turkeys in our area so the kids could actually find some feathers outside! I found this large one when I dropped Papa off in our alfalfa field yesterday. Feathers can be purchased online for those where wild turkeys don’t run through the backyard! Ha!
Because we used an Exacto knife for making the quill point, use extreme care around younger grands and use discretion for when kids are old enough to do this on their own. In fact, I’d probably encourage an adult to do it because the feathers are very tough and hard to cut.
Tip: A heavier knife would have been better to use.

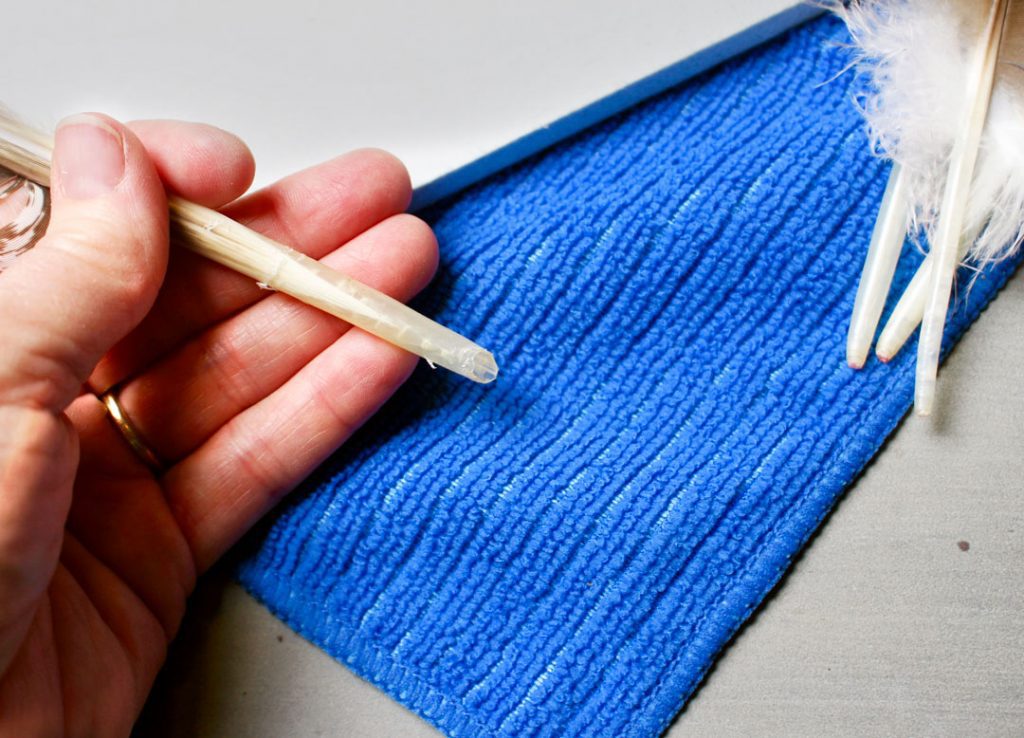
Cutting the quill pen tip
Cut the end of the feather off at a diagonal. You will see right away that the feather is hollow. Isn’t that cool? This leaves a pointed end on the feather. Cut the very tip of that point off, leaving a very small flat area on the tip of the feather.
Make a slit into the feather at the tip on that flat end. This slit will go up into the hollow part of the feather about ¼ inch. Later this slit will draw up and hold some ink when dipped.
Now comes the really fun part!
Dip the quill pen into one of the colored inks and try writing a message on some paper. Which color do you like the best? I’m a fan of the blackberry ink and would skip the blueberry ink all together. All of the inks dried into various shades of blue.
I’m pretty curious about some of the wild berries that grow around here. What color ink would they make? Also, we may try to make some ink from soot after making smores some evening.
A fun perk is I’m going to throw the extra mashed berries into my smoothie this morning!
Let me know what you and the grands wrote in your journals using your DIY quill pen and ink! Do I see the possibility of a new book of the modern American boy or girl??
Supplies:
- Turkey or pheasant feathers
- Exacto knife
- Cutting board
- Fresh or thawed frozen berries (½ cup)
- Vinegar (½ teaspoon)
- Salt (½ teaspoon)
Enjoy!
Welcome to Nana’s! Where there’s fun things to do with your “grand” kids!
Come join the fun at www.WelcomeToNanas.com


Laura Noren says
Thank you for making this available! I plan to use it with my 5th and 6th grade as we are studying colonial history. I have one question though. In the picture, it looks like you are adding honey to the "ink". Is that something we should do?
Thank you again,
Laura Noren
Shelly says
So sorry to be so late in answering.
I used only the berry juice in the ink. The blackberries made a nice ink color.
I mentioned in the post that a bit of vinegar and salt can be added to make the ink last longer but that is optional.
You may be seeing the three different types of berry juices that I tried in the picture, none of those are honey.
I hope this was a hit in your class!
My kids loved doing this in a history unit years ago!!
Sincerely, Nana
Erin M says
Do you know the title of the book you mentioned? I homeschool our boys and they would love to learn more about what boys did years ago.
Thanks, Erin
Shelly says
Oh I LOVE this book, I think they will like it too. It has amazing pen and ink drawings in it. The title is: “The Diary of an Early American Boy” . My only concern is that it may be out of print and you may need to find it online as a result. We homeschooled our children as well and this book was a favorite of our sons. Best wishes!! Nana- Shelly
Shelly says
I just looked online and it is available from Amazon- it is by Eric Sloane. It is based on an actual diary from 1805. I'm going to go get mine off of the shelf and look at it now- you have inspired me!!
Anne Brown says
This was surprisingly easy. Thank you for such clear directions. My ten-year-old and I enjoyed it.