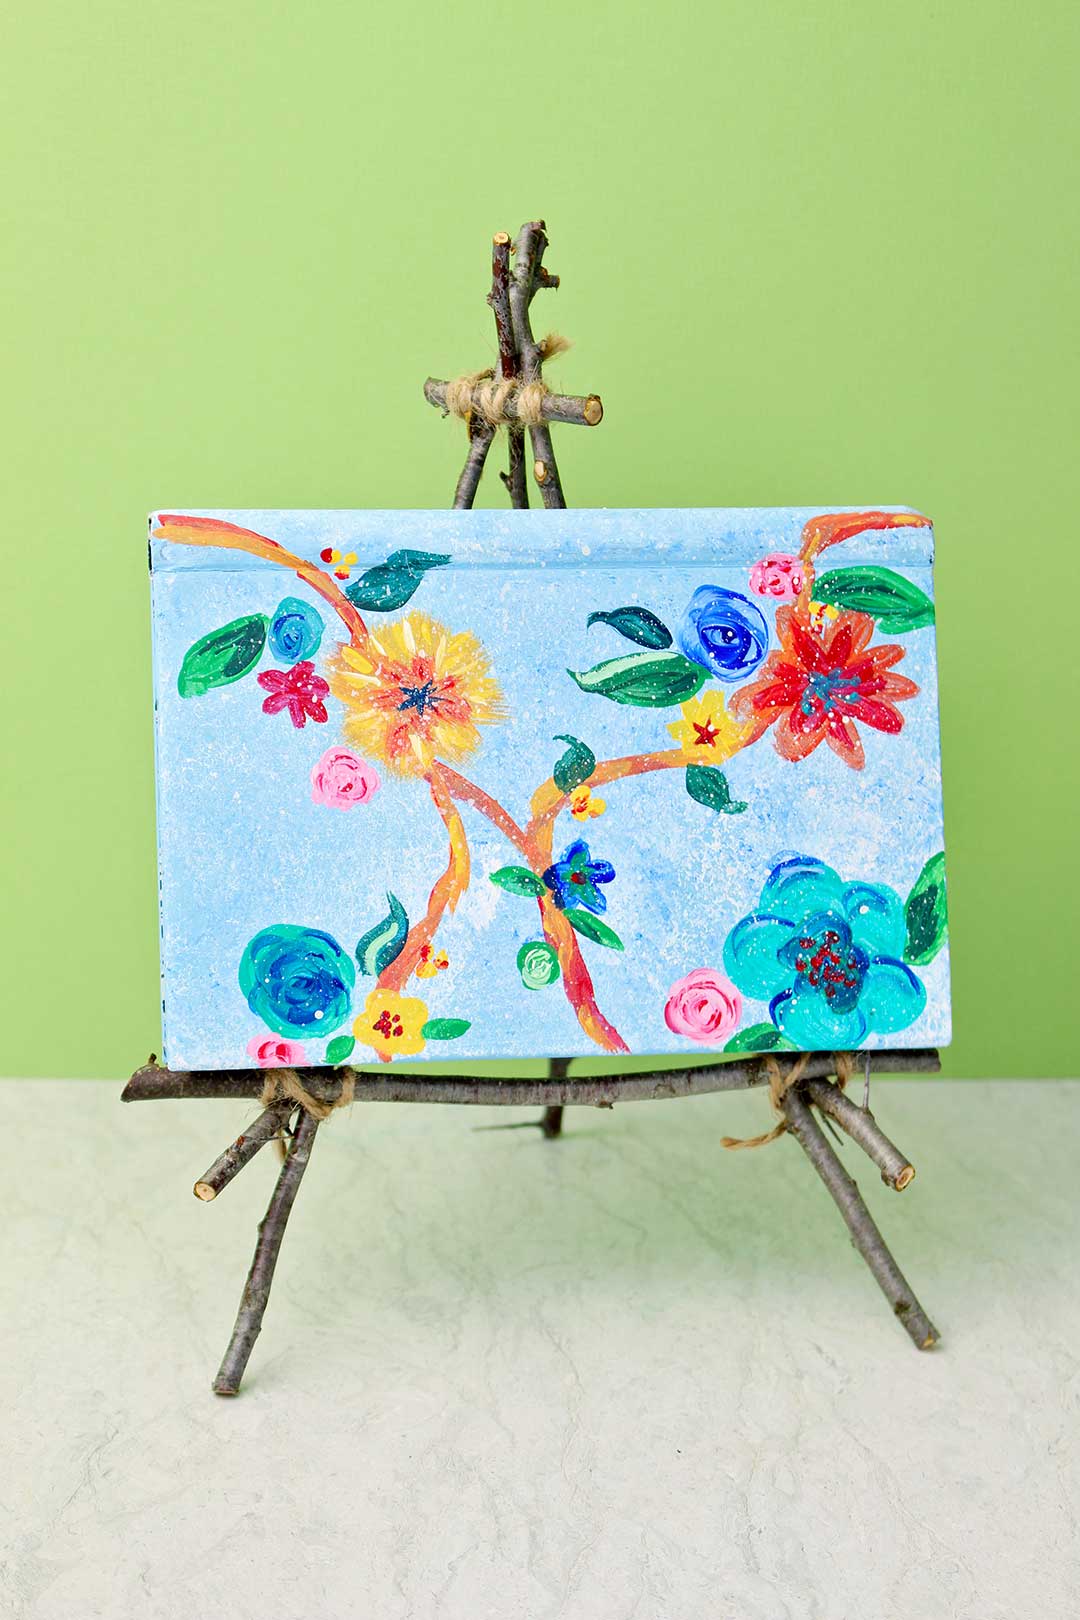
I saw a Tabletop Easel from Twigs in a local restaurant recently. It was used to display a small piece of art. I was smitten and wanted to try making one right away. They are so cool!
What a wonderful and useful DIY nature craft you can make from just twigs and twine! Come and check it out- you need one...or two.
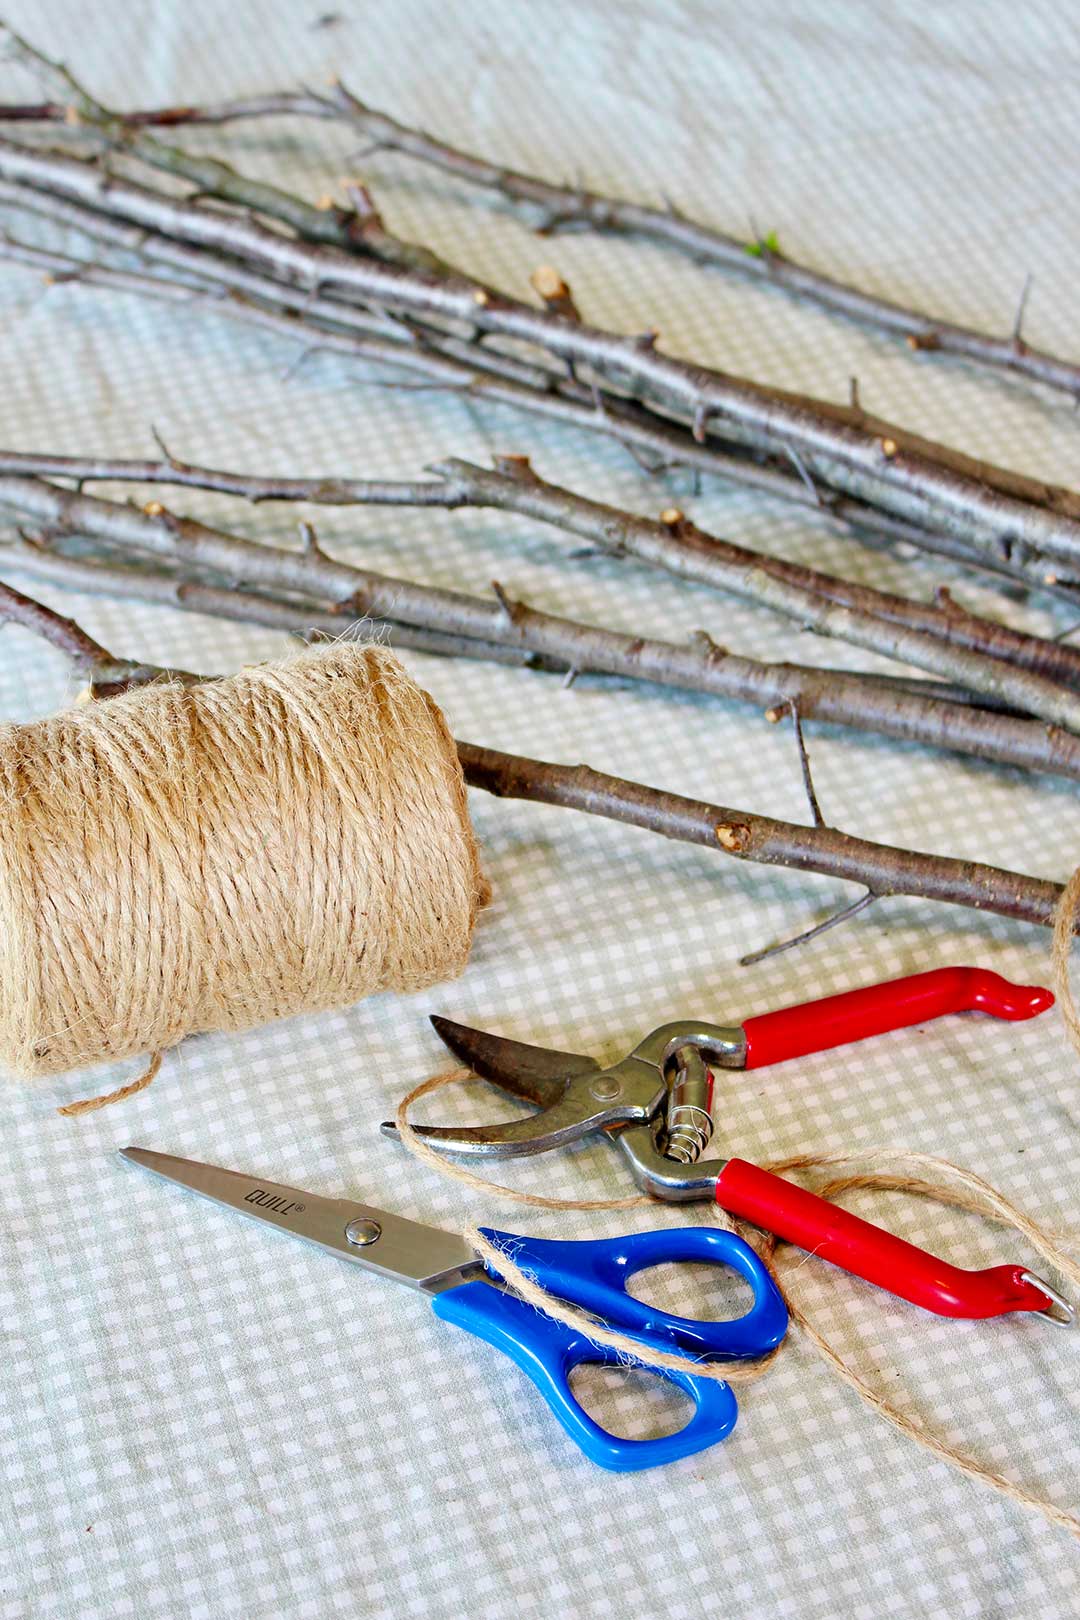
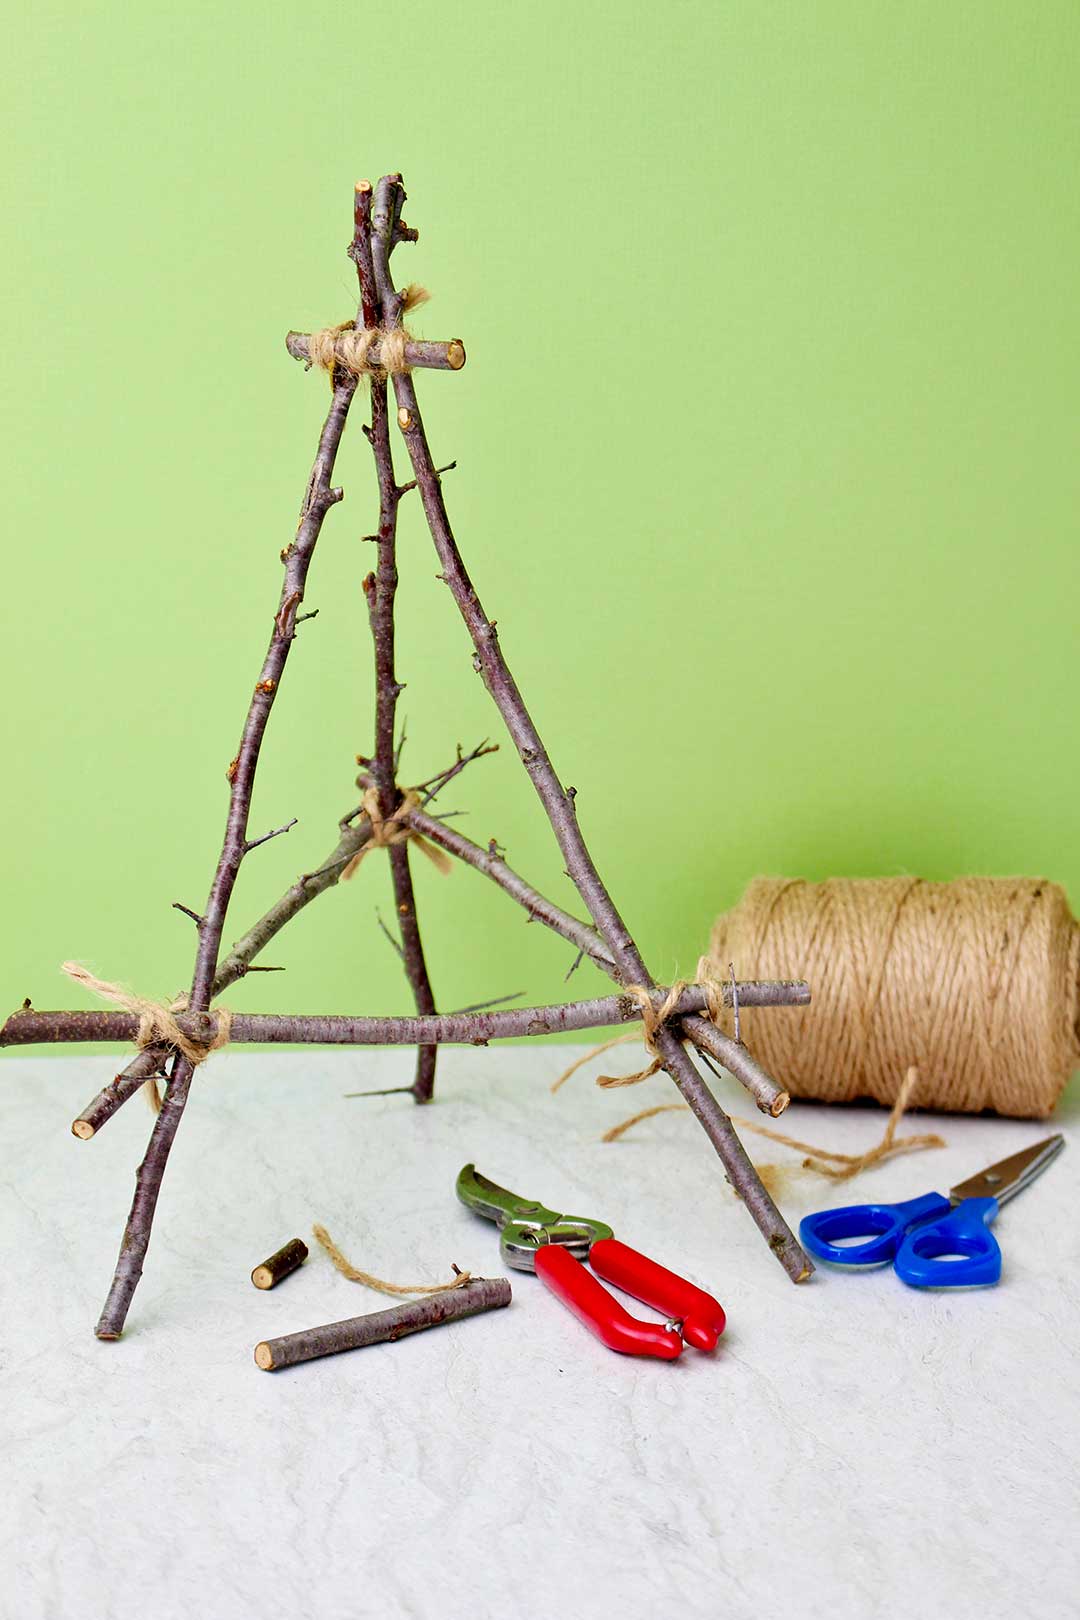
Supplies for a DIY Tabletop Easel from Twigs
- 6 twigs/sticks- at least 1 foot long and about ½ inch in diameter at the largest point. Fairly straight.
- Twine- light weight (string or yarn will also work)
- Garden clipper- to clip the twigs to size
These little easels were really intriguing to me, I’m hoping you think so too.
I love that the materials are so available. All you need is a few sticks and some twine (string or yarn would work as well).
Nature walk
We took a walk and found straight sticks that could be used. Papa used our garden clippers to cut a few from some wild plum bushes in our hedge line for us. Thanks Papa! Sticks that have fallen from a tree can work as well. It helps if they are fairly straight though.
Wouldn’t this be a great project to make after finding the twigs on a nature walk with kids? Or adults for that matter!
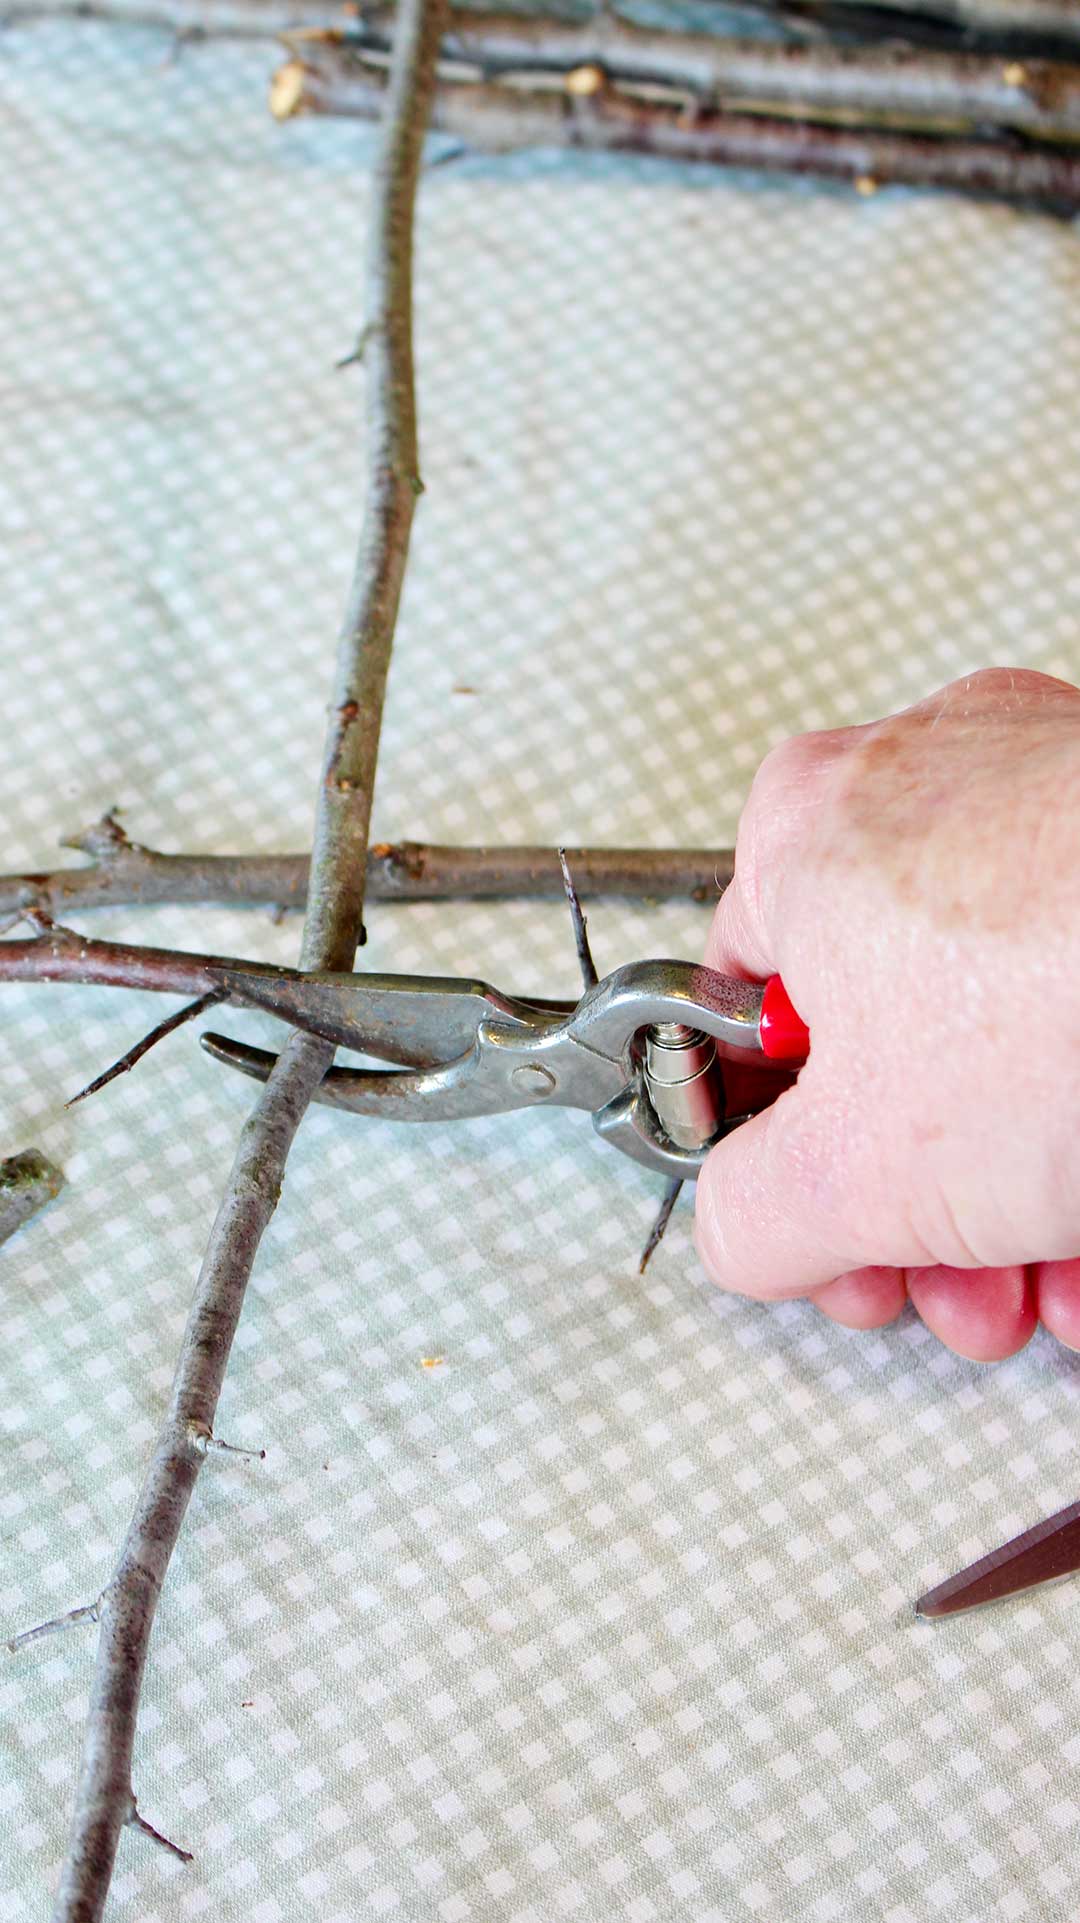
These sticks were about ½-inch in diameter at their thickest point. They were fairly straight as I mentioned before. You will need 6 twigs that are 1-foot long or a bit more.
Break off bigger side branches that come off the main twig. I left a few small ones for visual interest.
How do you make an easel out of sticks?
I'm going to be honest. This craft made me wish I had an extra hand a few times. Perhaps you could work with a partner as you each make an easel.
You could help each other hold the sticks in place as you tie them together. That sounds fun actually.
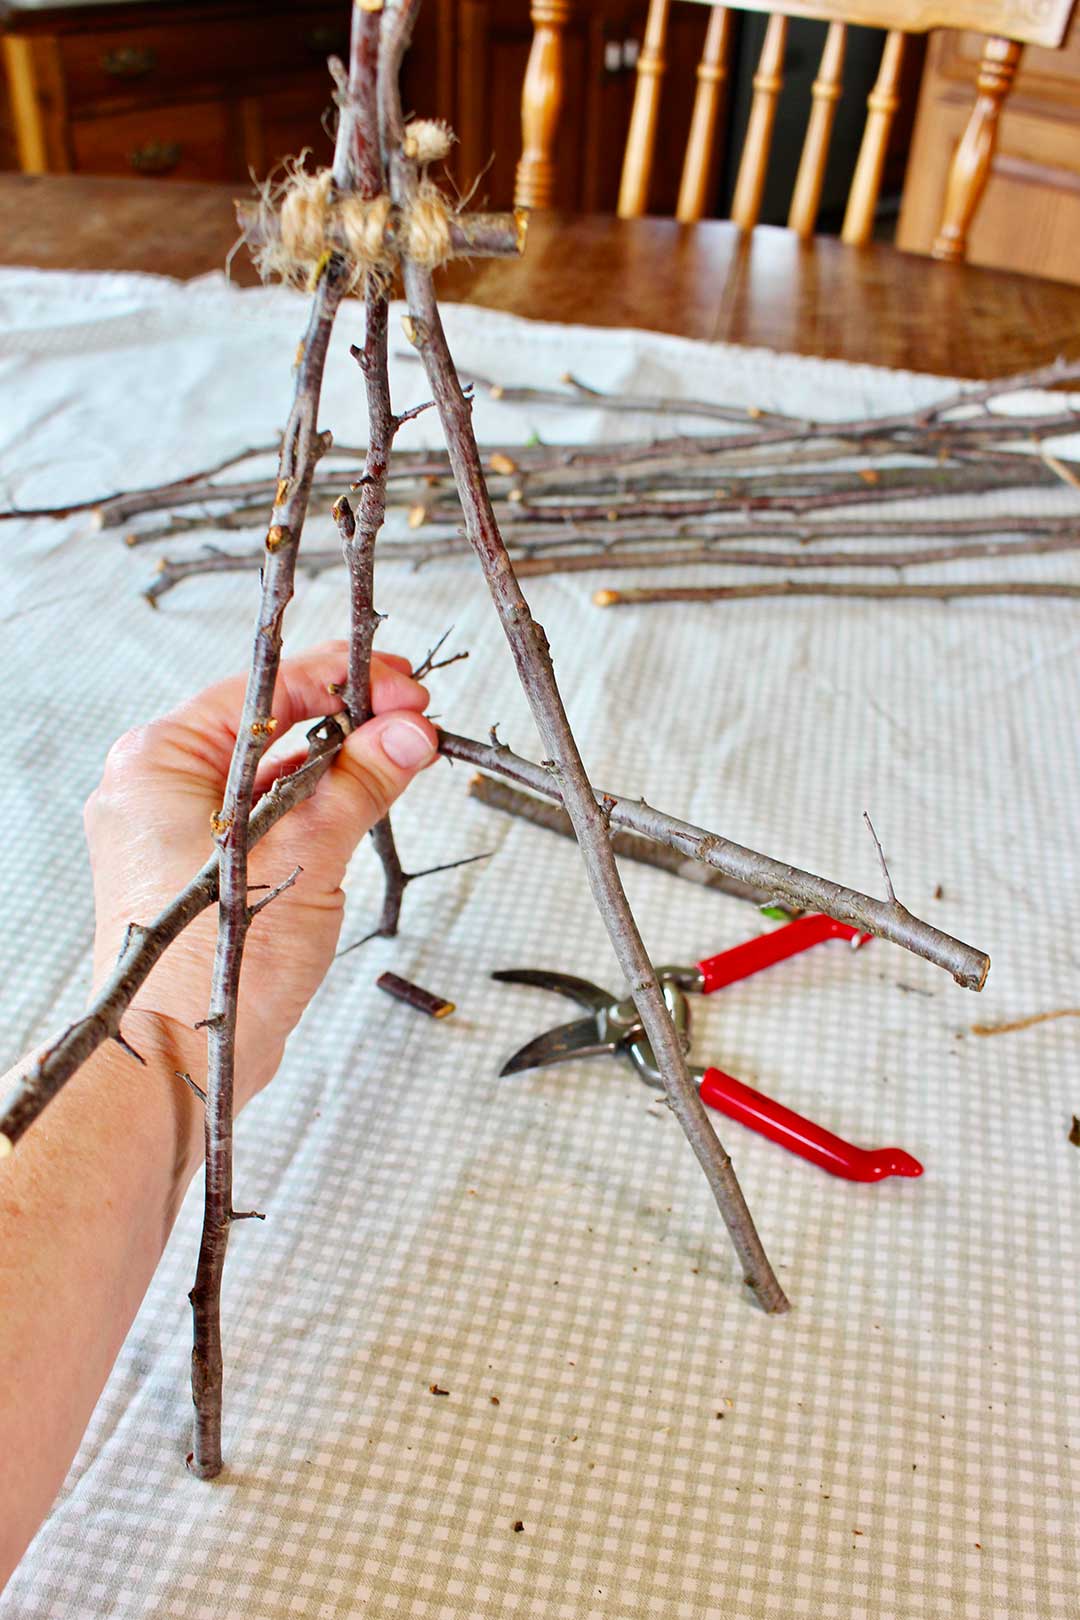
Take three of the twigs and clip each of them down in size to 1-foot long. Lay they side by side with all of the smaller ends together and all the larger ends together.
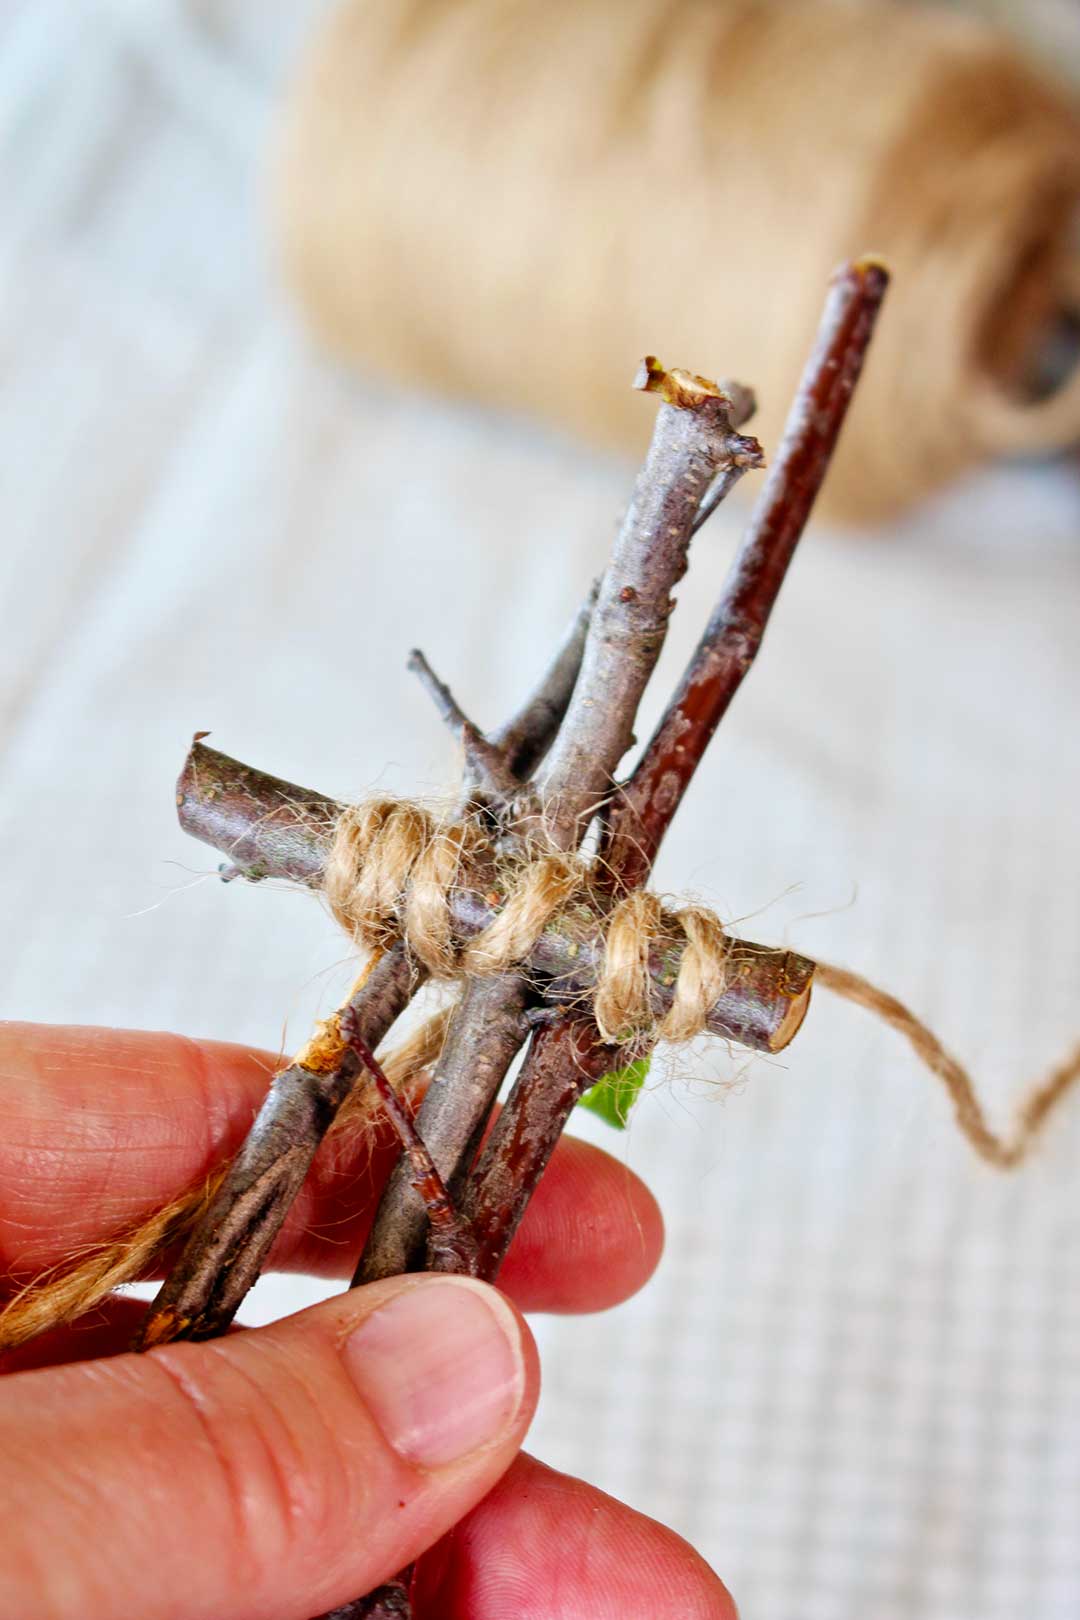
Use a piece of twine to make a figure eight pattern around the top end of the twigs. This will be about 1 or 1.5-inches from the smaller ends of the twigs. Tie a knot in the twine on what will become the back of the easel. Clip the ends of the twine to about 1-inch in length. You can trim these down further when the easel is finished if you want.
Twig easel- a tripod
The center twig will move back to hold up the easel. The outside two twigs will move forward to be the front two legs of the easel.
This forms a tripod- two legs forward, one leg back. Spread the legs out a bit so it stands up sturdily.
If the tripod doesn’t sit level, keep working with the twigs a bit. Clip off a twig to even the three legs up if needed.
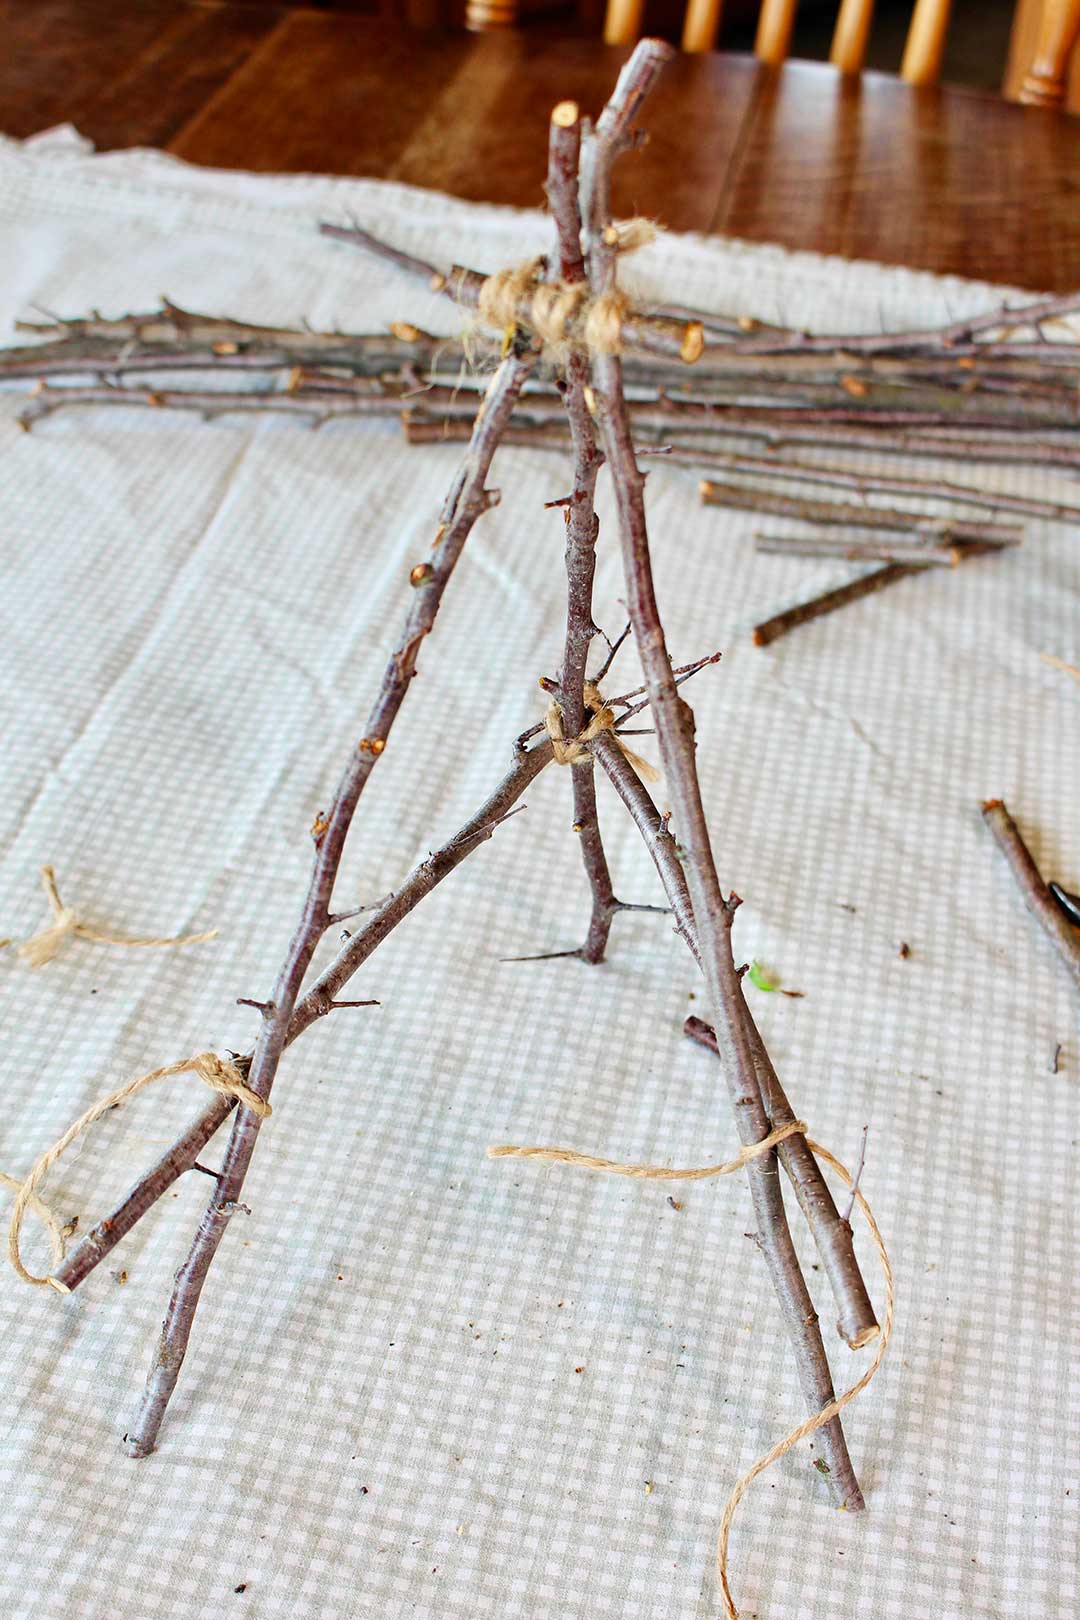
Cross bars- twig easel support
Now we will fashion the cross bars- or should I say cross twigs! They will hold the three legs in place, so the easel doesn’t collapse.
You will use the three additional twigs that you collected for these pieces.
Cut these three twigs down to about 10 inches long. You will trim them even more after they are tied in place.
Tie the back leg of the tabletop easel
We will start by tying two of the twigs to the back leg of the easel. This is a bit clumsy so it may be helpful to get someone to help hold these in place while you work.
Position the two twigs about ⅔ the way down from the top of the easel, horizontal to the tabletop. They will be on the outside of the easel legs and cross in the back (one on each side of the tripod). See the picture.
Using a figure eight winding, tie the two cross twigs to the back leg of the easel with twine. Tie a knot towards the inside of the tripod and trim the twine when you have it secured well.
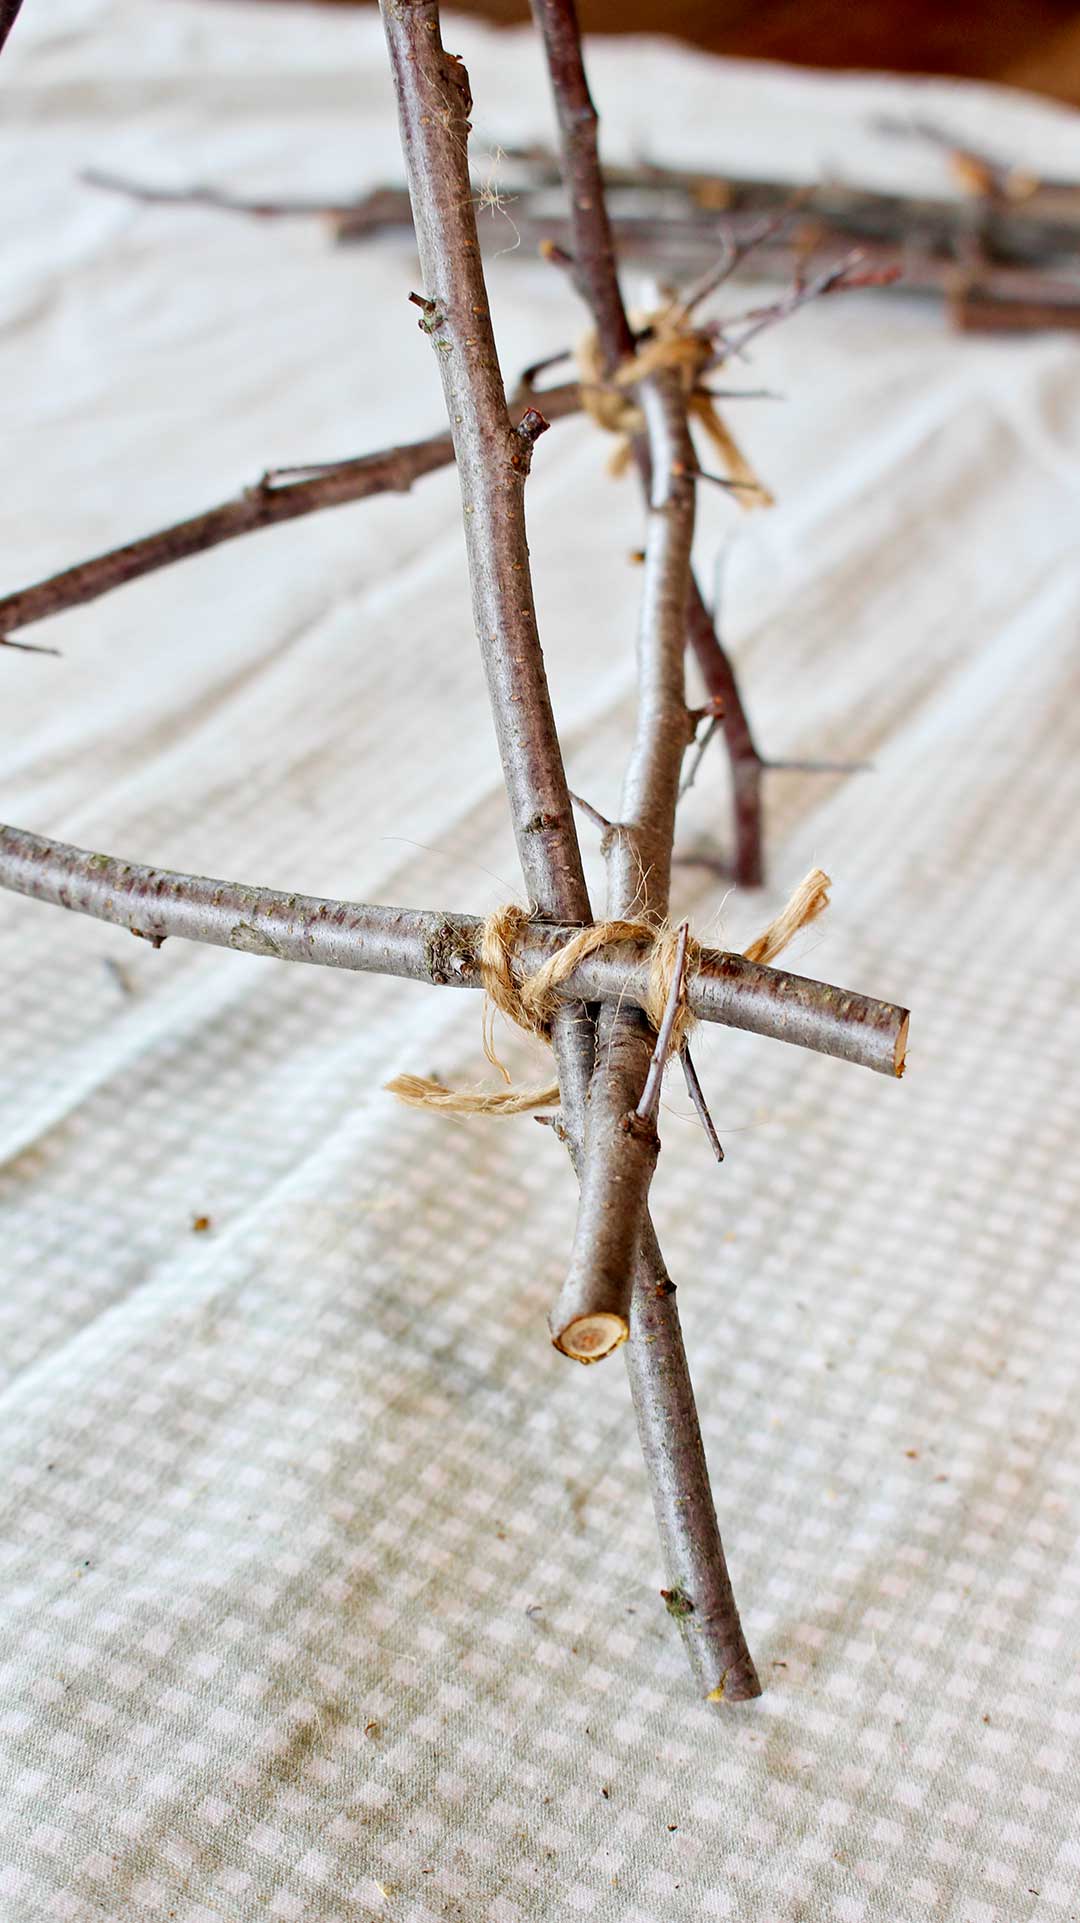
Finish tying a DIY picture frame stand
Then take the third twig and place it crosswise in front of the two legs of the easel. It will kind of sit on top of the two side twigs already there.
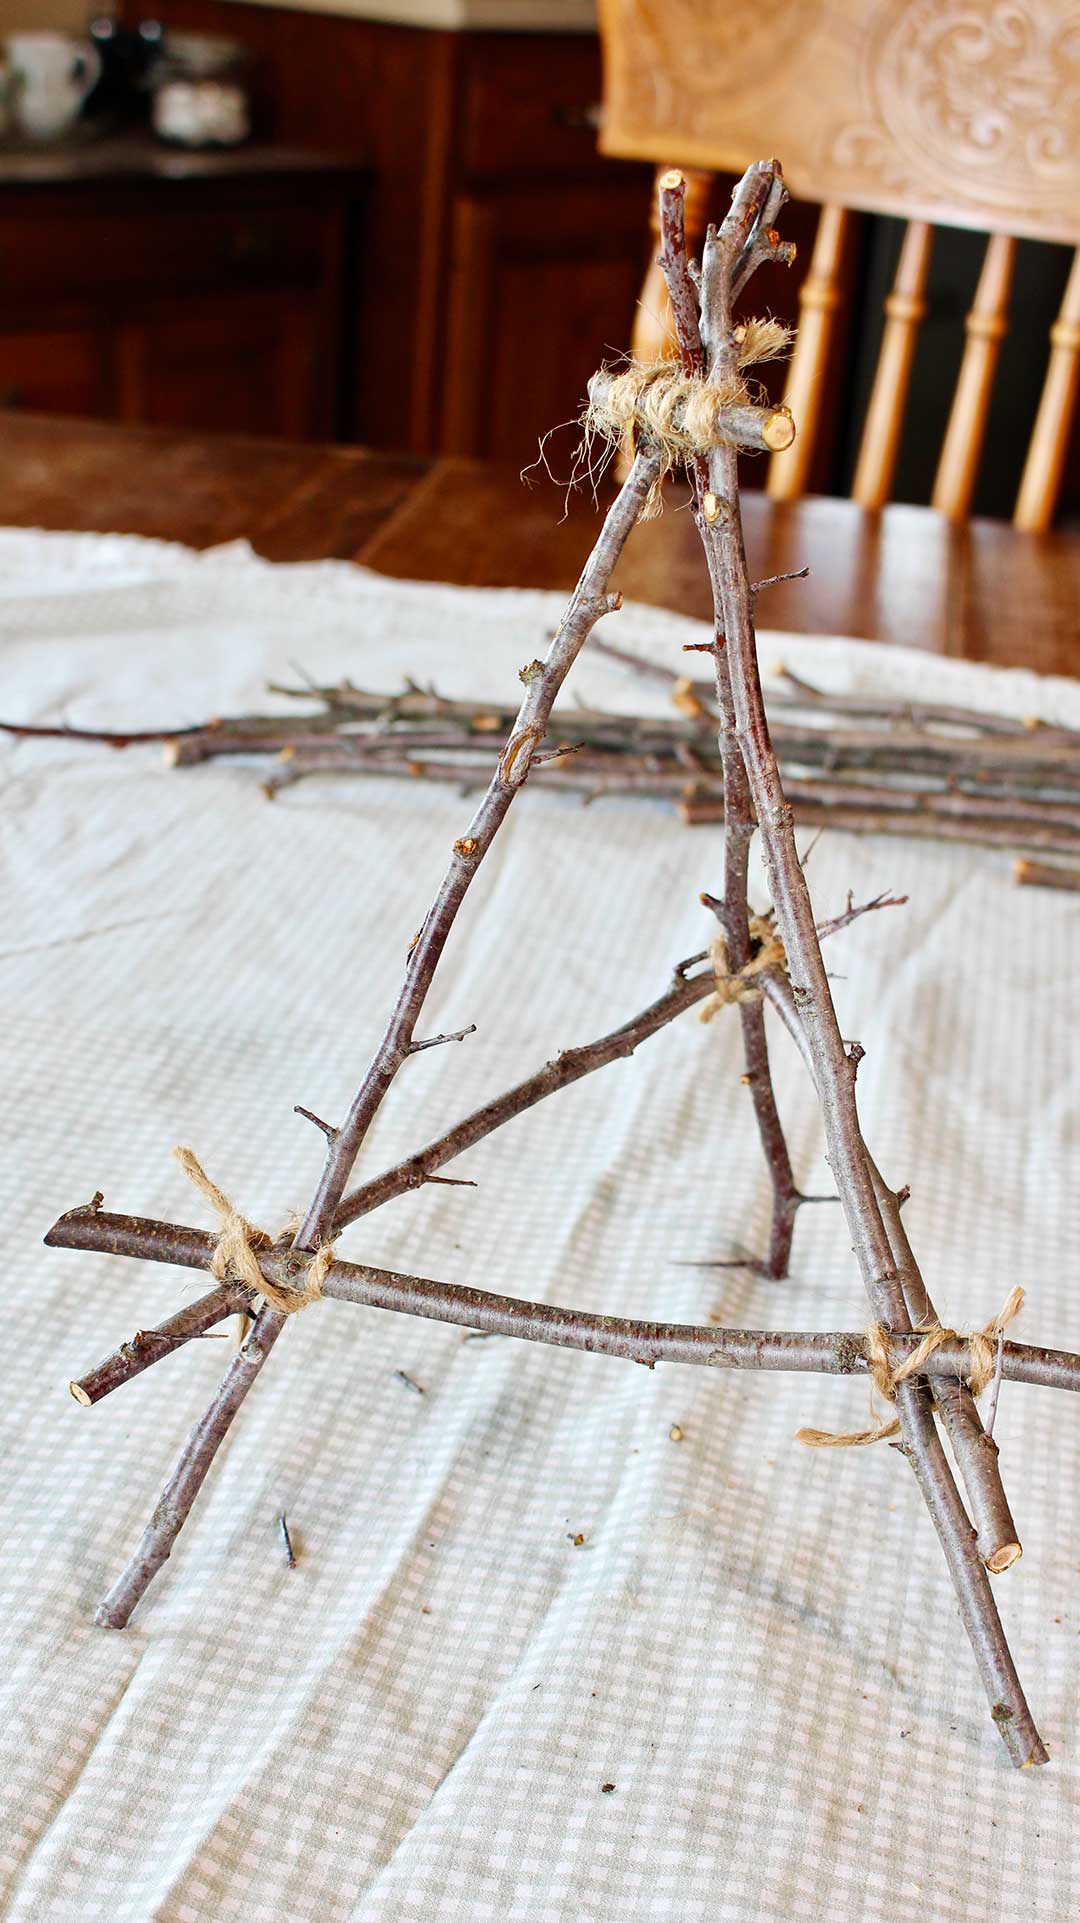
Keep working with the three tripod legs until you are happy with how they are positioned to be a good easel.
Use a piece of twine and a figure eight winding to tie one of the side twigs and one end of the front twig to one leg of the easel. Tie a knot towards the inside of the easel. Trim twine ends.
Then repeat that on the third leg of the easel.
The front twig will be what your picture rests on for display!
If you want to trim the ends of the cross twigs anywhere they stick out too far, go ahead and do so.
Looking for a vine? Leaves of three, let it be!
The DIY Tabletop Easel from Twigs that I saw in the restaurant had a small vine that was wrapped around the back and side leg of the easel somehow. I may try to find a little vine and add it to my easel on my next walk outside!
I just remind you…leaves of three, let it be! We have lots of poison ivy around our place. I won’t grab any of that vine for my easel! Don’t you make that mistake either!!
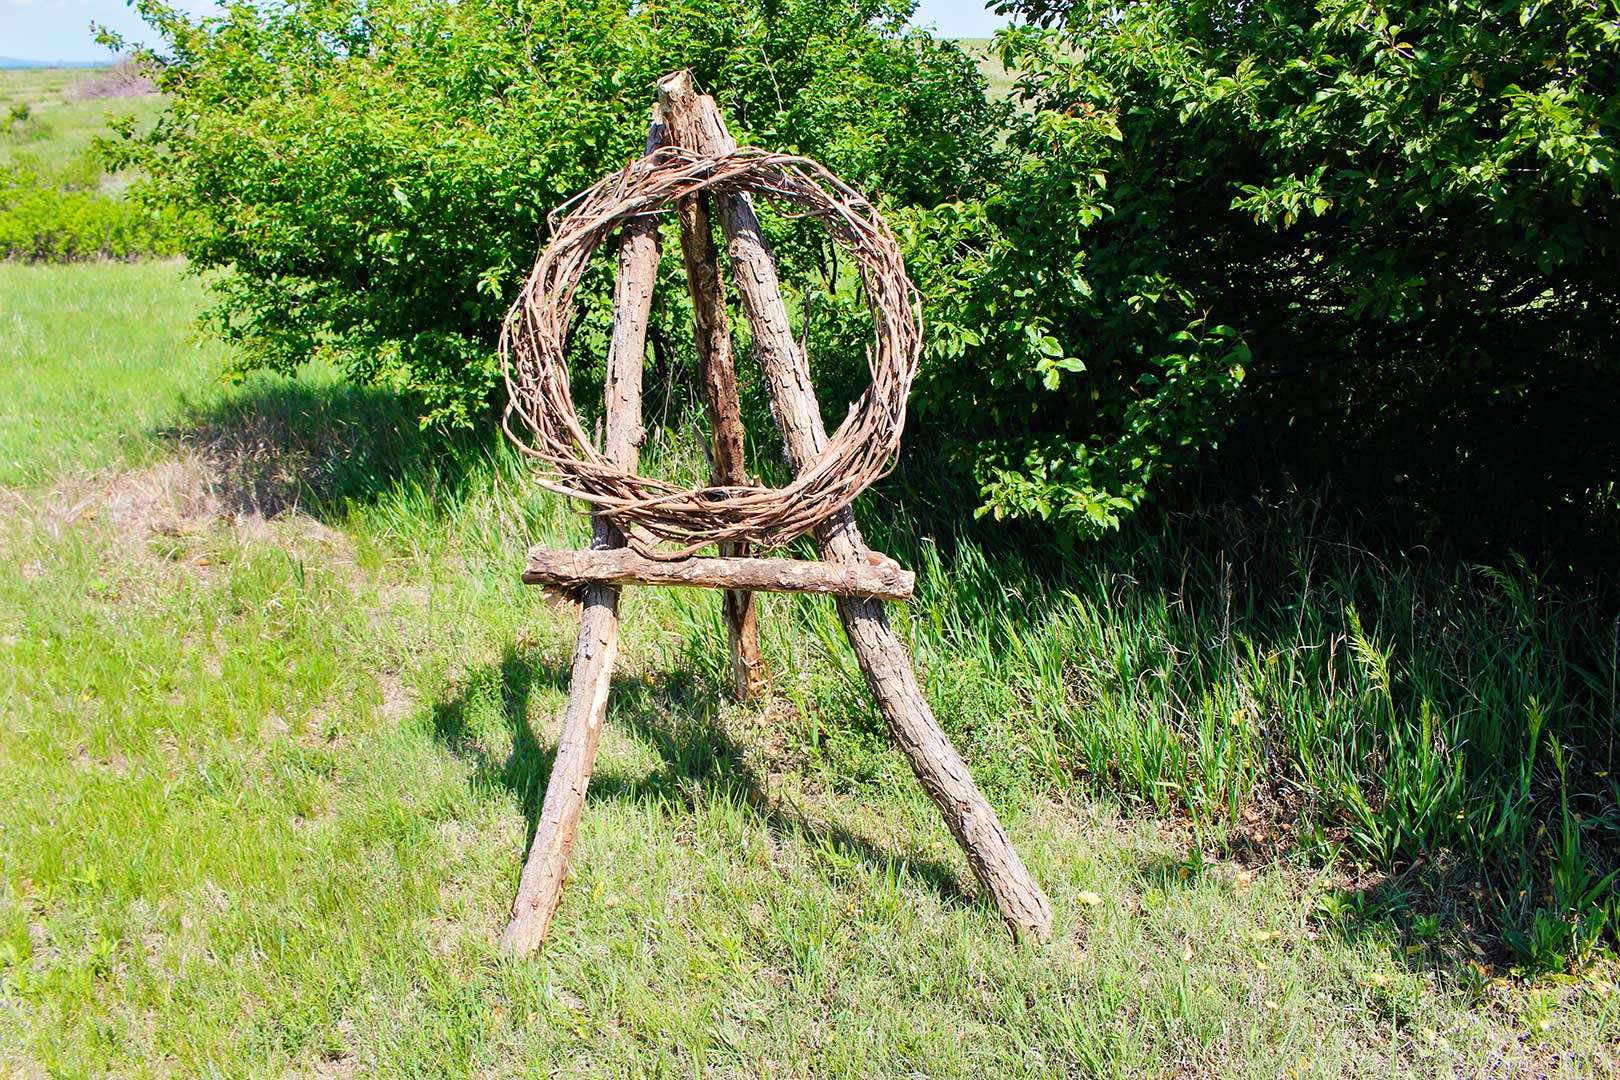
Outdoor Easel- jumbo size
Well, just for fun Papa helped me make a DIY easel from large branches. This one will be out in the yard for the summer.
I’m hoping to make a frame from old barn wood and add some flowers. But for now this grapevine wreath will do just fine!
The way we made it was using the same procedure as the tabletop easel except 6 times as large!
Large branches cut
The branches came from some pasture clearing that was done awhile back. Perhaps you could ask around to see if someone is going to or has done some tree trimming recently if you are interested in making a large easel.
Papa sawed the six branches off to about 6 feet long. They were about 4 inches in diameter at the largest end.
Bolt and nut for the top
He drilled a hole straight through the tops of the three branches that go side by side (smaller ends). We used an 8-inch bolt and nut to hold them in place. This wasn’t tightened too tight so that the branches would spread easily.
We stood it up with the center branch back and the front two branches forward, in a tripod. I kept working with the legs until it stood evenly and was sturdy.
Wire for the cross bars
The cross bars made of sticks are held in place with wire instead of twine. It worked in the same way as described above for the small easel.
We tightened the bolt at the top when the cross bars were done and the easel was standing the way we wanted. It wasn't real tight as the branches need to
Youtube option-
If you like watching on YouTube check it out here and hit "subscribe" while you're there: Tabletop easel from twigs
Thank you, Papa!
It didn’t take long to make with Papa’s help. Thank you again, Papa! He’s always up for one of my projects (well, almost always).
So as you can see, you can make an easel in any size you want.
Wedding easel, party easel...
I was thinking how well these would work for a party or wedding or any type of event. It would be an inexpensive way to make a number of easels when using the woodland or nature type of theme.
Please let me see the easels you create and how you will use them. I want to see pictures!!
Picture stand easel- picture projects
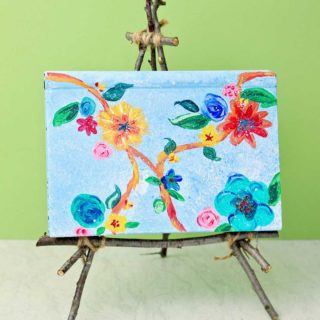
Why not paint a small picture to go on the easel you make! There are several ideas on Welcome To Nanas! I’ll post a few links for you!
This size tabletop easel best holds a picture that is 5x7 inches in size. If you paint a picture be sure to use a canvas that size or cut your paper to that size so you can place it on the easel you made!
- DIY Easy Abstract Heart Painting
- Easy DIY Watercolor Flower Card
- How to Make Beautiful Pressed Flower Art
- Torn Paper Mosaic Art
Enjoy!
If you try this craft, let me know! Go ahead and leave a comment, rate it, and tag a photo with #WelcometoNanas wherever you post.
Come join the fun at https://welcometonanas.com
DIY Tabletop Easel from Twigs
Equipment
- Garden clipper
Items Required
- 6 Twigs/sticks at least 1 foot long and about ½ inch in diameter at the largest point. Fairly straight.
- Twine- light weight (string or yarn will also work)
Instructions
- These sticks were about ½-inch in diameter at their thickest point. They were fairly straight as I mentioned before. You will need 6 twigs that are 1-foot long or a bit more.
- Take three of the twigs and clip each of them down in size to 1-foot long. Lay they side by side with all of the smaller ends together and all the larger ends together.Use a piece of twine to make a figure eight pattern around the top end of the twigs. This will be about 1 or 1.5-inches from the smaller ends of the twigs. Tie a knot in the twine on what will become the back of the easel. Clip the ends of the twine to about 1-inch in length. You can trim these down further when the easel is finished if you want.This forms a tripod- two legs forward, one leg back. Spread the legs out a bit so it stands up sturdily.
- Cut the last three twigs down to about 10 inches long. You will trim them even more after they are tied in place.We will start by tying two of the twigs to the back leg of the easel. This is a bit clumsy so it may be helpful to get someone to help hold these in place while you work.Position the two twigs about ⅔ the way down from the top of the easel, horizontal to the tabletop. They will be on the outside of the easel legs and cross in the back (one on each side of the tripod). See the picture.Using a figure eight winding, tie the two cross twigs to the back leg of the easel with twine. Tie a knot towards the inside of the tripod and trim the twine when you have it secured well.Tie the back leg of the tabletop easel
- Then take the third twig and place it crosswise in front of the two legs of the easel. It will kind of sit on top of the two side twigs already there.Keep working with the three tripod legs until you are happy with how they are positioned to be a good easel.Use a piece of twine and a figure eight winding to tie one of the side twigs and one end of the front twig to one leg of the easel. Tie a knot towards the inside of the easel. Trim twine ends.Then repeat that on the third leg of the easel.The front twig will be what your picture rests on for display! If you want to trim the ends of the cross twigs anywhere they stick out too far, go ahead and do so.
- Made a six foot tall easel from branches. Instructions at https://welcometonanas.com/diy-tabletop-easel-from-twigs
Video


Leave a Reply