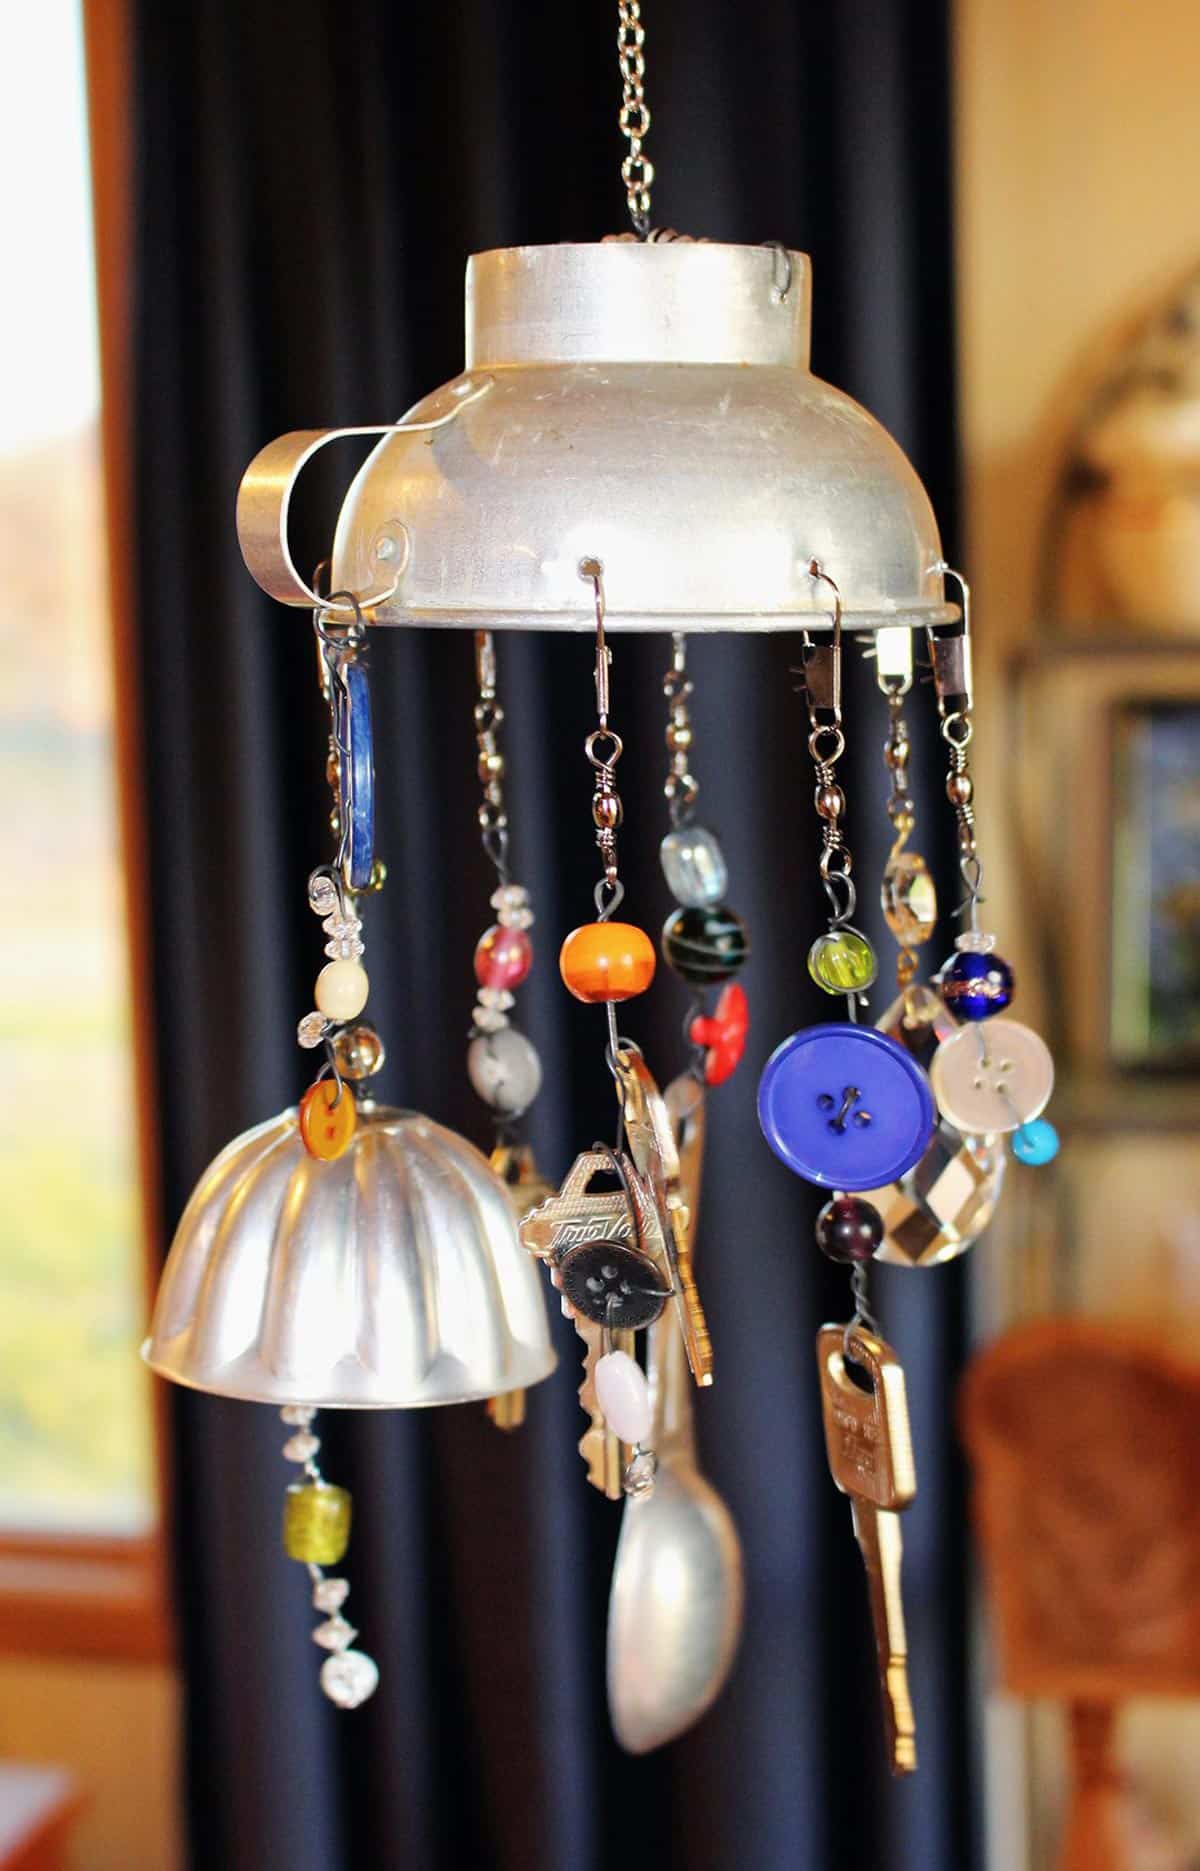
These whimsical DIY Wind Chimes use repurposed items to make a beautiful outdoor decoration that sings in the breeze! It's fun kids craft project that is easy to make with this step-by-step tutorial.

Jump to:
Recycled Craft for Kids: DIY Wind Chimes!
Summer breezes will make your whimsical repurposed wind chimes…well…chime! I love crafts that give old items new life and this is an excellent project to do just that.
These wind chimes make for a fun weekend project, a lovely gift, and look so cool on a post in a garden. Who do you know that would enjoy receiving one from you and your kiddos?
There is an infinite number of possibilities when making this easy project! The sky is the limit, so let the kids gather up some creative items to hang and let their imagination soar.
Supplies to Make DIY Wind Chimes for Kids
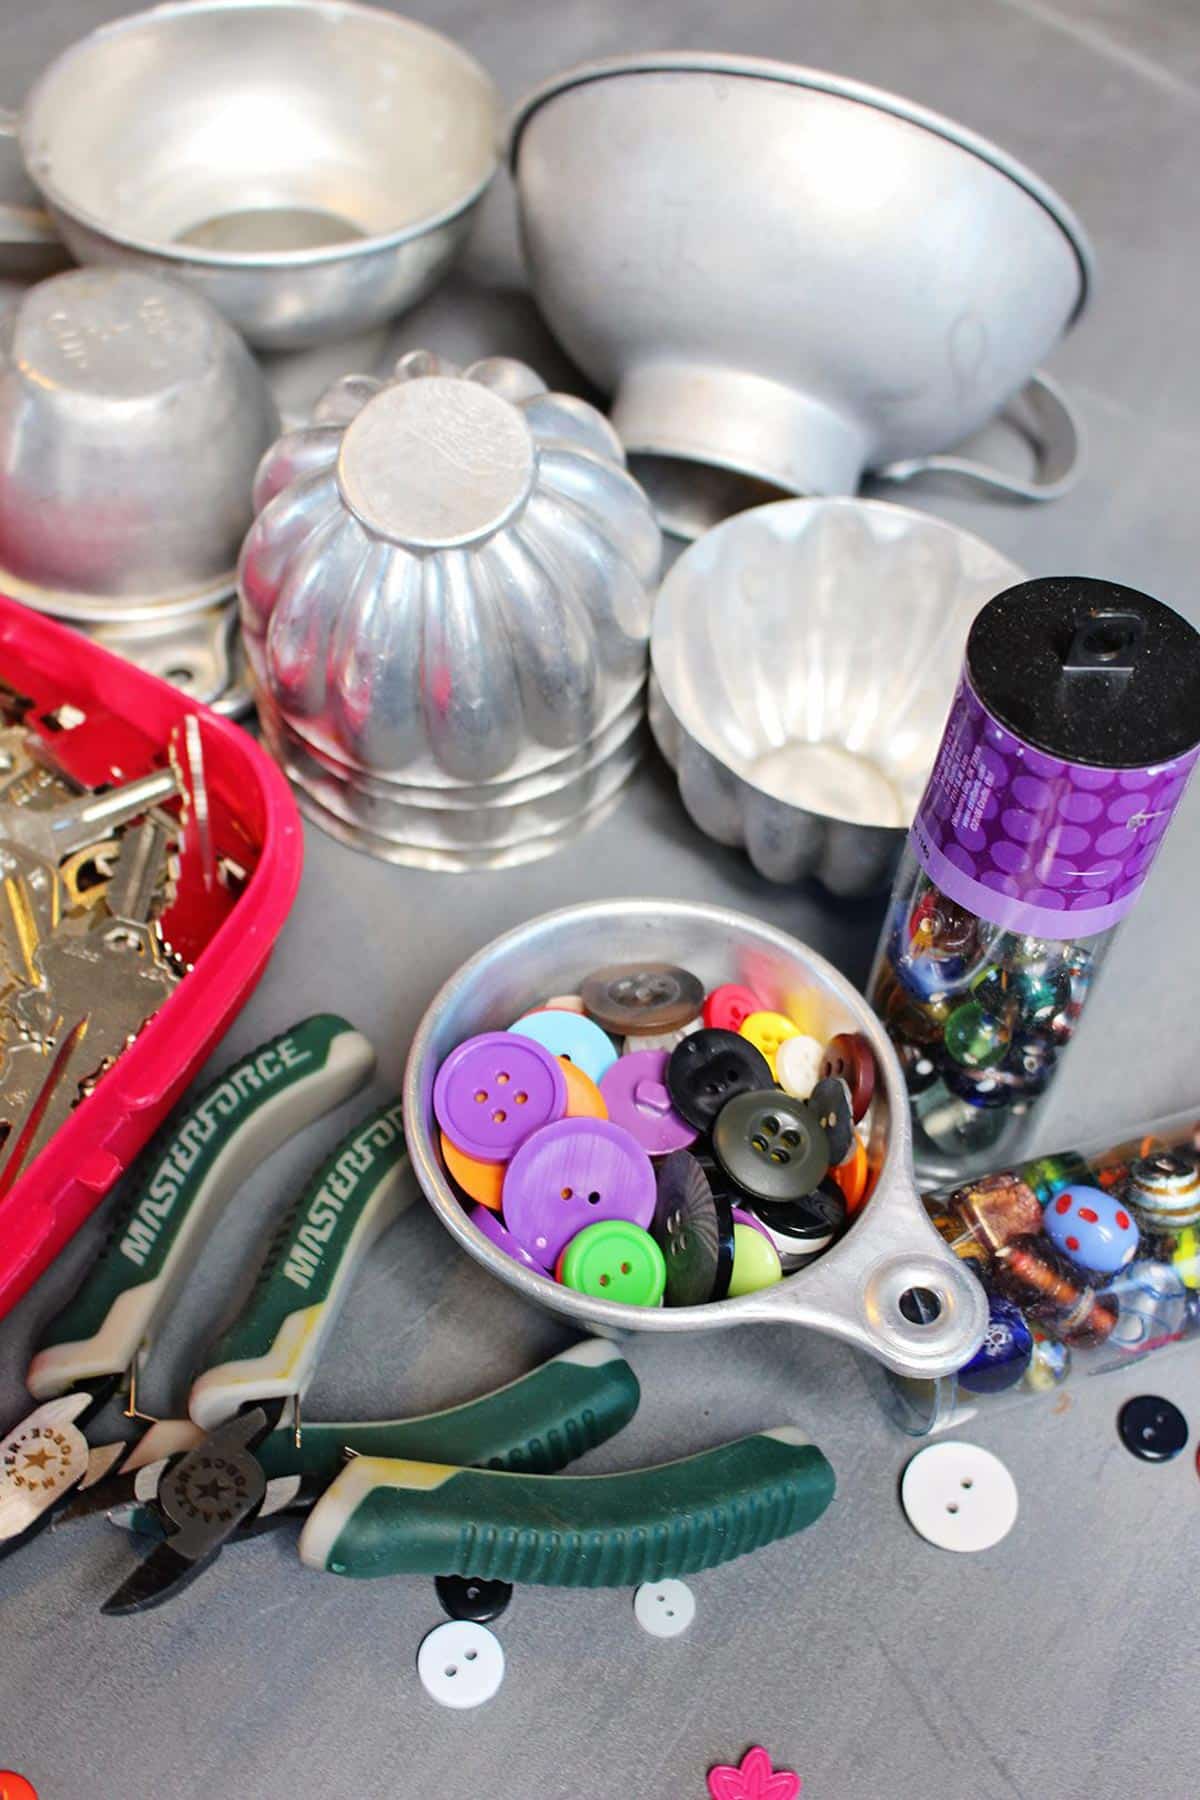
You don't need much to create your own wind chimes, and it's a great way to put random items from your craft closet or home to good use:
- Large Anchor Item: The larger item will be the top support for the entire wind chime. I used a vintage funnel, but you could use anything that fits your theme and can be punctured to attach some wire. You could try a metal bowl, large tin cans from the recycling bin, a metal flower pot, wooden circles, or even a piece of driftwood.
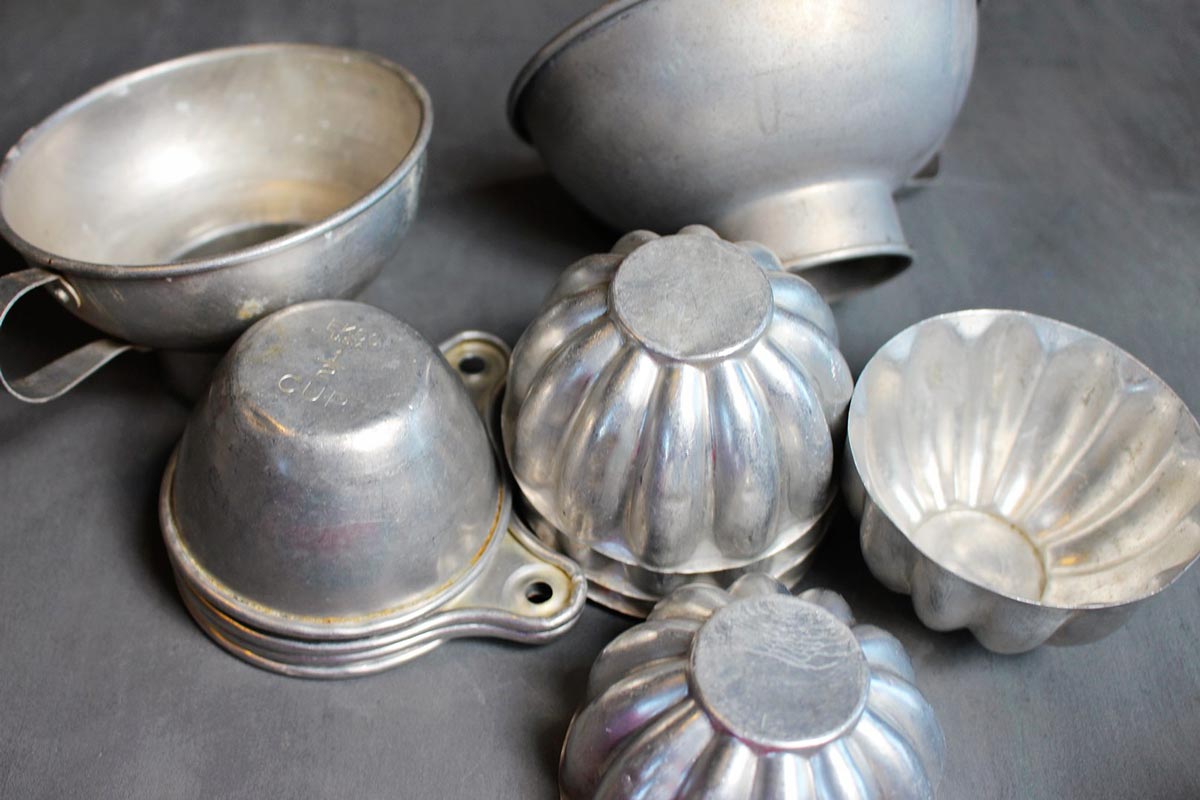
- Small Repurposed Items: These pieces will hang down below your anchor item and are really the stars of the show for your unique wind chime! Choose a collection of items in a theme of your choice or interest, or gather pieces that you think will make a beautiful sound. For example: old spoons, forks, jello molds, cookie cutters, sieves, funnels, wrenches, nuts, bolts, washers, old keys, etc,
- Beads and Buttons: Choose some assorted decorative additions such as sewing buttons, pony beads, glass beads, wooden beads, bells, sea shells, or even bottle caps punched or drilled with a center hole.
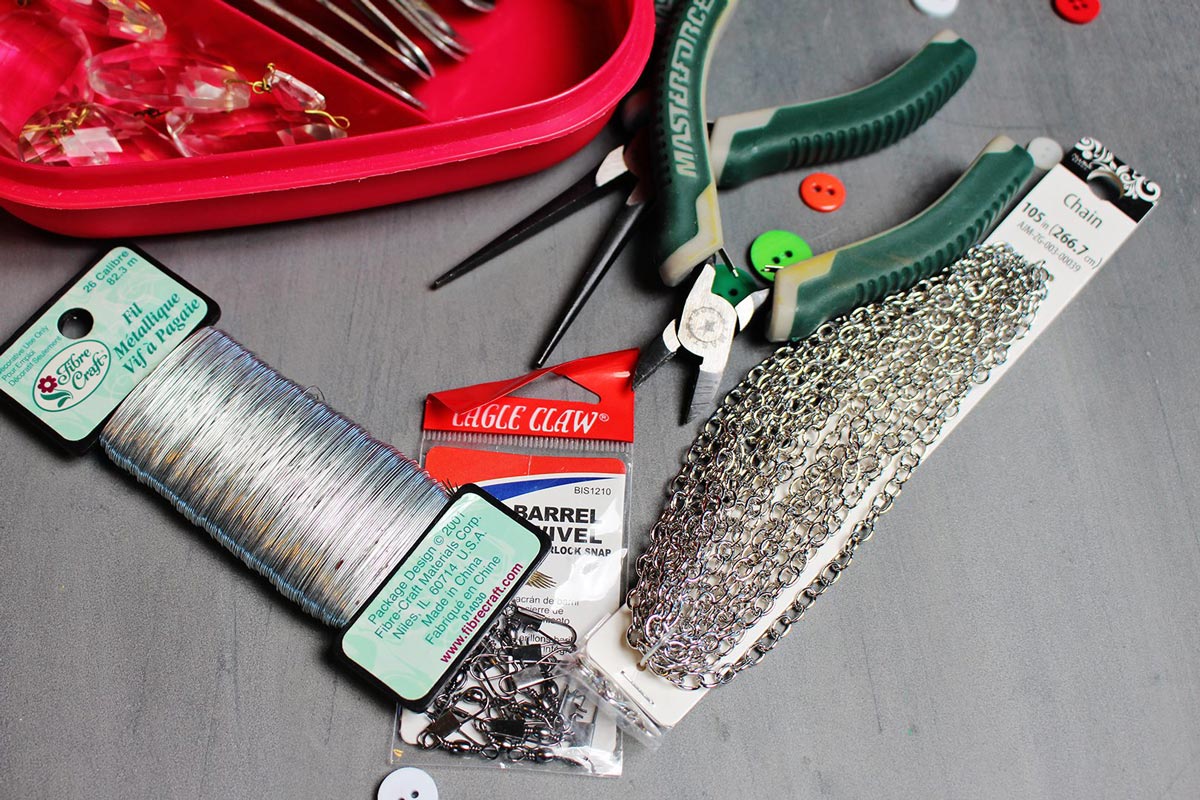
- Fishing Line: This is the best string for lighter items hung where there is less wind.
- OR Light to Medium Wire: Use if your items are heavier, or if you'll be hanging your project in an outdoor space with some wind. You should be able to find this at craft stores or a hardware store like Home Depot.
- Fishing Swivels: Purchase swivels with interlock snap (size 5 worked well for me) if you want your items to have flexibility to move around a bit. Alternatively, you could try using a paper clip or piece of string or wire, or even eye hooks if you are using a drillable wooden piece as your large anchor item.
Steps to Make Repurposed Wind Chimes
Because I don’t know what you will creatively find for your whimsical repurposed wind chimes I can’t give exact instructions for each step. Instead, I will explain the basic principles and you can creatively find ways to make it work with your items!
As a basic structure, the larger item will be the top support for the entire wind chime. The smaller items will be hung from this larger item and will need to balance once those smaller items are connected. There will also need to be a way to hang the larger item and get it to balance as well.
This is a great problem solving exercise! Let's dive in.
If you would like to see the process used in making a wind chime like in these pictures you can follow along on the YouTube video at this link: Whimsical DIY Wind Chimes Tutorial.
Hang the Large Anchor Item
Let’s start with hanging the large anchor item.
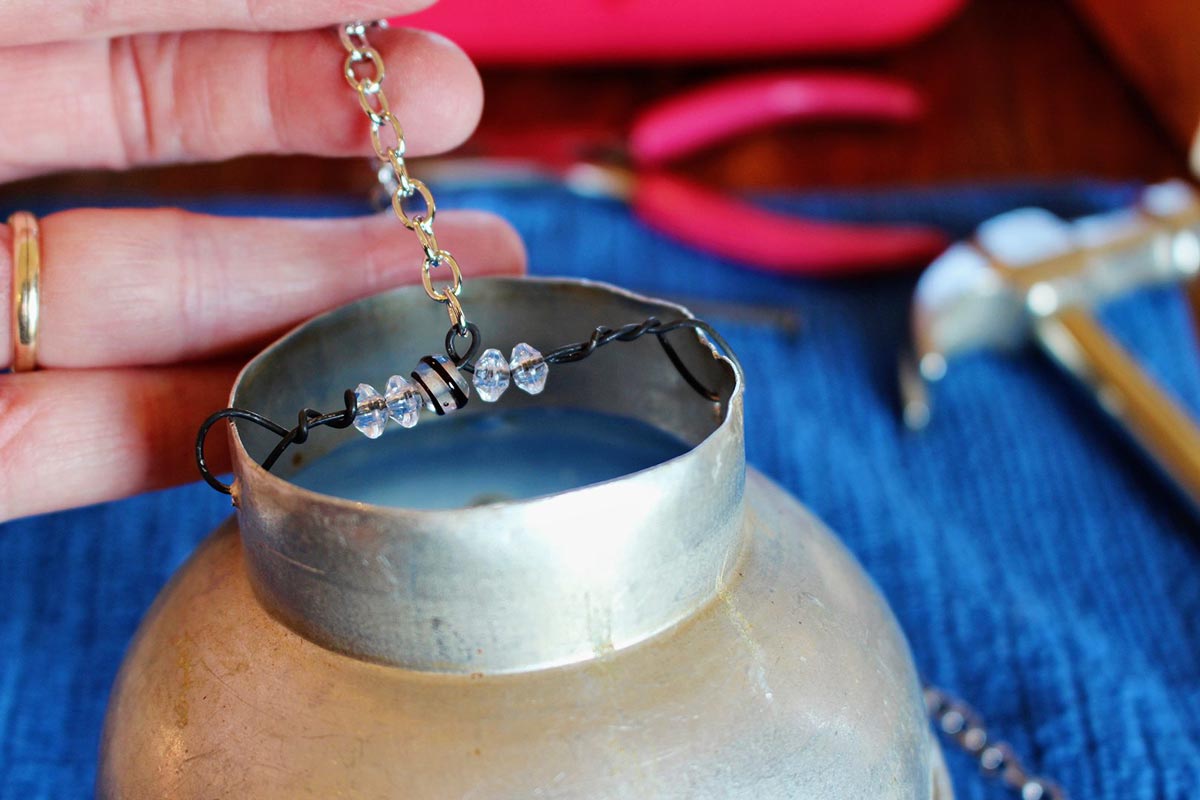
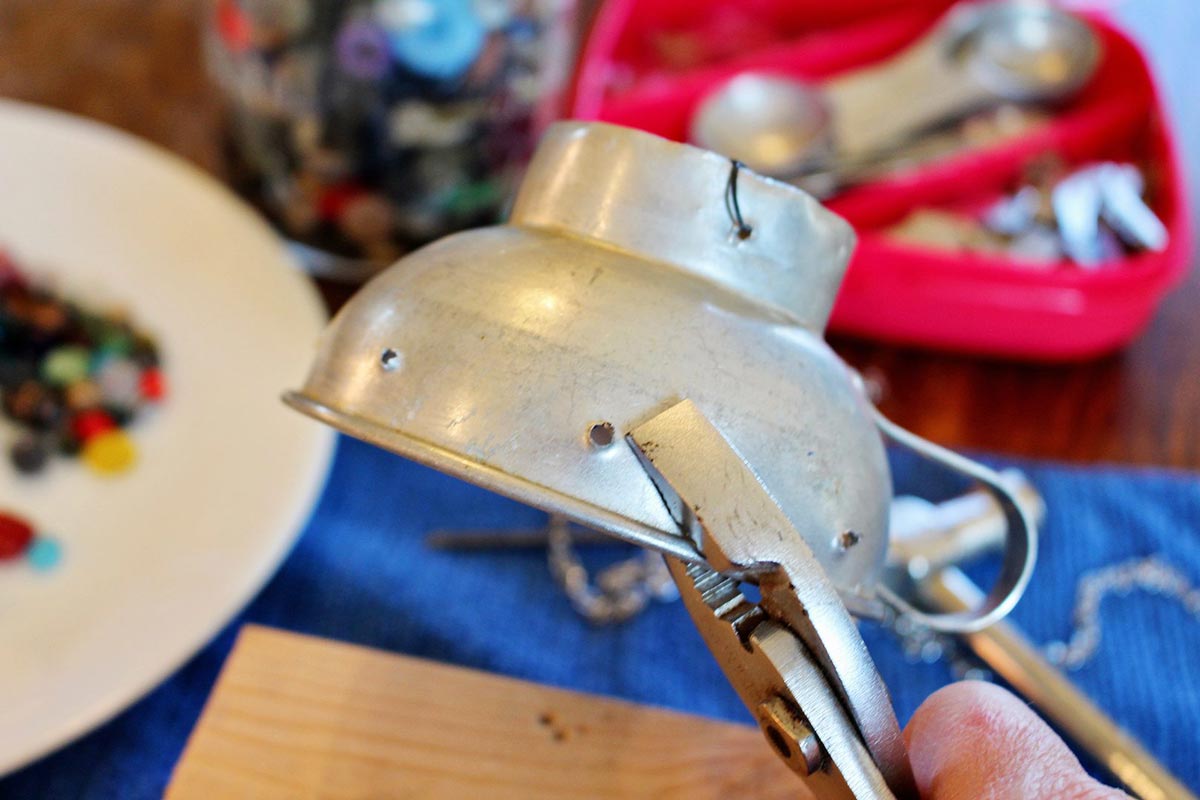
Use a nail and hammer to punch (or drill and drill bit) small holes as needed throughout the project. Make the necessary holes to hang your anchor, then use a loop of wire, a chain, or fishing line to balance the large item.
Add some decorative beads as well, if you'd like!
Prepare Smaller Decorative Items
Now it's time to prepare your fun repurposed items!
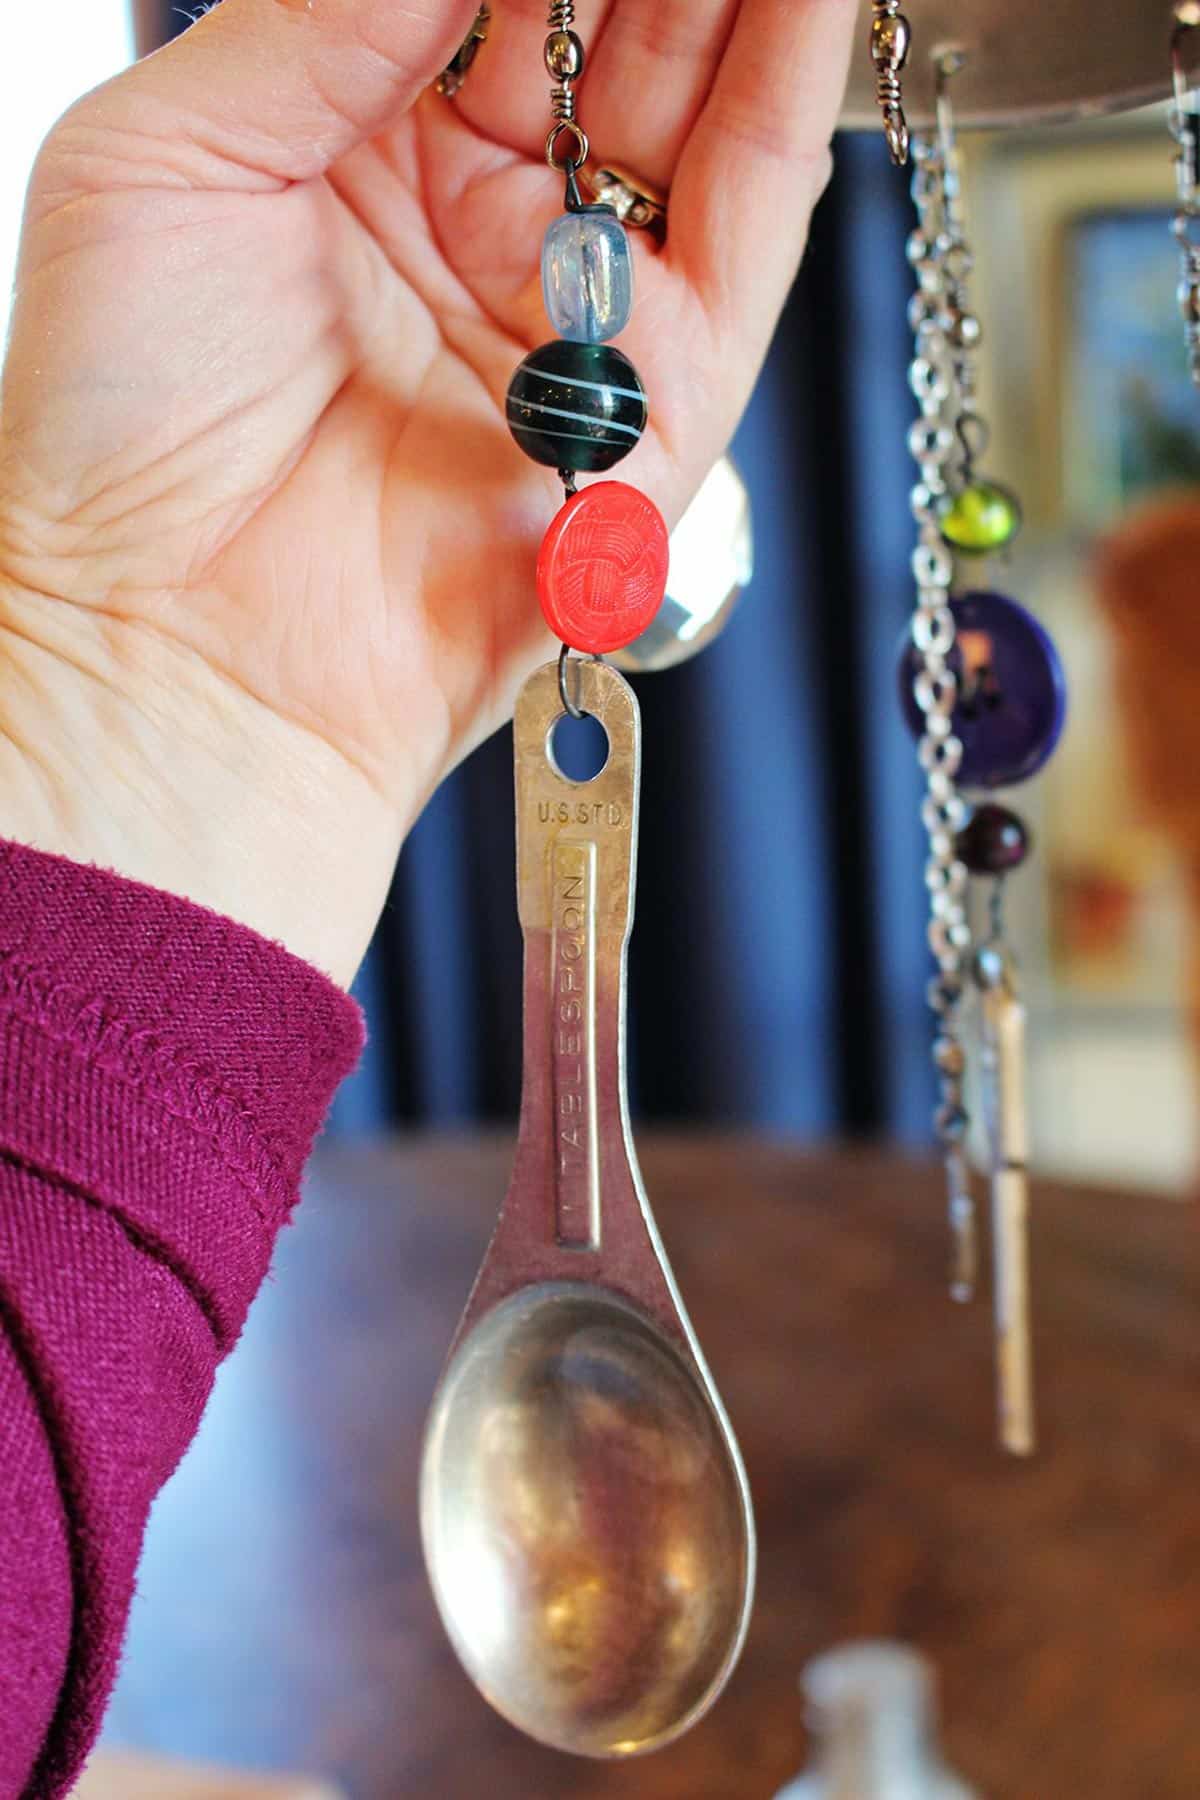
Drill holes in the items as needed, then attach to the end of the fishing line or light to medium weight wire to hang the pieces. Depending on the item, it may hang vertically or horizontally on the end of the string.
You can string items in a pattern or random order, but I would hang at slightly different lengths so you have some variation. Just make sure your shortest chime will still hit a long piece around it to make some pretty noise!
As you create, you can string and twist on beads and other items as desired for decoration.
Tie each top of the wire or line to a fishing swivel and clip. The swivel will allow the wind chime to rotate when blown by the wind.
Balance Smaller Decorative Items
Depending on the design of your top item, drill holes around the outside edge (or choose locations along the item) to tie the lengths of string or wire. Keep in mind that you want the main piece to hang nicely as you attach the smaller items.
Now attach your smaller items to the holes in the larger anchor, one by one. Again, you can use wire that is strung or twisted with beads for decoration.
Work to balance the smaller items so that the larger anchor remains balanced, attaching with those fishing swivels as you go. There's no wrong way to do this, just have some fun!
Craft Tips
Here are a few tips to help you along the way as you create these wind chimes!
- Shop From Your House First: As the kids hunt for items to make their whimsical wind chimes, start by looking throughout the house! Search through your kitchen cupboards, junk drawers, garage, or craft closets to find fun and unique items. This is such a great project for using up those random items sitting around the house!
- Purchase items Secondhand: I had this project in mind a long…long…time, so I’ve had time to gather up a lot of repurposing options for my first time. But if you are still needing some good pieces, a trip to your local thrift store is also a great source of items to repurpose. The kids may just find the perfect thing for their creative process and rarely have I spent more than a dime or quarter for each item.
- Drilling Holes: If the item doesn’t have holes already present, you may need to use the nail and hammer (or drill) on a wooden block to punch a hole in the appropriate places. Younger kids will need some help with this step.
- Balancing Items: Every set of items is unique, so you will need to be a creative problem solver to design an interesting and balanced piece. Remember that if you are making large wind chimes and your pieces are bigger, use heavier wire to support the weight, especially if it will be outside in higher wind.
- Consider the Weather: If your wind chime is going to be out in the elements, consider making it weather resistant!

Craft Variations
Want to switch things up? Here are a few ways you can customize and play with this craft.
- Choose a Theme: Pull together a group of objects that will work well together. A group of kitchen items, old toys, or a group of shop items works great. One of the items will be larger and will be the upper frame of the wind chime. This may be a larger wrench, copper pipe, or funnel for the shop items or a colander or larger sieve for the kitchen items.
- Add Extra Color: If you want an extra colorful wind chime, you could paint or spray paint your repurposed items a different color before hanging. With the addition of some bright colors of bead strands, it could be a fun way to theme or mix up your beautiful decoration.
- Play With Length: I went with only one layer of items hung from the anchor piece, but how about extending the length a bit more? I was thinking it could be cute to hang a second bowl or funnel below the primary anchor item to give even more spaces to hang different materials. Almost like a second wind chime within the first!
- Play With Sound: Personally, I think the metal kitchen items make such a wonderful sound in the wind! But kids could choose other items that make fun and unique sounds too.

FAQ
The fun thing about homemade wind chimes is that you can use all sorts of items to create them! I love repurposing old kitchen or shop items, they make pretty sounds and it's an easy way to give old items a second life! If you don't see what you like around your house, you can fine fun pieces from your local craft store or thrift store.
The best items to use in a repurposed wind chime are ones that will make pretty sounds when they are blown in the wind! I like using metal items such as old silver spoons or other kitchen pieces (the perfect way to give older pieces a new life). You can also add a type of bell that fits your preference of sound, or even beads or glass pieces (without sharp edges) that will mesh well with the soft clinking sound of the beads.
If you are using light items and won't be hanging your wind chimes in a location with high wind, I recommend using fishing line. However if you are using heavy items to create your wind chimes, switch to a light or medium wire. This will hold up better in a windier environment as well!

More Recycled Crafts for Kids
Looking for more great upcycled crafts and easy DIY projects for kids? Here are a few favorites for you to try:
- DIY Sit-Upon Cushion from a Reusable Shopping Bag
- How to Easily Make Recycled Paper at Home
- DIY Twine Wrapped Upcycled Bottle Vases
- Fast Upcycled Picture Frame Photo Board
Enjoy!
If you try this craft, let me know! I’m so eager to see what you come up with. Go ahead and leave a comment, rate it, and tag a photo with #WelcometoNanas wherever you post.

Whimsical Repurposed DIY Wind Chimes
Equipment
- Drill and Drill Bit or Hammer and Nail Used to create holes in items to hang
- Needle nose pliers Used to twist wires
Items Required
- 1 Large Anchor Item For Example: a metal bowl, large tin cans from the recycling bin, a metal flower pot, wooden circles, or even a piece of driftwood
- Small Repurposed Items For example: old spoons, forks, jello molds, cookie cutters, sieves, funnels, wrenches, nuts, bolts, washers, old keys
- Beads and Buttons
- Fishing Line For light items and low wind
- Light to Medium Wire For heavier items and higher wind
- Fishing Swivels Swivels with interlock snap (size 5 worked well for me)
Instructions
- As a basic structure, the larger item will be the top support for the entire wind chime. The smaller items will be hung from this larger item and will need to balance once those smaller items are connected.
- Use a nail and hammer to punch (or drill and drill bit) small holes as needed throughout the project.
- Make the necessary holes to hang your anchor, then use a loop of wire, a chain, or fishing line to balance the large item. Add some decorative beads as well, if you'd like!
- Drill holes in the items as needed, then attach to the end of the fishing line or light to medium weight wire to hang the pieces. Depending on the item, it may hang vertically or horizontally on the end of the string.
- Tie each top of the wire or line to a fishing swivel and clip. The swivel will allow the wind chime to rotate when blown by the wind. As you create, you can string and twist on beads and other items as desired for decoration.
- Depending on the design of your top item, drill holes around the outside edge (or choose locations along the item) to tie the lengths of string or wire.
- Now attach your smaller items to the holes in the larger anchor, one by one. Again, you can use wire that is strung or twisted with beads for decoration.
- Work to balance the smaller items so that the larger anchor remains balanced, attaching with those fishing swivels as you go.
Notes
This post was originally published in April 2020 and has been updated to add more relevant and detailed content.


Gail Porter says
I love these windchimes! Have been trying to make some out of anything and everything. You give me great ideas! Thank you!
Shelly says
I was just thinking about that today- all the things that a person could use. What a fun way to recycle "stuff" from the shop or garage! I first saw a wind chime like this in a friend's yard. I was smitten! Thanks for the encouragement- you are why I do this!!
Diana Valle says
Wow!!!! Great ideas!!!!
Laura says
What a creative way to repurpose vintage items!