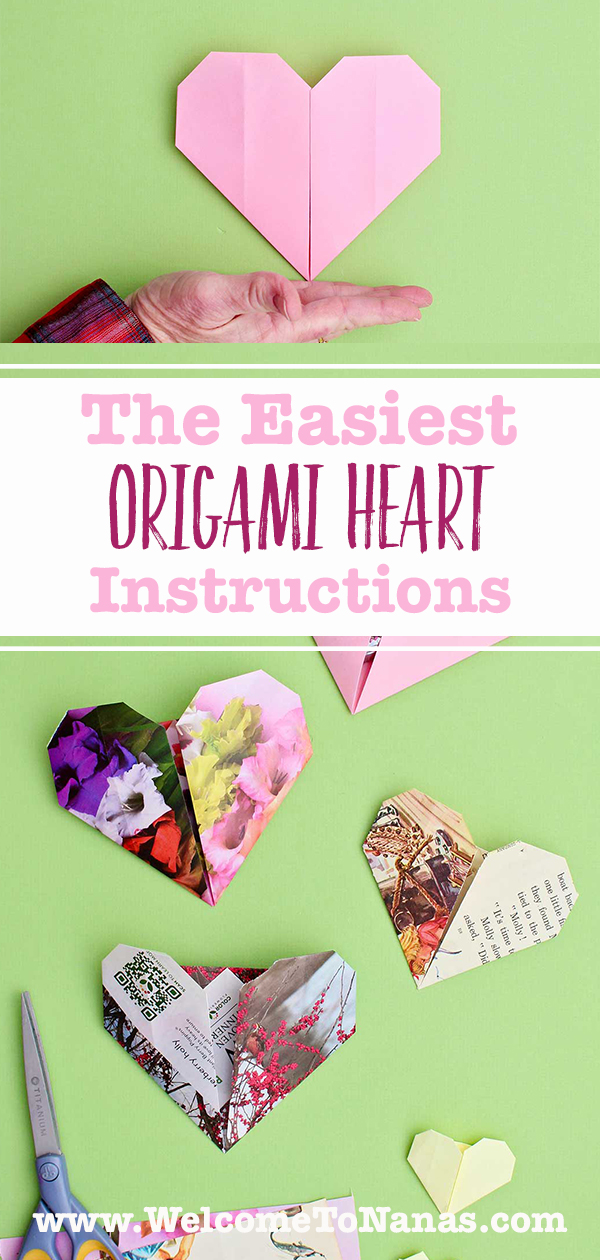
The Easiest Origami Heart Instructions will help an absolute beginner fold an origami heart in five minutes or less! I’ve made hundreds of origami hearts and this is the easiest way I’ve found to do so. If your paper is already cut into a square it will be even faster.
Jump to:
- Origami Paper Heart Craft
- Cute Craft Alert: Easy Origami Heart
- What You Need for Your Heart Origami
- How to Make an Origami Heart: The 7-Step Beginner Fold
- Troubleshooting Origami Hearts
- Craft Variations
- Creative Uses for Your Paper Hearts
- Mastered the Easy Heart? Try the Origami Heart with Pockets!
- FAQ About Heart Origami
- More DIY Origami for Kids
- Come join the fun at WTN!
- More Crafts Please!
- The Easiest Origami Heart Instructions
Origami Paper Heart Craft
This is the perfect activity for all ages- sit around the table together making origami hearts to give as Valentines. Your friends and family will love getting them.
Spoiler alert, I show you a second bonus way to fold a heart after you’ve mastered the easiest one so you’ll have even more ways to use the origami hearts. Stick around to learn that one too!
On your mark, get set, let’s go fold!
Cute Craft Alert: Easy Origami Heart
Even after 60 years of heart making, I never tire of Valentines. Our kids loved making origami hearts and tucking them into friend’s lockers or decorating cards with them. I loved taping them on things- windows, doors, mirrors...with notes of encouragement and love.
The world could use a big dose of encouragement. A personal note written on a heart and given with a hug is a good start. Spread the love!
What You Need for Your Heart Origami
The only thing you have to have is paper. Cool, huh?
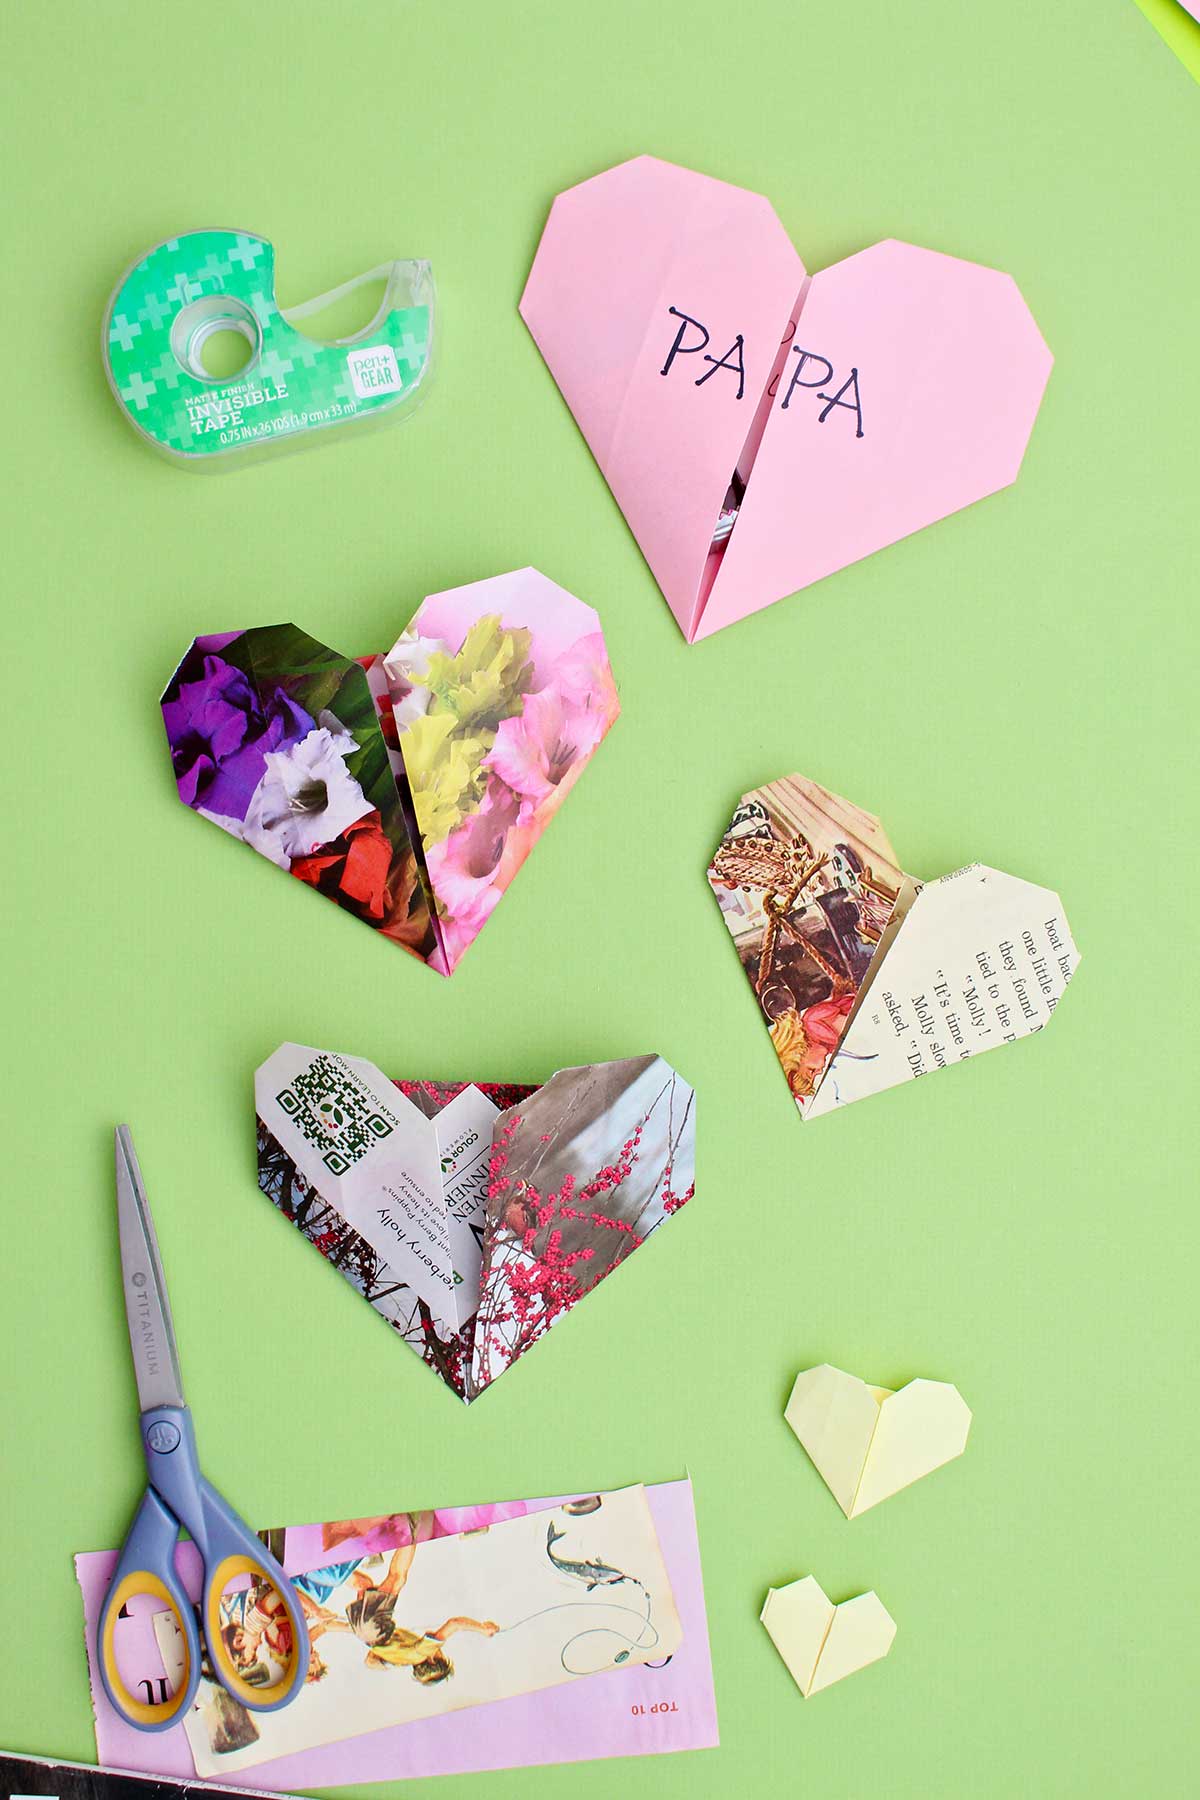
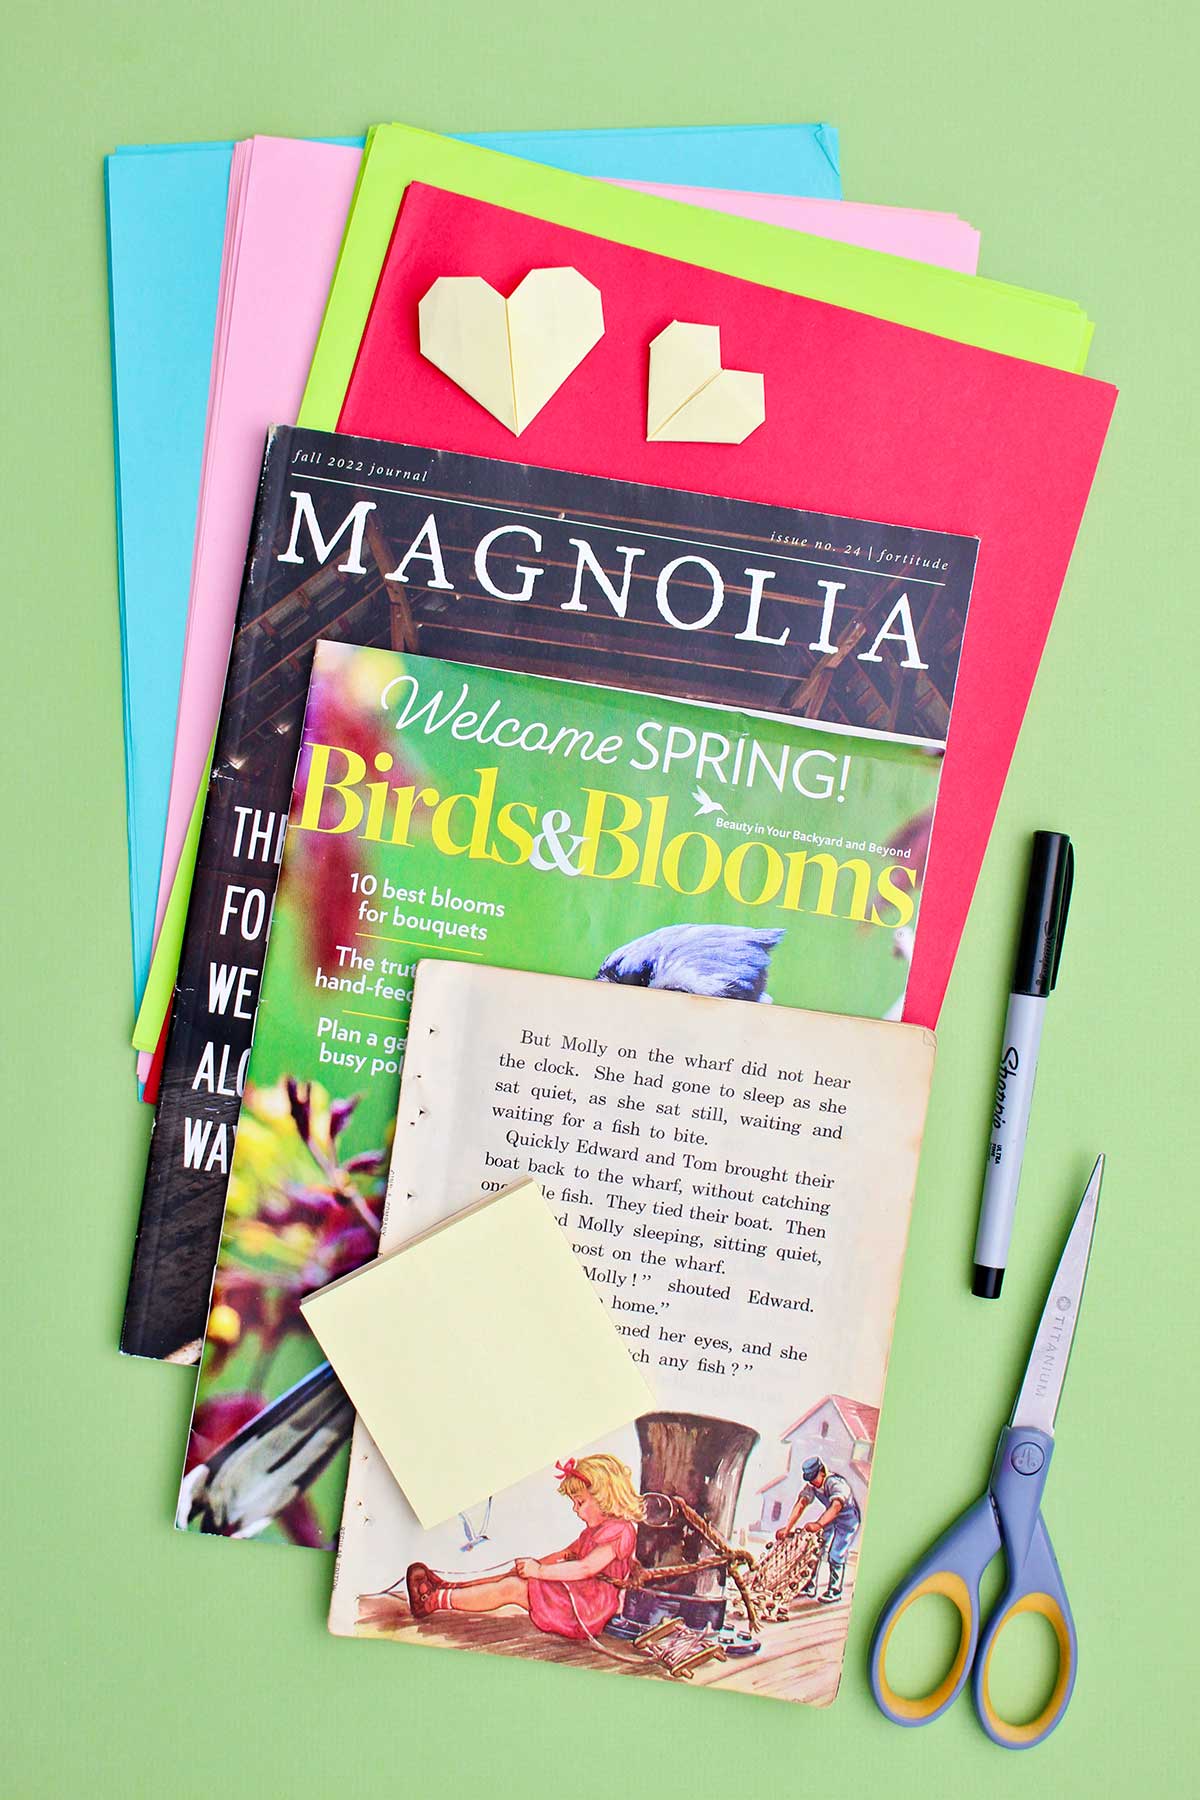
- Paper!- I used colored copy paper to start with and then used other types of paper for variation. You can use origami paper, scrapbook paper, card stock , or other recycled paper.
- Scissors- You will use scissors to cut the paper into a square.
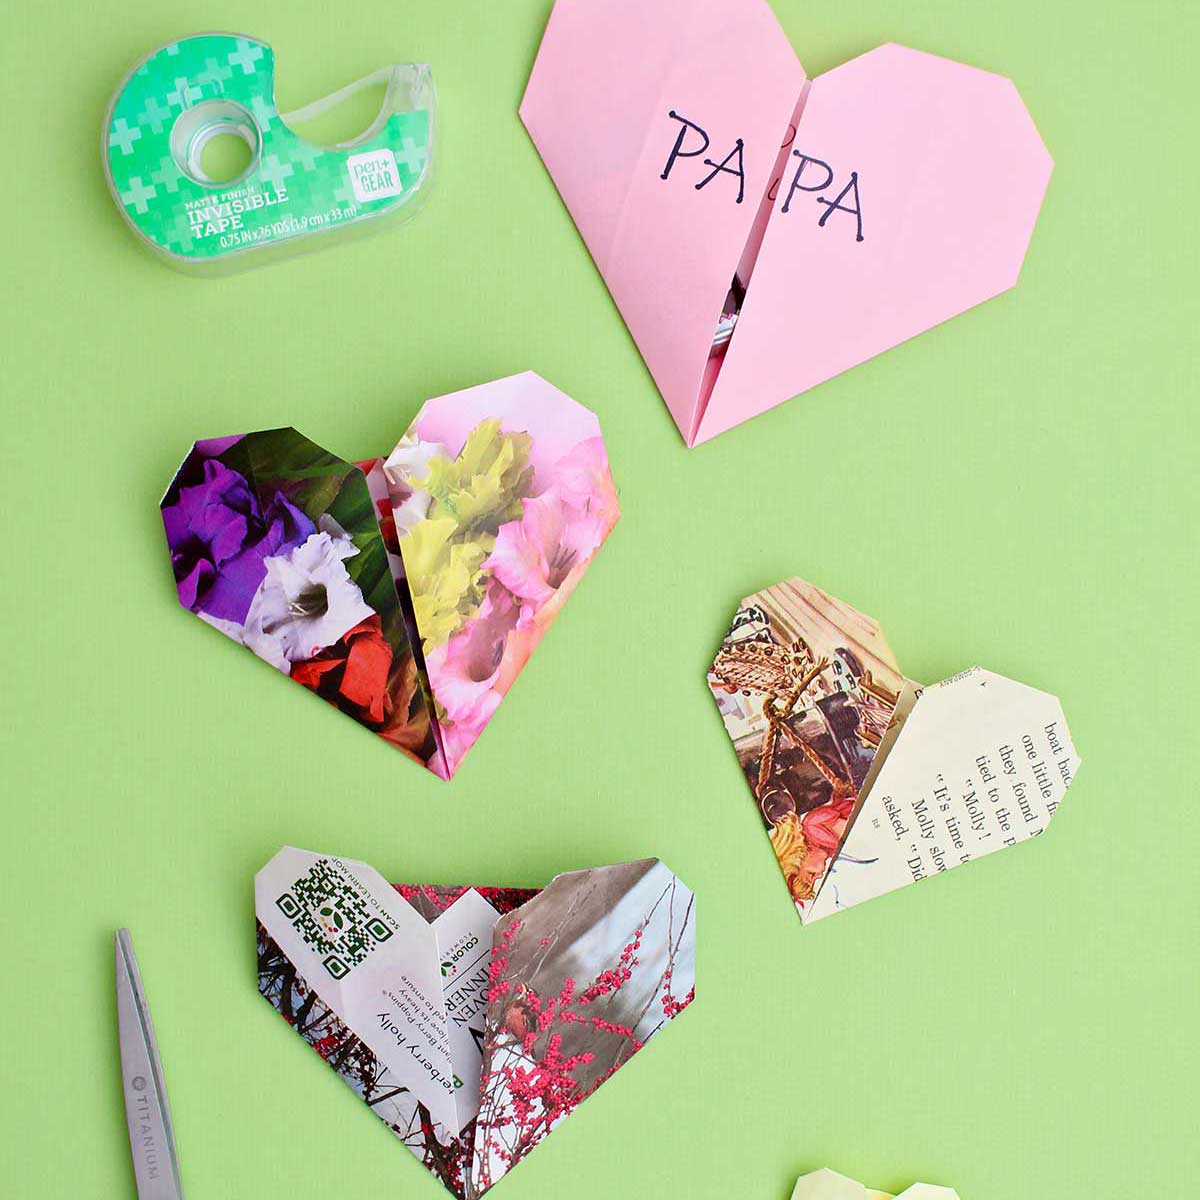
- Coloring supplies (optional)- Decorate your hearts with colored pencils, markers, or crayons .
- Black permanent marker (optional)- Write a message on the heart with a black permanent marker.
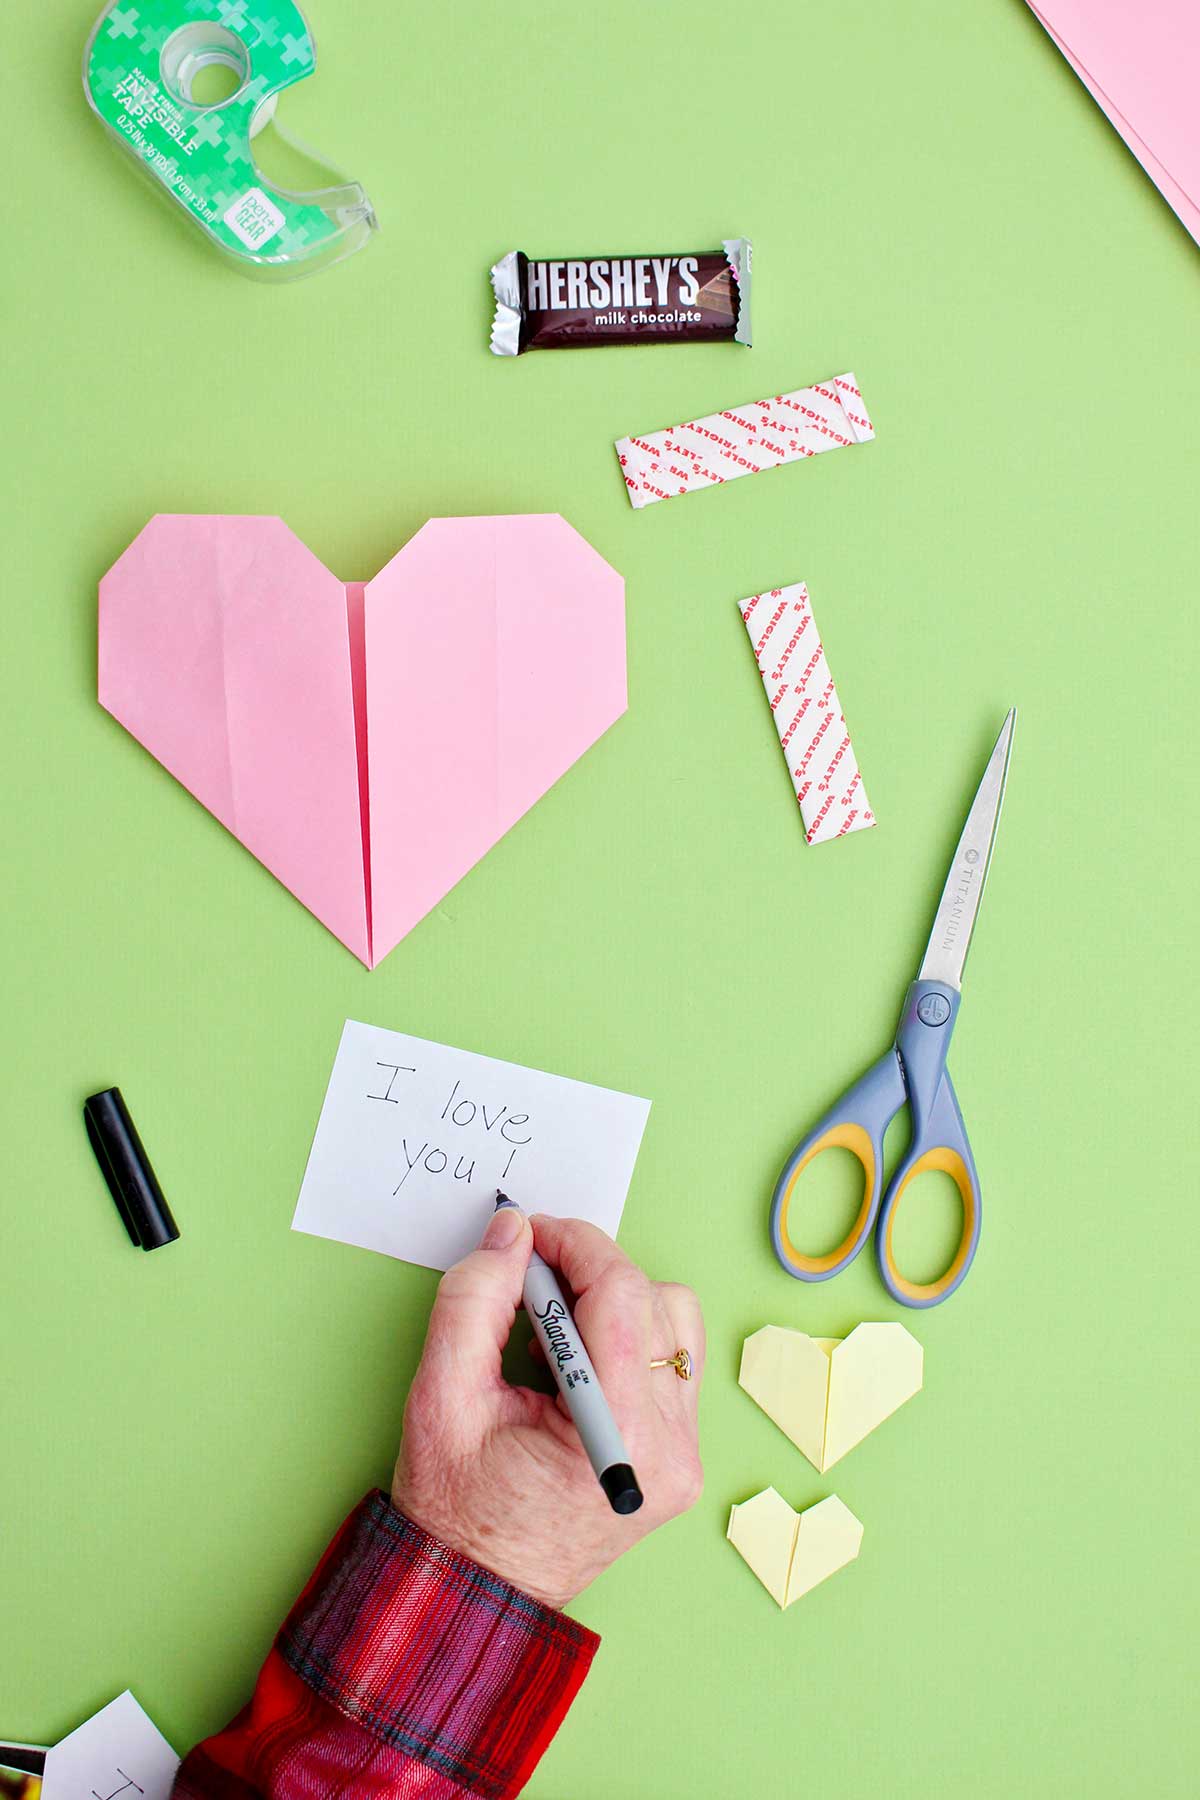
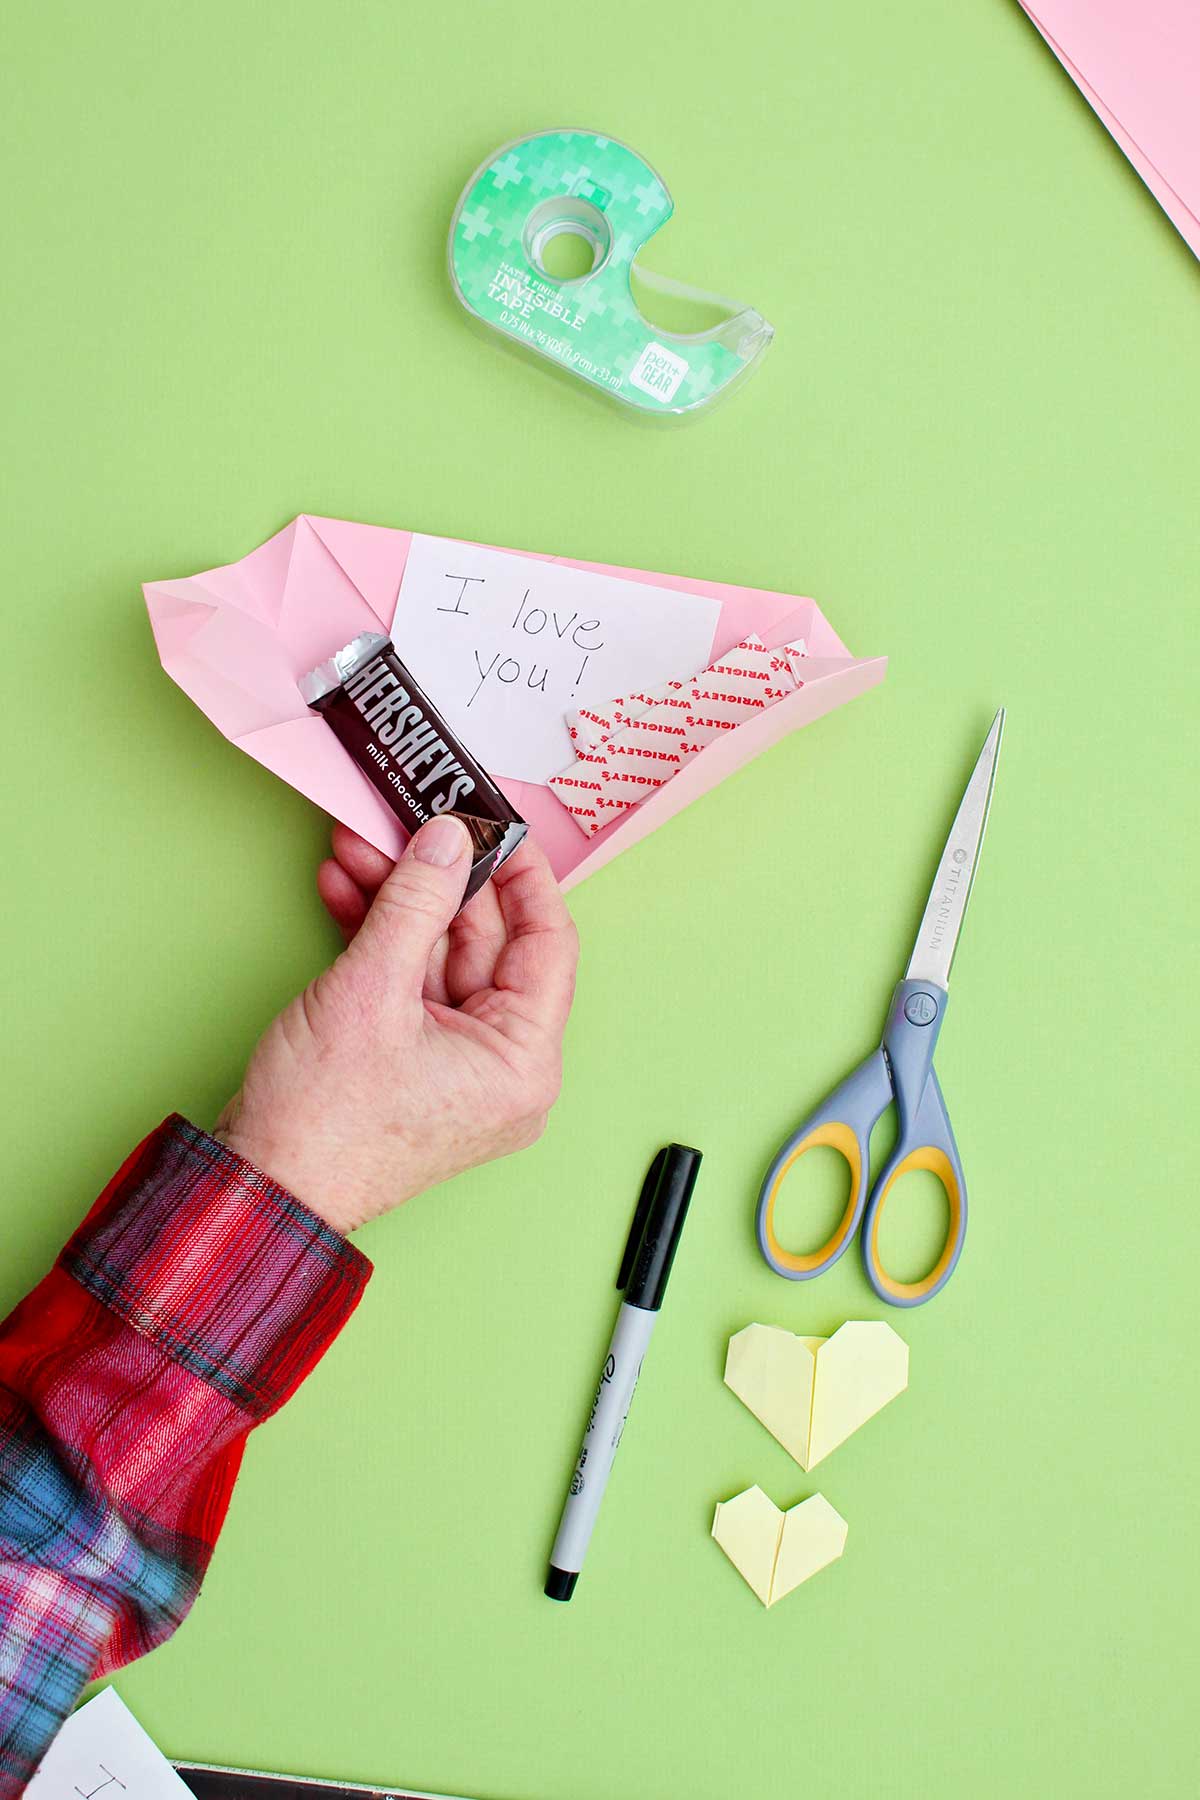
- Goodies (optional)- Small flat items to slip in the hearts like stickers, sticks of gum, flat candy (snack size flat bars like a Hersheys), a paper note, etc.
- Clear tape (optional)- Clear tape will hold small items inside the heart if you choose to do that.

The Secret to Picking the Best Paper
The secret to choosing the perfect paper for your easy origami heart is thinking about the purpose of your heart, how you will use it in the end. Look at the "Creative Uses for Your Origami Heart" section to see all the ways you can use these hearts, that will give you ideas.
- You need larger paper for larger hearts of course, so to make bigger hearts scrapbook paper would work well (12x12 inches). There are so many cool designs too.
- Heavier cardstock paper is good for a heart that you’ll use to slip in small items for a valentine (8.5x8.5 inches).
- A variety of paper sizes, types and patterns works well for a garland- think book pages, magazine pages, various colors of copy paper, etc.
- Some magazine pages are very light weight. So you may want to avoid the very lightweight paper and find magazines with heavier weight paper to use.
- Origami paper is already cut in squares. Most of my origami paper is smaller squares so they make smaller hearts of course. I have origami paper with designs as well as plain colors which is nice.
How to Make an Origami Heart: The 7-Step Beginner Fold
To follow along with me, check out the full YouTube video at this link: The Easiest Origami Heart Instructions ( & fun ideas how to use them!)
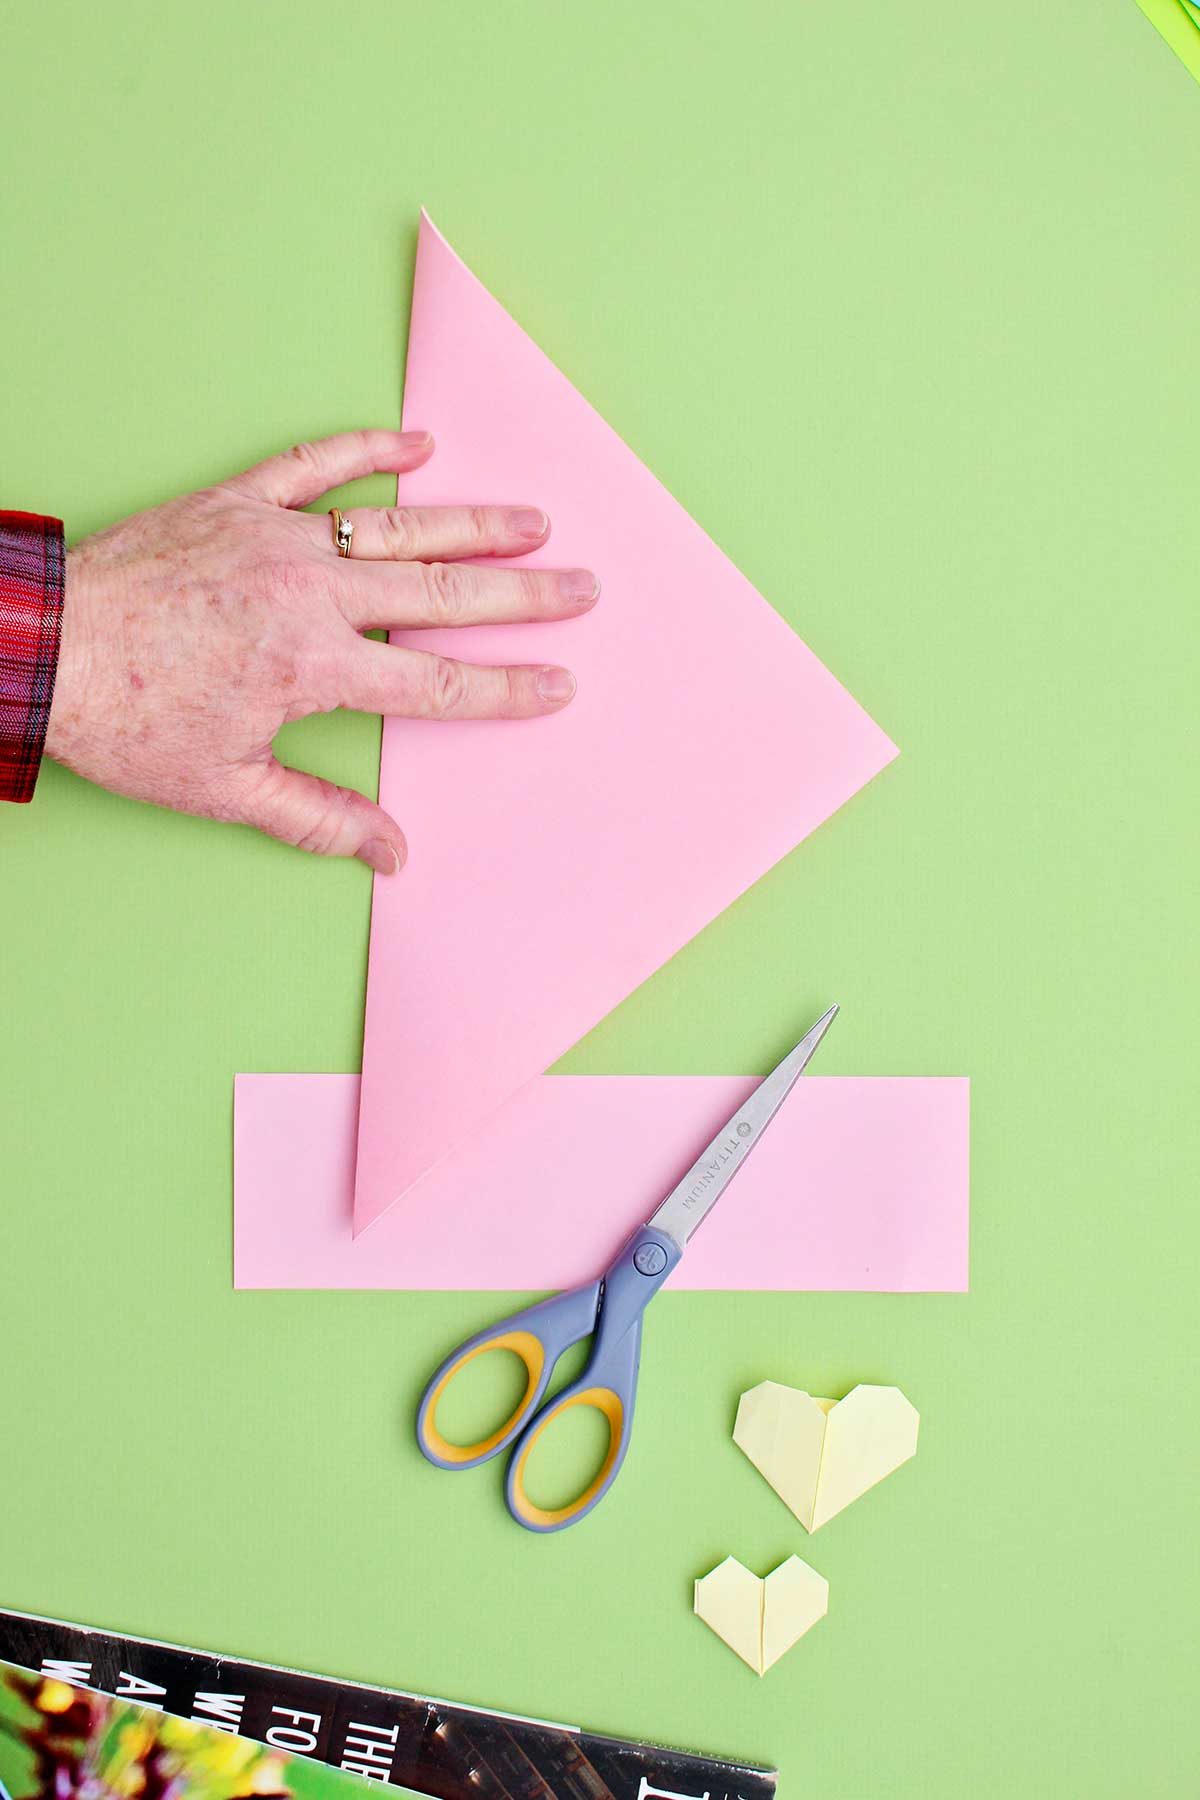
- Step 1: Cut your paper into a square.
- Step 2: Fold the paper in half diagonally one direction and open it up. Then fold diagonally in the other direction and open it up. This makes an “X” fold in the paper. Turn the paper so it looks like a diamond in front of you.
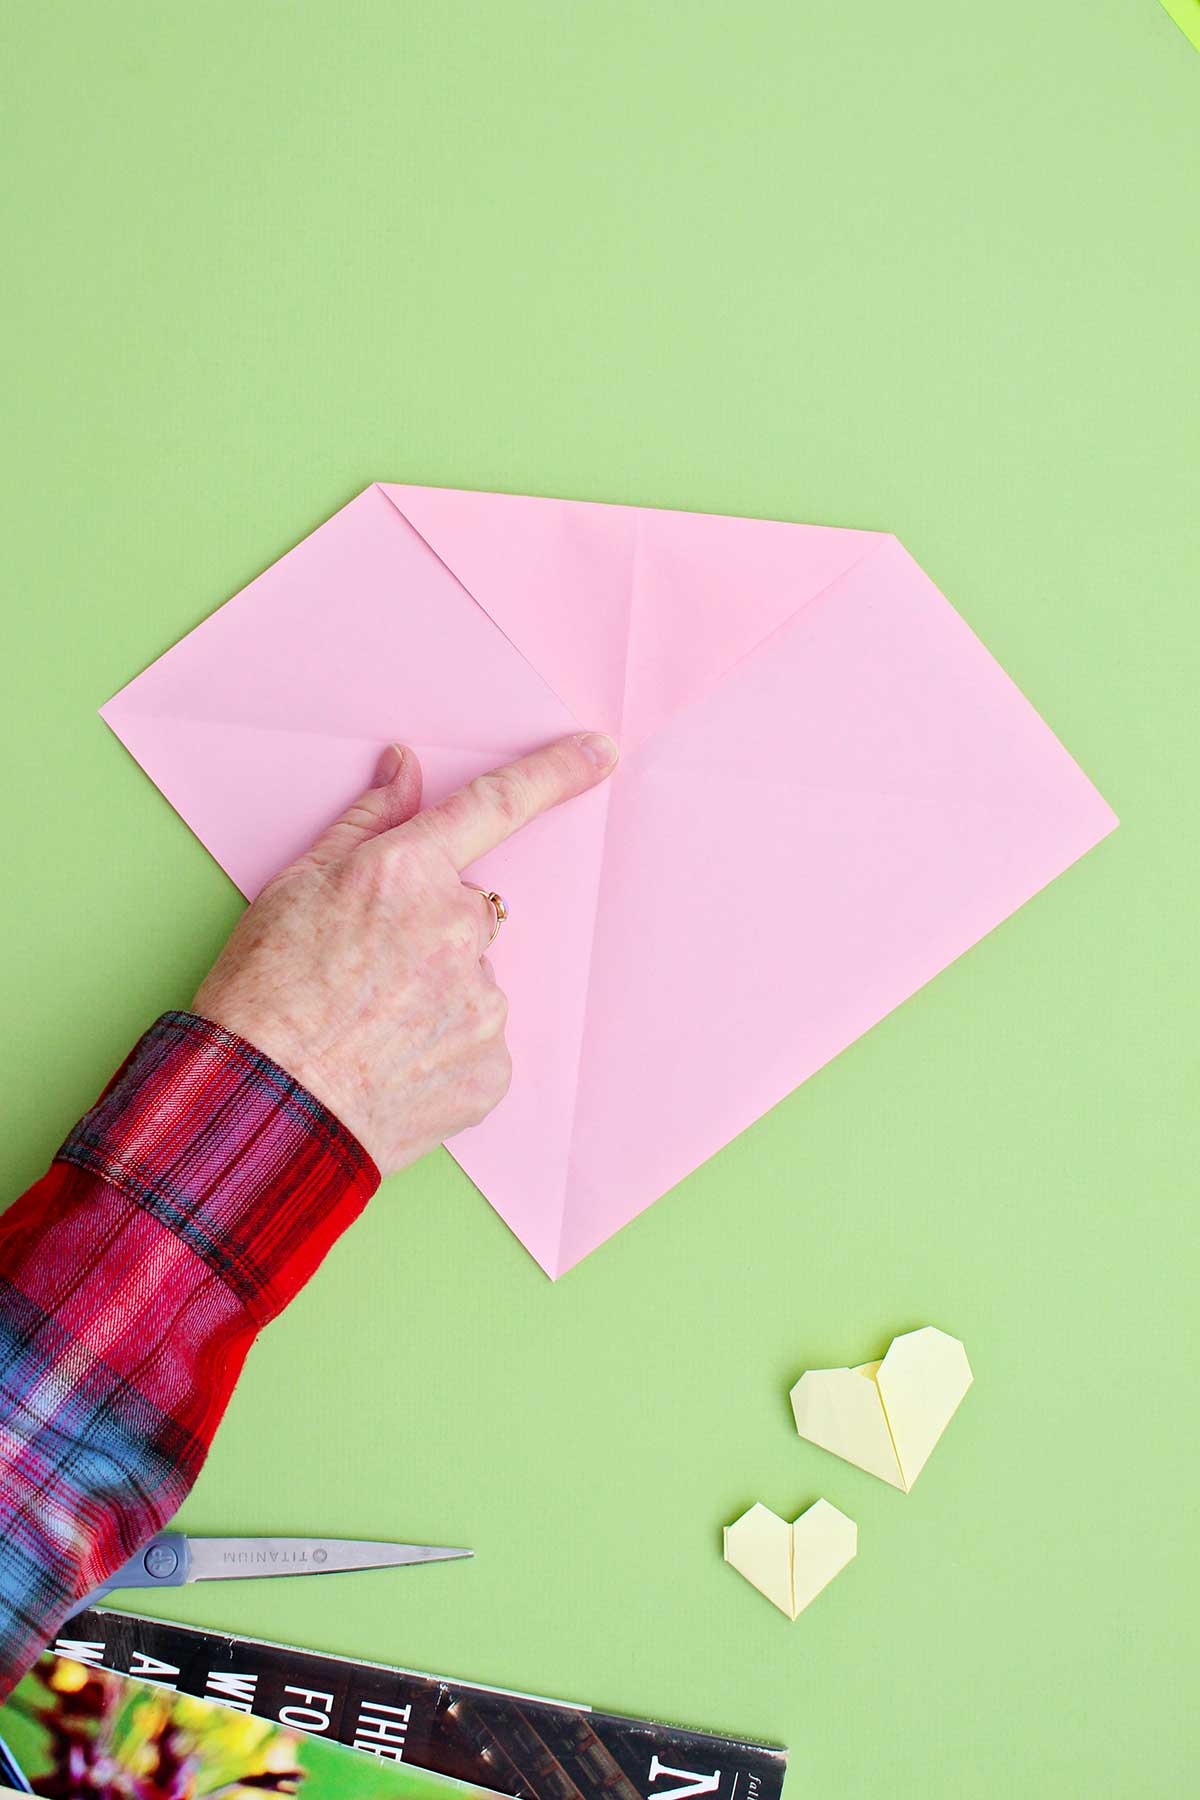
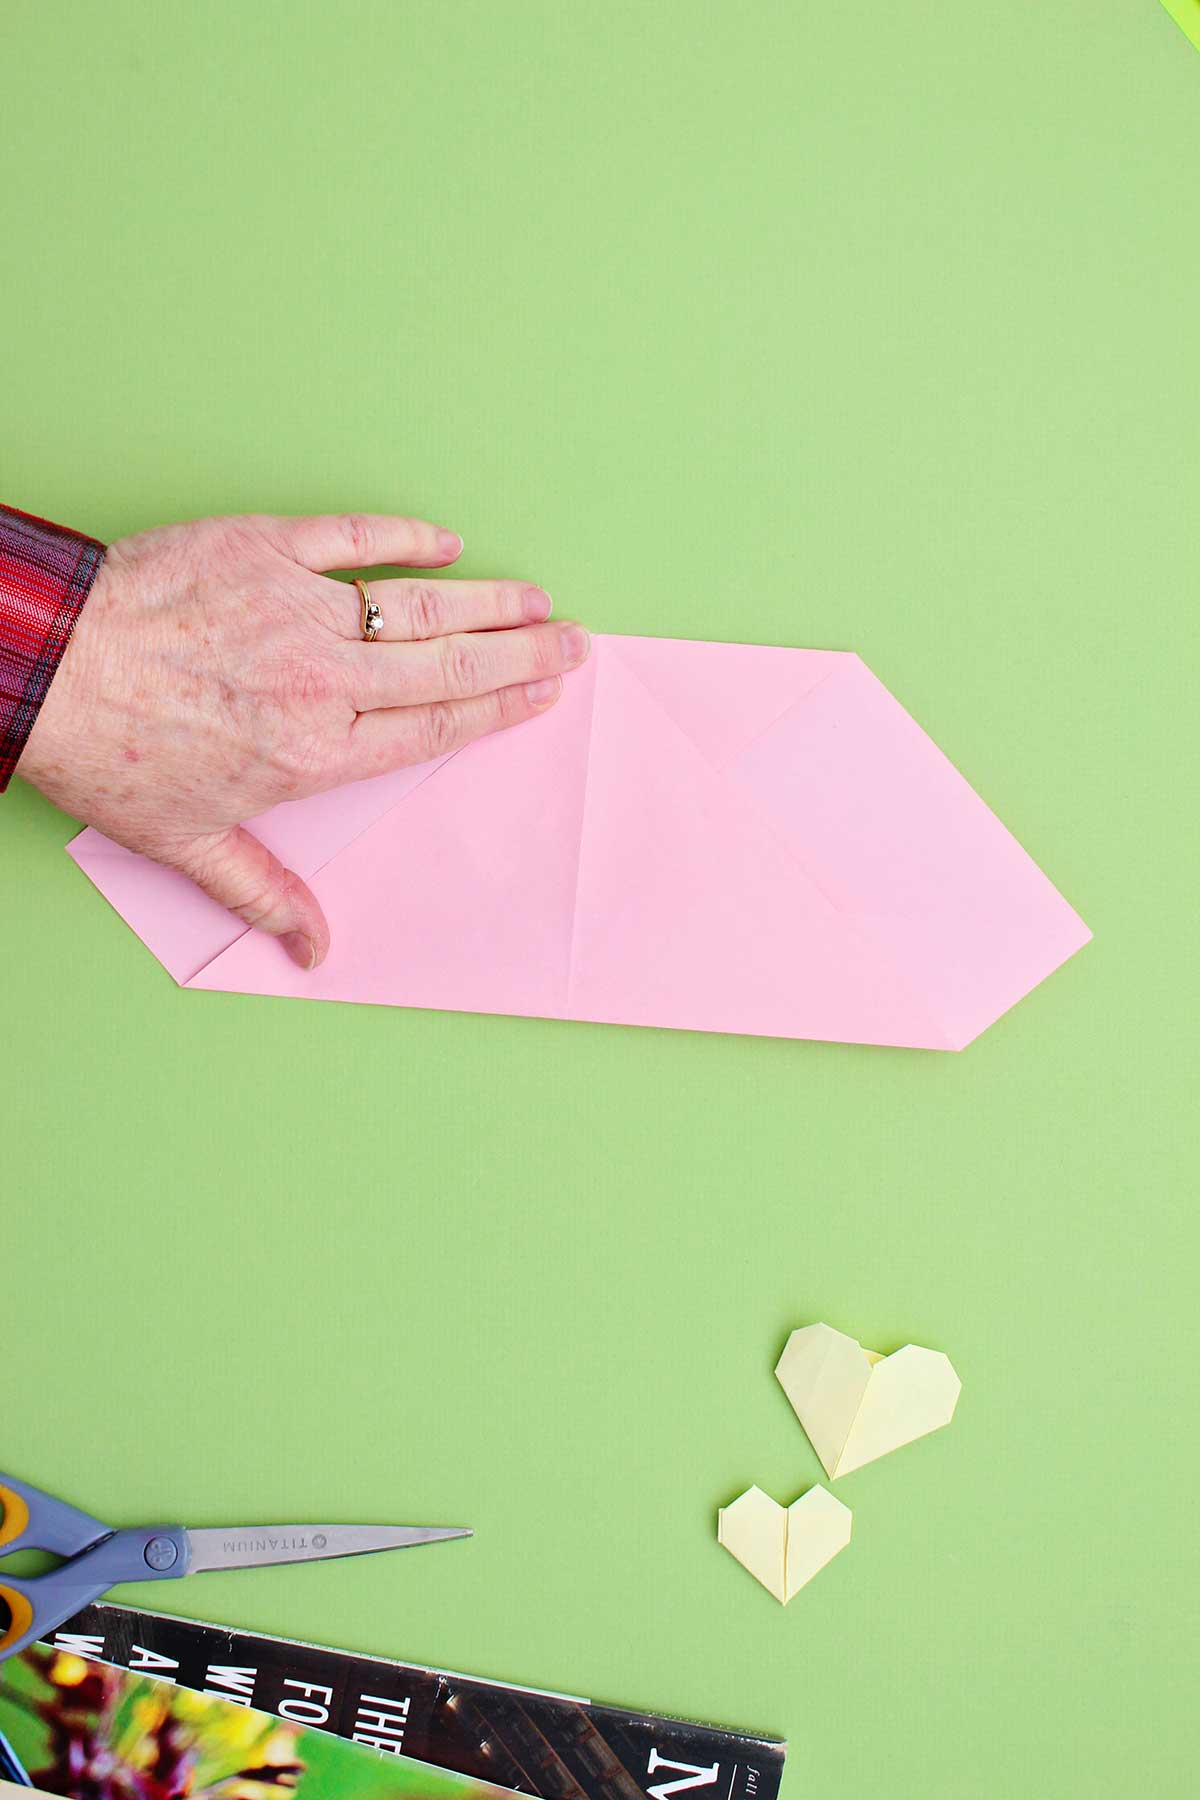
- Step 3: Fold the top corner of the paper down to the center of the paper (marked by the center point of the two folds you made earlier).
- Step 4: Fold the bottom corner of the paper up to the center of the top fold you just made.
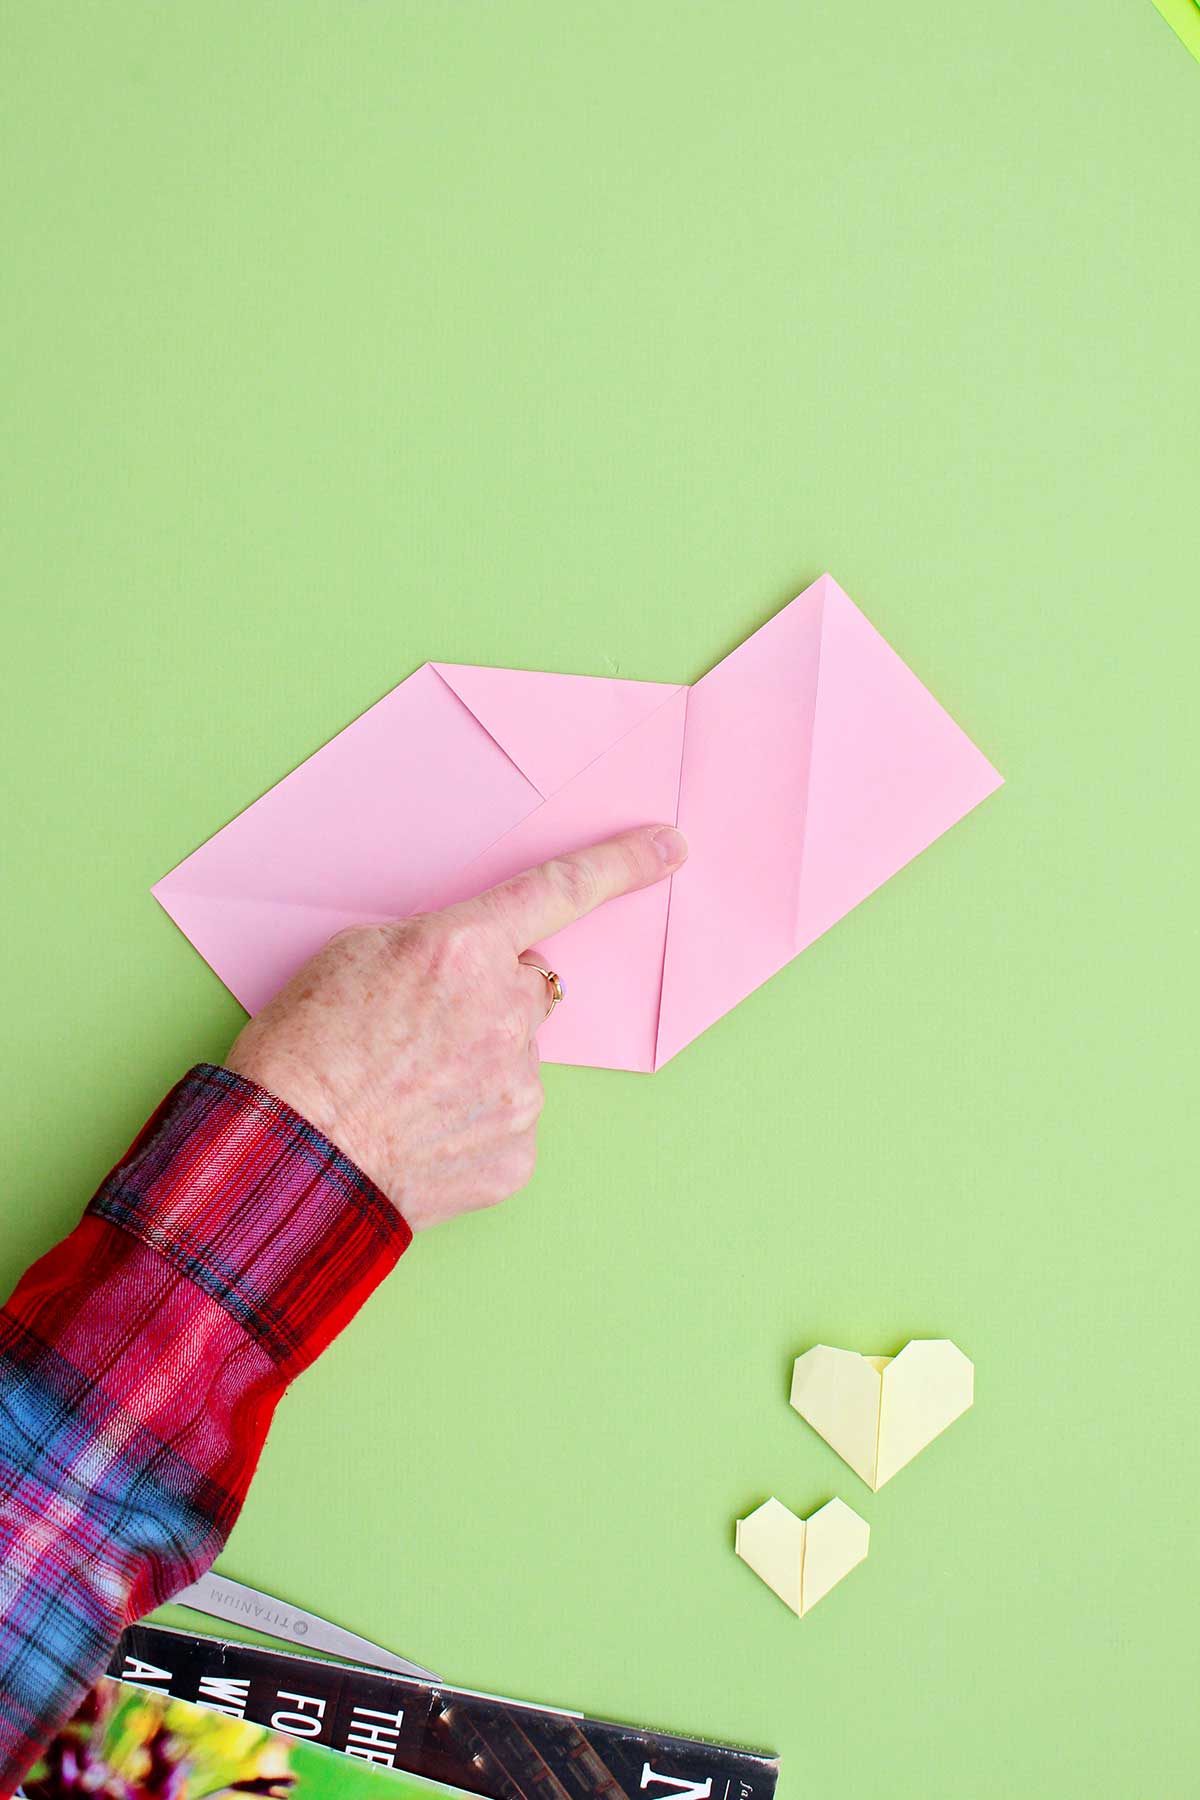
- Step 5: Fold the right half of the fold you just made up even with the center fold of the paper. Repeat with the left half of the fold so it is a mirror image of the right side.
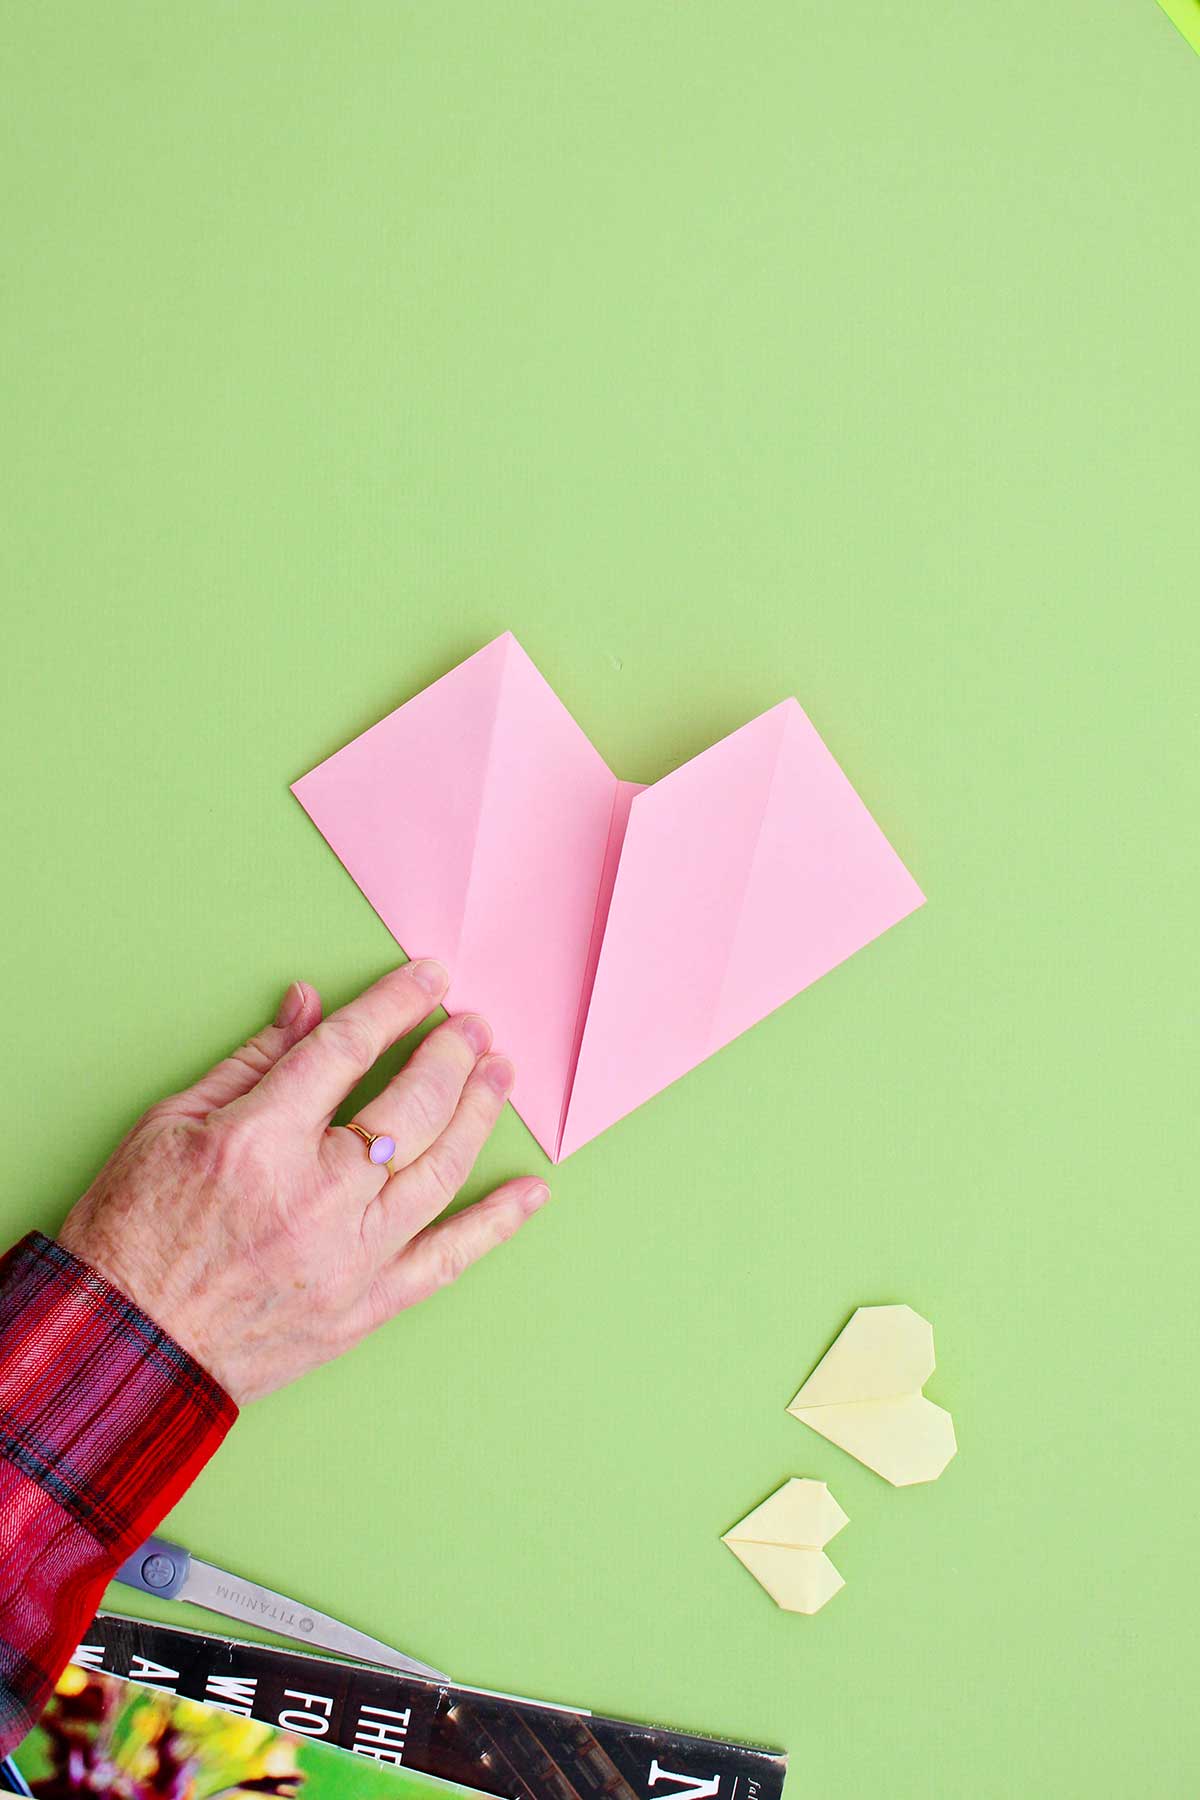
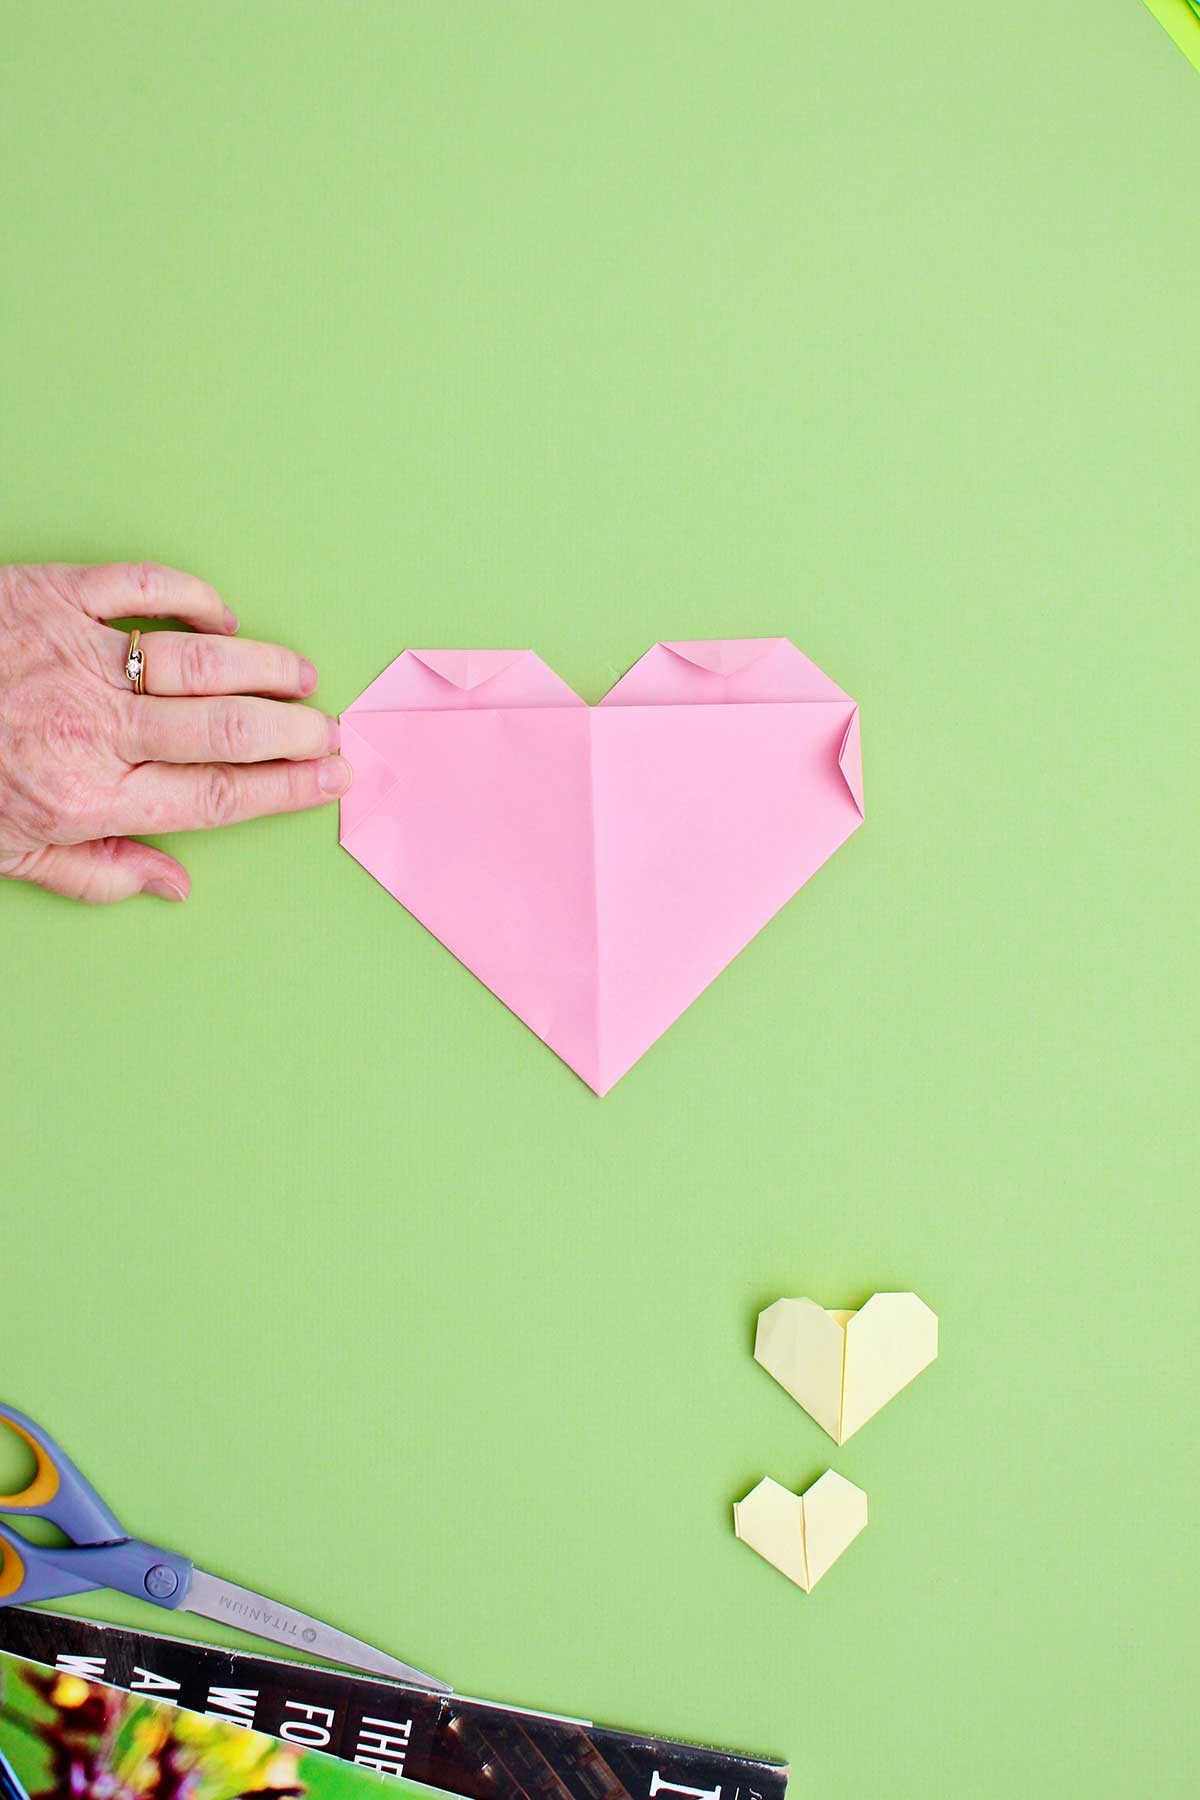
- Step 6: There are two small triangle sections above the top fold of the heart, they look like ears. Fold the top right triangle point down to touch the top fold. Repeat with the top left triangle.
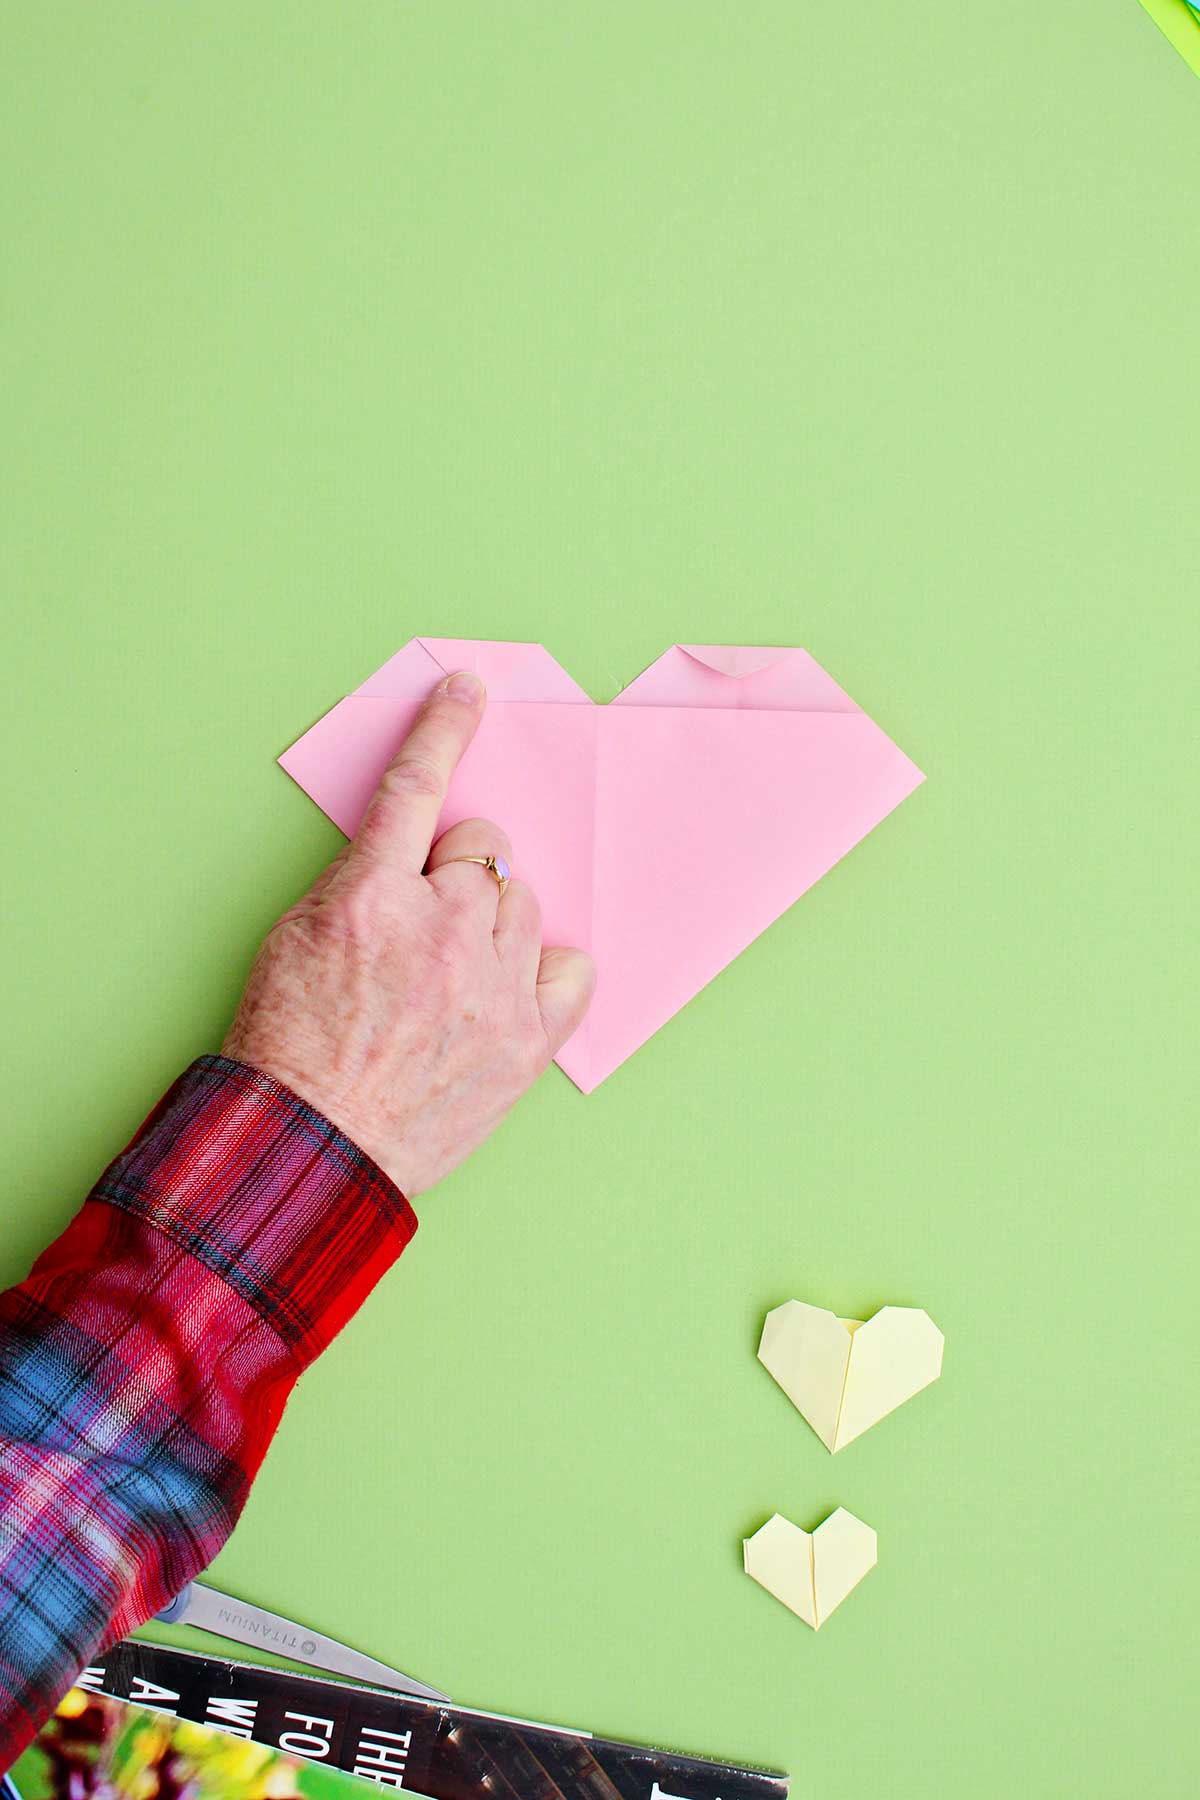
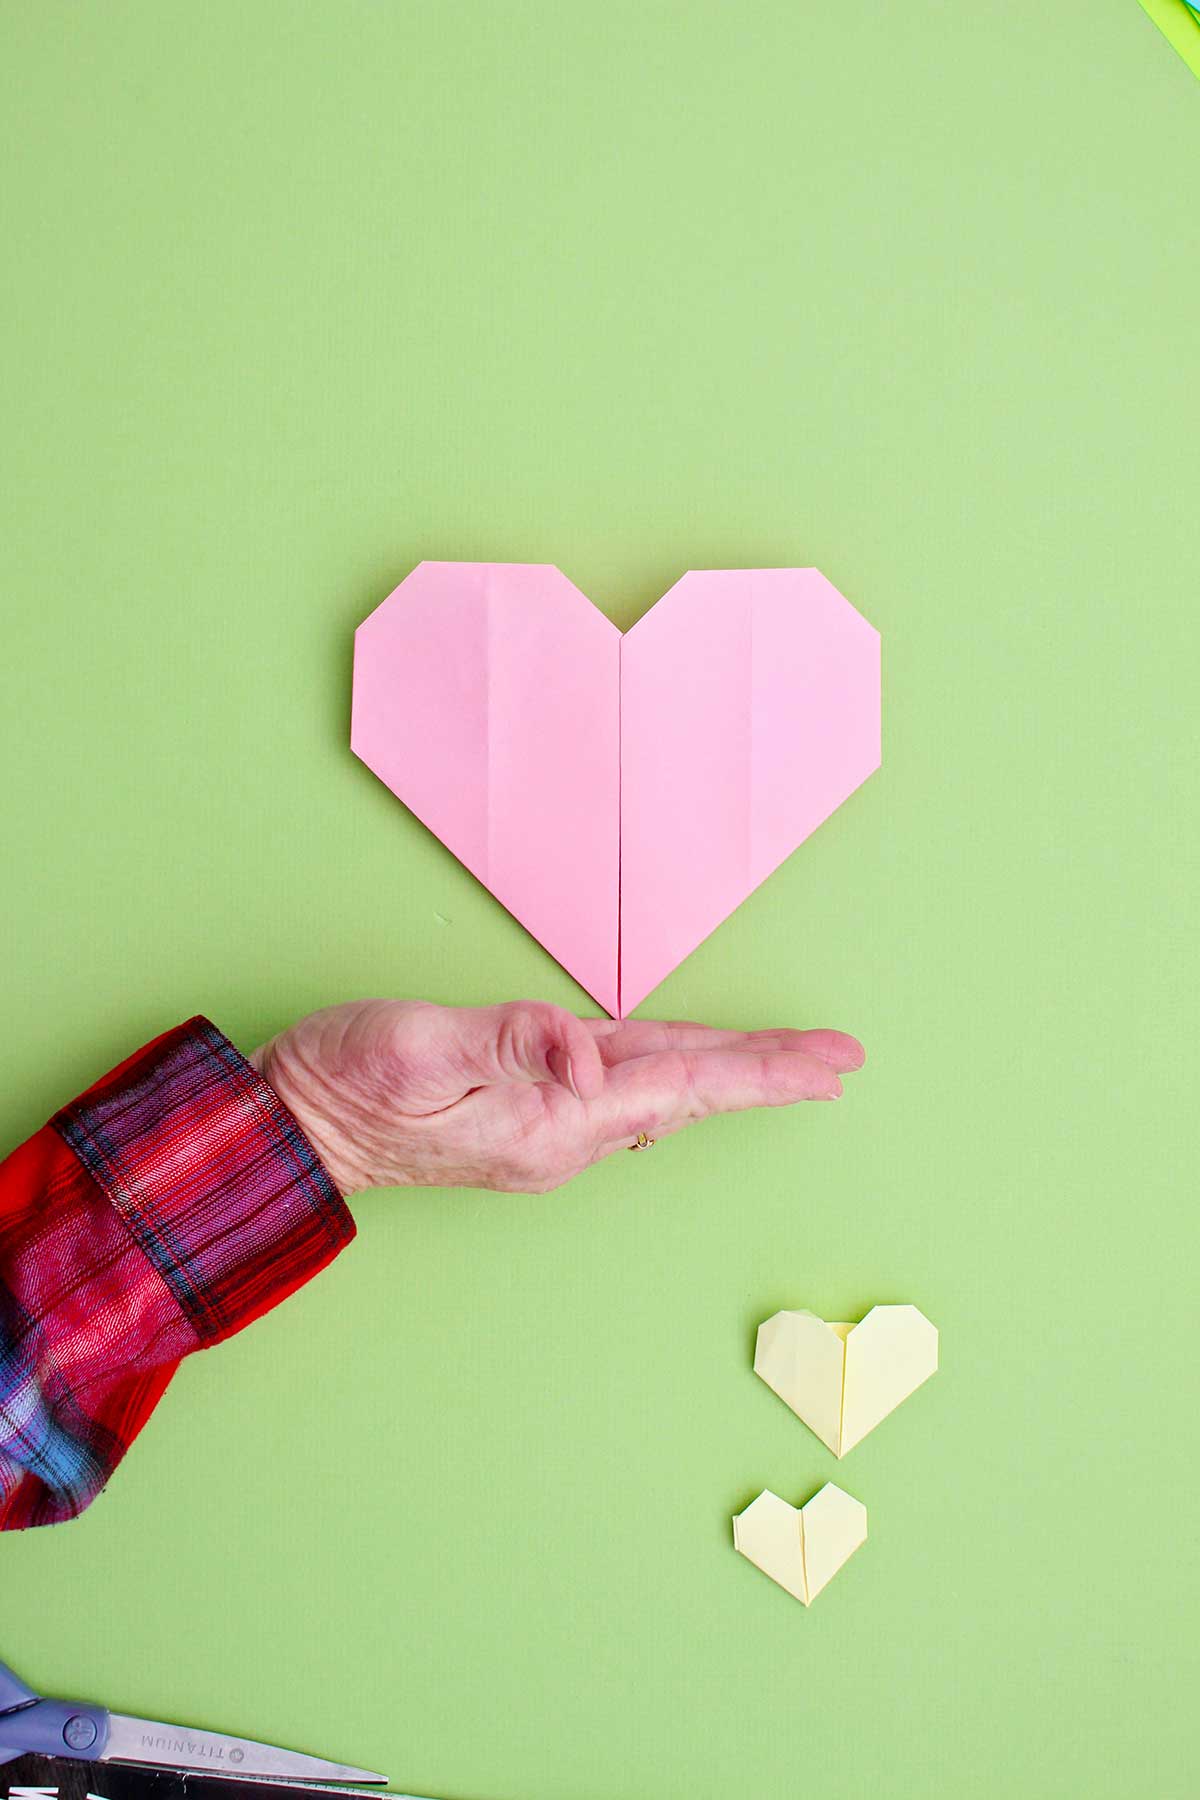
- Step 7: Fold in the point on the right and the point on the left so they make small triangle pieces. Then turn the heart over.
How long did that take? Less than 5 minutes!! Try it one more time since it’s familiar then just fold away!!
Troubleshooting Origami Hearts
These tips can help making heart origami even easier!
Why are my sides uneven?
Be sure to start out with a well cut square piece of paper. Then make each fold as straight as possible, matching edges and making creases crisp and firm.
How do I keep my folds from tearing?
Very lightweight paper tears more easily so avoid using light papers. When making your creases and folds, make them as accurate as possible and then leave them alone, don’t crease over and over again. Using a bone tool for creasing is also helpful with less oils and moisture from one’s hands.
Craft Variations
Want to switch things up? Here are a few ways you can customize and play with this craft.
- Use various sizes of paper to get different sizes of hearts.
- Use various types of paper like newspaper, old book pages, magazine pages, scrapbook paper, origami paper.
- Fold the heart in half (bring both sides towards you) and this keeps it from opening up as easily.
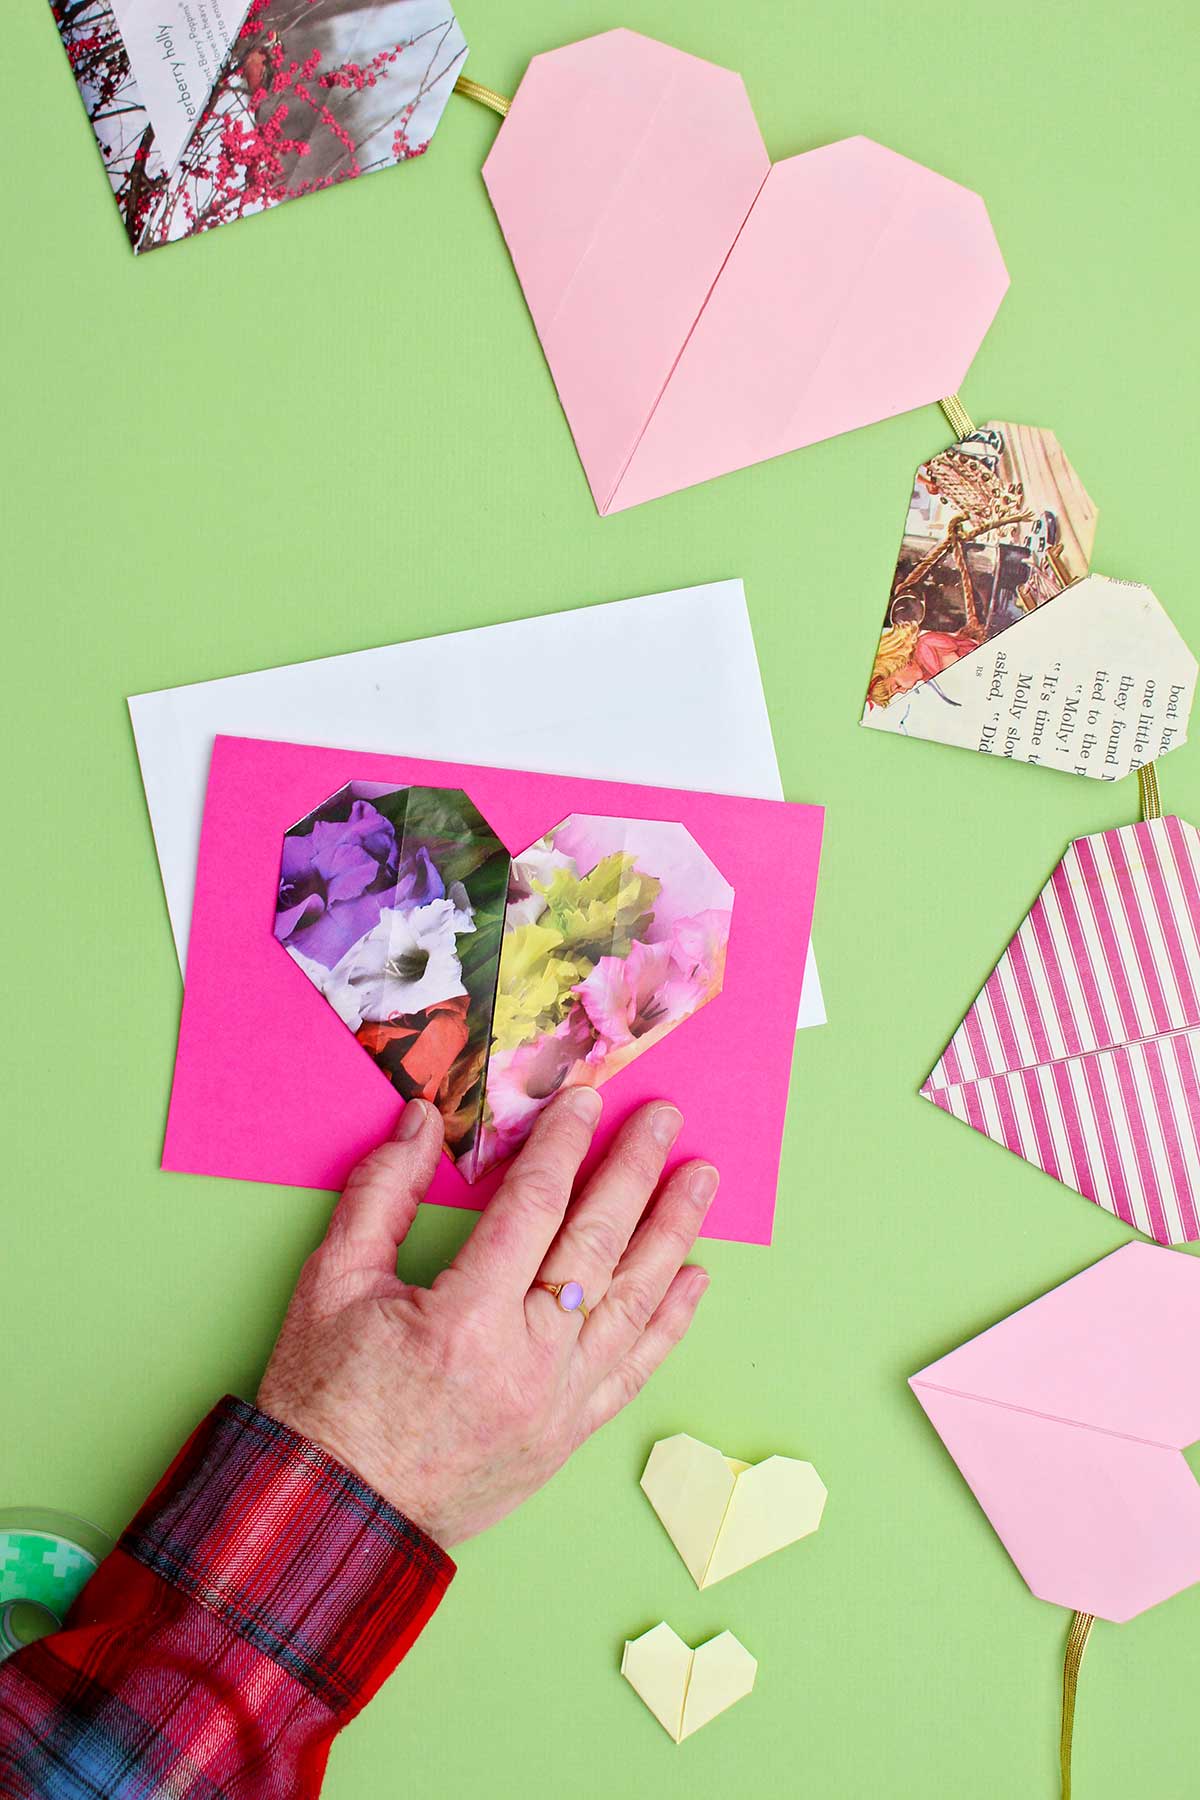
Creative Uses for Your Paper Hearts
Here’s a few fun ideas for how to use your folded origami paper hearts
- Valentine or fun note of encouragement- Write a message inside the folded heart. You can also tuck small flat treats inside the flaps.
- Cards- Glue a paper heart on the front, I like designed paper (scrapbook paper, or magazine paper with pictures).
- Envelopes- Decorate the front of the envelope with origami hearts.
- Gifts or packages- Decorate the top of your gifts with hearts!
- Garland- Make a series of hearts and attach them to a ribbon.
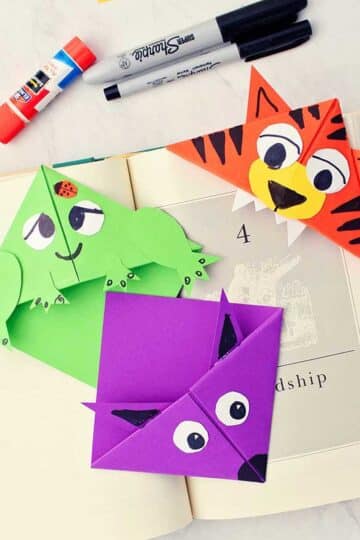
- Bookmark- Slide the second type of paper heart onto the corner of the page (using the little pocket in the back) or just slip between pages. Attach the heart to a ribbon as another type of bookmark.
Mastered the Easy Heart? Try the Origami Heart with Pockets!
Now that you’ve got the easy origami heart mastered, how about a bonus? Slightly different origami heart instructions for paper hearts that offer a little pocket.
- Step 1: Start with a square piece of paper set in front of you as a square (not a diamond). Have the design side down. Fold the square in a half to a rectangle one direction and then open it up. Fold the square in a half to a rectangle the other direction and then open it up again. This will make a folded cross on the paper.
- Step 2: Fold the bottom edge of the paper up to the center fold of the paper. Turn the paper over to the right so the design is facing up.
- Step 3: Take hold of the bottom right corner of the paper and fold the right half of the bottom fold up to the center fold. Repeat this step with the left corner of the paper creating a mirror image. Turn the paper over to the right.
- Step 4: Fold the right flap into the center line of the paper. Repeat this step with the left flap creating a mirror image.
- Step 5: Fold the right top corner down to the center fold of the paper. Repeat this with the lfet top corner creating a mirror image.
- Step 6: Take the top point and bring it down towards the bottom point, but tuck it into the pocket at the bottom of the shape. This will open two small “pockets” at the top of the heart. Press these down into triangles as you finish slipping the top corner into the bottom pocket. See the picture or video for help on this step.
- Step 7: Fold down the top right corner down to the edge of the triangle you just made at the top. Repeat this step with the left top corner.
- Step 8: The two points at the top of the heart look like ears. Fold down these ears just a bit to take off the pointed look. Turn your folded paper heart over to the right and wah-lah, a heart!
I like this heart because it stays folded a little better and it has a pocket in the back as well as the front pockets. The back pocket allows it to be used as a bookmark you slip onto the corner of a book page!
FAQ About Heart Origami
Folding paper hears is simple. It is a beginner origami shape and only takes a few folds. Follow along and try it! The video is especially helpful.
This simple step-by-step tutorial takes less than 5 minutes. And when you practice it a couple of times it may only take a minute once the paper is cut into a square!
I use regular copy paper (8.6x11”) and love that size for giving as a Valentine. Scrapbook paper is 15x15” and makes a larger heart. Origami paper makes smaller hearts. Cut any paper into a square and you can make a heart as long as it isn’t too heavy to fold or too flimsy to stay folded.
A beginner wants an origami project with only a few folds. There are several great starters that fit the bill- like a dog face, heart origami, or an envelope.
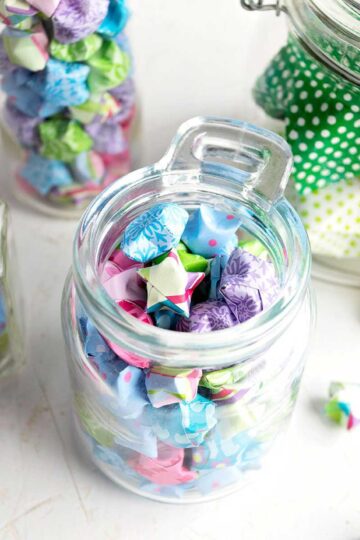
More DIY Origami for Kids
Looking for more easy origami crafts to try? Here are a few you can try!


Come join the fun at WTN!
Try this craft, leave a comment, rate it, and tag a photo with #WelcometoNanas wherever you post.
More Crafts Please!
Love getting crafts straight to your inbox? Sign up to receive a weekly email and get a free gift!
The Easiest Origami Heart Instructions
Equipment
- none needed
Items Required
- Paper! I used colored copy paper to start with and then used other types of paper for variation. You can use origami paper, scrapbook paper, or other recycled paper.
- Scissors
- Coloring supplies (optional)
- Black permanent marker (optional)
- Goodies (optional)
- Clear tape (optional)
Instructions
- Cut your paper into a square.
- Fold the paper in half diagonally one direction and open it up. Then fold diagonally in the other direction and open it up. This makes an “X” fold in the paper. Turn the paper so it looks like a diamond in front of you.
- Fold the top corner of the paper down to the center of the paper (marked by the center point of the two folds you made earlier).
- Fold the bottom corner of the paper up to the center of the top fold you just made.
- Fold the right half of the fold you just made up even with the center fold of the paper. Repeat with the left half of the fold so it is a mirror image of the right side.
- There are two small triangle sections above the top fold of the heart, they look like ears. Fold the top right triangle point down to touch the top fold. Repeat with the top left triangle.
- Fold in the point on the right and the point on the left so they make small triangle pieces. Then turn the heart over.
- There is a bonus extra way to fold an origami heart on the website!


Leave a Reply