This Reversible Baby Bib Pattern is easy to sew with step-by-step instructions, and makes the perfect gift for a new mother and baby! Use any fabric that you'd like for each side of the bib to create a fun combination, and you can even add a monogrammed letter or design for the baby!
Jump to:
- Reversible DIY Bib for Baby
- Vintage Inspired Project
- Free Printable Bib Pattern
- The Best Fabric for a Baby Bib
- Sewing Instructions for Your Baby Bib
- Variations on This Easy-to-Sew Bib
- How to Use Your DIY Bib
- Want more sewing projects for baby??
- Supplies for the Reversible DIY Bib for Baby:
- Reversible DIY Bib for Baby- Free Pattern
Reversible DIY Bib for Baby
This Reversible DIY Bib for Baby has a free easy bib pattern and instructions to sew a reversible bib using repurposed or new fabric.
You can customize an adorable baby bib with your chosen cute fabric and the baby's initials. It's an easy sewing project that can be adjusted all different ways to your liking!
These bibs make for great baby gifts for a new mom, a DIY baby shower gift that makes cute additions to any little baby's "wardrobe"! Won’t that little one look cute in a personalized baby bib?

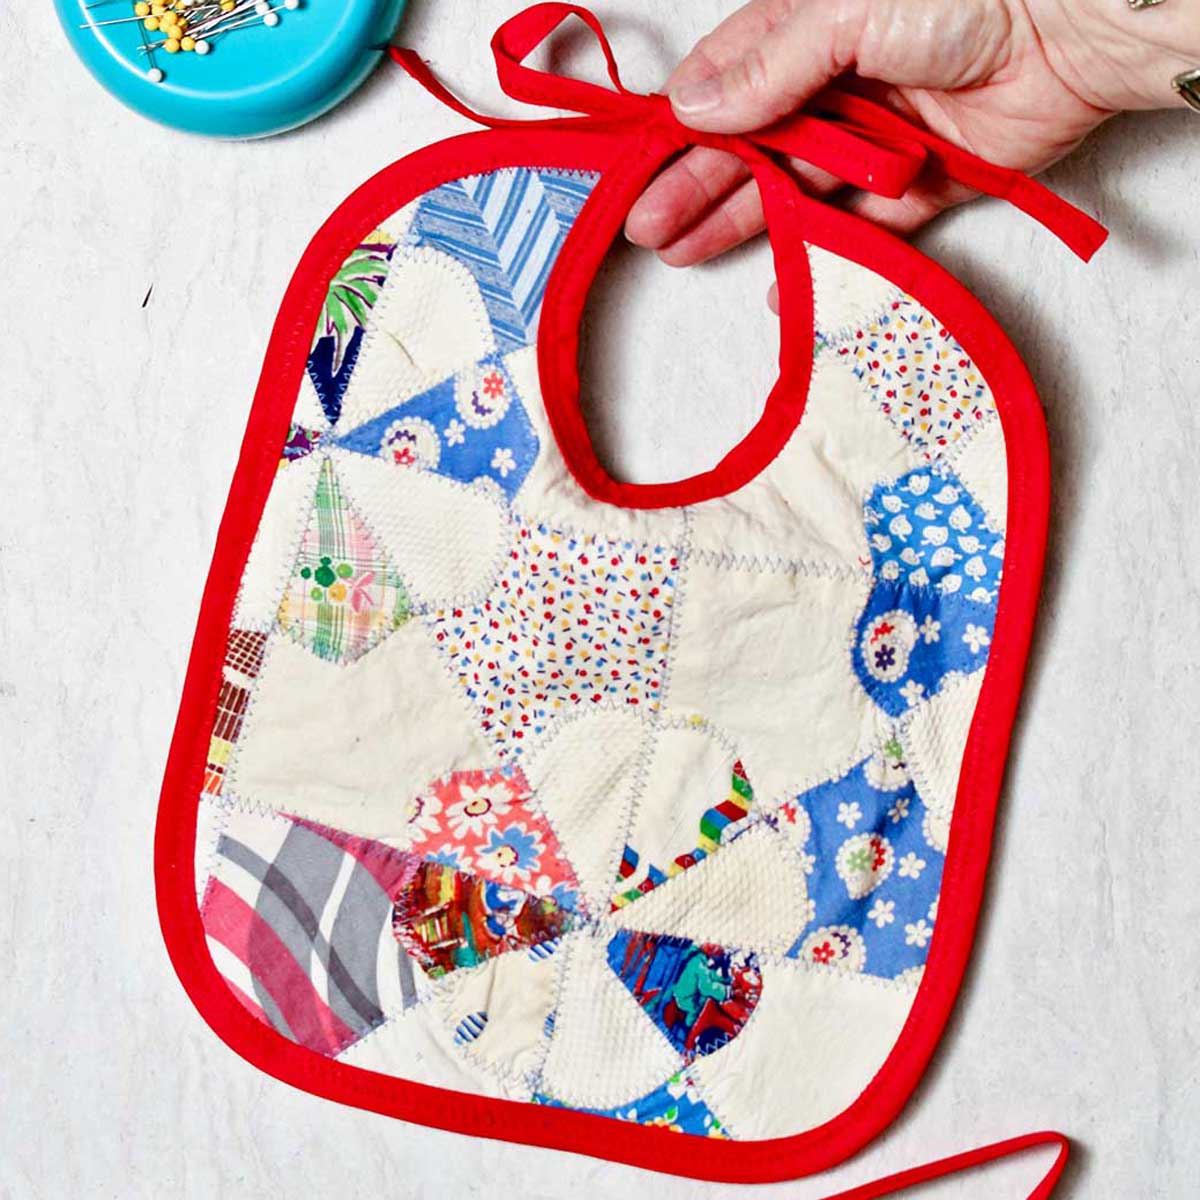
Vintage Inspired Project
This pattern was inspired by a vintage bib that belonged to my son who is now 35 years old!!
It was simple bib that held up over the test of time with a new baby, and I just loved the cute patterns of fabric.
Using that sweet first piece as a guide, I developed this free sewing pattern to make a gift for a friend’s baby and now want to share it with you. I hope this DIY baby bib provides as much good "drool-catching" use to the baby girl or boy in your life as it did for me!
Free Printable Bib Pattern
To start this sweet sewing project, you'll first need to print off a copy free baby bib pattern!
Here is the link: Reversible DIY Bib for Baby Free Pattern.
Just a quick note - this is a two page pattern, so be sure to print on one side of the paper only.
We'll walk through the pattern with step-by-step instructions, but if you prefer watching video instructions on YouTube instead, feel free to follow along with this video.
While you are there, go ahead and subscribe to my channel for updates on new video tutorials!
The Best Fabric for a Baby Bib
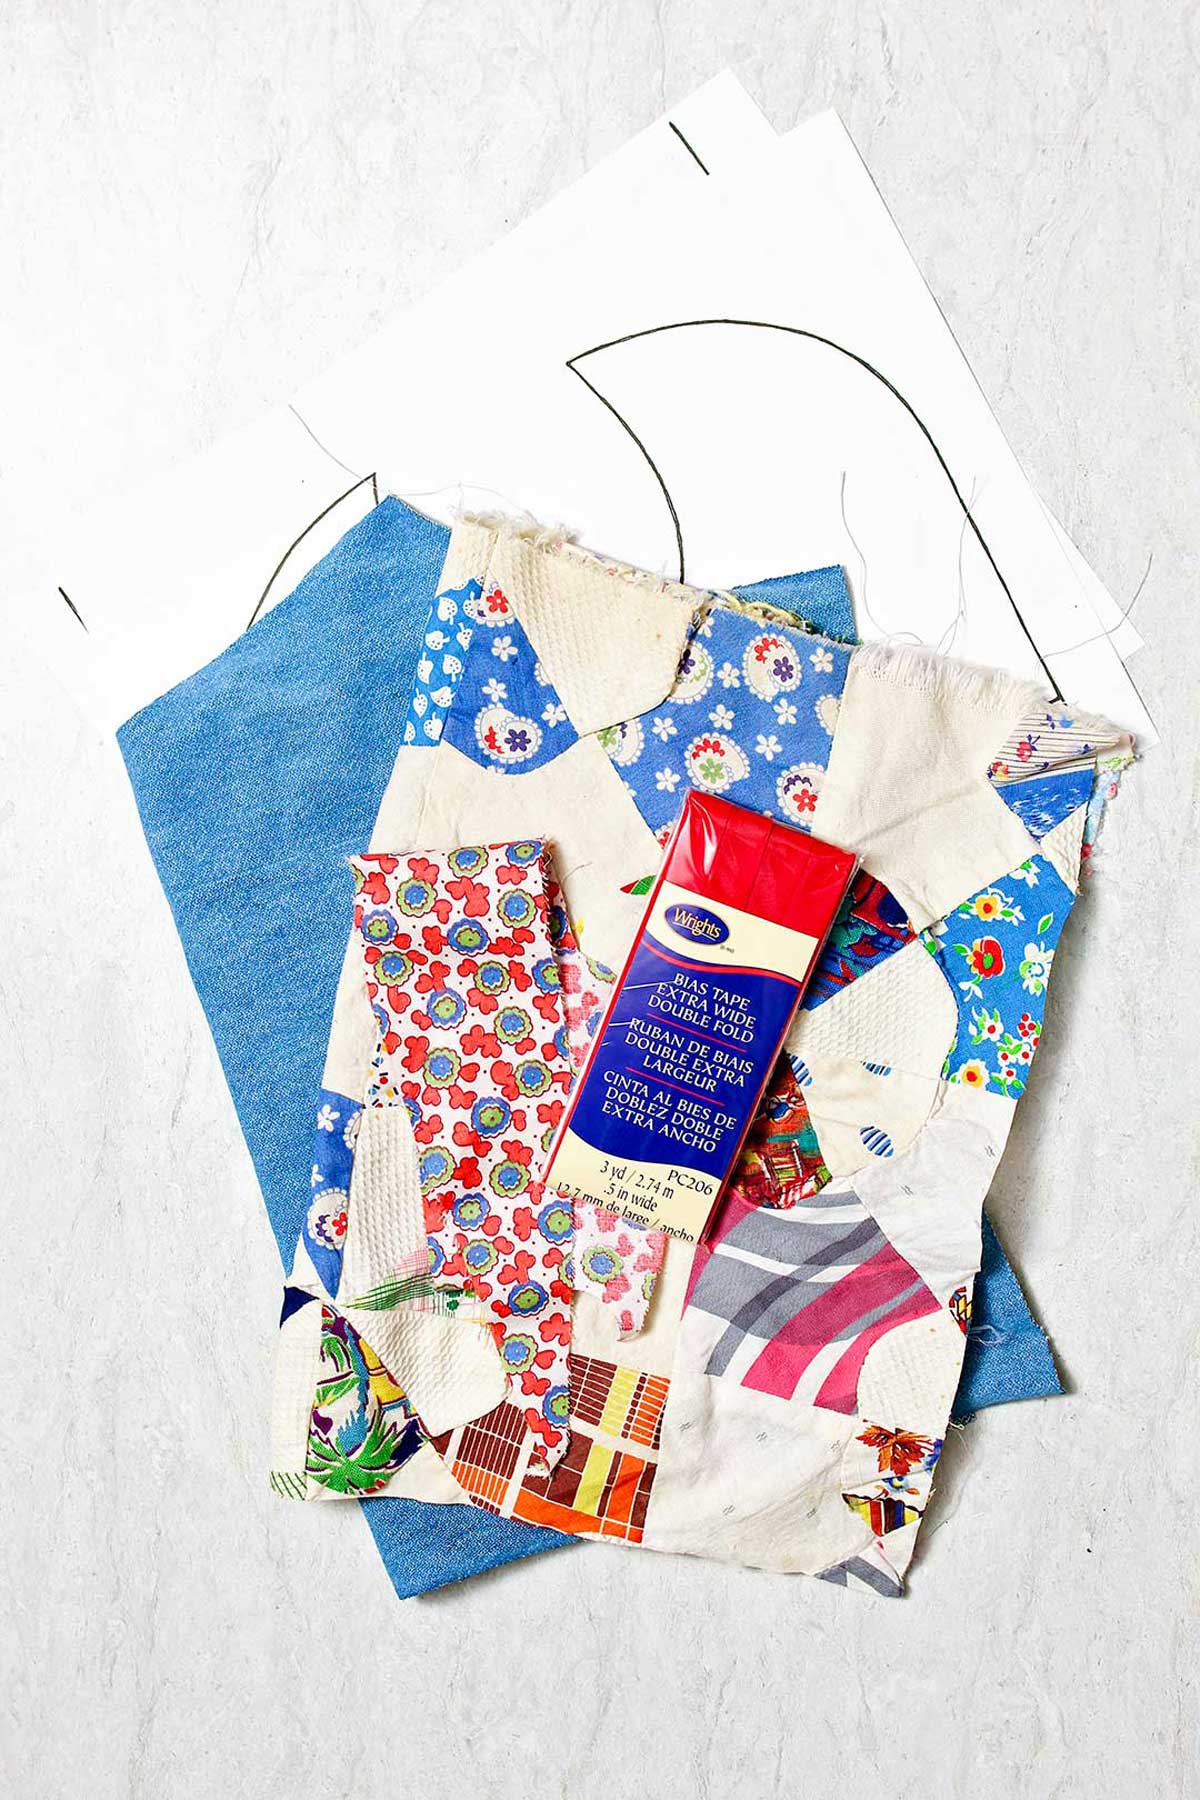
The fabric for this project can be new, scraps from previous projects, or upcycled fabric like I used in this example.
You need two pieces of fabric that are 12-inches by 18-inches in size. You can use the same fabric on both sides or different fabric on each side of the bib like I did.
The pattern is reversible, so using two different fabrics (or fabric styles) is a great way to make a super cute bib.
There are so many awesome designs in fabric, and if you have as much fabric laying around the house as I do, you'll have lots of options to choose from 😉 You have freedom to be creative and have fun with this!
I used a piece of denim from a pair of jeans and a scrap of an old quilt that I found in a thrift store. Both pieces were clean and in good repair- just waiting to be used in a good project!
The fabric can be whatever you want, but denim, woven cotton fabric scraps, a terry cloth towel, and flannel fabrics work well. You can even make a DIY bib from a hand towel!
As I mentioned, both the bottom pattern piece and the top pattern piece require a 12" by 18" piece. This would be the perfect use for a fat quarter of fabric for each side.
I’m excited to see what you find to use!!
Sewing Instructions for Your Baby Bib
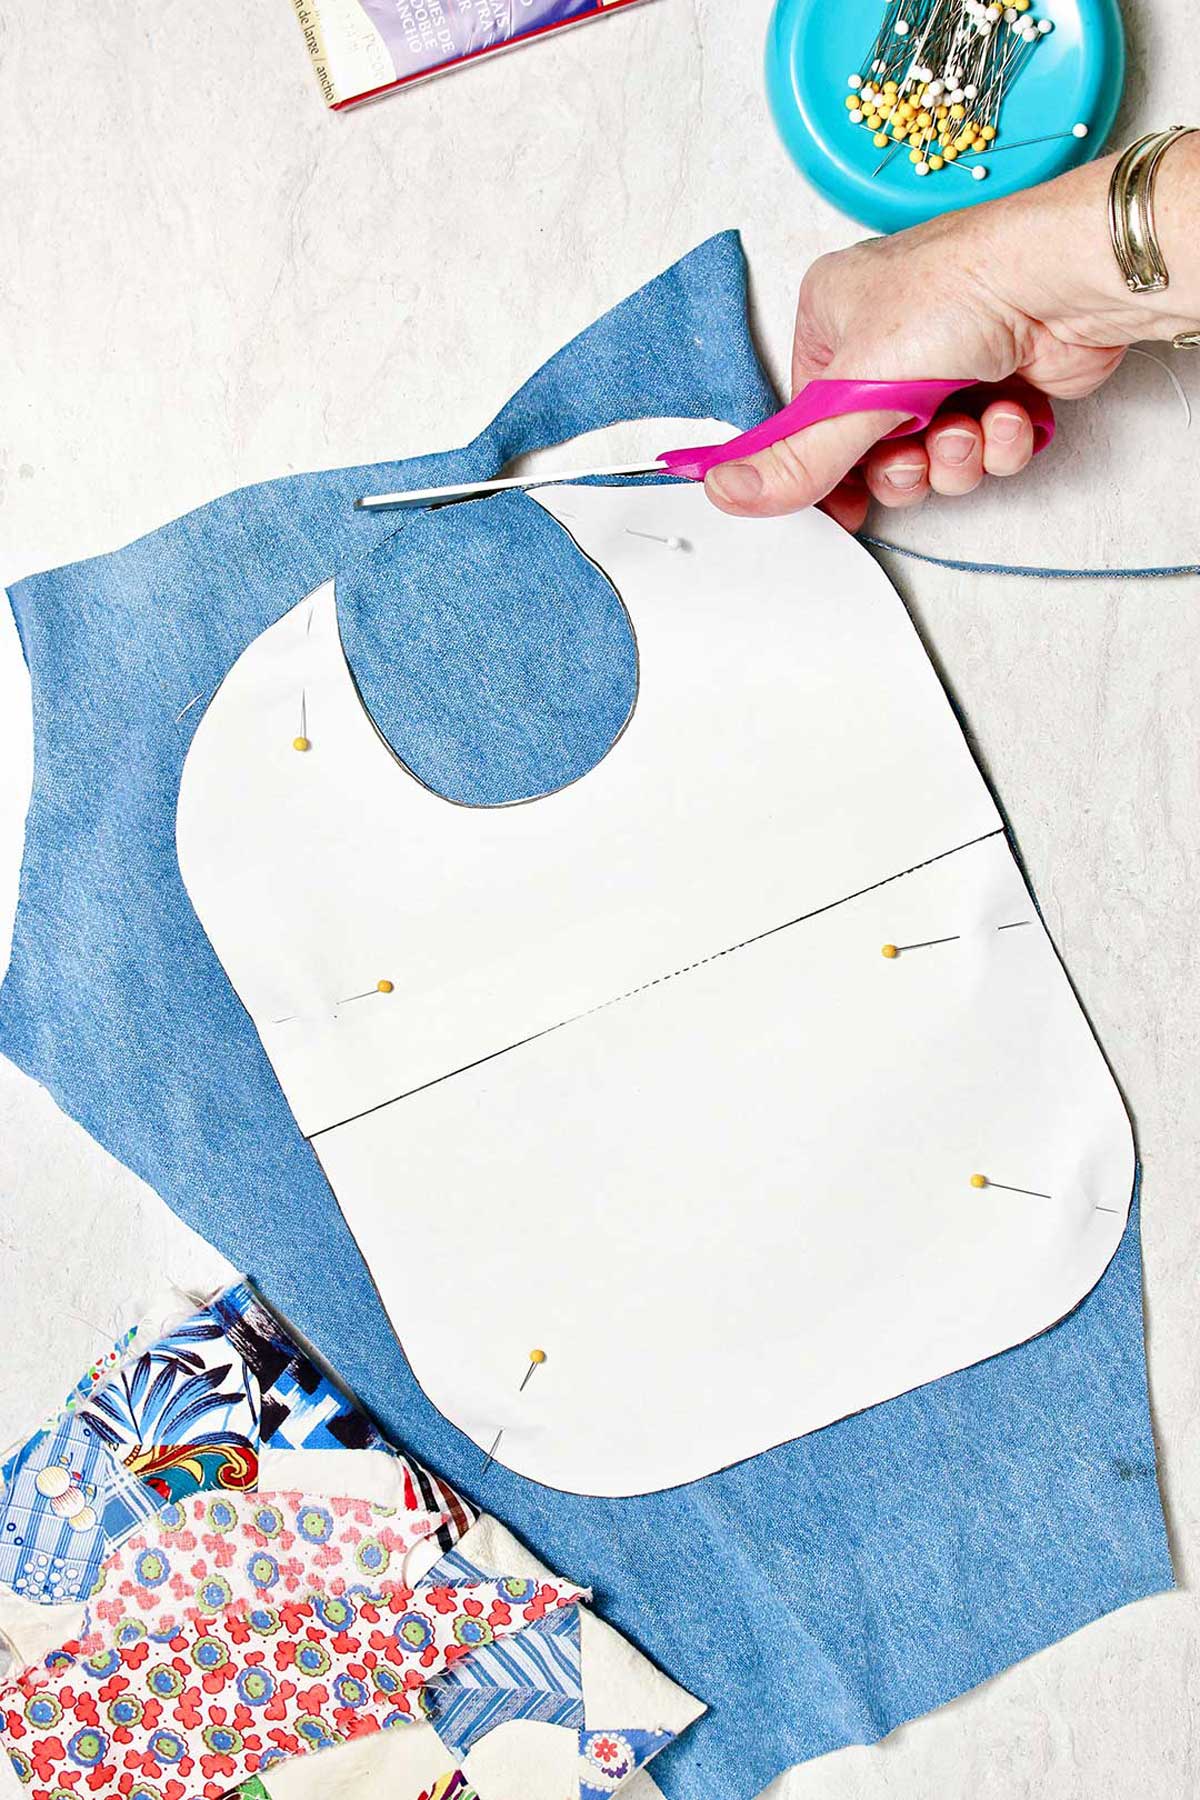
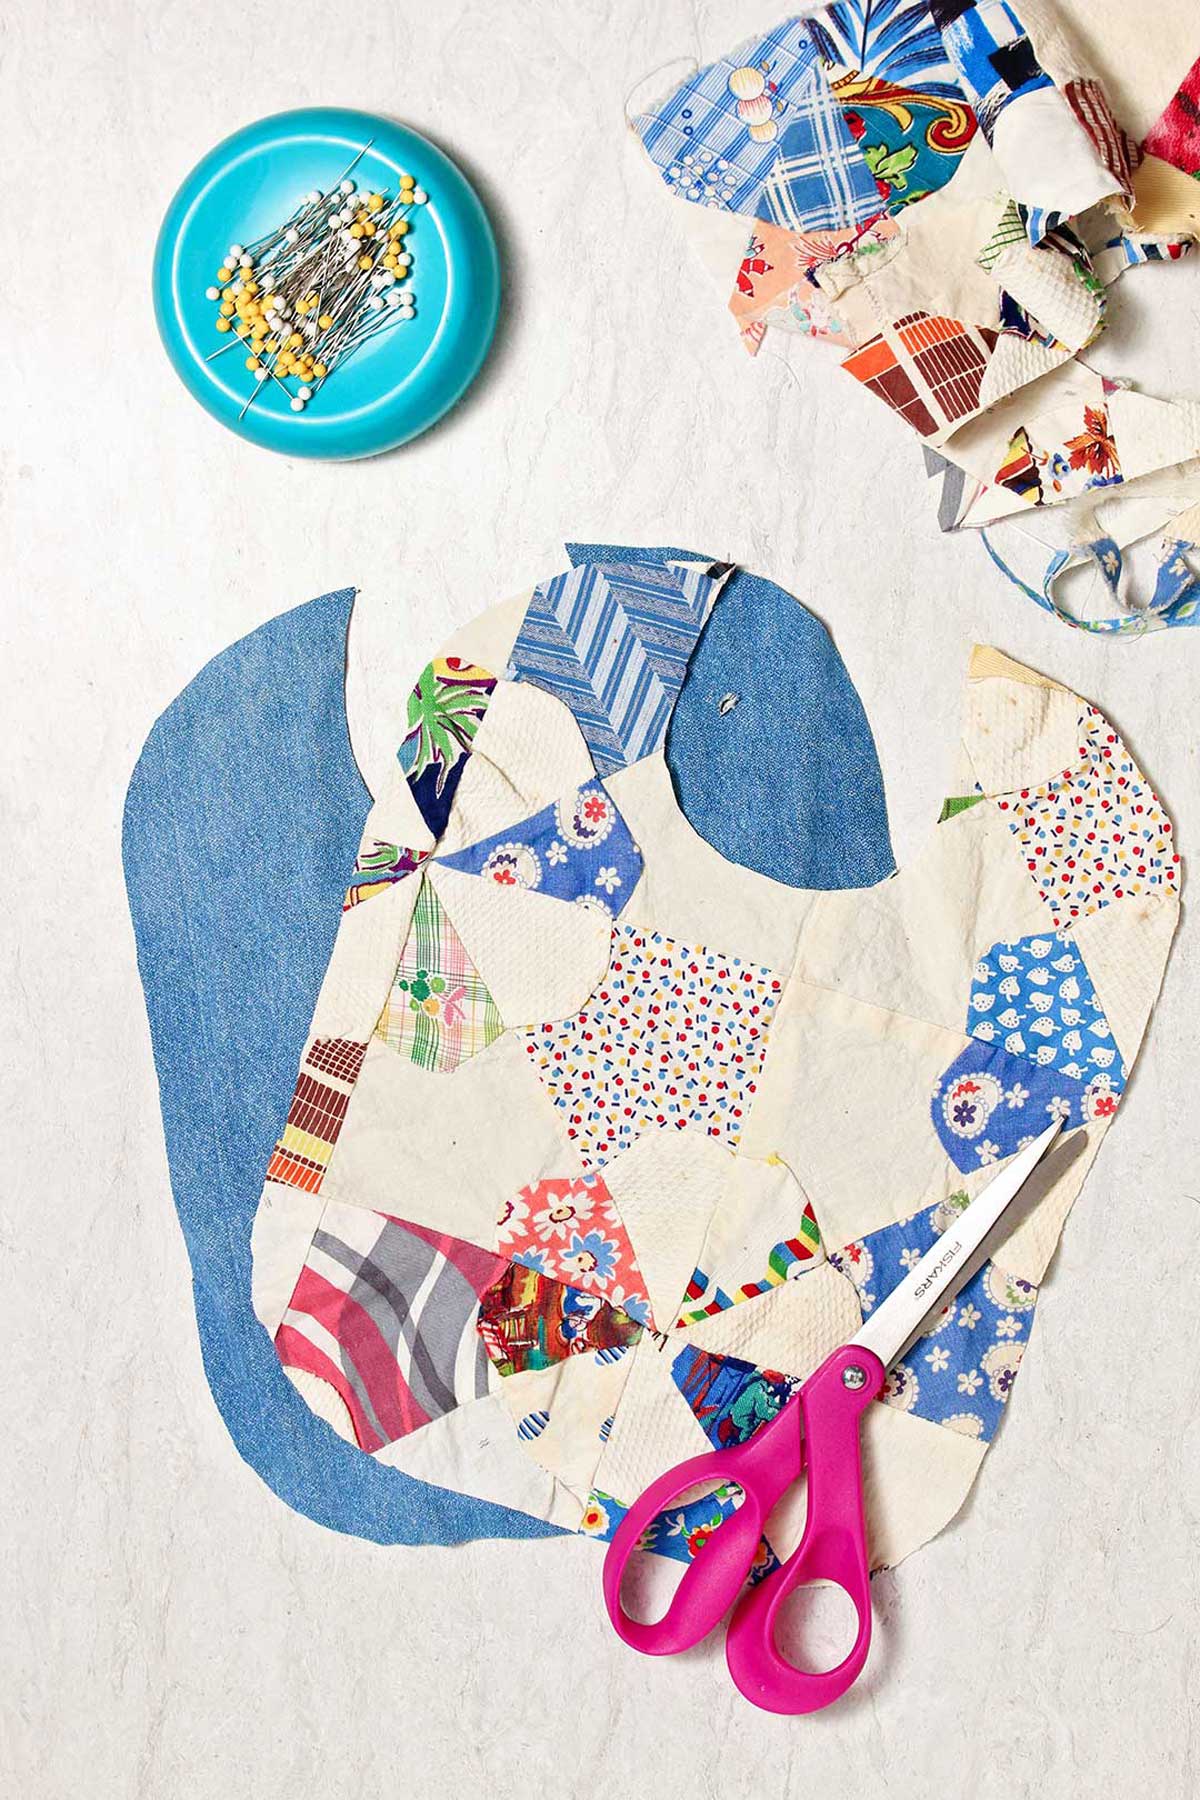
Once you've printed both pages of the free bib pattern, cut the pattern out and tape the two pieces together.
Use the pattern now to cut one bib piece from each fabric that you've chosen.
If you'd prefer, you can find a printable copy of the whole tutorial by scrolling down to the "Print" button on the numbered instructions at the end of this post.
Monogram or design possibility
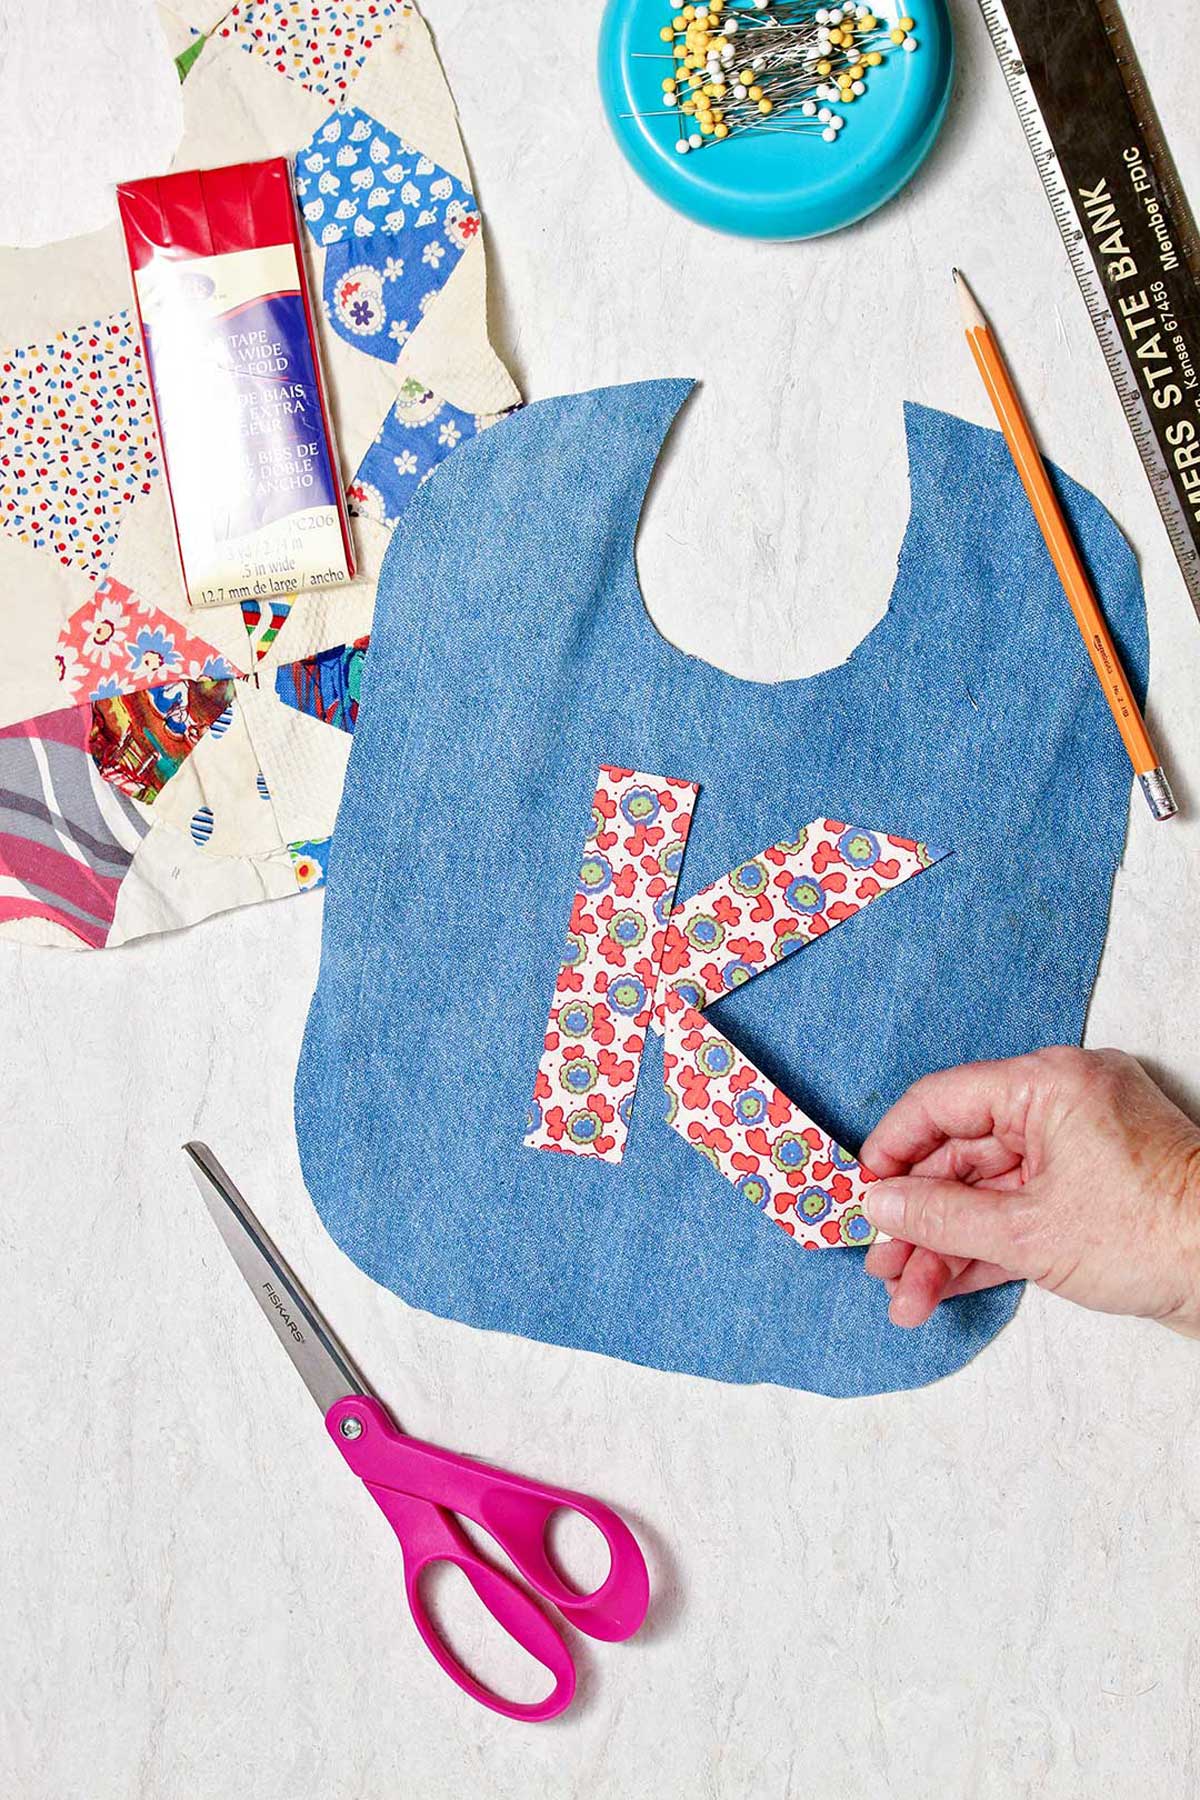
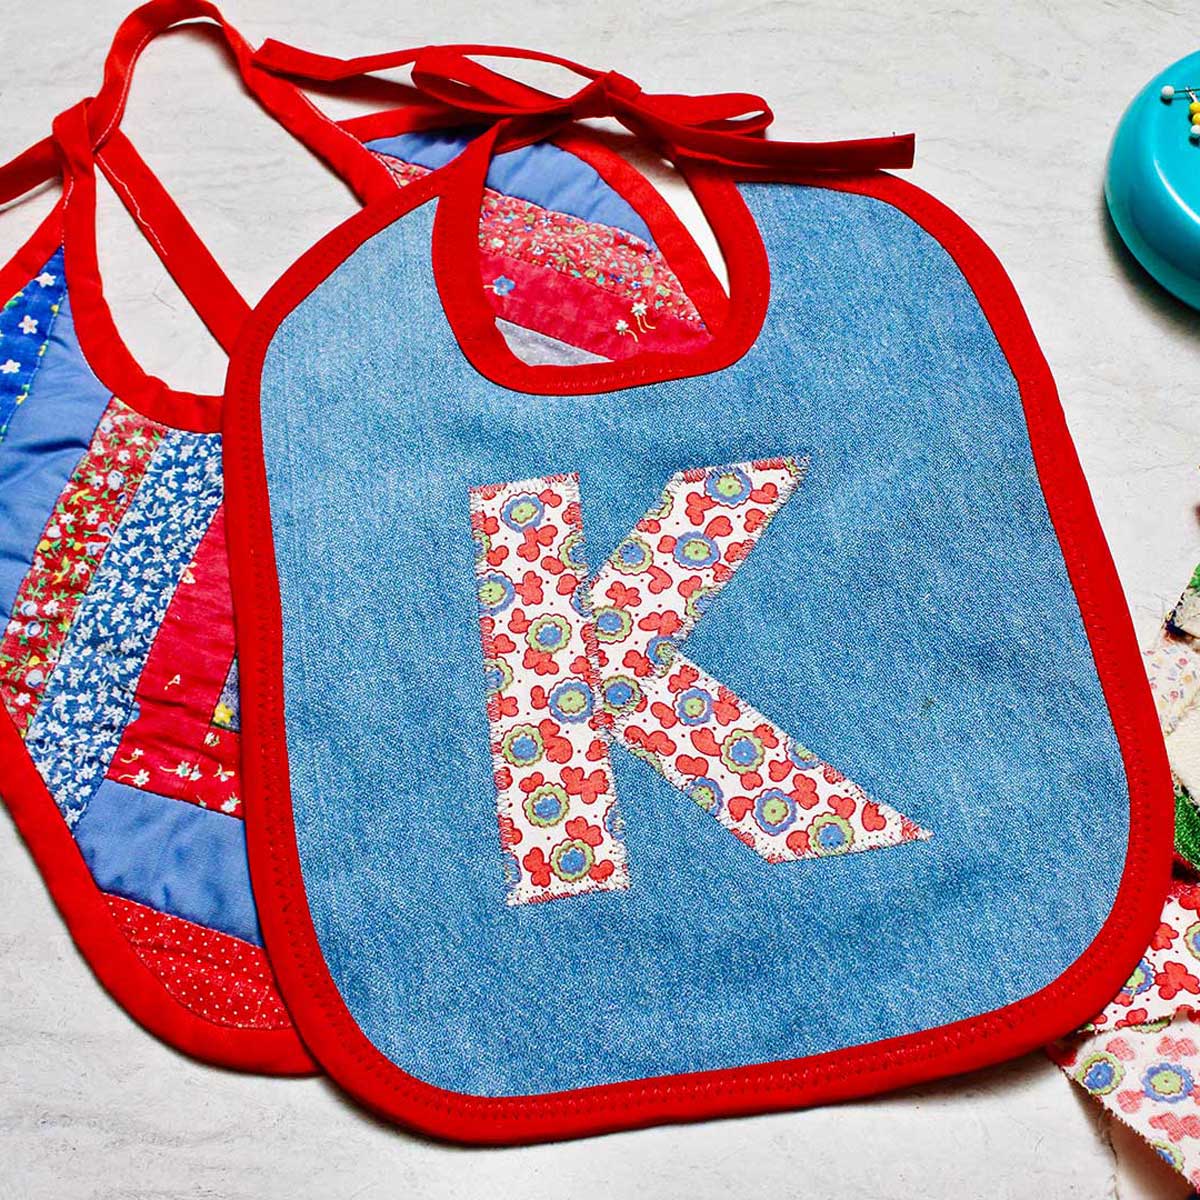
I chose to add a monogram to the plain denim piece. I used a “K” which was the first letter in the babies first name.
You could also use a design of some sort- like a heart, car, or flower.
To make the monogrammed piece, I ironed Wonder Under (a fusible web) on the wrong side, or back of the fabric. Next I drew the design on the fabric and cut it out.
Once this was finished, I pulled off the paper backing on the Wonder Under and ironed the monogram on the front of the denim bib piece of fabric. It works so well!
Follow the instructions on the Wonder Under for this step.
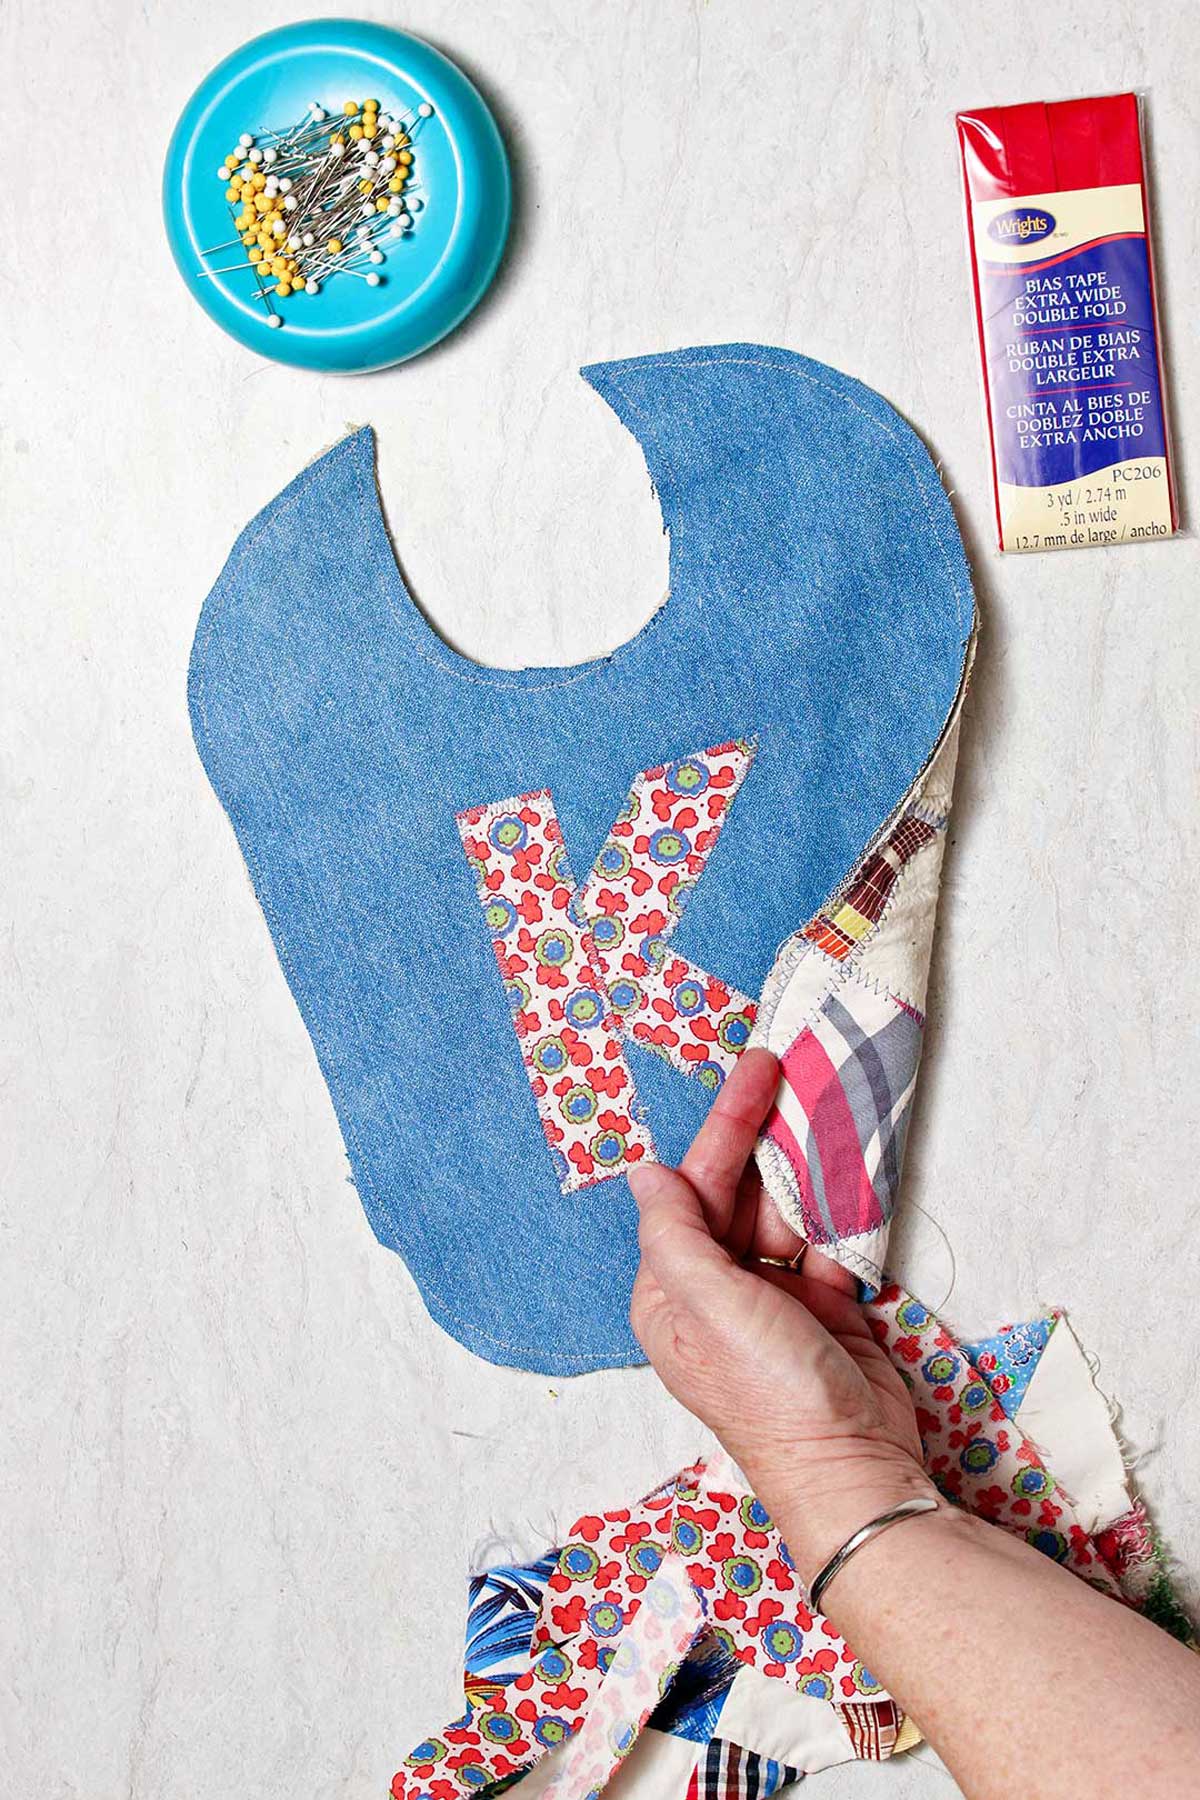
Place the two pieces together...
Place the two bib pieces together, edges matching, wrong sides together.
One of my bonus tips for those new to sewing - you can hold the first layer together with the second layer by zig-zag stitching the edges. The only purpose of this is just to hold the layers of fabric in place as you finish the edge, if you want!
Just to restate, at this point you want the right sides of the fabrics both facing out, so you can see those cute designs whenever reversed!
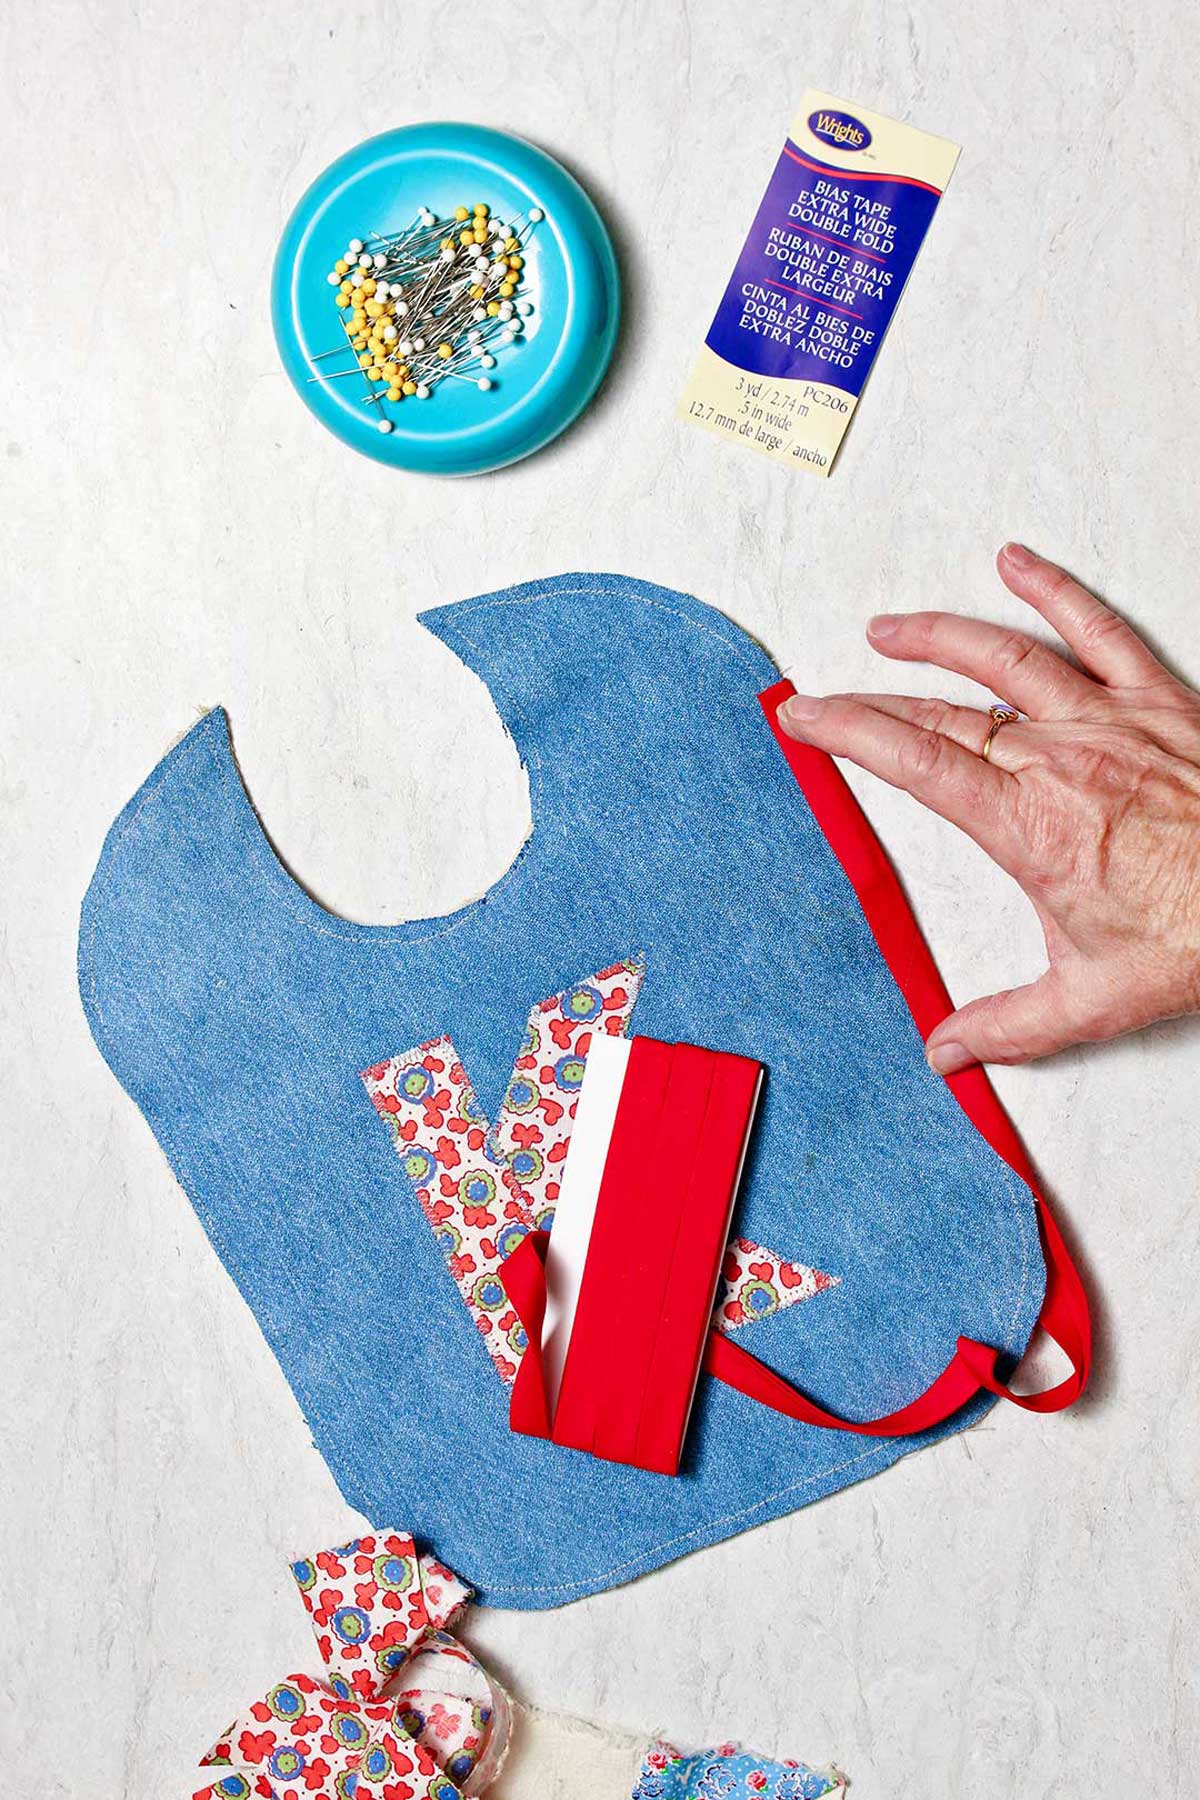
Finish edge with seam binding
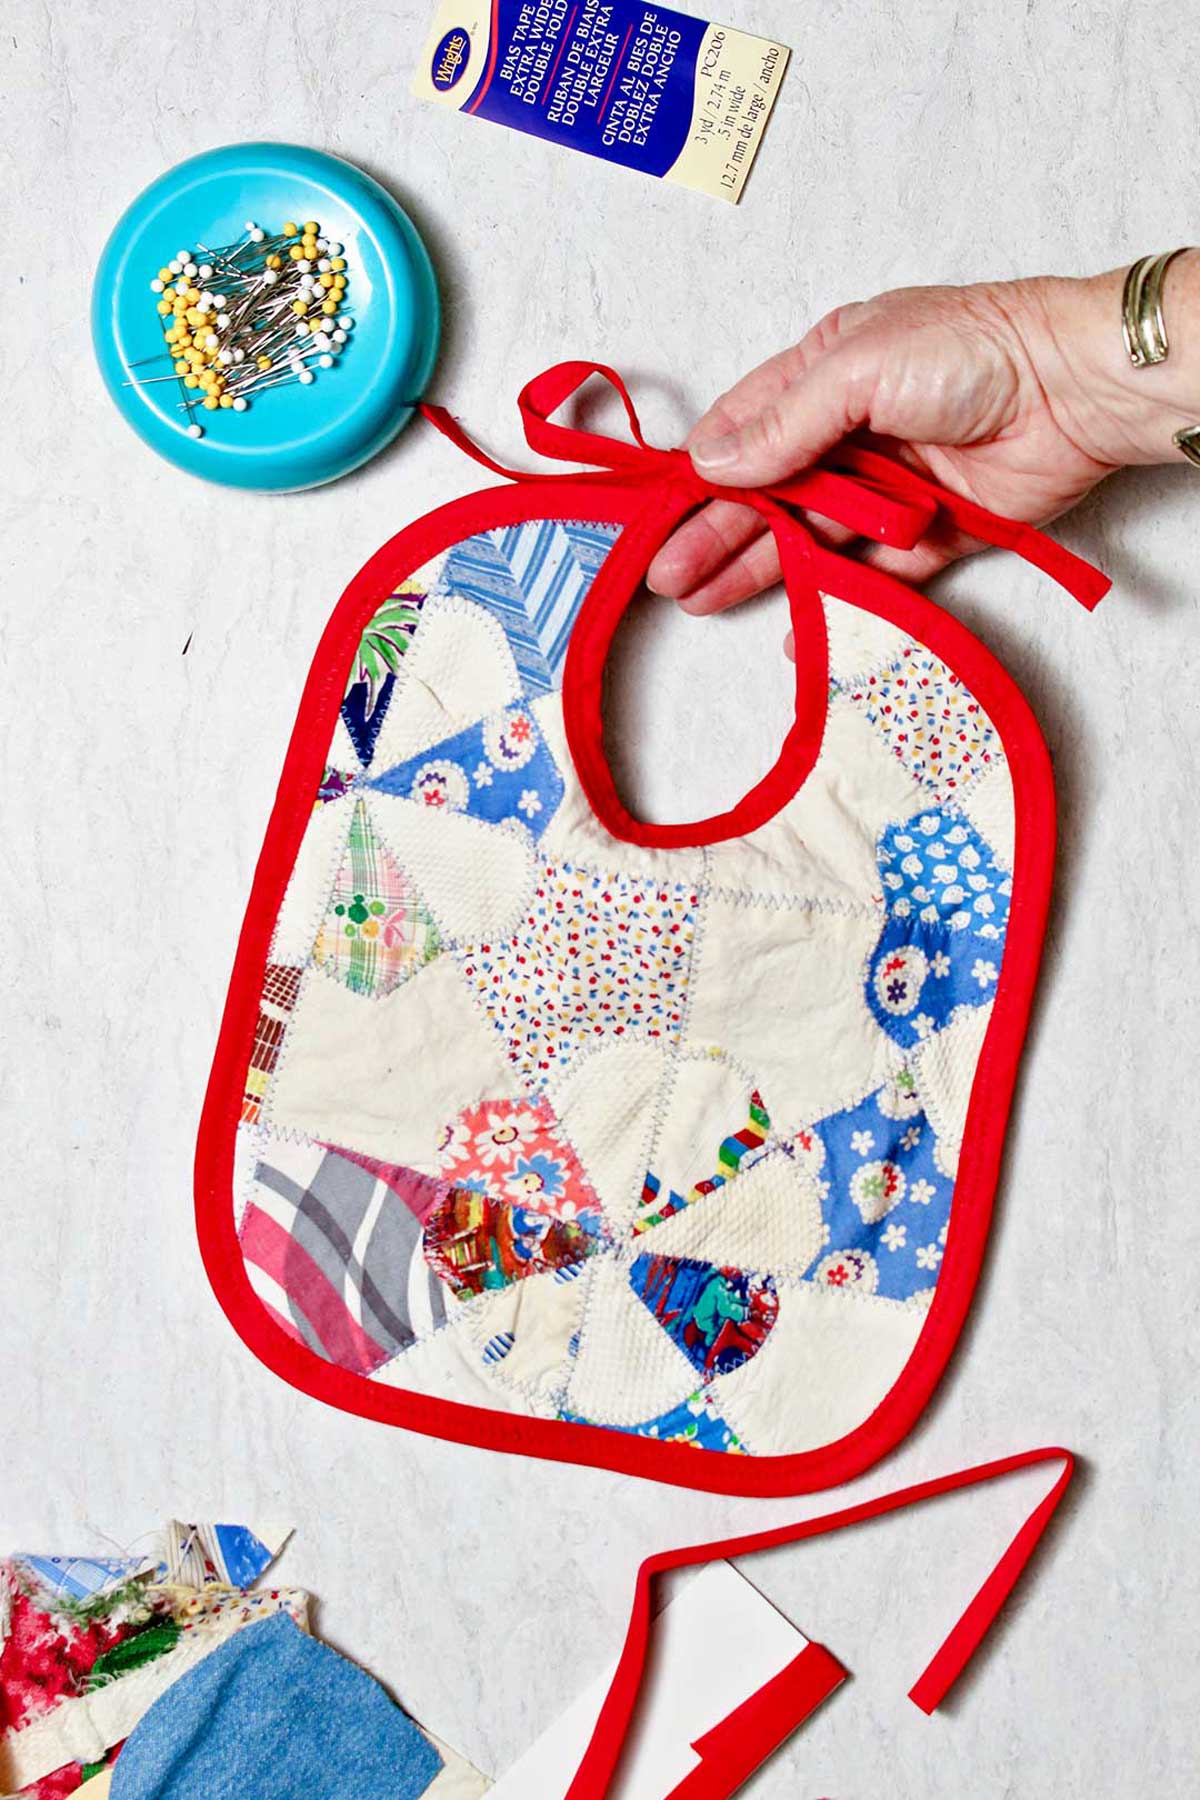
We will use seam binding or bias tape to finish the edge of the bib. You'll want to choose a color that coordinates with your fabric.
Open the binding up and sandwich the edge of the bib inside the binding. Start on the neck edge and go all the way around the main part of the bib, ending again at the top of the bib on the other neck edge.
If it helps you, you can pin the seam binding on before sewing so you make sure you catch every layer of the bib and it stays secure as you sew.
I use a zig-zag stitch along the edge of the binding closest to the fabric. The stitching stays entirely on the binding- it holds it on really well.
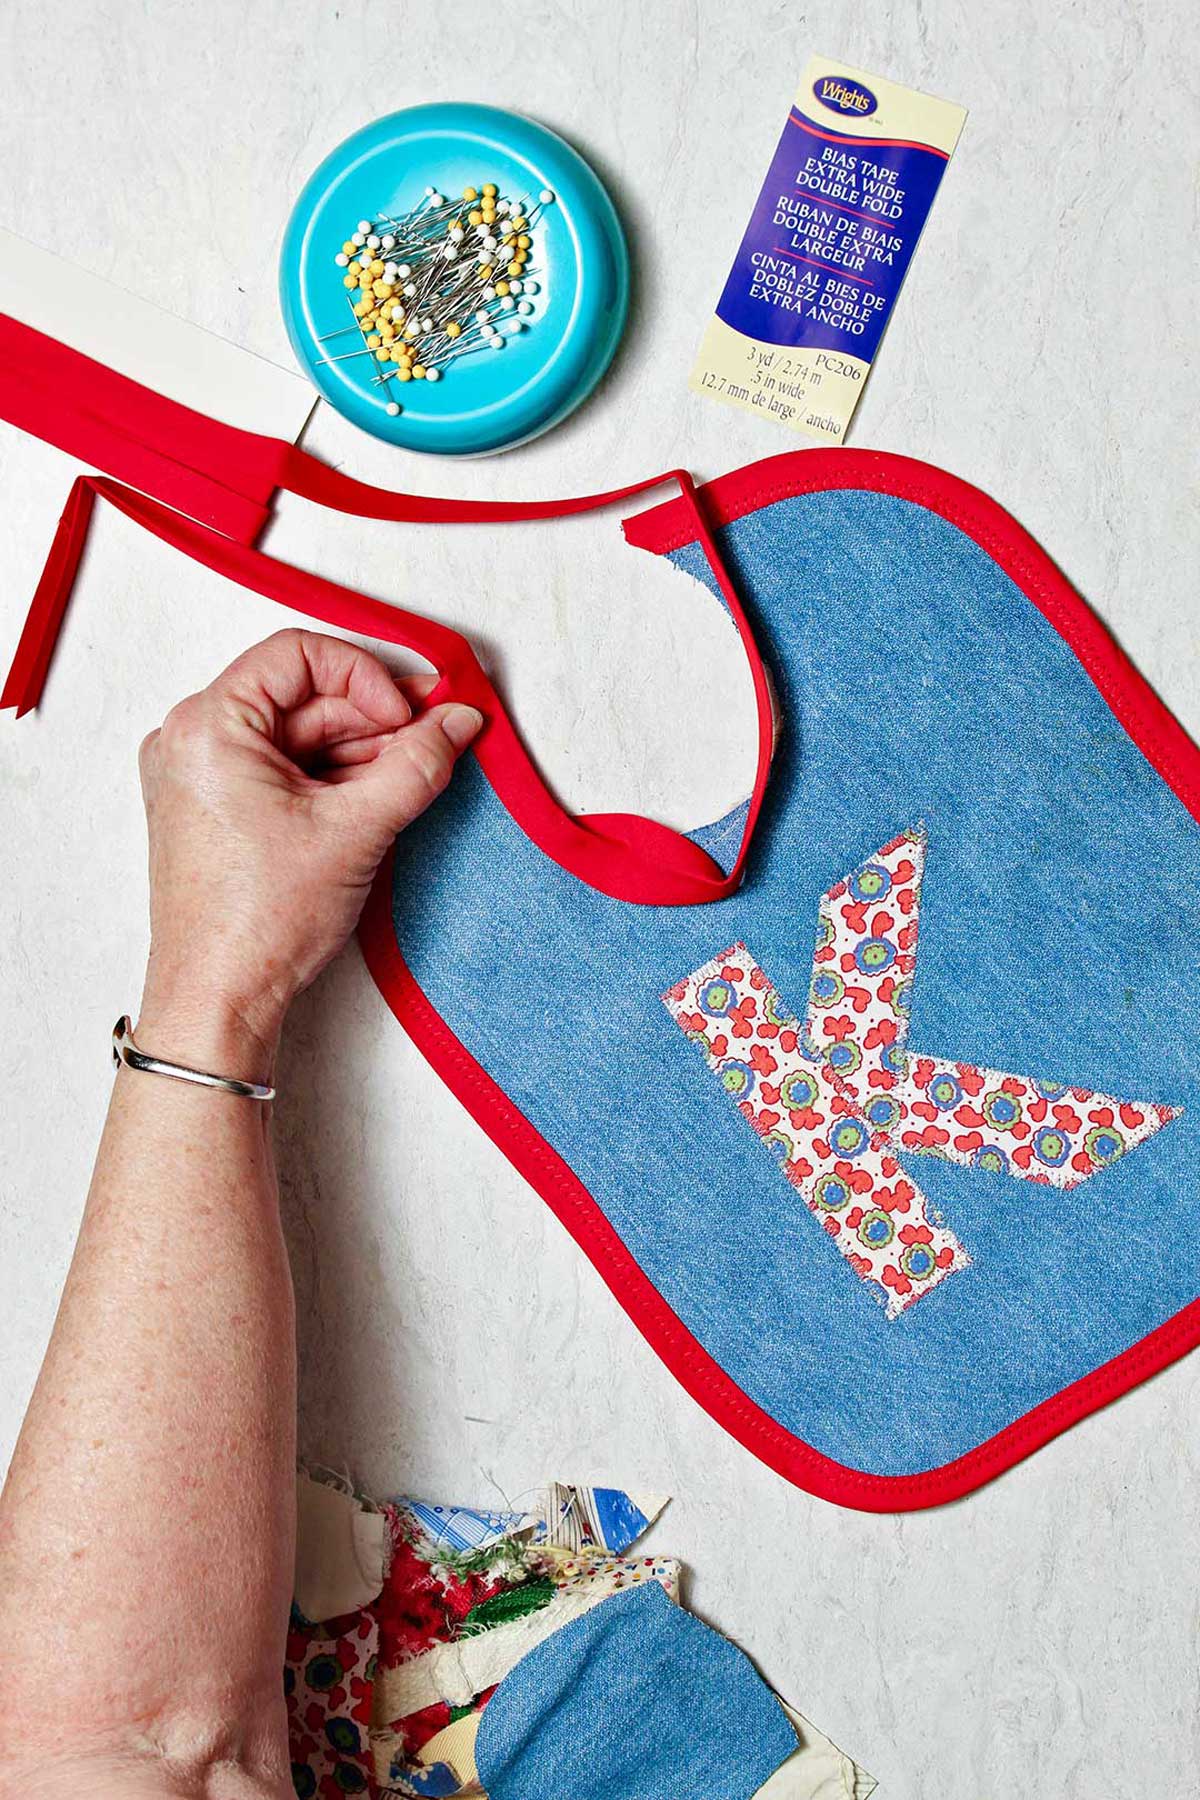
Finish neck edge with seam binding- make ties
Now for the last step, it's time to finish the ties and the neck edge of the bib with binding as well!
Leave one foot of extra binding on each side of the oval shape of the neck opening. These will be your ties.
Zig-zag the edge of the 12 inch tie, and continue zig-zagging the seam binding as it circles the inner curves of the bib and finishes up the opposite side of the neck edge.
Finally, zig-zag all the way down the edge of the other 12 inch tie.
This step is all in one continuous seam.
Variations on This Easy-to-Sew Bib
And that's it, you've finished! Now that you've walked through the baby bib tutorial, you might want to try some variations as well.
As we talked about before, you can use all kinds of fabrics to make unique bibs.
This pattern size is great for younger babies, but if you are looking for baby items for older babies, or even a toddler bib, you will likely want to size this up!
I haven't tried this, but the pattern is simple and I think would be easy to adjust for different standard sizes as needed. I would try altering the entire bib to the proper size for an older child by adding an equal measurement around the edge before cutting out the fabric. You'll also need to alter the small opening for the neck to be larger one for older kiddos.
Another variation I think would be neat to try in the future, is to make a bib with a velcro closure instead of ties. This pattern is not made to accommodate this, but if you wanted to try extending the "shoulder" area on Bib Piece 1, you could attach small pieces of velcro (hook and loop tape) or kam snaps to each edge where they come together.
Again, this pattern isn't built for this, so it would take a bit of guess-work.
How to Use Your DIY Bib
OK, so I love this project the more I think about it. It really doesn’t take long, and it is a great learn-to-sew project for a variety of skill levels.
I’m going to make up a few extras to have on hand for gifts.
They are fun baby accessories to add to a meal brought to a new mother, for example, or they make perfect baby shower gifts!
Please attach pictures so we all get to see what you choose to do with this Reversible DIY Bib for Baby pattern.
There are so many possibilities!!
For a DIY baby bib, you need two pieces of fabric that are 12-inches by 18-inches in size. Check out the free printable pattern for exact measurements and shapes!
Really the fabric to make a bib can be whatever you want! But denim, woven cotton fabric scraps, a terry cloth towel, and flannel fabrics work well. You can even make a DIY bib from a hand towel!
To make a cute reversible baby bib, you need two pieces of fabric that are 12-inches by 18-inches in size. You can use the same fabric on both sides or different fabric on each side of the bib like I did.
Want more sewing projects for baby??
If you are on the lookout for another great baby shower gift with a step by step tutorial to follow, check out these ideas from around the site!
They are perfect for DIY gifts of course, but fun for your own babies as well, or just doting on those new little ones in your life too. Happy sewing!
- Easy DIY Baby Onesie Gift
- Homemade Baby Burp Cloth
- Free Baby Shoes Sewing Pattern and Tutorial
- How to Sew a Hooded Towel
Supplies for the Reversible DIY Bib for Baby:
- Copy of the Reversible DIY Bib for Baby Free Pattern
- Fabric- 2 pieces that are about 12-inches by 18-inches in size
- Fabric- small scraps to use for a monogram or design (optional)
- Wonder Under fusible web- for ironing on the monogram (optional)
- Seam binding- one package in a coordinating color to your fabrics
- Sewing machine
- Thread
- Scissors
- Pins
Reversible DIY Bib for Baby- Free Pattern
Equipment
- Sewing machine
- Scissors
- Pins
Items Required
- Copy of the Reversible DIY Bib for Baby Free Pattern
- Fabric- 2 pieces that are about 12-inches by 18-inches in size
- Fabric- small scraps to use for a monogram or design (optional)
- Wonder Under fusible web- for ironing on the monogram (optional)
- Seam binding- one package in a coordinating color to your fabrics
- Thread
Instructions
- Print off a copy of the free pattern for the bib. Here is the link: Reversible DIY Bib for Baby Free Pattern. It is a two page pattern so print on one side of the paper only. Cut the pattern out and tape the two pieces together.
- Use the free pattern to cut one bib piece from each of your two fabrics.
- Add a monogram to the plain denim piece (optional). I used a “K” which was the first letter in the babies first name. You could also use a design of some sort- like a heart, car, or flower. I ironed Wonder Under (a fusible web) on the back of the fabric. Then drew the design on the fabric and cut it out. I pulled off the paper backing on the Wonder Under and ironed the monogram on the front of the denim bib piece of fabric. It works so well! Follow the instructions on the Wonder Under.
- Place the two bib pieces together, edges matching, wrong sides together. You can zig-zag them together on the edges to hold them in place if you want.
- We will use seam binding to finish the edge of the bib. You want a color that coordinates with your fabric. Open the binding up and sandwich the edge of the bib inside the binding. Start on the neck edge and go all the way around the main part of the bib, ending on the other neck edge.If it helps you, pin this on before sewing.I use a zig-zag stitch along the edge of the binding closest to the fabric. The stitching stays entirely on the binding- it holds it on really well.
- Then finish the ties and the neck edge of the bib with binding as well. Leave one foot of extra binding on each side of the neck edge. Zig-zag the edge of the 12 inch tie, continue zig-zagging the seam binding as it circles and finishes the neck edge, and then zig-zag down the edge of the other 12 inch tie- all in one continuous seam.
- That’s it. You’ve finished your bib project. It really doesn’t take long, and it is a great learn to sew project.
Video
This post was originally published in March 2023 and has been updated to add more relevant and detailed content.

MyPetDoggie says
Thanks for putting each and every piece of knowledge under a single piece of content!
Jolene says
I’m struggling with the binding around the neck that makes the tie- I need to use a softer fabric like flannel but that makes the ties really thick. Any suggestions?
Shelly says
Hello! Are you making your own binding out of the flannel material? That would make thick ties. I used purchased seam binding in a solid color that complimented the fabric. That worked well. Please give more details if I am not fully answering your question and I'll get back with you! Thanks, Nana-
Violet says
This is honestly such a precious and practical gift! I featured your reversible baby bib on Crafts on Display, I hope you enjoy it. Keep up the amazing work! https://craftsondisplay.com/sewing/reversible-baby-bib-240379/
Shelly says
Thank you, I hope you got good feedback on the bib pattern. I have made it many times and hope your viewers will also! Blessings!