
Easy Craft Idea for all ages...
Painted Terra Cotta Flower Pots work well as a craft for any age- for the grands and even for Nana and her friends.
Jazz up those Terra Cotta Flower Pots before planting flowers in them this spring. This easy and fast craft was a hit with the grands.
Gifts for Mother's Day or Any Occasion!
The grands and I painted Terra Cotta Flower Pots for their mother’s birthday gift. These would be perfect for Mother’s Day gifts as well. Of course, it goes without saying that they are perfect for Nana’s house too!!
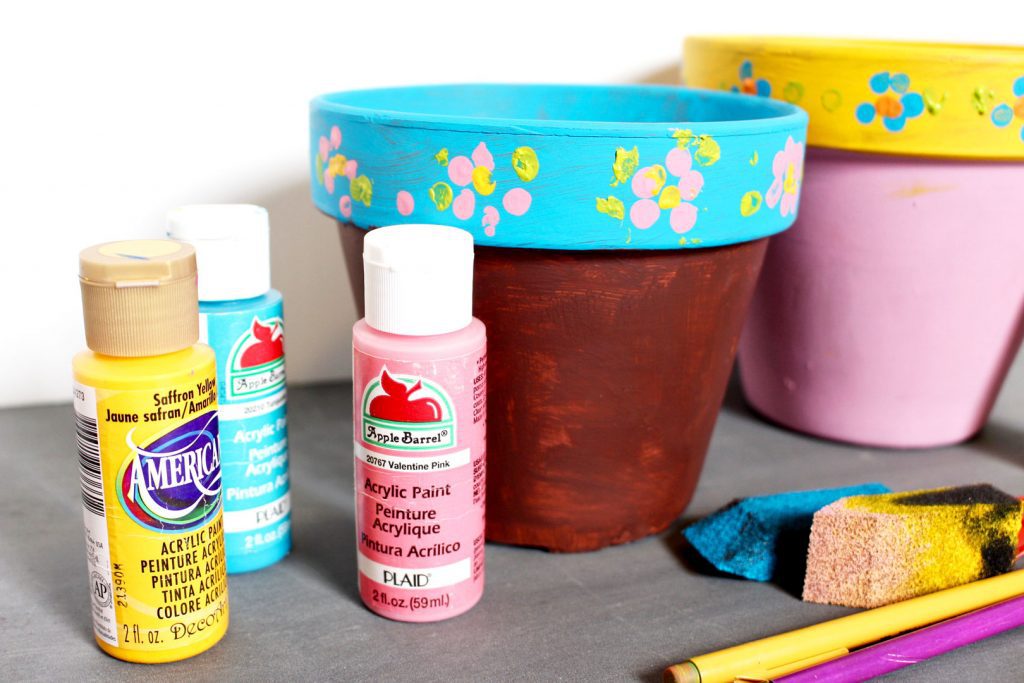
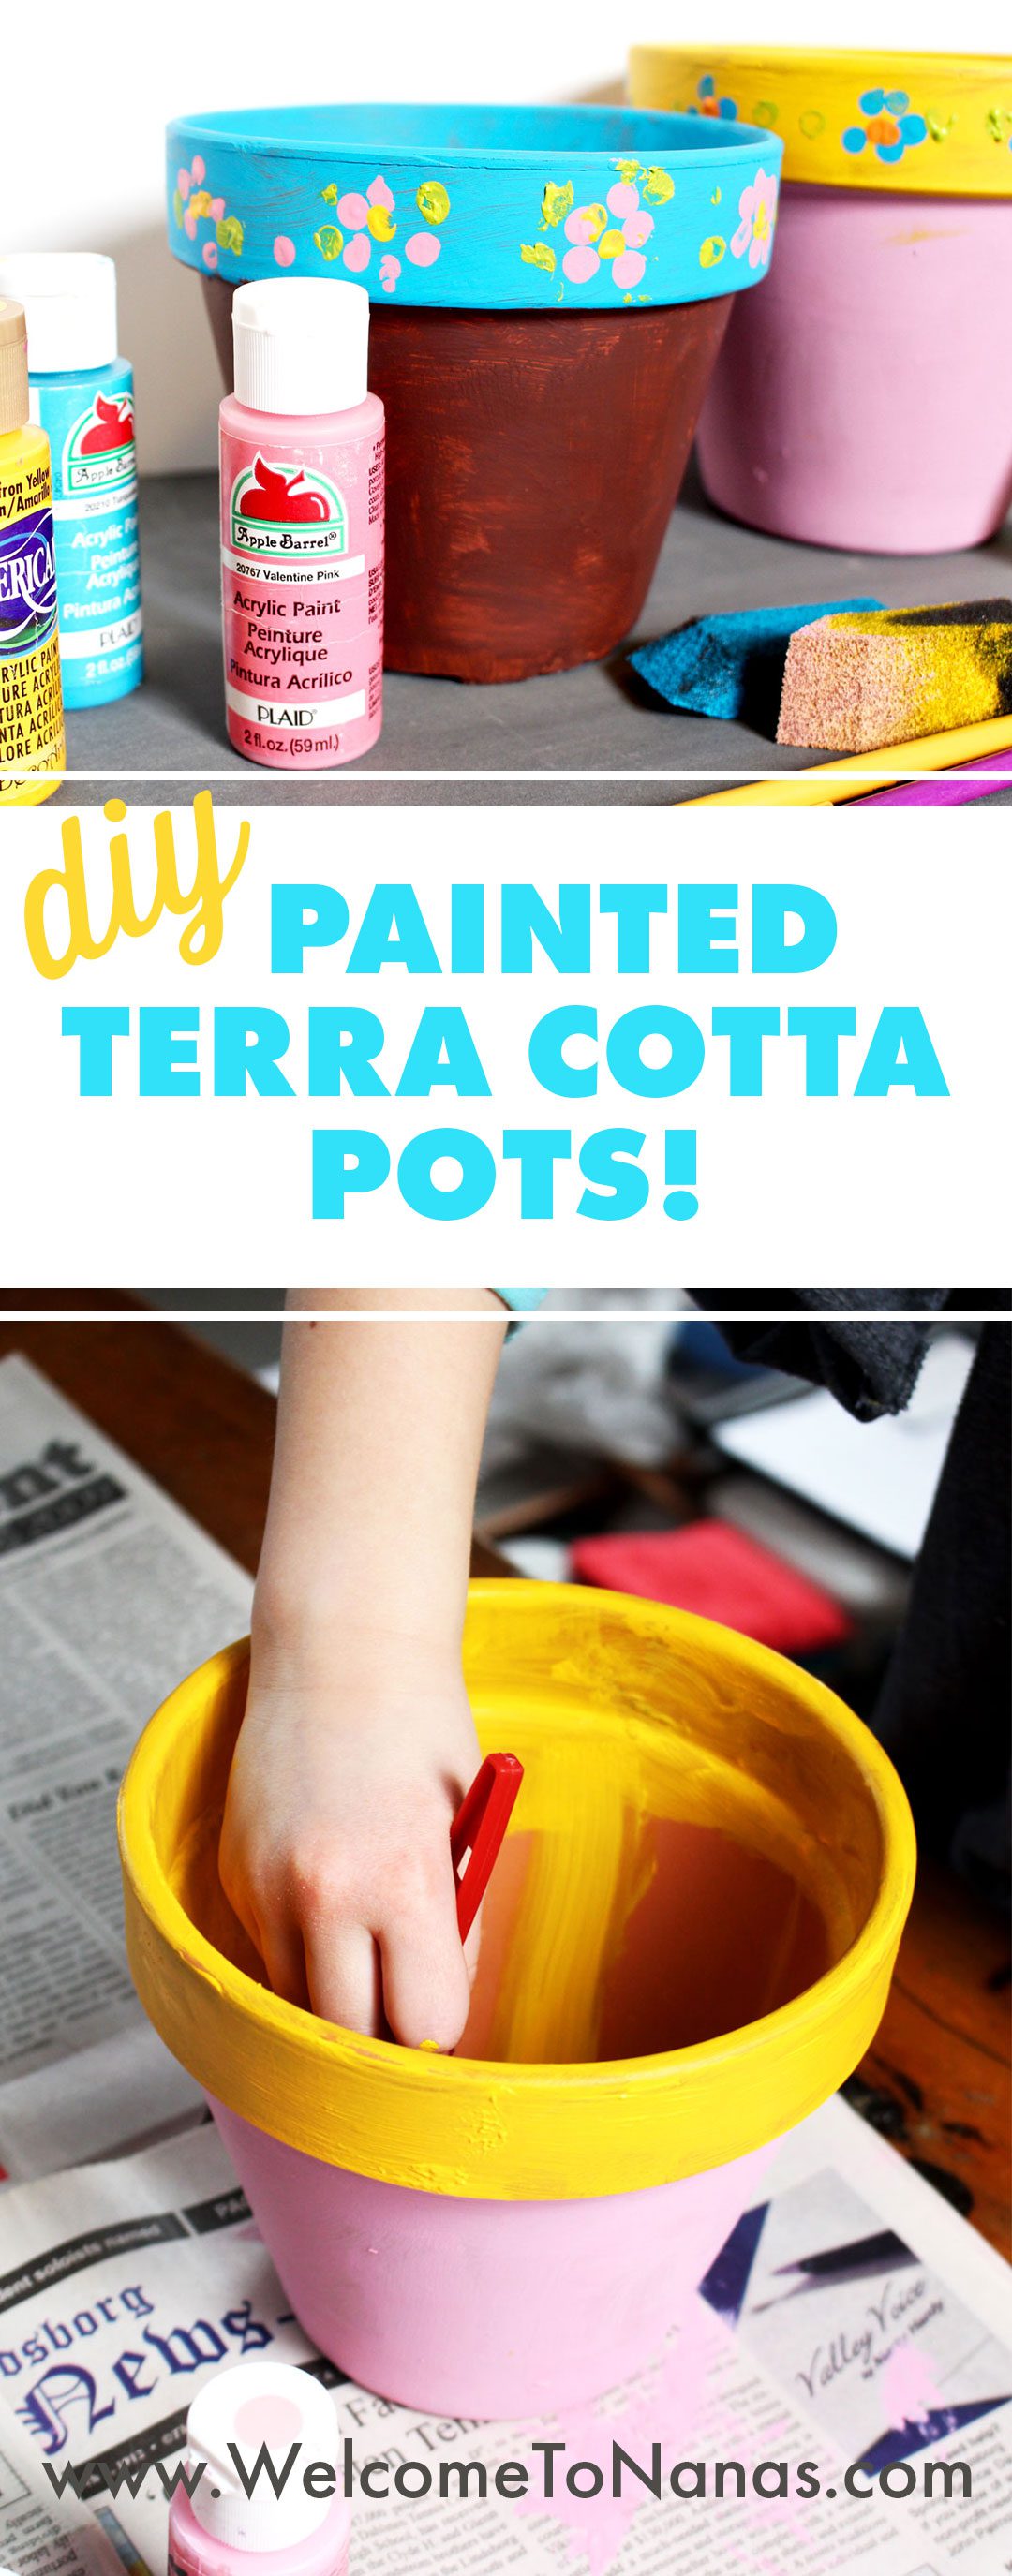
Gather Your Supplies
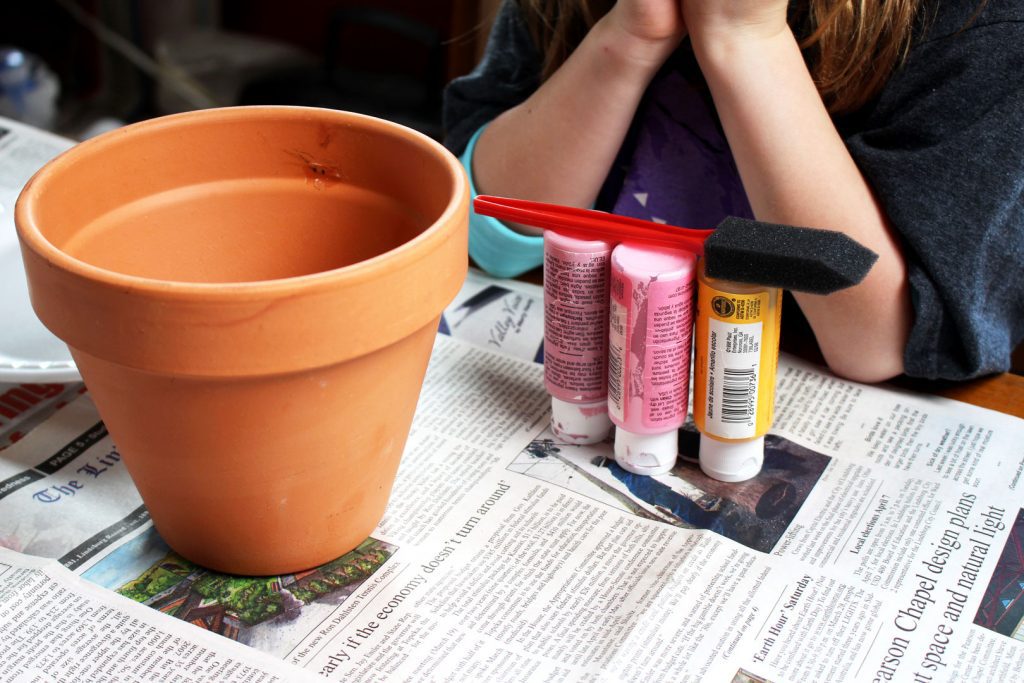
New terra cotta flower pots are best to use for this project as they need to be clean for the paint to adhere well. You can use any sizes of pots you would like.
Put paper down on the table and t-shirts or paint aprons on the kids (and you) to protect them all from paint!
Kids- Choose Your Colors!!
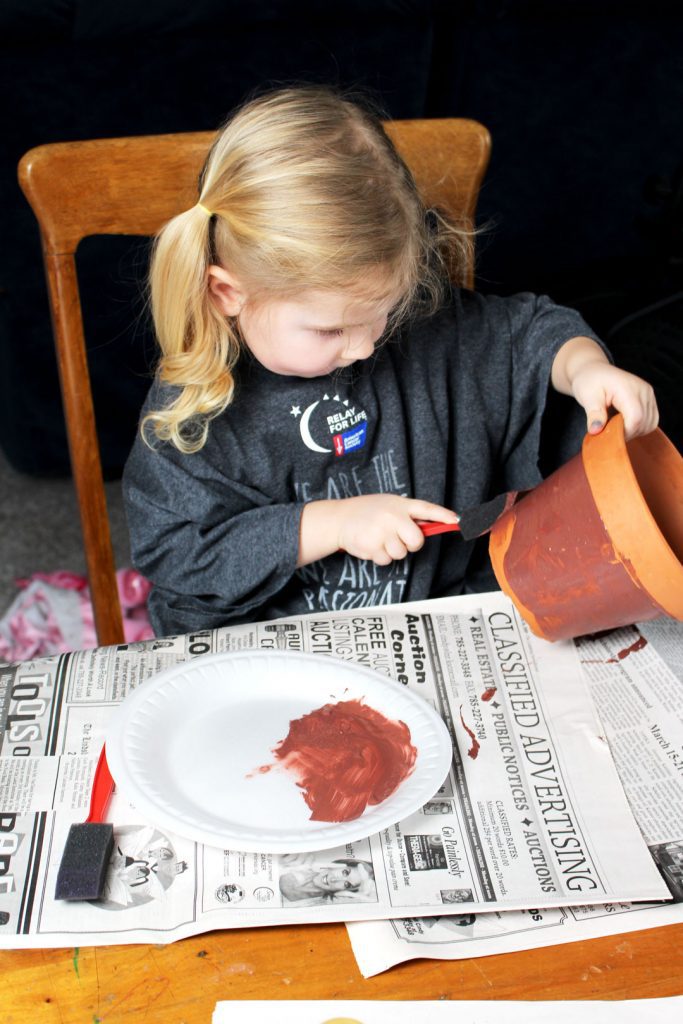
The kids knew right away what colors they wanted to paint their pots. Choose two colors, one for the main part of the pot and a second for the rim and interior of the pot.
Place a half dollar sized dollop (love that word) of paint on a foam plate. Use a foam brush to brush on the paint starting with the main part of the pot. Then switch colors and use a clean foam brush to paint the second contrasting color on the rim and interior of the pot.
Tip: You may need to come back and paint a second coat on the pot to cover the surface well. The paint dries very quickly.

Pretty Painted Flowers on Flower Pots
This last step is so fun and easy!! The grands loved painting flowers on the rim of their Painted Terra Cotta Pots!
Choose two more colors that contrast with the rim color for the petals and interior of flowers. Also choose a green for leaves. Place small dime sized dolops of the three colors on your foam plate.

Flower Pattern to Paint
Start by having the grands use a pencil to draw dots on the rim of the pot where you want the center of the flower to be. This will help them have a plan as they are painting their flowers.
Tip: For the younger grands it will help if you draw the dots all around the rim of the pot that they can use for the center of their flowers. This helps them remember the pattern of center dot color and circling it with dots of the petal colors.
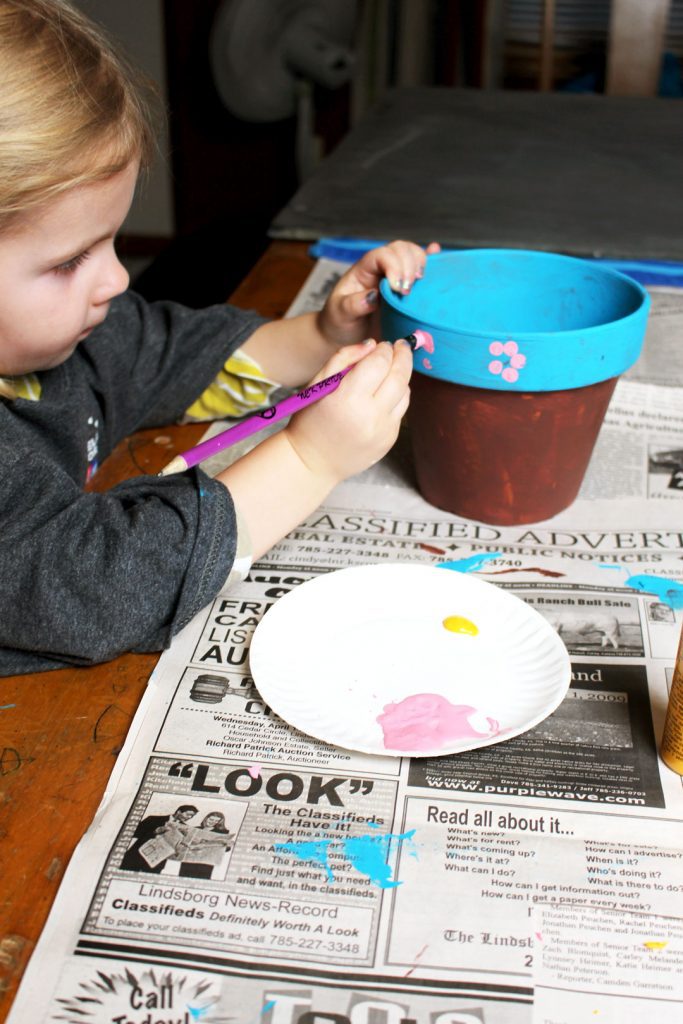
Use the rubber eraser of a new pencil to make the flower pattern. Dip the eraser in the paint that will be the petals color of the flower. Make a circle of dots around the pencil marks for flower petals. We had to dip the pencil in the paint for each petal so it would make a nice round shape.
Wash the pencil eraser well and then dry it off.
Next, dip the eraser in the paint color chosen for the center of the flowers and make a dot of color in the center of each flower, over the pencil dot drawn earlier. Wash off the pencil eraser once again and then dry it off.

Finish off the flowers by dipping the eraser in the green leaf color and making dots of color on a couple places next to each flower.
Of course the grands wanted to keep making dots of color and added a few flourishes of their own!
Seal the Painted Terra Cotta Flower Pot
When the painted terra cotta pots are dry, spray them outside and inside with a clear acrylic sealer. This will make them easy to clean off and will help the paint to last much longer. I didn’t get a picture of this step, oops.
Tip: Be sure to do this step in a well ventilated area.

Perfect To Give Or Perfect to Keep!!
The grands were so proud of their Painted Terra Cotta Flower Pots. They kept wanting to carry them around and I was concerned they would be broken before we could even get them to their house. We wrapped them in tissue paper and put them in a gift bag for safe keeping until their mom’s birthday the next day.
It was too early for the flower plants to be out at our local store so that will need to wait a couple weeks. If you have extra pots, you could also try decoupaging terracotta with fabric!

Supplies:
- Terra cotta pots in sizes of your choice (new is preferred, need to be clean)
- Acrylic paints in colors of your choice (at least 5 colors, 2 for background, 3 for flowers)
- Clear acrylic sealer in a spray can
- Foam brushes (2 each)
- Pencils with a new rubber erasers
- Foam plates
- Newspapers (to cover the table)
- Old t-shirts or paint aprons (to cover kids!)
Enjoy!
Welcome to Nana’s! Where there’s fun things to do with your “grand” kids!


Leave a Reply