These adorable Easter String Eggs are a messy, fun craft made from glue, string and balloons. Turn them into a garland, a basket, or a decoration!
Want to learn how to make string Eggs for Easter?
I’m excited for us to learn how to make string eggs for Easter gifts and decorations! It is such a hands-on project with string and glue and balloons. Kids and adults will love it. Even though (or especially because) it is kind of messy.
We will explore using string eggs to hold candy inside, to string as a garland, and to cut a hole in the side to use them to hold Easter eggs as a basket or a decoration. I’m sure you’ll think of lots of other ways to use them as well.
Girlhood memories of string Easter eggs
When I was young I remember seeing sugar eggs in the Easter candy aisle. The sugar eggs had a whole cut in the side and small frosting and candy figures inside. So you looked through the side and saw a little scene inside the egg. I was totally intrigued with them.
When I learned to make a string egg it gave me an opportunity to imitate the sugar egg, but be able to keep and use the next year! I was always looking for little projects like this when I was young. I’m hoping you or the young people in your life will be intrigued with it as well.
Supply options
The supply list is at the bottom of this post, but I will talk about some supply options and some different methods you may choose as you make these Easter egg crafts.
Balloon size/type depends on use
First, you need to decide what your purpose or use for your string eggs because this determines the size of the balloon that you will use or how large you will blow up your balloon.
I’m going to go through three ways to make/use these string eggs and explain to you how I did each one. You can choose one of these ideas, or you can come up with your own ideas and pursue those!
If you’re wanting to use them to hold candy eggs or make a garland, you will use a water balloon or only blow the balloon up to be a bit smaller than your fist.
But if you’re going to make a large hollow egg for decorations, you might want to use a nine or 12 inch balloon and blow it up more like the size of a soccer ball.
Choices of string
There are various things that you can use for string to wrap around your balloon. You can use embroidery floss/embroidery thread, or crochet thread, as well as yarn.
It's nice because they come in such a variety of colors. I used solid colors but you could use a variegated thread or change color thread to make unique color schemes!
Note: I used yarn for my smaller eggs and a white crochet thread for the larger egg.
Glue
I used regular white glue to make my eggs (like Elmer's glue). Some people prefer Mod Podge.
Note: I purchased a gallon of white glue for craft purposes. This is a less expensive way to get a larger quantity of glue.
I've also heard that people use a liquid starch or a sugar water mixture on their string crafts. I know that’s what my grandma did when she would crochet and stiffen things like snowflakes and such. I’m sure that would work, I just don’t have experience with it.
Prepare your work surface
You’re going to want to prepare your work surface because this is a messy craft. It’s glue which will dry and peel off or wash off a countertop, but I would rather not get it messy in the first place.
So put down a piece of waxed paper or parchment paper to work on. Then you can just throw away it when you’re done instead of having to scrub the countertop.
Bowl
Use a large bowl to put your glue mixture in. I put in probably one and a half cups of glue to start with because I was making several string eggs. You would not need that much if you’re only going to make one. And you can always add more glue if you need to.
How do I start making string eggs?
Garland
If you’re wanting to make a garland of string Easter eggs, you will want to either use water balloons or not blow a regular balloon up very large.
Blow them up to about the size of your fist and go ahead and blow up the number that you will want to use and string on your garland. I made seven of the little balloons. That way I can try to make them all the same size. I was moderately successful at that!
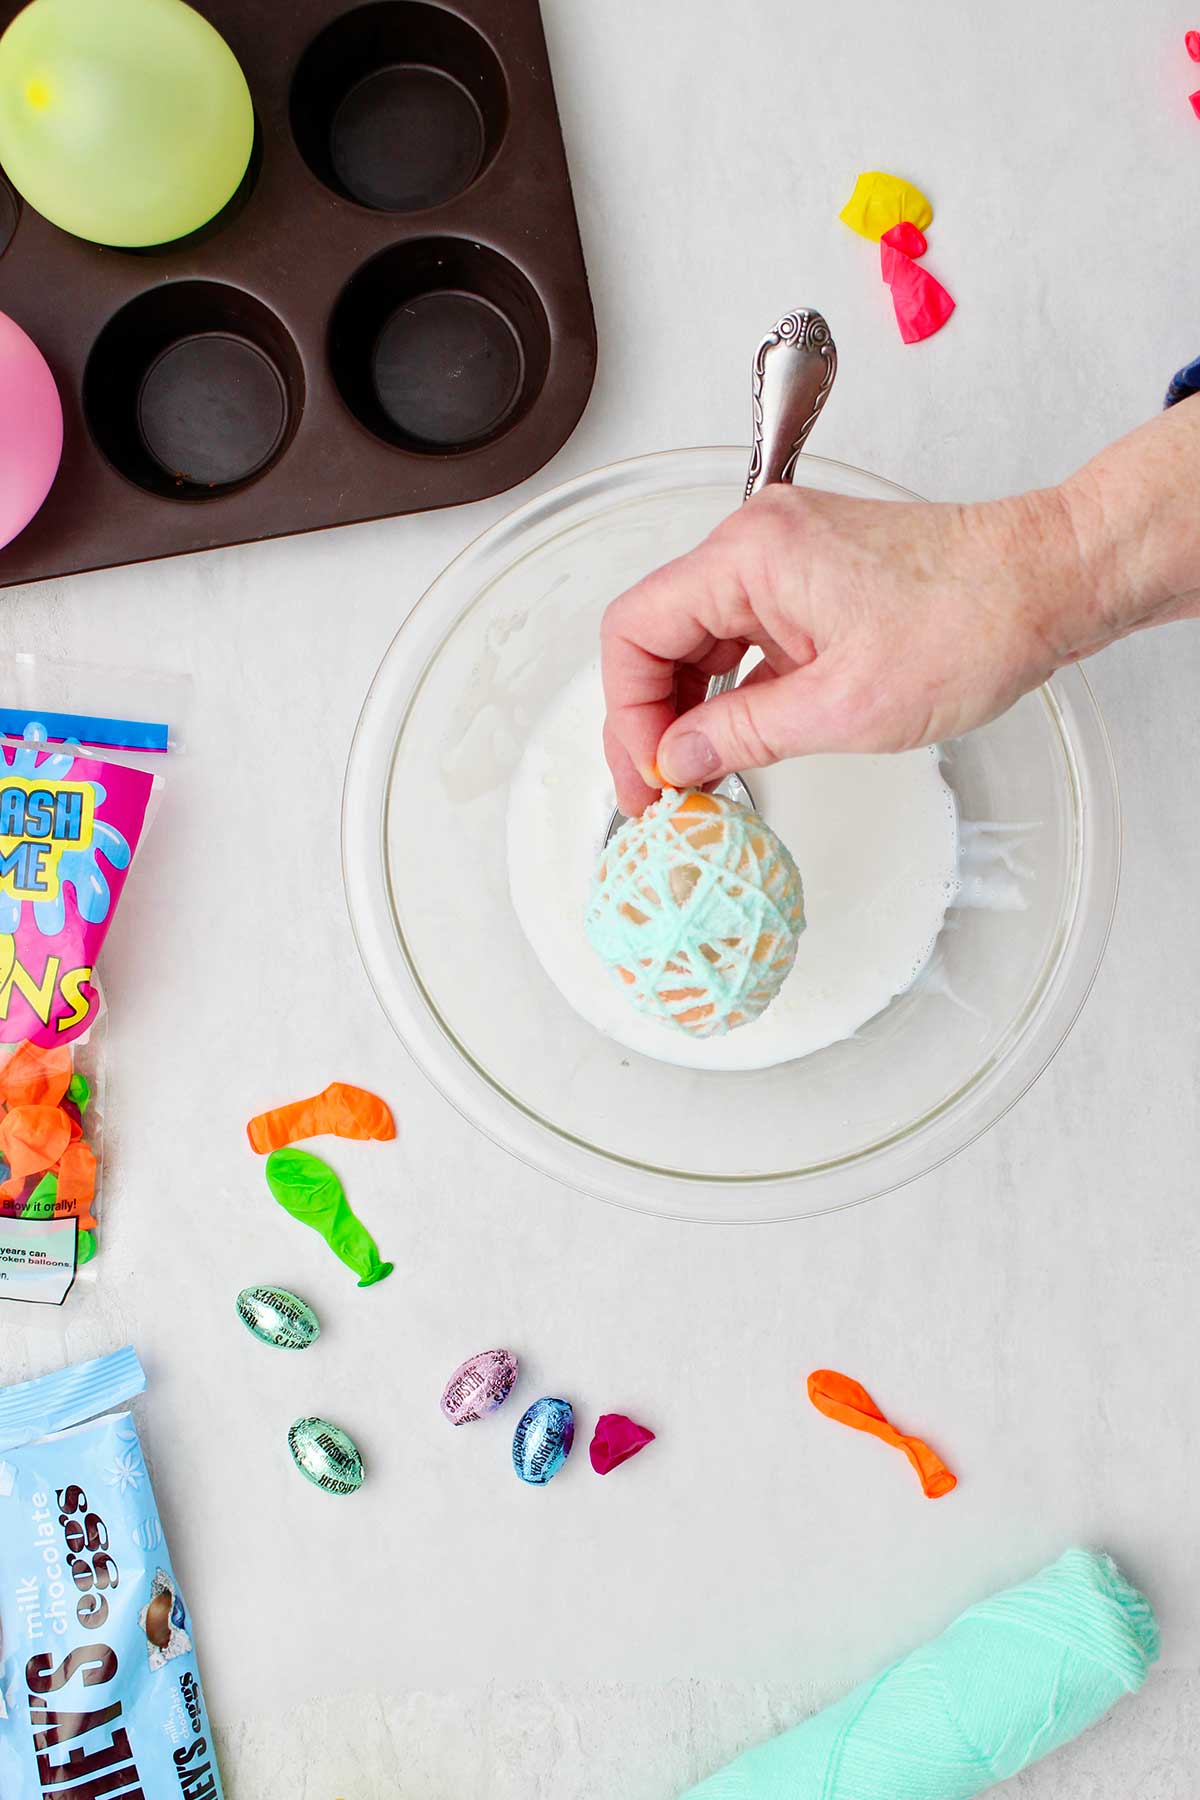
DIY egg with candy inside
If you’re going to use your string egg to hold candy, then you will want to put candy inside your balloon before you blow it up.
I used water balloons for this purpose. They are smaller and stay in the egg shape. But they’re also pretty lightweight because they want them to break easily in a water balloon fight! So you may want to use a regular balloon and just not blow it up very large, a bit larger than a real egg.
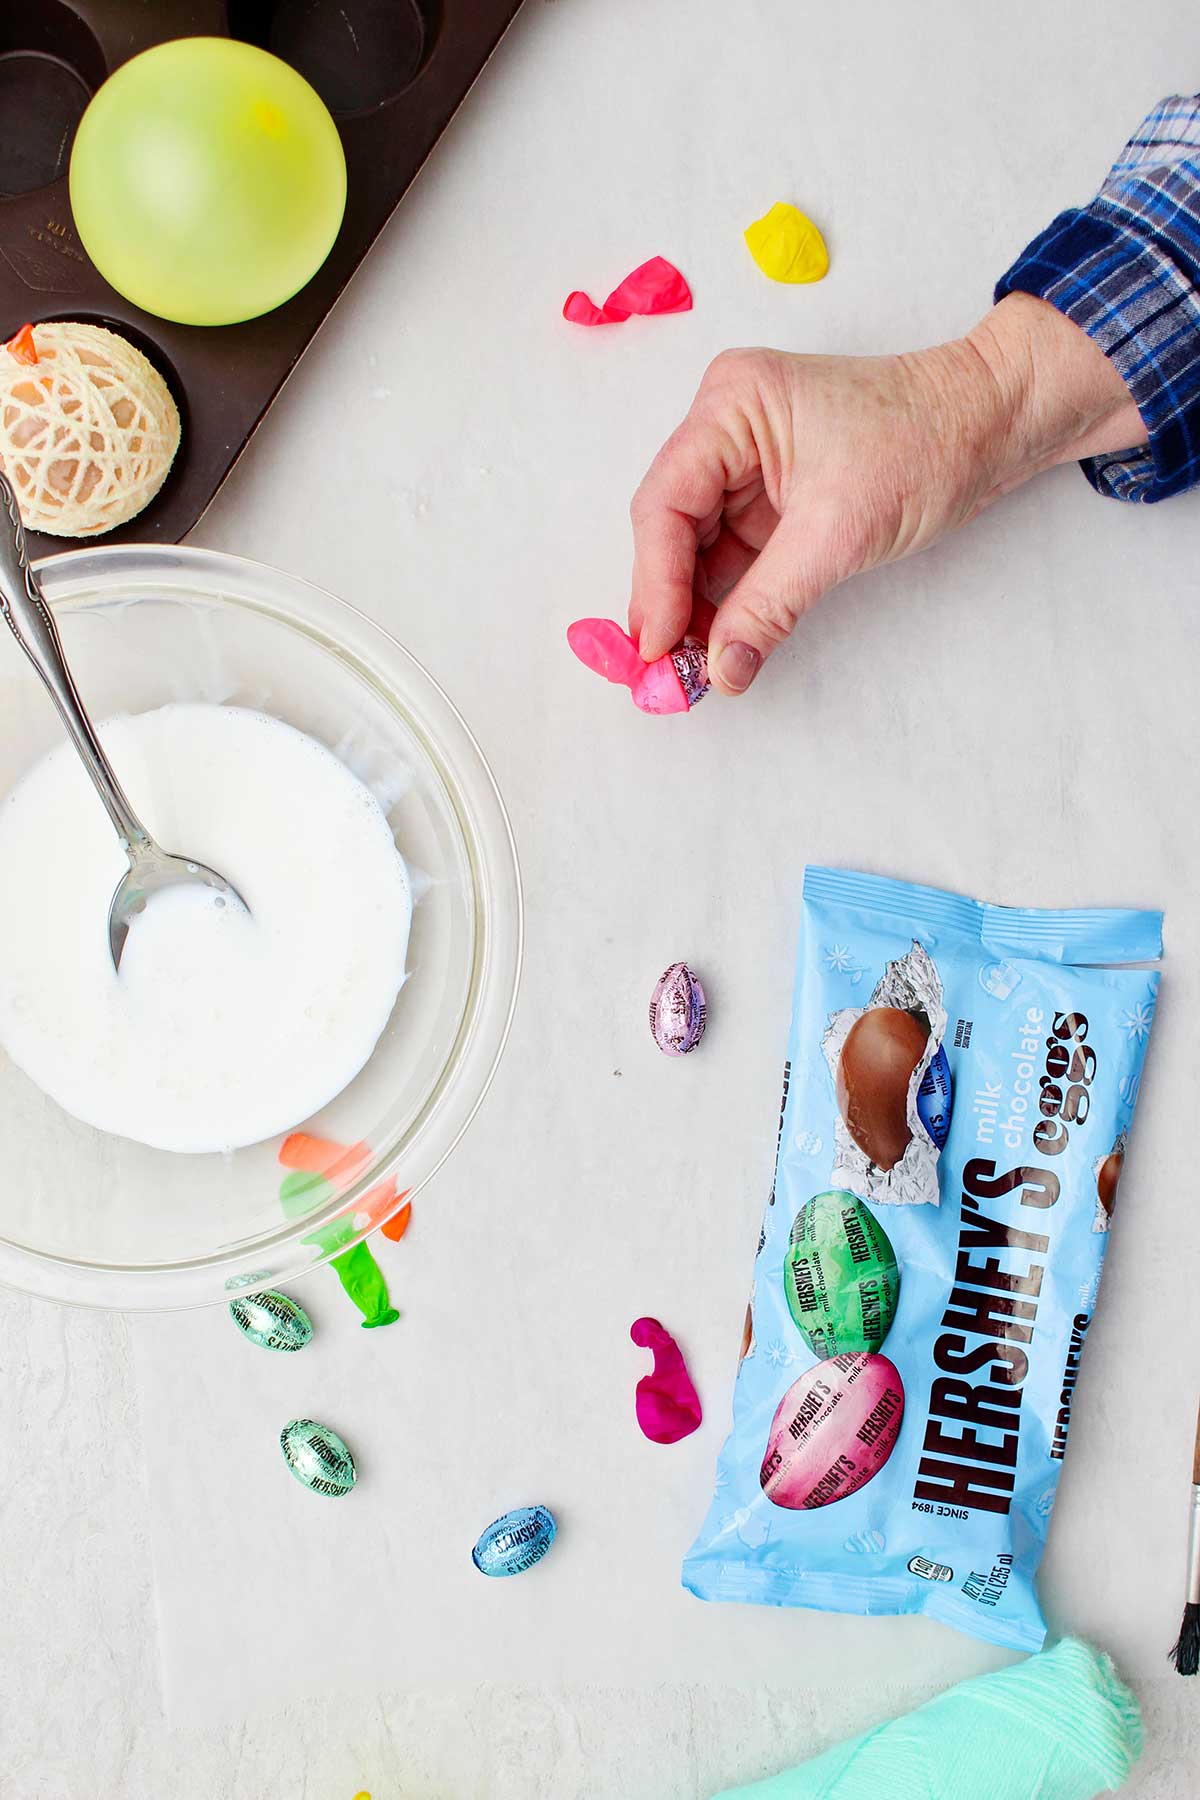
To put the candy into the balloon it’s best to have a round shaped candy so that it moves into the open end of the balloon more easily. I used foil wrapped chocolate candy eggs.
Put the candy into the the opening of the balloon and gently roll the balloon up and over the piece of candy. I could only get two maybe three in each of my water balloons. I’m sure you might be able to get more in regular balloons.
Once the candy is inside the balloon, go ahead and blow it up to the correct size. This sounds pretty funny on the video.
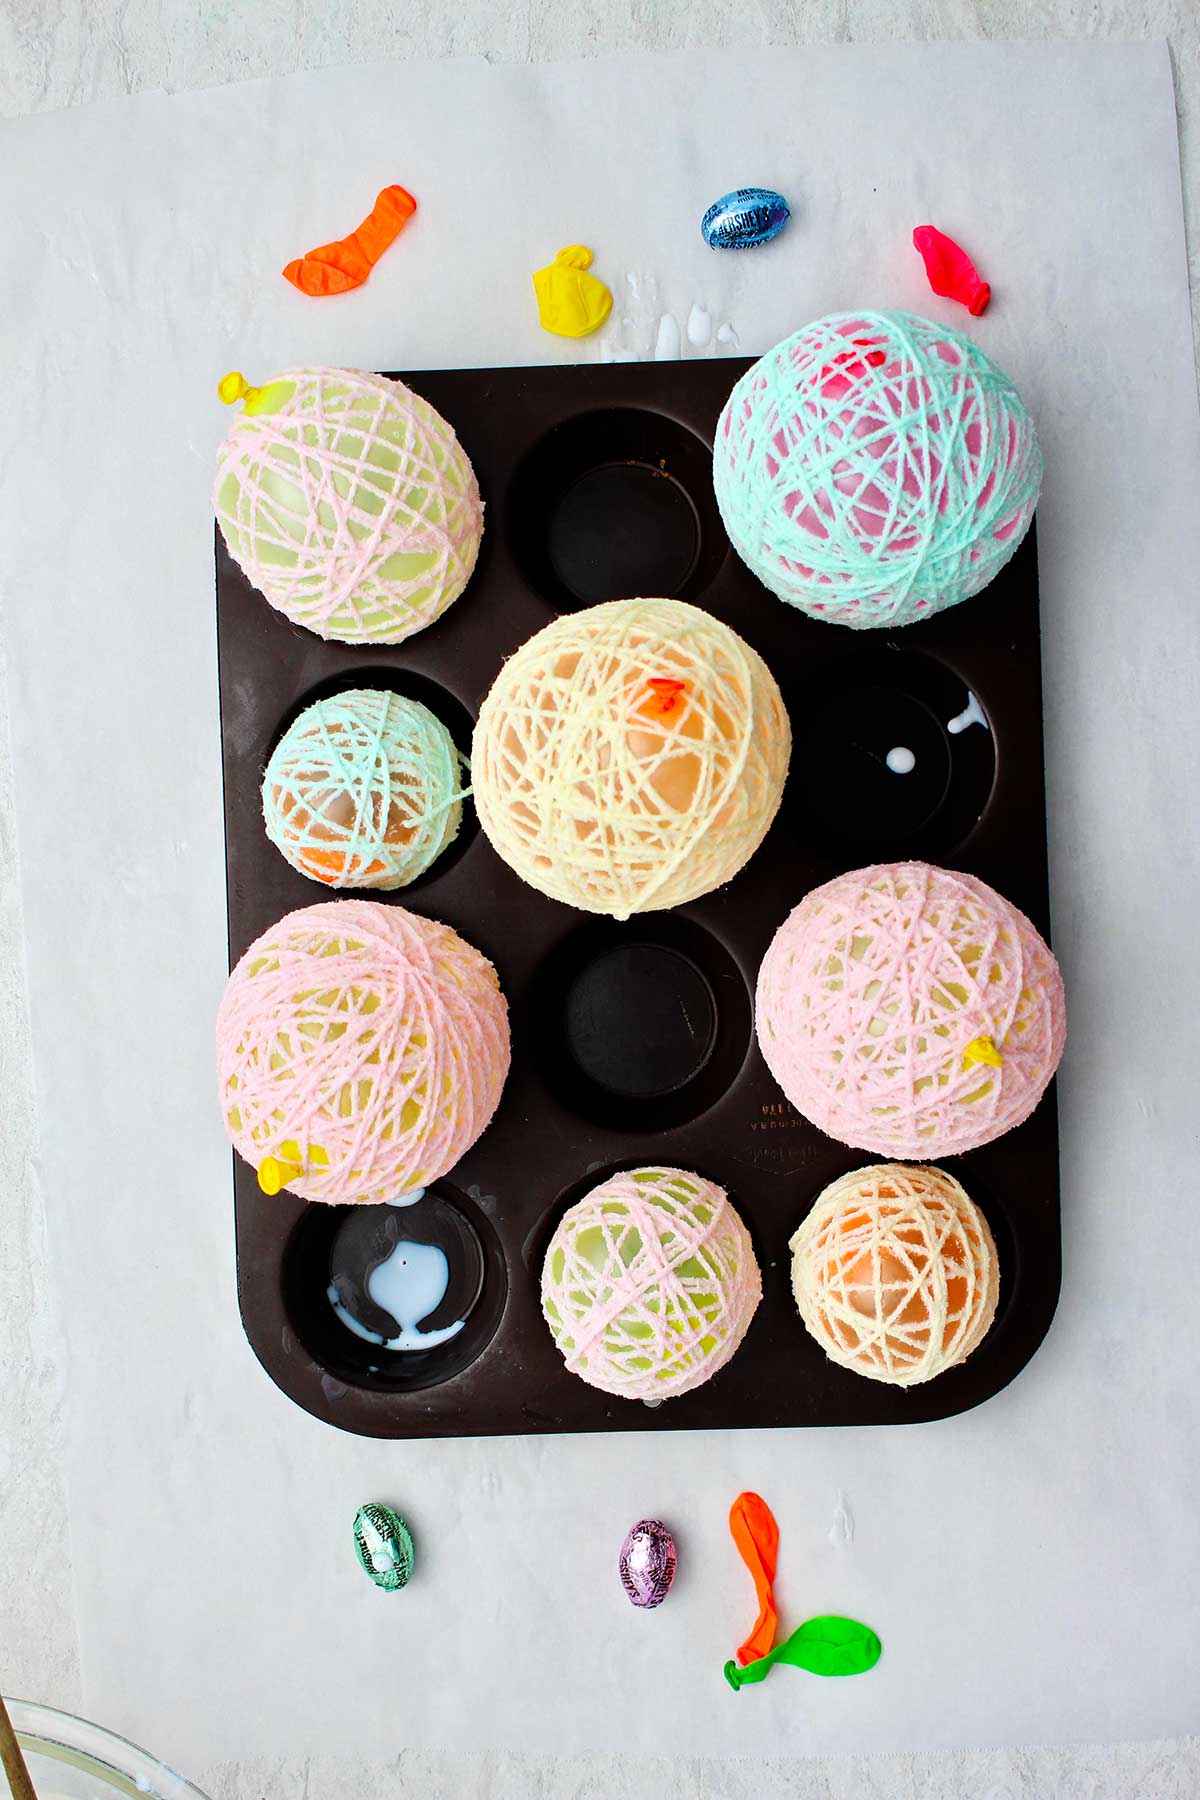
String egg decoration
If you’re wanting to use your string egg for a table decoration, you want it to be larger so you can cut a hole in the side of it and make a diorama. I recommend using a nine or 12 inch balloon. Blow it up to be about the size of a soccer ball.
How do I put the string on the balloon?
OK with your balloons blown up and ready to go, you will use the same directions for all of them in applying the string.
Place a cup to a cup and a half of the white glue in a large bowl. You can always add more glue if you need to along the way.
If you would like to watch a full length tutorial video and follow along as you make your eggs, watch here: How to Make String Eggs for Easter Gifts & Decor Full Length Tutorial.
Getting the string ready
Unroll your string very carefully so that it doesn’t get tangled. I enrolled mine onto the floor and then transferred it into the bowl using the following instructions.
- If you are making the candy filled string eggs, use about 10 yards of string
- If you’re making the string eggs for a garland, use about 15 yards of string
- If you are making the large string egg, use about 15 yards of string, and then continue to add more pieces of string of that length until you are done covering the balloon.
How much string and how to get it into the bowl?
Start with these measurements and just add another piece if needed. It doesn’t work to get too much string at once because it tangles. Ask me how I know 🙂
I measure a yard of string by stretching it from my nose to my fingertip, with my arm stretched straight out to my side. That distance from my nose to my fingertips is about a yard (as an adult).
As you measure the string, gently let the string fall into a pile on the floor next to you. Clip the string and hold the clipped end.
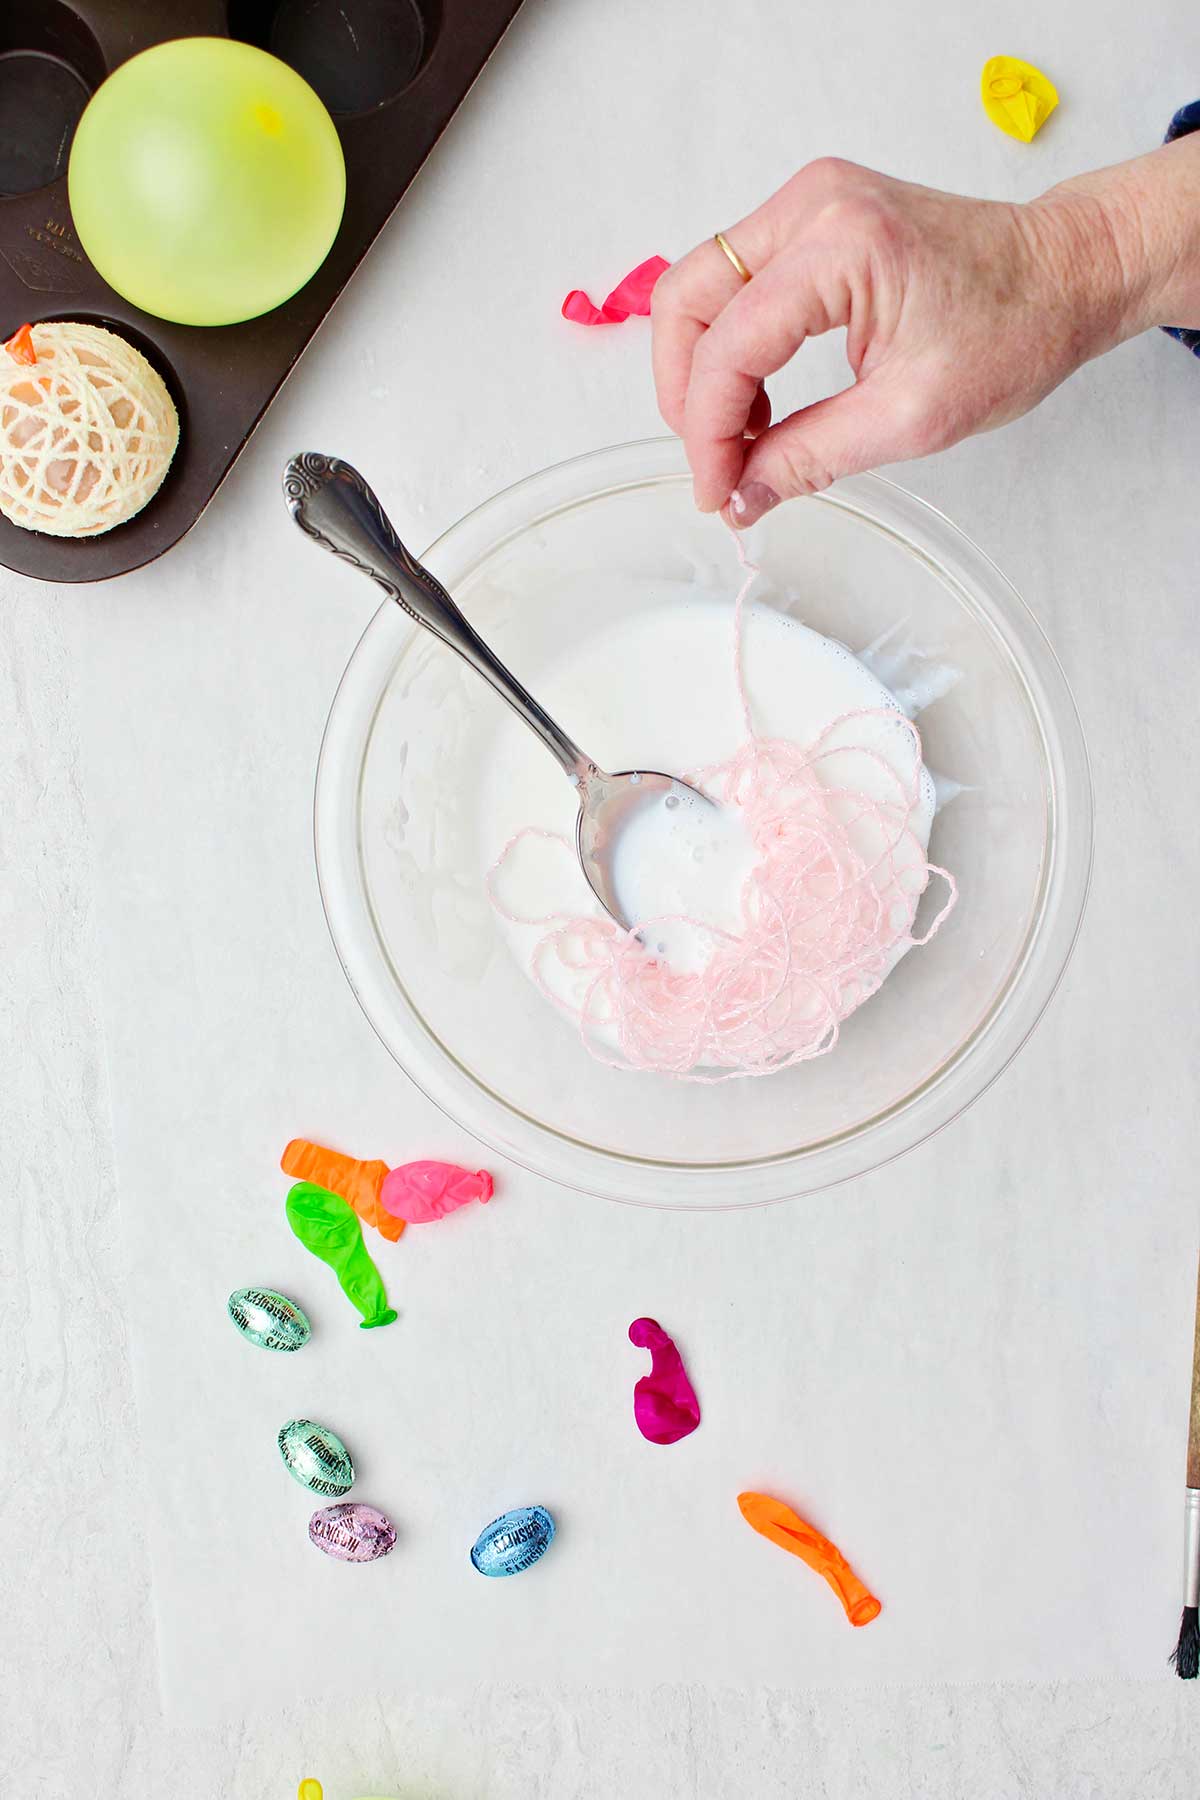
Transfer it up to the bowl of glue by holding the final end that you’ve clipped, placing it in the bowl. Then gently pull the string off the floor and loop it into the bowl so that it just piles on top of itself without tangling. This is key to all of this as a tangled thread is very hard to work with.
You can see on one of my eggs that it is kind of lumpy in its shape. That’s because I had tangled thread, and went ahead and made the egg with the tangled thread! Just being real here!!!
Continue to hold onto the last end of the string as you finish putting it into the bowl so it doesn’t get lost down into the mass of string and glue.
Getting glue on the string
Use a spoon to gently press the string down into the glue. Do not stir it!
Take one of your balloons, and hold onto the tied end as you also hold onto the end of the string that you’ve kept in your hand.
With your other hand, pull some of the string out of the bowl. As you’re pulling it out of the bowl squeeze your fingers down the string, so it pulls some of the glue off of the string. Then wrap that part around the balloon.
Pull your fingers down the string to get some of the glue off the string, and then wrap that part around the balloon, repeating this until you’ve used up all the string in the bowl.
This whole time you’ll work over the bowl of glue so all of the extra glue falls back down into the bowl.
Wrap string in all directions
While you are winding the string, turn your egg this way, and that way so that the string wraps around the egg in every direction.
Keep looking at your balloon to see that the string crisscrosses it in various directions. This will hold your egg together when it’s dry, because the strands of yarn crossing over in various angles, will attach itself at these cross points.
If you do not have enough string to cover the egg, then set your egg down, wash your hands, and cut another piece of string and repeat this process.
Large balloon challenges
I will tell you that it’s much much easier to work with the small string eggs than the large one. So if you are working with children, their little hands will struggle making the larger balloon string egg.
You might want to hold the tied end of the balloon for them and let them do the string wrapping if you want to try the larger balloon. It’s just clumsy.
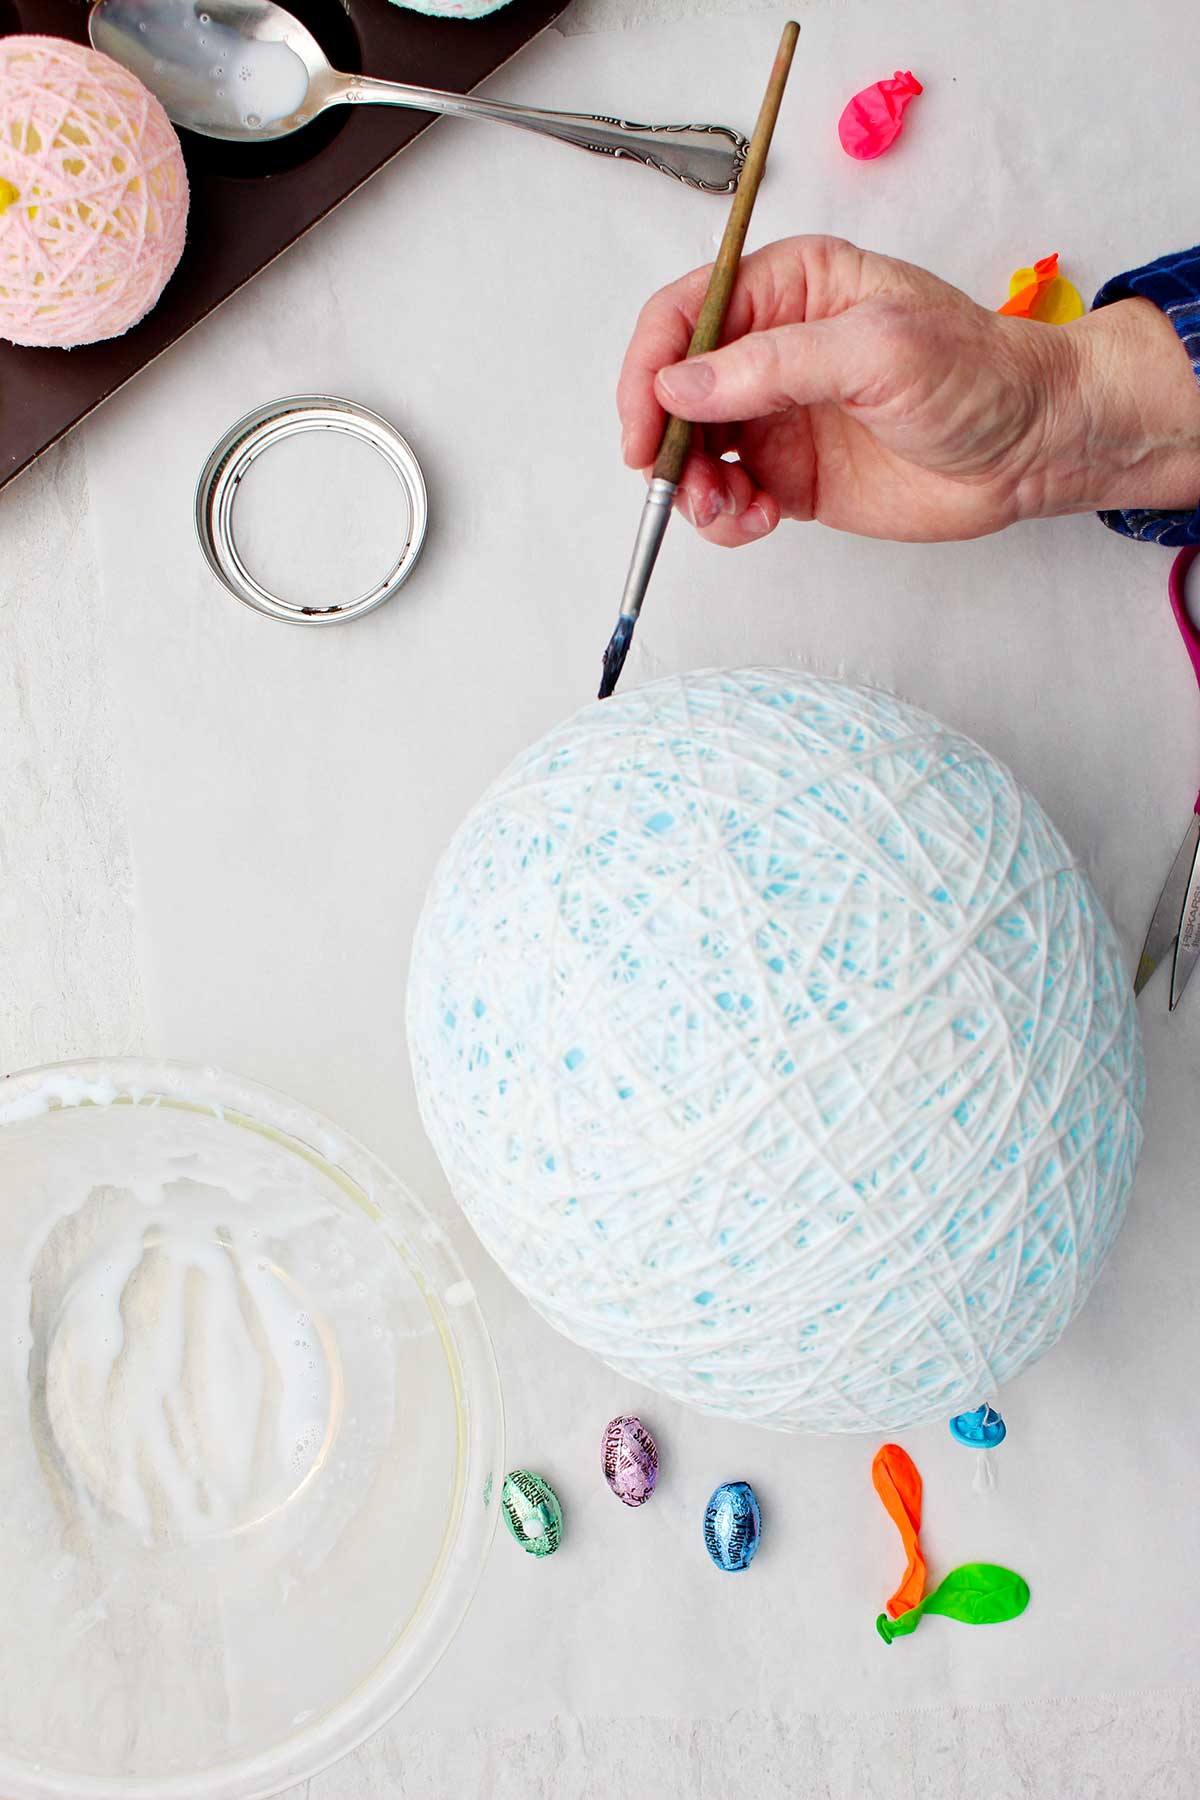
With a large balloons string egg, I did a layer of string with a glue on it. And then I just started wrapping the balloon with dry string until I had it well covered.
After it was well wrapped, I then used an old paint brush, and brushed the entire balloon with glue. I was very careful to make sure there was glue on all of the string.
This just worked better for me with the big balloon and the end result was the same. You might consider this option.
Let the string eggs dry
As I finished the smaller string eggs, I set them in a muffin tin which held them while I made the other eggs and as they dried.
The large egg sat up on a mason jar lid to hold it as it dried, this worked well.
It would work just to leave them sitting on wax paper as well. I just did not want to risk not being able to get the paper off when it was dry.
The most difficult part of the whole thing was waiting for the eggs to dry. It took a full 24 hours and I had a fan on them part of the time.
It helps to turn the eggs every few hours so that the air can circulate around them, but it just takes a long time. It’s important not to do the next step until they are fully dry.
Now the fun part! Pop!
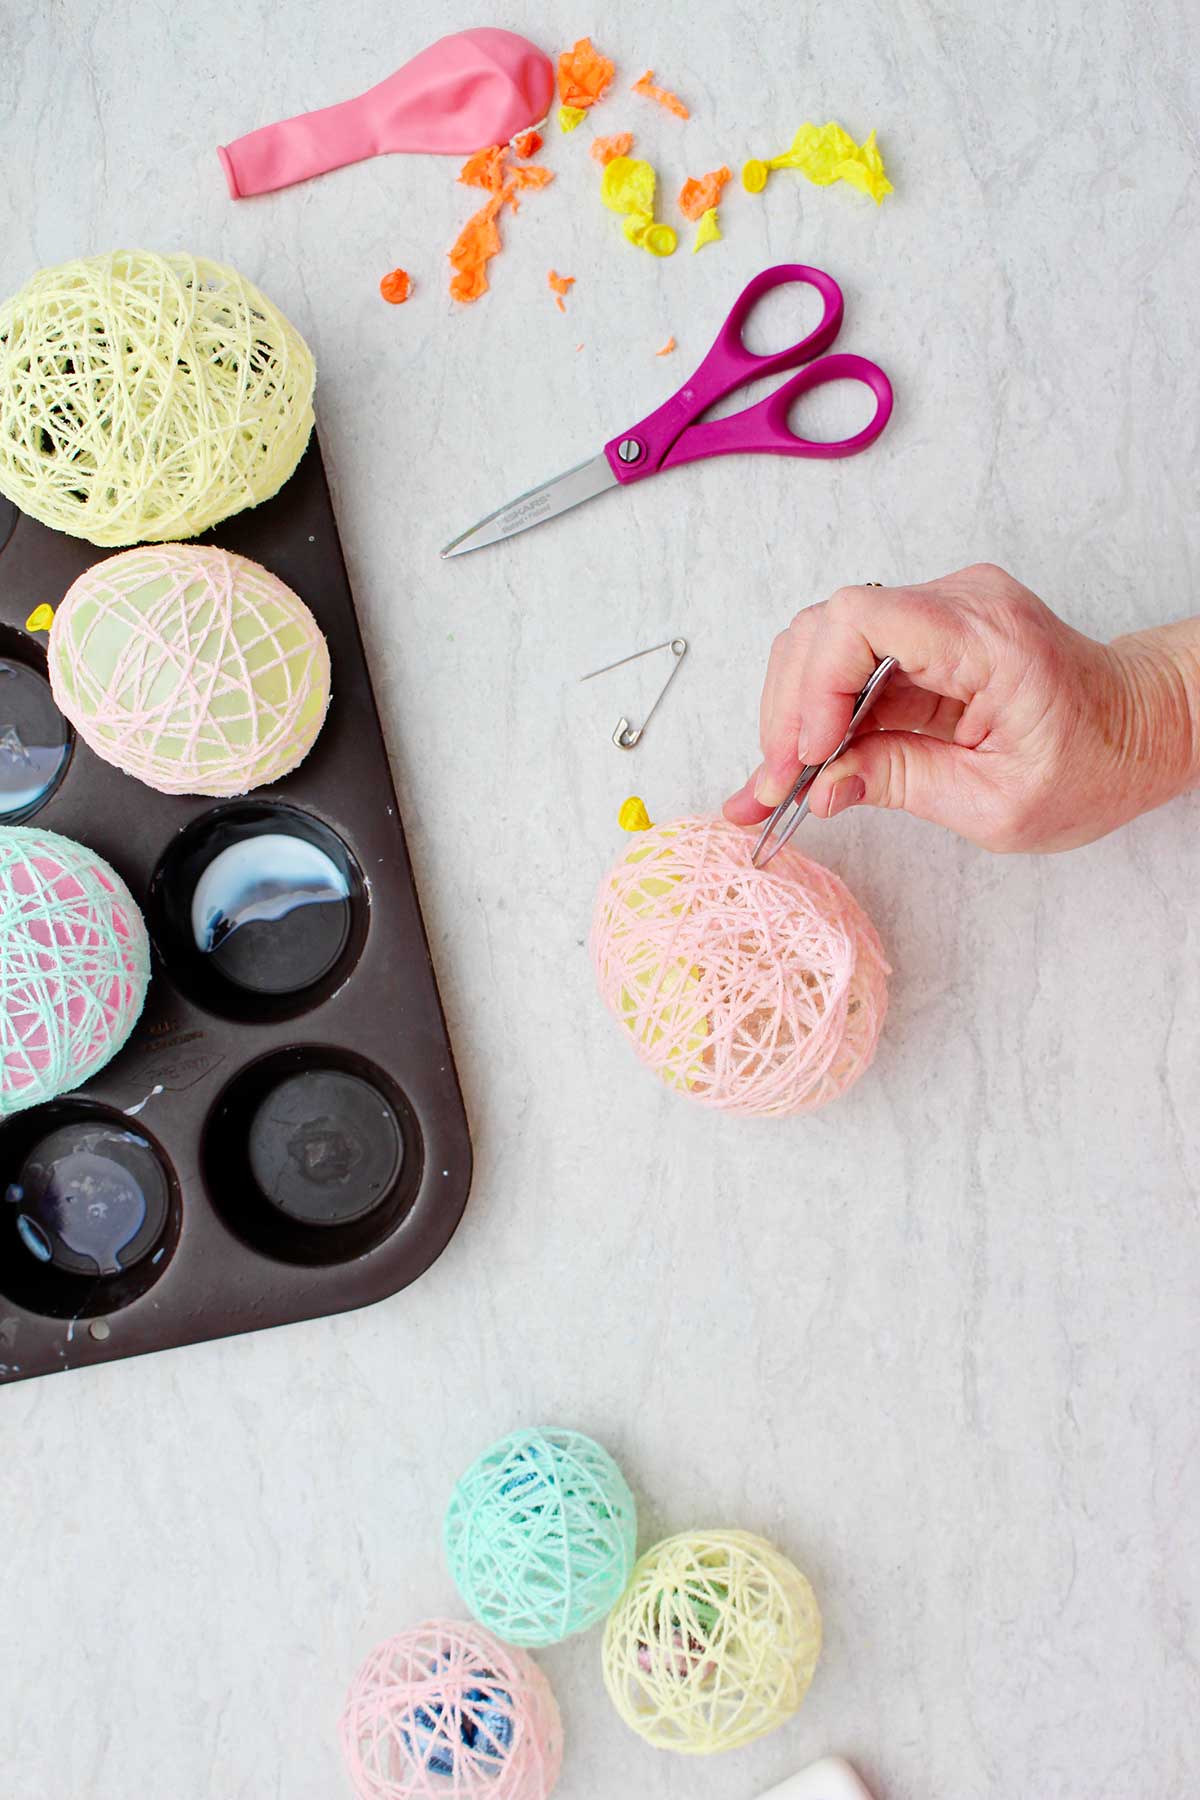
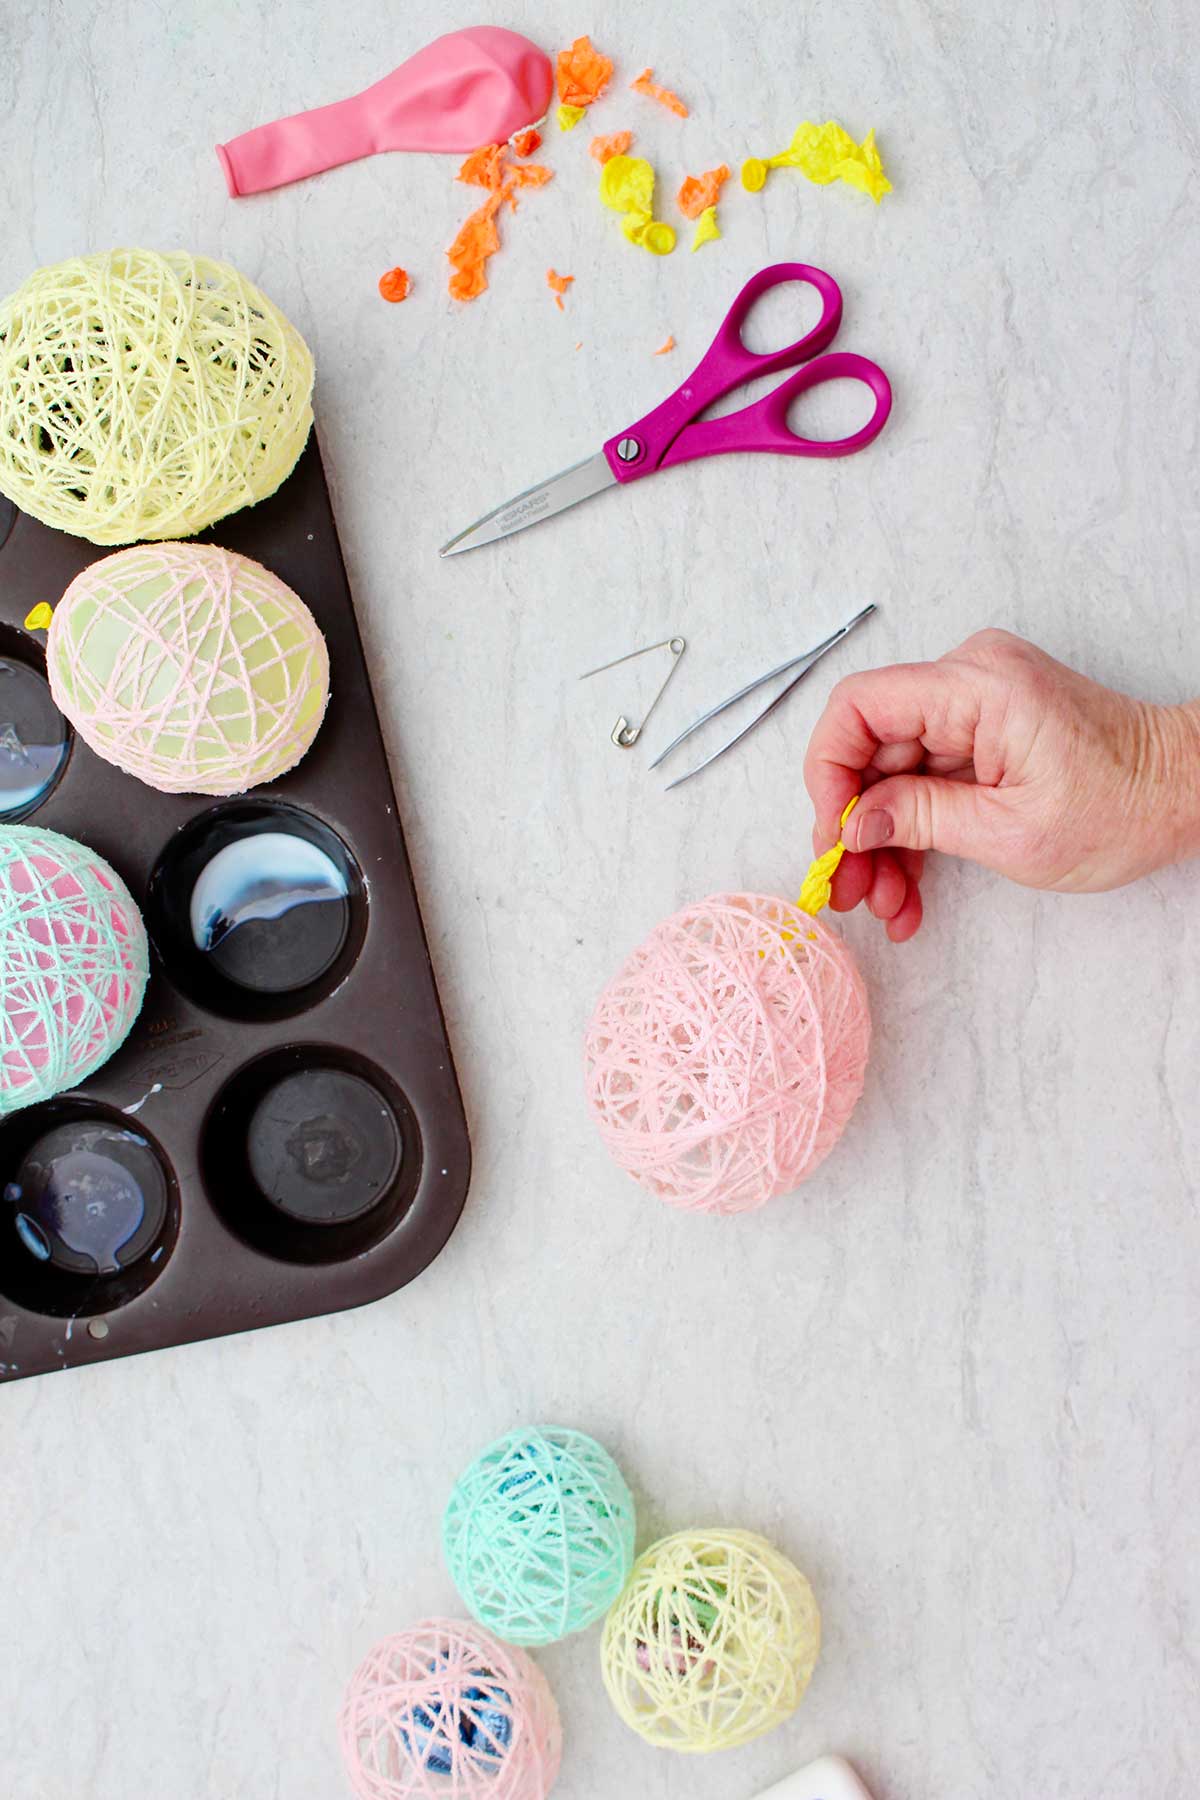
Hold the top of the egg (knotted end of the balloon) in one hand, and with the other use a pair of tweezers to reach through the holes between the strings. Push the balloon away from the dried string on the bottom of the egg first. It will probably pop quickly and that’s OK.
Sometimes the deflated balloon will just pull away from the inside of the egg and you can just pull it out with the tied end of the balloon.
But I had to push the balloon away from the string over and over again, and then gently reach through some of the small holes between the strings with the tweezers and pull pieces of the balloon out of the inside of the string egg.
The good news about this is it's to be kind of fun 🙂
Note: If the egg caves in a bit as the balloon deflates don't freak out! Finish pulling out the balloon and then use the tweezers to pull the string egg back into shape. Then let it sit for awhile before using.
Easter eggs with candy in them
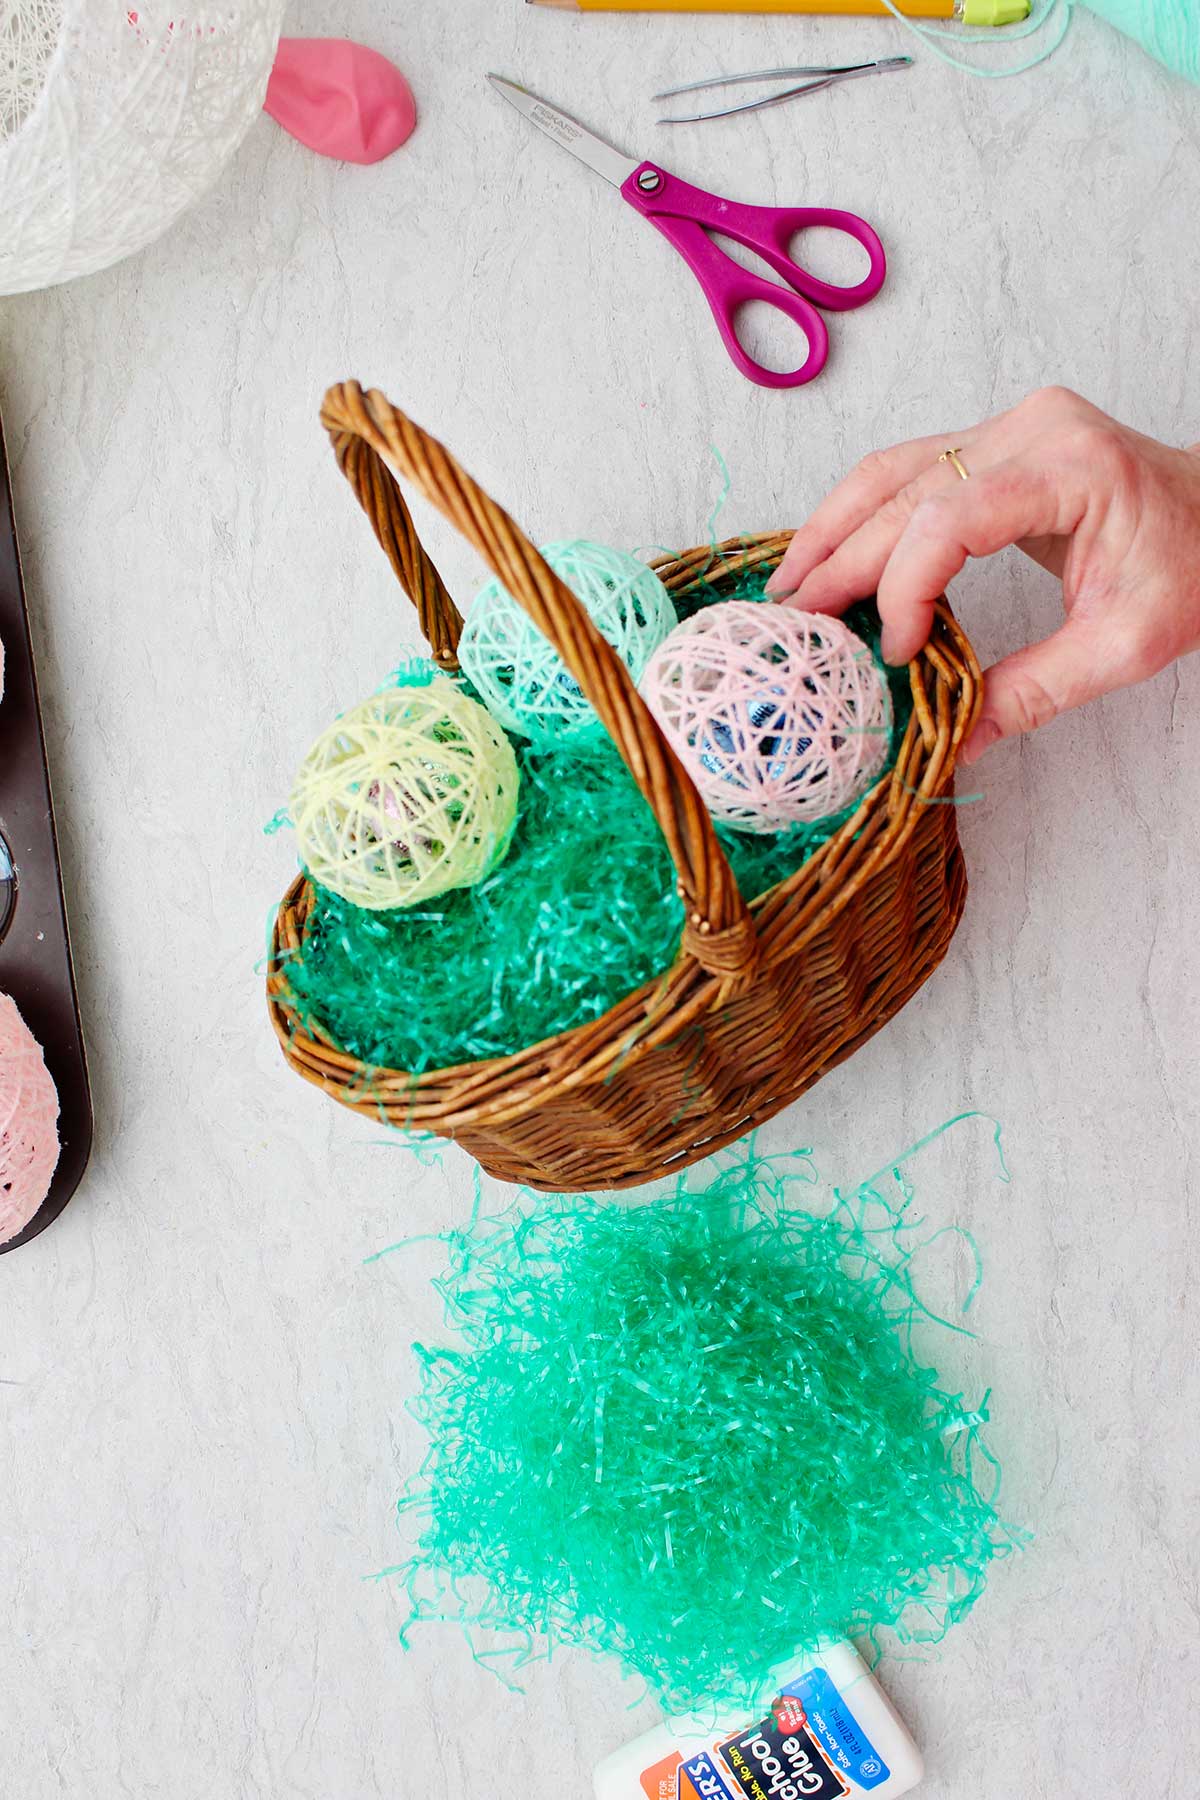
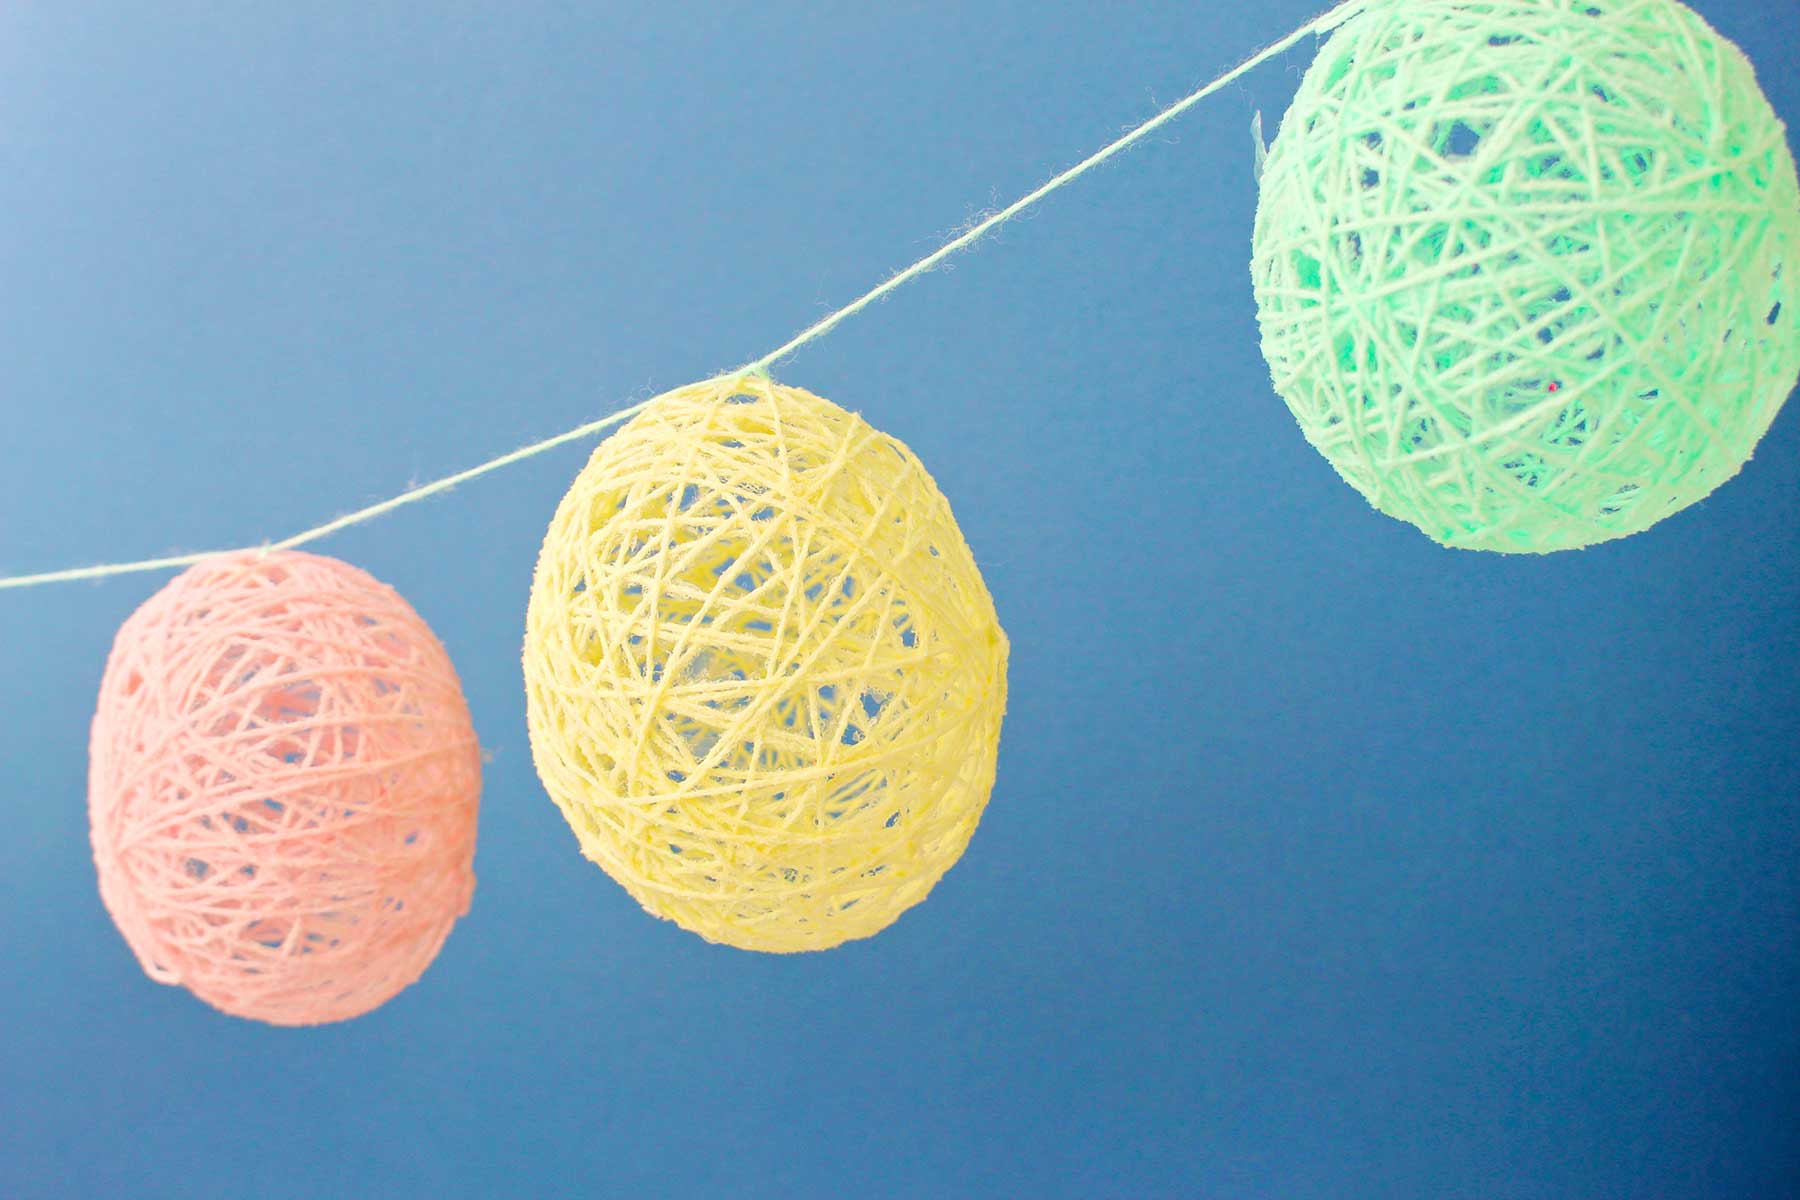
This is all that needs to be done with the candy filled eggs. I placed them in a small Easter basket with Easter grass, and it’s very cute.
I will tell you that this was more work than I probably would do for all of my Easter candy! Especially since you have to cut the Easter egg open to get the chocolate eggs out from inside and can't reuse them!
But it was fun to try and is a cute alternative to a plastic egg.
Make an Easter egg garland
The eggs that I made for the garland are also ready to use.
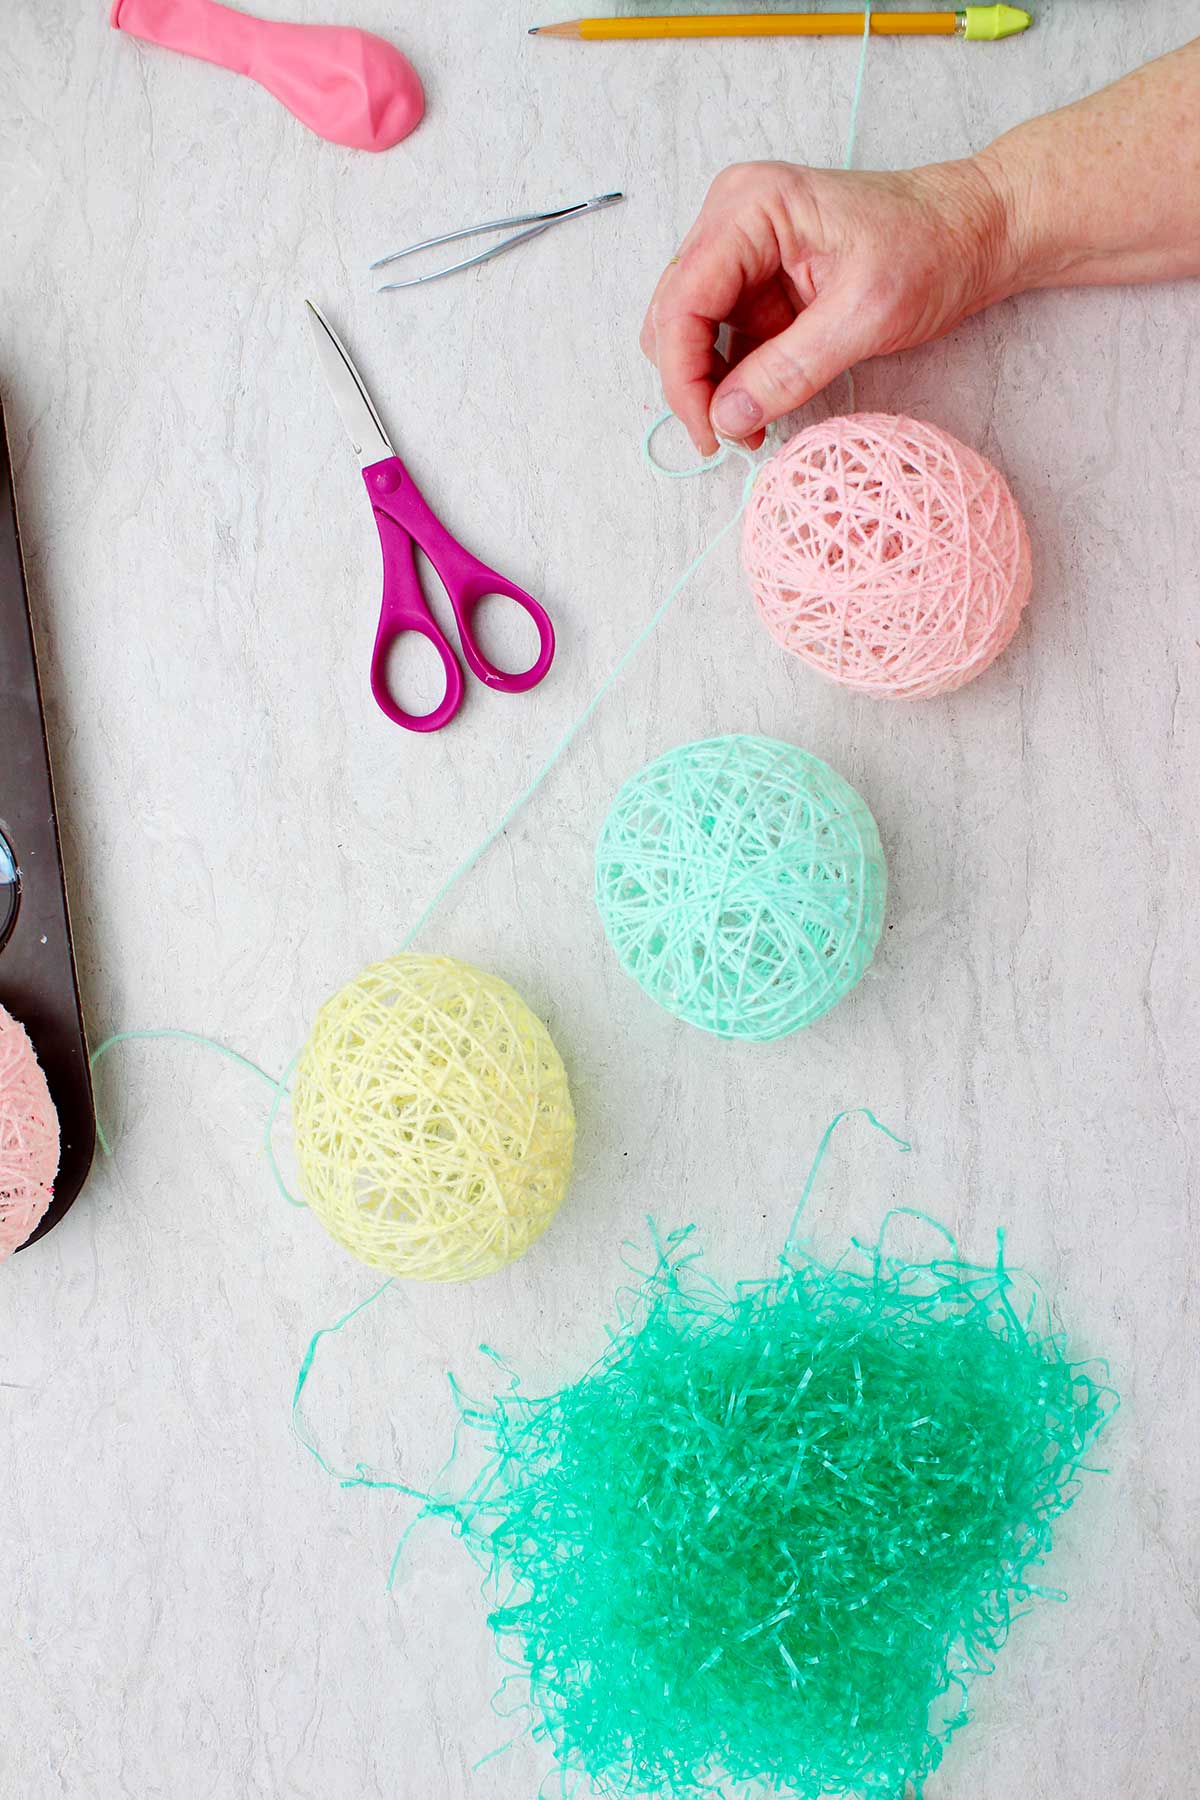
They are easy to string on a piece of yarn or string or ribbon. I used the tweezers to help me out.
Stick the yarn inside a hole on the top of the egg, and then reach through another small hole with the pair of tweezers and pull the yarn on through.
Tie the yarn over the top of the egg to keep it in place and then string the next egg and so forth.
You could add ribbon bows to the top of the eggs if you would like, or other decorations onto the side of the egg as well.
Easter egg table decoration
My favorite is next, the large string egg!
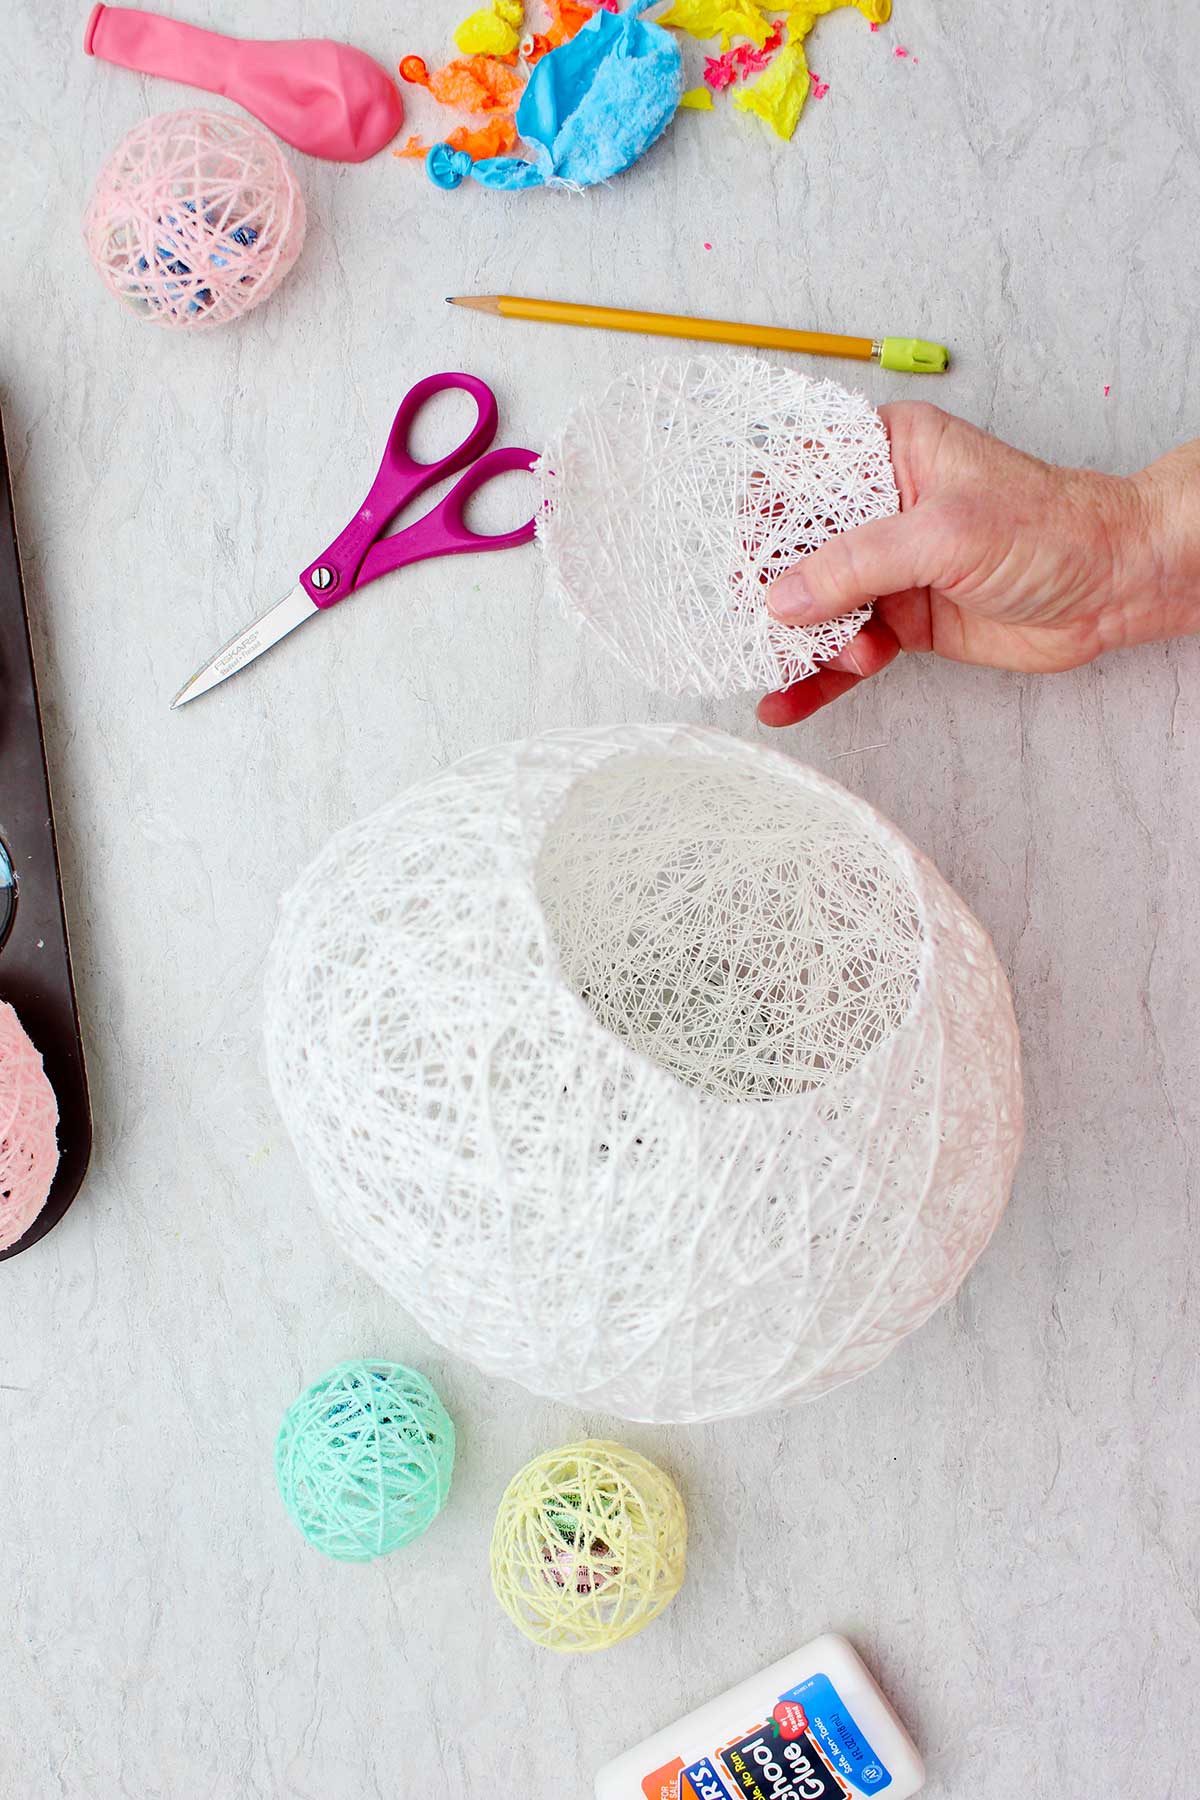
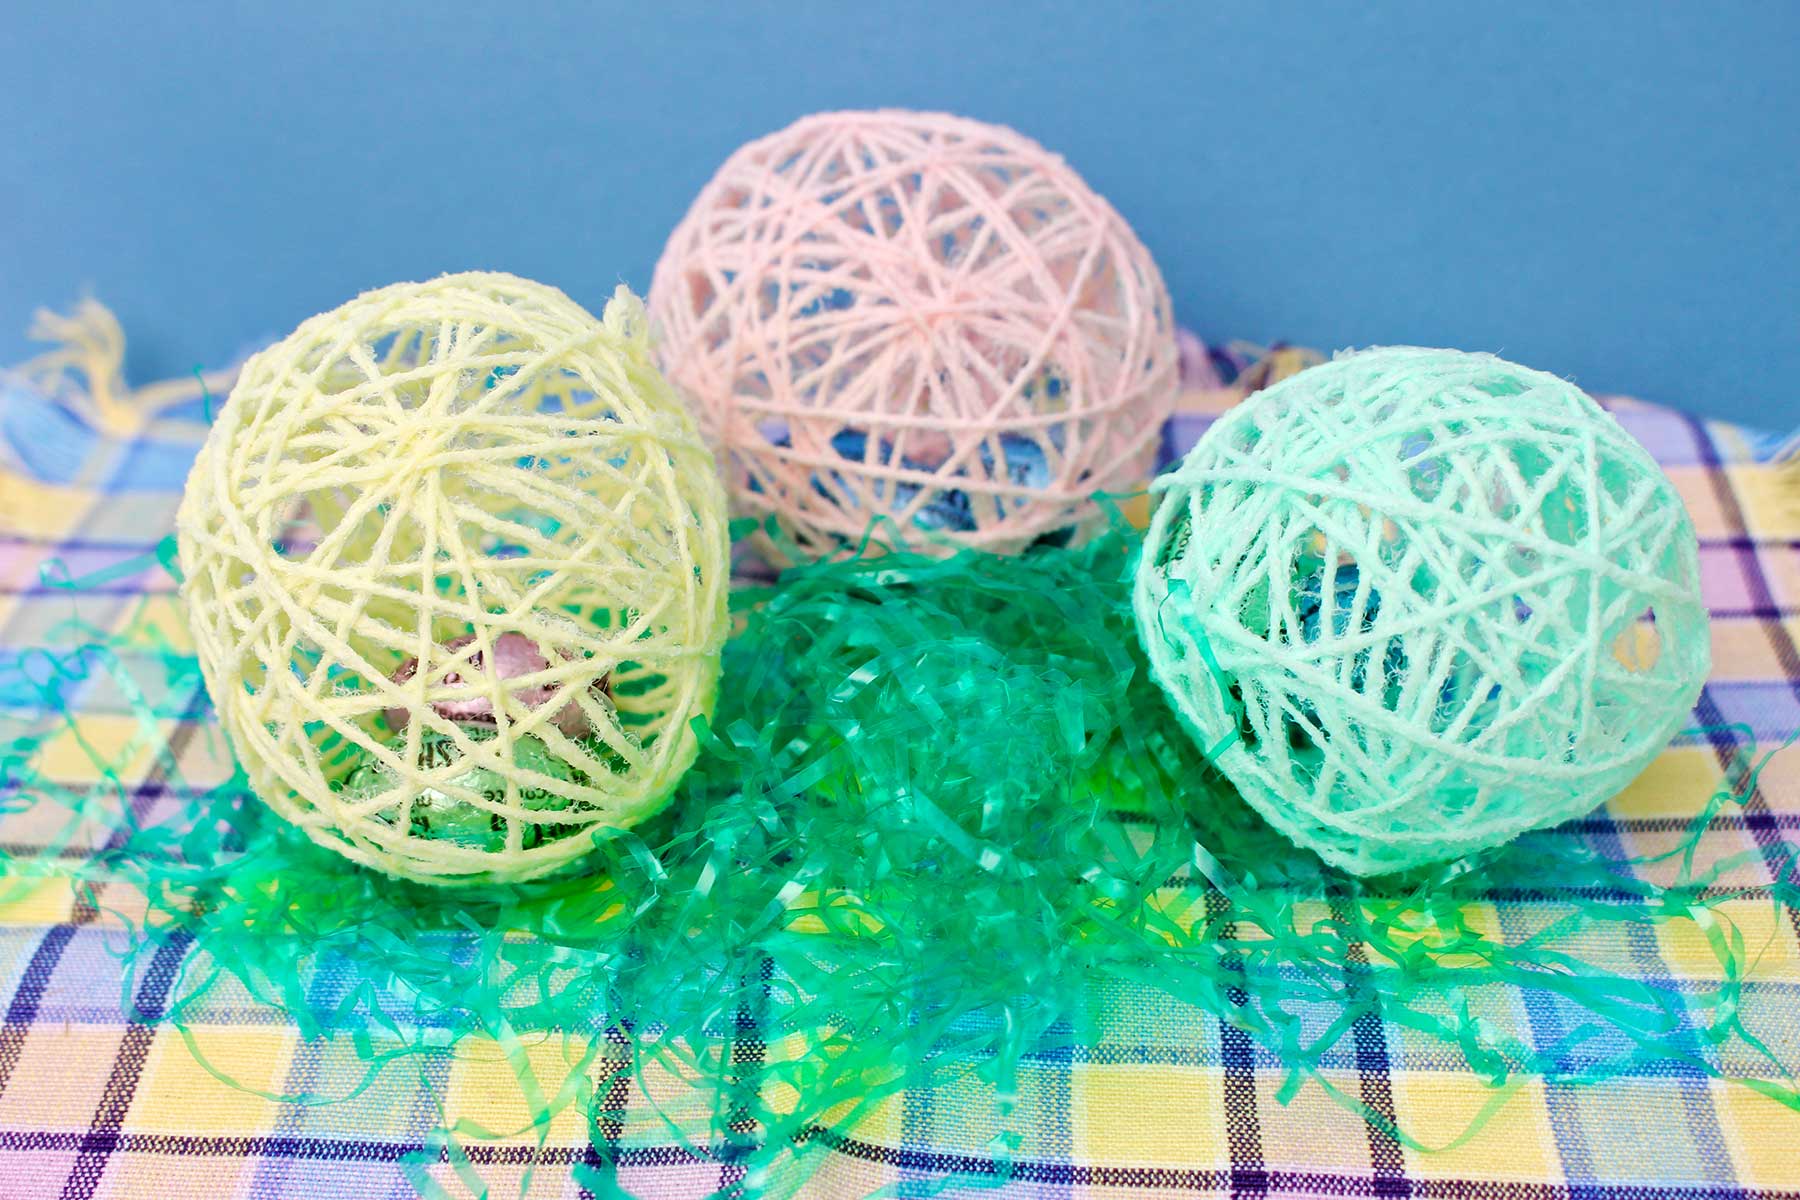
I drew a circle on the front of the egg and cut it out. The dried string was pretty hard to cut so you might have to help the Littles.
When the hole is cut, you can either stand the egg up or lay it on its side and place decorations inside. It sits up well on a mason jar ring or you could glue a flat piece of cardboard or something similar to the bottom to use as a stand.
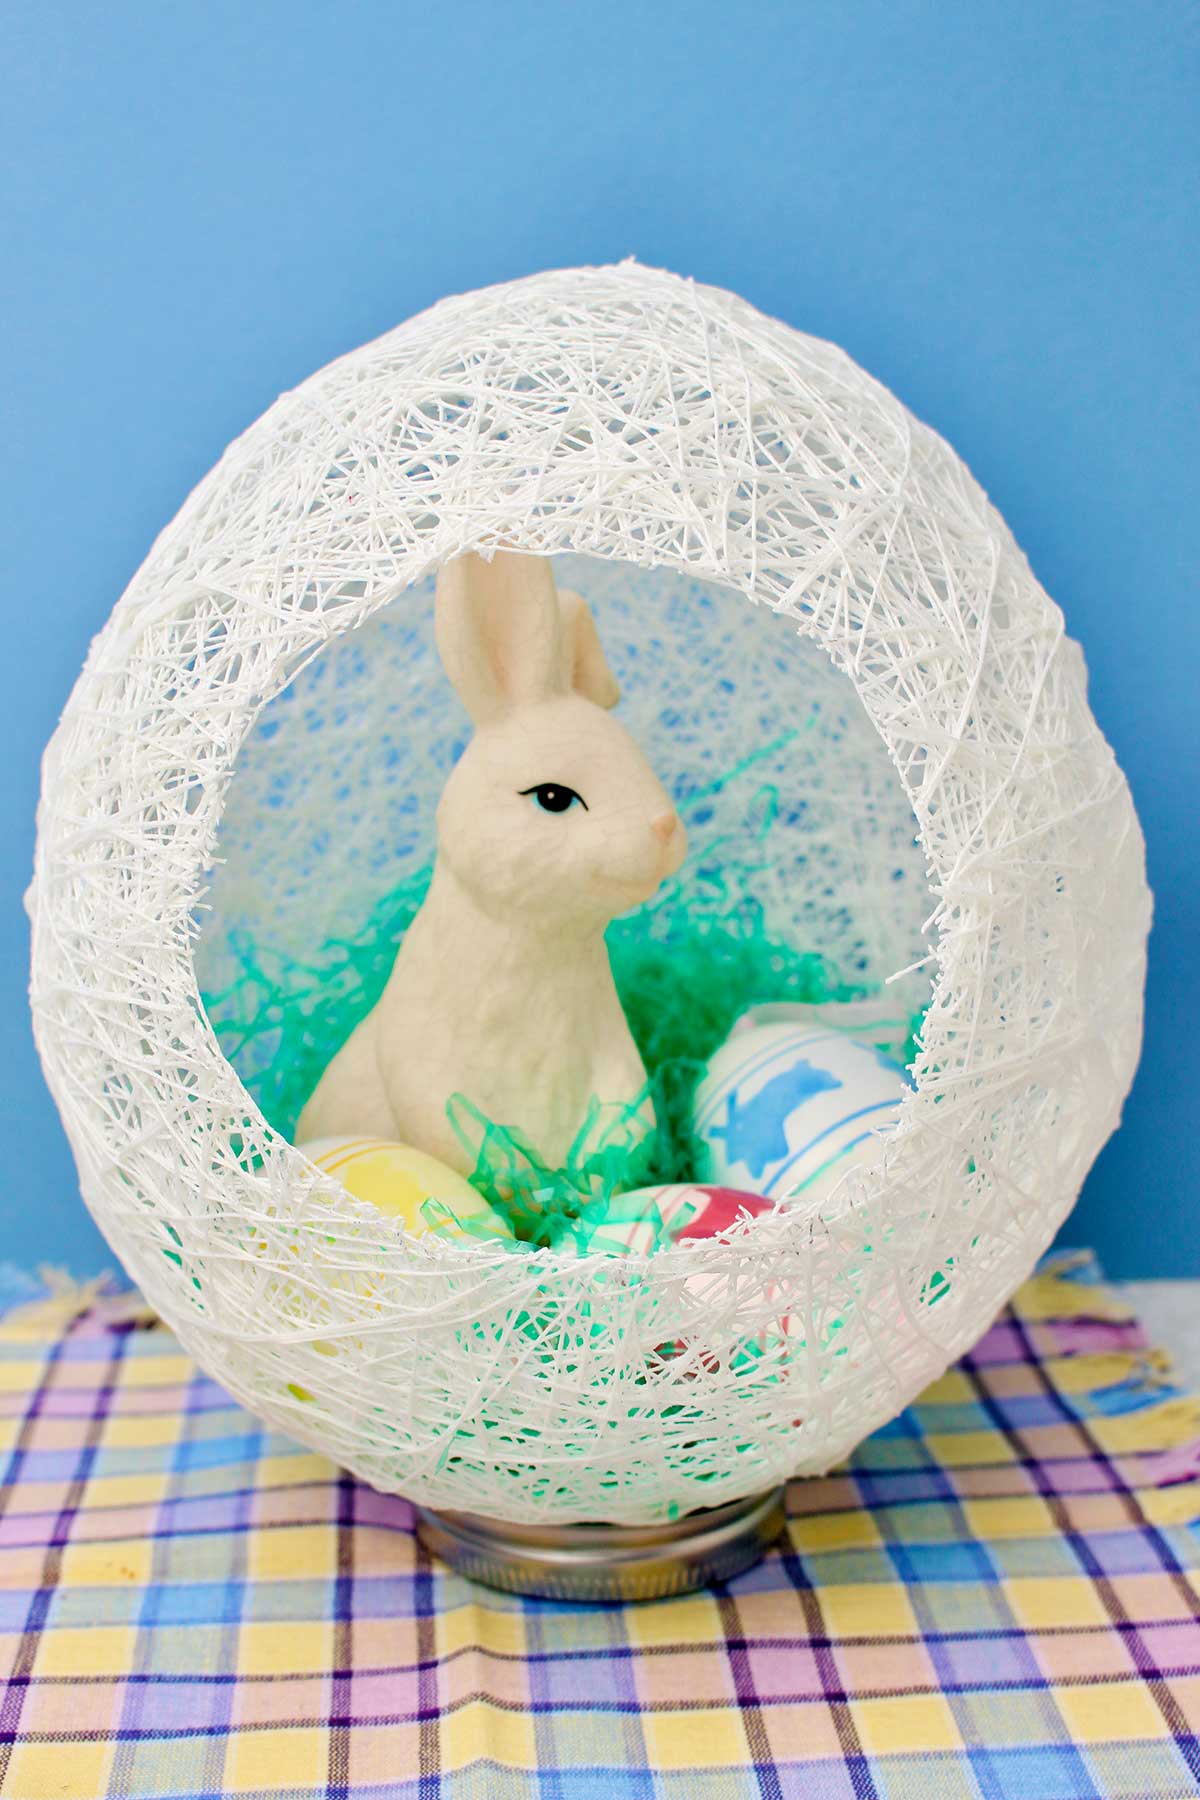
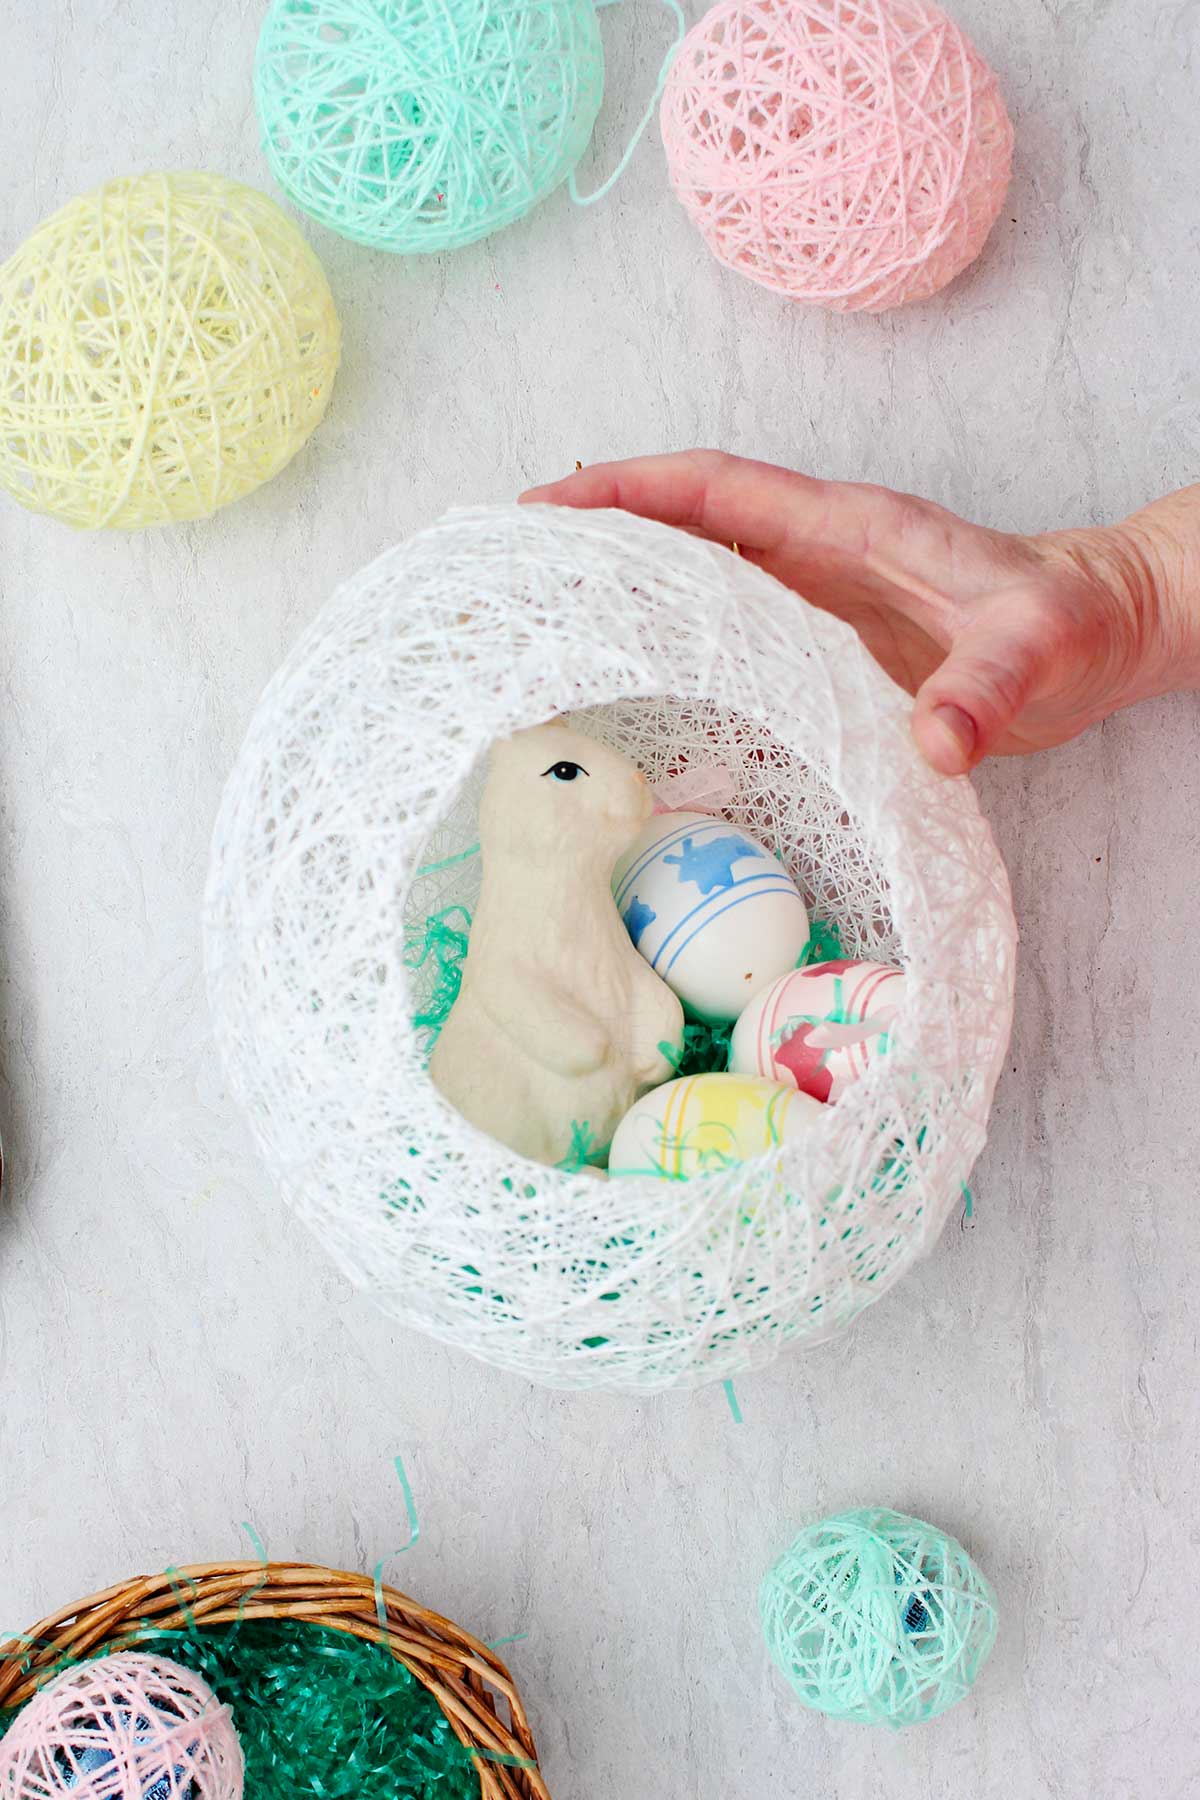
I chose to put mine straight up and down vertically so that I could stand a little ceramic bunny inside with some Easter eggs. I put Easter grass in and then the decorations on top of it.
This will be fun to use as a table decoration for Easter! You could even add some painted wooden eggs, or tie-dye decorated eggs that you make yourself!
You could add ribbon around the circle edge that you cut or add a bow or other decorations to the side of this egg too if you want.
Here is the link to the full length tutorial again if you want to check it out- subscribe to my YouTube channel while you are there!! Link: How to Make String Eggs Full Length Tutorial Video.
Do you have more string egg ideas?
Later, I thought it might’ve been fun to sprinkle the Easter eggs with glitter while the glue was wet. I am not a big glitter fan because it gets all over the house 🙂 but it would be cute on these decorated eggs.
I’m eager to hear what other ideas you come up with for this craft.
I just now thought of putting a ribbon loop on the top of the egg and hanging them on a tree branch or Easter tree. Or cutting your large string egg in half and using it as a string basket to hold candy instead of an Easter egg basket.
Oh so many ideas and so little time!
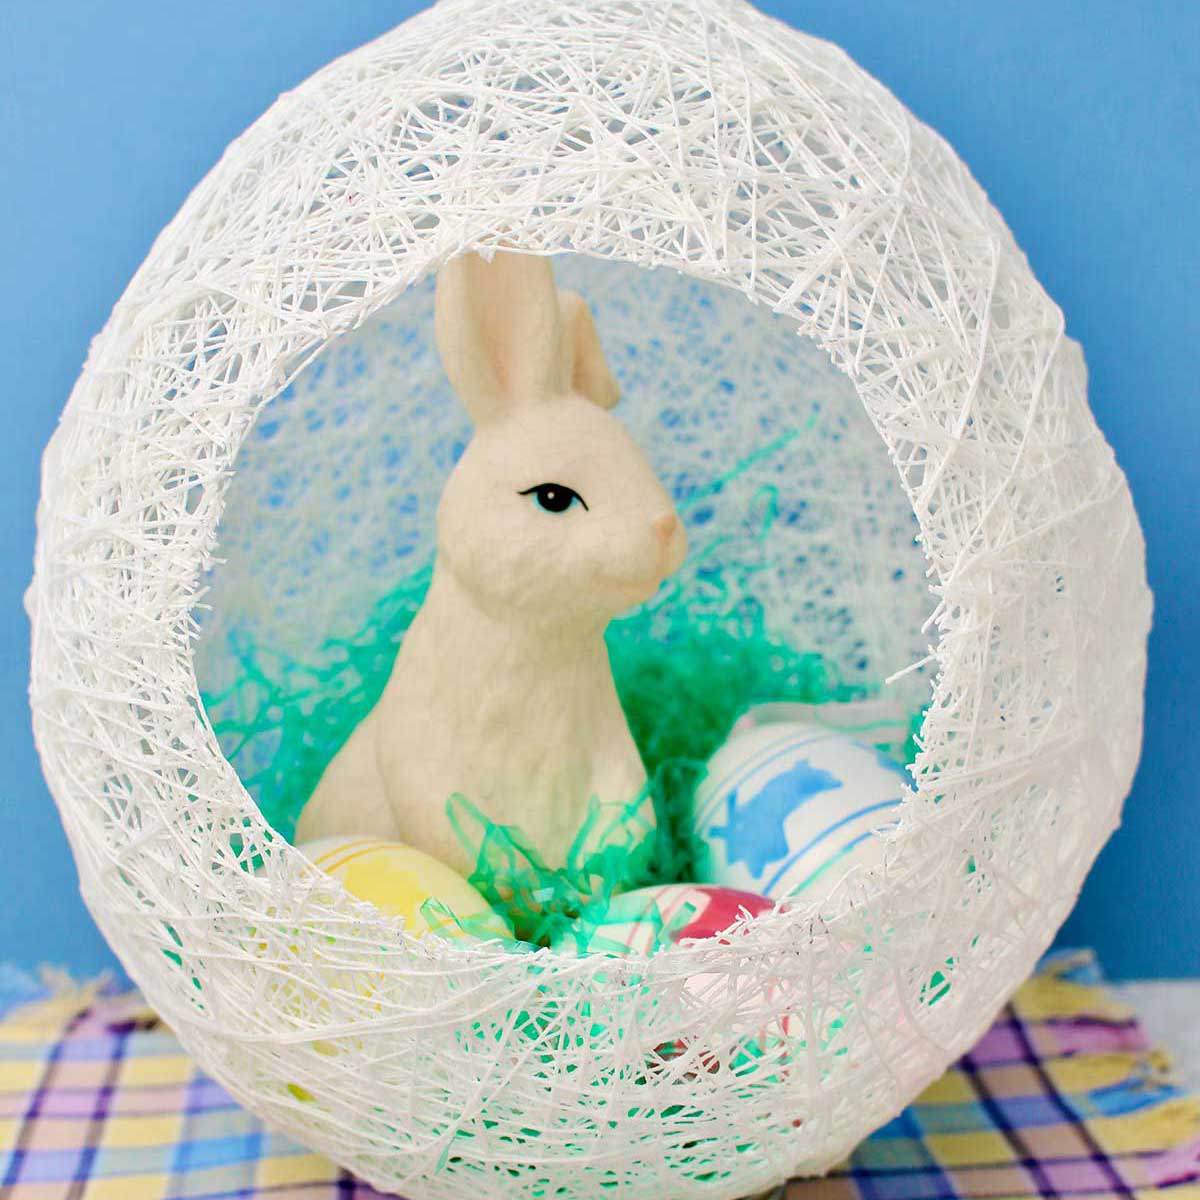
Blow up a balloon and measure your string. Add the string carefully to your glue (try and keep it from tangling!). After it's coated, wrap the string around your balloon in a criss-crossing pattern. Let it dry fully, then pop the balloon to leave an empty egg!
Yarn, or string eggs, are hollow eggs made from string, glue and balloons! You can make them to hold candy inside, to string as a garland, or to cut a hole in the side to use them to hold Easter eggs as a basket or a decoration. They are a fun, hands-on craft project for kids!
More ideas for Easter crafts
If you are wanting more fun ideas for Easter crafts, you might want to check out these ideas for the whole family!
- How to Tie-Dye Easter Eggs with Shaving Cream
- Wash Rag Boo Boo Bunny For Easter
- Fast Rice Crispy Easter Nests Recipe
- Free Happy Easter Coloring Page

Enjoy!
If you try this craft, let me know! Go ahead and leave a comment, rate it, and tag a photo with #WelcometoNanas wherever you post.
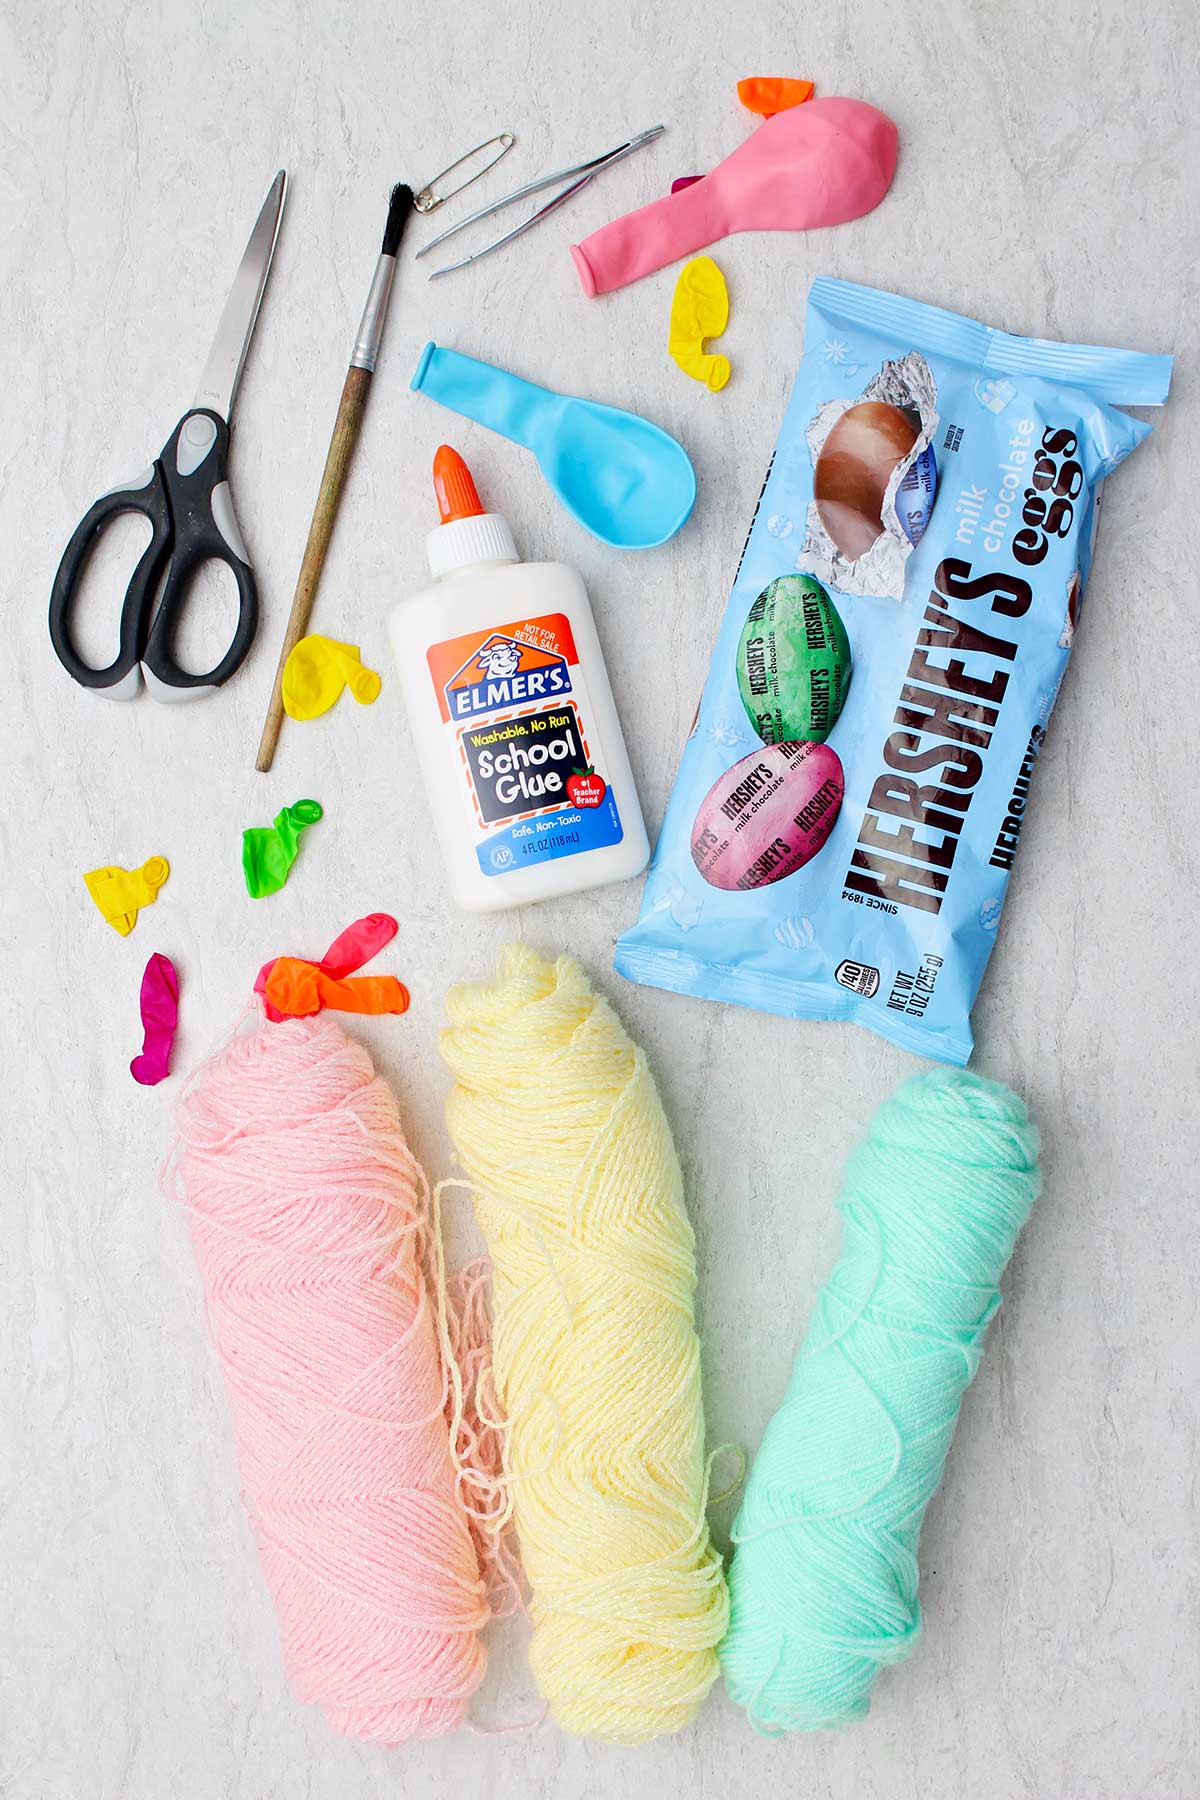
Supplies for String Easter Eggs:
- Balloons (water balloons, larger balloons)
- String- crochet thread, embroidery thread, yarn
- White glue (or Mod Podge)
- Bowl, spoon
- Old paint brush
- Table covering or waxed paper/parchment paper
- Muffin tin (something to set wet eggs on- optional)
- Scissors
- Tweezers
- Extras- Easter basket, small candy, small figurines, Easter grass, ribbon/string (optional)
How to Make String Eggs for Easter Gifts & Decor
Equipment
- Bowl, spoon
- Muffin tin (something to set wet eggs on- optional)
- Scissors
- Tweezers
Items Required
- Balloons (water balloons, larger balloons)
- String- crochet thread, embroidery thread, yarn
- White glue (or Mod Podge)
- Old paint brush
- Table covering or waxed paper/parchment paper
- Extras- Easter basket, small candy, small figurines, Easter grass, ribbon/string (optional)
- Bowl, spoon
- Muffin tin (something to set wet eggs on- optional)
- Scissors
- Tweezers
Instructions
- Put down a piece of waxed paper or parchment paper to work on. Then you can just throw away it when you’re done instead of having to scrub the countertop.Use a large bowl to put your glue mixture in. I put in probably one and a half cups of glue to start with because I was making several string eggs. You would not need that much if you’re only going to make one. And you can always add more glue if you need to.
- Blow up you balloons- small balloons for candy filled and garland, large for table decore.To put the candy into the balloon it’s best to have a round shaped candy so that it moves into the open end of the balloon more easily. I used foil wrapped chocolate candy eggs. Put the candy into the the opening of the balloon and gently roll the balloon up and over the piece of candy. I could only get two maybe three in each of my water balloons. I’m sure you might be able to get more in regular balloons.Once the candy is inside the balloon, go ahead and blow it up to the correct size.
- Unroll your string very carefully so that it doesn’t get tangled. I enrolled mine onto the floor and then transferred it into the bowl using the following instructions.If you are making the candy filled string eggs, use about 10 yards of stringIf you’re making the string eggs for a garland, use about 15 yards of string. If you are making the large string egg, use about 15 yards of string, and then continue to add more pieces of string of that length until you are done covering the balloon. Transfer it up to the bowl of glue by holding the final end that you’ve clipped, placing it in the bowl. Then gently pull the string off the floor and loop it into the bowl so that it just piles on top of itself without tangling. This is key to all of this as a tangled thread is very hard to work with.Continue to hold onto the last end of the string as you finish putting it into the bowl so it doesn’t get lost down into the mass of string and glue.
- Use a spoon to gently press the string down into the glue. Do not stir it!Take one of your balloons, and hold onto the tied end as you also hold onto the end of the string that you’ve kept in your hand. With your other hand, pull some of the string out of the bowl. As you’re pulling it out of the bowl squeeze your fingers down the string, so it pulls some of the glue off of the string. Then wrap that part around the balloon. Pull your fingers down the string to get some of the glue off the string, and then wrap that part around the balloon, repeating this until you’ve used up all the string in the bowl.This whole time you’ll work over the bowl of glue so all of the extra glue falls back down into the bowl.Keep looking at your balloon to see that the string crisscrosses it in various directions. This will hold your egg together when it’s dry, because the strands of yarn crossing over in various angles, will attach itself at these cross points.If you do not have enough string to cover the egg, then set your egg down, wash your hands, and cut another piece of string and repeat this process.
- As I finished the smaller string eggs, I set them in a muffin tin which held them while I made the other eggs and as they dried.The large egg sat up on a mason jar lid to hold it as it dried, this worked well. It helps to turn the eggs every few hours so that the air can circulate around them, but it just takes a long time. It’s important not to do the next step until they are fully dry.
- Hold the top of the egg (knotted end of the balloon) in one hand, and with the other use a pair of tweezers to reach through the holes between the strings. Push the balloon away from the dried string on the bottom of the egg first. It will probably pop quickly and that’s OK. Sometimes the deflated balloon will just pull away from the inside of the egg and you can just pull it out with the tied end of the balloon. But I had to push the balloon away from the string over and over again, and then gently reach through some of the small holes between the strings with the tweezers and pull pieces of the balloon out of the inside of the string egg.
- This is all that needs to be done with the candy filled eggs. I placed them in a small Easter basket with Easter grass, and it’s very cute.
- The eggs that I made for the garland are also ready to use. They are easy to string on a piece of yarn or string or ribbon. I used the tweezers to help me out. Stick the yarn inside a hole on the top of the egg, and then reach through another small hole with the pair of tweezers and pull the yarn on through. Tie the yarn over the top of the egg to keep it in place and then string the next egg and so forth. You could add ribbon bows to the top of the eggs if you would like, or other decorations onto the side of the egg as well.
- My favorite is next, the large string egg! I drew a circle on the front of the egg and cut it out. The dried string was pretty hard to cut so you might have to help the Littles.When the hole is cut, you can either stand the egg up or lay it on its side and place decorations inside. It sits up well on a mason jar ring or you could glue a flat piece of cardboard or something similar to the bottom to use as a stand. I chose to put mine straight up and down vertically so that I could stand a little ceramic bunny inside with some Easter eggs. I put Easter grass in and then the decorations on top of it. This will be fun to use as a table decoration for Easter! You could add ribbon around the circle edge that you cut or add a bow or other decorations to the side of this egg too if you want.




Leave a Reply