Can I make my own book cover? I can and so can YOU!
My mom used to tell us how her family shared schoolbooks and passed them from the oldest child down to the youngest. She grew up during the depression and they had to make the books last through seven children so they made book covers for each book.
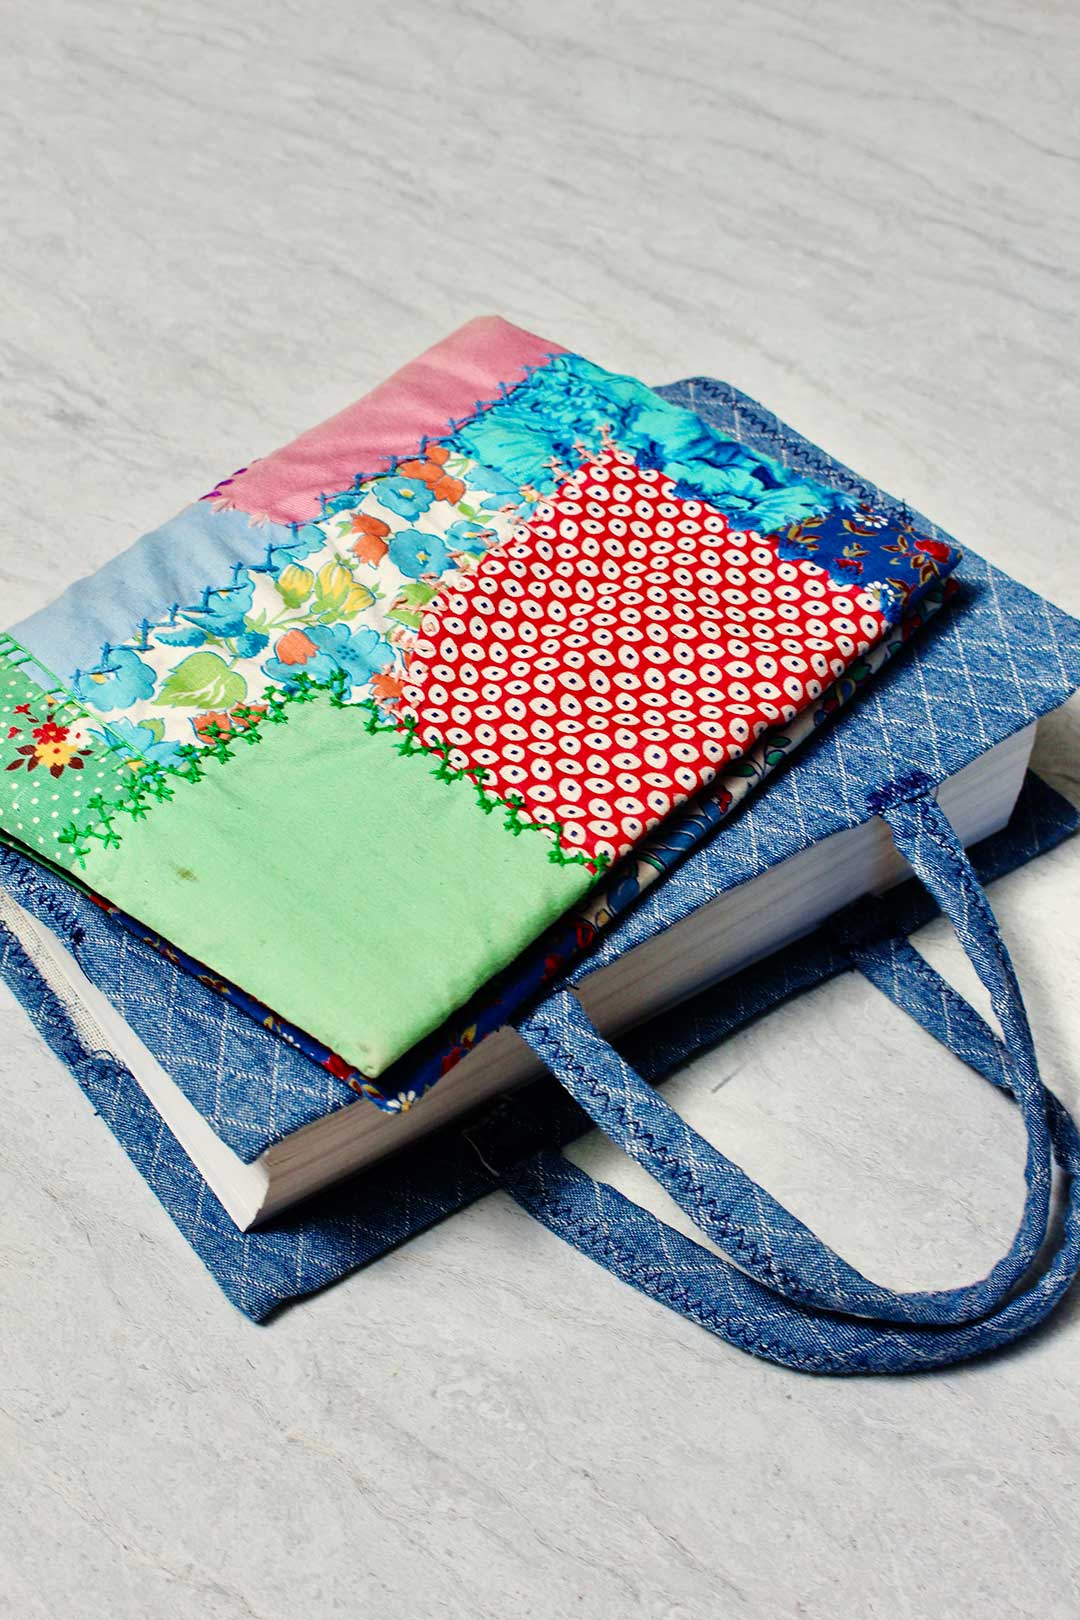
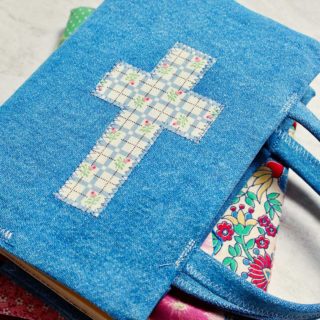
I can imagine my grandmother sewing a fabric book cover something like this one for that purpose, can't you?
That story intrigued me as a child, so I wanted to learn how to make a fabric book cover. This little pieced together fabric cover for a photo album is the result. I still have it. The blue book cover was made later for some kids books. I added handles which was a big hit. This provided the pattern we will use today.
Free pattern to create your own book cover
These fabric book covers are just plain CUTE, so you need no reason other than that to sew a few up and slip them on your books or your kids books.
This free fabric book cover pattern and tutorial will show you How to Make a Fabric Book Cover with handles that you can adapt to fit any sized book. You can leave the handles off if you desire.
Here is the link to the How to Make a Fabric Book Cover Free Pattern
The cover I made in this tutorial is for a vintage book that I read from almost daily. I’m excited about how it turned out and how it will protect the book.
Measure and create my own book cover- that FITS
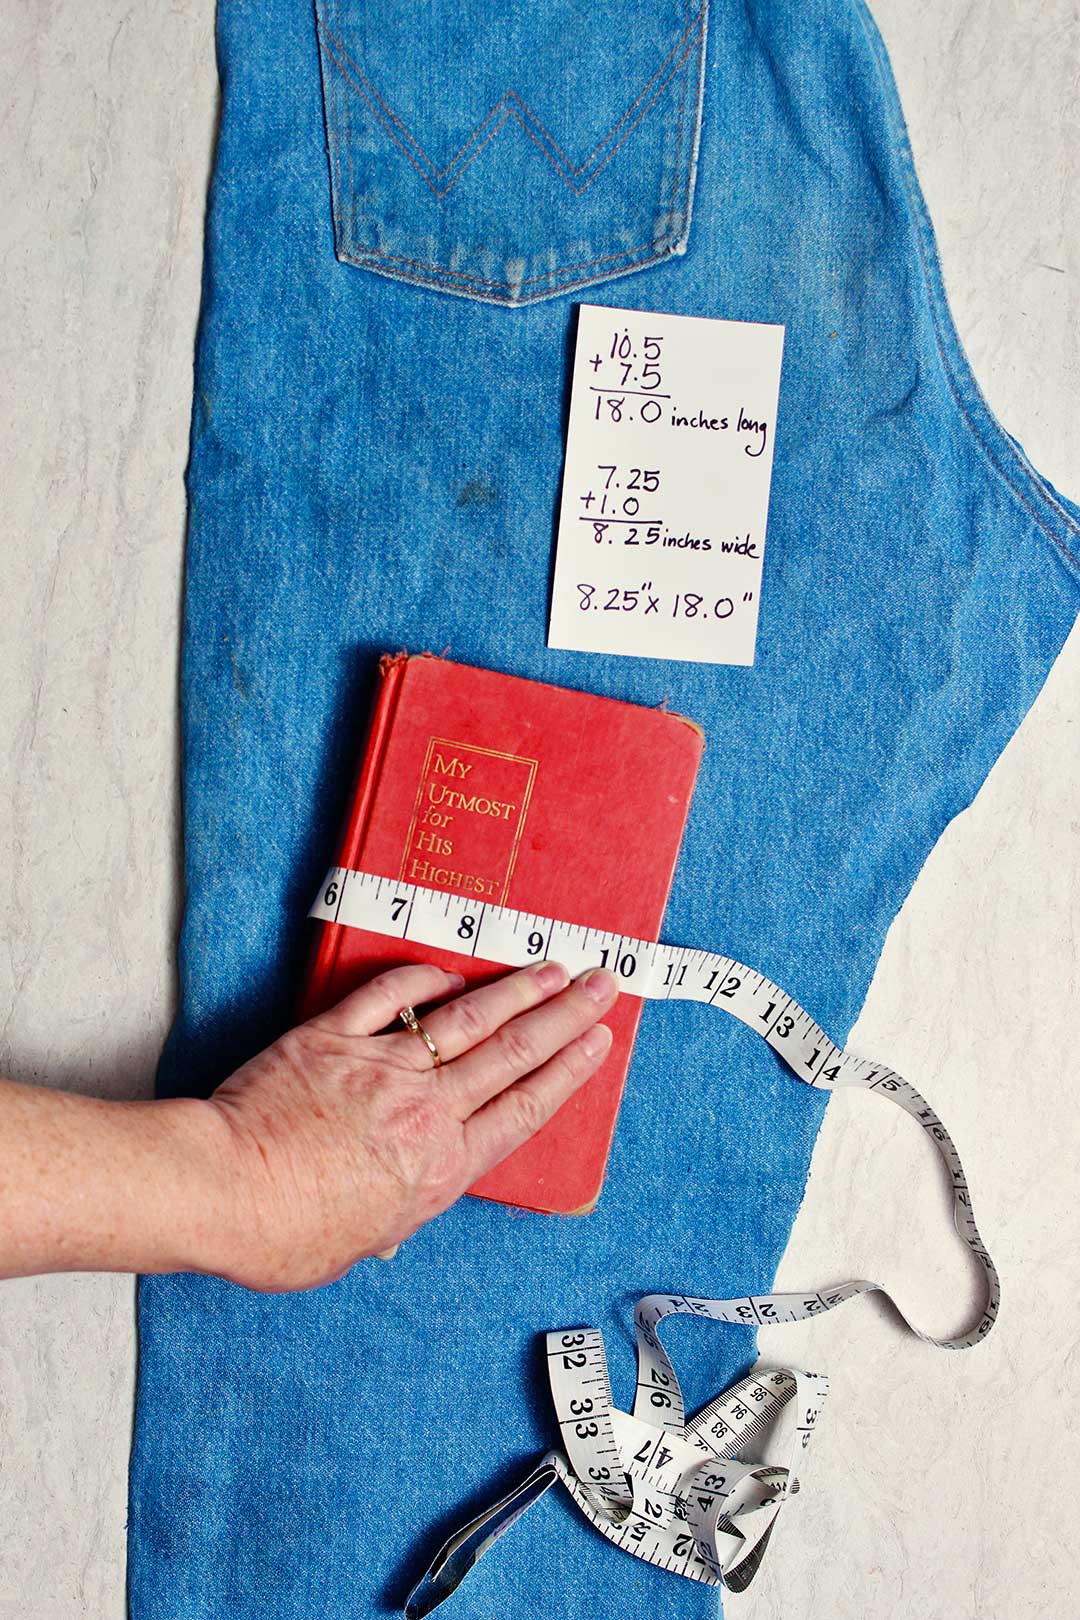
It is important to carefully measure the size of the book you want to sew a fabric book cover for. The measurements are the key for it to fit the book correctly.
First measure the width of your front book cover. While the book is closed, continue the measurement around the spine of the book and across to the edge of the back cover. Add 7 ½-inches to this measurement.
Next, measure the cover size height and add one inch to the measurement.
Plug your measurements into the free fabric book cover pattern. You can download it by clicking here.
Cut a piece of heavier fabric with your measurements (width and height as figured above).
How to sew a fabric book cover
Turn under ¼ inch on each end (towards the wrong side of the fabric) and sew down well with a wide zig-zag stitch.
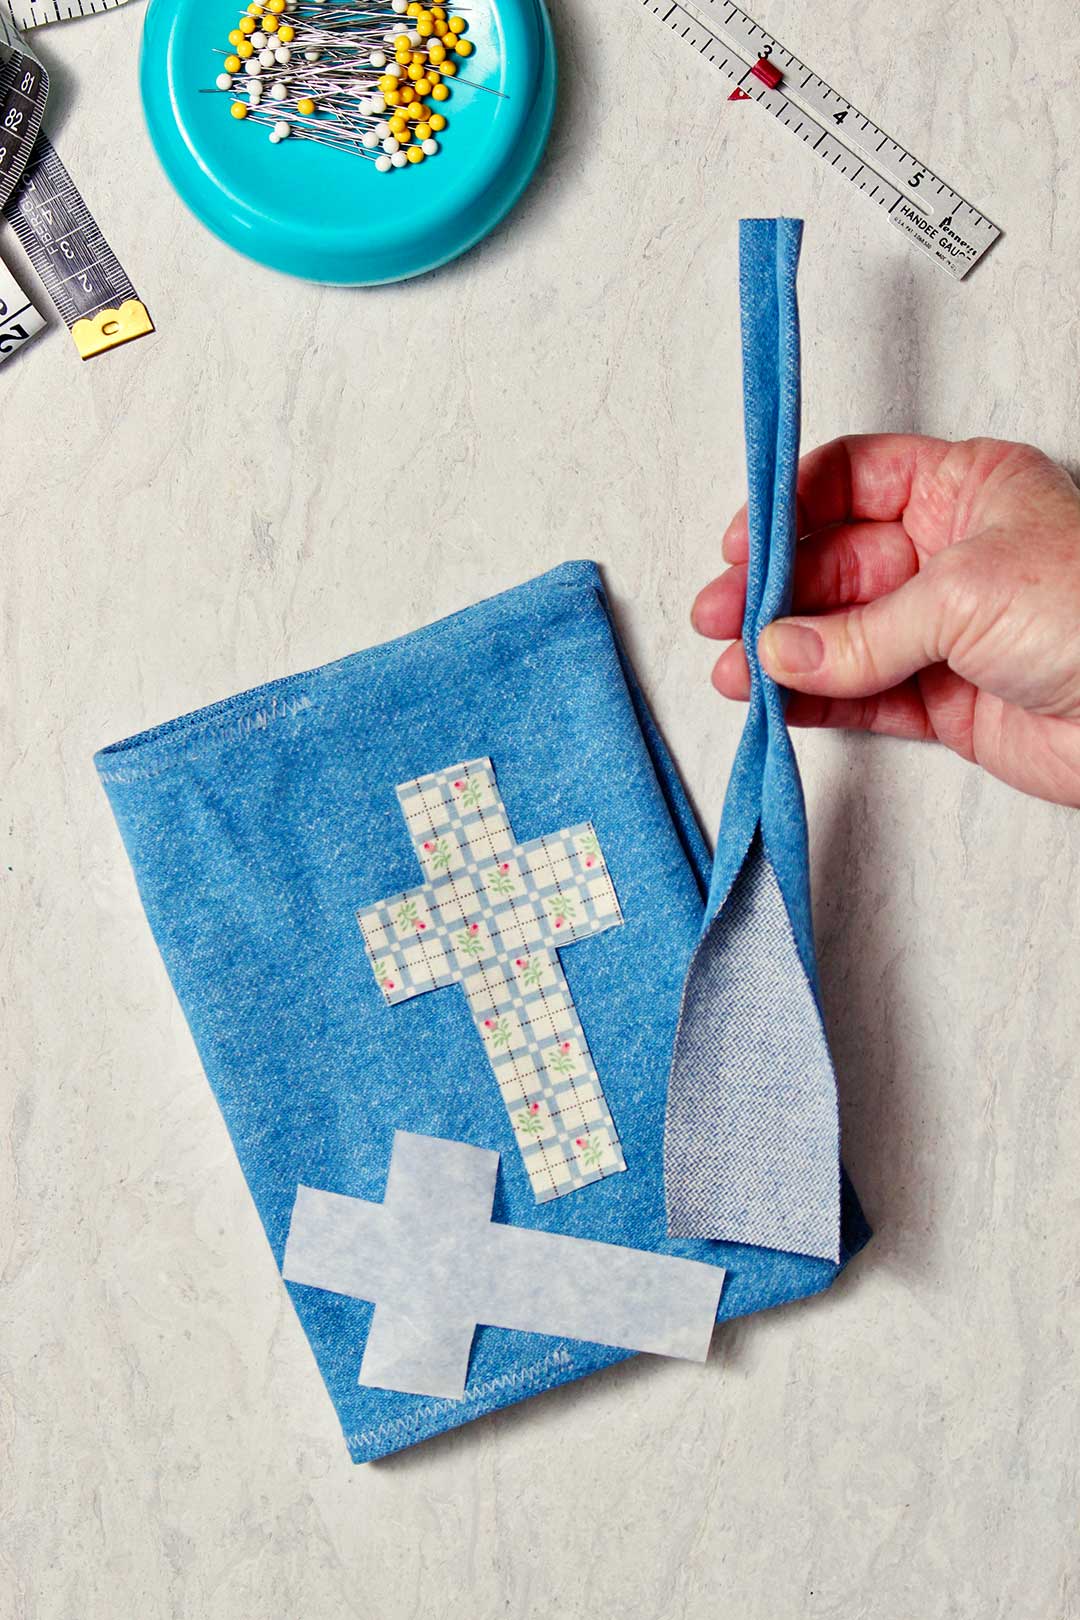
It you want to stitch on a coordinating fabric design now is the time. You could make a heart, flower, initial or a cross like I did. I show the heart option in a later picture.
Fold the cover as if it was on a book so you can be sure you are placing it in the right place and right side up!
Cut the shape out of the fabric, pin it 4 ½ inches from the end of the book cover. Zigzag around the edge to keep it in place.
Note: You can use a two-sided fusible interfacing to hold it in place (Wonder Under is one brand name). This is optional but it makes it much easier. I did that on my book cover.)

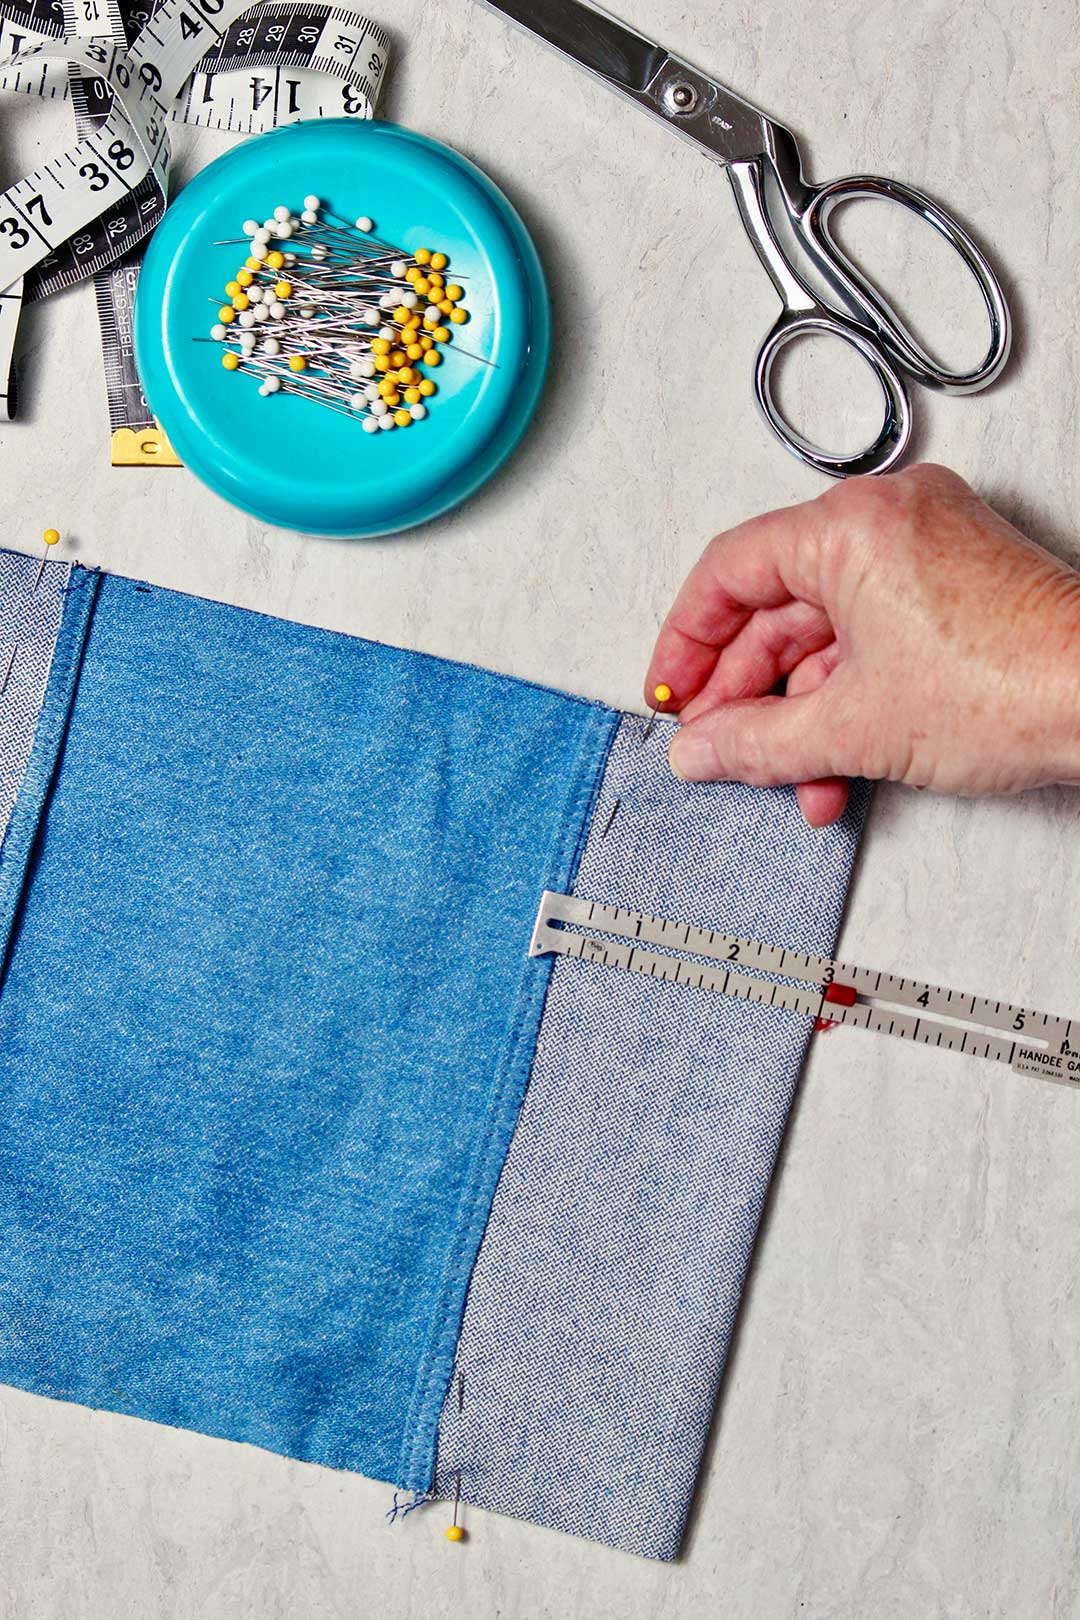
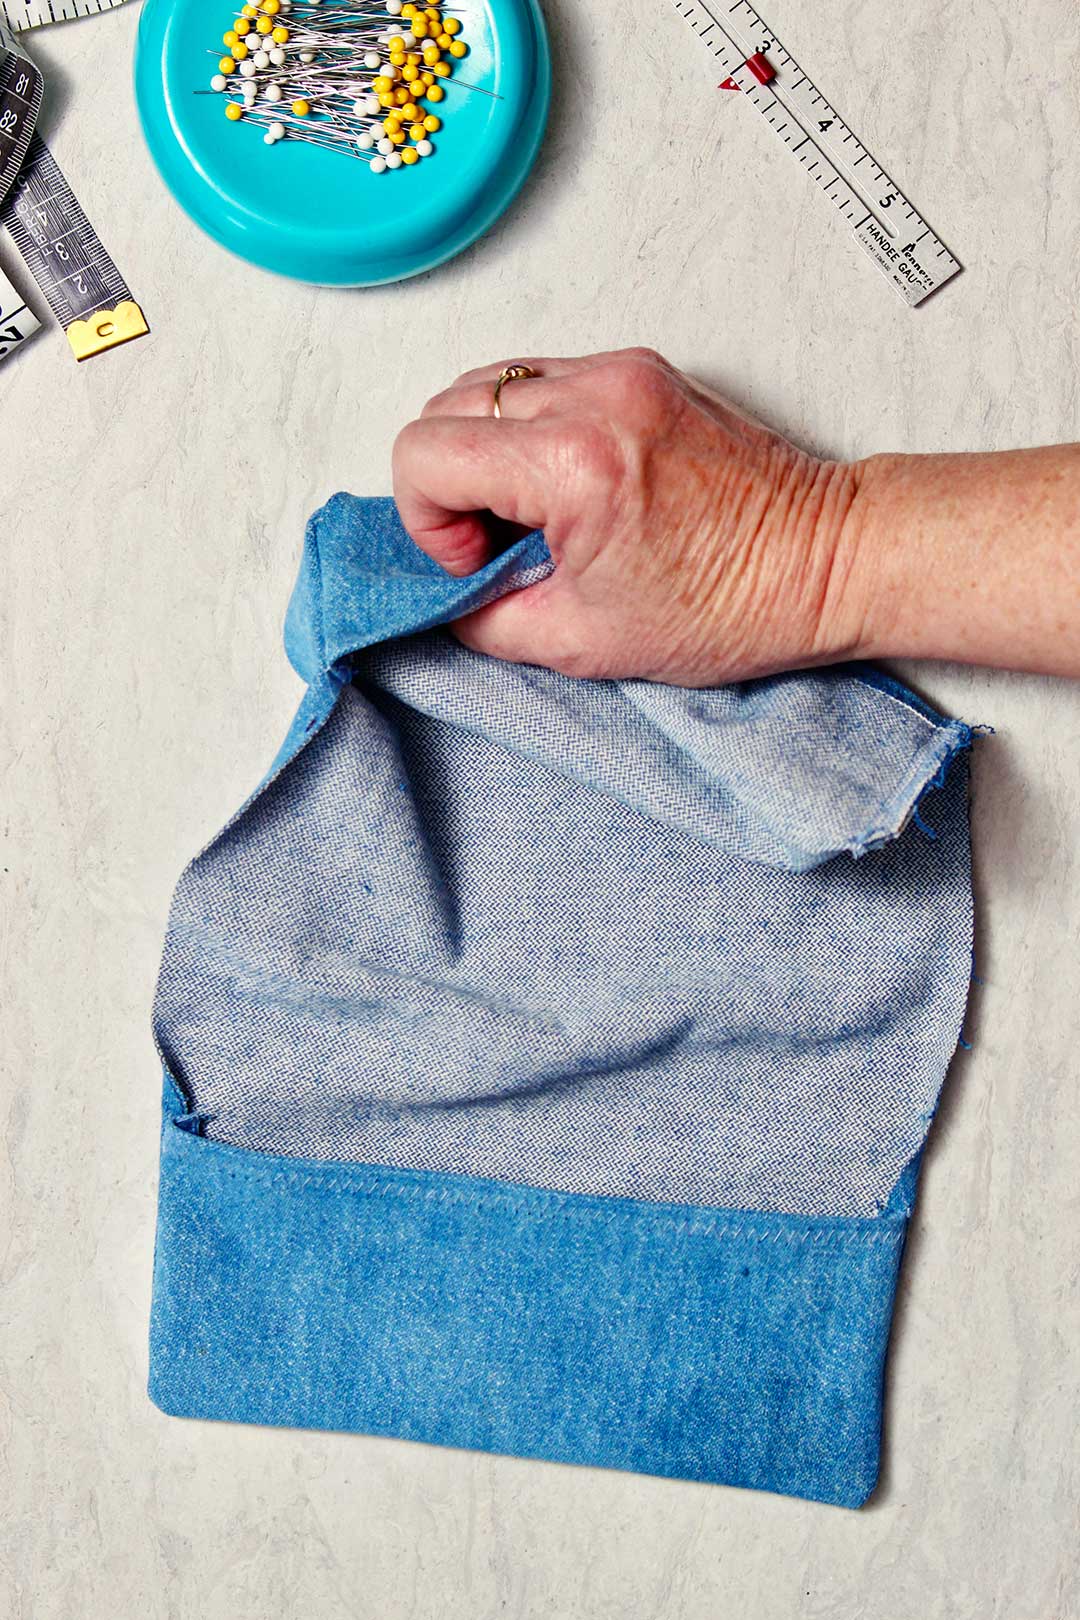
Fold back the ends of the cover
Turn back and pin each of the ends of the book cover 3 inches with right sides together. Sew a ¼-inch seam on the top and the bottom of the folded pieces to hold this in place (backstitch at both ends of these seams). Do the same thing on the other end of the book cover.
Zig zag across the top and bottom edges of the book cover so they don’t ravel.
Turn the ends right side out, being sure to get the corners pushed out and as square as possible.
On the top and bottom edges of the book cover that are turned down ¼-inch but between the two end flaps, use a wide zigzag to finish and hold them down.
How to make a fabric book cover with handles
To make handles you cut two strips of fabric that are 2 inches wide and 10 ½-inches long.
Press the strips in half lengthwise, wrong sides together.
Open the handles up, wrong side facing up. Turn and press the long raw edges in to touch the center fold, wrong sides together.
Fold in half again and press the handles again so the raw edges are inside.
Stitch down the open edge of the handles about ⅛ inch from the edge, holding the handles together in a narrow strip. I used a wide zigzag stitch for this, but you can also use a straight stitch.
Zigzag several times across each end of the handles so they don’t ravel.
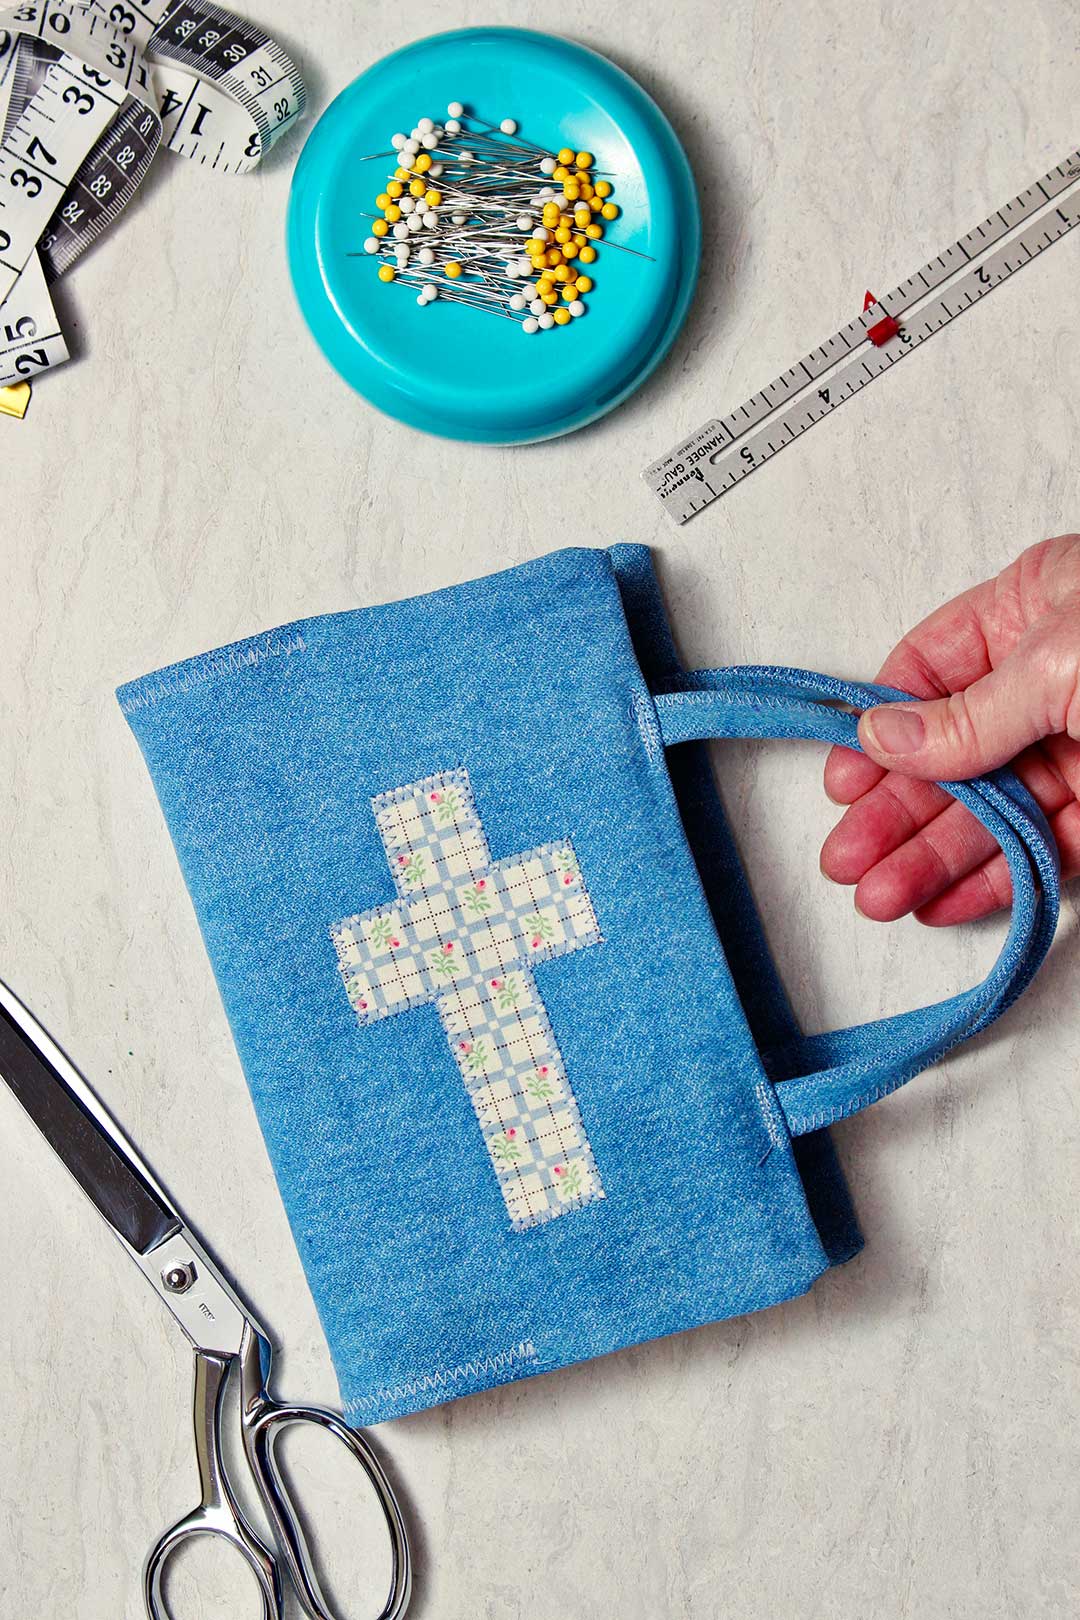
Sew on the handles
Measure the center of one end of your book cover. Mark with a pin. Measure out 2 ½ inches to each side of this pin and mark with pins, then remove the center pin. Do the same thing on each end of the book cover. This marks where you will sew the ends of the handles.
Use a zig-zag stitch to sew the handles onto the very edge of the book cover with the ends of the handles on the inside of the book cover.
Slip the book cover onto your book
I don't mean to be silly, but this is so fun, to see if what you made FIT the book you made it for. It's the moment of truth...drum roll...
Fold the covers of your book backwards and carefully slip the flaps of the book cover onto the edges of the covers.
Gently fold the covers of the book forwards and allow the book cover to slip over the book.
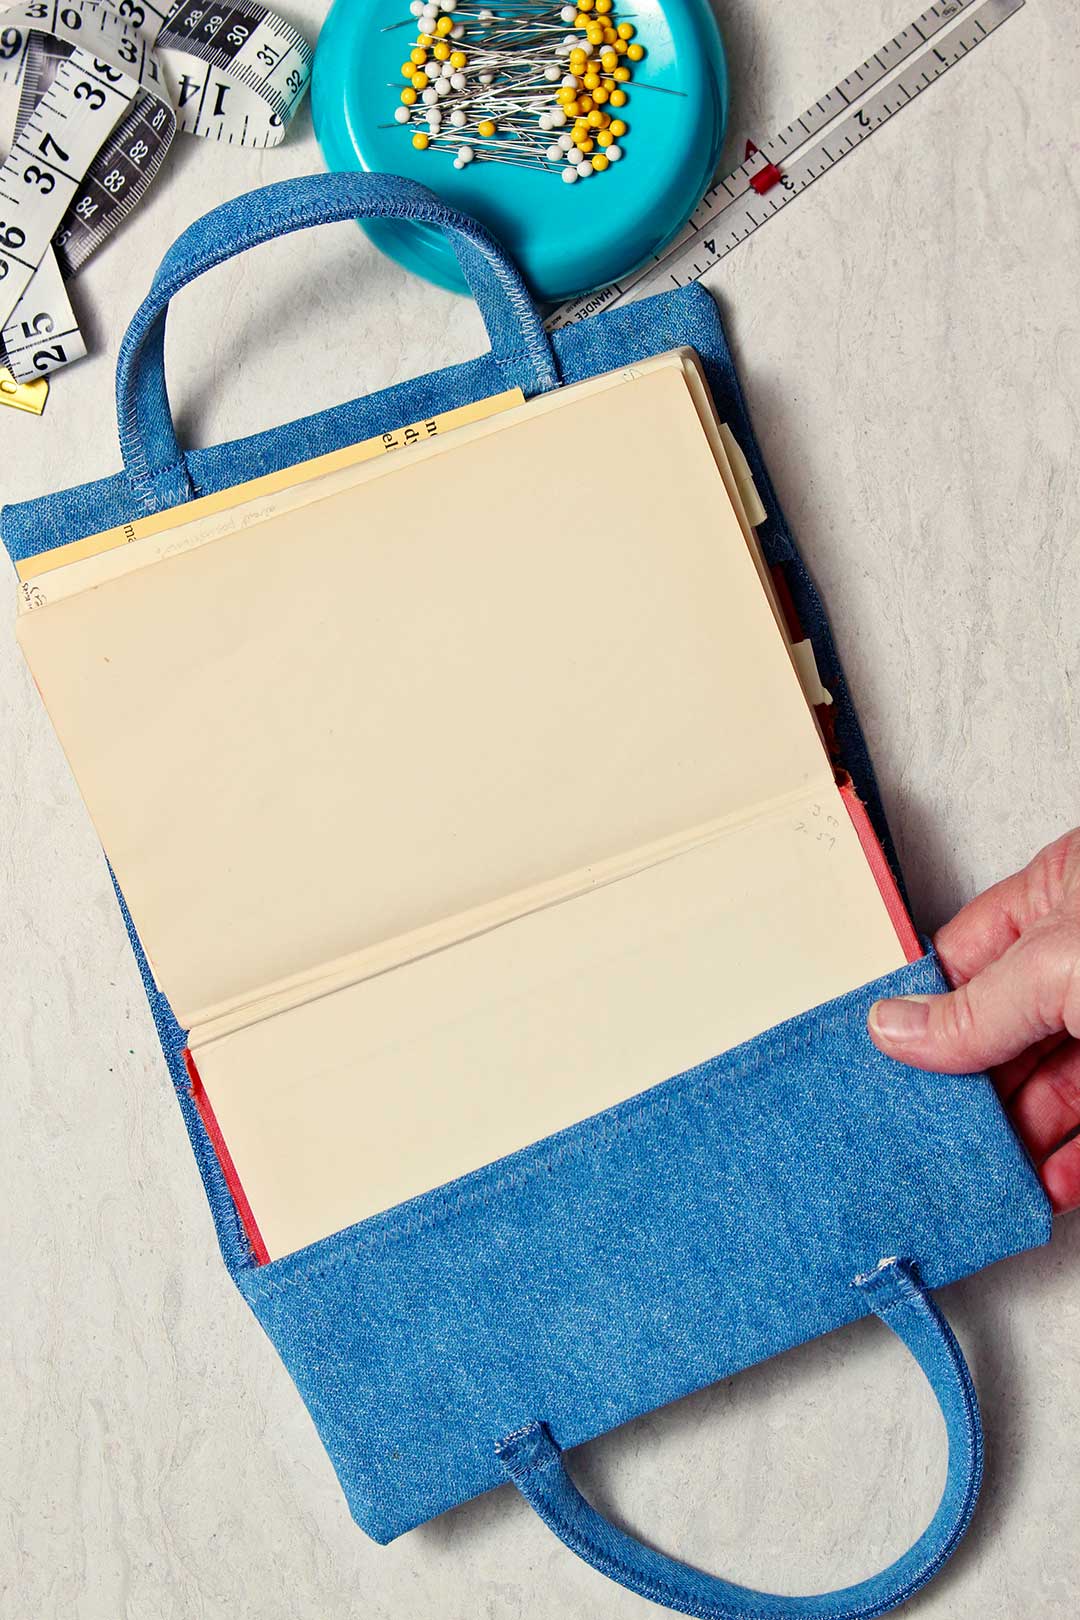
Ta-dah!
You learned how to make a fabric book cover of your very own!!
Aren’t they cute? It sure makes carrying your favorite book easy and protects it as well. My grandmother would be proud of us!
Now that you can make a fabric book cover, you also know how to make a fabric notebook cover, or photo album cover. Hmm- a series of books covered with coordinating fabrics would look so good stacked on a bookshelf in your home. So many possibilities!
Here is the How To Make a Fabric Book Cover Free Sewing Pattern link again.
Want to do more sewing?
Enjoy!
If you try this craft, let me know! Go ahead and leave a comment, rate it, and tag a photo with #WelcometoNanas wherever you post. Come join the fun at https://welcometonanas.com
More from Welcome To Nana's
How to Make a Fabric Book Cover
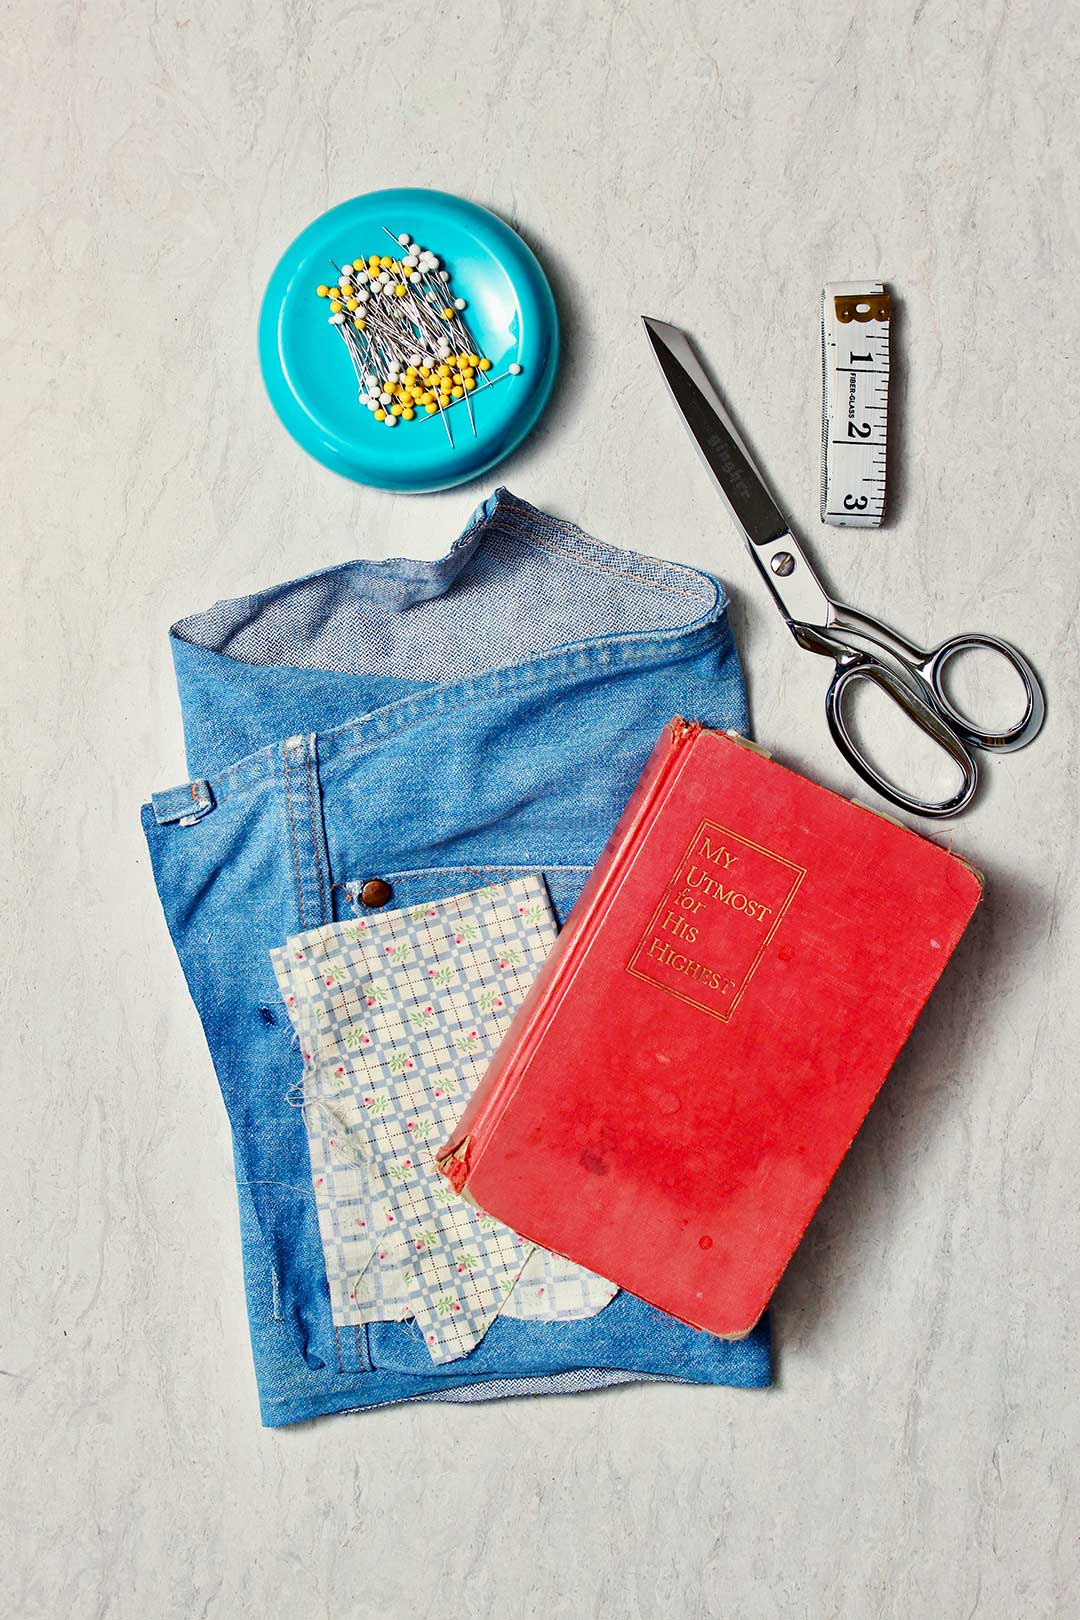
Equipment
- Sewing machine
- Scissors
- Pins
Items Required
- How to Make a Fabric Book Cover Free Pattern
- ½-yard heavier fabric
- A small piece of coordinating fabric to decorate the front (optional)
- Thread
Instructions
- Carefully measure your book cover as shown on the pattern. Plug your measurements into the How to Make a Fabric Book Cover Free Pattern.
- Cut a piece of heavier fabric with your measurements (width and height as figured above). Cut two 10x2 inch pieces of fabric for handles (optional).
- Turn under ¼ inch on each end (towards the wrong side of the fabric) and sew down well with a wide zig-zag stitch.
- It you want to stitch on a coordinating fabric design now is the time. Cut the shape out of the fabric, pin it 4 ½ inches from the end of the book cover. Zigzag around the edge to keep it in place.
- Turn back each of the ends of the book cover 3 inches with right sides together. Sew a ¼-inch seam on the top and the bottom of the folded pieces to hold this in place (backstitch at both ends of these seams). Do the same thing on the other end of the book cover. Zig-Zag to prevent raveling.
- Turn the ends right side out, being sure to get the corners pushed out and as square as possible. On the top and bottom edges of the book cover that are turned down ¼-inch but between the two end flaps, use a wide zigzag to finish and hold them down.
- Press the two handle strips in half lengthwise, wrong sides together. Open the handles up, wrong side facing up. Turn and press the long raw edges in to touch the center fold, wrong sides together. Fold in half again and press the handles again so the raw edges are inside.
- Stitch down the open edge of the handles about ⅛ inch from the edge, holding the handles together in a narrow strip. I used a wide zigzag stitch for this, but you can also use a straight stitch. Zig zag the ends of the handles
- Mark handle placement on both ends of the cover about 2-2.5 inches out from the center. Use a zig-zag stitch to sew the handles onto the very edge of the book cover with the ends of the handles on the inside of the book cover.
- Fold the covers of your book backwards and carefully slip the flaps of the book cover onto the edges of the covers. Gently fold the covers of the book forwards and allow the book cover to slip over the book. Ta-dah! You did it!!
Video
Supplies needed for How to Make a Fabric Book Cover
- How to Make a Fabric Book Cover Free Pattern
- ½-yard heavier fabric
- A small piece of coordinating fabric to decorate the front (optional)
- Thread
- Scissors
- Pins
- Sewing machine


Leave a Reply