Looking for a simple, no mess way to decorate eggs for Easter? The grandkids and I were delighted with the EggMazing Egg Decorator Kit! Create beautiful pen designs in seconds as you turn the eggs on the spinner. It is mesmerizing!
Jump to:
- Cute Craft Alert: The EggMazing Fun for All Ages
- Why You’ll Love This Egg Decorating Idea
- What Is the EggMazing Egg Decorator?
- What You Need for EggMazing Decorating
- How to Use the EggMazing Decorator
- Craft Tips for Success with the EggMazing Spinner
- Craft Variations- for a TWIST on the egg decorating
- FAQs
- Give It a Try!
- More DIY Egg Decorating Ideas for Kids
- Come join the fun at WTN!
- The EggMazing Egg Decorator In Action
Cute Craft Alert: The EggMazing Fun for All Ages
I wanted a new “spin” on decorating Easter eggs with the grandkids and we got it with the EggMazing Egg Decorator. As soon as we got the spinner out everyone gathered around. And I’m not exaggerating. The kids and adults were intrigued and had to wait patiently for their turn using the spinner and decorating an egg.
Each child could easily turn on the device and place an egg in the spinner. Every face was curious and watching closely. There was instant color and design as the pen touched the spinning egg! The kids and adults enjoyed experimenting with striped patterns and soon we had a whole line of brightly decorated Easter eggs. It was so intriguing!
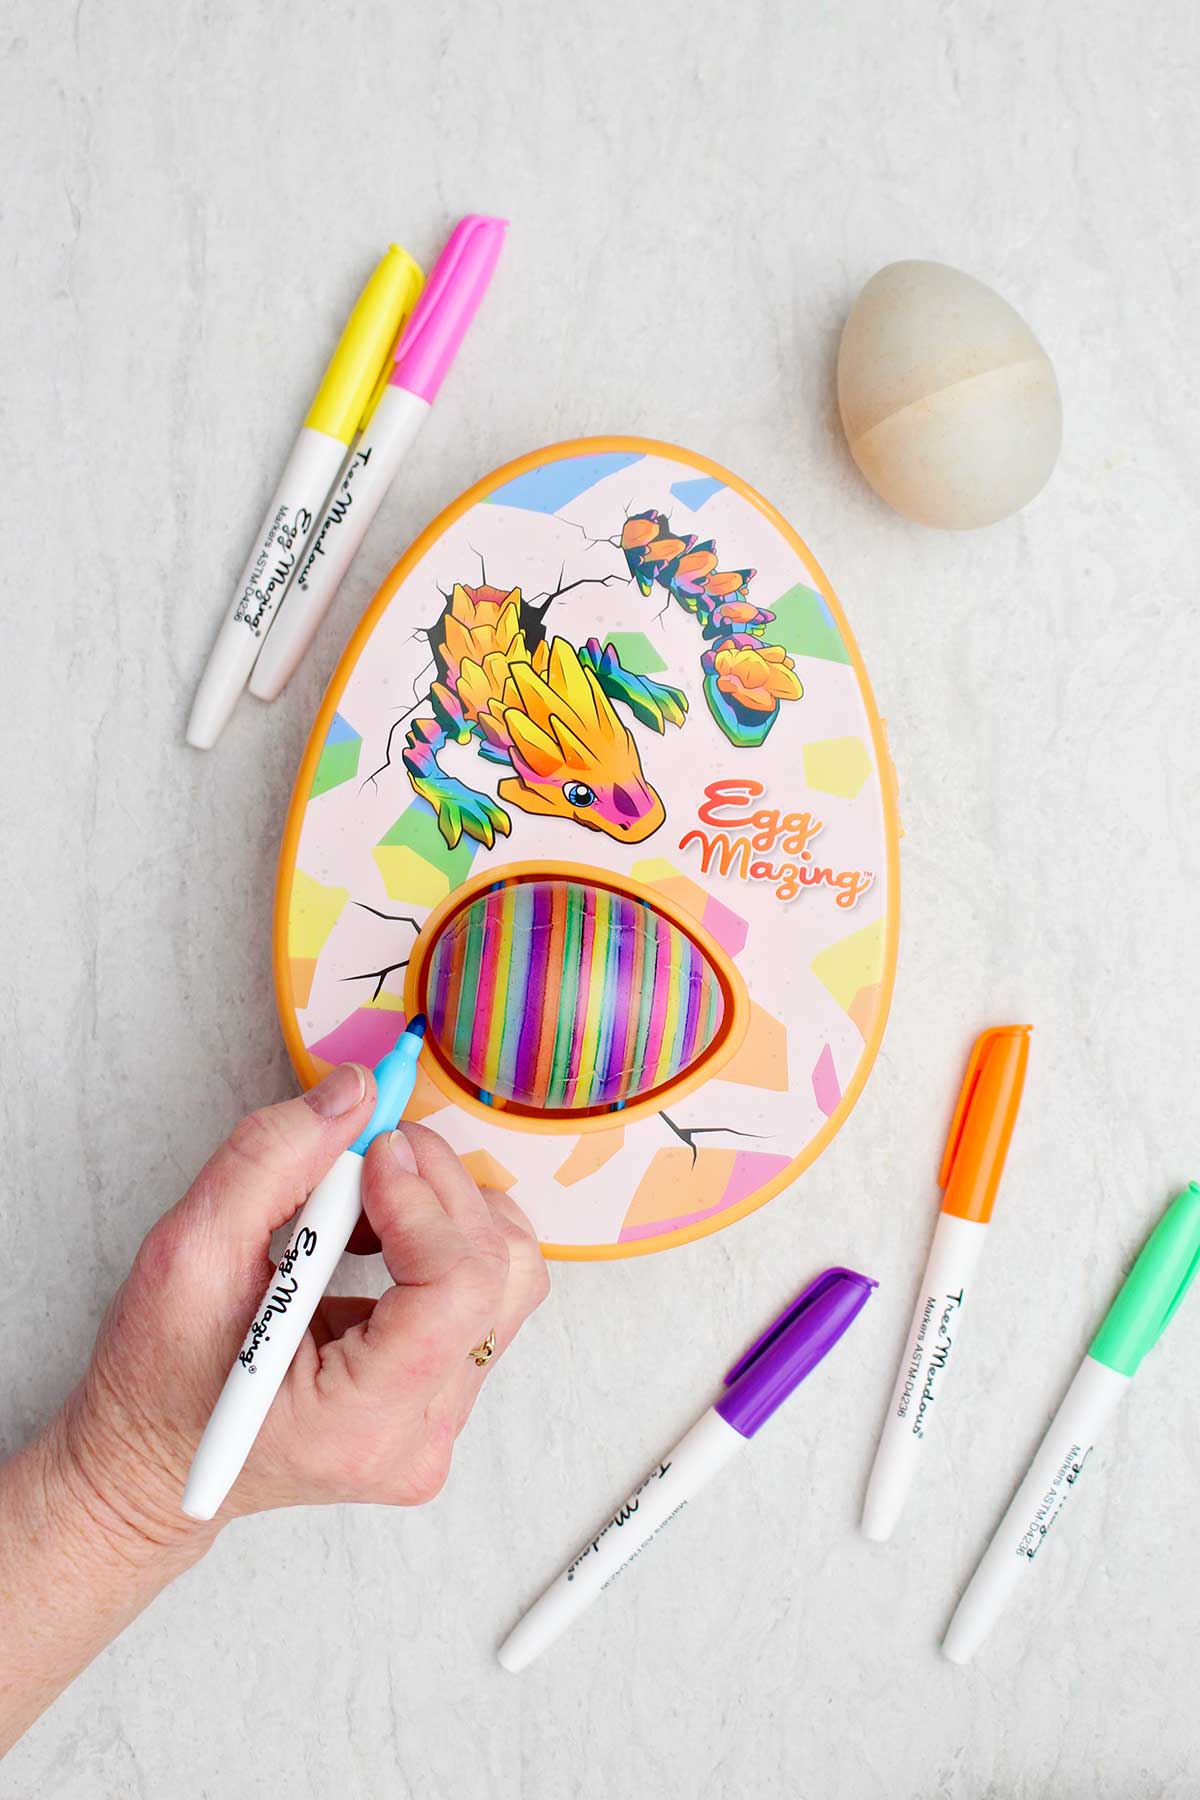
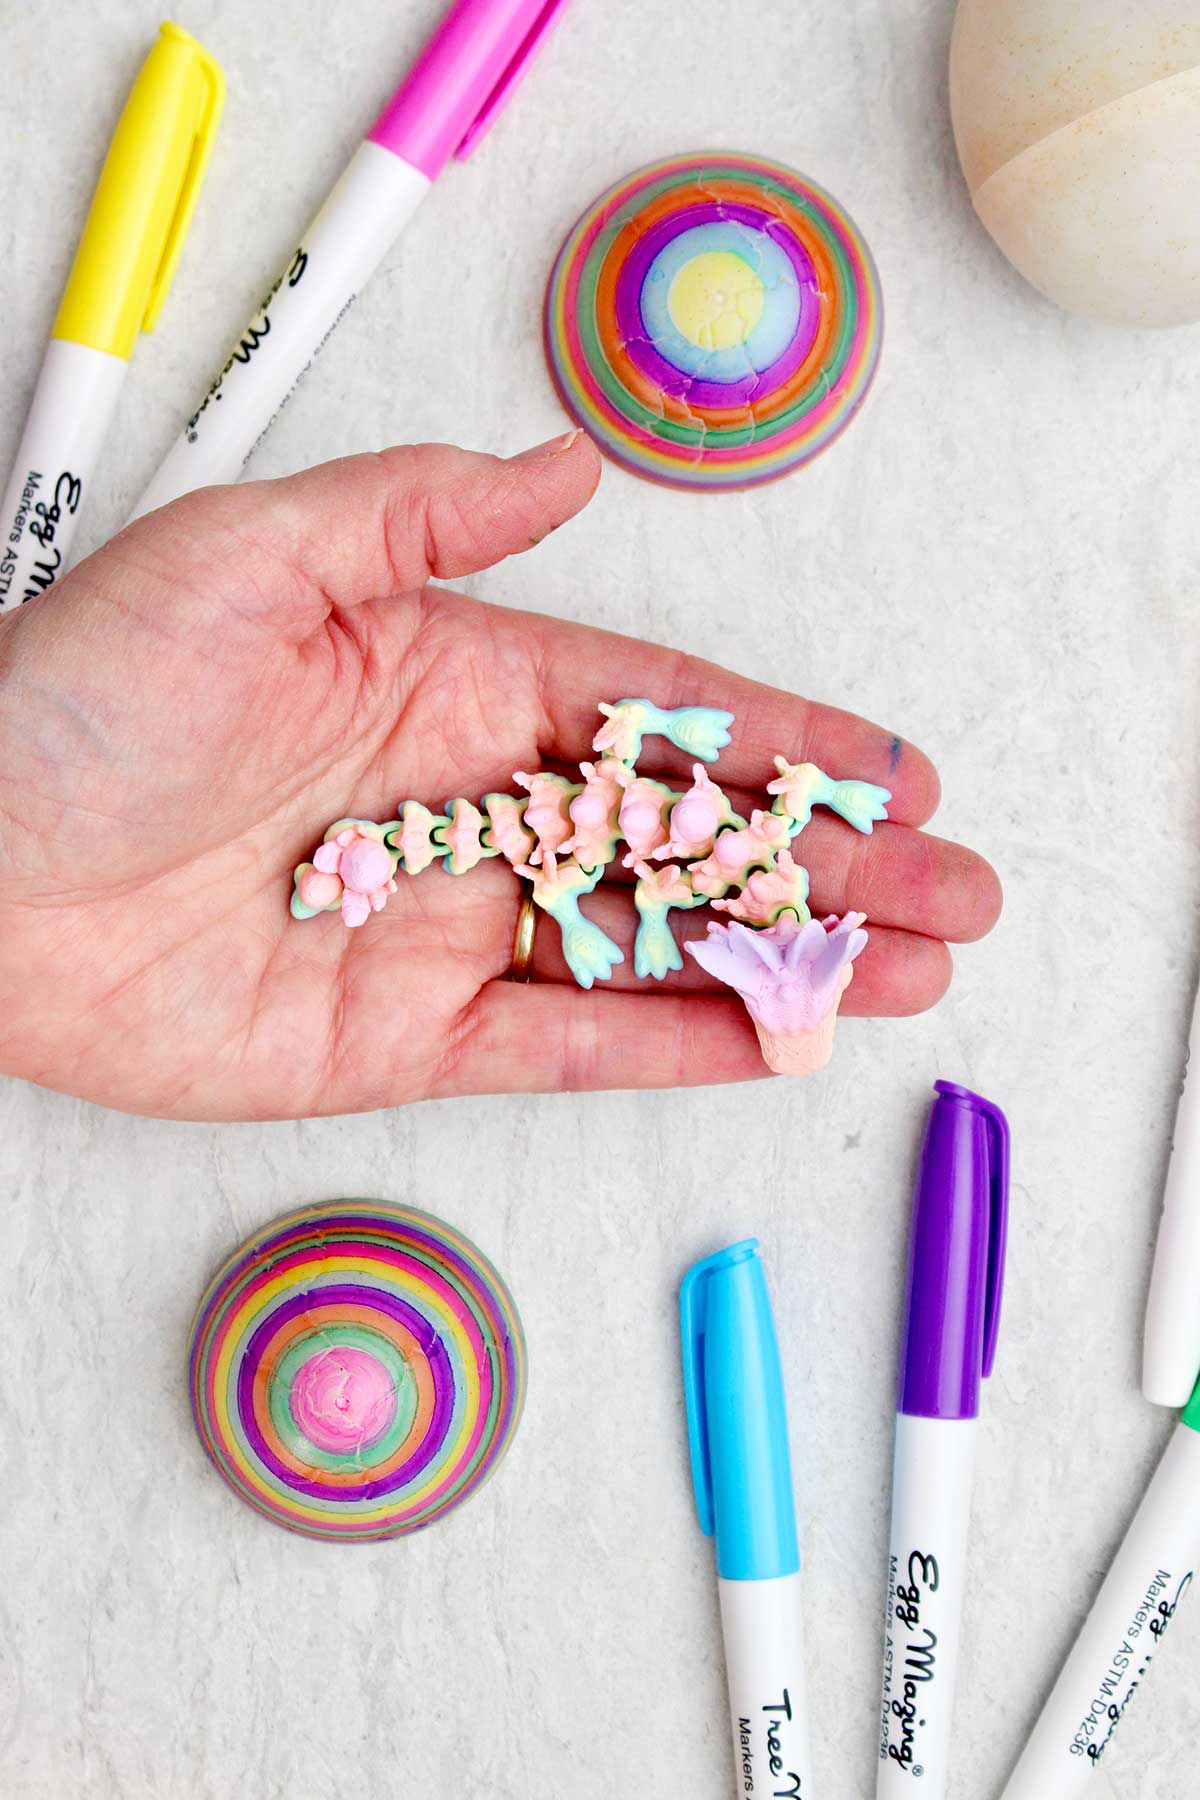
We decorated the dragon eggs as well. Opening them up at the end literally brought squeals from the kids. They were so surprised at the cool 3D printed dragons inside. You’ve got to watch the video of this!
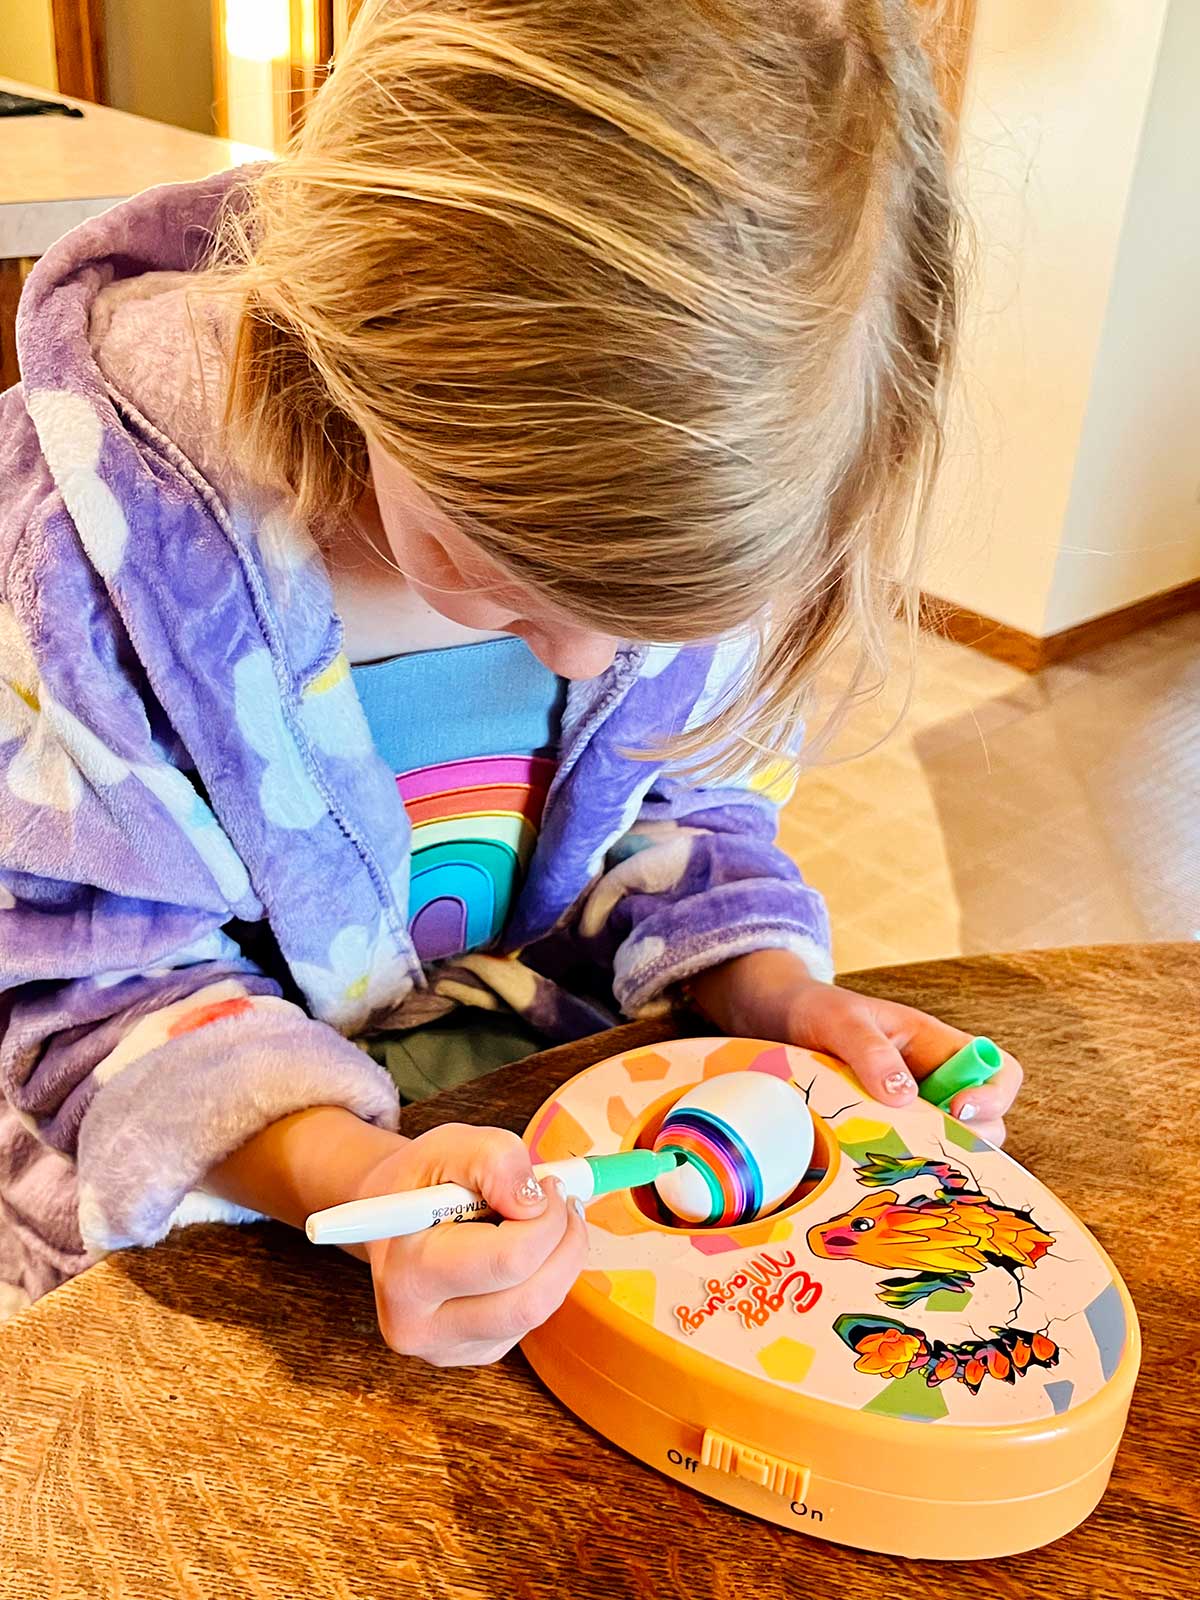
Even the youngest (our youngest is 6) could create beautiful eggs. So I think this would be a great craft for those that don’t usually feel successful in creative projects. They can easily jump in and create pretty striped eggs. What I also loved was there was no egg dye mess.
Why You’ll Love This Egg Decorating Idea
This is a win-win decorate an Easter egg idea for families. Here’s why:
- Less messy than traditional egg dyeing
- Quick-drying markers don’t smudge and there’s no waiting for the eggs to dry!
- Great project for all ages (from as young as 3 to adults!)
- Creative but not frustrating
- Reusable- pack away the spinner and bring it out next year. Start a tradition!
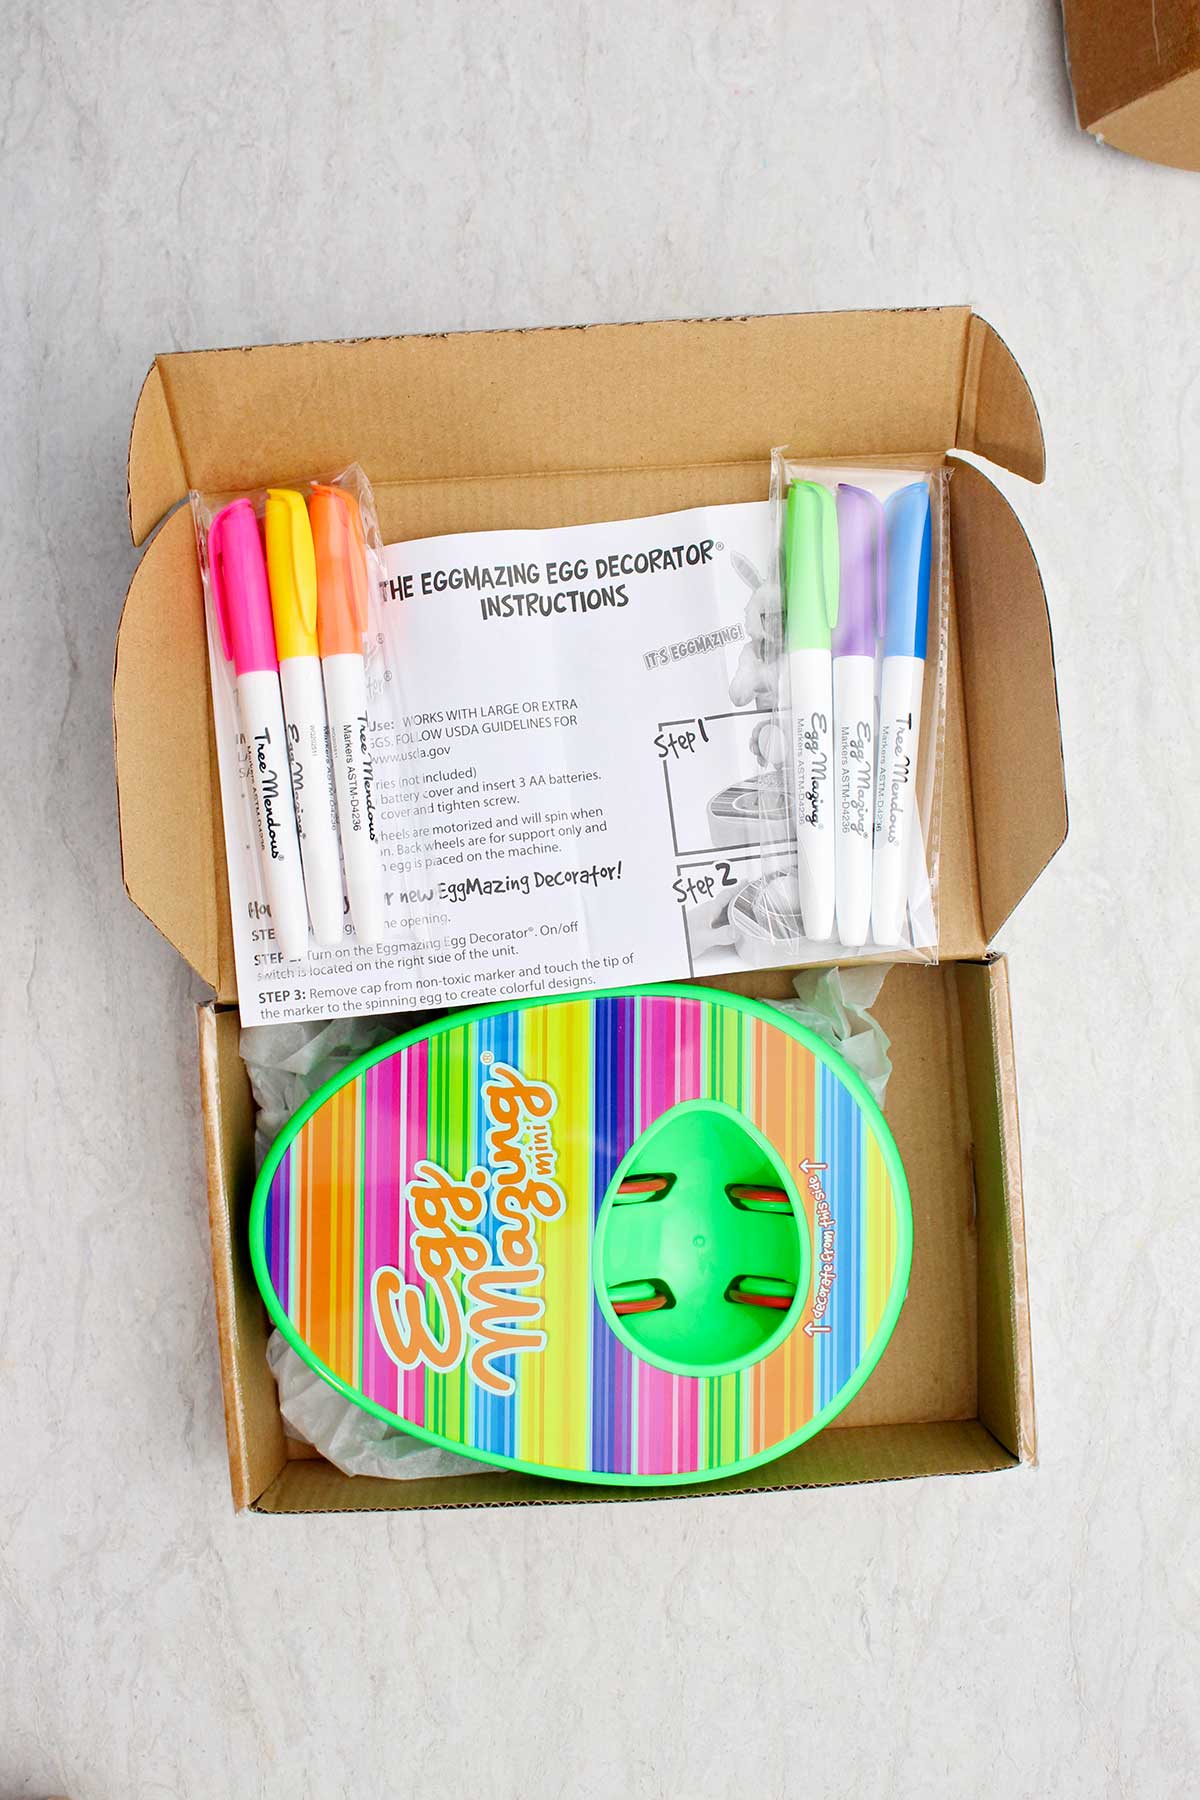
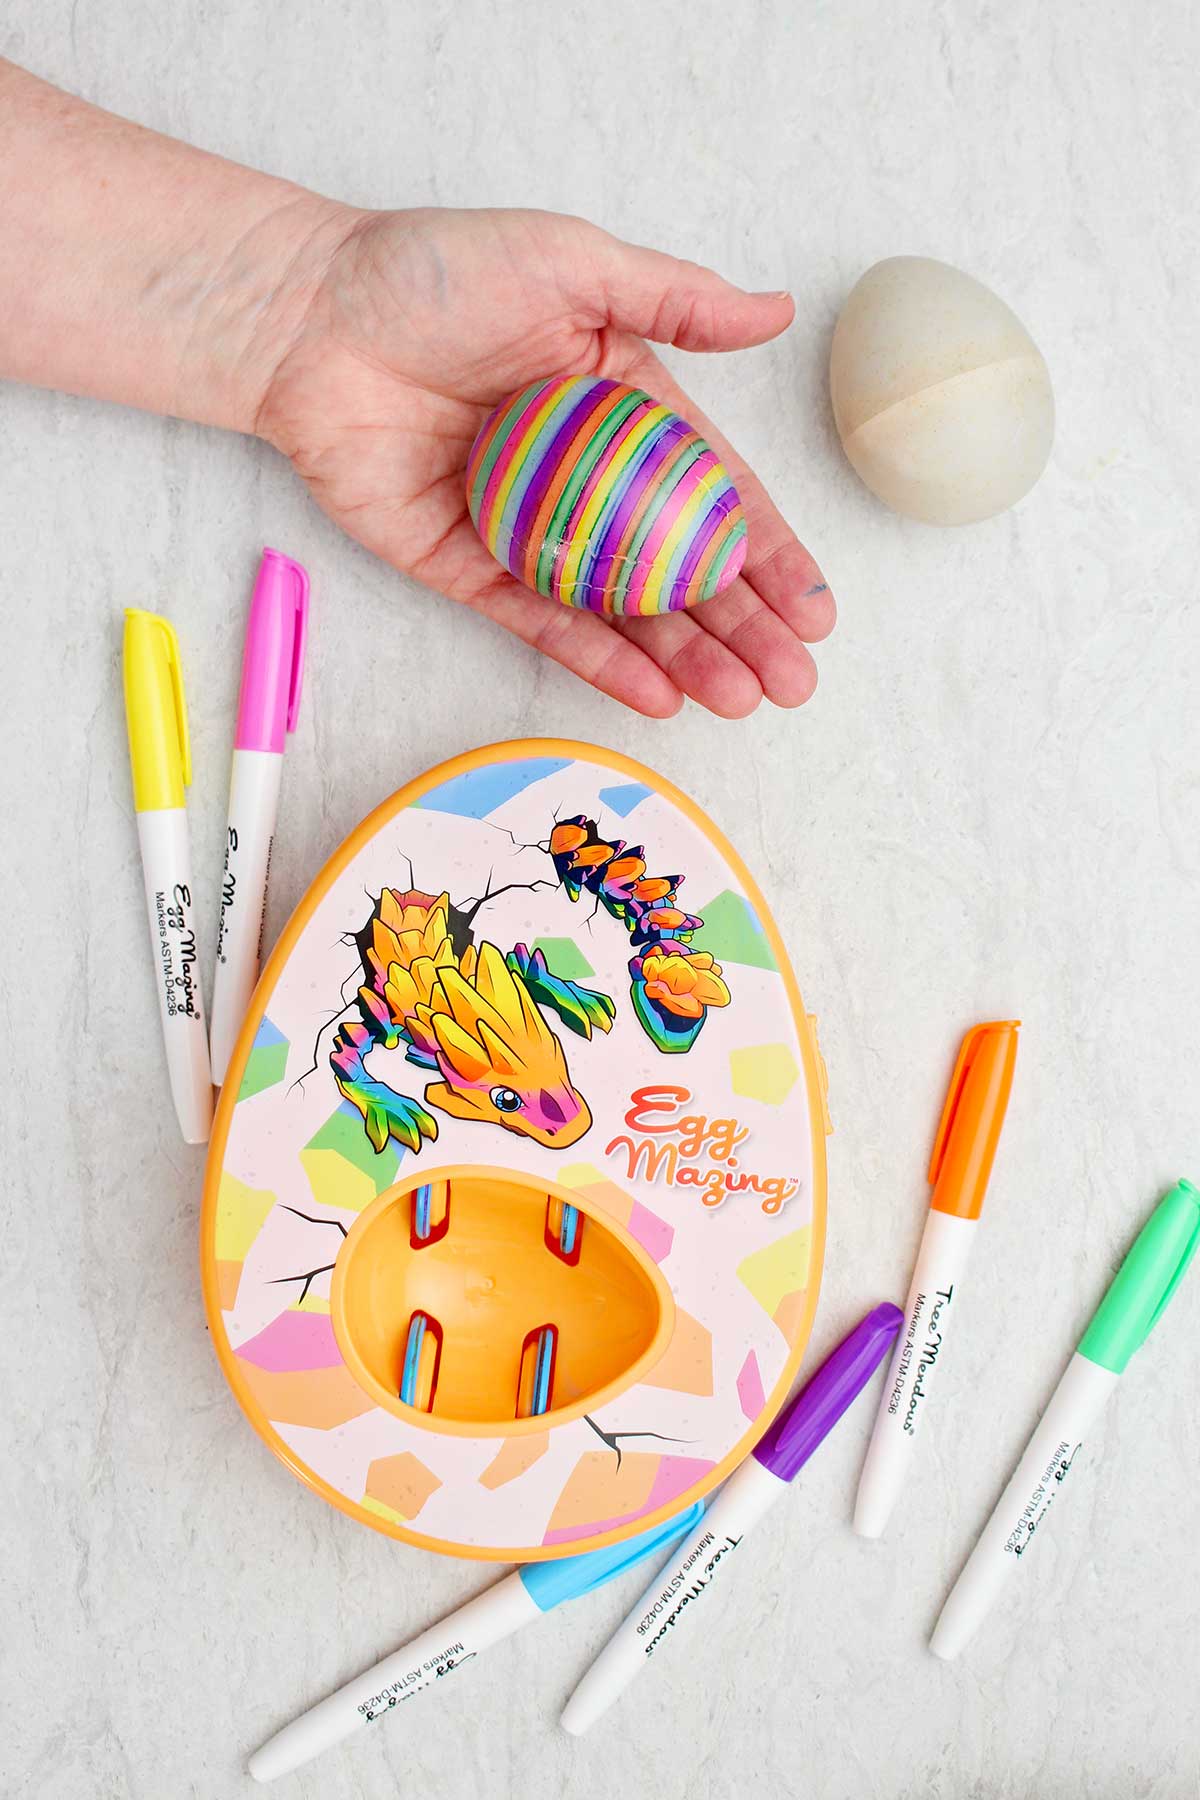
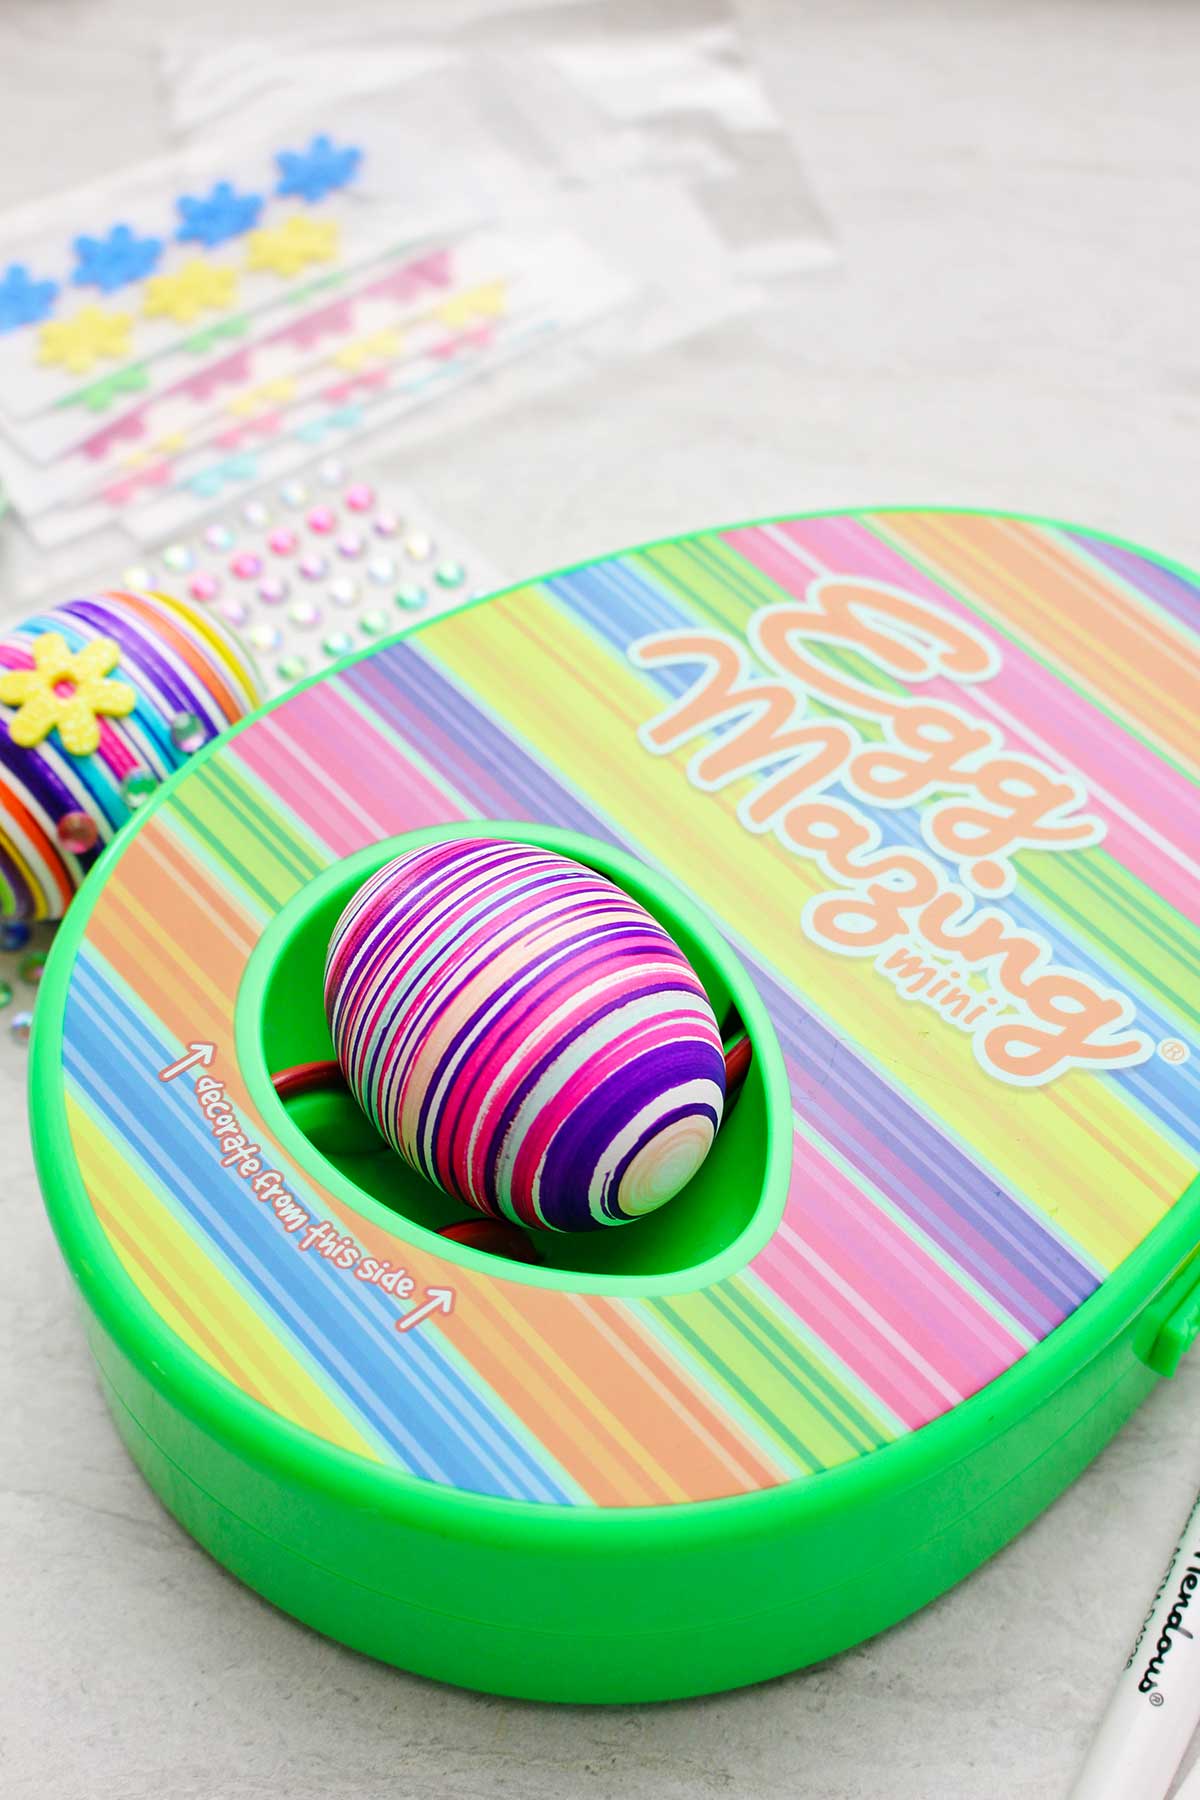
What Is the EggMazing Egg Decorator?
The EggMazing Egg Decorator is a simple little machine that sits on the table. It spins your egg while you gently touch the egg with a marker. As the egg turns, the pen color creates stripes and lines. It's Egg Mazing- (sorry, I couldn't help myself).
CHOOSE ONE EGG DECORATING KIT (they all have a spinner device, the spinners are just decorated differently)
- EggMazing Egg Decorator Kit (original or EggMini- different number of quick drying pens included, no eggs)
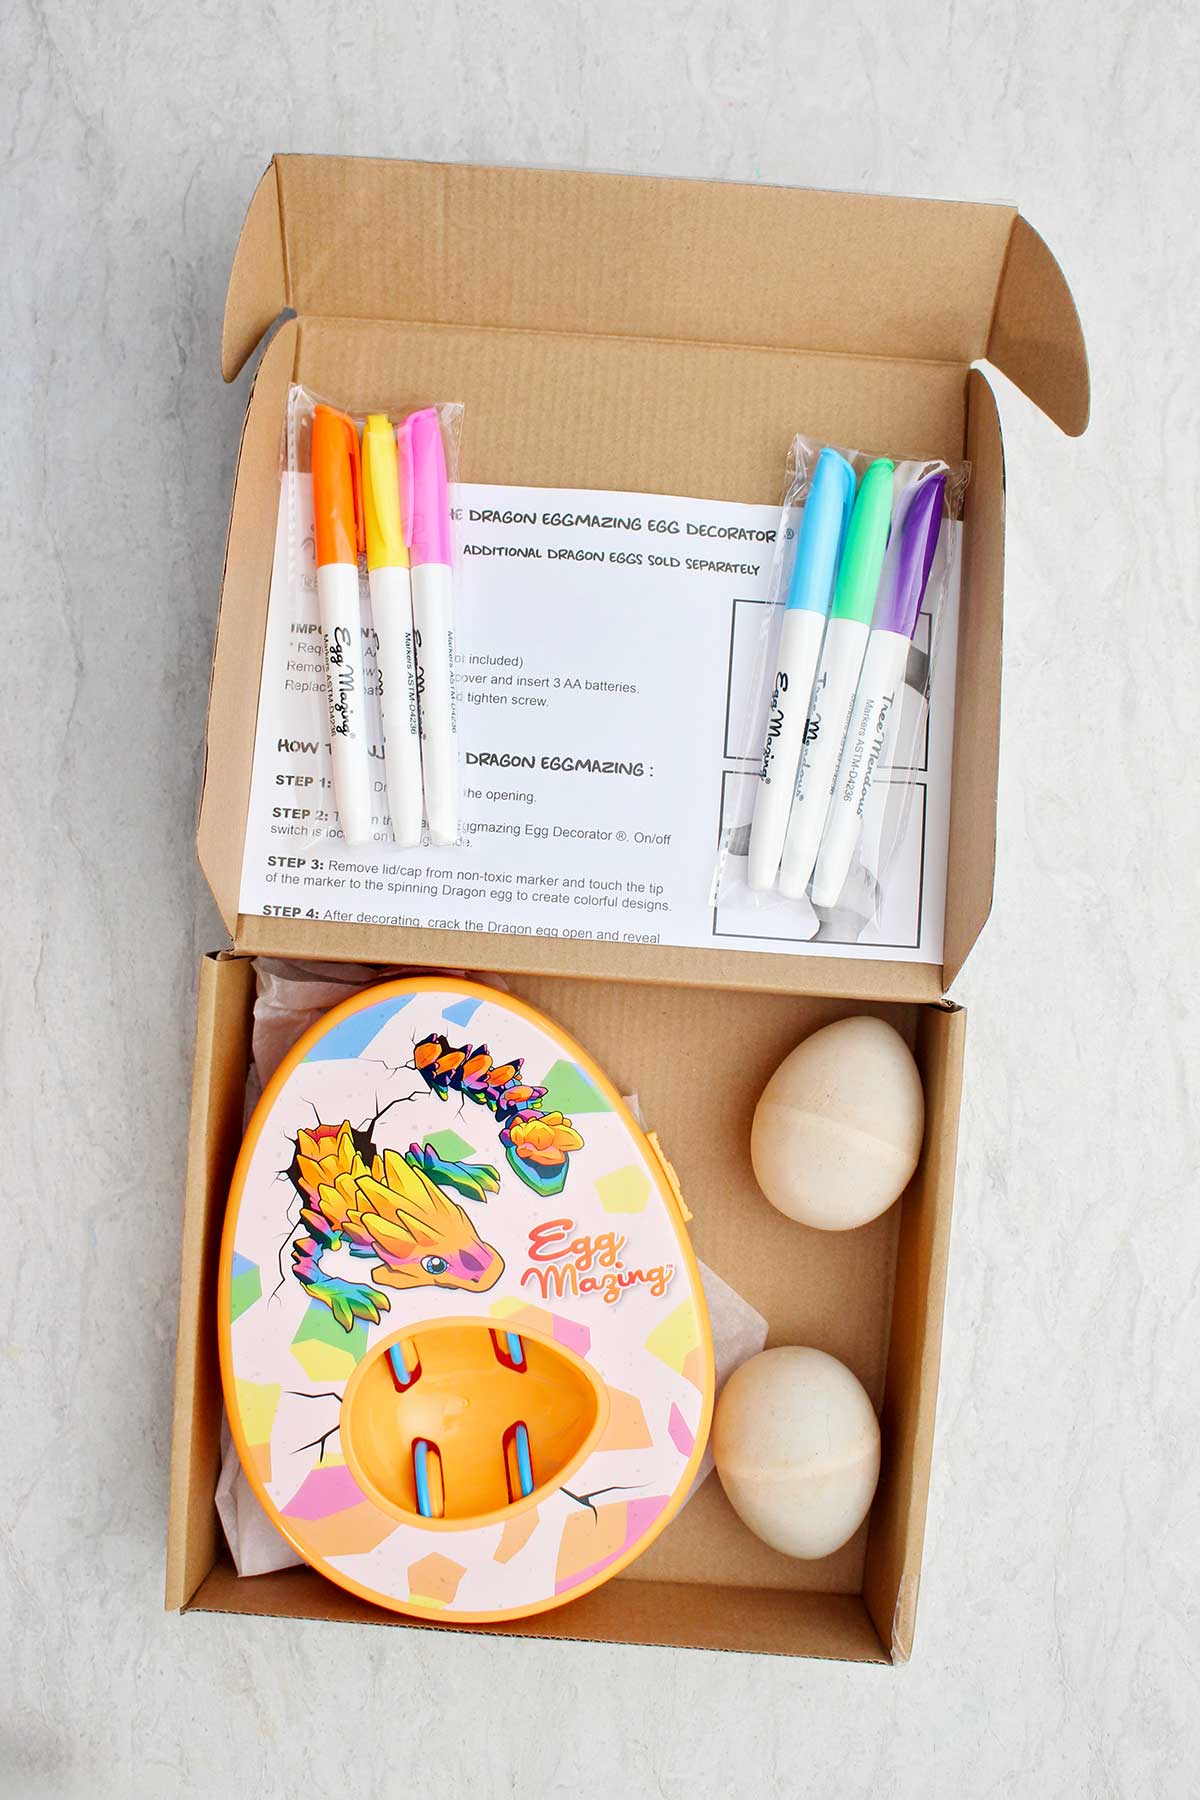
- OR 1 EggMazing Egg Decorator Dragon Kit (quick drying pens and 2 dragon eggs).
- OR 1 Glow in the Dark DinoMazing Egg Decorator (quick drying pens and 2 dinosaur eggs)
- OR 1 of many other EggMazing kits in various themes like Peeps
Each kit comes with special quick-drying markers to make colorful designs that don't smudge.
You do need to provide the eggs yourself, see the supply list for options.
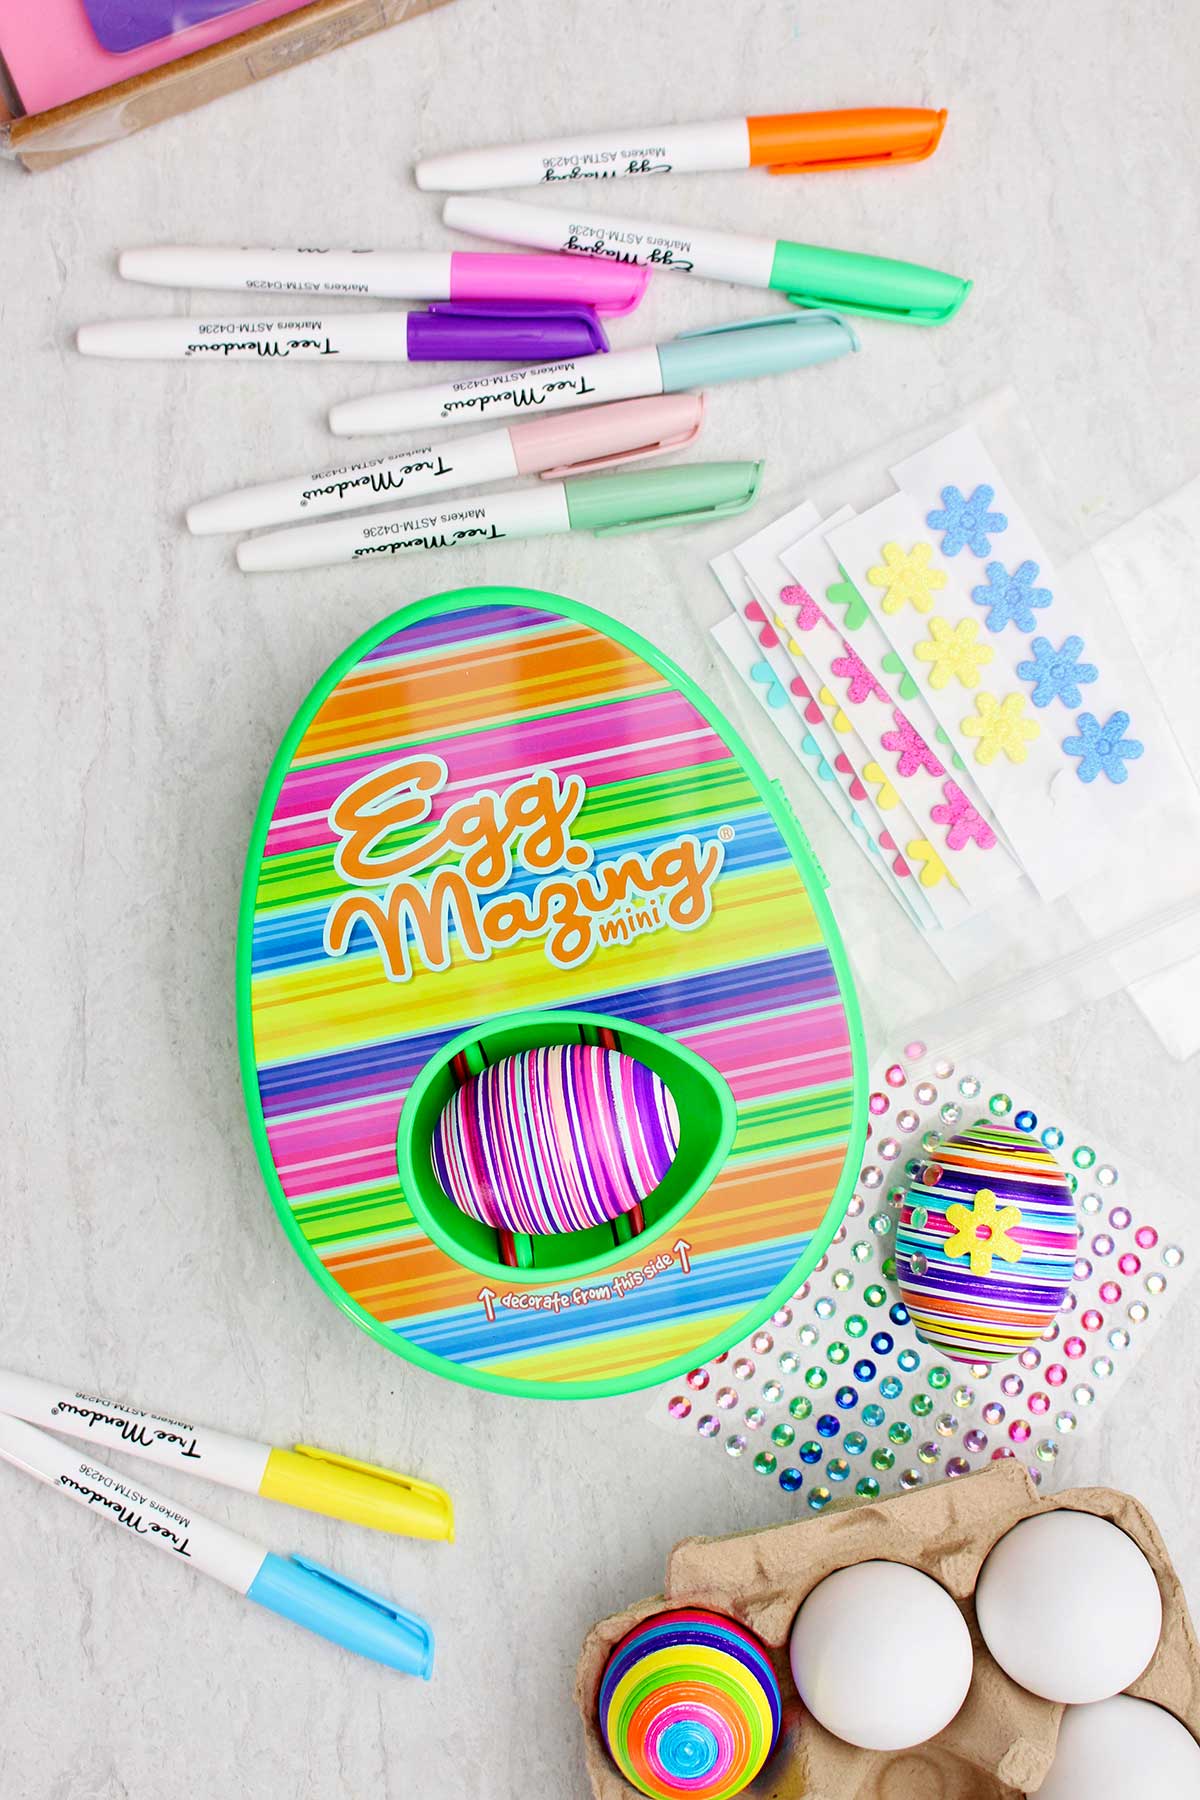
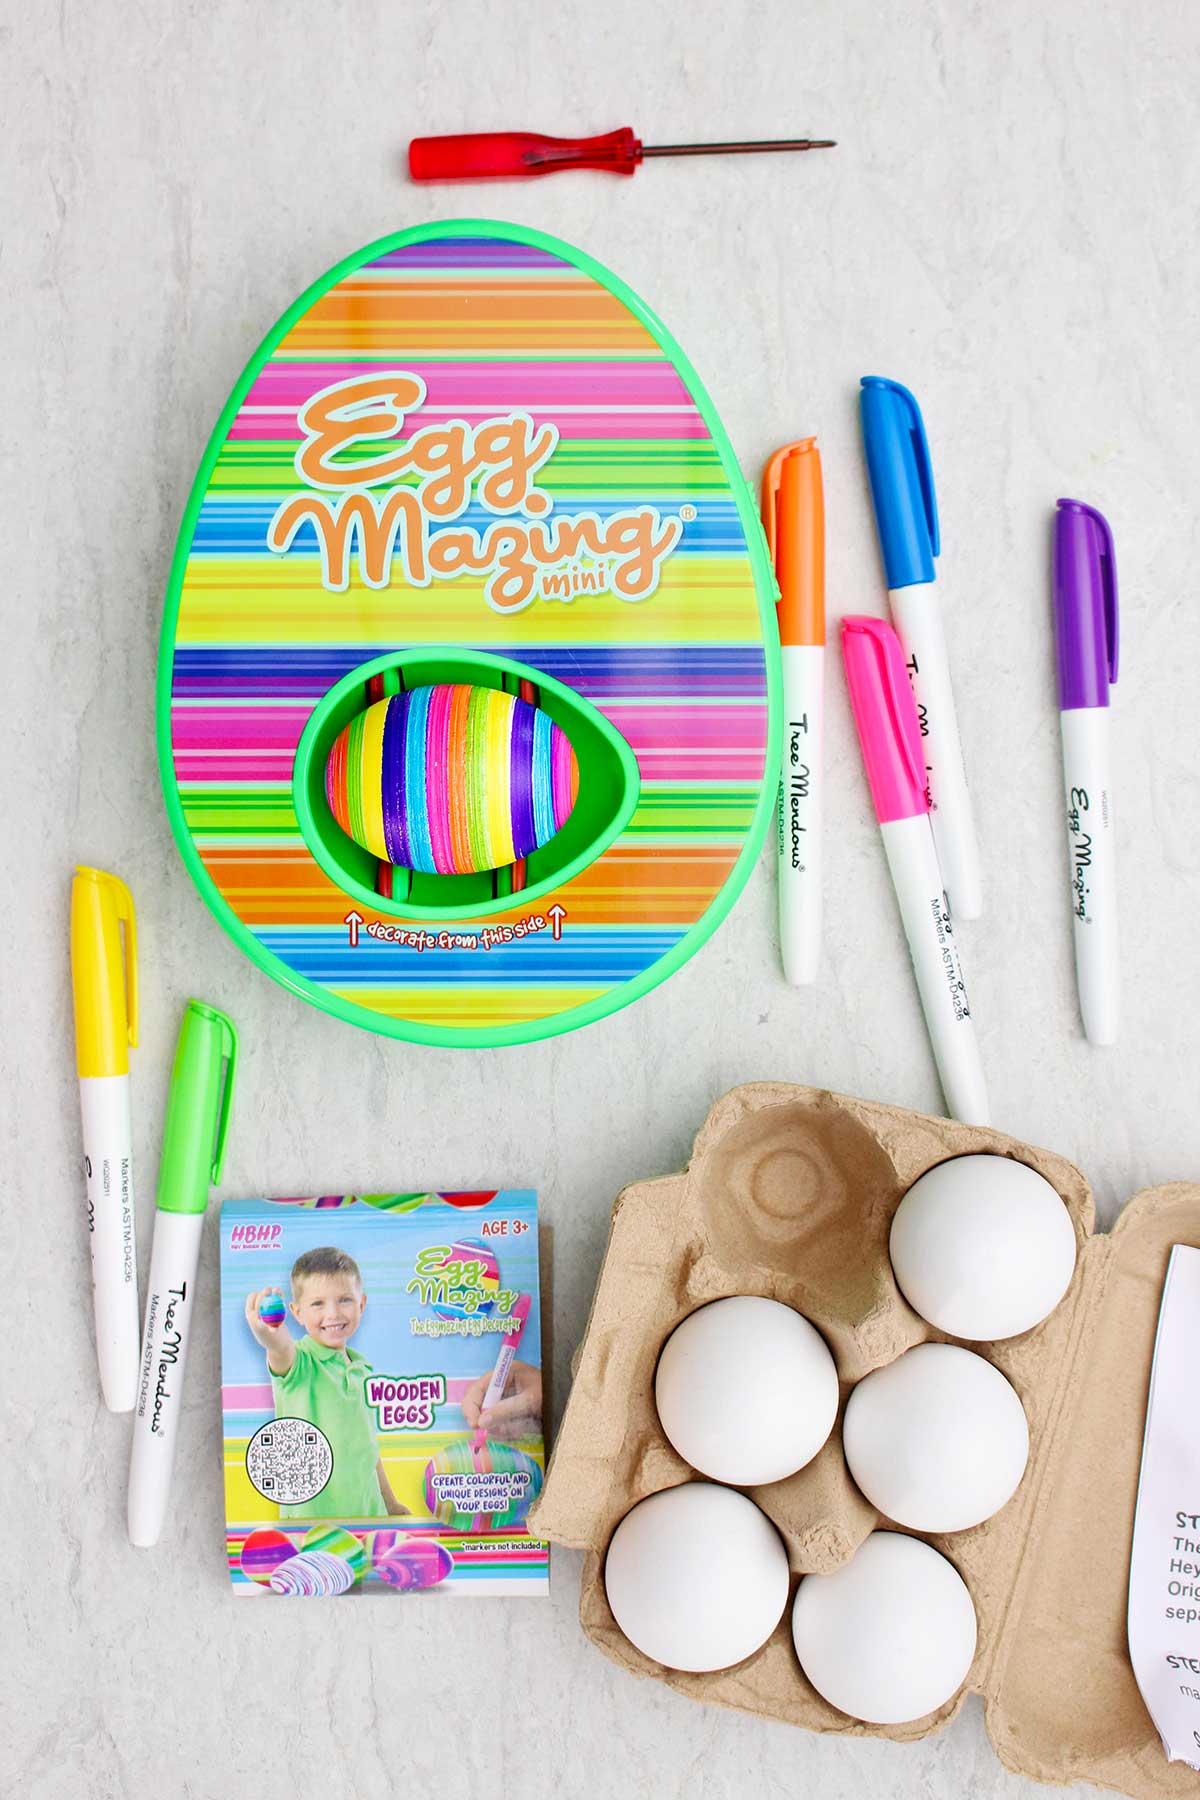
What You Need for EggMazing Decorating
Here are a few quick notes about the supplies you will need to decorate eggs with the EggMazing Egg Decorator!
- An EggMazing Egg Decorator Kit (Regular, Mini, Dragon, Glow in the Dark Dino- your choice. Each has a spinner device and some quick drying pens. Most do not have eggs included)
- Quick drying pens- there are some in each kit to use (water based markers smudge)
- 3 AA Batteries (not included in the EggMazing Egg Decorator Kits)
- Eggs to decorate: Large hard boiled eggs (cooled and dry)
- OR Wooden Easter eggs like the pack of EggMazing Wooden Eggs (I like them painted white)
- OR Extra EggMazing Dragon Eggs (cool 3D Printed Dragon in the egg)
- OR Extra Dino Mazing Glow in the Dark Eggs by EggMazing (I don’t have experience with these. There’s a small dinosaur inside)
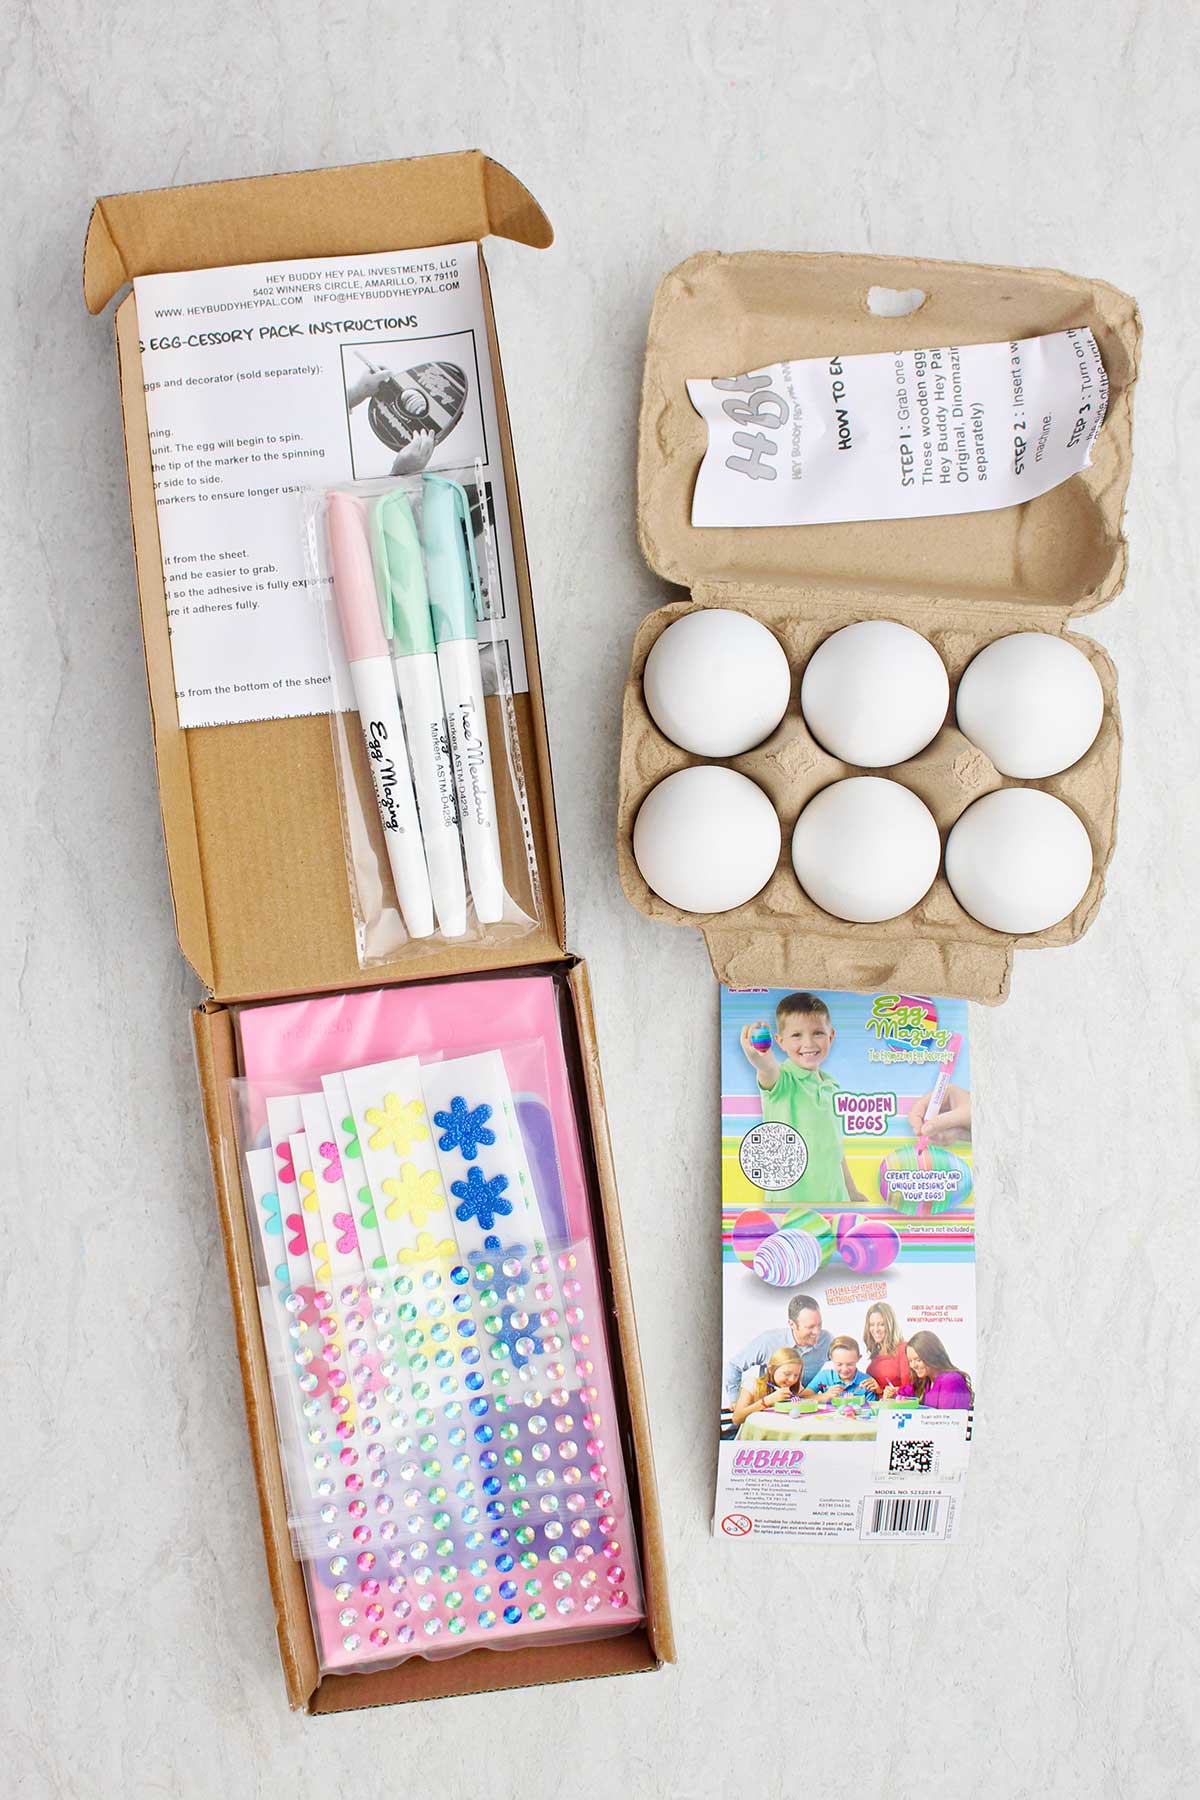
- EggMazing Egg-cessory Pack (optional)- we had this kit (with jewels, foam letters and shapes, 3 additional quick drying pens) but you could use your own craft supplies to decorate the eggs.
How to Use the EggMazing Decorator
- Add batteries to the egg spinner by opening the back battery cover with a small Phillips head screwdriver. Put in three AA batteries then replace the battery cover.
- Turn on the spinner with the small switch on the right hand side of the device.
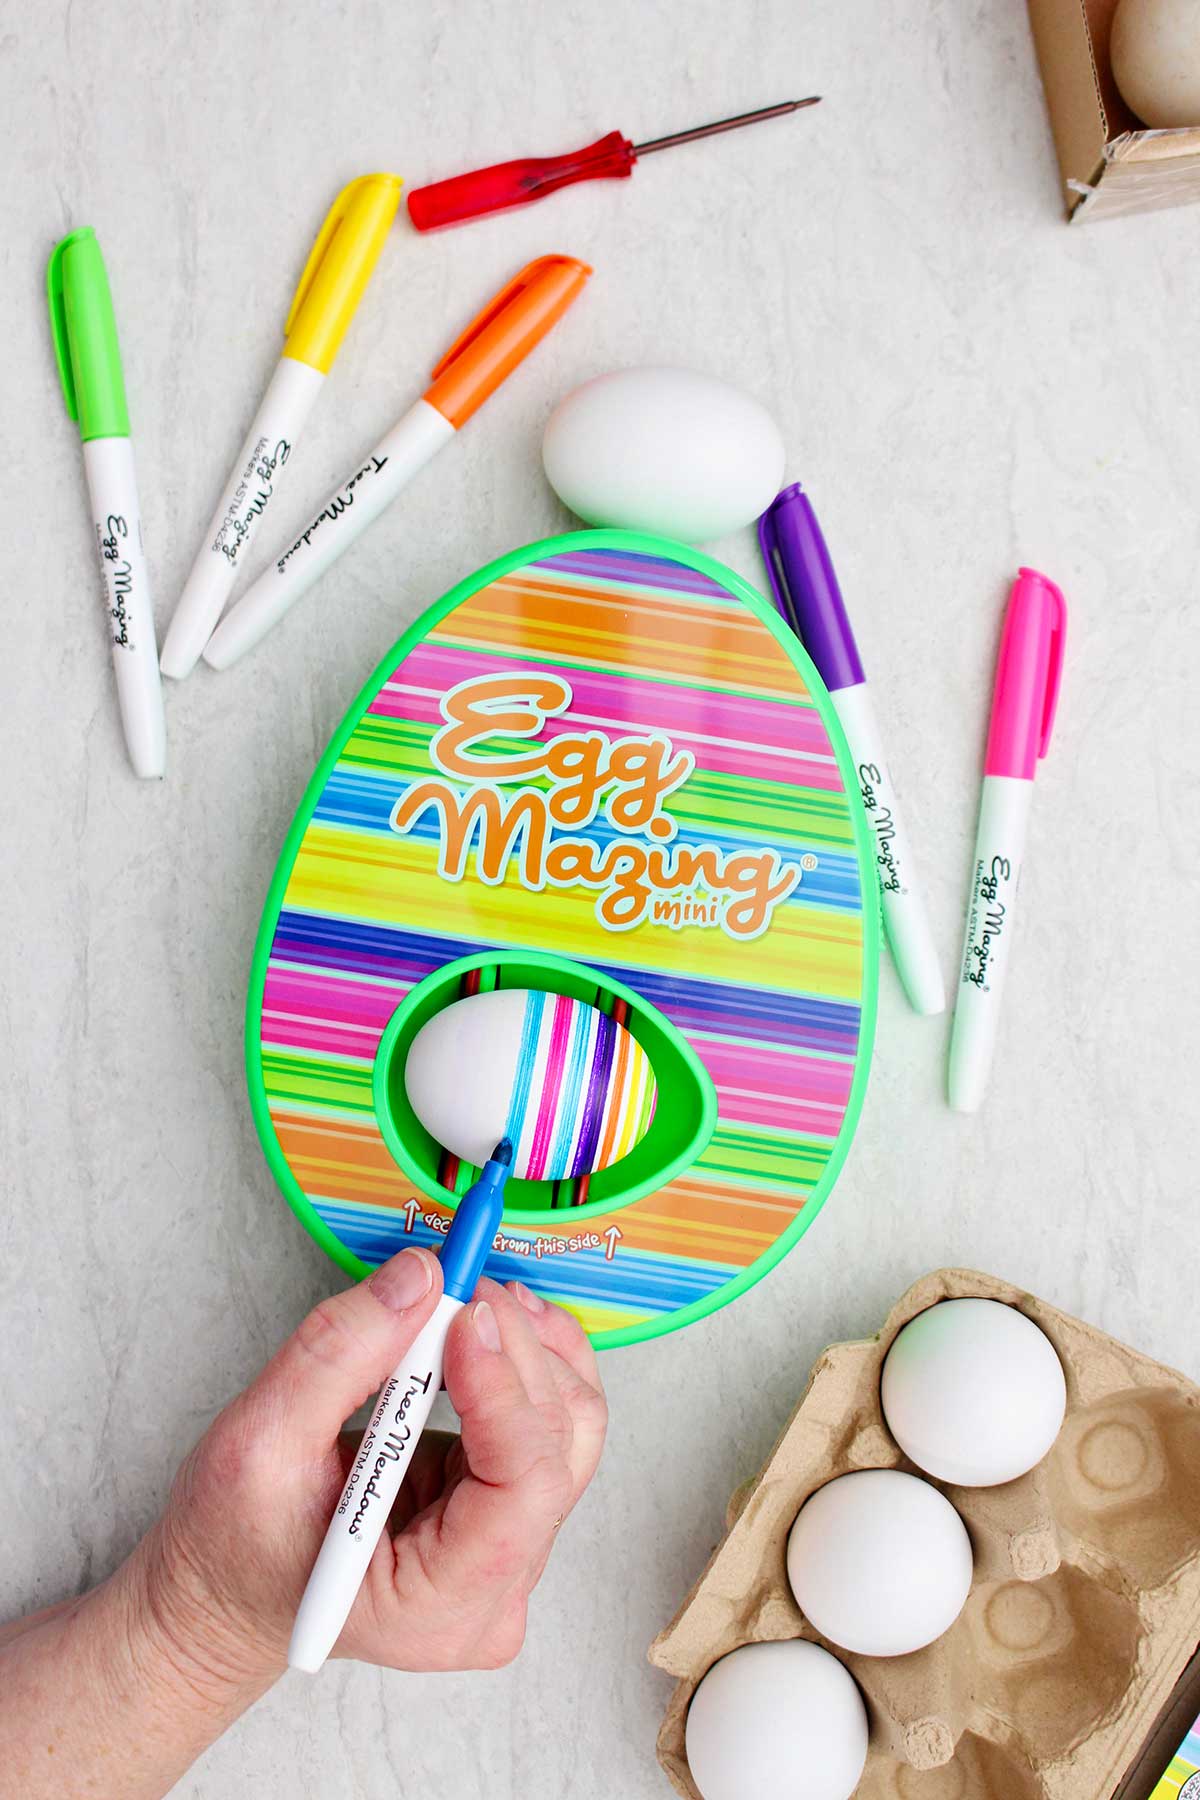
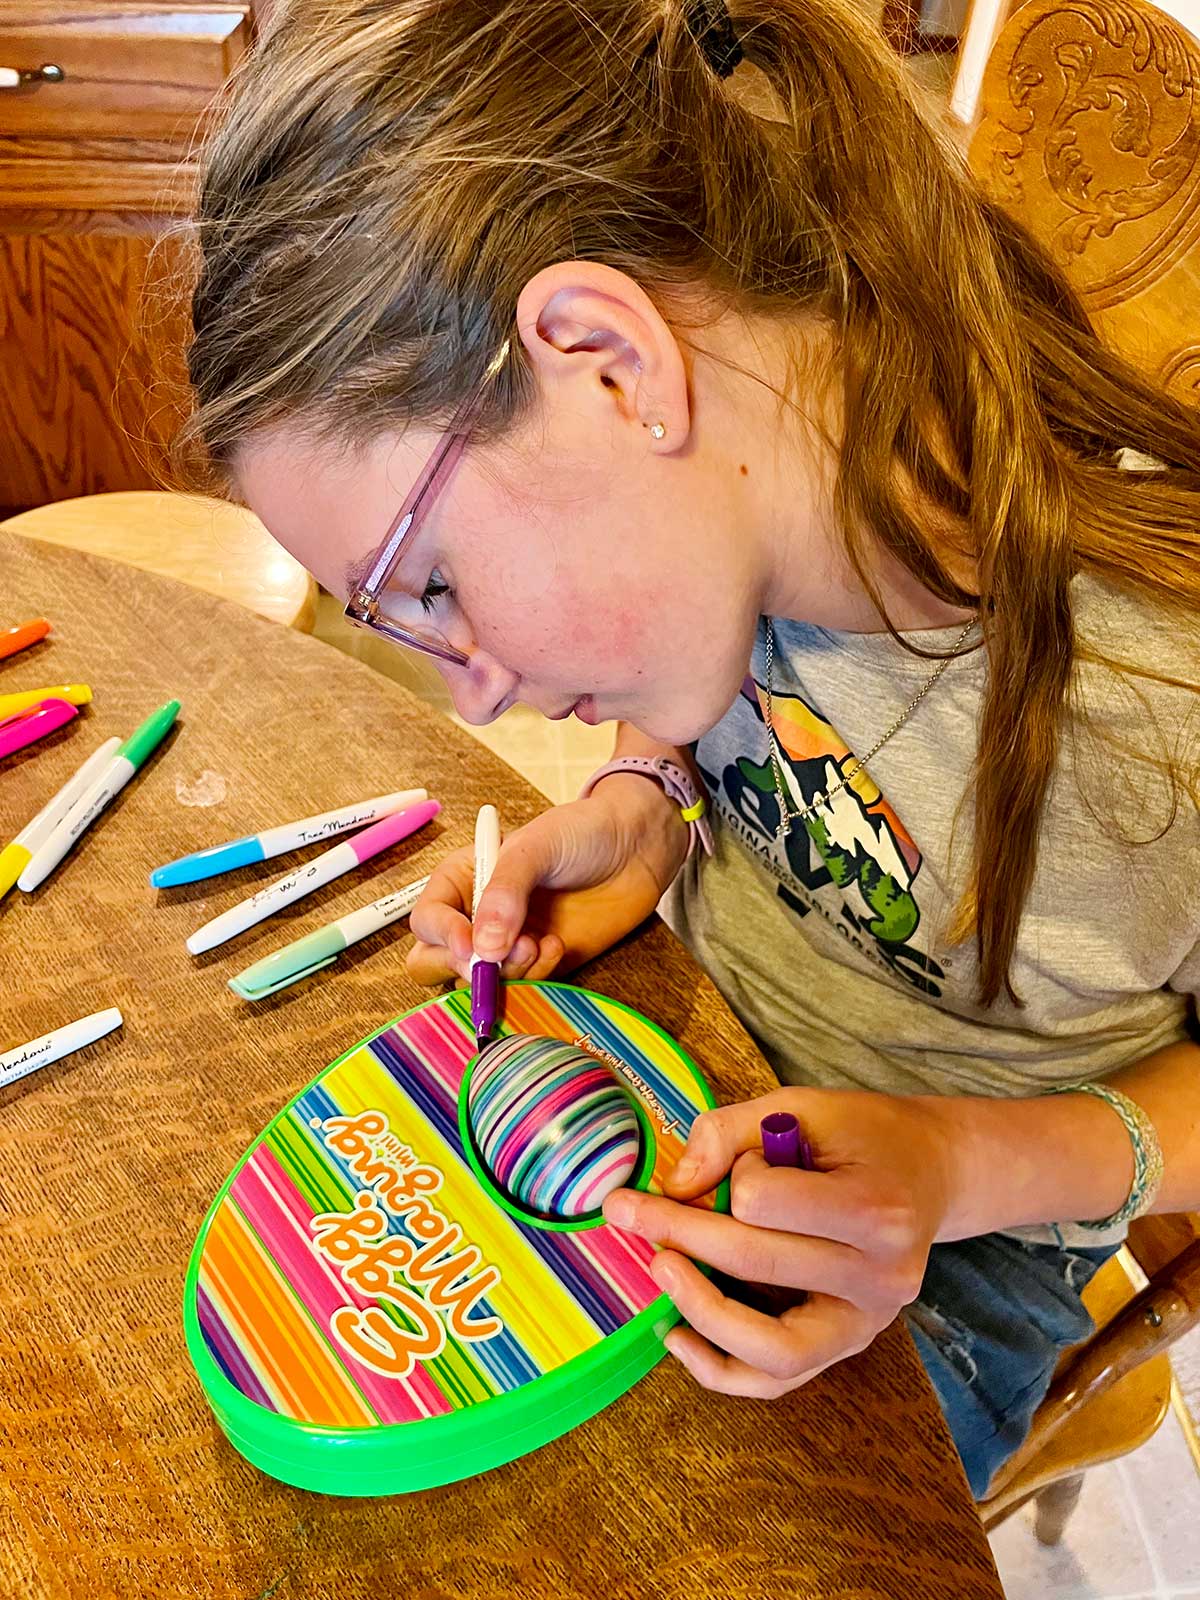
- Place the egg securely in the indented area on the front of the spinner.
- Hold one of the quick drying pens (included in the kit) gently against the egg- hold it in one place. The pen will draw a line that goes around the egg while the egg spins. Move the pen over slightly if you want the line to be wider.
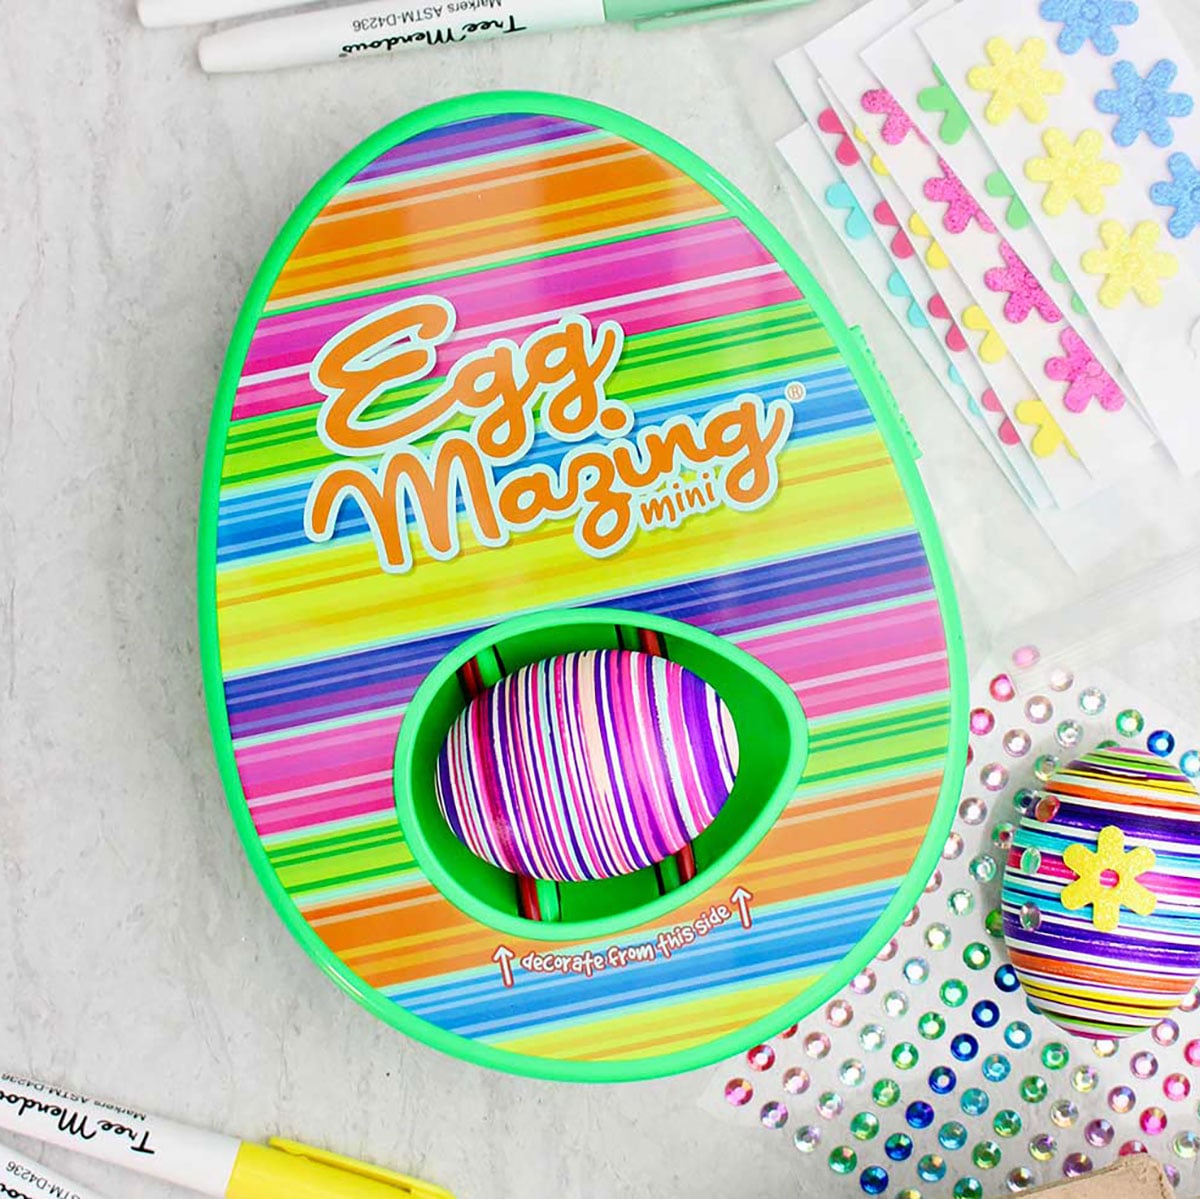
- Change colors of quick drying pens to make a striped pattern. Leave a bit of white space between the colored stripes for white lines in the pattern.
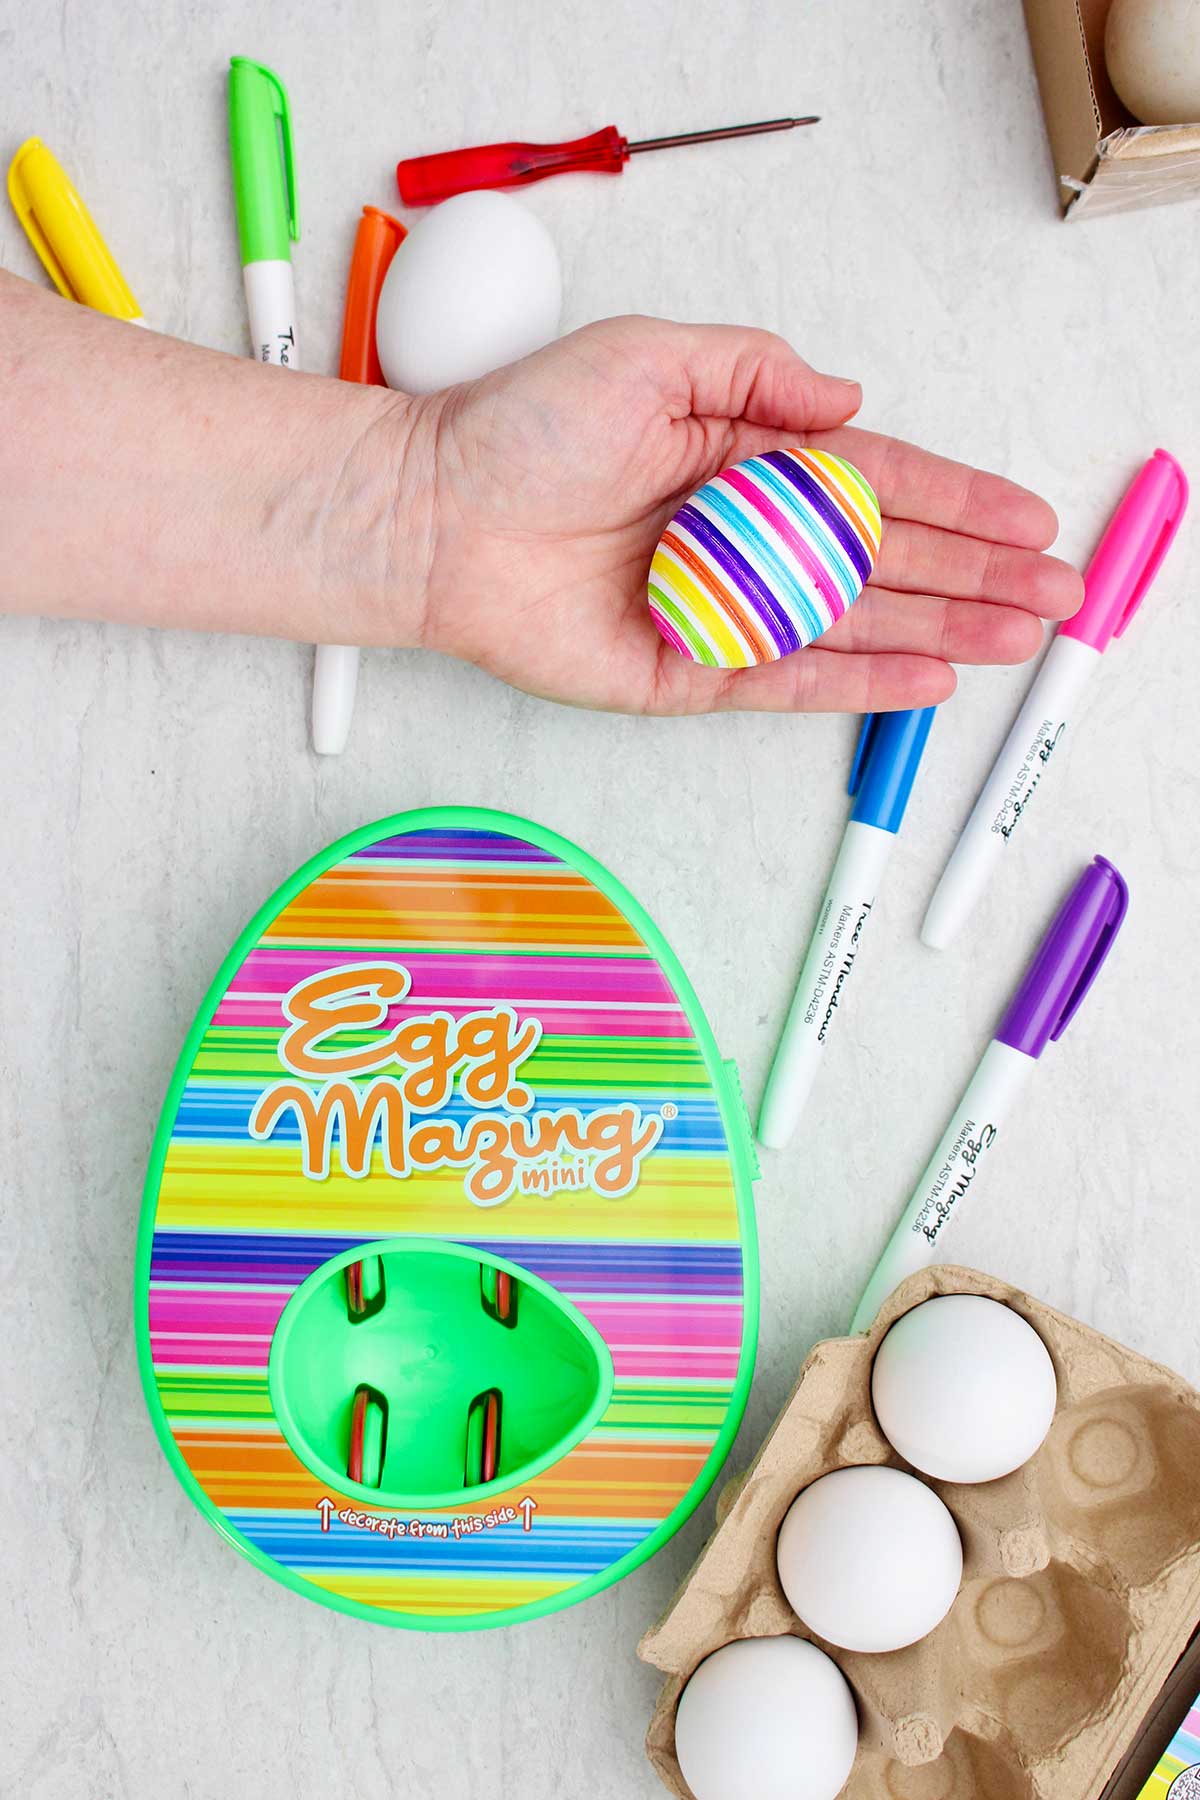
- Turn off the machine and remove your egg. Doesn’t it look amazing?
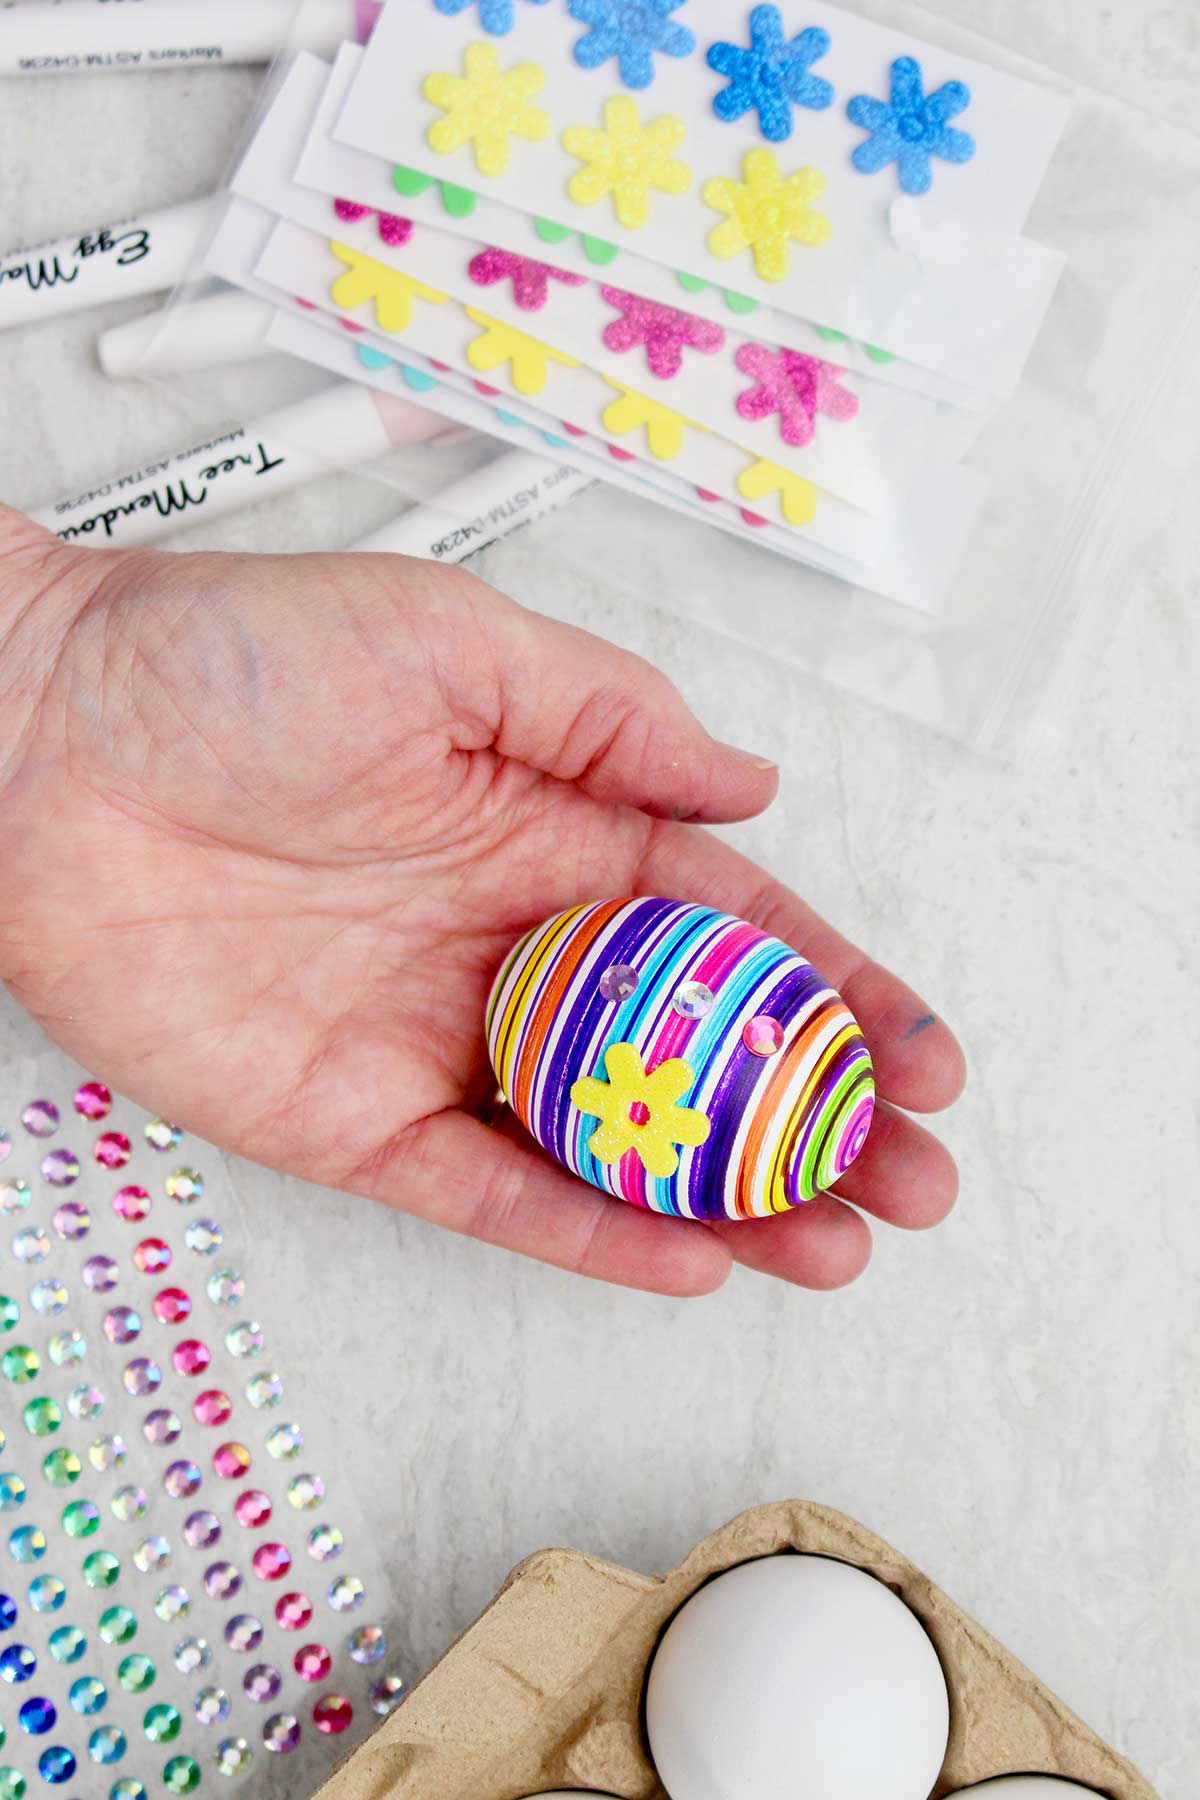
- Add decorations if desired to personalize the egg even more (jewels, polka dots, foam shapes and letters, etc.)
- When finished, wipe off the spinner (especially the wheels), make sure the caps are tightly shut on the markers, take out the batteries, and store it for next year!
Every egg turns out a little different and that's what is so fun about it.
The complete video instructions are found on YouTube at: The EggMazing Spinner in Action Full Video
Craft Tips for Success with the EggMazing Spinner
These Easter egg ideas can help making egg decorating even easier!
- Use the pens that are included in the kit as they are fast drying pens. A regular water based pen will smear because of the wheels that are spinning the eggs.
- Use gentle pressure holding the pen against the egg.
- Be sure to cap the pens well so they don’t dry out.
- Experiment with holding a finger from your non pen holding hand gently against the egg to balance it, especially when coloring the ends of the egg.
- Most of the kits do not have eggs included, be sure to purchase some to use with the spinner.
- Wooden eggs painted white work best as the colors of the pens show up better.
- Leave some white space for white stripes between the colored stripes
- Add 3 AA batteries to the spinner as they are not included.
- Take the batteries out of the device when storing it for the next year.
Craft Variations- for a TWIST on the egg decorating
Here are a few variations you’re welcome to try with your egg decorating:
- Move the pen back and forth to get a diagonal line over the egg, this is best done at the end, over the stripes of color and white.
- There are other kits to buy- like the Dragon Eggmazing Egg Decorator Kit. The eggs open with a dragon inside!
- Wooden eggs can be kept from year to year as keepsakes.
- Place the eggs in a basket for decorations
FAQs
Not it isn’t! It’s much cleaner than dyeing eggs traditionally.
Kids as young as age 3 can enjoy it (with a little adult help). The company recommends age 3+.
Quick-drying markers work best for color that doesn’t smudge. Water based markers tend to smudge on the wheels of the spinner which would be frustrating and could possibly damage the device.
Yes, you can use hard boil large eggs or use wooden eggs (I recommend the wooden eggs be painted white). Eggs need to be cooled and dry if hard boiled.
Give It a Try!
If you’re looking for a fresh, fun way to decorate eggs this Easter, give the EggMazing Egg Decorator a try. I think you’ll love how easy and mess free it is. There is a lot of “bang for the buck”.
You’ll love watching the kids and you will want to make a few eggs yourself too. This could be the start of a nice and simple tradition! Pack away the EggMazing Egg Decorator for next year!!
More DIY Egg Decorating Ideas for Kids
Looking for more easy egg decorating crafts to try? Here are a few of our favorites:


Come join the fun at WTN!
If you try it, I’d love to hear how it went! Feel free to share your creations or favorite designs by putting your pictures in the comments! Tag your photos with #WelcometoNanas wherever you post them
Love getting crafts straight to your inbox? Sign up to receive a weekly email and get a free gift!

The EggMazing Egg Decorator In Action
Equipment
- EggMazing Egg Decorator Kit (original or EggMini- different number of quick drying pens included, no eggs)
Items Required
- EggMazing Egg Decorator Kit (Regular, Mini, Dragon, Glow in the Dark Dino- your choice. Each has a spinner device and some quick drying pens. Most do not have eggs included)
- Quick drying pens there are some in each kit to use (water based markers smudge)
- 3 AA Batteries (not included in the EggMazing Egg Decorator Kits)
- Eggs to decorate Large hard boiled eggs (cooled and dry)
- OR Wooden Easter eggs like the pack of EggMazing Wooden Eggs (I like them painted white)
- OR Extra EggMazing Dragon Eggs (cool 3D Printed Dragon in the egg)
- OR Extra Dino Mazing Glow in the Dark Eggs by EggMazing (I don’t have experience with these. There’s a small dinosaur inside)
- EggMazing Egg-cessory Pack (optional) we had this kit (with jewels, foam letters and shapes, 3 additional quick drying pens) but you could use your own craft supplies to decorate the eggs.
Instructions
- Add batteries to the egg spinner by opening the back battery cover with a small Phillips head screwdriver. Put in three AA batteries then replace the battery cover.
- Turn on the spinner with the small switch on the right hand side of the device.
- Place the egg securely in the indented area on the front of the spinner.
- Hold one of the quick drying pens (included in the kit) gently against the egg- hold it in one place. The pen will draw a line that goes around the egg while the egg spins. Move the pen over slightly if you want the line to be wider.
- Change colors of quick drying pens to make a striped pattern. Leave a bit of white space between the colored stripes for white lines in the pattern.
- Turn off the machine and remove your egg. Doesn’t it look amazing?
- Add decorations if desired to personalize the egg even more (jewels, polka dots, foam shapes and letters, etc.)
- When finished, wipe off the spinner (especially the wheels), make sure the caps are tightly shut on the markers, take out the batteries, and store it for next year!


Leave a Reply