Wow!! Glass Pebble Christmas Ornaments Rock!
Oh my, I’m more than a little excited to share this Easy Glass Pebble Christmas Ornament activity with you! The grands loved this one and I even made one for myself to hang in the window as a suncatcher. I'm amazed that they look so much like stained glass!
They will be beautiful in either location, on the tree or in the window. The pebbles sparkle and the light streams through them catching the color of the glass. I could go on and on!!
The second amazing thing is how simple it is to make an Easy Glass Pebble Christmas Ornament. Clear glue, glass pebbles of various colors and a bit of ribbon are the supplies you will need to purchase if they aren’t in your “stash” already.
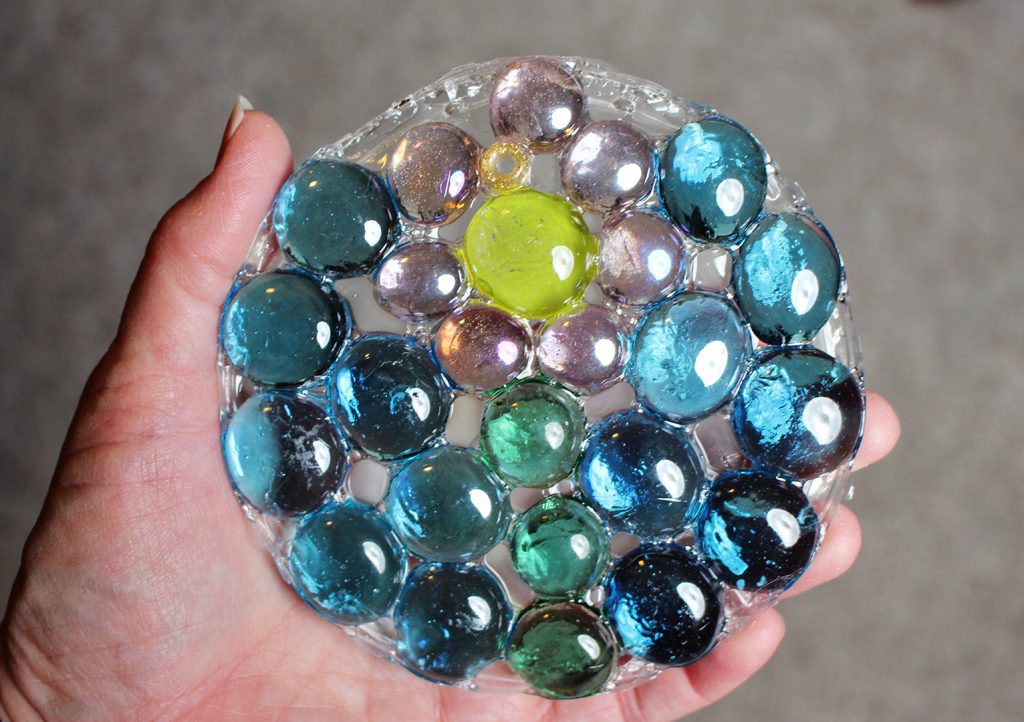
Glass Pebbles...pretty like stained glass
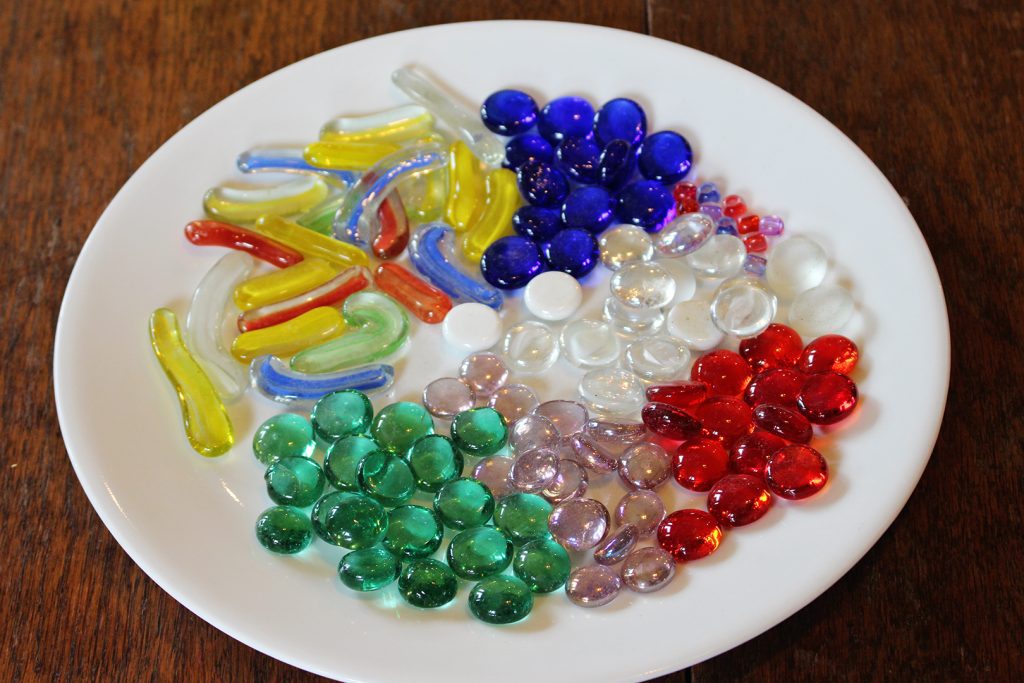
I found bags of the glass pebbles of various colors in the floral departments of several stores. But I also had several extra colors and types of pebbles left over from the mosaic stepping stone project we made earlier at Welcome To Nanas.
Glass pebbles are so cool. I may have to find a hundred other crafts to make from them. The kids thought they were so pretty. Be sure to remind the younger grands that they are not candy though!!!
How to Make Easy Glass Pebble Ornaments
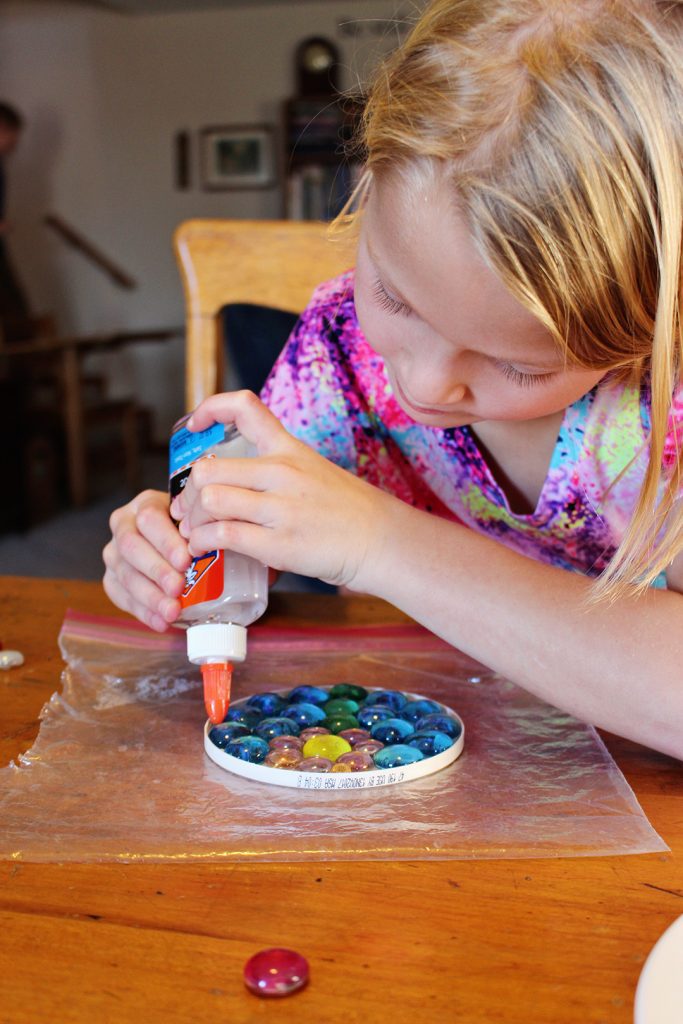
The ornament is shaped by using a plastic lid off of a small container as a form. The lid needs to have a small lip around the edge and be as smooth and flat as possible. This will not hurt the lid for later, by the way.
Choose a lid of a smaller diameter for a Christmas tree ornament (about 3” in diameter). Choose a lid of a larger diameter for a suncatcher to hang in the window (about 5” in diameter).
The lids we used were about 5” in diameter (from yogurt containers) and that made the Glass Pebble Christmas Ornaments that my grands made too large and heavy to hang on the tree.
We are going to make more of a smaller size later, but the instructions found here will work for you to make yours the right size for the tree the first time!! You’re welcome!
Tip- I tried using a metal lid from a jar in a trial run…and that didn’t work. There was no way to twist it and get the ornament out of the lid, plus it rusted! So, let me save you the trouble of trying it!! You’re welcome again, ha!
What patterns should you use?
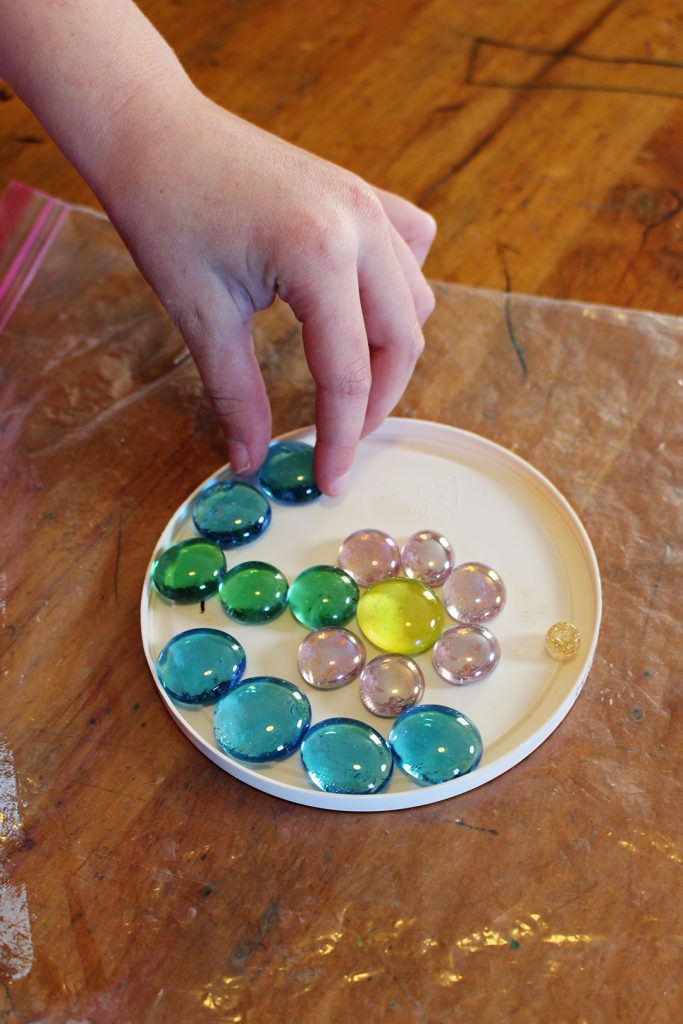
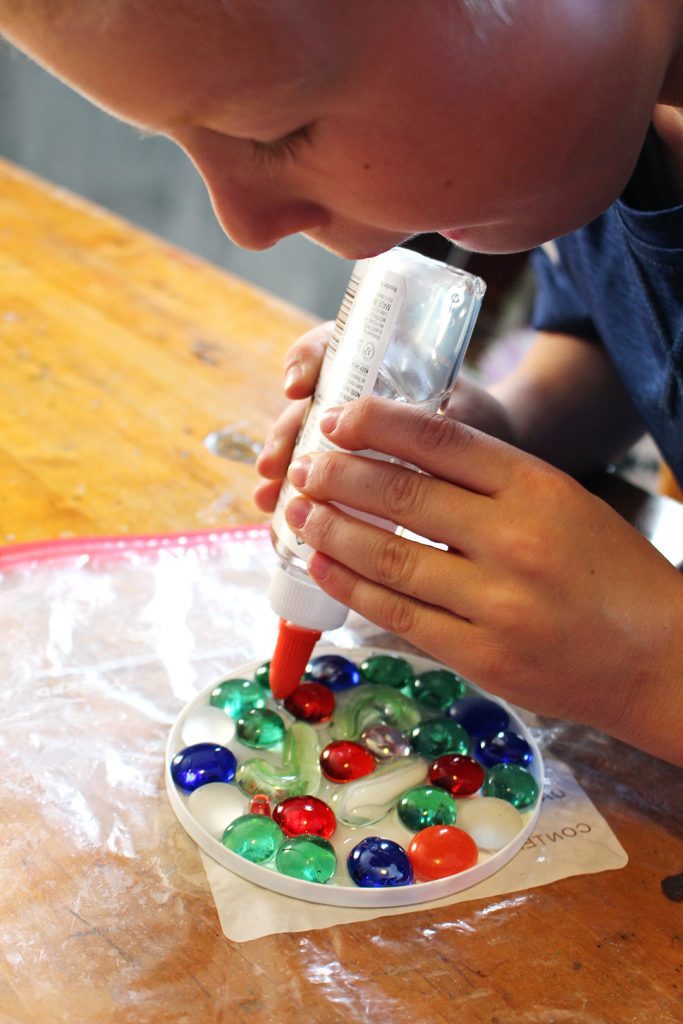
Let the grands arrange the glass pebbles in the lid, placing the flat side of the pebbles down. It’s fun for the grands to arrange them and re-arrange them until they are happy with the design.
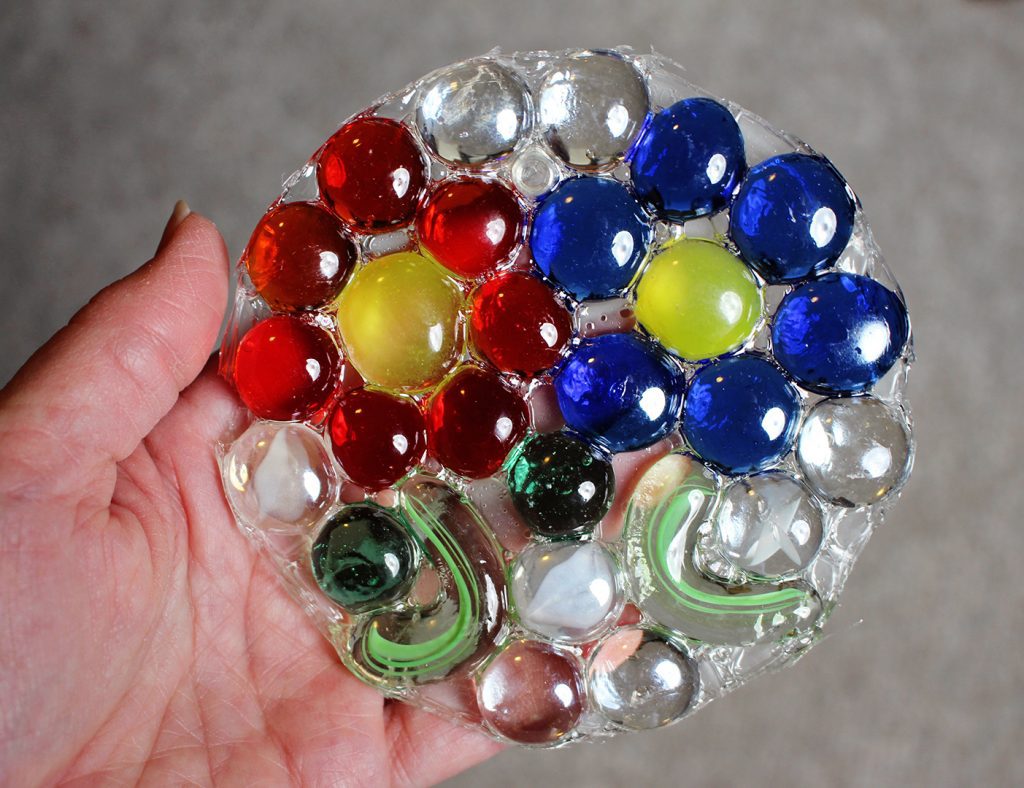
Place a pony bead into the design at the top of the ornament, about ½ inch from the edge. Drop it in so that you can see the hole going through from the front to the back. This is where a ribbon or cord can be strung so they can be hung easily.

How to glue them together
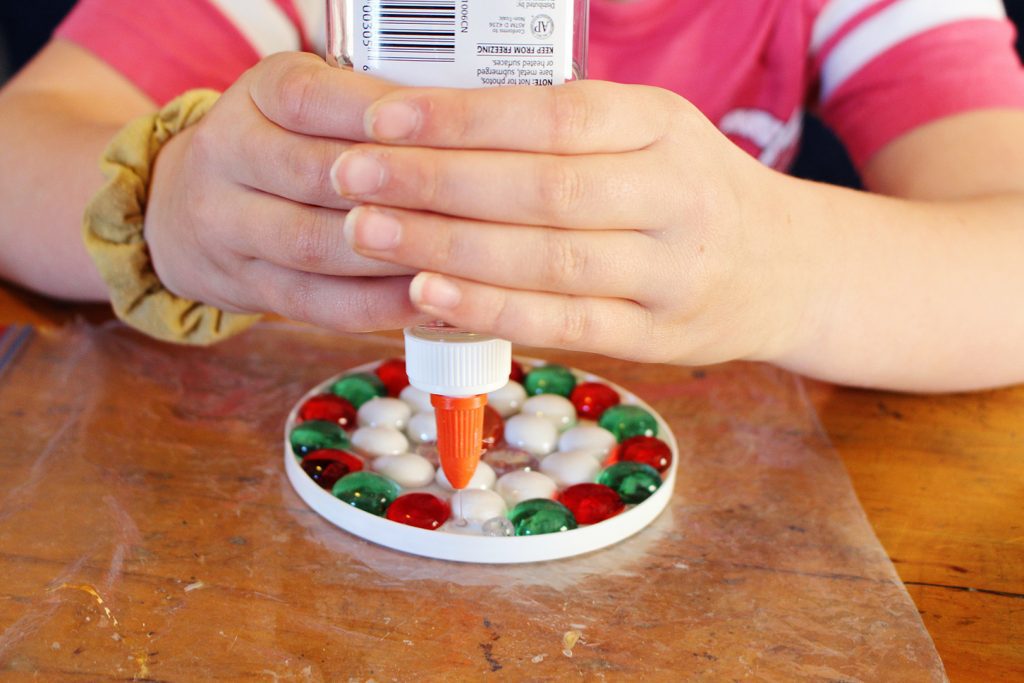
Squirt clear glue around each glass pebble to fill in the spaces between them. The glue will ooze in around the pebbles and hold them together when dry. Even squirt the glue between the pebbles and the outside edges of the form so it is a circle shape when dry.
Speaking of drying, it took about a week for the glue to dry enough to pop the Glass Pebble Christmas Ornaments out of the forms. A couple days after we made the ornaments, I squirted more glue between the pebbles because the first layer of glue had dried into a very thin layer. That made the Easy Glass Pebble Christmas Ornament stronger when it was done drying.
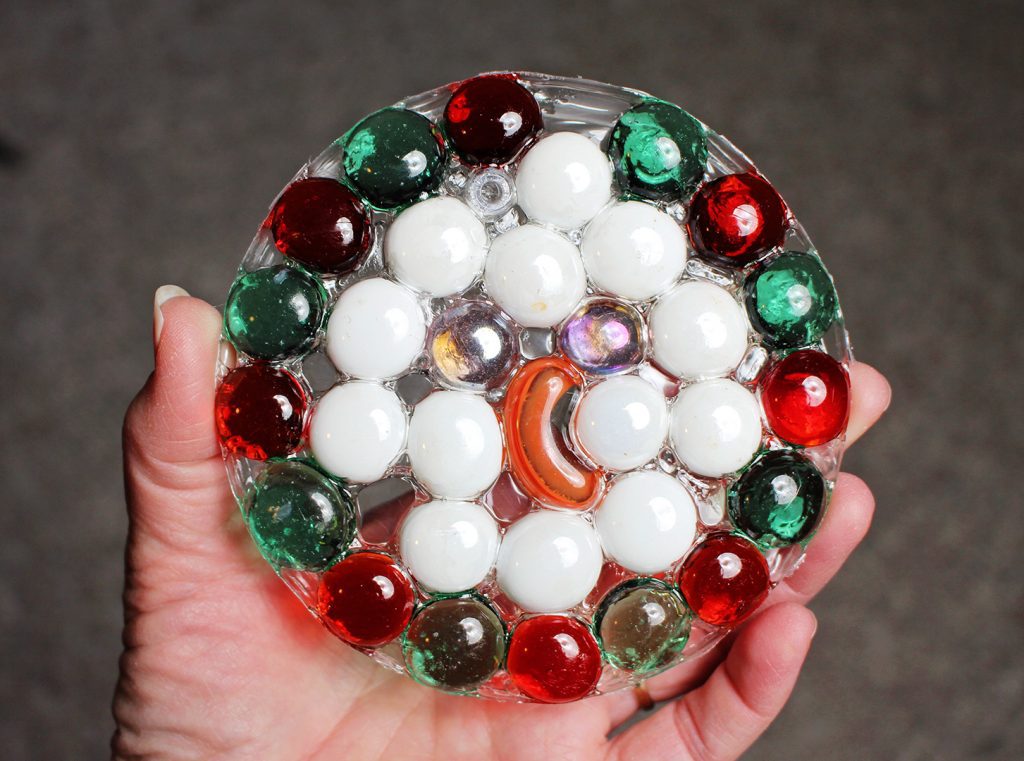
After several more days we finally popped the ornaments out of the forms and set them out on the table, front side down. It took a a couple more days for the back side to fully dry too.
Glass pebble ornament joy!!
When the kids finally saw their ornaments they were thrilled. They kept holding them up to the window to see the light shine through, exclaiming how they sparkled and shone.
We tied a ribbon through the pony bead at the top of each Easy Glass Pebble Christmas Ornament so it would hang easily. The kids can’t wait to make more and hang them on the tree soon. Wow, Christmas is almost here!
We hope you have as much fun with these as we did- I think this is one of Nana’s favorite crafts so far!
What you'll need to make glass pebble ornaments
- Plastic lids
- Glass Pebbles in Mixed Colors

- Pony Beads- Assorted Colors (one per ornament)
- Elmer's Glue, Clear
- Ribbon (about 8” long for each ornament)
More Homemade Christmas Ornament Ideas
If you are having fun with these Glass Pebble Christmas Ornaments, give these a try too!
Salt Dough Christmas Ornaments
Sparkling Wire & Bead Ornaments
Enjoy!
If you try this craft, let me know! Go ahead and leave a comment, rate it, and tag a photo with #WelcometoNanas wherever you post.


Judy P says
We’re going to try this! Thanks!!
Shelly says
Wonderful!! This is a fun one. Be sure to post some pictures.
Zabrina says
You all so could use this for coasters