Who doesn't love stained glass?
These DIY Stained Glass Valentine's Day Cards are stunning, and so simple to make. I’m a sucker for anything with a stained glass look, how about you?
How to Make this Valentine's Day Card
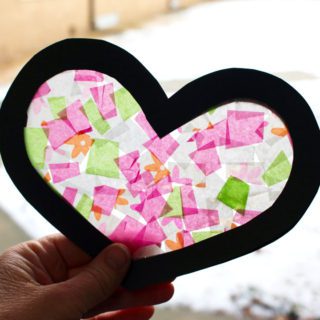
Can’t you just see your little “Tiffany glass” artist handing these cards to teachers or neighbors? The light through the colorful heart window will shine right into their hearts!
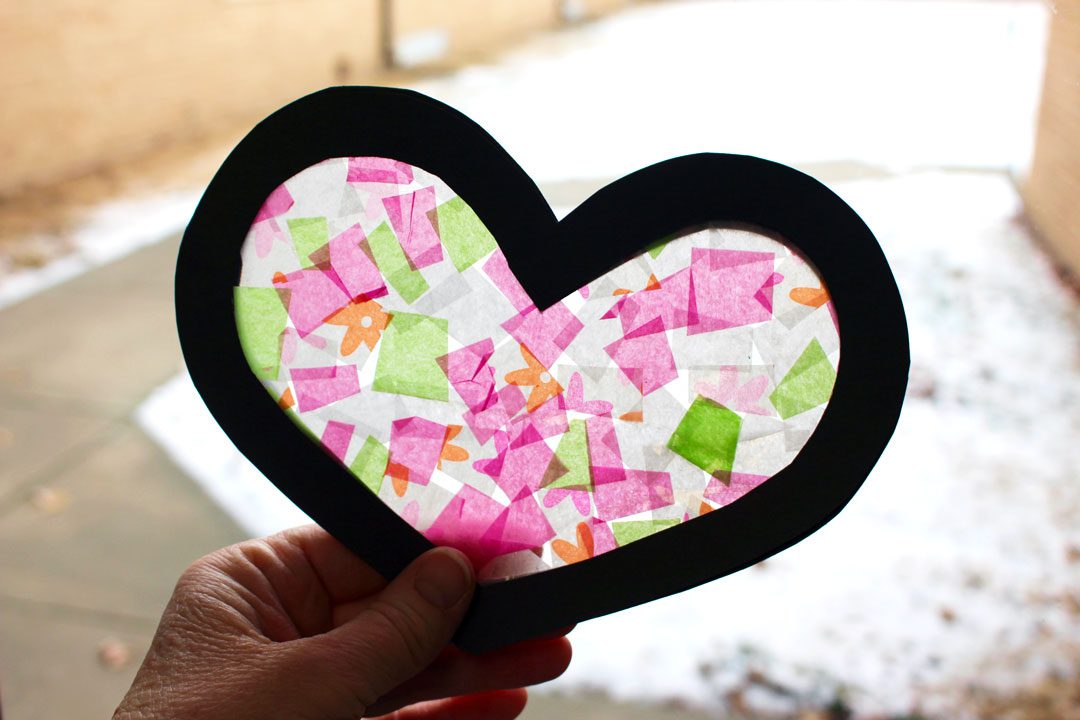
Then can’t you just see the cards getting taped up on the window to let the light shine through as soon as they’ve read the message inside? That is a perfect “pepper upper” on a cold and snowy winter day (or any day of the year).
I’m smiling at the thought of it. Can’t wait any longer, let’s get started!
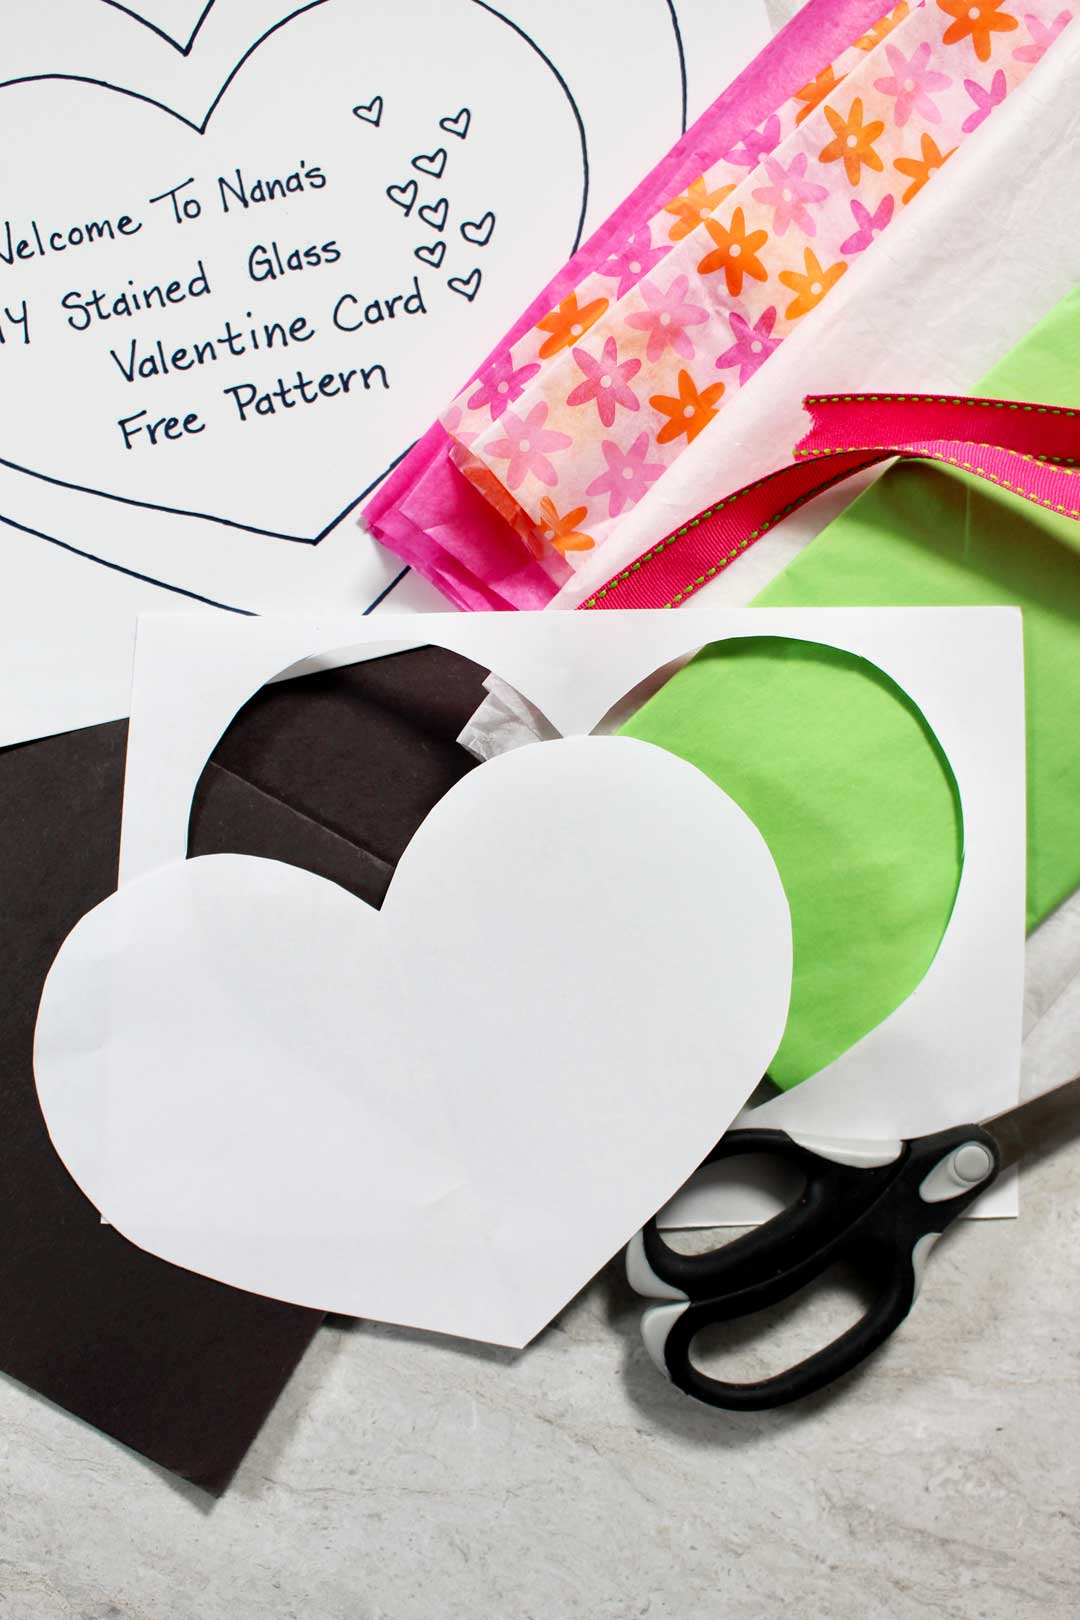
Free heart template to copy-
I know it is easy to cut a heart shape of your own, but I’ve included a Free DIY Stained Glass Valentine's Day Card heart template that makes it even easier. Download your free template here.
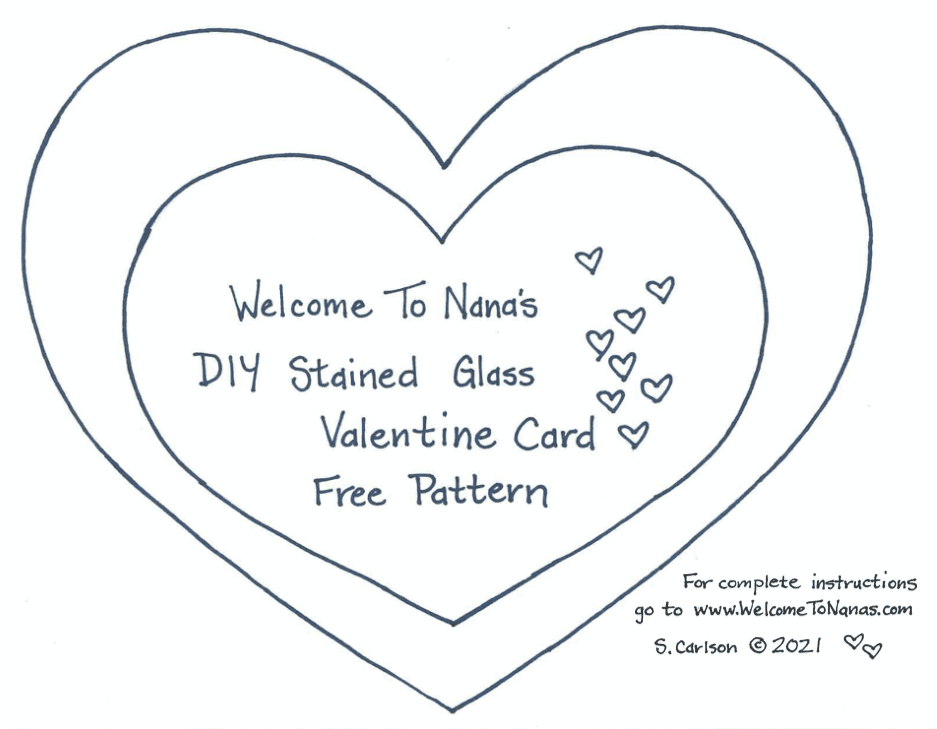
The large sized heart is the right size to make a flat card or picture from a whole sheet of Construction Paper. The smaller sized heart is to make a card from a piece of Construction Paper that is folded in half. In the latter case, the heart will be on just the front flap of the card. Let me know how the free pattern works for you. You can adapt it to whatever size you want by copying the pattern at 50% or 75% size for example.
So, start this fun craft off by copying the Free DIY Stained Glass Valentine's Day Card heart template onto copy paper. Cut out the heart in the size you want to use for your project.
Choice of two sizes for your card
The directions for making either sized card are the same, except for the size of the heart, so follow along and let’s have some fun!
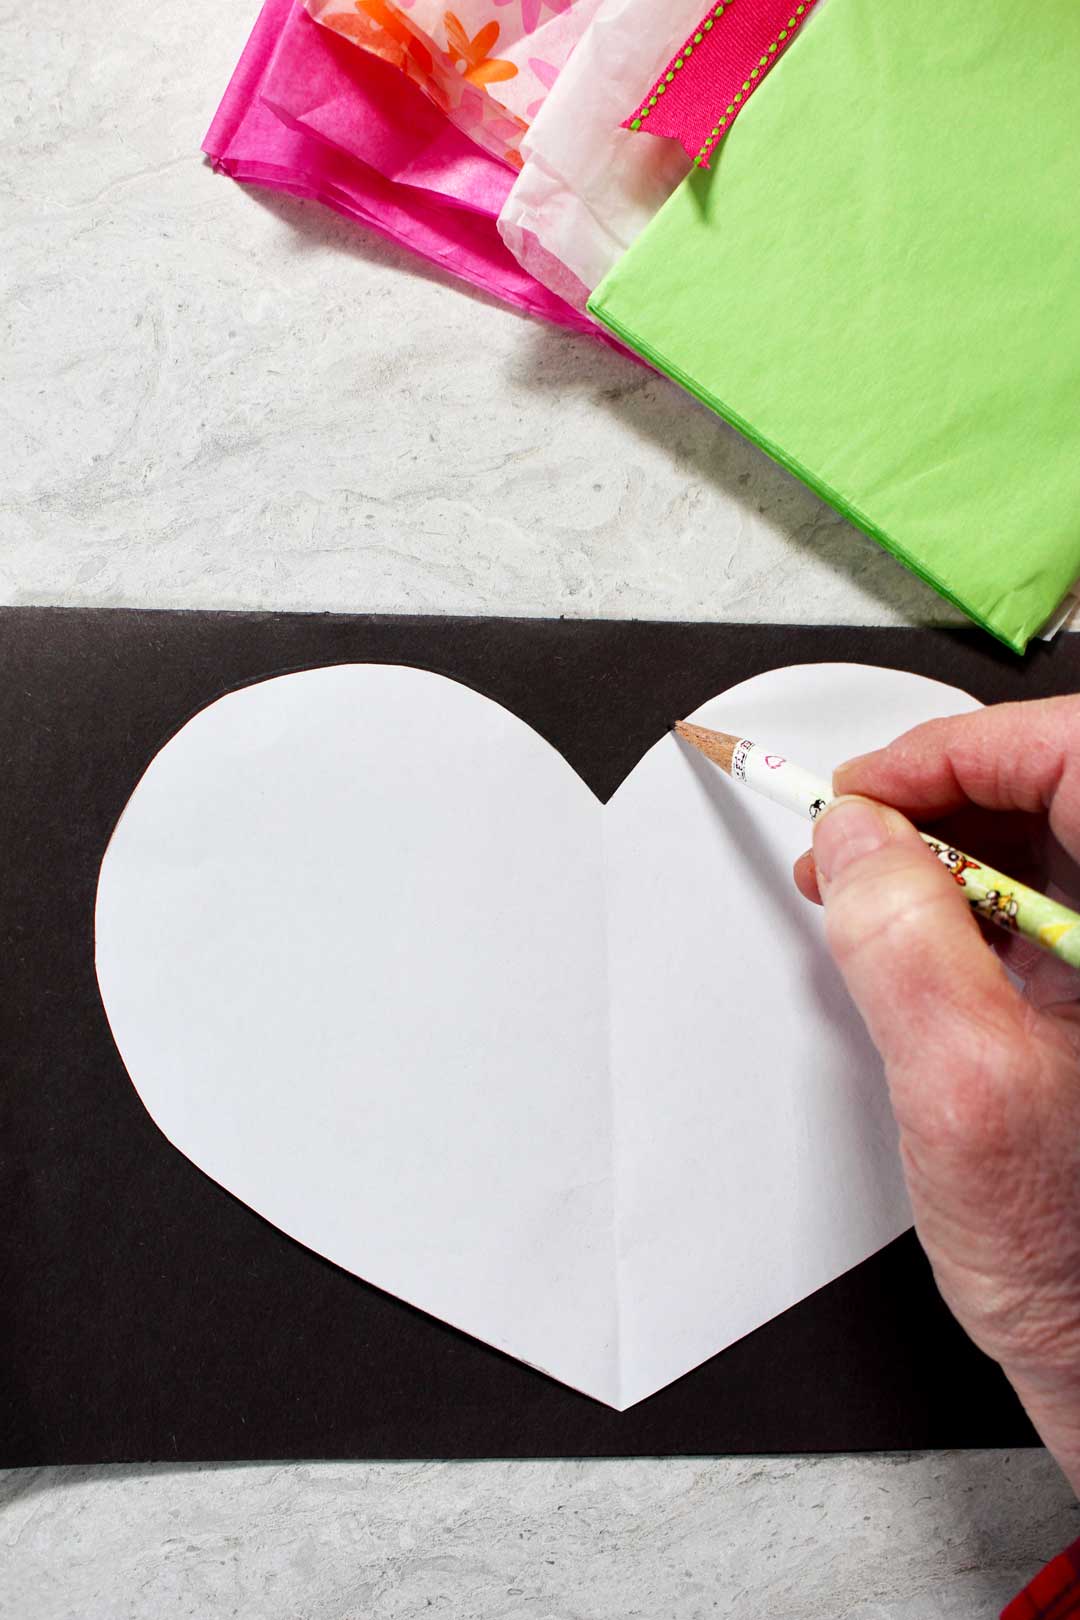
Trace and cut out the heart window
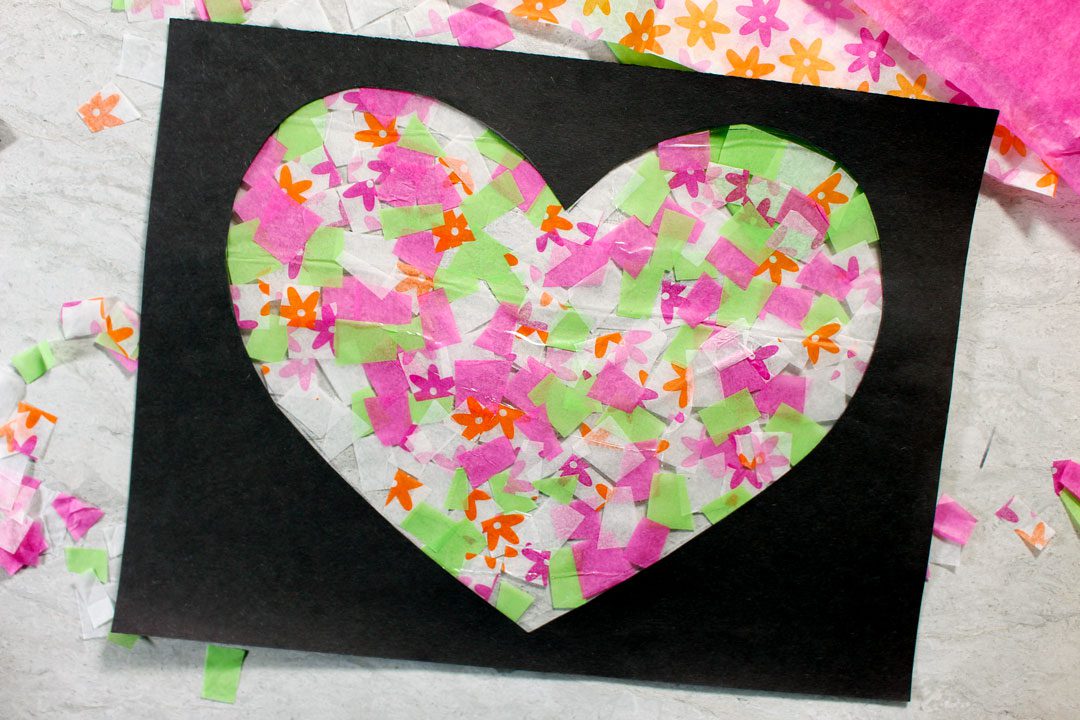
Trace the heart on the Construction Paper. The picture shows the card in black for the framed glass look, but the paper can be in any color.
Carefully poke a hole in the center of the heart with a scissors or pencil. Then cut out the heart shape, leaving a heart shaped window in the card.
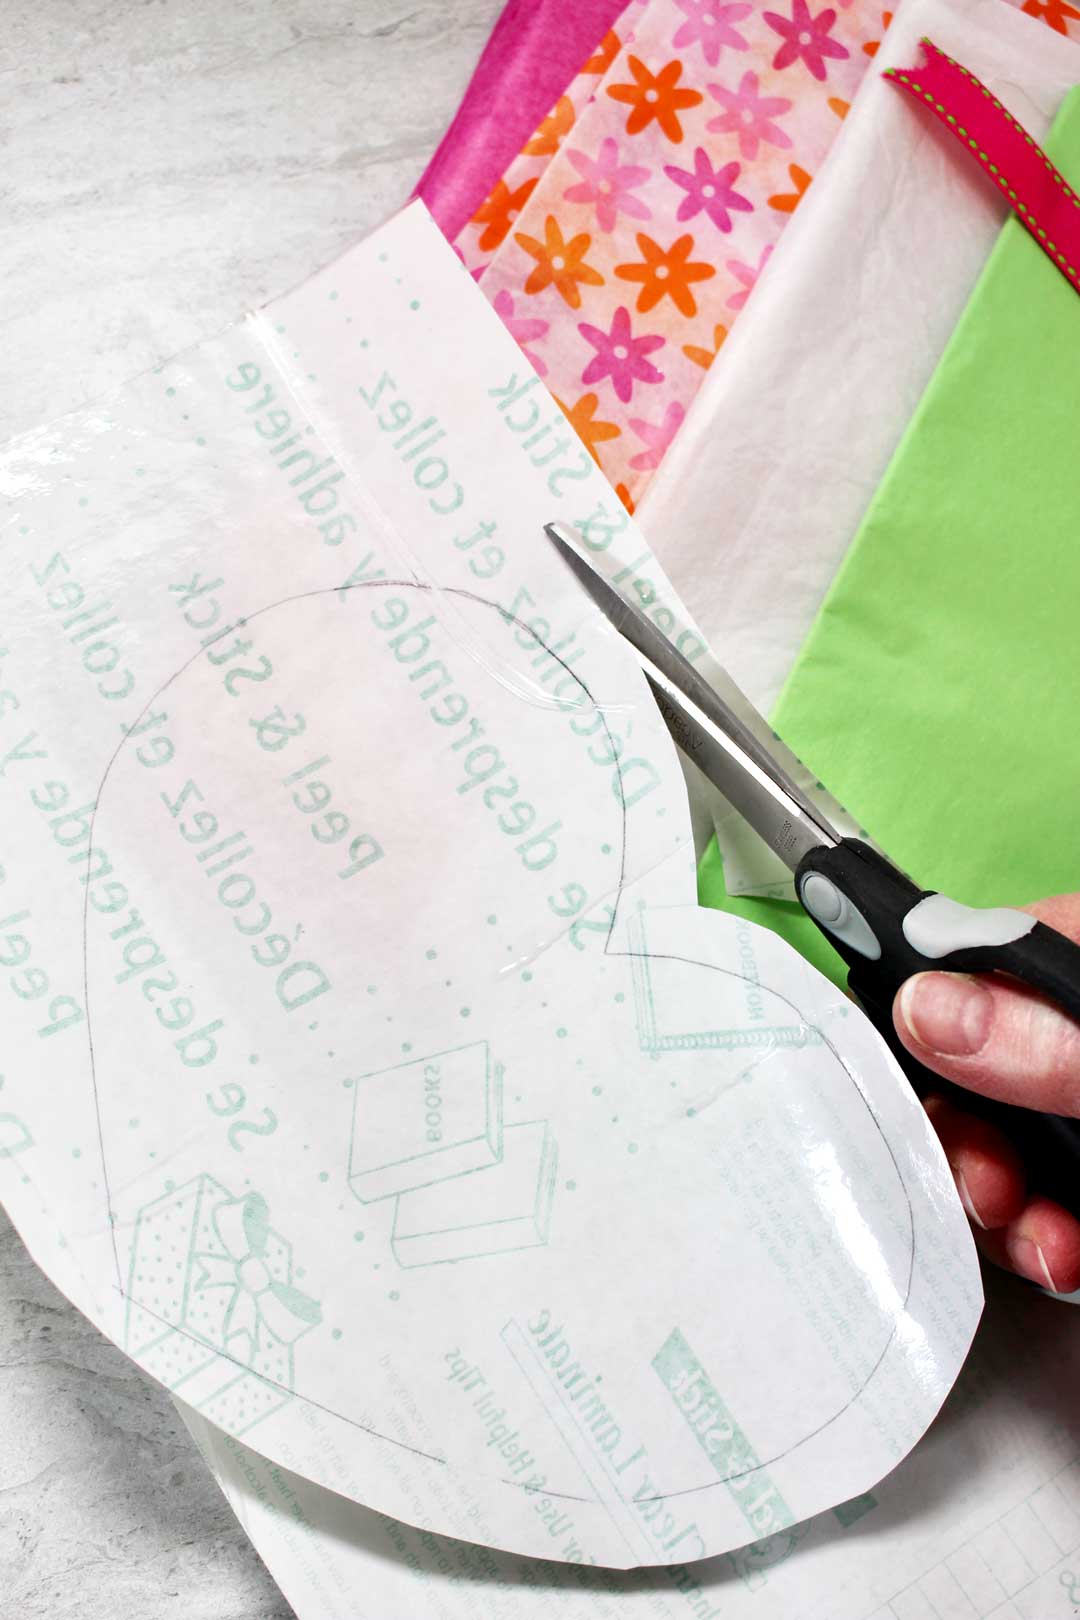
Contact paper heart
Trace the heart on the Clear Contact Paper. Cut out the heart- NOT on the line, but about ½ inch outside this line.
Tear off the paper backing and lay the heart, sticky side up, on the table.
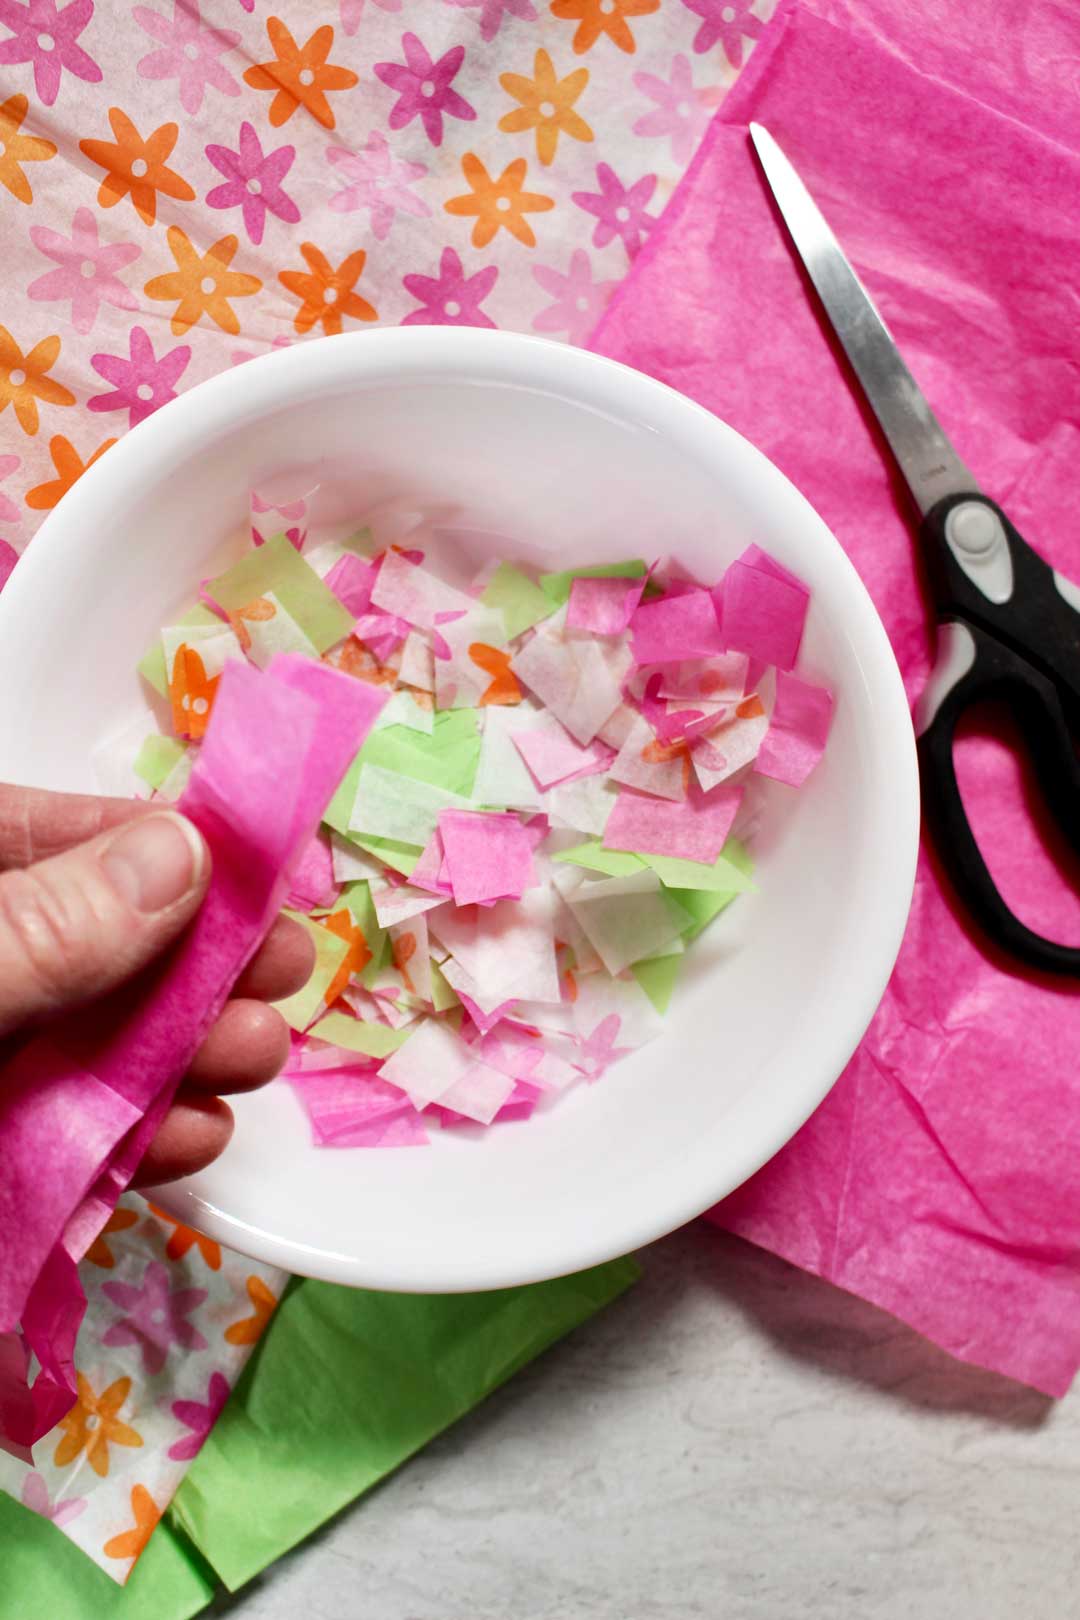
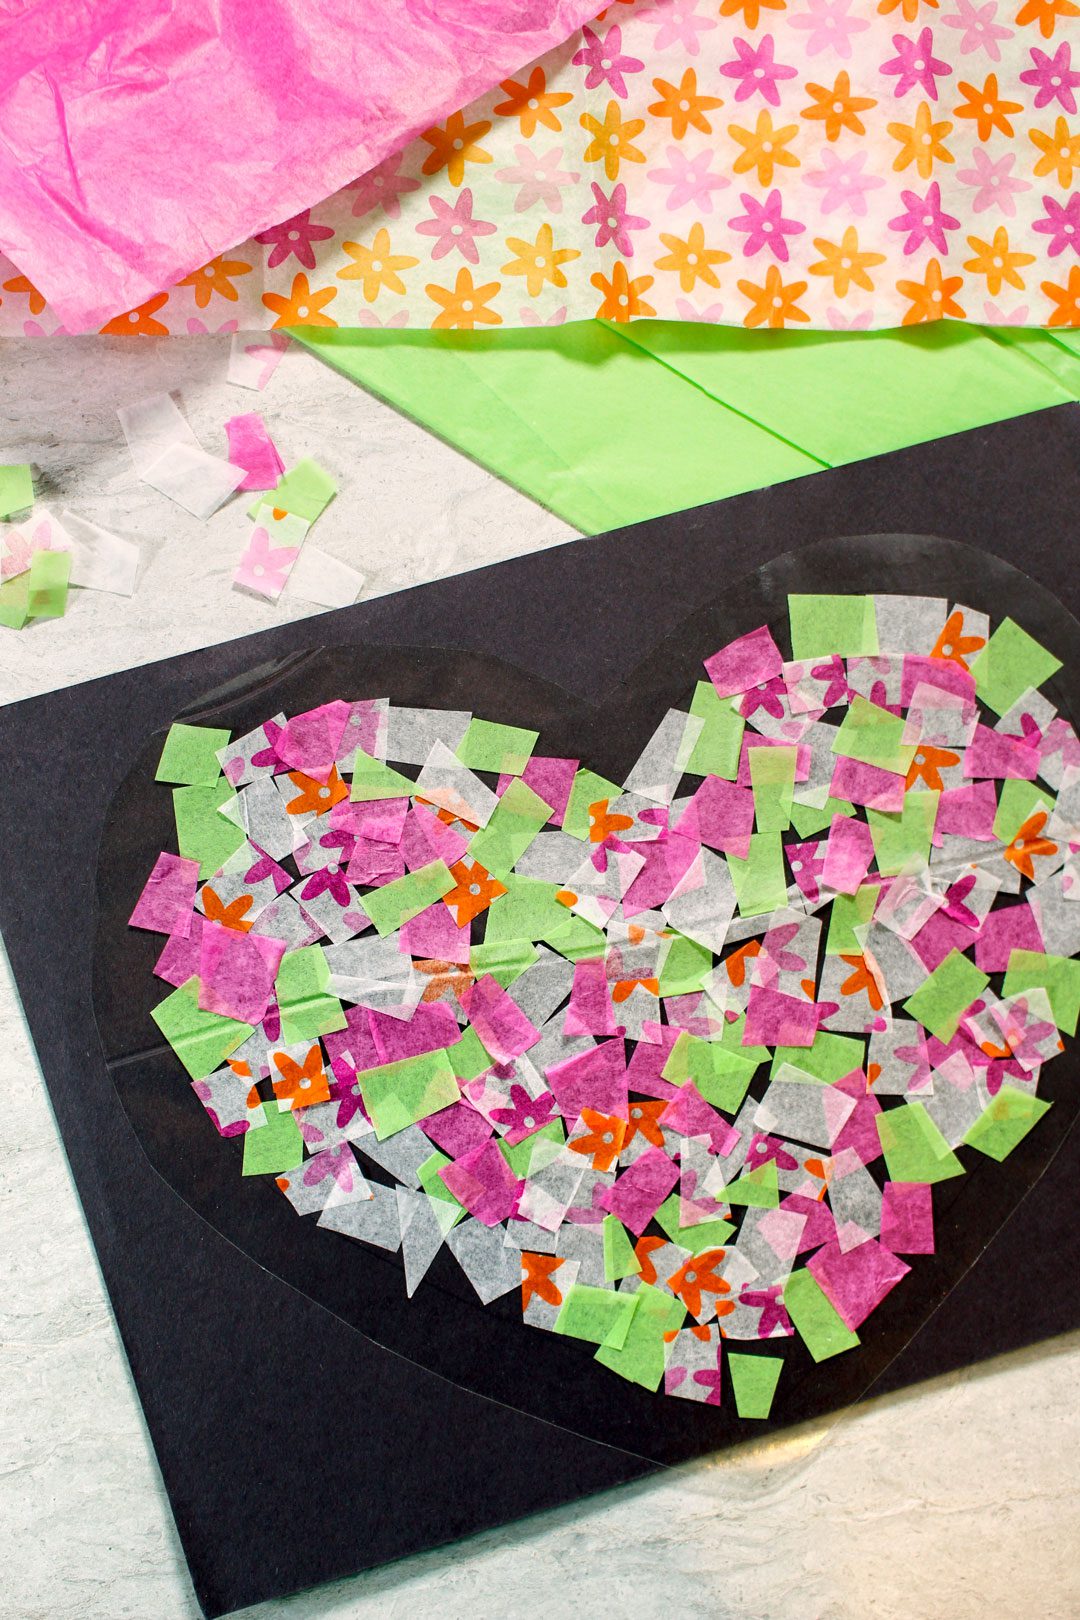
Tissue paper "glass" pieces
Spend a few minutes cutting the Tissue Paper into strips and then into pieces. Cut larger pieces if the child is younger. It is a bit challenging to pick up the flimsy pieces with little fingers.
The Tissue Paper pieces kind of look like confetti. Resist the urge to throw it though! I used pinks and whites (that is what I had in my gift wrapping stash), but you can use any colors you want. There are really nice rainbow groupings of Tissue Paper that come in packs, that would look so nice.
Tip: You only need to cut a few strips of the tissue paper, not the whole piece (unless you have a whole pack of kids making the project). Cut a couple strips off the bottom of each piece of tissue paper and it will still be large enough to use for gift wrapping later.
Place the tissue paper
Now let your little “Tiffany glass” artist lay the tissue paper pieces all over the sticky area of the contact paper INSIDE the heart area. The pieces can overlap a little. They can make patterns or be random if they want, both look beautiful.
Trace a second heart in the same size on Clear Contact Paper and cut it out ON the lines. Peel off the paper and lay it on top of the tissue covered part of your first heart. Match the lines as closely as possible.
Attach the heart to the card
Press this stained glass heart on the back of the heart, matching the cut out heart area as closely as possible. The sticky edge should stick to the card and hole it in place. If you need to use some tape that is fine.
Write your special message
If you used a dark color for your card you may need to glue a white rectangle of copy paper to the inside of the card to write a message.
Your little “Tiffany glass” artist will have something special to say so help out with spelling if needed and encourage them to express their heart! Here is where the magic happens.
A stash of special cards...
I found a whole stash of homemade and purchased cards in my dad’s night stand after he passed. He was saving up those special messages from family and friends to be a ray of light on a cloudy day. There were cards from his grands in that pile, some of mine as well. I'm sure these cards will find their way into someone's stash of special cards!
Now, take a hand and go deliver the cards or place them in the mail. What joy they will bring to someone’s heart on this Valentine’s Day. My heart is happy just thinking about it!
One more stained glass idea
After doing the photo shoot for this project I thought of cutting out the center of a heart and using it to make a little heart shaped sun catcher. This works just the same way as above except I cut the heart out on the line and then cut a heart shaped hole out of the center of the heart. These would hang well in the window with a ribbon.
Oh we could go on an on, couldn’t we? Why don’t you come over for an afternoon and we will just do that (after a cup of coffee and a visit of course).

How about other shapes?
Can’t you just see this same concept used to make a butterfly or flower this spring? I’ll make some patterns for that this spring, OK?
Other Valentine Ideas
For many other Valentine ideas try looking on this post: 10 Valentine crafts and ideas.
Happy Valentine's Day!!
Happy Valentine's Day from Nana's house to yours!!
Enjoy!
DIY Stained Glass Valentine's Day Card
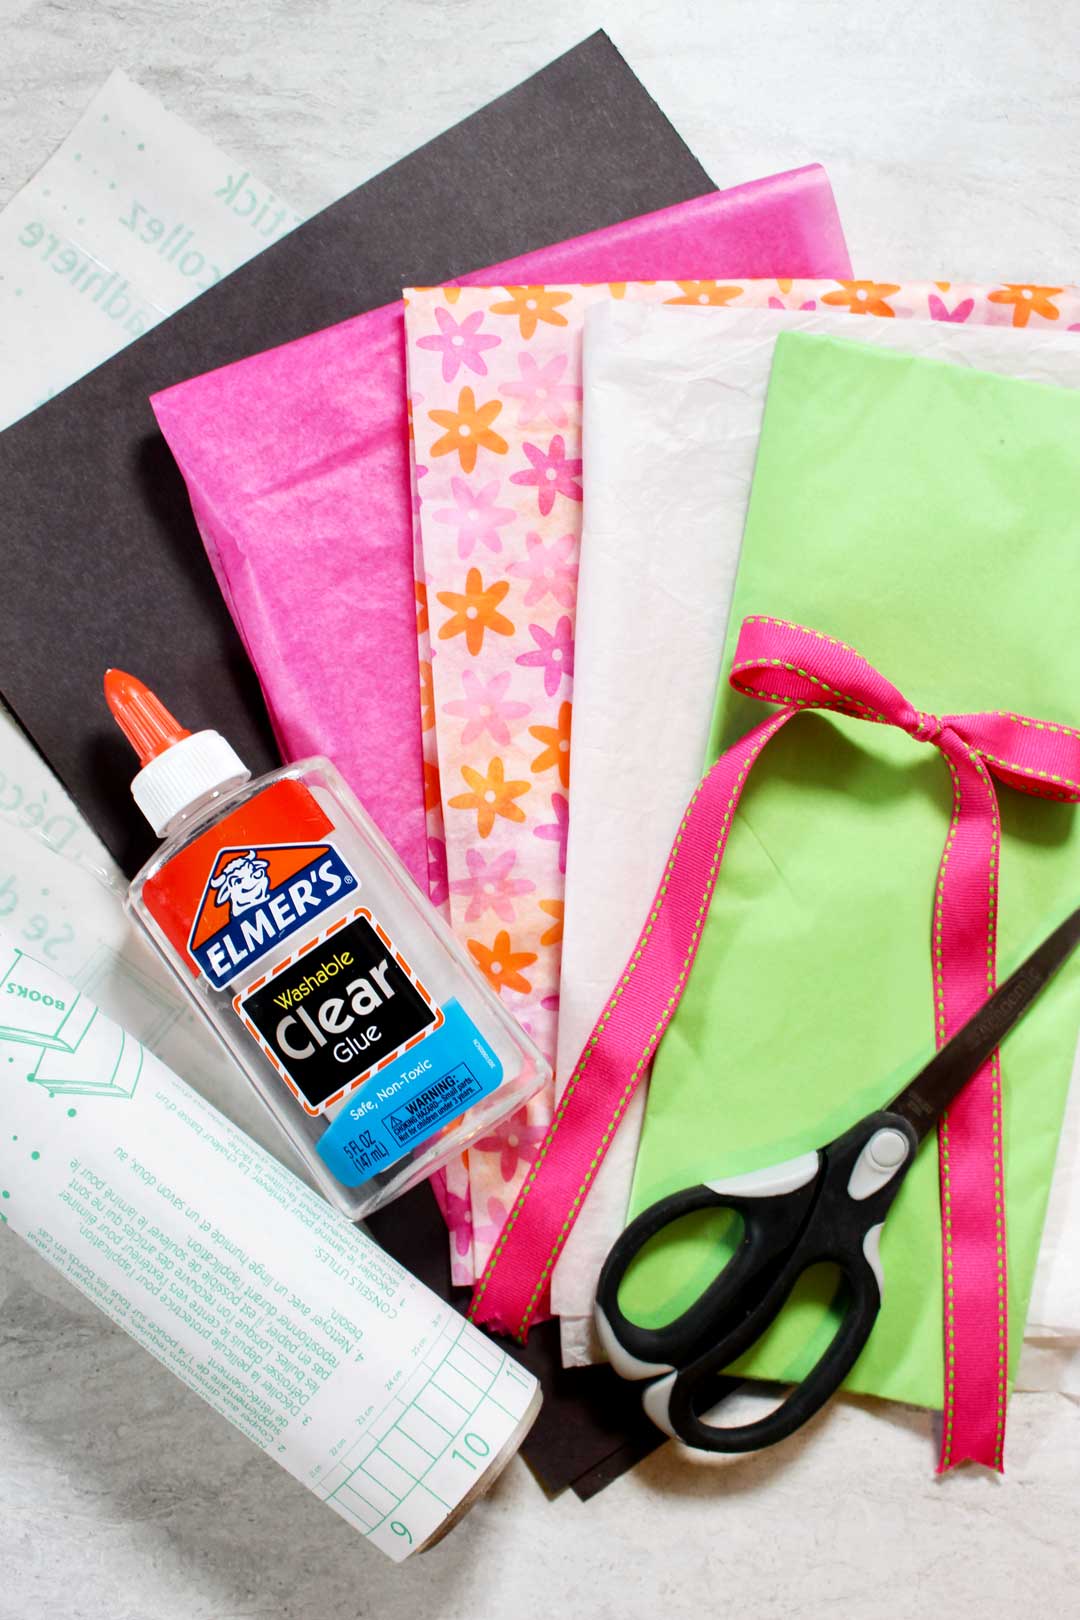
Equipment
- Scissors
Items Required
- 1 piece Construction Paper
- Clear Contact Paper
- Tissue Paper various colors of choice
- Glue
- Ribbon (optional)
Instructions
- Start this fun craft off by copying the Free DIY Stained Glass Valentines Day Card heart template onto copy paper. Cut out the heart in the size you want to use for your project.
- Trace the heart on the Construction Paper. The picture shows the card in black for the framed glass look, but the paper can be in any color.
- Carefully poke a hole in the center of the heart with a scissors or pencil. Then cut out the heart shape, leaving a heart shaped window in the card.
- Trace the heart on the Clear Contact Paper. Cut out the heart- NOT on the line, but about ½ inch outside this line.
- Spend a few minutes cutting the Tissue Paper into strips and then into pieces.
- Now let your little “Tiffany glass” artist lay the tissue paper pieces all over the sticky area of the contact paper INSIDE the heart area. The pieces can overlap a little.
- Trace a second heart in the same size on Clear Contact Paper and cut it out ON the lines. Peel off the paper and lay it on top of the tissue covered part of your first heart. Match the lines as closely as possible.
- Press this stained glass heart on the back of the heart, matching the cut out heart area as closely as possible. The sticky edge should stick to the card and hole it in place. If you need to use some tape that is fine.
- If you used a dark color for your card you may need to glue a white rectangle of copy paper to the inside of the card to write a message.
- Your little “Tiffany glass” artist will have something special to say so help out with spelling if needed and encourage them to express their heart! Here is where the magic happens.
- Now, take a hand and go deliver the cards or place them in the mail. What joy they will bring to someone’s heart on this Valentine’s Day.
Notes
Welcome to Nana’s! Where there’s fun things to do with your “grand” kids!
Come join the fun at www.WelcomeToNanas.com


Leave a Reply