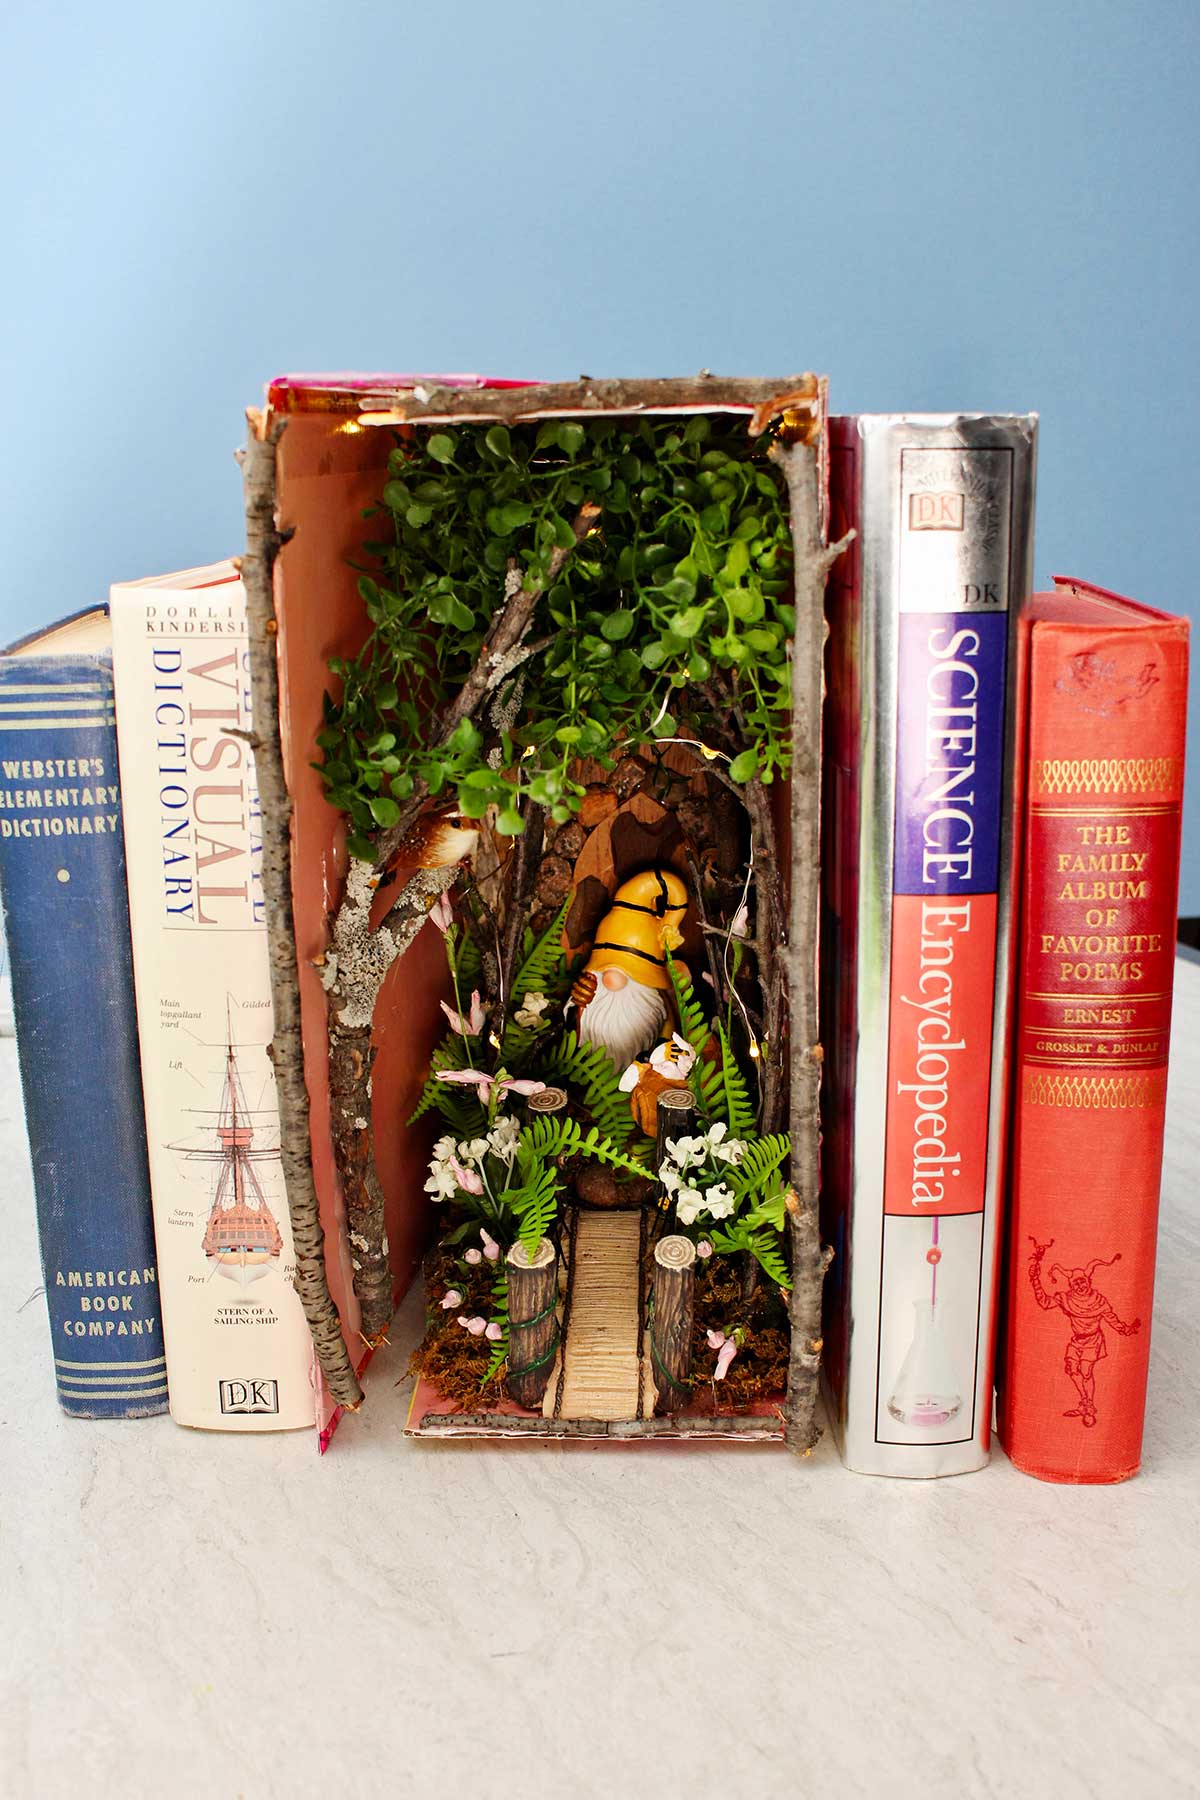
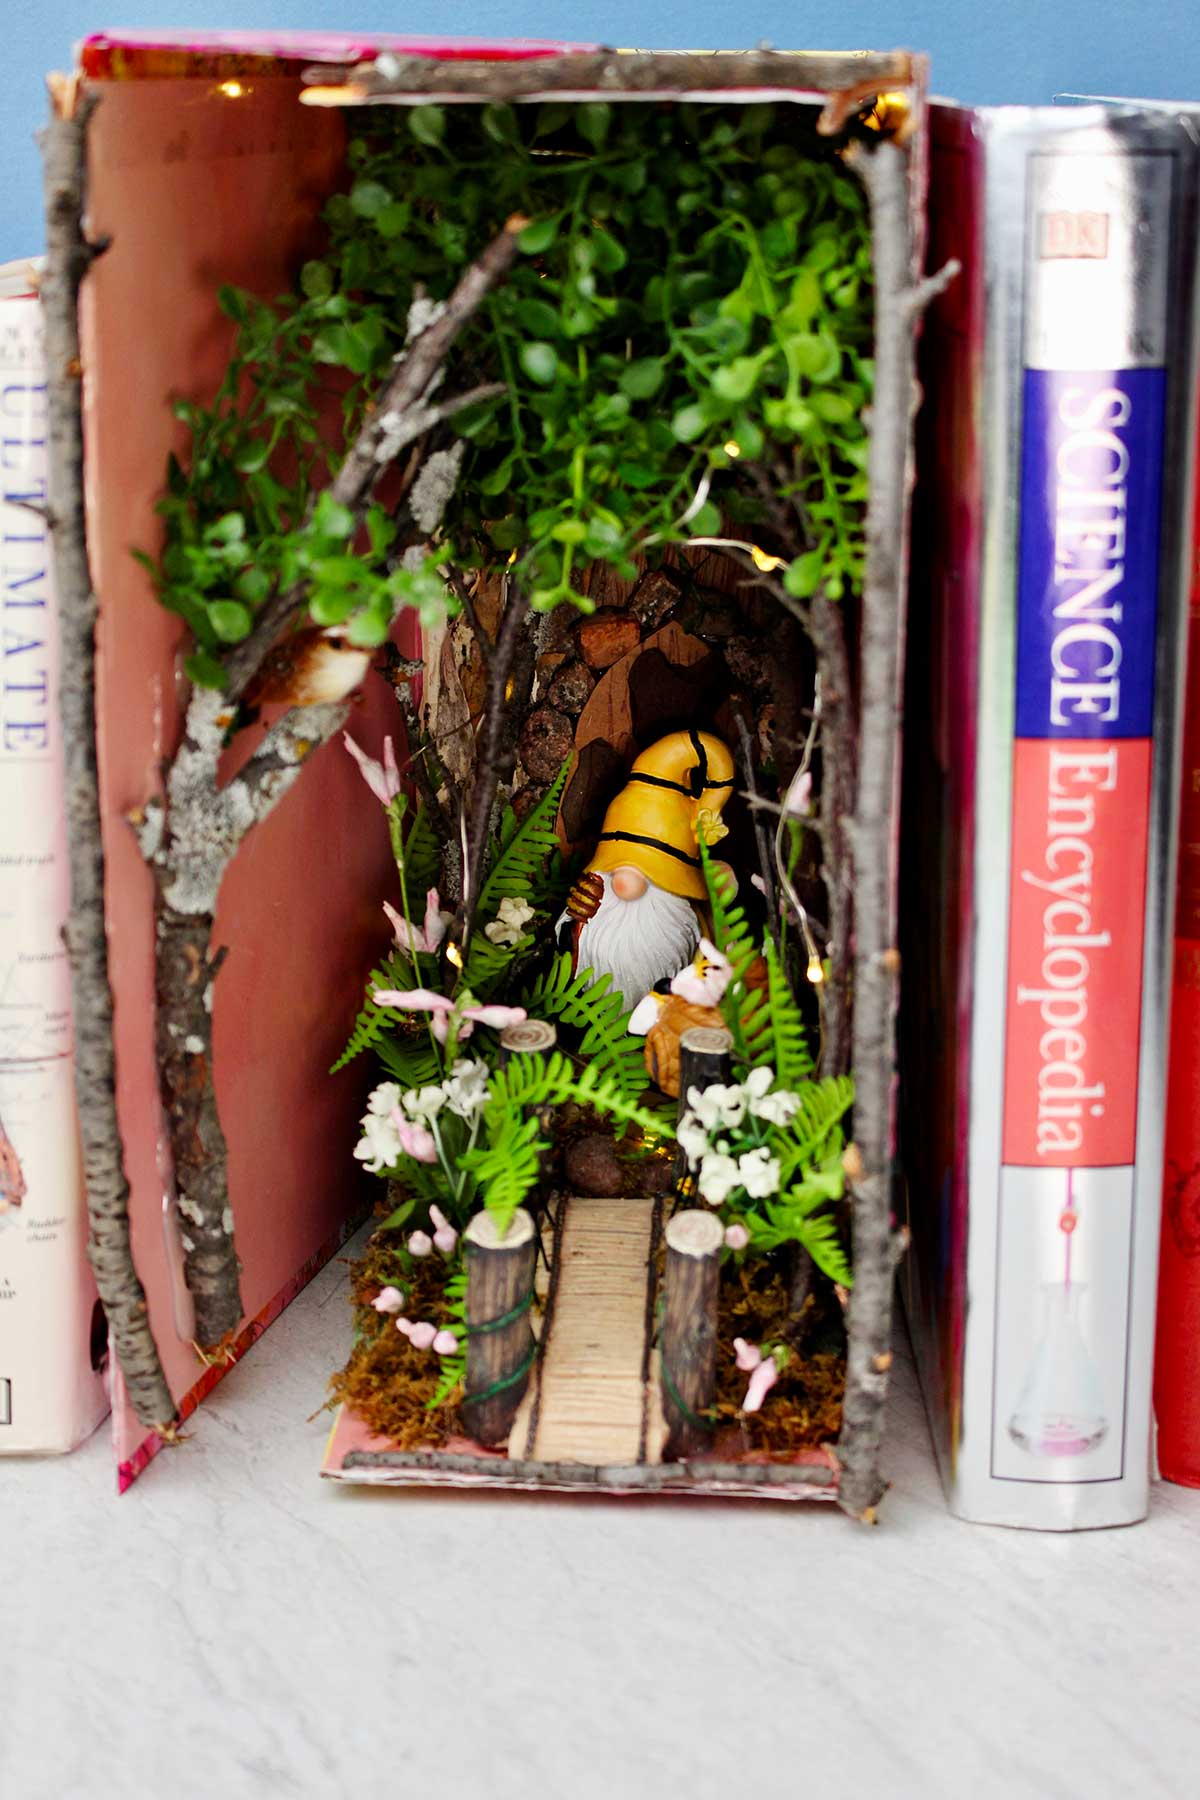
Learn how to make a DIY Nature Book Nook Shelf Insert for a kid's bookshelf with just a few craft supplies. This fun craft for kids is easy to put together and encourages imagination with a miniature forest scene!
Jump to:

Book Nook Shelf Inserts Are Amazing!!
I saw a book nook on a friend’s bookshelf and was totally intrigued! Everyone loves a miniature, I think, but I'm especially partial to them. I hope you are too.
We could think of many options for making a little bookshelf diorama scene. But we’re going to do a nature scene.
Don't worry, this craft doesn't have to be complicated or difficult! I've made the tutorial simple and straightforward for kids to follow, with plenty of room for imagination of course :).
I've loved finding a miniature nature scene on the bookshelf between the books. I'm excited for you to try making one!
Supplies
Here are a few quick notes about the supplies you will need to make this DIY book nook shelf insert!
- Box- Find a box that fits on your shelf when you set it upright. It needs to be about three or 4 inches wide when it’s sitting up.I purchased one from Hobby lobby in their storage box section (11x8x4"). But a cereal box could work.
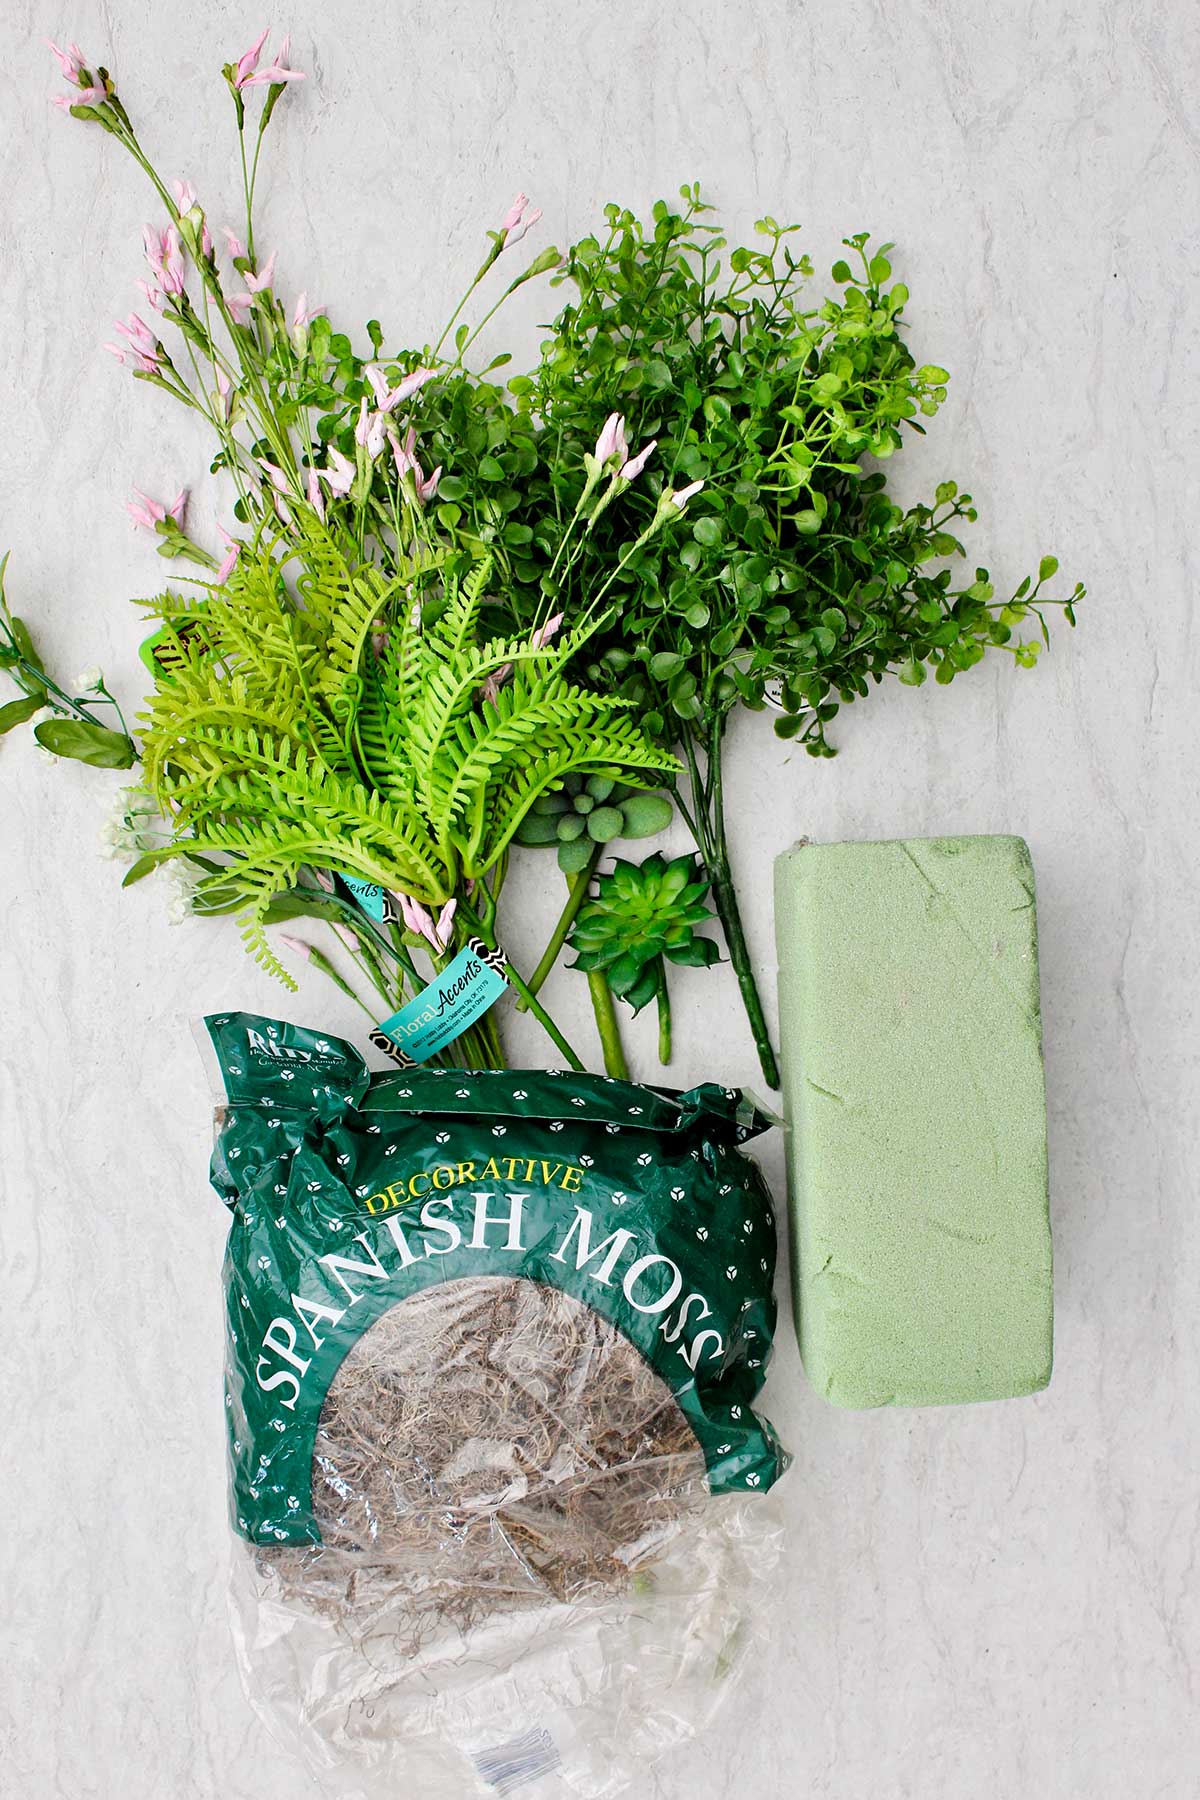
- Nature items- Collect up small things from nature that can be used in the book nook. Things like pebbles, bark, twigs, moss, sand, etc.
- Artificial nature items- Add to your natural items with artificial greenery and flowers, artificial moss, and other items. Be creative.
- Figurines- Many stores have miniature figurines for use in a fairy garden or miniature scenes. I found the small gnome items in our local Dollar General. Choose two or three for fun. But this is optional.
- Paint- Acrylic craft paints are handy to use to add a bit of color to your scene. Red, blue, green, yellow would be good colors to choose. This is optional.
- Hot glue and glue gun- A hot glue gun and glue works to hold your items in place in your miniature scene.
- Scrapbook paper (optional)- Scrapbook paper covers plain cardboard of the box interior.
- Fairy light- A set of fairy lights is nice to add some light back into the scene.
- Craft scissors
Steps by Step Instructions
What would you like your book nook scene to look like? Would you want it to be a little fairy garden or a gnome house? Or perhaps a forest scene without miniature figurines at all. Maybe draw a picture of your idea.
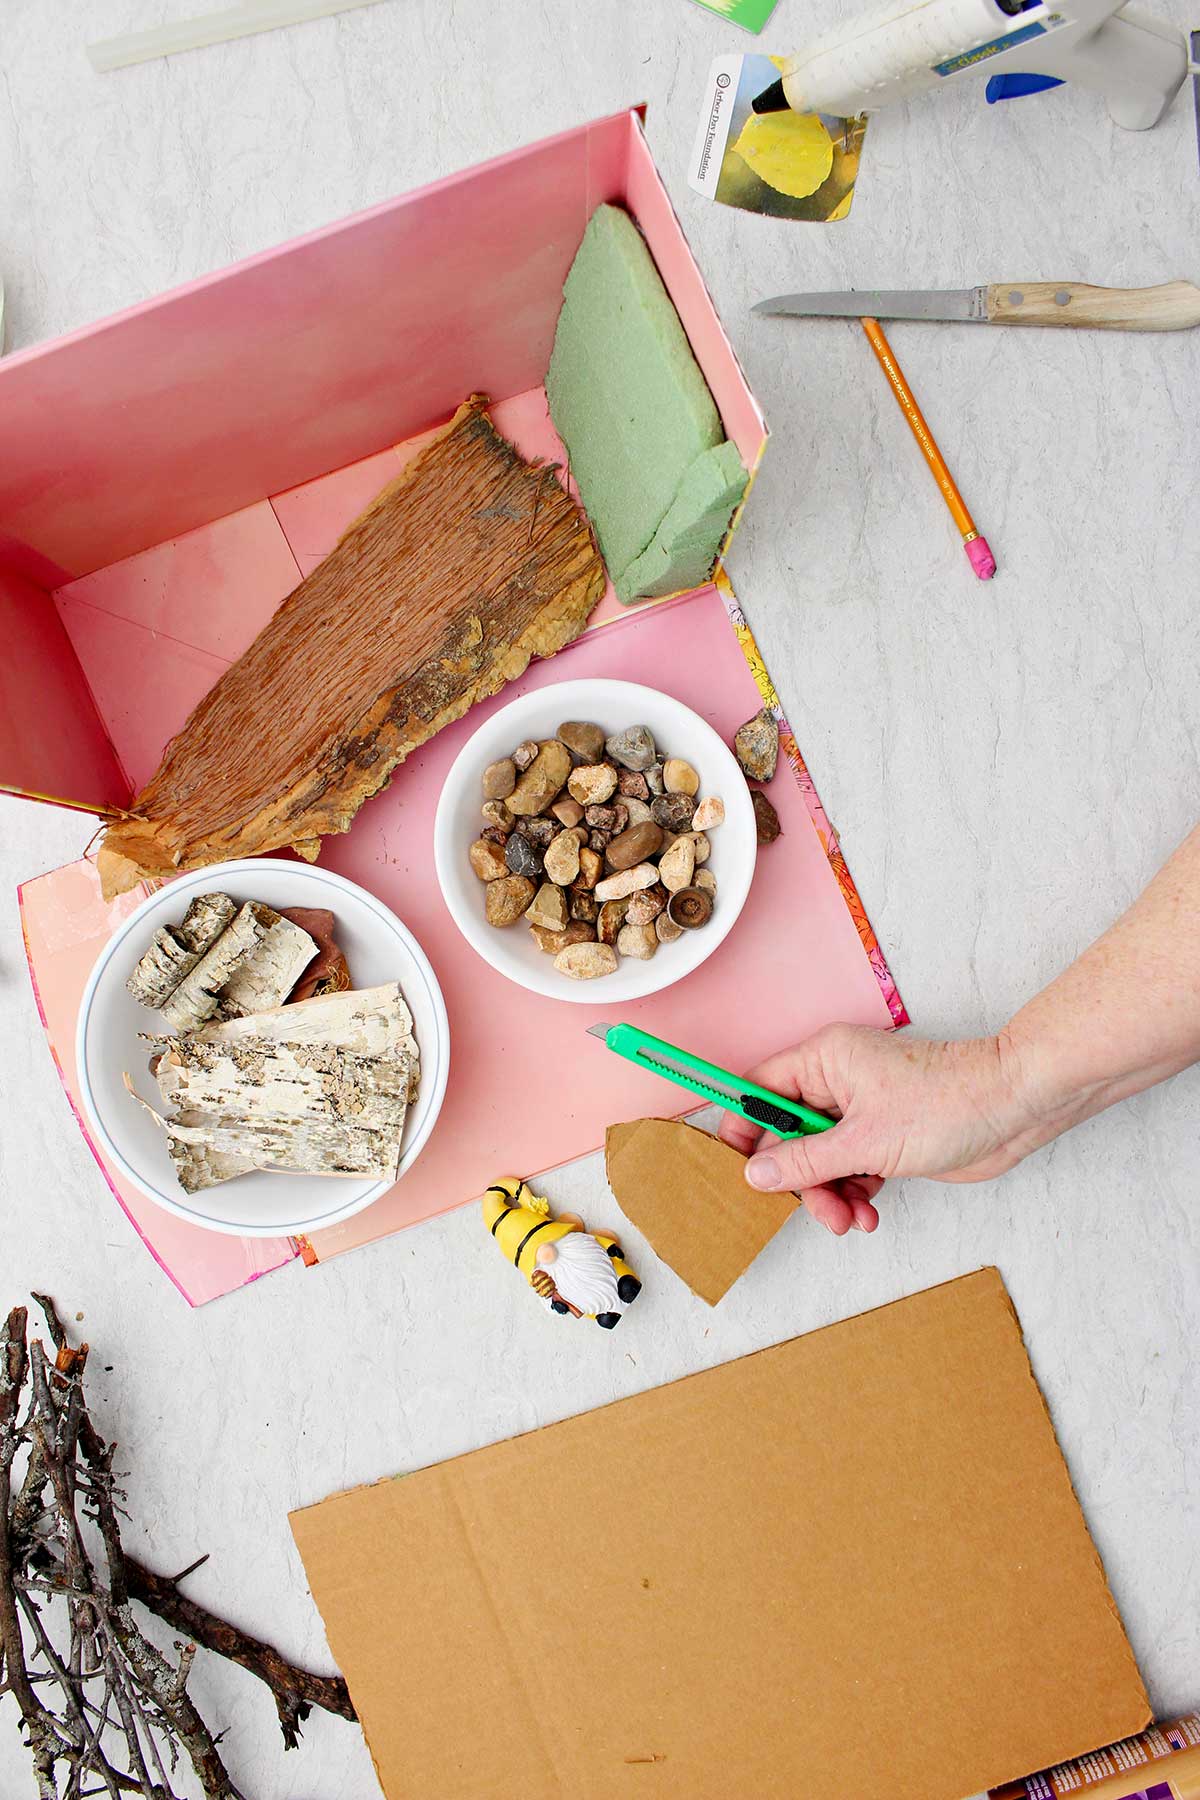
Prep the box
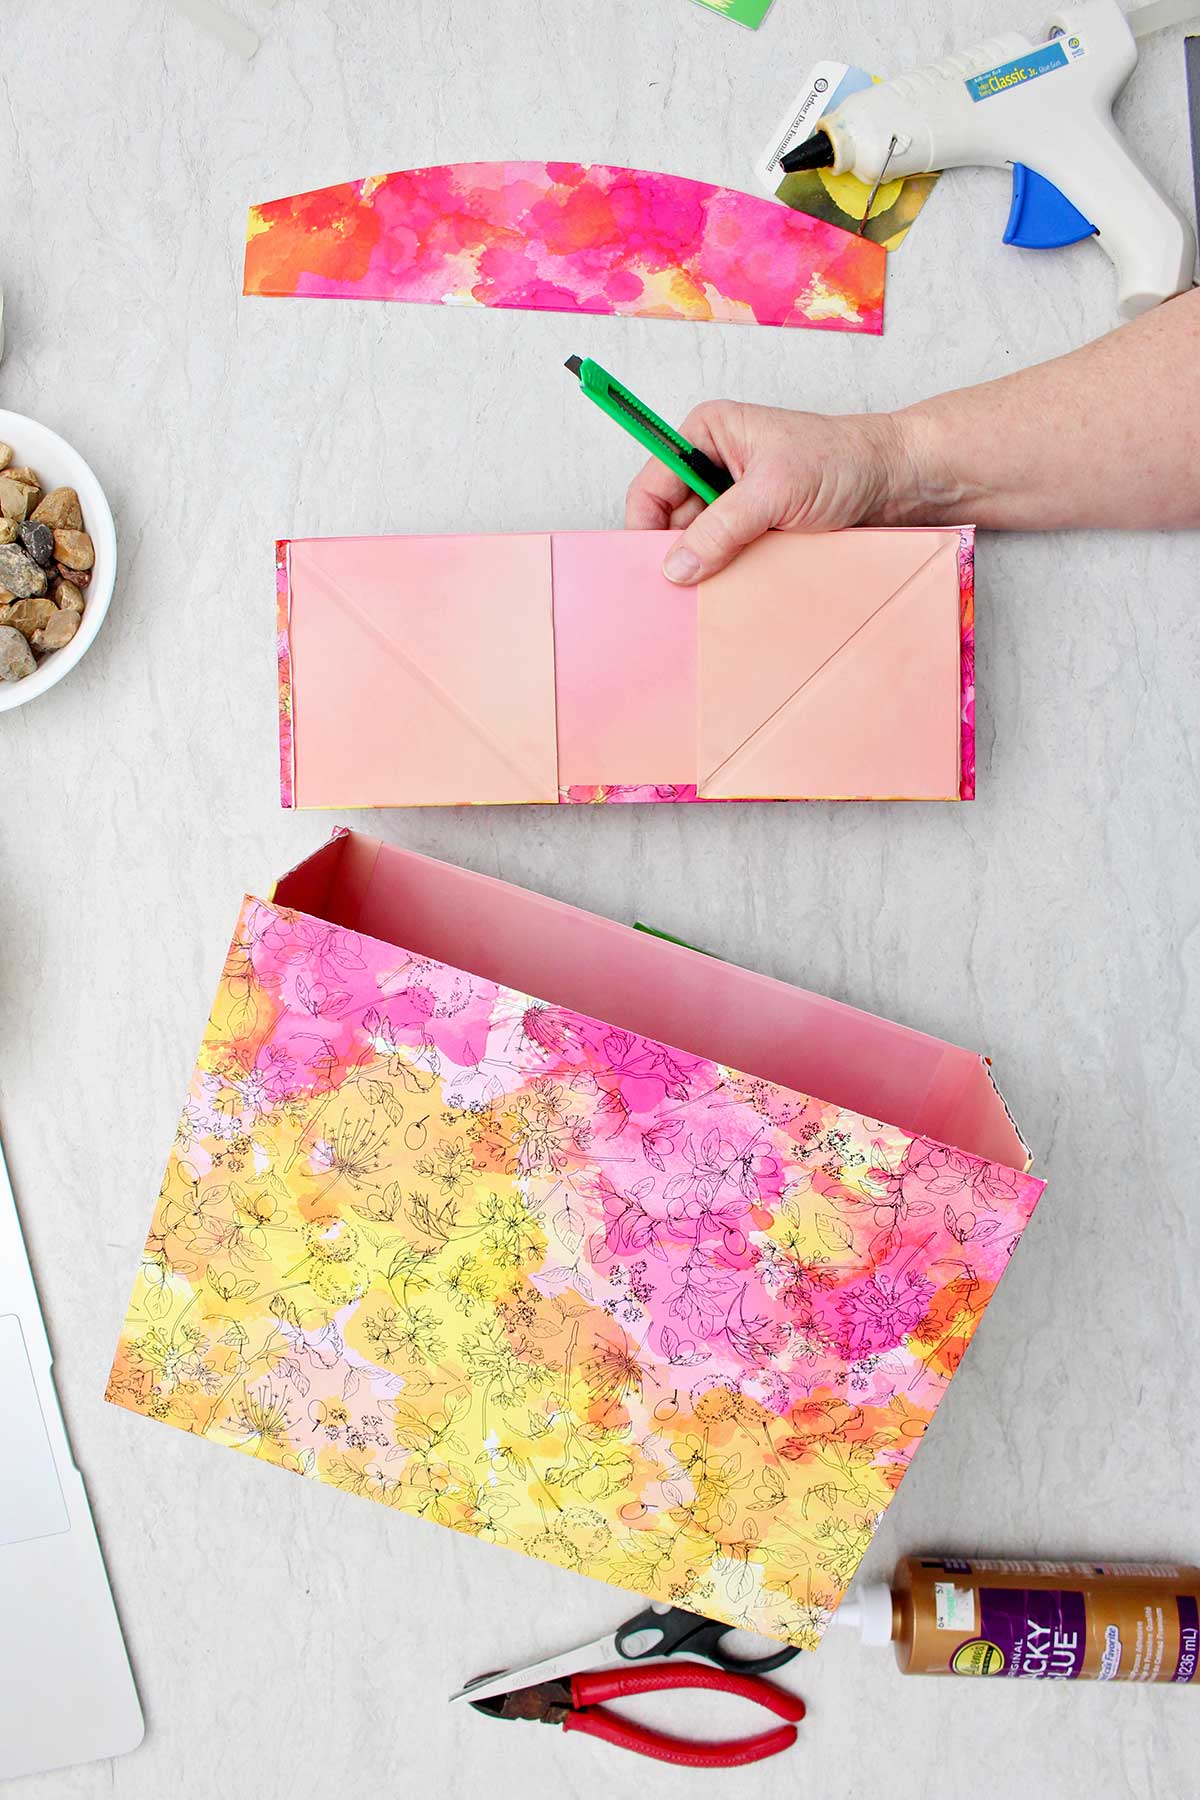
Cut your box so that one side panel of the box is open and you can see into the bookshelf story scene when it’s standing up and down. Make sure the box fits on your shelf before cutting the box.
Paint the inside of the box a unifying color with acrylic craft paints. Perhaps a light brown, or a light blue. You could also line it with a colored scrapbook paper of some sort if you would prefer.
Make a plan
Take some time to arrange items inside of your box so you know where you want to place them. What do you need to make or create to finish the scene that you don’t already have?
Create the extra pieces of your scene and fit them in the arrangement.
Make sure you can see from the front to the back of the box. Rearrange items if needed.
Glue the scene in place
Pull the items out and begin to hot glue them in place. Start with the background items first and then work your way forward.
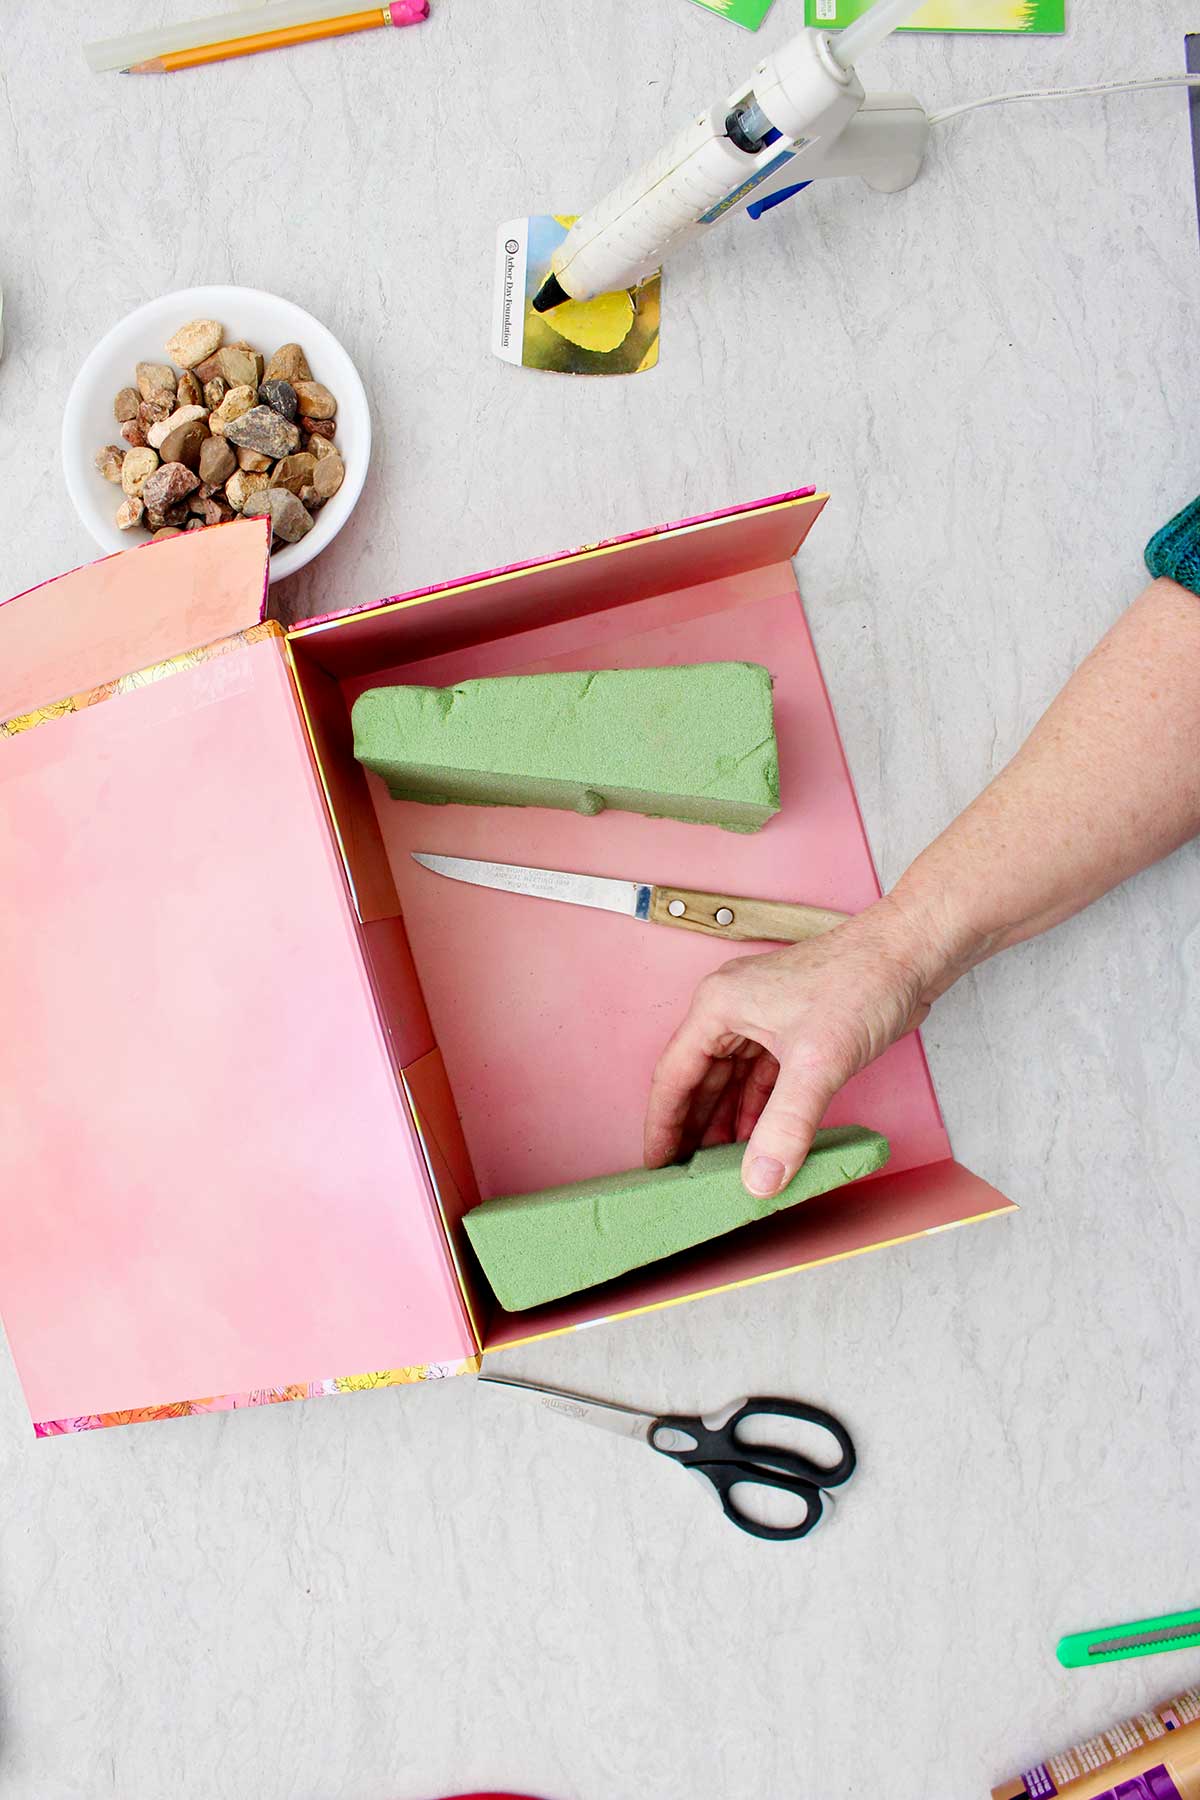
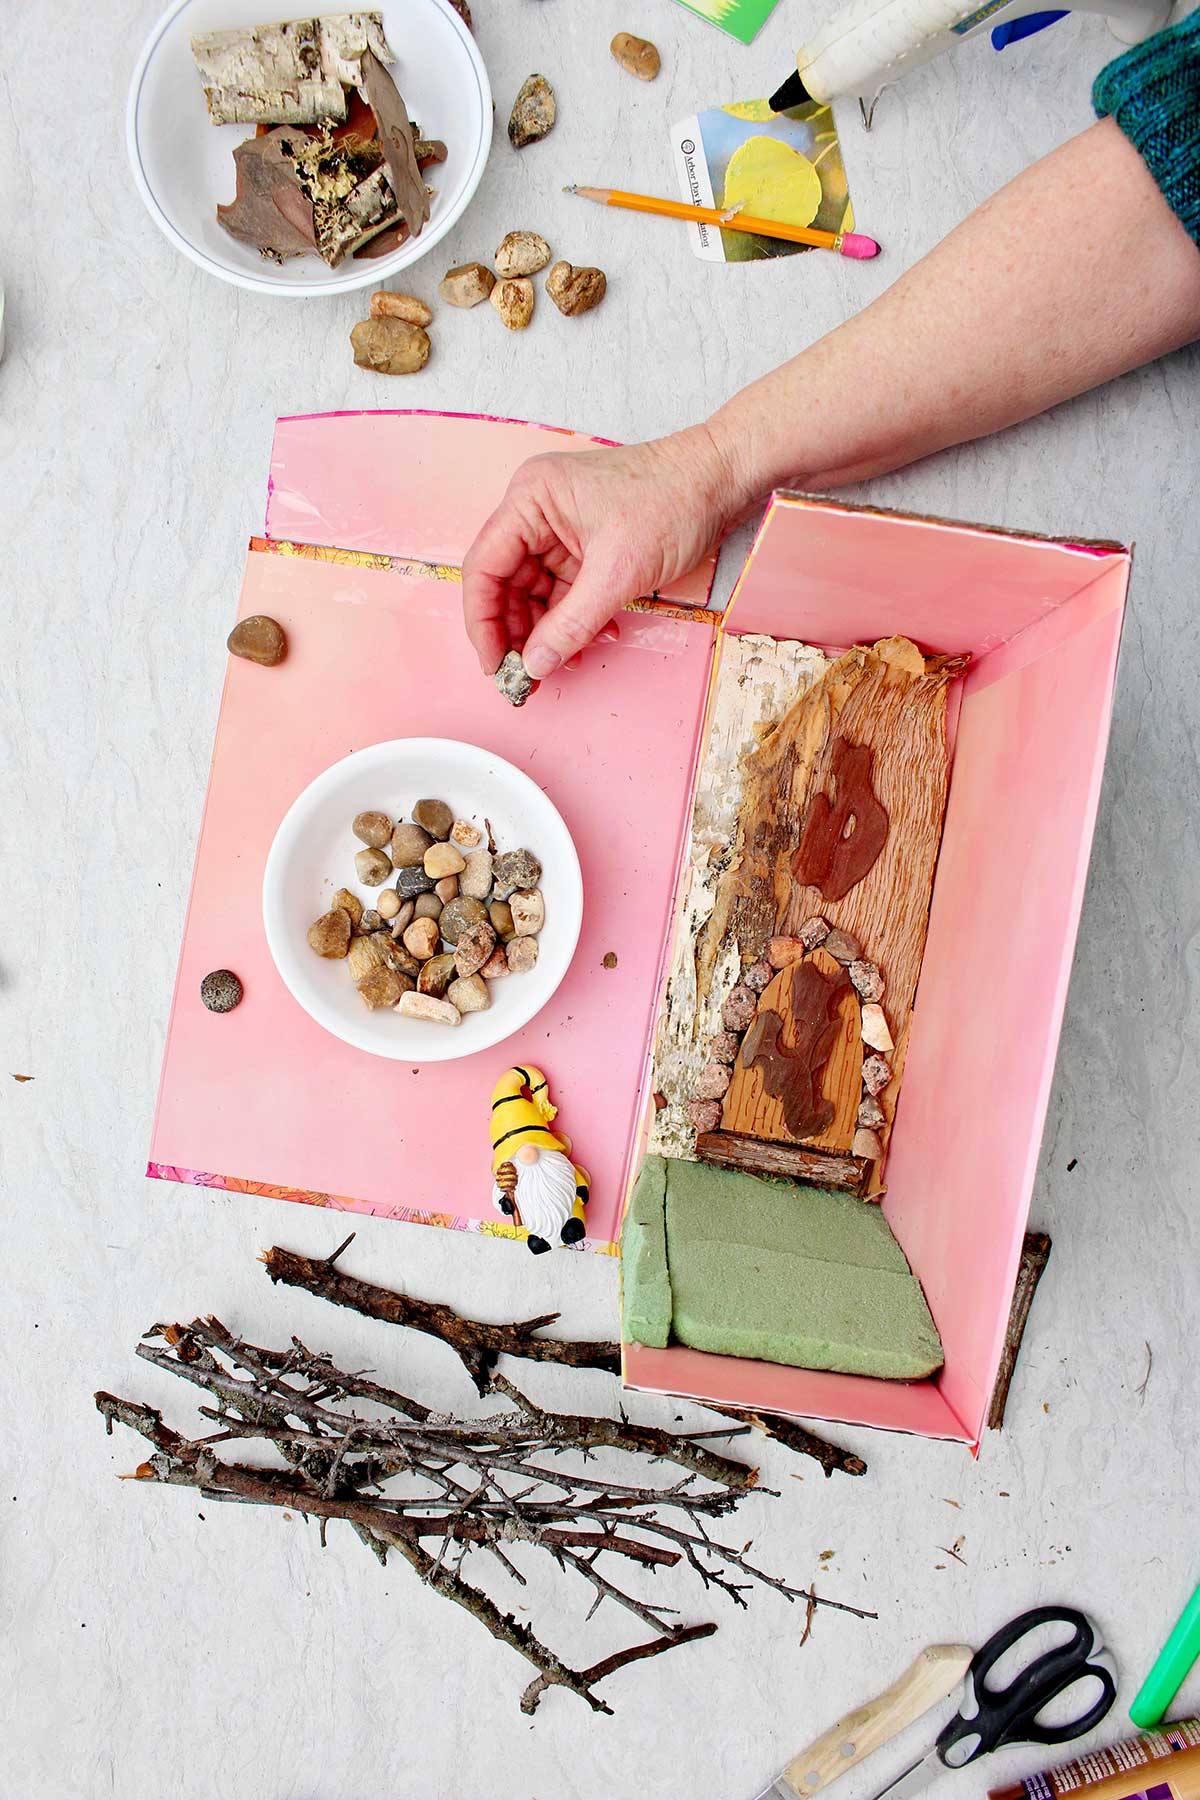
I cut a small wedge of foam so that the floor of the box sloped upwards by about an inch from the front to back. Cover the floor of the box with what you want as the nature scene “ground”. An artificial moss can be used or moss you find outdoors.
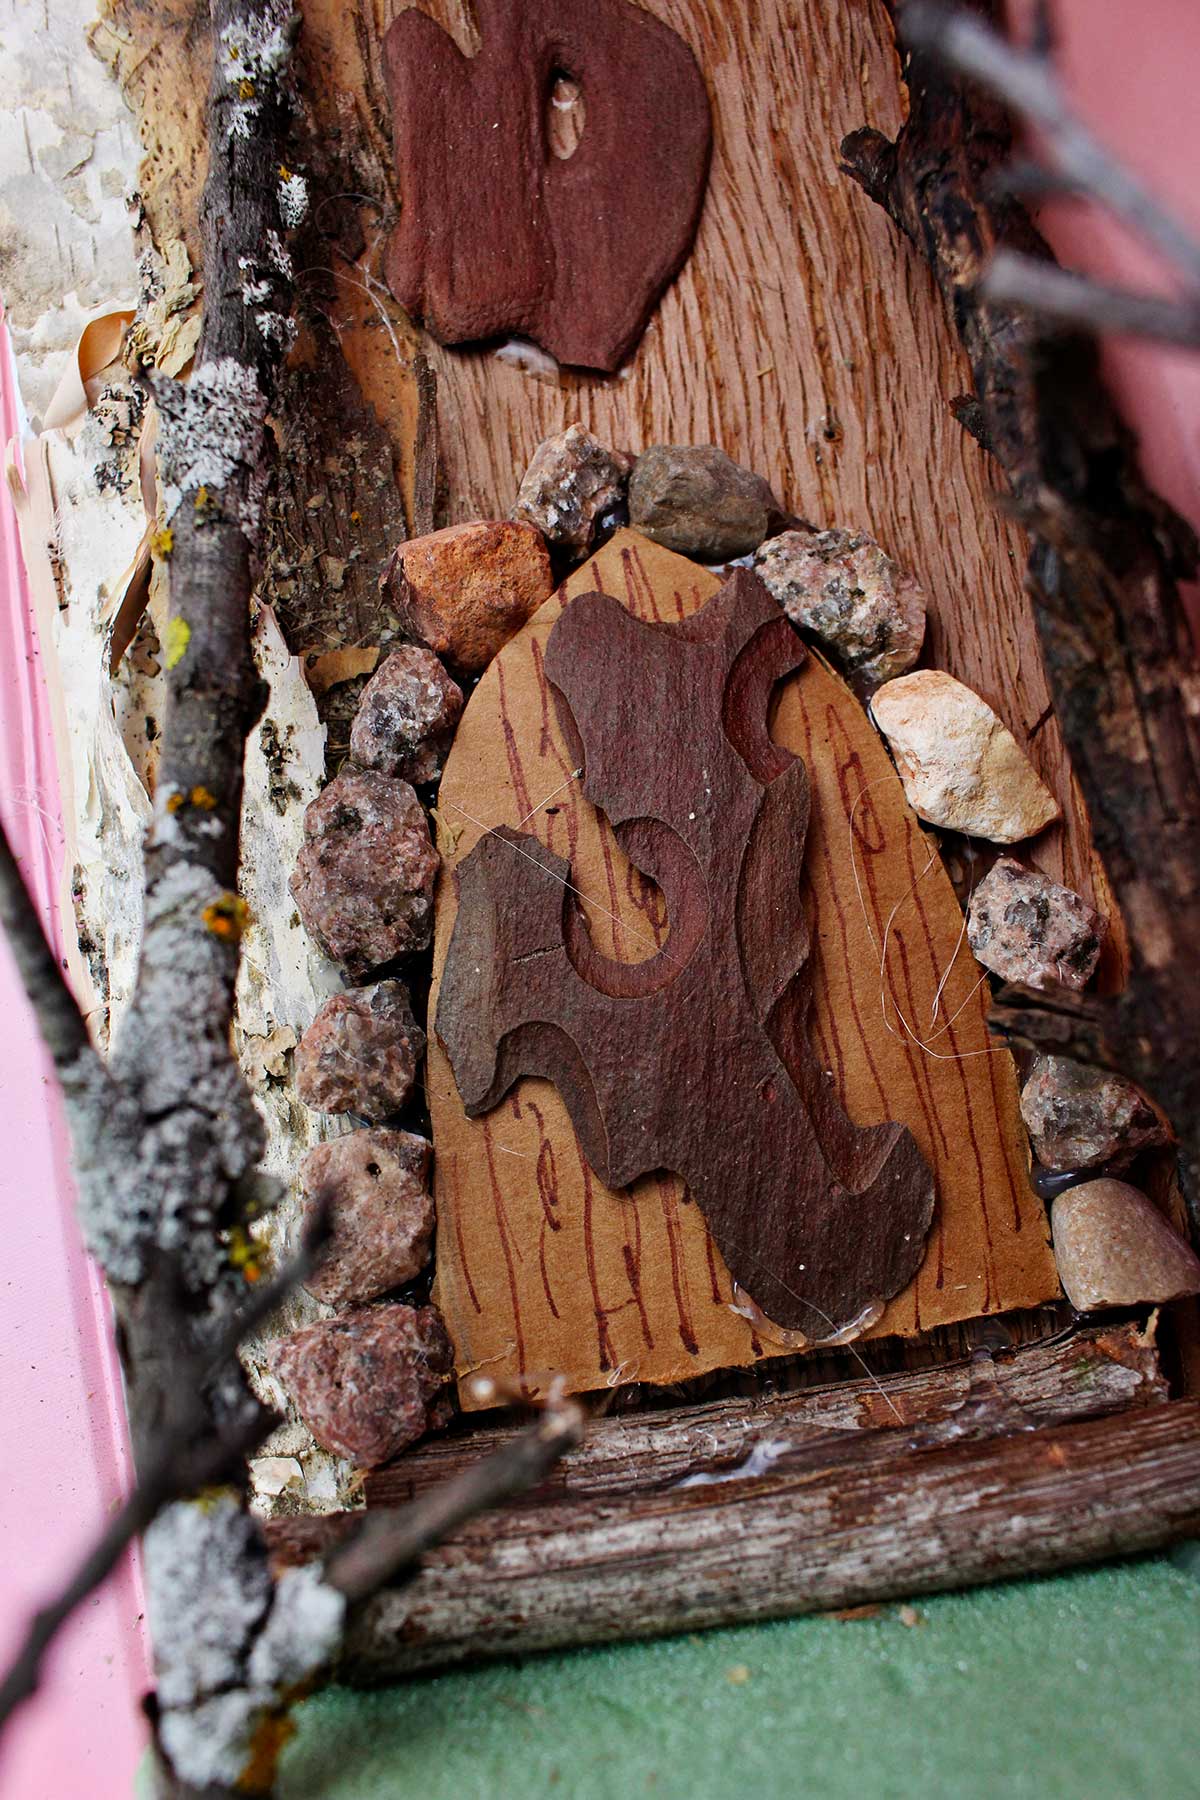
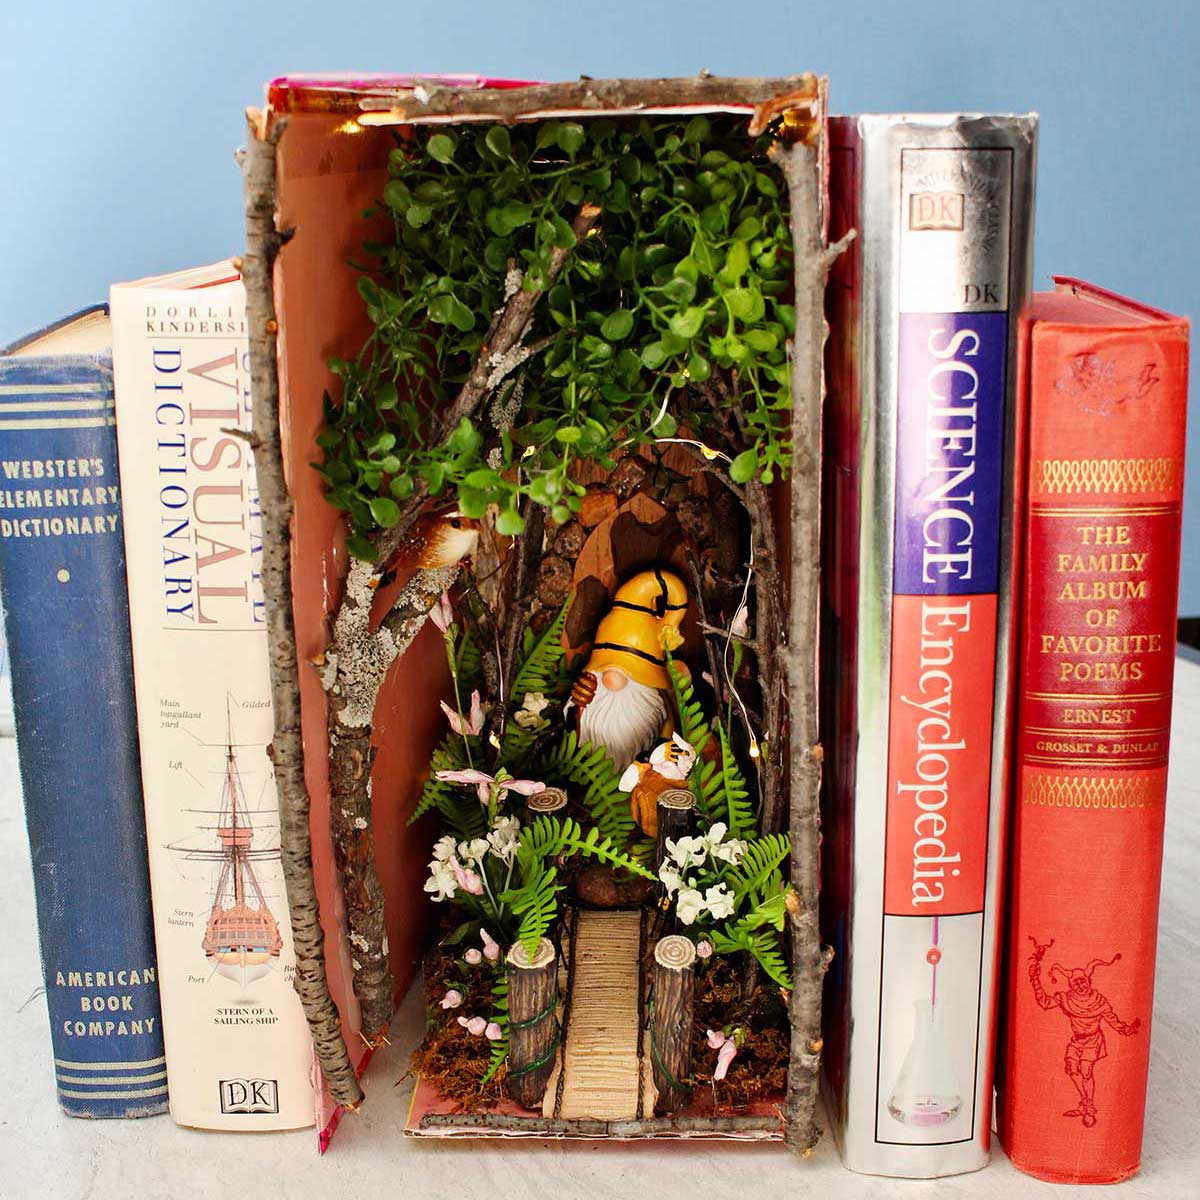
I made a house for my gnome on the back wall of the box using bark and pebbles. And used a small door made from cardboard in the center.
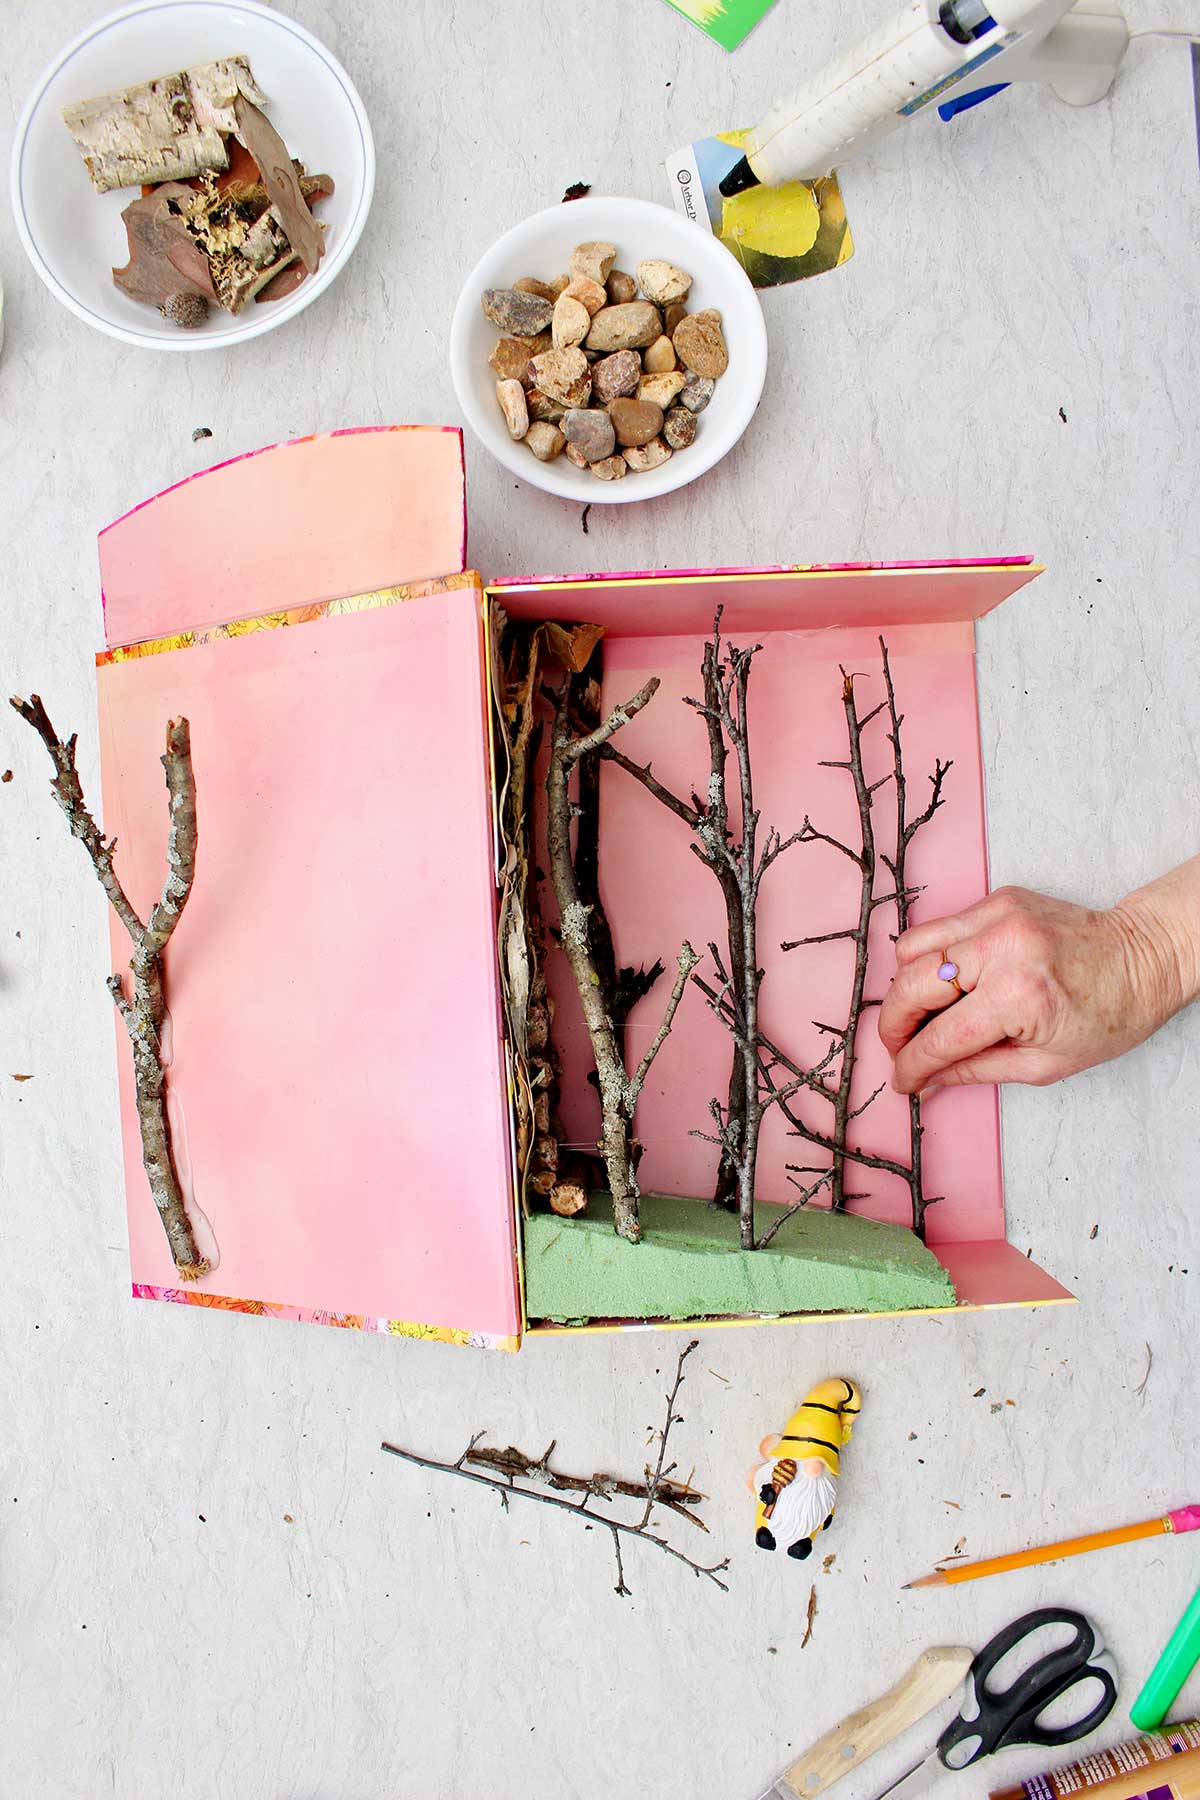
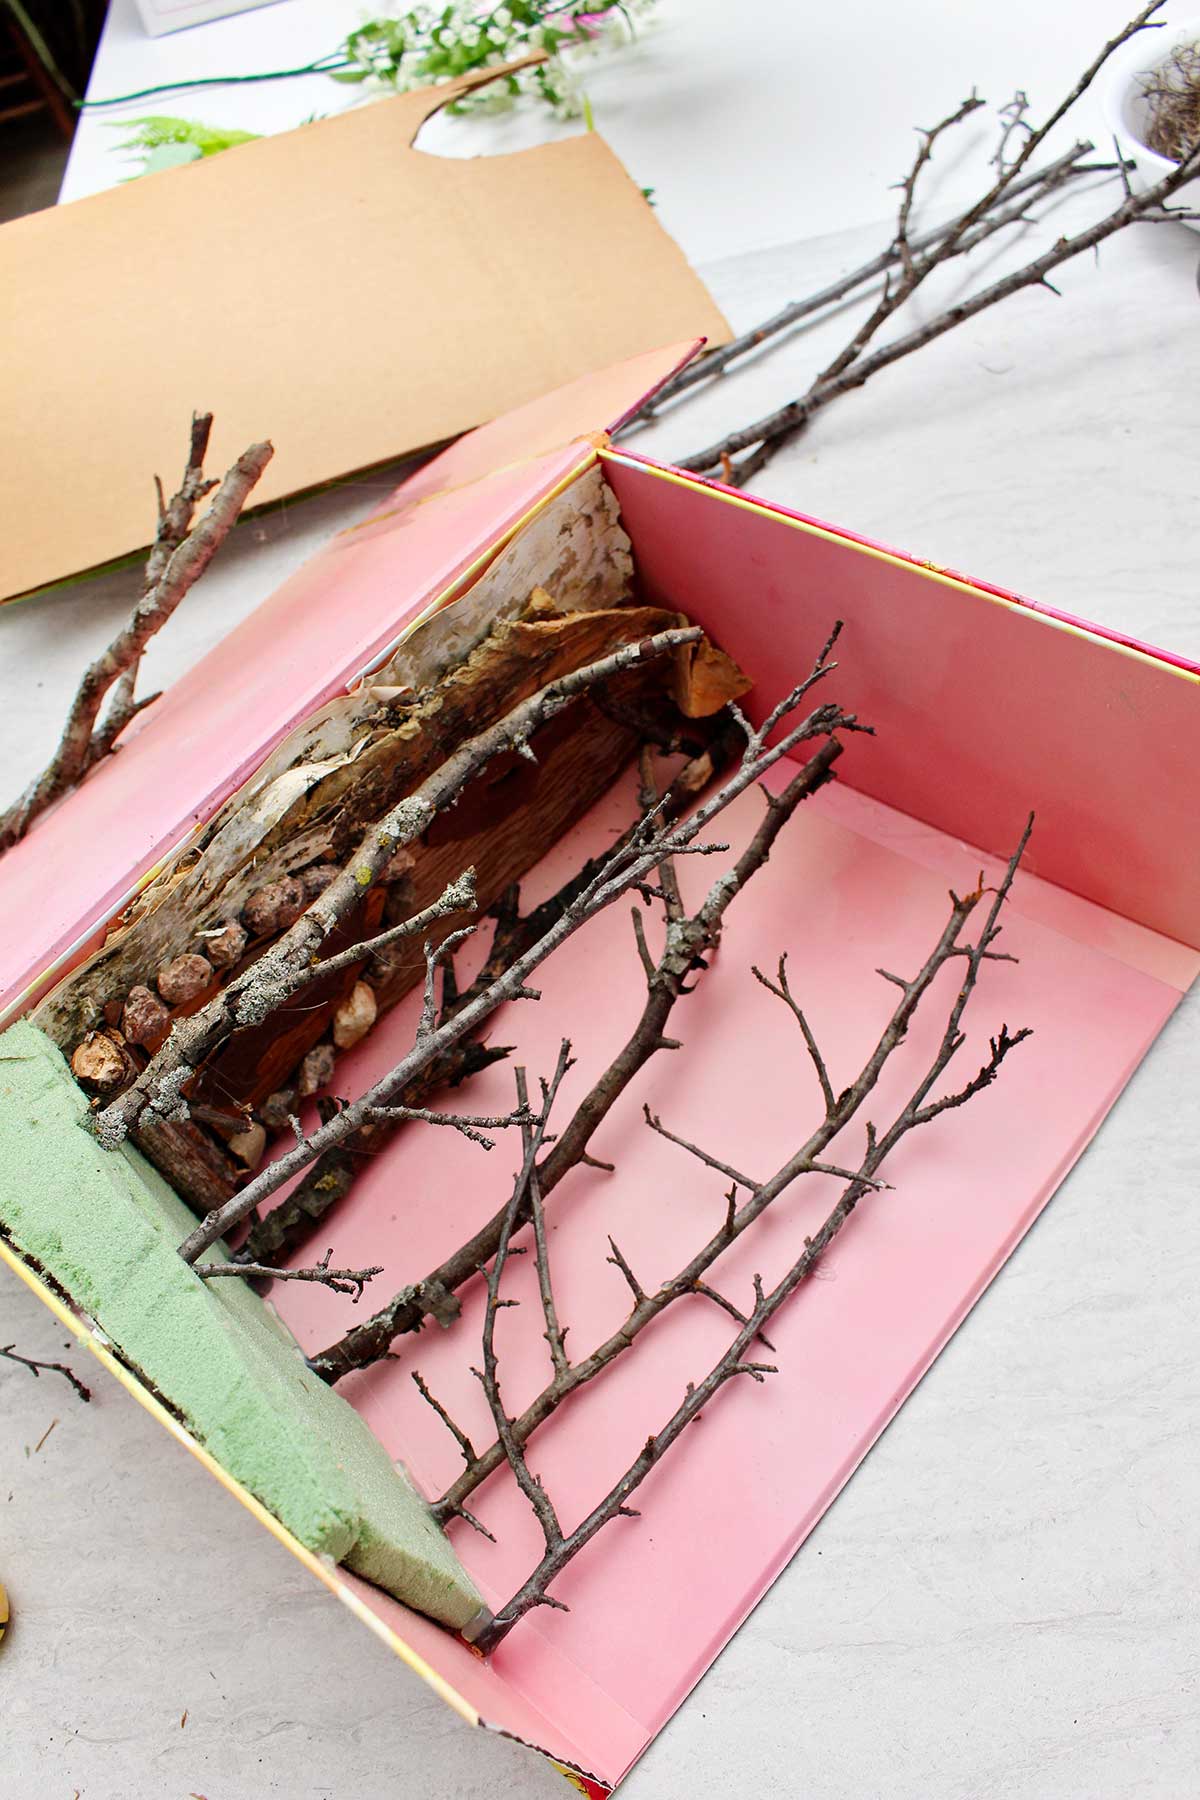
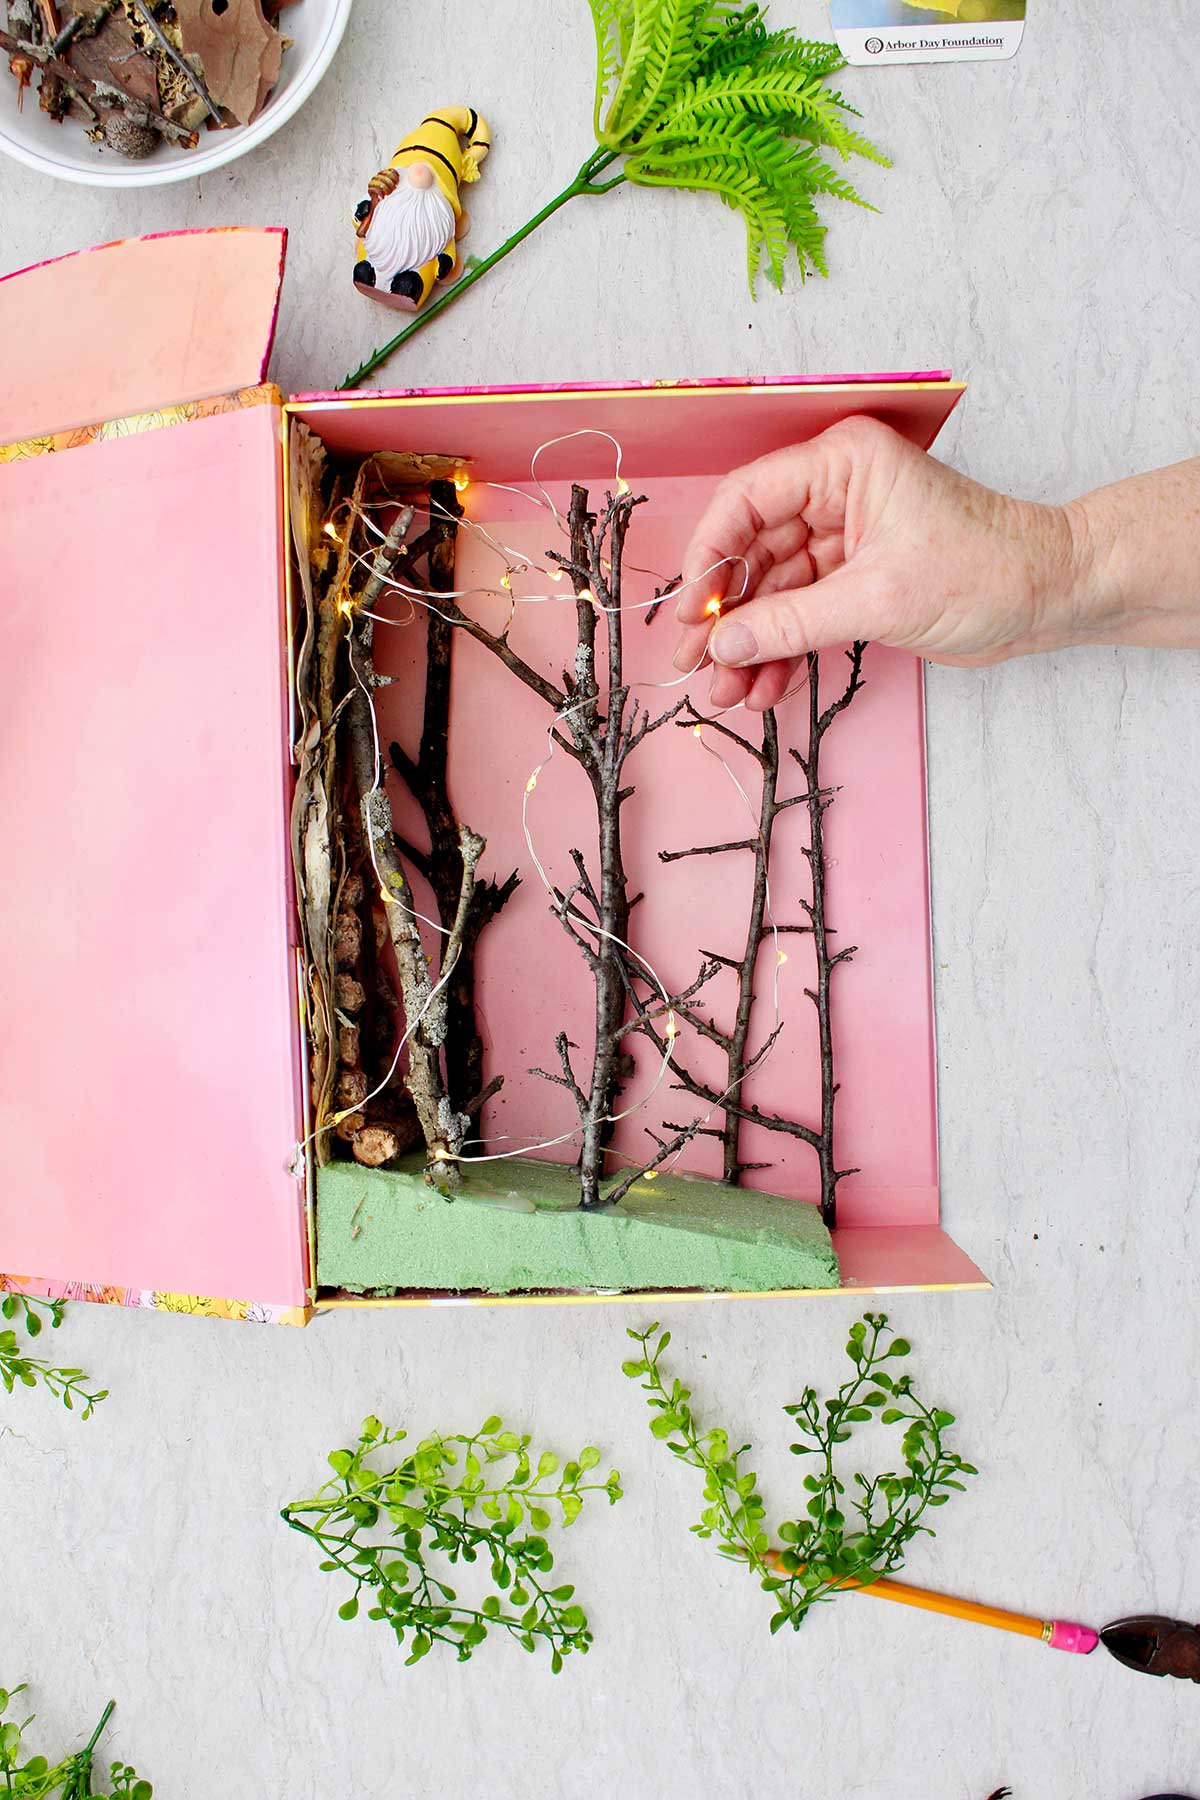
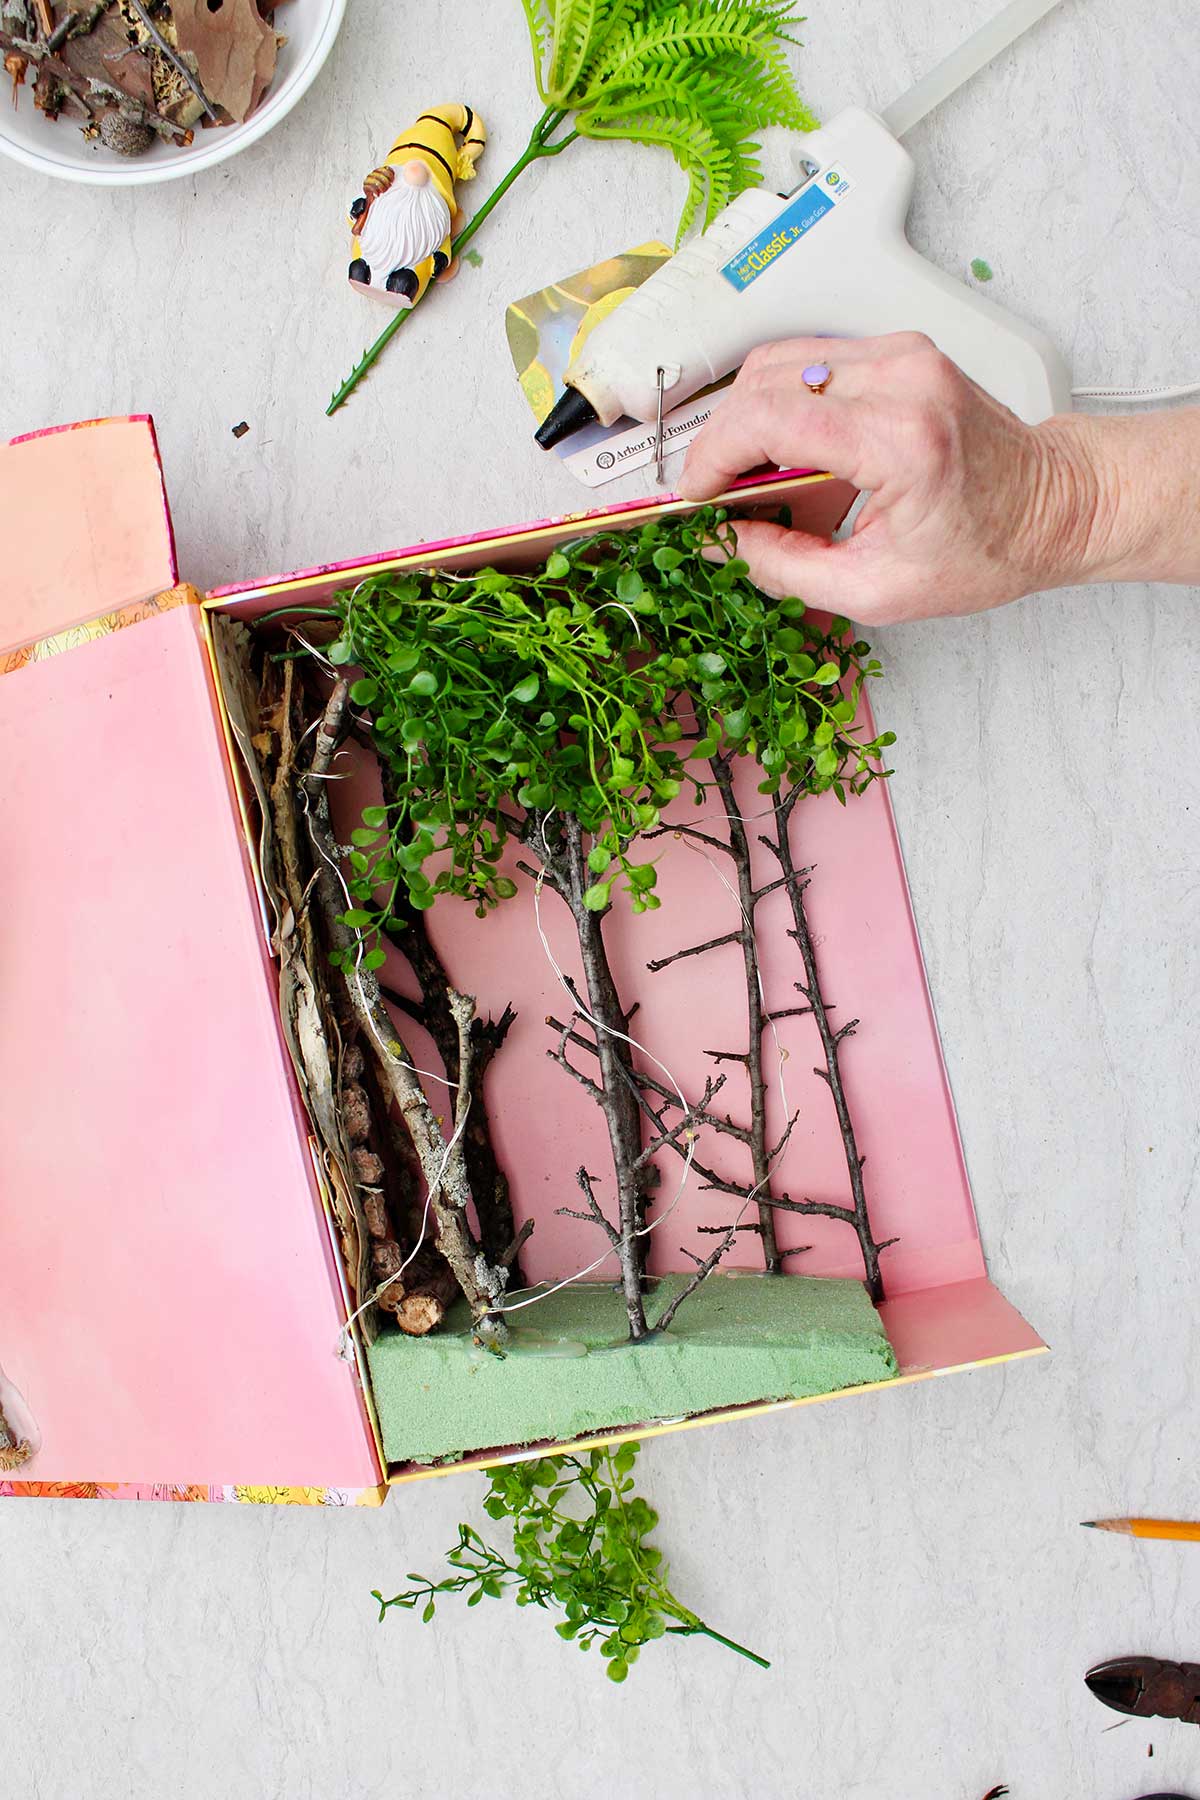
A “forest” came together from cut twigs cut to look like trees on either side of the box. I took the branches off one side of the twigs so they would fit closer to the side of the box. When done, they were hot glued in place. Add moss and artificial greenery to look like the foliage of the trees.
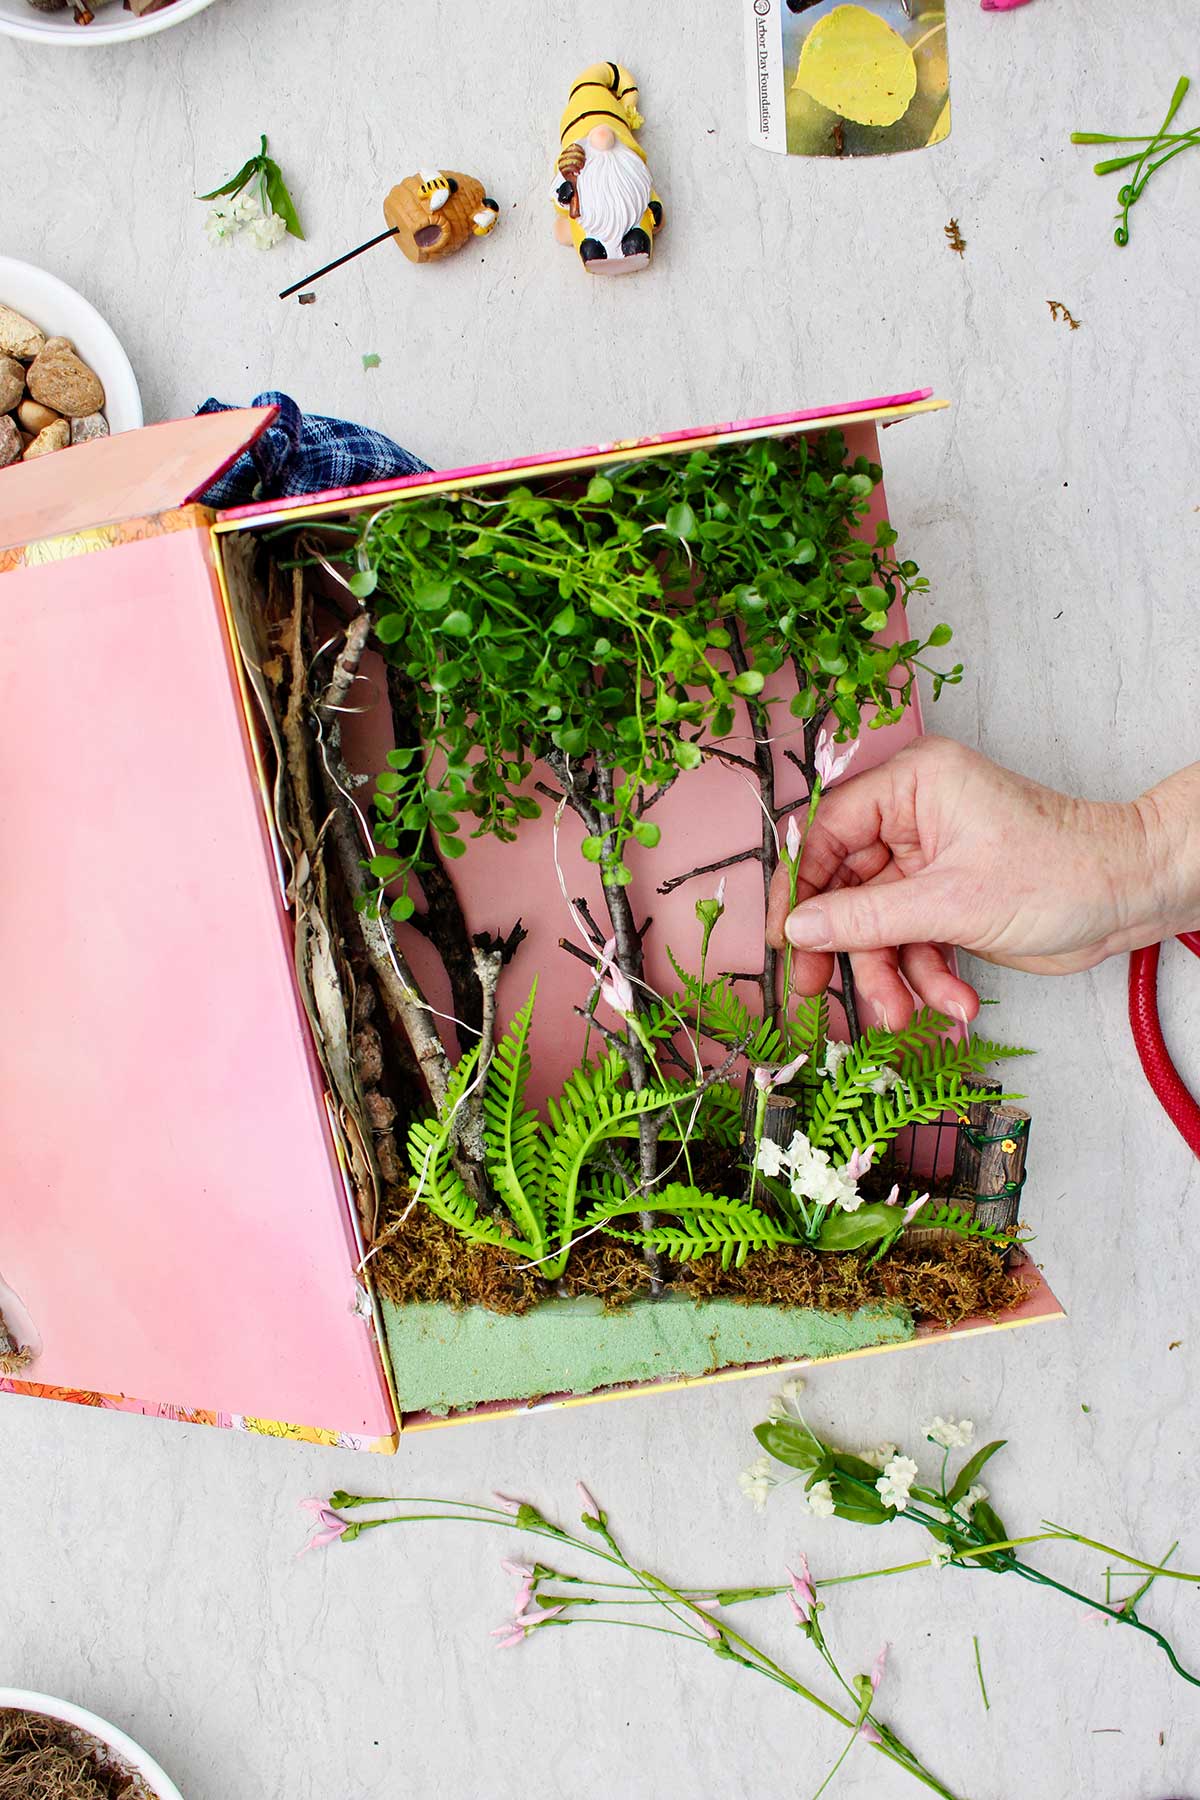
Place additional greenery and flowers along the bottom edges of the box to be filler.
Fairy lights and figurines
Thread a string of twinkle fairy lights into the branches of the tree. Make sure that the device that turns it on and off is easily accessible. I poked a hole in the side of my box. Then threaded the twinkly lights through that hole.
I can turn the lights on and off with the device when I want to without reaching inside of the box.
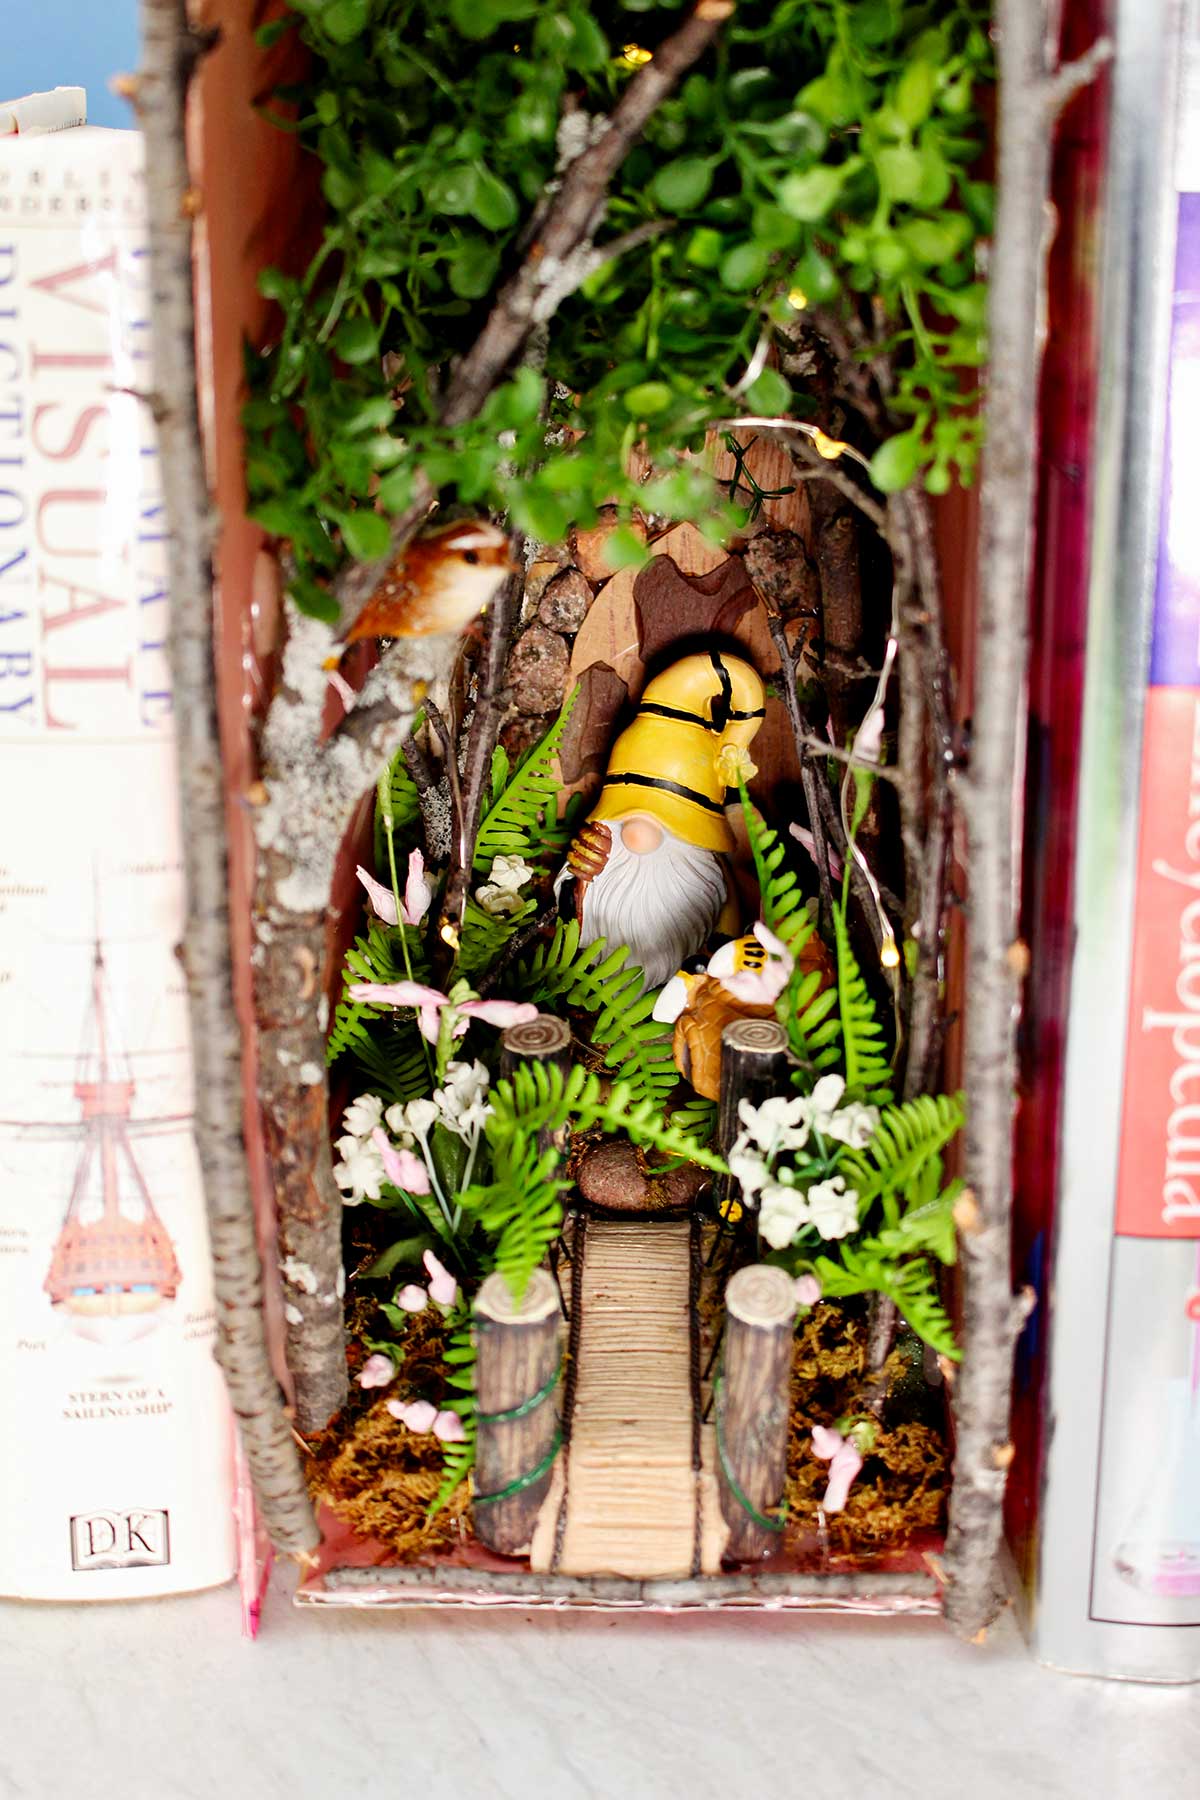
Add the miniature figurines into the scene and glue them in place so sit securely on their own. I found a small bridge and a gnome and a small beehive for my figurines.
Use some twigs or trim around the front edge of the box to finish it. This step is optional.
Place the book nook on your bookshelf, turn on the twinkling lights and enjoy!
Craft Tips for a Bookshelf Nook Insert
- Purchased box- I used a box purchased at Hobby Lobby. It had a flip up lid and was 4x8x11” in size. A nice feature of this box is the decorative paper that covers it. Also, the front is an attached lid that opens. Because of this you can easily work inside the box.
- Picture- Take a picture of the scene design that you practice setting up inside the box. Then you can refer to it when you take the items out and go to glue them inside in the same arrangement.
- Nature items- Take a nature walk and collect up small items that will fit in your box. Pick up pebbles, twigs, pieces of bark, and such.
Craft Variations
Want to switch things up? Here are a few more book nook shelf inserts ideas.
- Scenes- Your book nook nature scene can be different than mine. Perhaps you want small animals in your scene. You don’t have to use figurines at all, they are optional. Use your imagination- you could make a Lego scene or a room or house scene.
FAQ
A book nook for a bookshelf is a little scene in a box with an open front. It will slip in-between the books on your bookshelf. The scene inside can be of a room, of a forest, or of legos. They are a delight to notice and look inside.
A box similar to a cereal box size works well to make a book nook from scratch. Cut off the front of the box and create a scene inside that you can look into while it is on the book shelf. Be creative and use items you already have to make a nature scene for example. Go outside and find materials or purchase a few figurines.
A book nook diorama can be made easily by purchasing a kit online or in a store. You will have all the supplies necessary. You can make a book nook from scratch easily too. Use a recycled cereal box and the craft supplies you have on hand. Make the scene very simple.
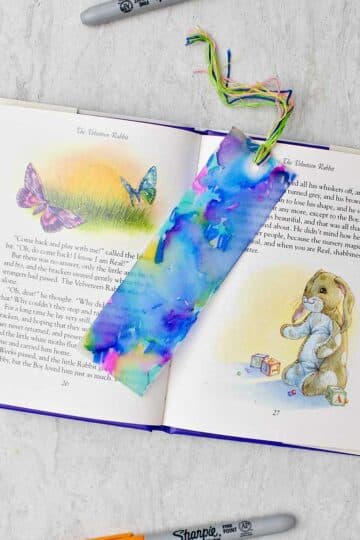
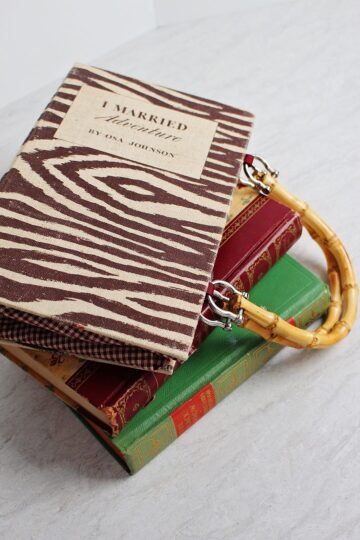
More DIY Crafts for Book Lovers!
Looking for more great DIY crafts for those book-loving kids of yours? Here are a few favorites for you to try:


Come join the fun at WTN!
Try this craft, leave a comment, rate it, and tag a photo with #WelcometoNanas wherever you post.
Want More Crafts?
Get a free craft and a weekly email with the newest crafts from Welcome To Nana's for signing up!
DIY Miniature Forest Book Nook Shelf Insert
Equipment
- craft scissors
Items Required
- 1 a box that fits on your shelf when you set it upright. It needs to be about three or 4 inches wide when it’s sitting up.I purchased one from Hobby lobby in their storage box section (11x8x4"). But a cereal box could work.
- Nature items Things like pebbles, bark, twigs, moss, sand, etc
- artificial greenery and flowers, artificial moss
- A hot glue gun and glue
- set of fairy lights
- miniature figurines (optional) for use in a fairy garden or miniature scenes
- Acrylic craft paints (optional)
- Scrapbook paper (optional)
Instructions
- Cut your box so that one side panel of the box is open and you can see into the bookshelf story scene when it’s standing up and down. Make sure the box fits on your shelf before cutting the box.Paint the inside of the box a unifying color with acrylic craft paints. Perhaps a light brown, or a light blue. You could also line it with a colored scrapbook paper of some sort if you would prefer.
- Take some time to arrange items inside of your box so you know where you want to place them. What do you need to make or create to finish the scene that you don’t already have?Create the extra pieces of your scene and fit them in the arrangement.Make sure you can see from the front to the back of the box. Rearrange items if needed.
- Pull the items out and begin to hot glue them in place. Start with the background items first and then work your way forward.I cut a small wedge of foam so that the floor of the box sloped upwards by about an inch from the front to back. Cover the floor of the box with what you want as the nature scene “ground”. An artificial moss can be used or moss you find outdoors.I made a house for my gnome on the back wall of the box using bark and pebbles. And used a small door made from cardboard in the center.A “forest” came together from cut twigs cut to look like trees on either side of the box. I took the branches off one side of the twigs so they would fit closer to the side of the box. When done, they were hot glued in place. Add moss and artificial greenery to look like the foliage of the trees.Place additional greenery and flowers along the bottom edges of the box to be filler.
- Thread a string of twinkle fairy lights into the branches of the tree. Make sure that the device that turns it on and off is easily accessible. I poked a hole in the side of my box. Then threaded the twinkly lights through that hole. I can turn the lights on and off with the device when I want to without reaching inside of the box.
- Add the miniature figurines into the scene and glue them in place so sit securely on their own. I found a small bridge and a gnome and a small beehive for my figurines.Use some twigs or trim around the front edge of the box to finish it. This step is optional.Place the book nook on your bookshelf, turn on the twinkling lights and enjoy!


Leave a Reply