Welcome To Nana's

  • All Crafts
  • Arts & Crafts
    • Drawing
    • Painting
    • Sewing
    • Paper craft
    • Nature
    • Recycled
    • Coloring Book
    • 3-D Project
  • Activities
    • Indoor
    • Outdoor
    • Science
    • Trip Activities
    • Recipes
  • Holiday
    • Christmas
    • Thanksgiving
    • Halloween
    • Easter
    • Fourth of July
    • Father's Day
    • Flag Day
    • May Day
    • Midsummers Day
    • Mother's Day
    • New Years
  • About
menu icon
go to homepage
  • All Crafts
  • Arts & Crafts
    • Drawing
    • Painting
    • Sewing
    • Paper craft
    • Nature
    • Recycled
    • Coloring Book
    • 3-D Project
  • Activities
    • Indoor
    • Outdoor
    • Science
    • Trip Activities
    • Recipes
  • Holiday
    • Christmas
    • Thanksgiving
    • Halloween
    • Easter
    • Fourth of July
    • Father's Day
    • Flag Day
    • May Day
    • Midsummers Day
    • Mother's Day
    • New Years
  • About
search icon
Homepage link
  • All Crafts
  • Arts & Crafts
    • Drawing
    • Painting
    • Sewing
    • Paper craft
    • Nature
    • Recycled
    • Coloring Book
    • 3-D Project
  • Activities
    • Indoor
    • Outdoor
    • Science
    • Trip Activities
    • Recipes
  • Holiday
    • Christmas
    • Thanksgiving
    • Halloween
    • Easter
    • Fourth of July
    • Father's Day
    • Flag Day
    • May Day
    • Midsummers Day
    • Mother's Day
    • New Years
  • About
×
Home » Arts & Crafts

DIY Easy Pom Pom Bookmark from Yarn

Published: Mar 10, 2021 by Shelly · This post may contain affiliate links · Leave a Comment

A yellow, blue and orange pom pom bookmark inside a stack of books.

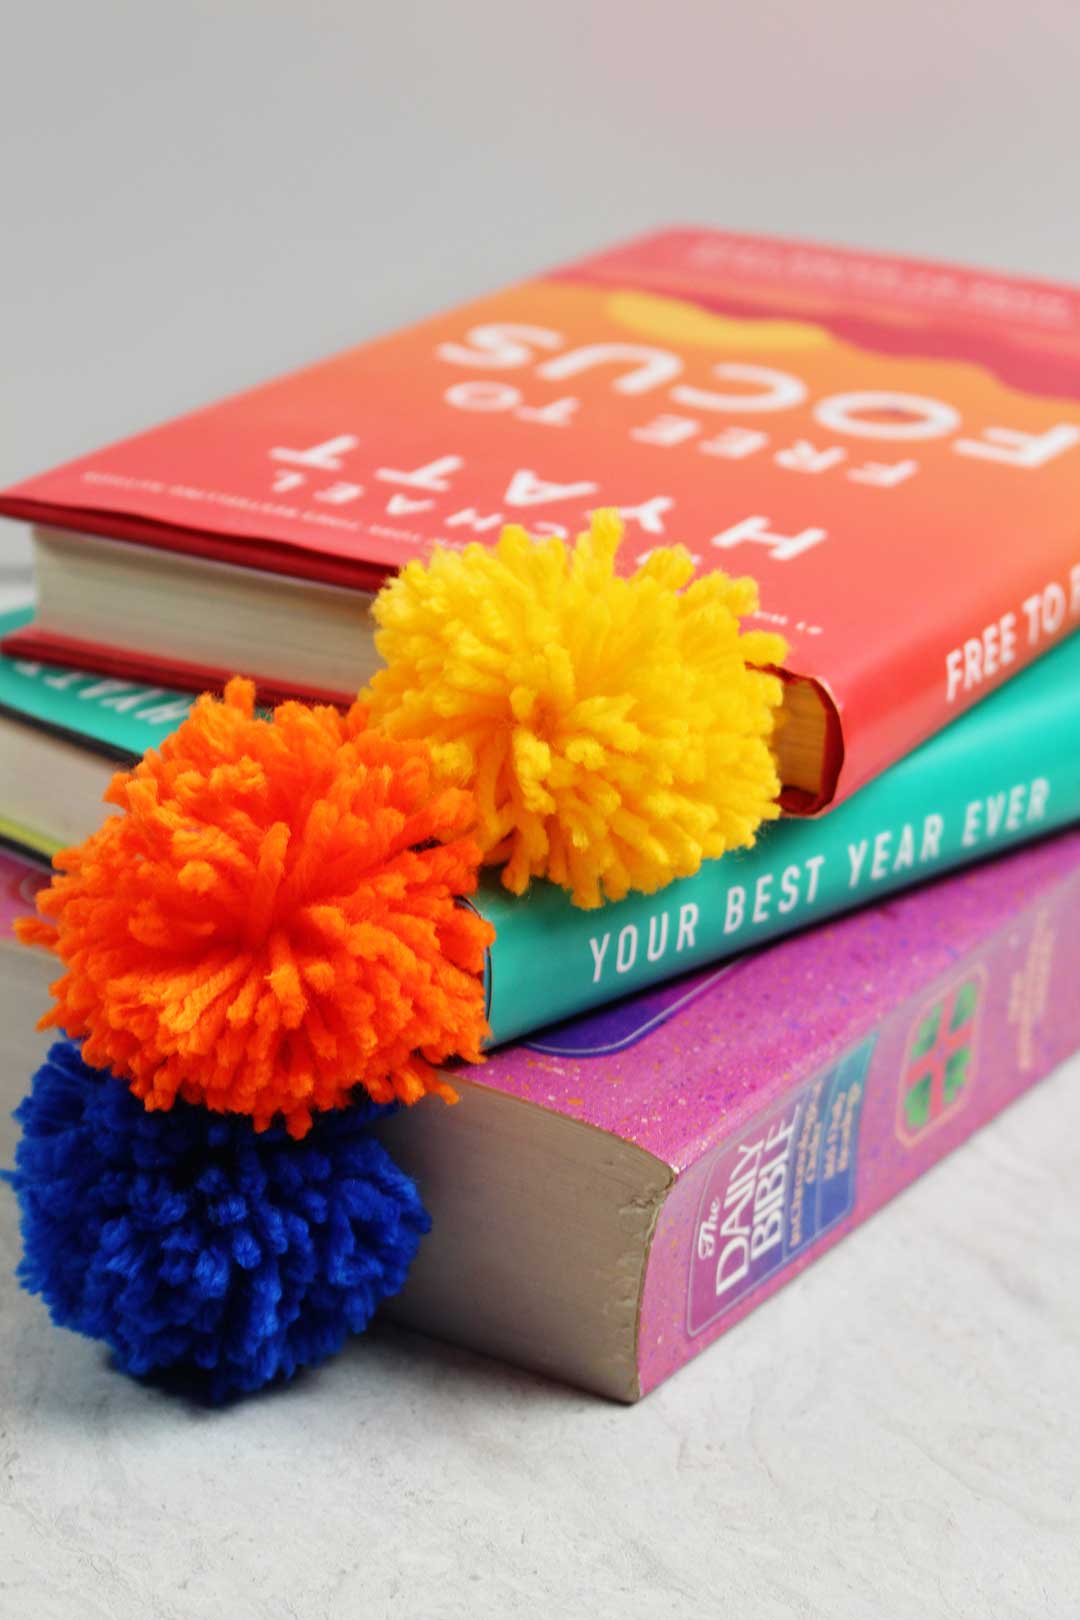
A DIY Easy Pom Pom Bookmark from yarn just makes me happy.

This DIY Easy Pom Pom Bookmark from yarn just makes me happy. They are so colorful, and who doesn’t need to know how to make a pom pom?? Your kiddos certainly do. 

I was just going to create a “how to make a pom pom” post, but why not learn AND have an immediate use for the pom pom you learned to make? I’ll do other posts on crafts made with pom poms and you will be able to say, hey, I already know how to make one, I’ve got this!

So I said this was easy. Follow along and welcome to Pom Pom paradise. (OK, so I’m getting punchy now, let’s get to it.)

Blue, orange, and yellow yarn near a pair of scissors, jar, and piece of cardboard.

Cut circle template pieces

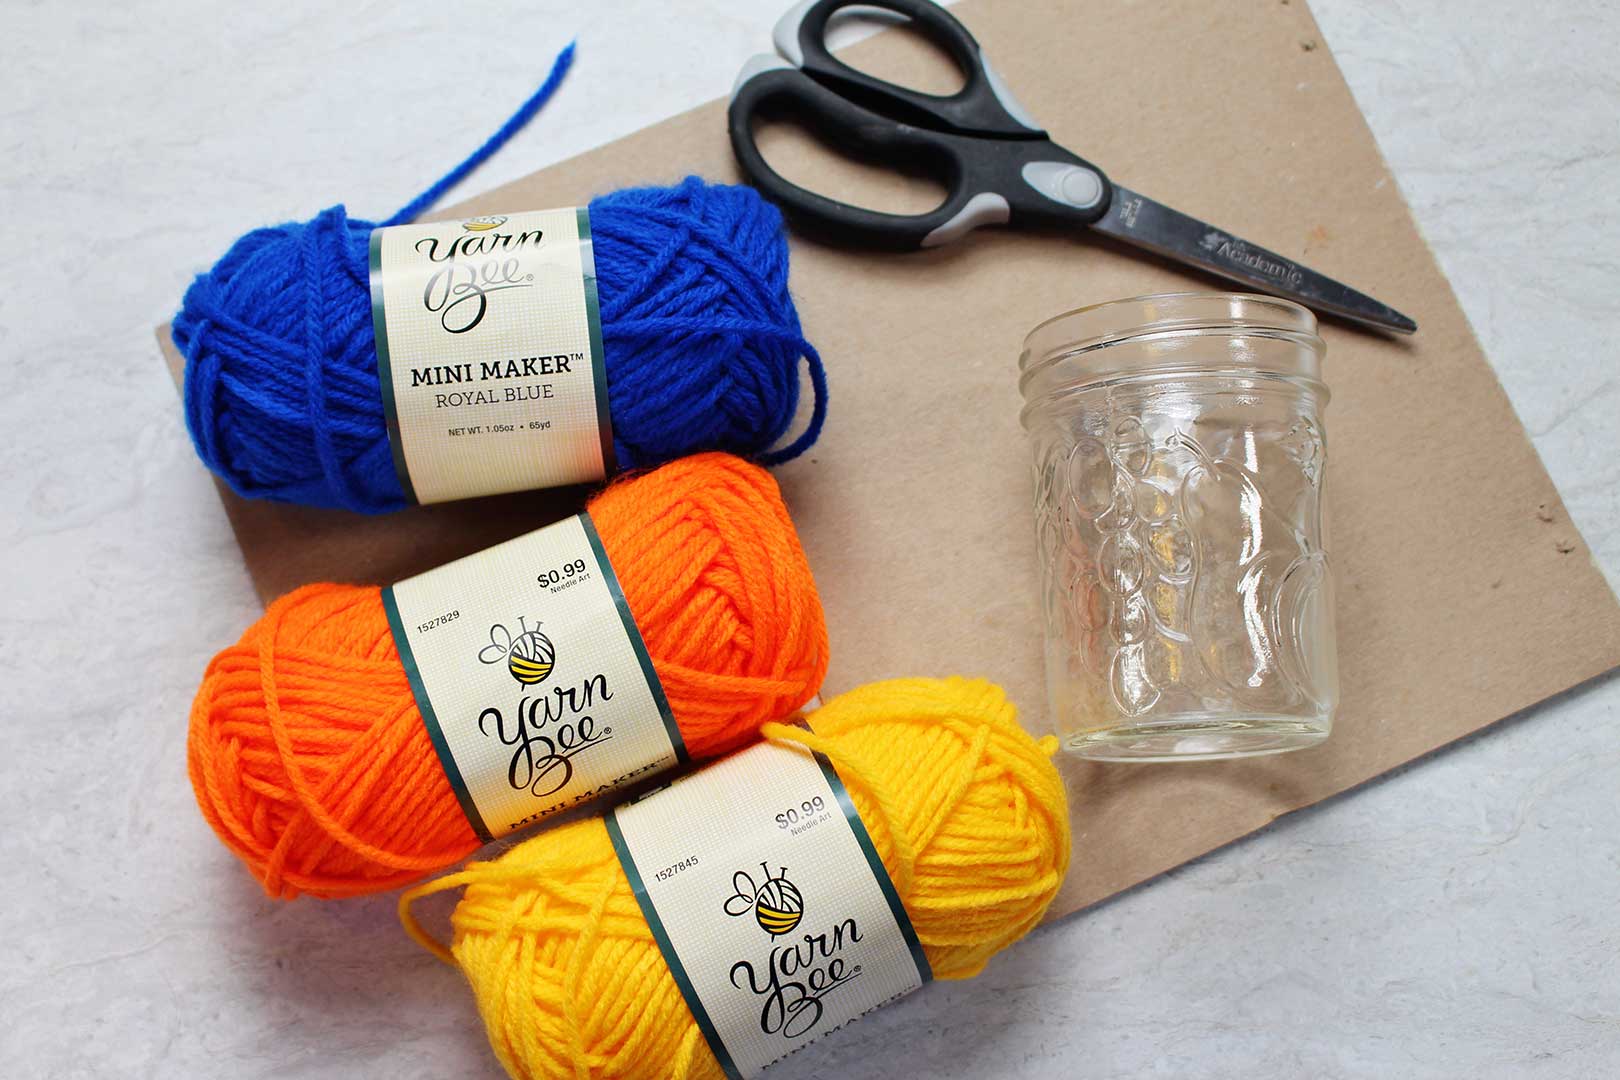
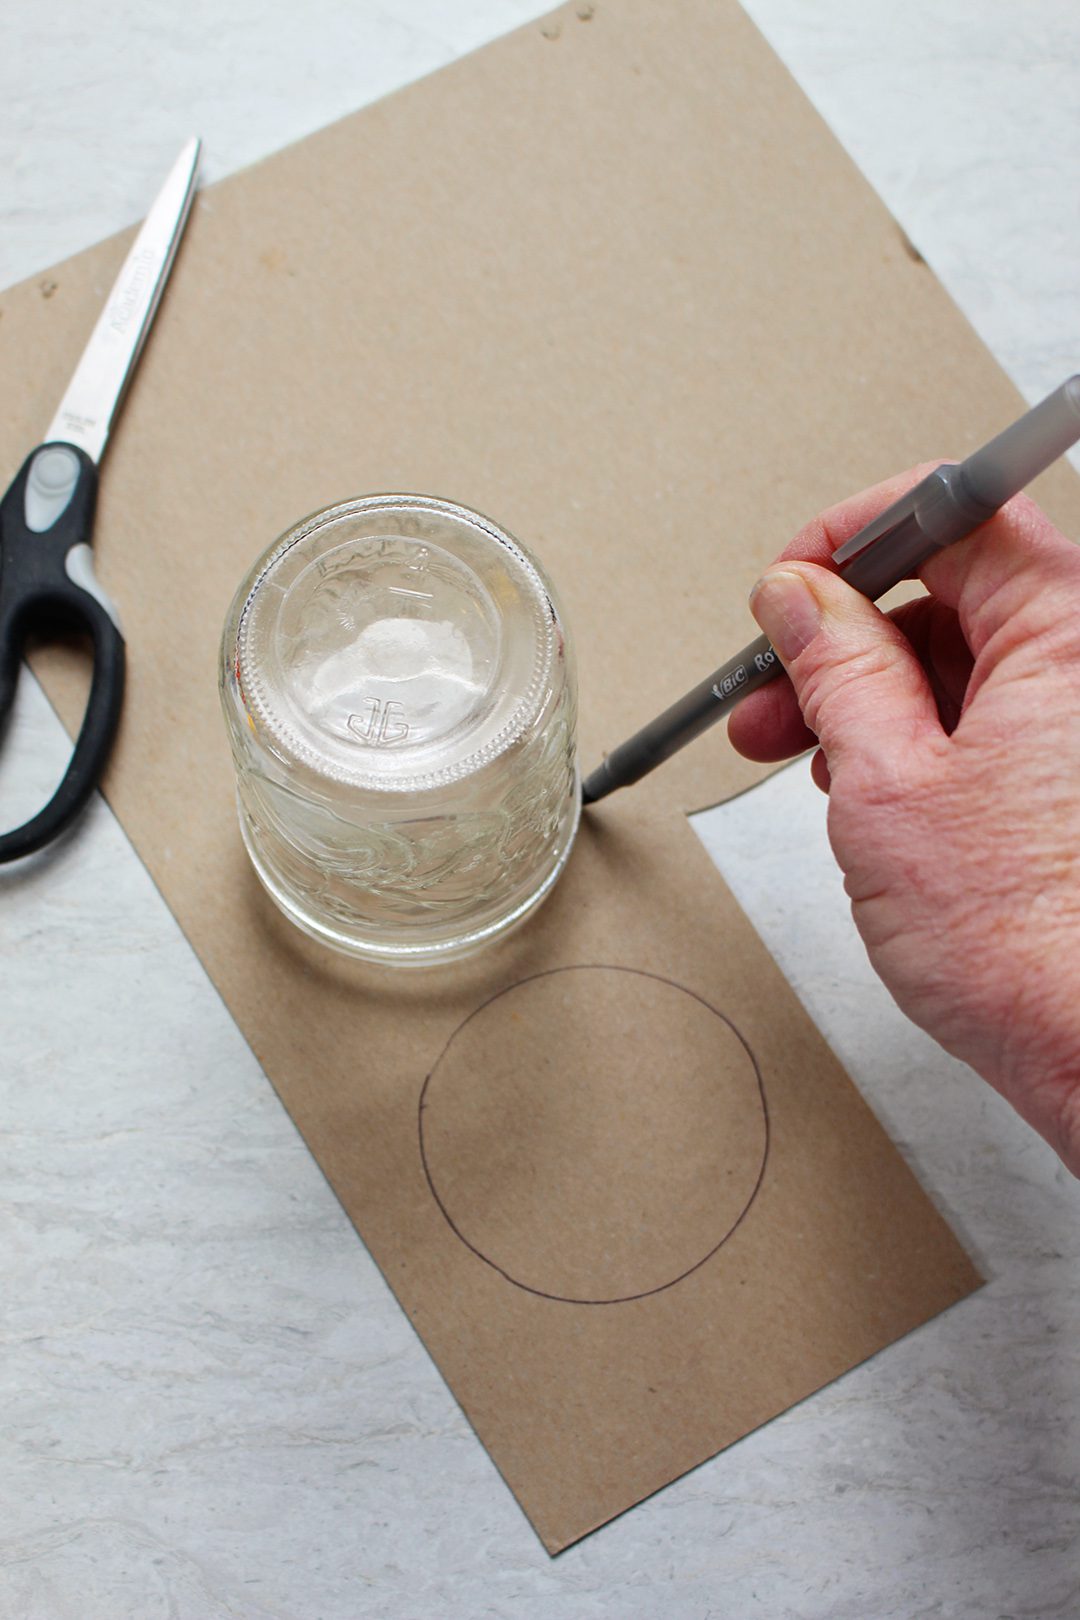
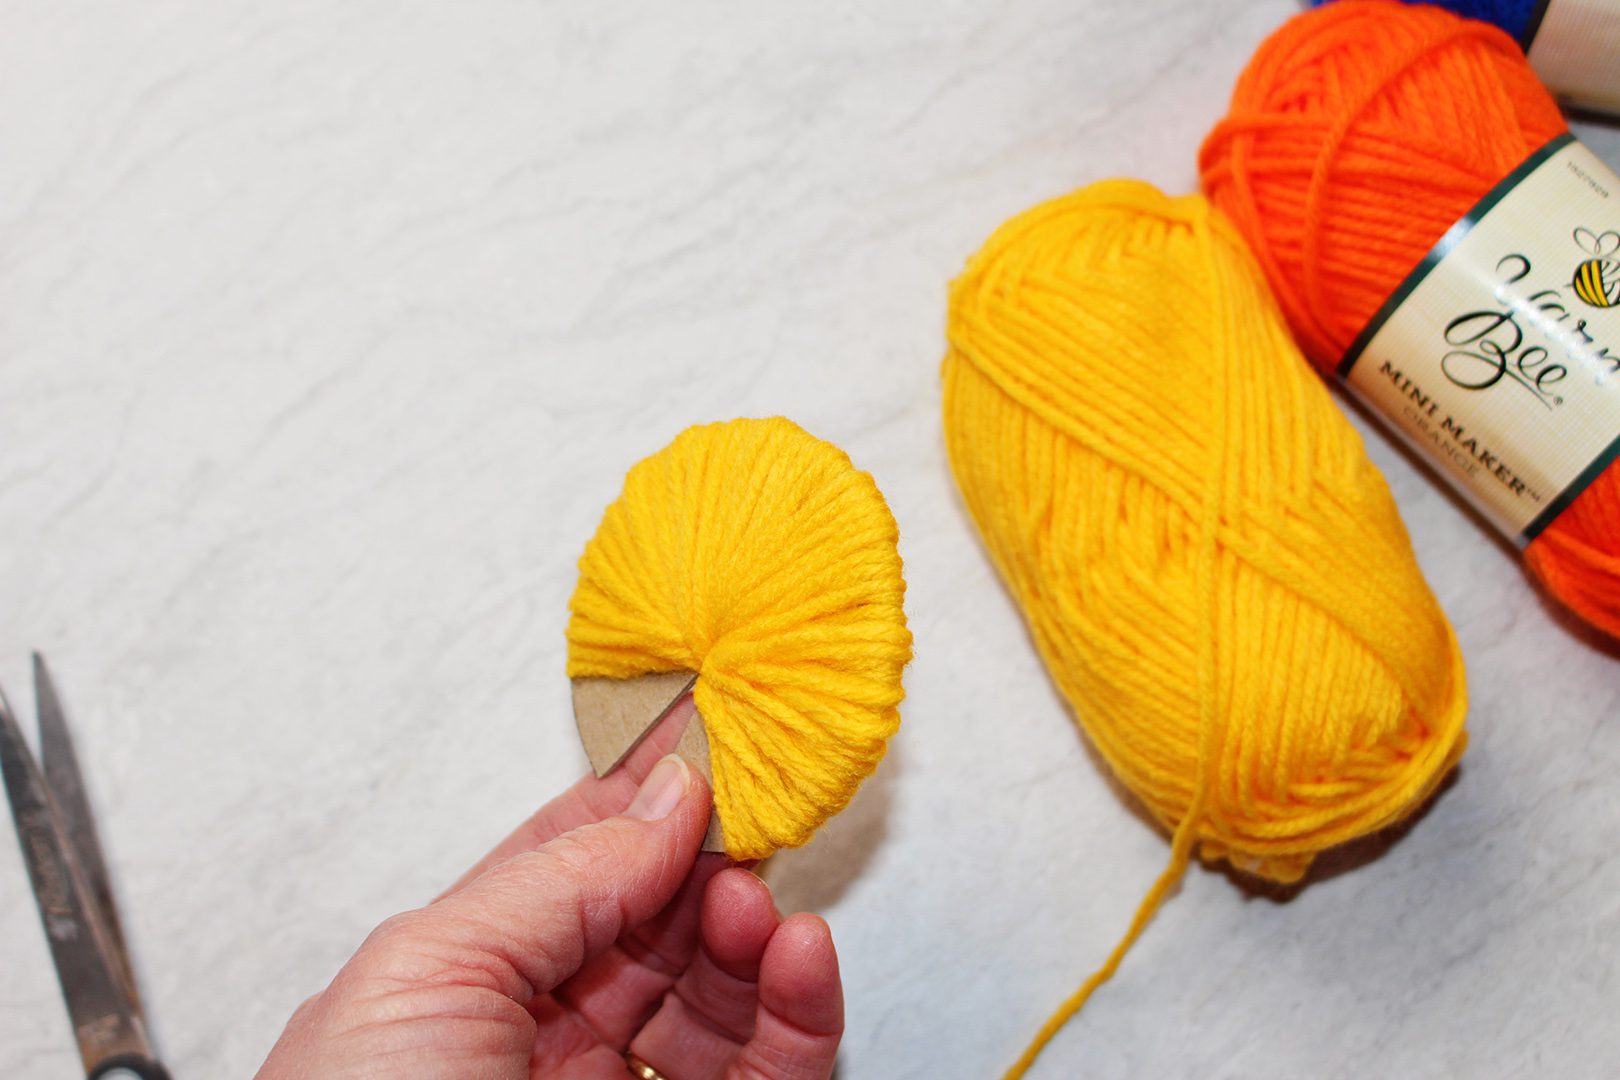
I used a wide mouth canning jar to provide a pattern for a circle. This was about 3.5 inches in diameter. You can make yours any size you want but the larger the pom pom the more yarn it takes to make or it will look skimpy and limp. 

Draw two circles on cardboard and cut them out.

Locate the center of the circles, draw a small circle around that point.

Cut straight into that center, around the small circle and back out to the edge as shown. The center circle was about ¾ inch in diameter.

Using a jar to draw a circle on cardboard with a pen, a pair of scissors nearby.

New yarn addiction

These cute little skeins of yarn came from Hobby Lobby. They were 99 cents each and there was a choice of many solid colors. This size is so perfect for small projects such as this. I'm smitten. I only bought a few but could easily have bought one of each. They looked like candy. I'm such a craft nerd. I digress...

Yellow yarn wrapped around a circular cardboard shape, scissors and orange yarn in the background.

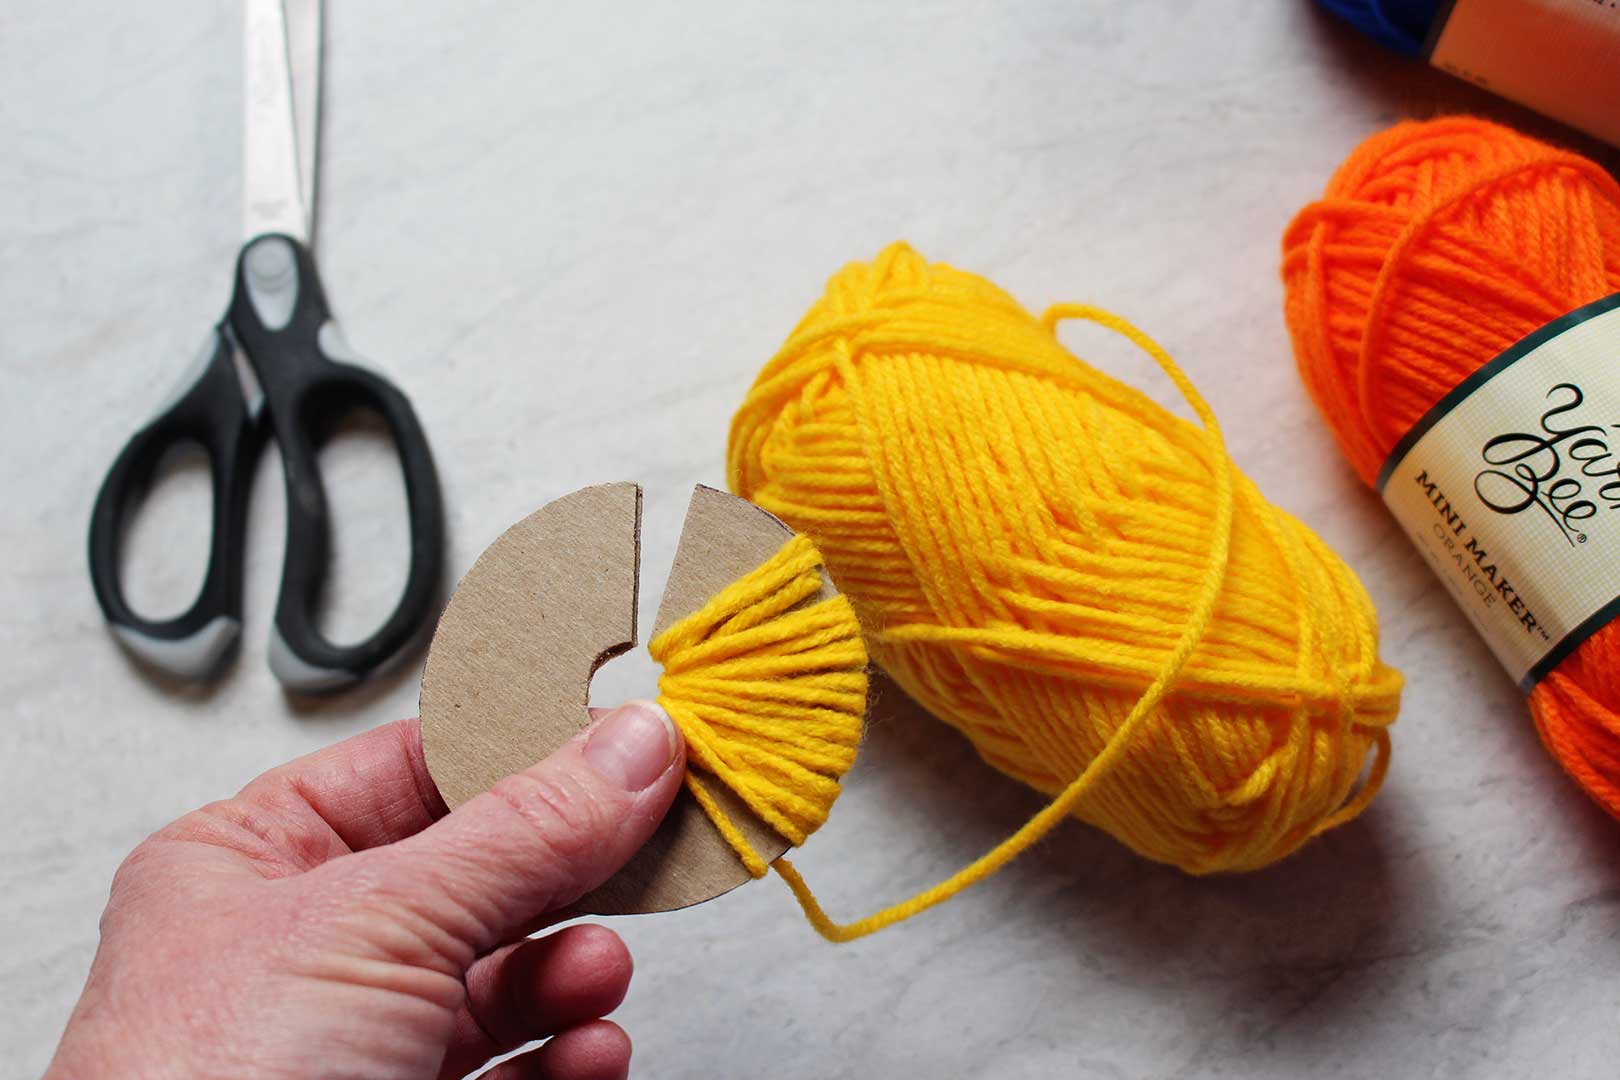
Wind and wind the yarn

Hold the end of the yarn and begin winding it around the cardboard, through the slit and into the center of the cardboard template. Wind gently, don’t pull the yarn tight. 

I wound mine about 100 times around. The more you wrap the fuller the pom pom will be. You can experiment with this as you make more later.

There are several ways you can wind yarn for making a pom pom, this is just one way. You can even wind yarn around your four fingers and tie it together between your second and third finger if you want to short cut the process. But I like the consistent pom pom size when using a template.

Yellow yarn wrapped around a circular cardboard shape.

Cut and...

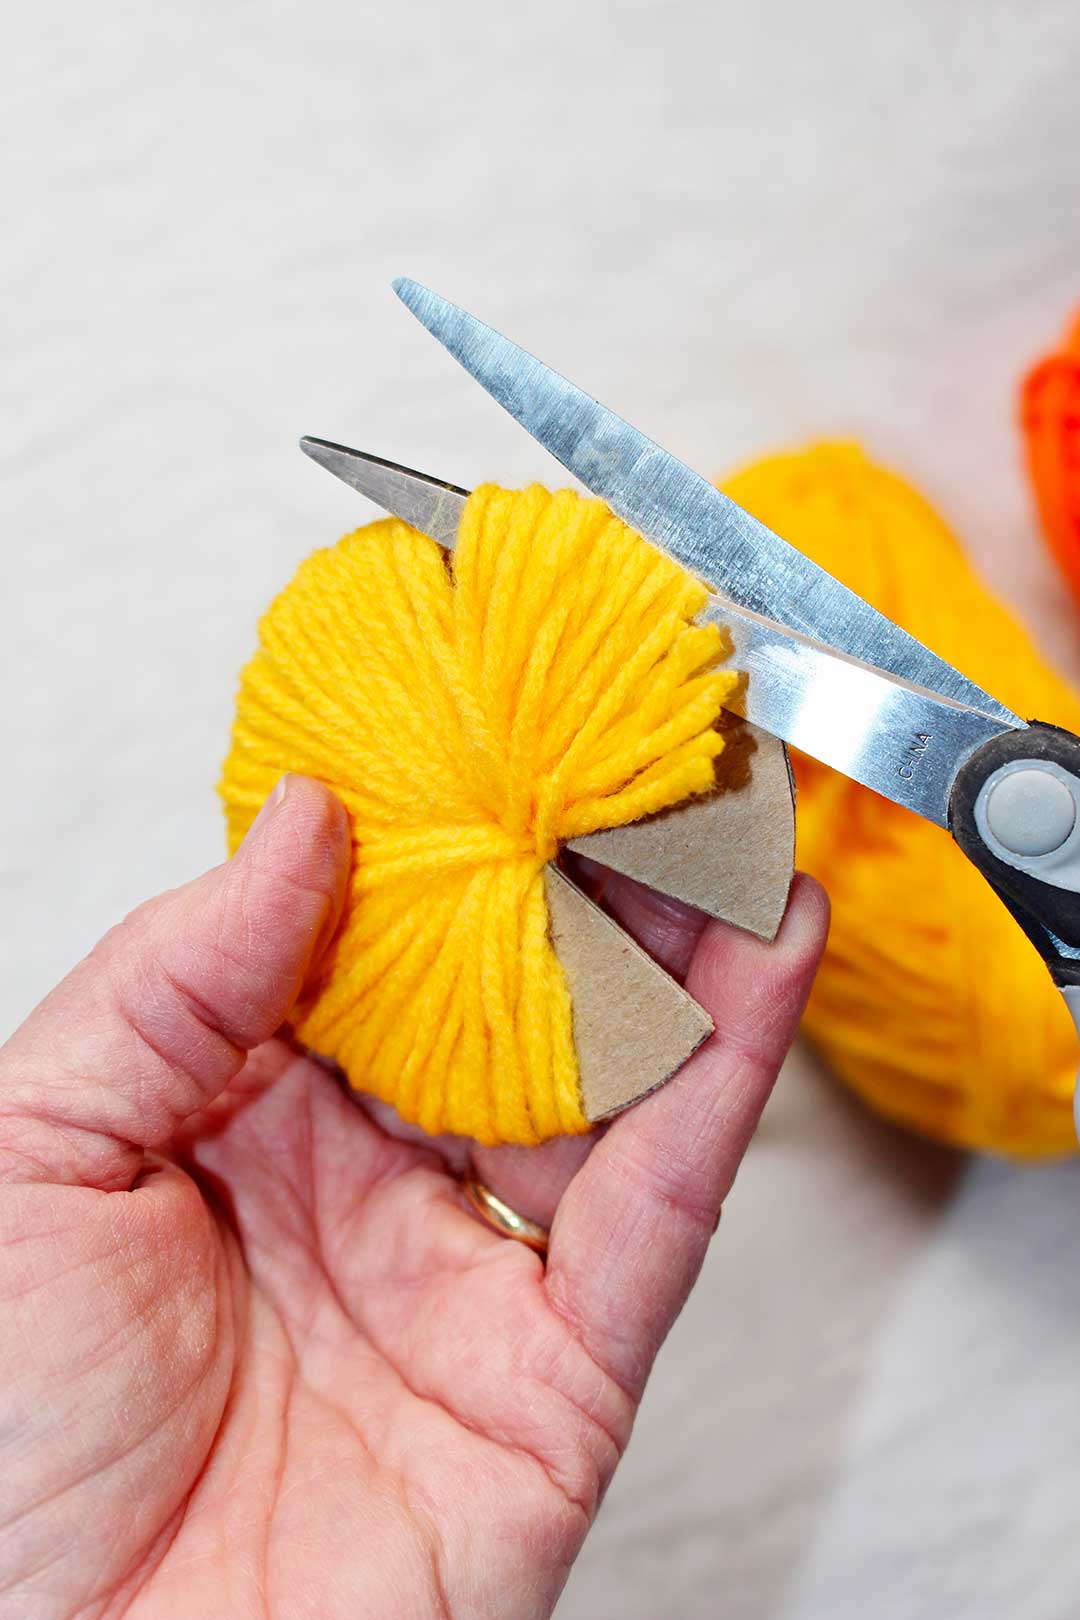
Cut the yarn when done wrapping the template. 

Cut a piece of yarn about 2 feet long. This will be used to tie the center of the pom pom in just a minute.

Slip the blade of your scissors between the pieces of cardboard and cut all of the loops of yarn around your cardboard template.

Scissors cutting the yellow yarn wrapped around a cardboard circular shape.

...tie the Pom Pom securely

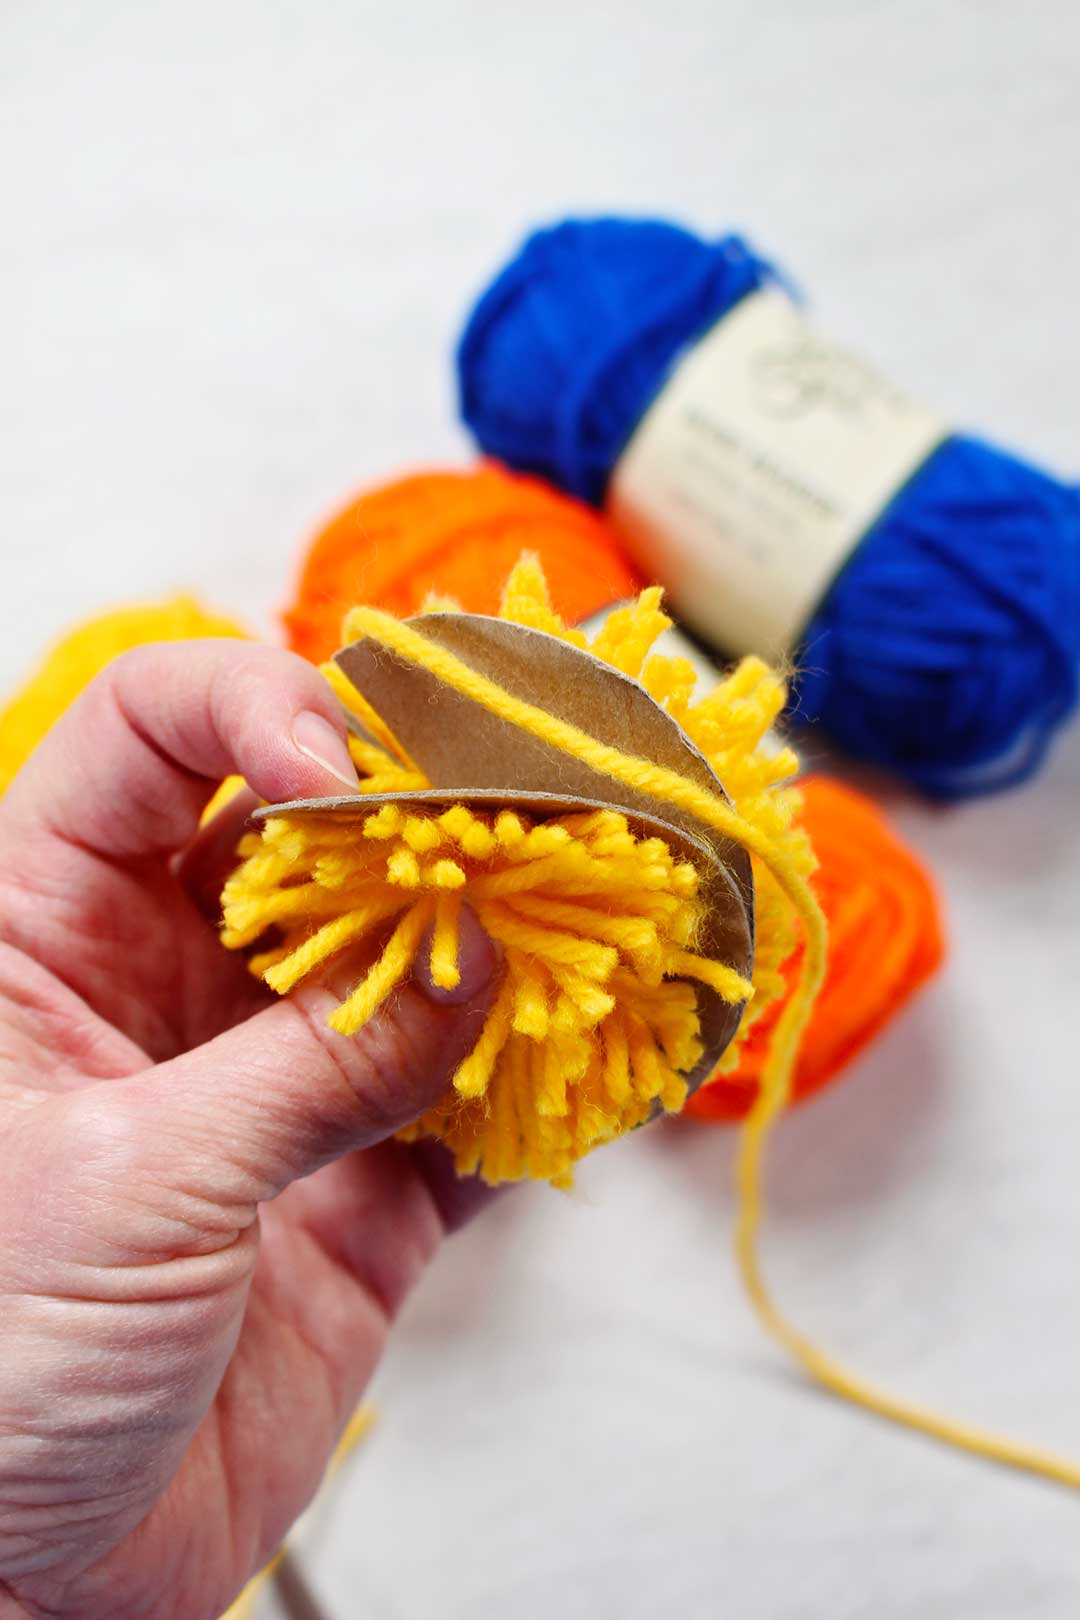
Slip the 2 foot piece of yarn between the cardboard template pieces and wrap it around the center of the yarn pieces (I wrapped mine around twice). Pull this up tightly, tying a knot to hold the center of the pom pom together well. 

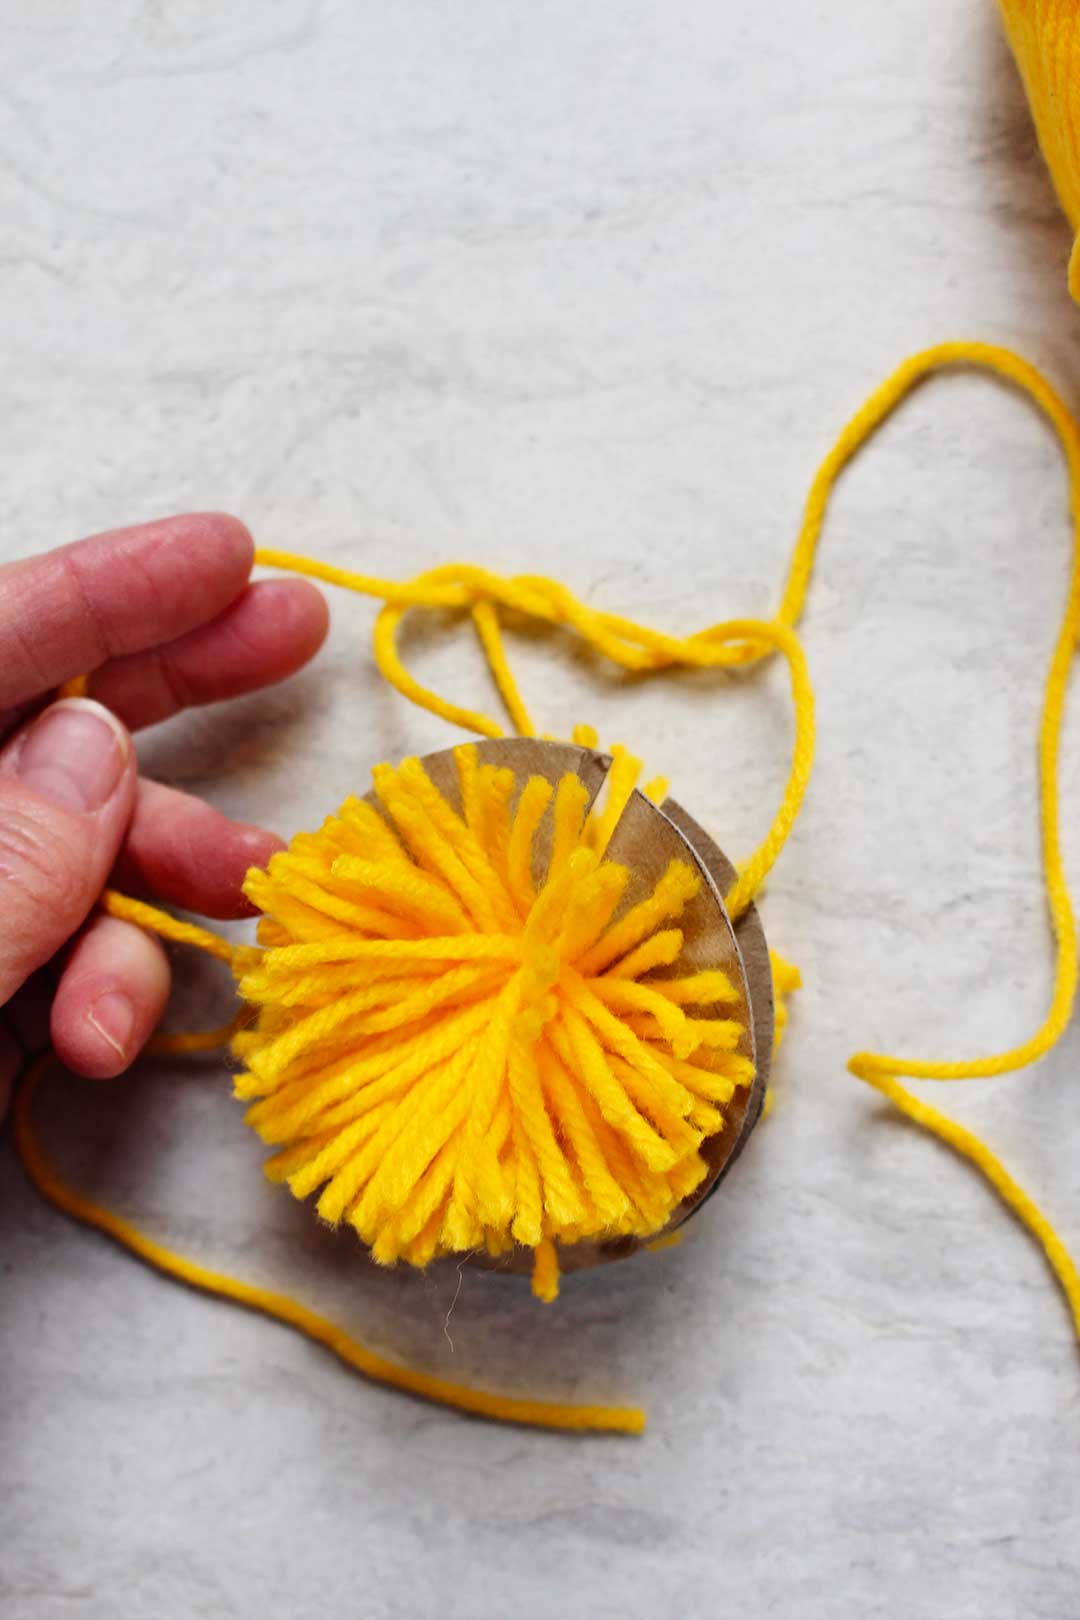
The cardboard template pieces will slip out of the center of the yarn quite easily.

Yellow yarn cut around a cardboard circle to create a pom pom, blue and orange yarn in the background.

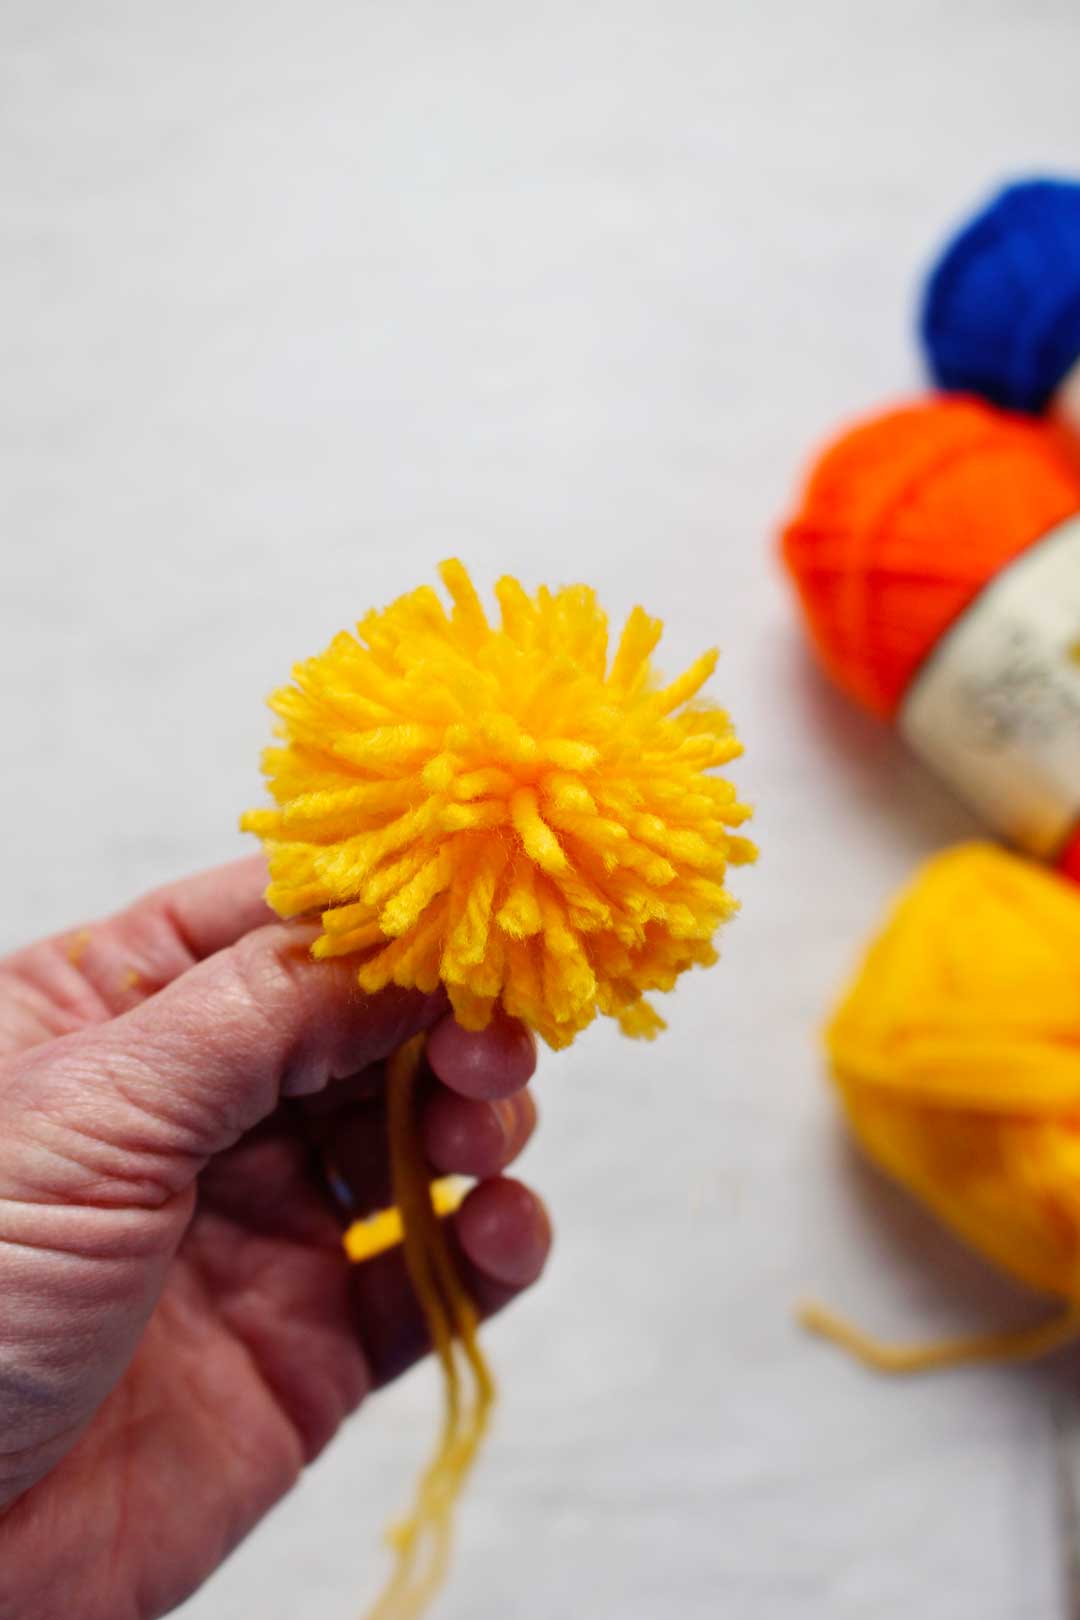
This pom pom is bright yellow yarn kind of looks like a dandelion, doesn’t it?

Pom Pom haircut and trim up

I gave my pom pom a haircut and trimmed it up about a fourth of an inch or so. I thought it tightened up the round shape and made it look more full and round.

Yellow yarn cut into a pom pom shape.

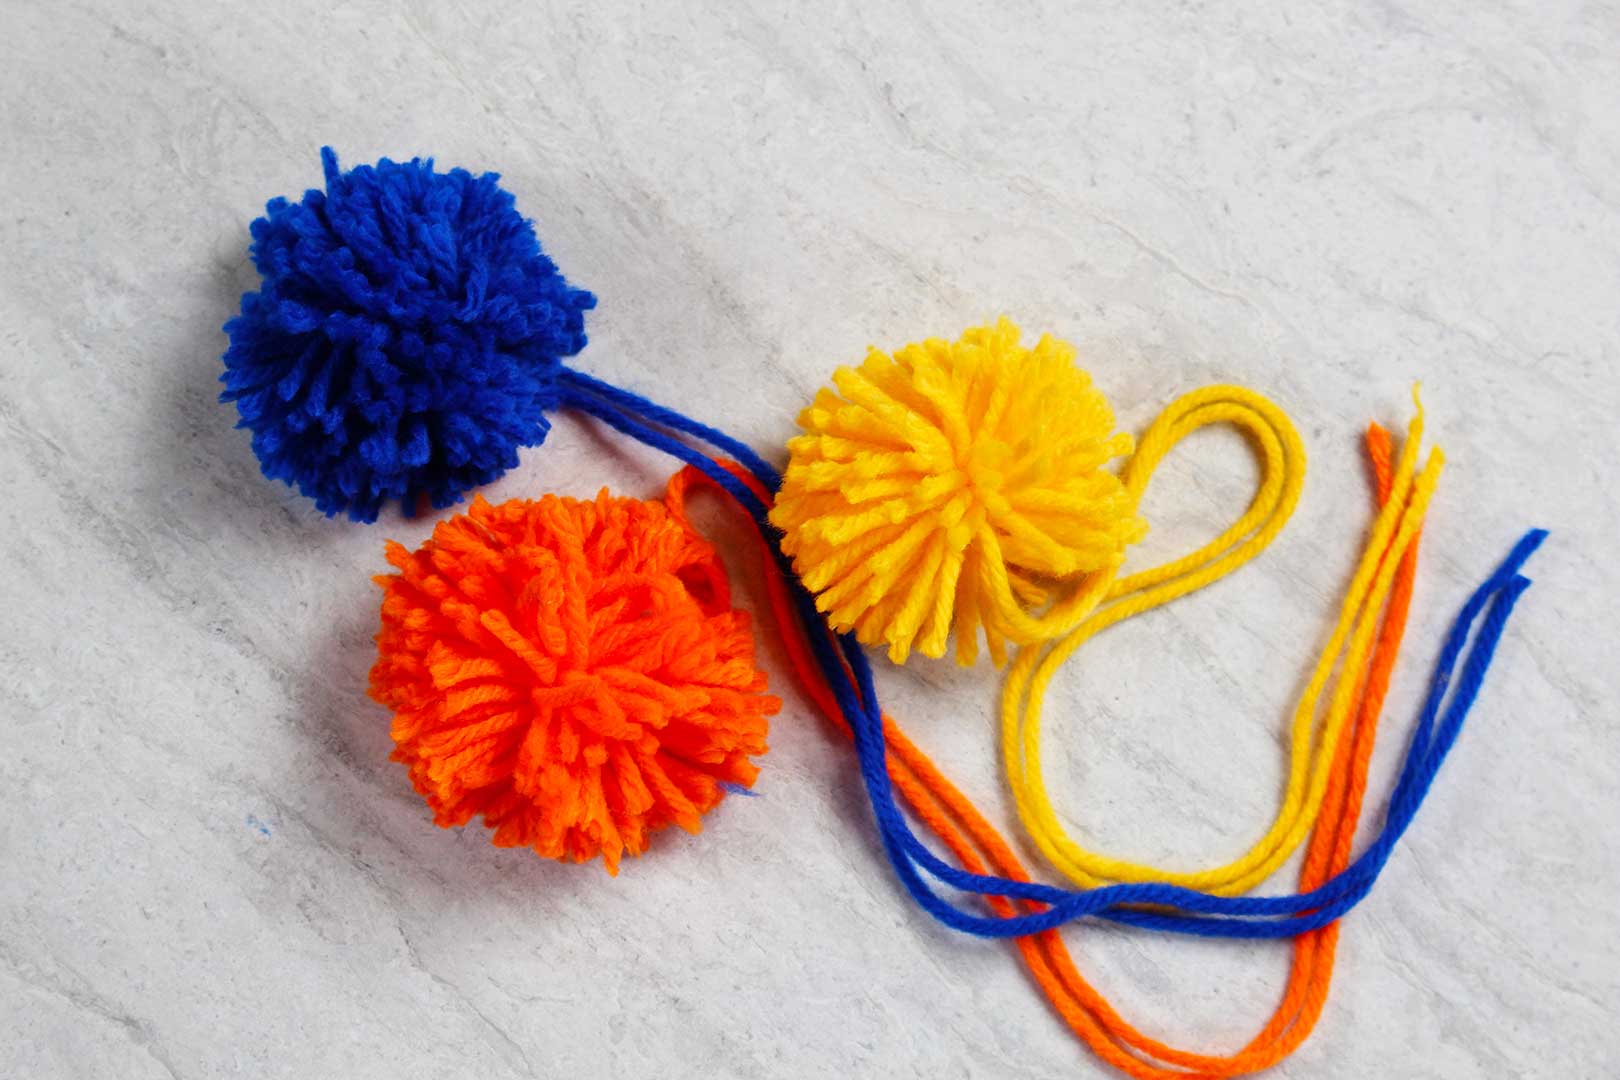
Boom. You are done!!

What do the grands think of their pom poms?

The long yarns can be trimmed to an appropriate length to fit between the pages of a book. You can also use the long yarns to tie the pom pom onto another project or the cut them to the same length as the other yarns for a full ball effect.

A yellow pom pom made from yarn.

A DIY Easy Pom Pom Bookmark from Yarn

The DIY Easy Pom Pom Bookmark from yarn looks so cute poking out from the top of your book. They just invite you to pick up the book and keep reading. And isn't that what we want to invite the grands to do? I will warn you, making these is kind of addicting.

There are so, so many uses for these little balls of fun. What are your ideas? We will explore some of those ideas in other posts. Hang onto your hat, Nana!

Blue, yellow and orange DIY pom pom bookmarks.

Enjoy!

Welcome to Nana’s! Where there’s fun things to do with your “grand” kids!

Come join the fun at www.WelcomeToNanas.com

More Arts & Crafts

  • A police car, tractor and yellow Beetle toy cars sitting on a Father's Day T-Shirt painted with a dirt road leading to various buildings.
    DIY Father’s Day T-shirt Map and Massage!
  • Person showing a Father's Day card with red flowers and a windmill against a sunset with type saying "Happy Father's Day"
    A Kind Word Magazine Collage Card for Father’s Day
  • A person holding a tp seed starter with a little sprout growing out of it with other tp tubes and sprouts in the back ground.
    How to Start Seeds Indoors in TP Tubes!
  • Three colorfully colored straw rockets.
    3 Cool Ways to Make Straw Rockets (Free Straw Rocket Template)

Leave a Reply Cancel reply

Your email address will not be published. Required fields are marked *

Recipe Rating


This site uses Akismet to reduce spam. Learn how your comment data is processed.

Hello there! I'm Shelly (Nana), an artist, previously homeschooling mother of 3, and now proud grandma (Nana) of 6. I love sharing artistically inspiring, hands-on crafts for kids of all ages. Let's go have some fun!

More about me →

Popular Crafts

  • Hand squeezing the a completed batch of light blue fluffy slime.
    How to Make the Best Fluffy Slime Recipe for Kids

  • Completed colorful tissue paper flowers, a purple and pink one resting on a glass cake stand with others underneath.
    How to Make Easy DIY Giant Tissue Paper Flowers (2 Ways!)

  • Overhead views of two different sprouts growing in glass containers.
    How to Grow a Tree from a Pine Cone

  • A sunset picture created with sharpies and alcohol on canvas, surrounded by bright sharpie markers..
    Cool Sharpie and Alcohol Painting on Canvas

Footer

↑ back to top

Privacy Policy

As an Amazon Associate I earn from qualifying purchases.

Copyright © 2025 Brunch Pro on the Feast Plugin