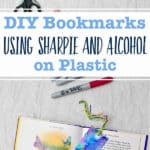
Kids will love making these cute and easy DIY Bookmarks using the colorful sharpie and alcohol technique! Great for back-to-school crafts and fun gifts for friends or students!
Jump to:
- Cute Craft Alert! A "stained glass" bookmark for back to school
- Supplies to make an easy bookmark DIY project
- Watch the video too!
- How to make DIY Bookmarks with Sharpie & Alcohol In Easy Steps
- Tips to make the DIY Bookmarks even easier!
- How does the alcohol and sharpie technique work?
- A few variations on the DIY Bookmarks craft
- Frequently Asked Questions- FAQ!
- More Easy Sharpie Crafts for Kids
- Enjoy!
- DIY Bookmarks Using Sharpie and Alcohol on Plastic
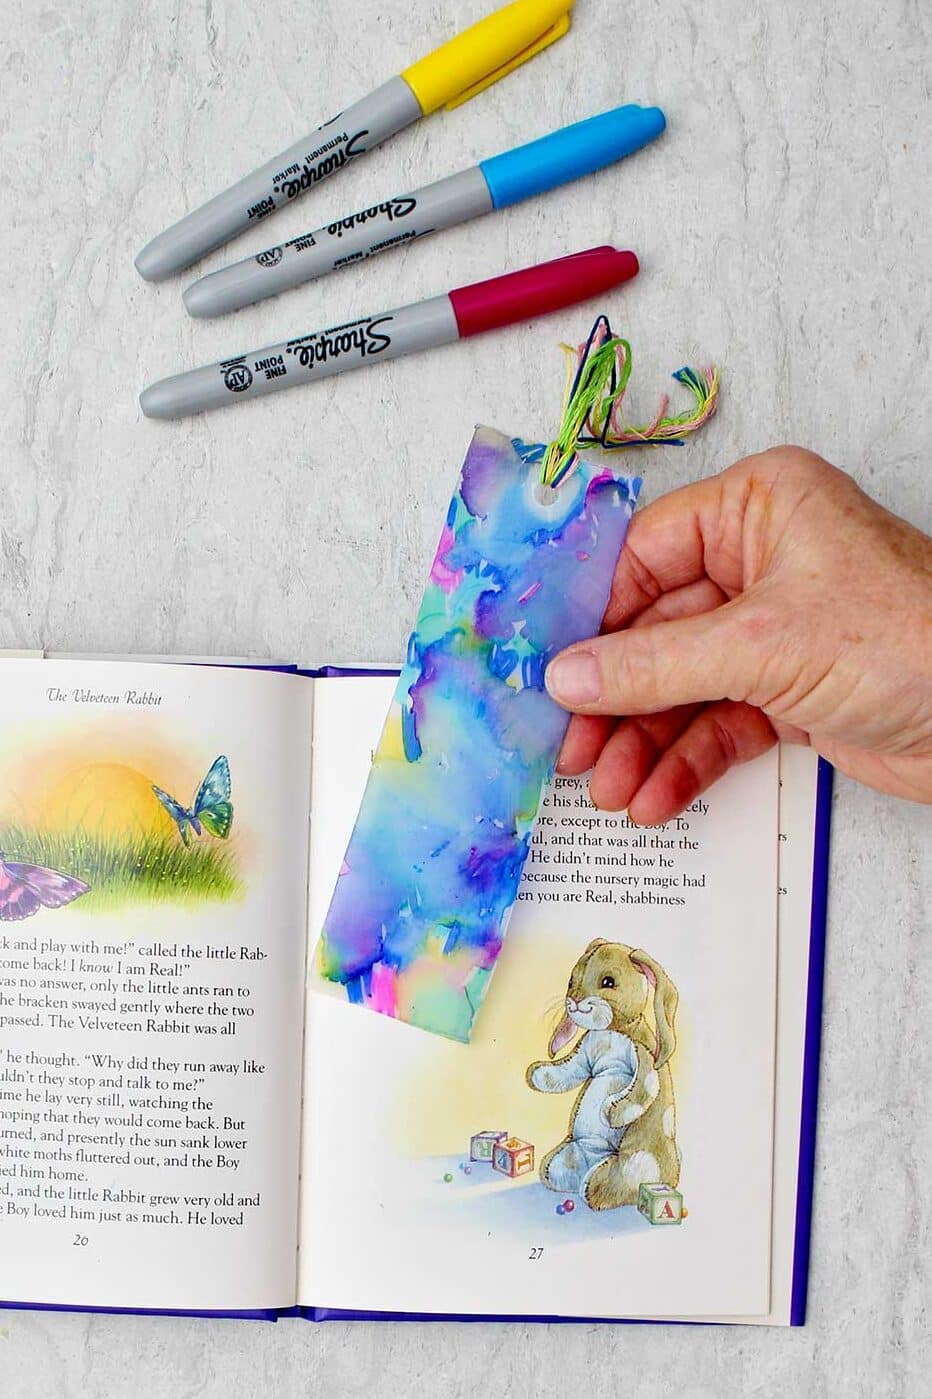
Cute Craft Alert! A "stained glass" bookmark for back to school
The Cute Sharpie and Alcohol on Canvas post has been so popular that I thought I’d try the technique again. With school starting, a handmade bookmark seemed like the thing to make and a fun way for kids to start school.
On my craft desk was a milk jug to recycle and use in a craft. Merge all those thoughts and you get a plastic bookmark made with the same sharpie and alcohol technique!
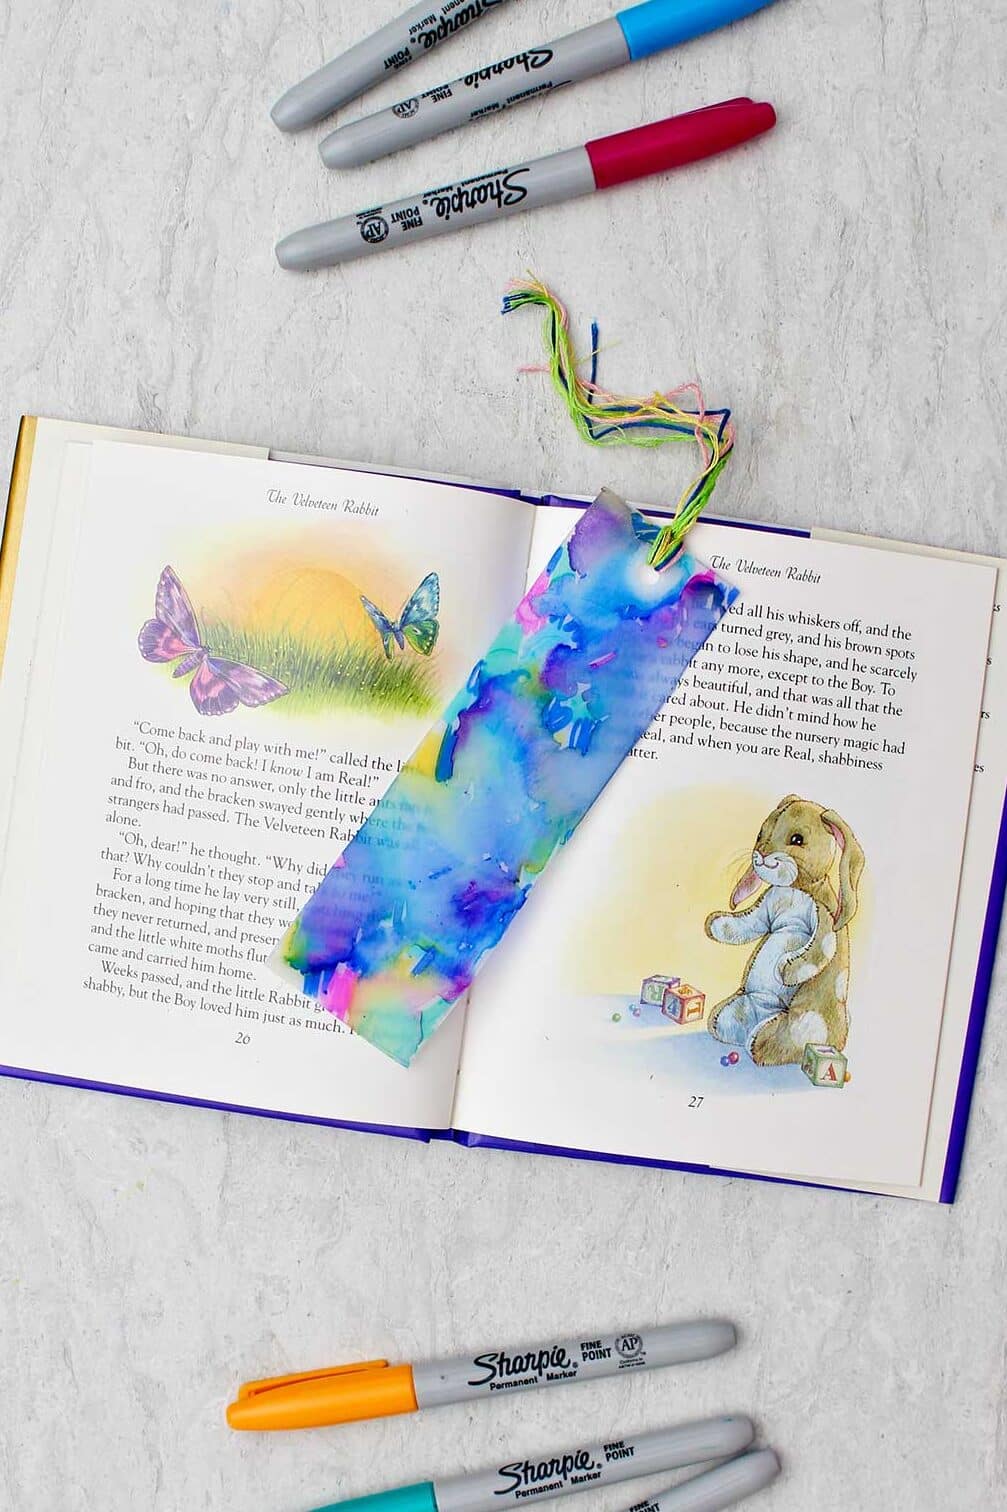
Kids will love watching how the ink from the permanent markers lift and swirl as the drops of alcohol hit it. It’s like magic! But the magic continues as the alcohol dries and the design looks like stained glass on the opaque milk jug plastic.
You’ve got to try this easy project and make your own colorful bookmark!
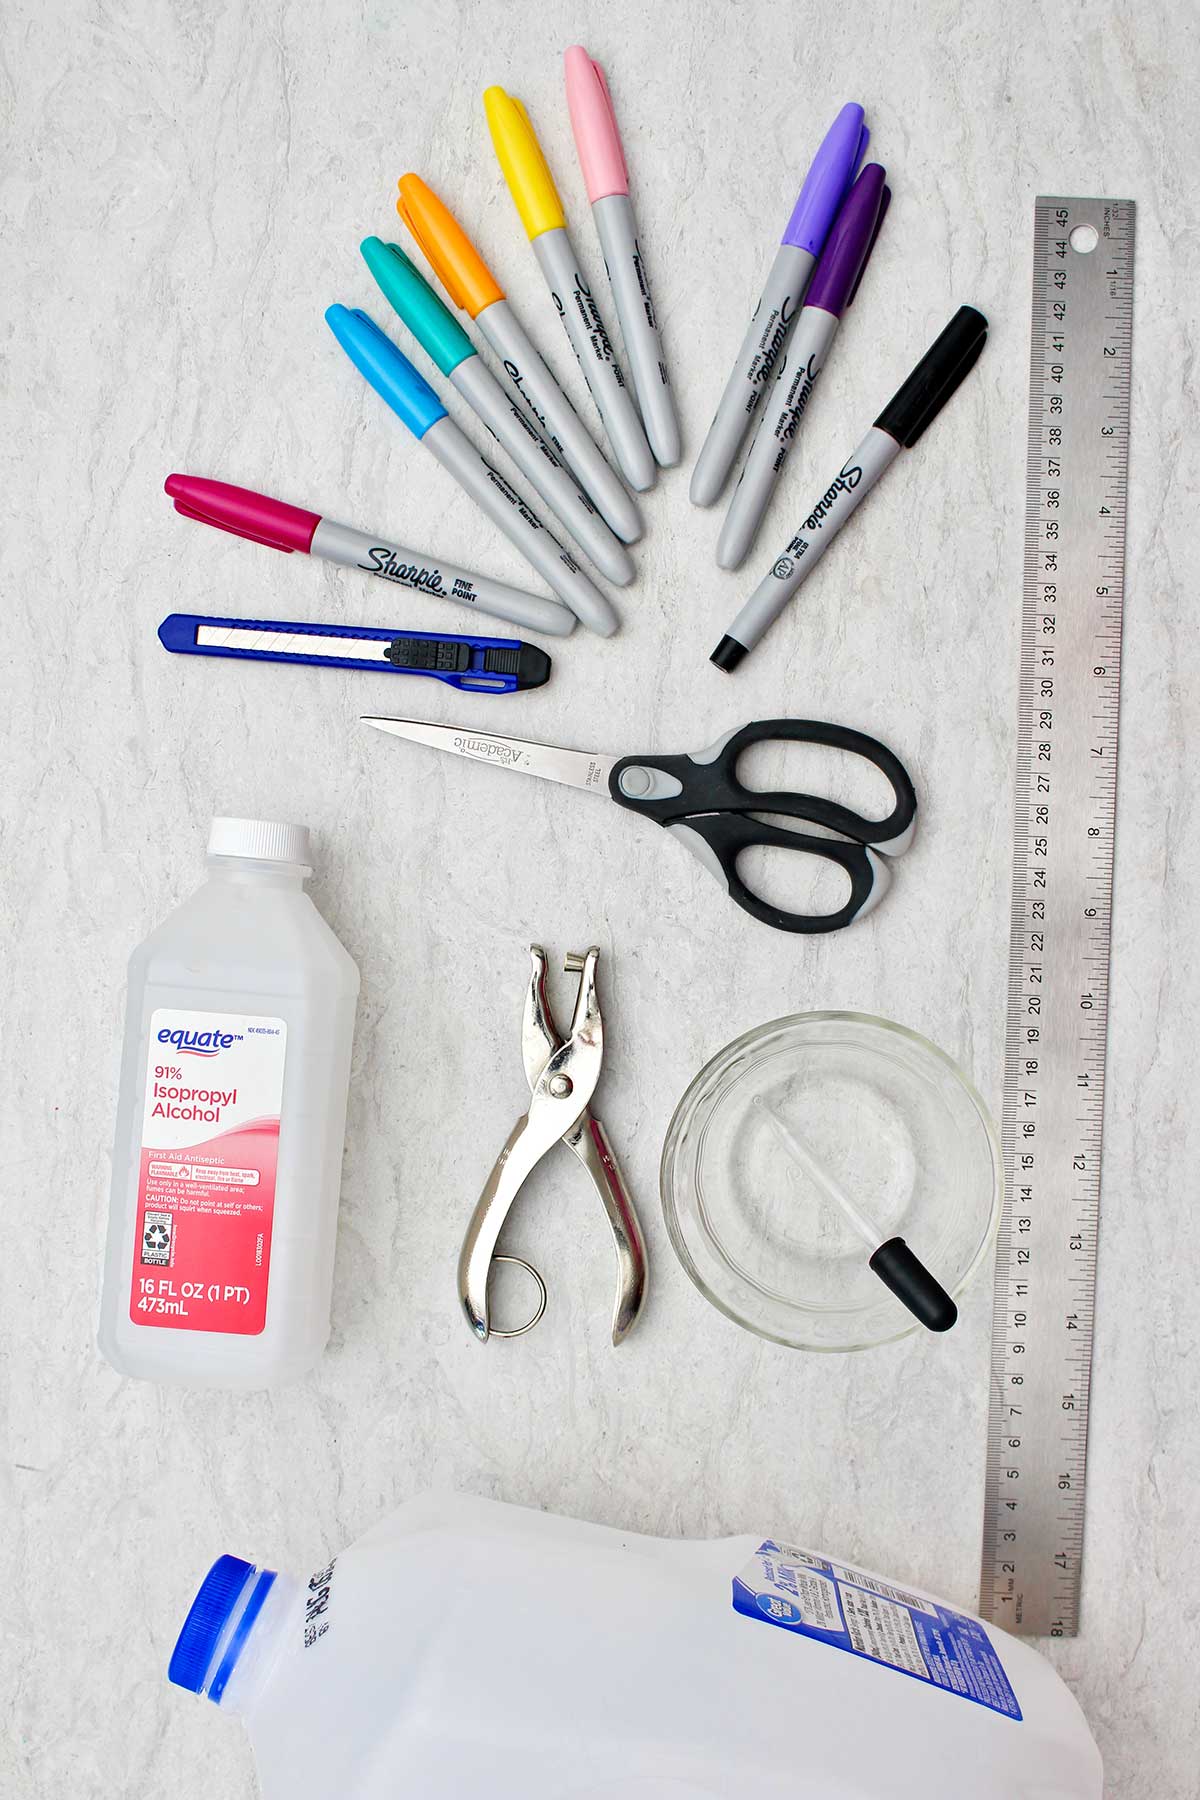
Supplies to make an easy bookmark DIY project
Here are a few quick notes about the supplies you will need to make this craft:
- A milk jug: It’s great to recycle, so let’s use the plastic from a milk jug as our canvas.
- Exacto knife: This handy hobby knife cuts the plastic easily.
- 91% Isopropyl Alcohol: You cannot use a lesser percentage alcohol than this or the craft won’t work, check the label on your alcohol bottle.
- Permanent markers: Must be permanent markers and not water-based markers to work.
- Eyedropper: To drop the alcohol on the bookmark.
- Clear acrylic spray finish: A fine mist spray that will keep the color from rubbing off the plastic.
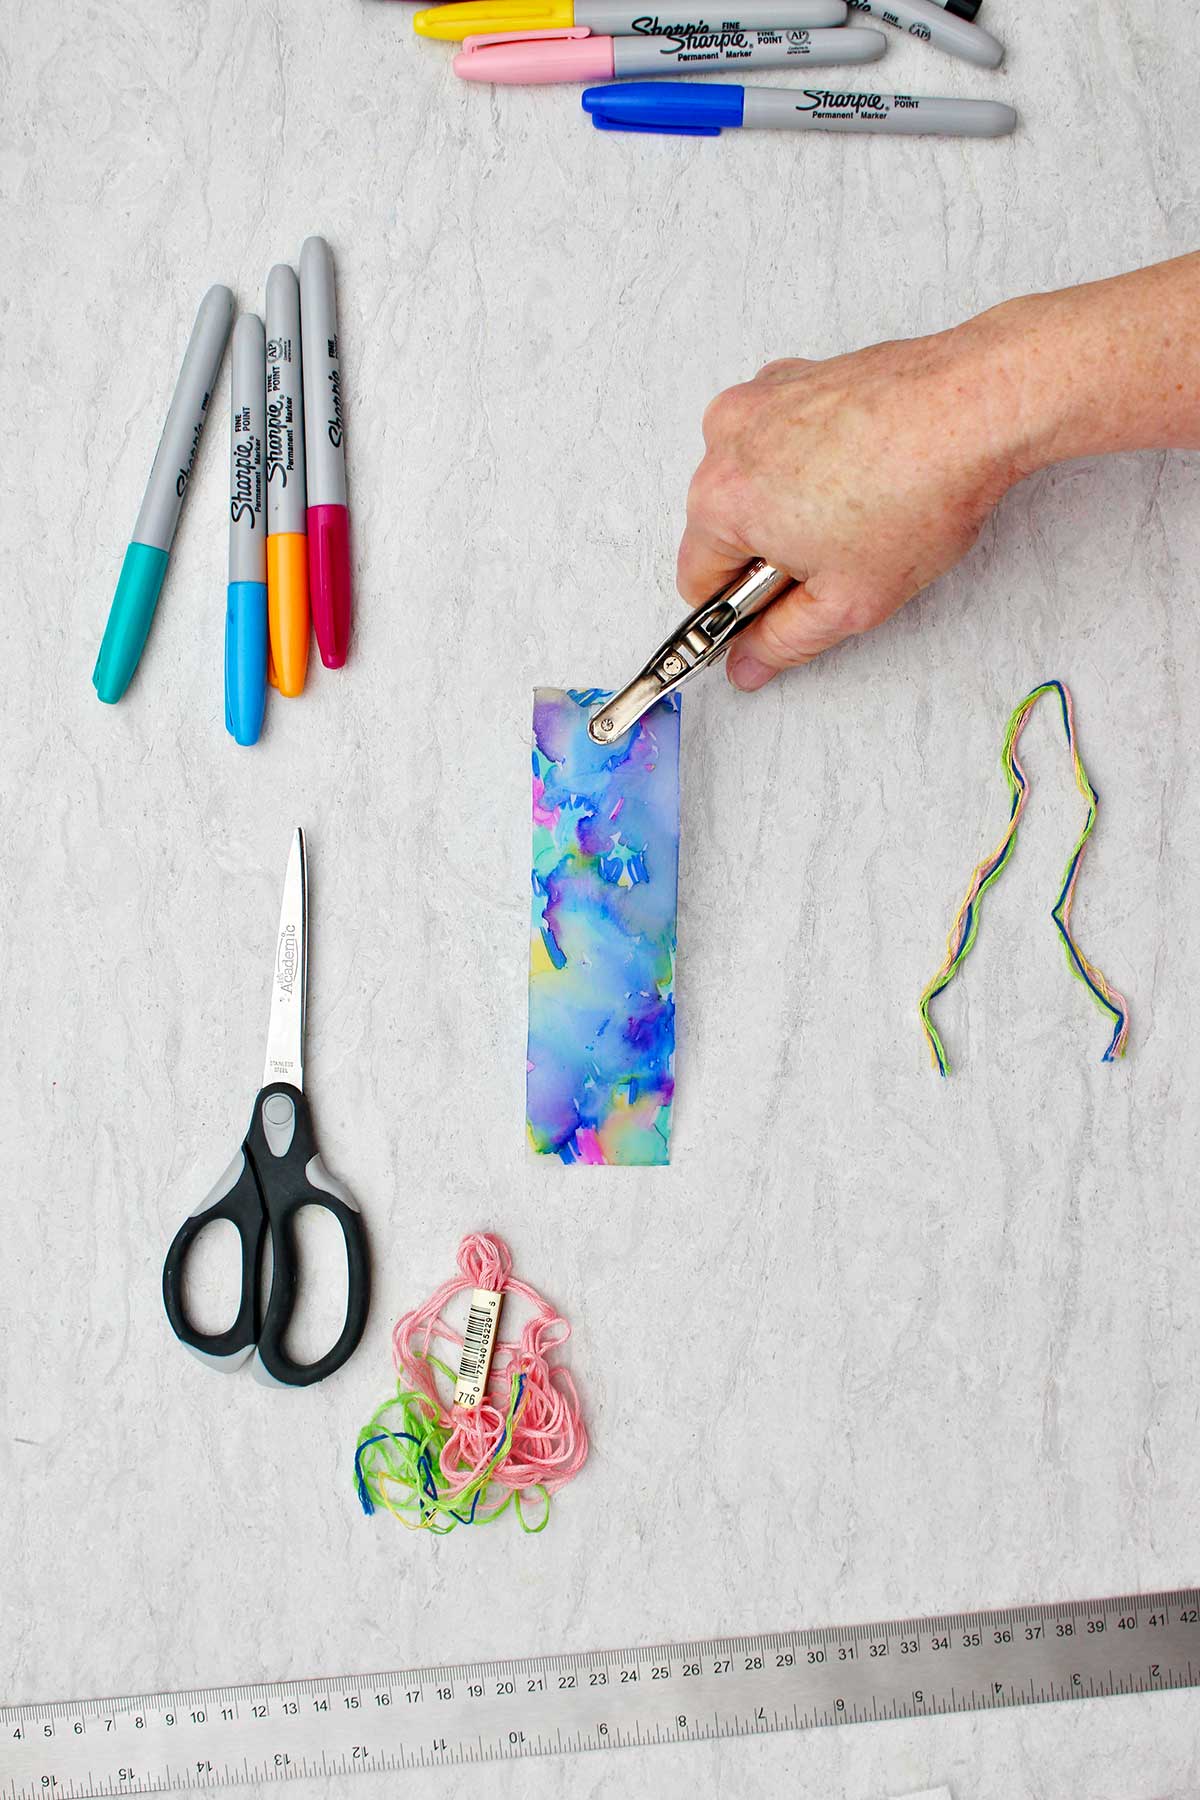
- Hole punch: A round hole punch is so handy for crafting. Used to add a tassel.
- Embroidery floss: To match the bookmark and finish the look.
- Other supplies: scissors, ruler, newspaper, small glass bowl
Watch the video too!
Watch how you and your kiddos can make a cute bookmark with the alcohol and sharpie technique. The short video is found in the recipe below and the full tutorial video is found on YouTube at this link: DIY Bookmarks Using Sharpie and Alcohol on Plastic Full Length Tutorial
How to make DIY Bookmarks with Sharpie & Alcohol In Easy Steps
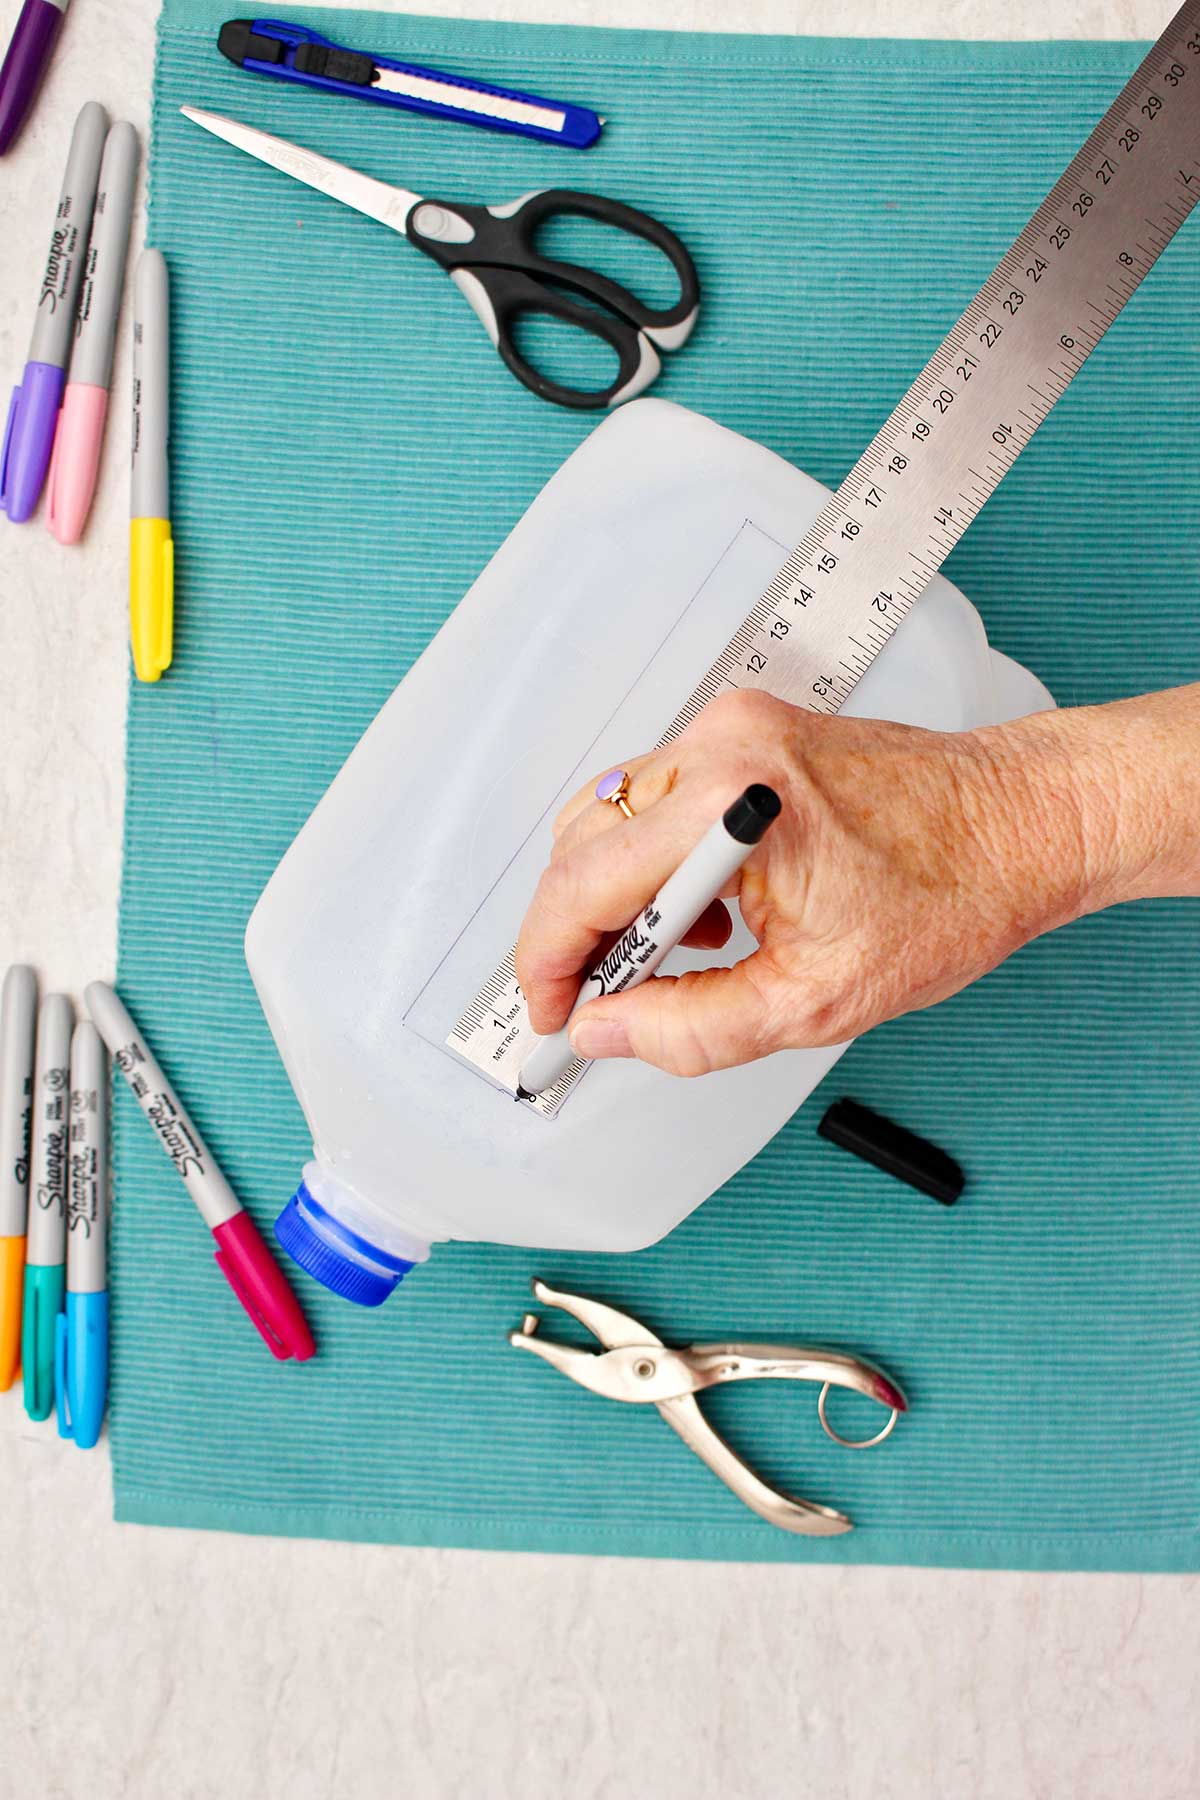
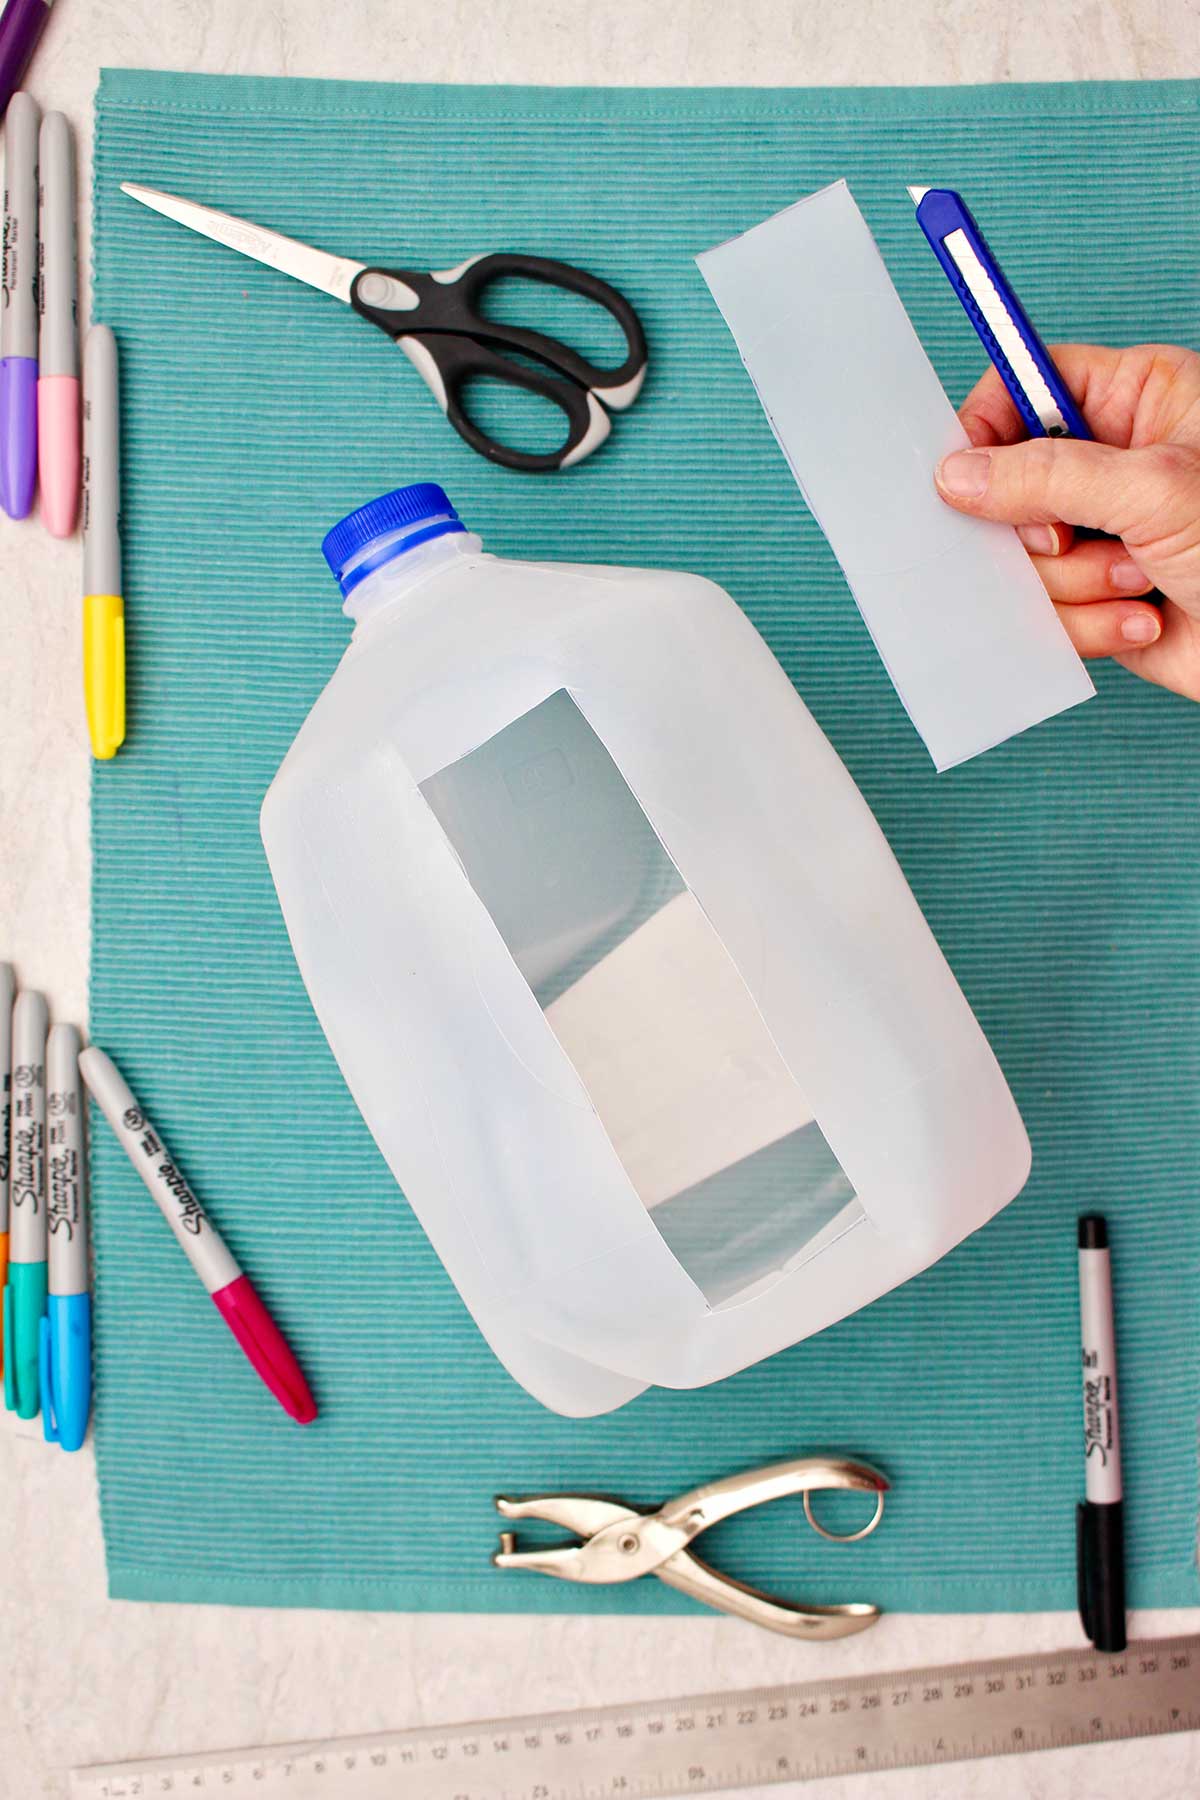
Draw the bookmark shape on the flat side of a milk jug with a colored sharpie, about 1.5 inches wide by 5.5 inches long.
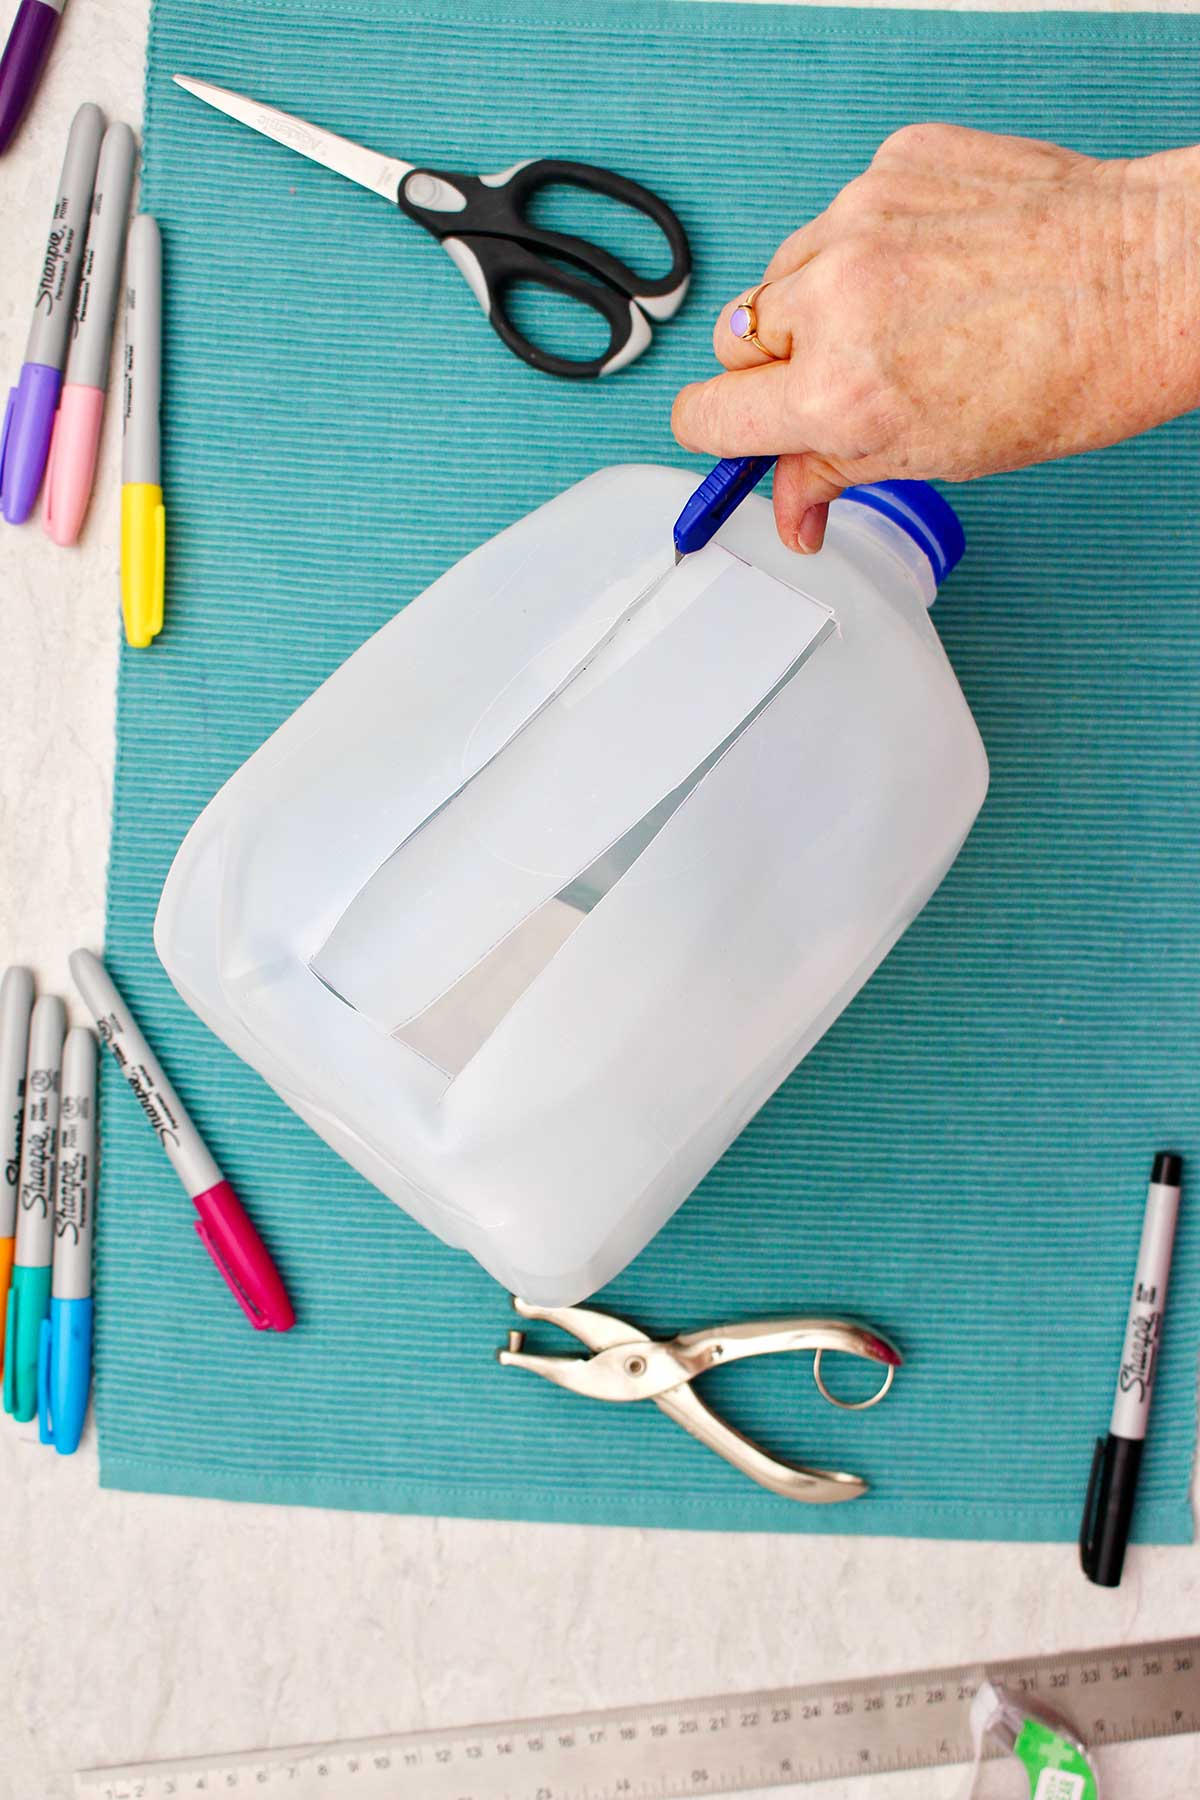
Cut out the bookmark with an Exacto knife or scissors. Of course younger children will need help with this step and you are reminded to keep your fingers away from the knife.
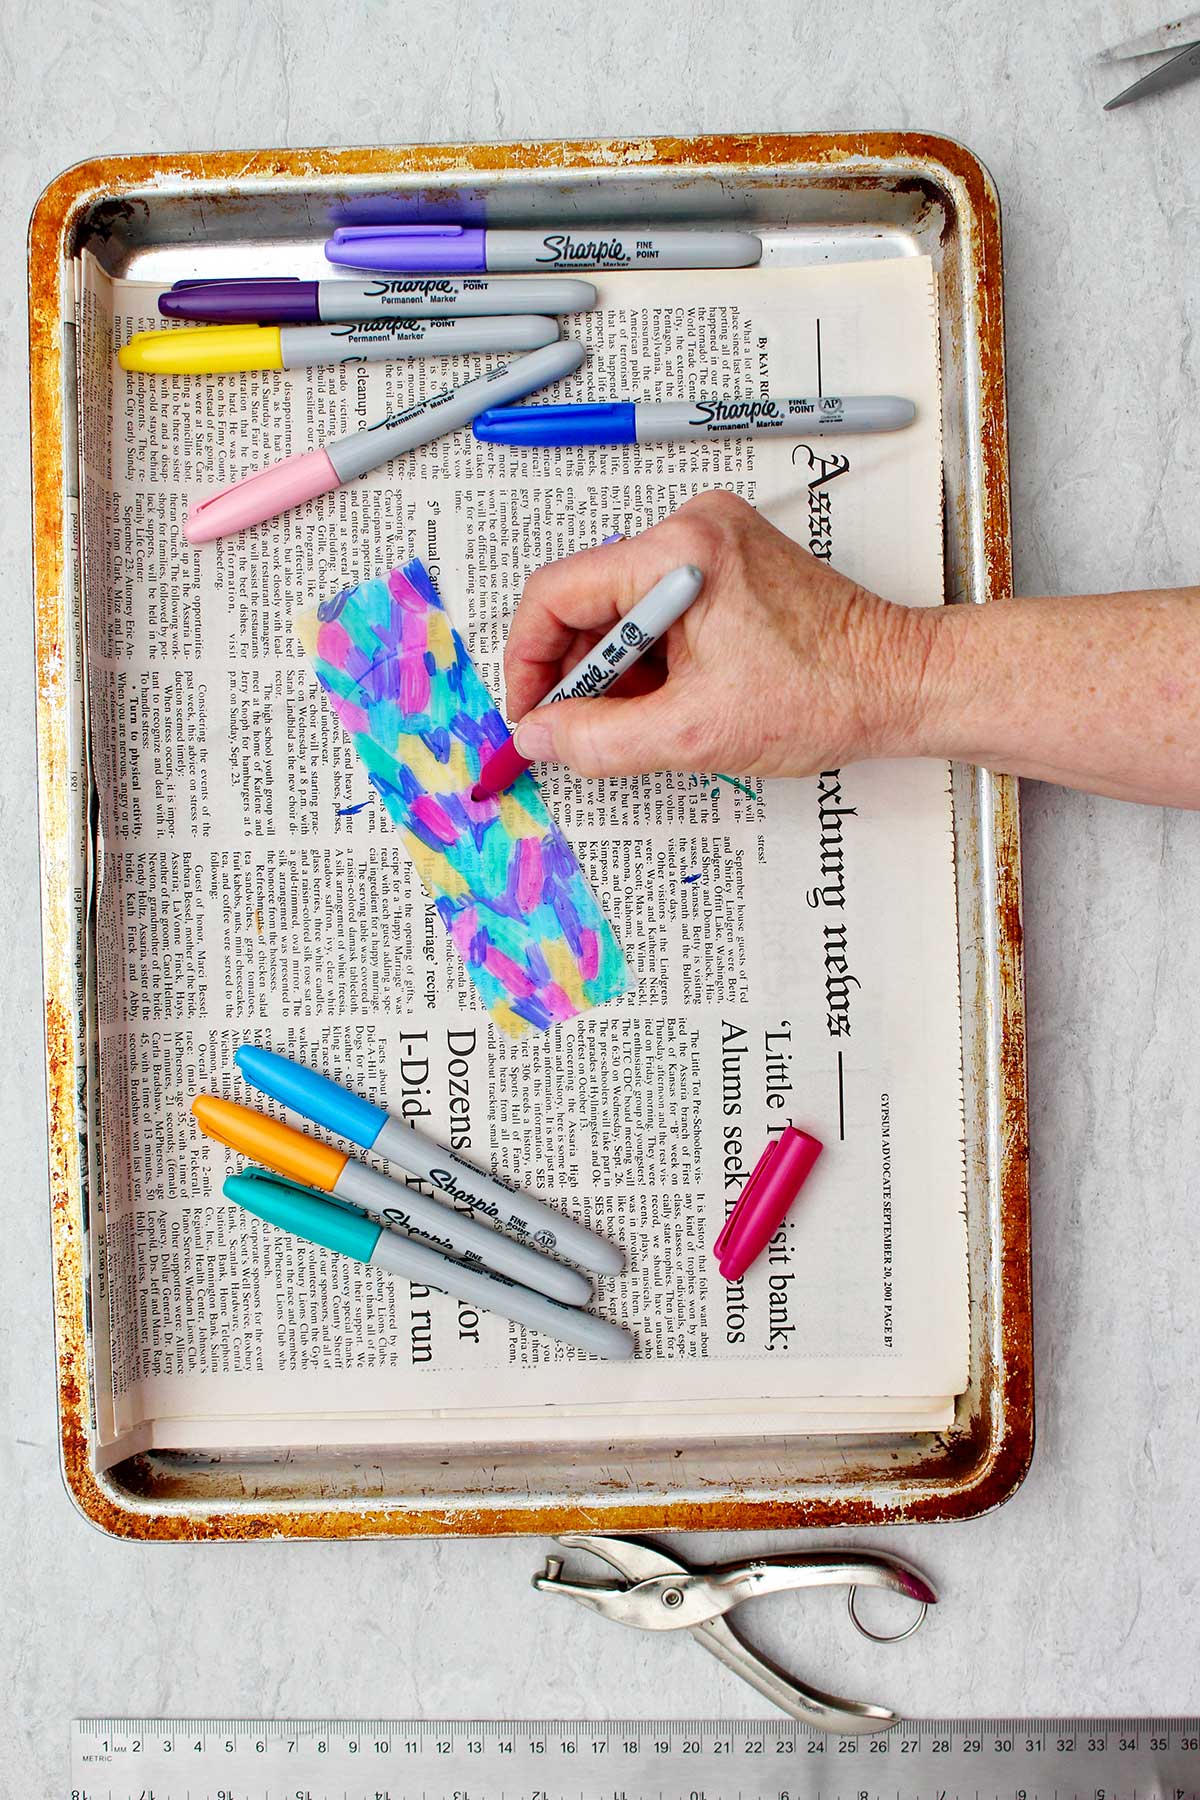
Color the surface of the bookmark with permanent markers. Use a simple design.
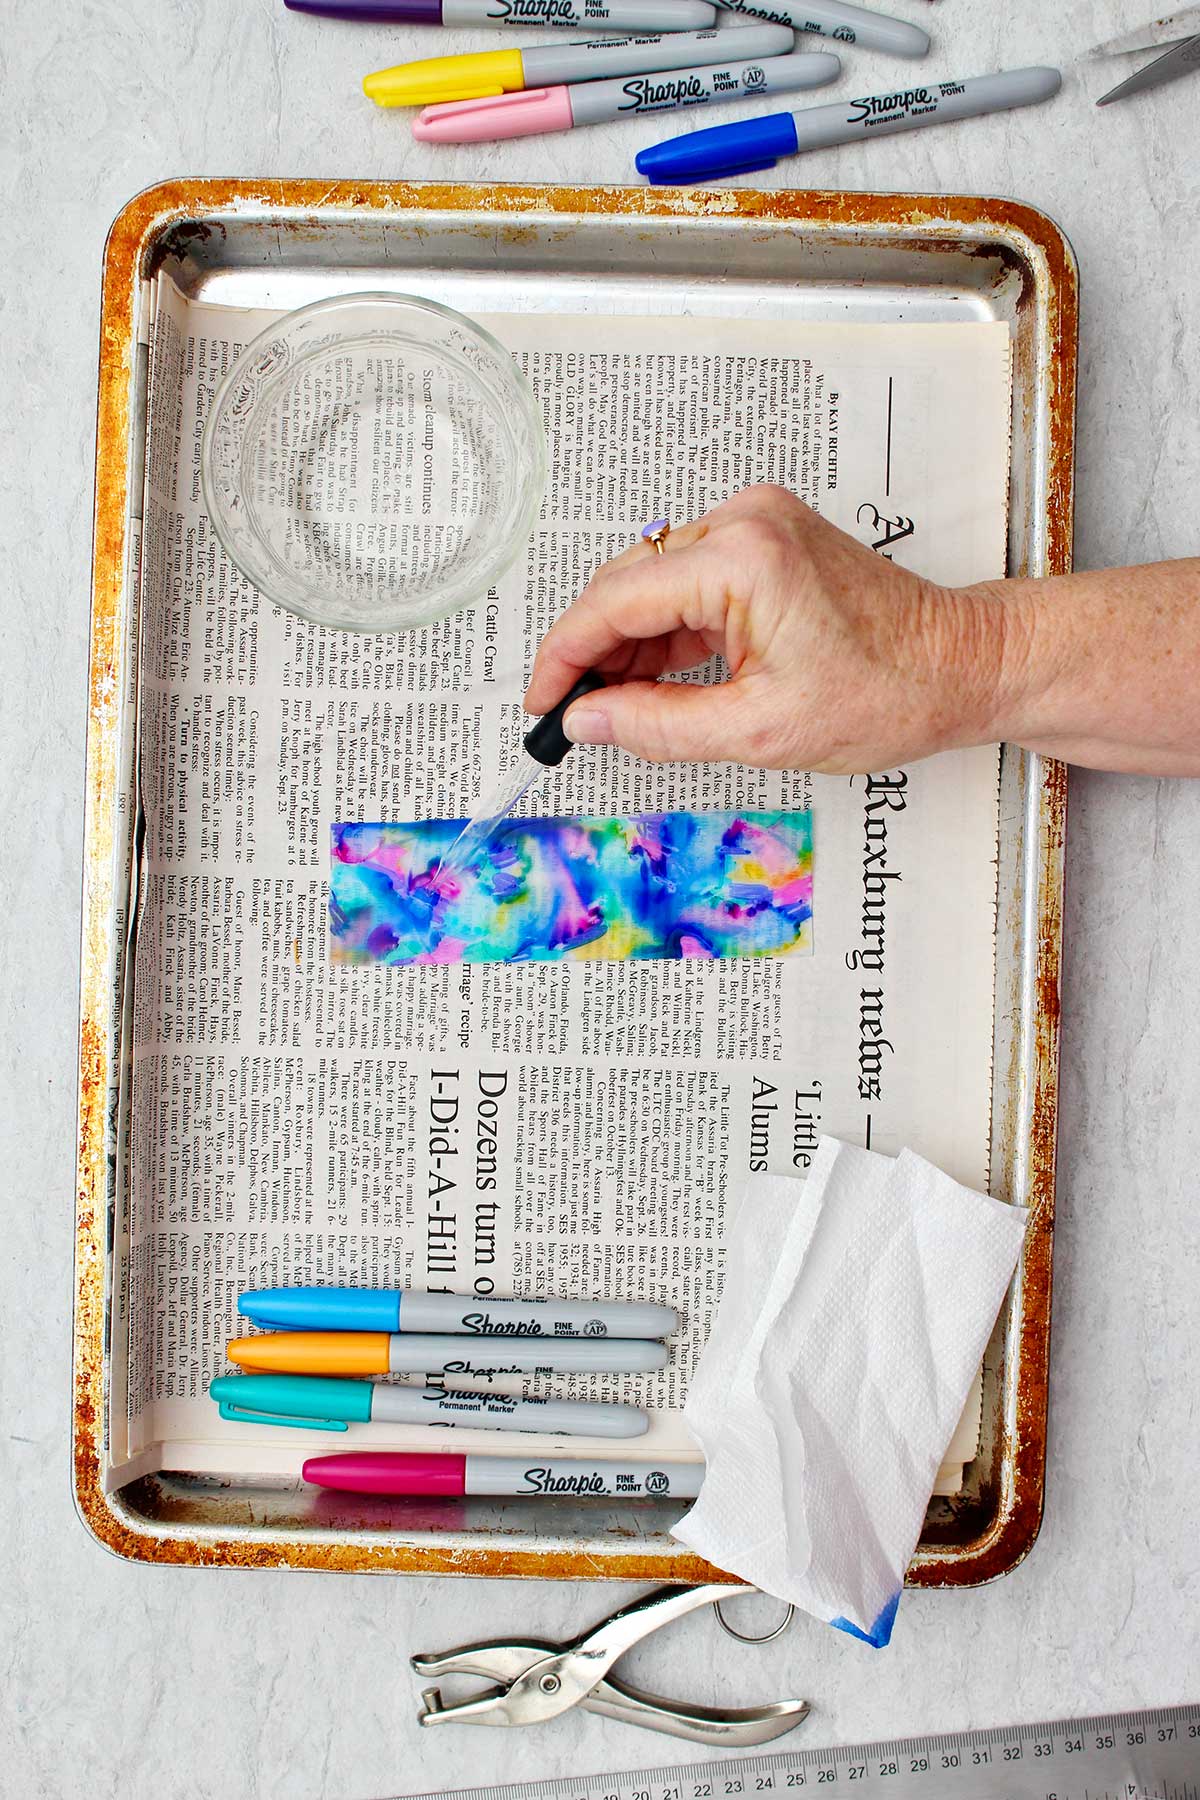
Use the 91% isopropyl alcohol and put some into a small glass container. Pick some up with an eyedropper and carefully drop it on the surface.
Let this dry and then you can always add some more drops if you feel like it needs some more swirling of colors.
I did get a bit too much alcohol and dabbed a bit of it off with a tip of a paper towel.
Let the alcohol dry. Dispose of extra alcohol.
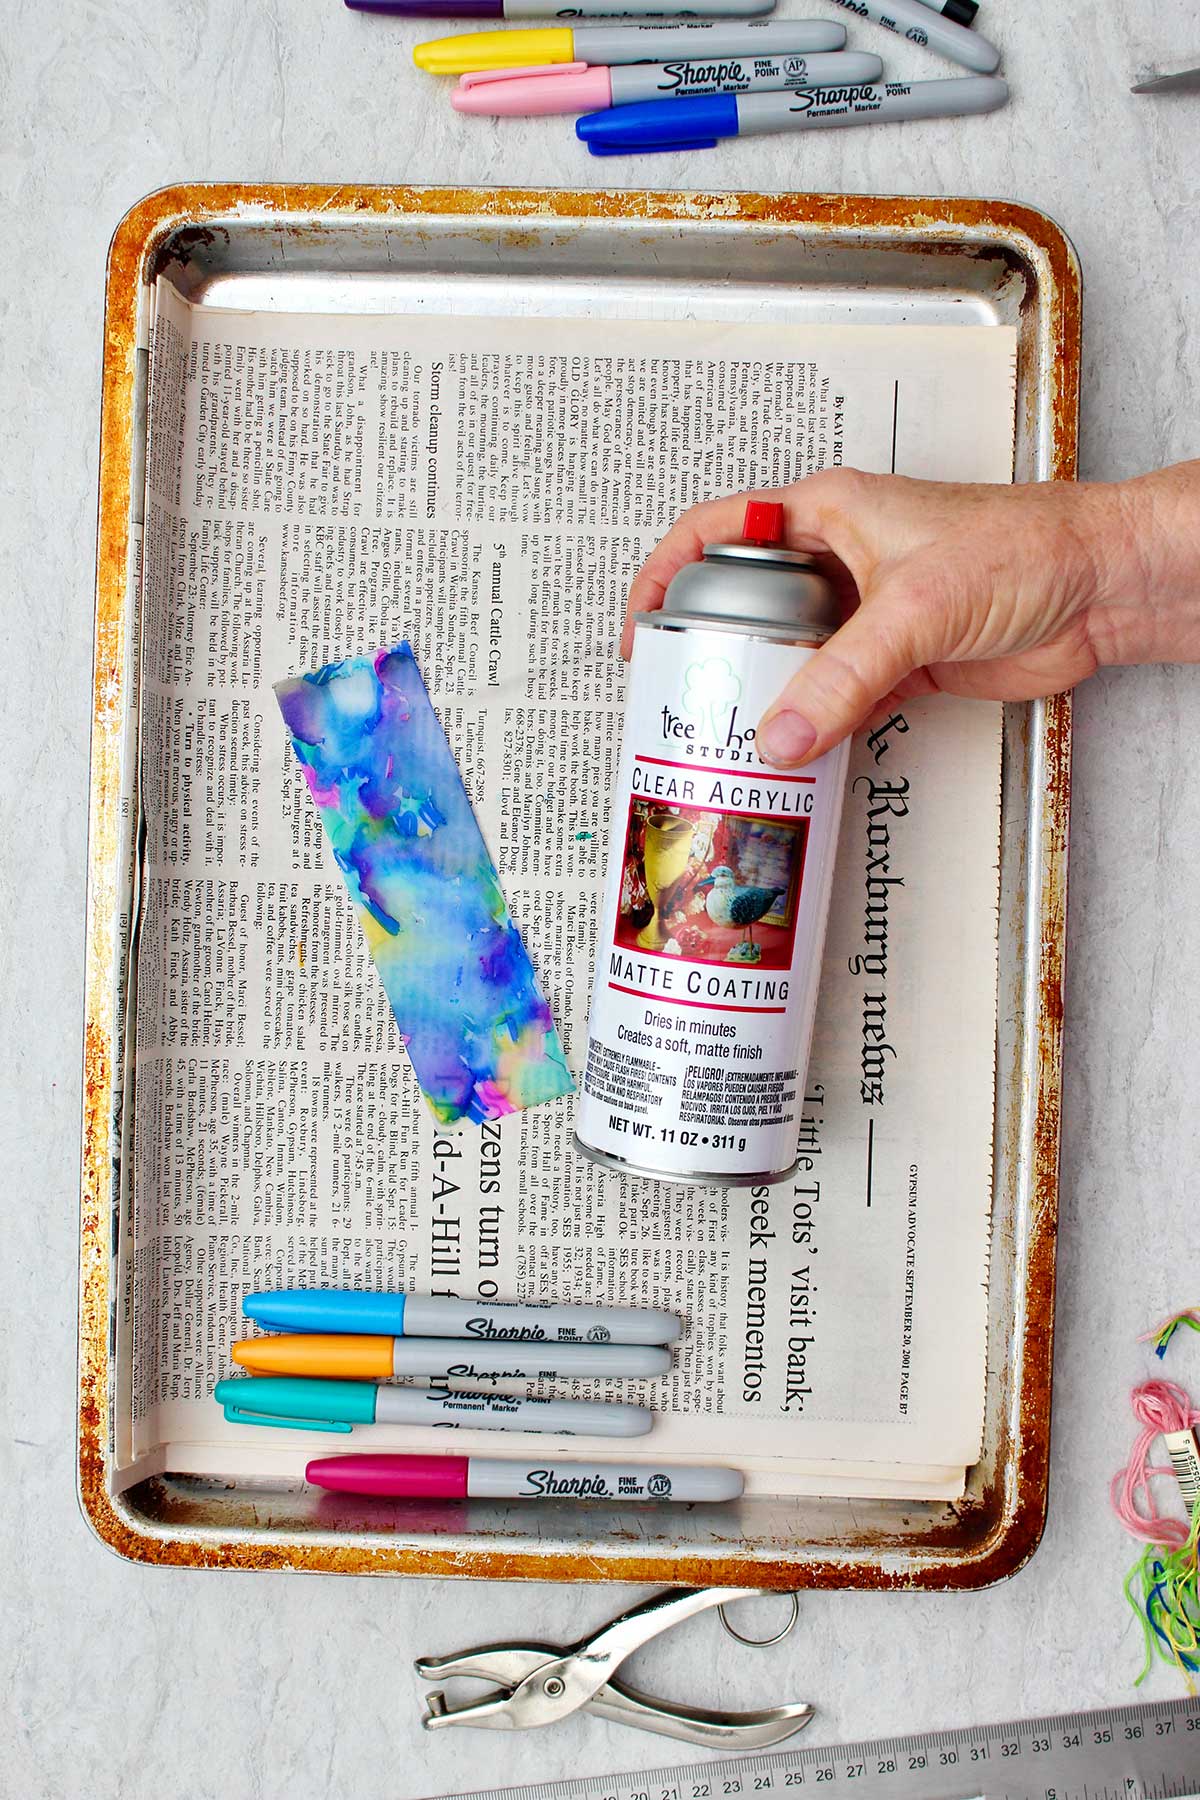
When the alcohol is completely dry, spray the bookmark with a clear acrylic spray in two or three light coats. It goes on like a mist and dries almost instantly. This is so the marker/alcohol doesn’t rub off on the book pages.
Punch a hole in the top to add a tassel.
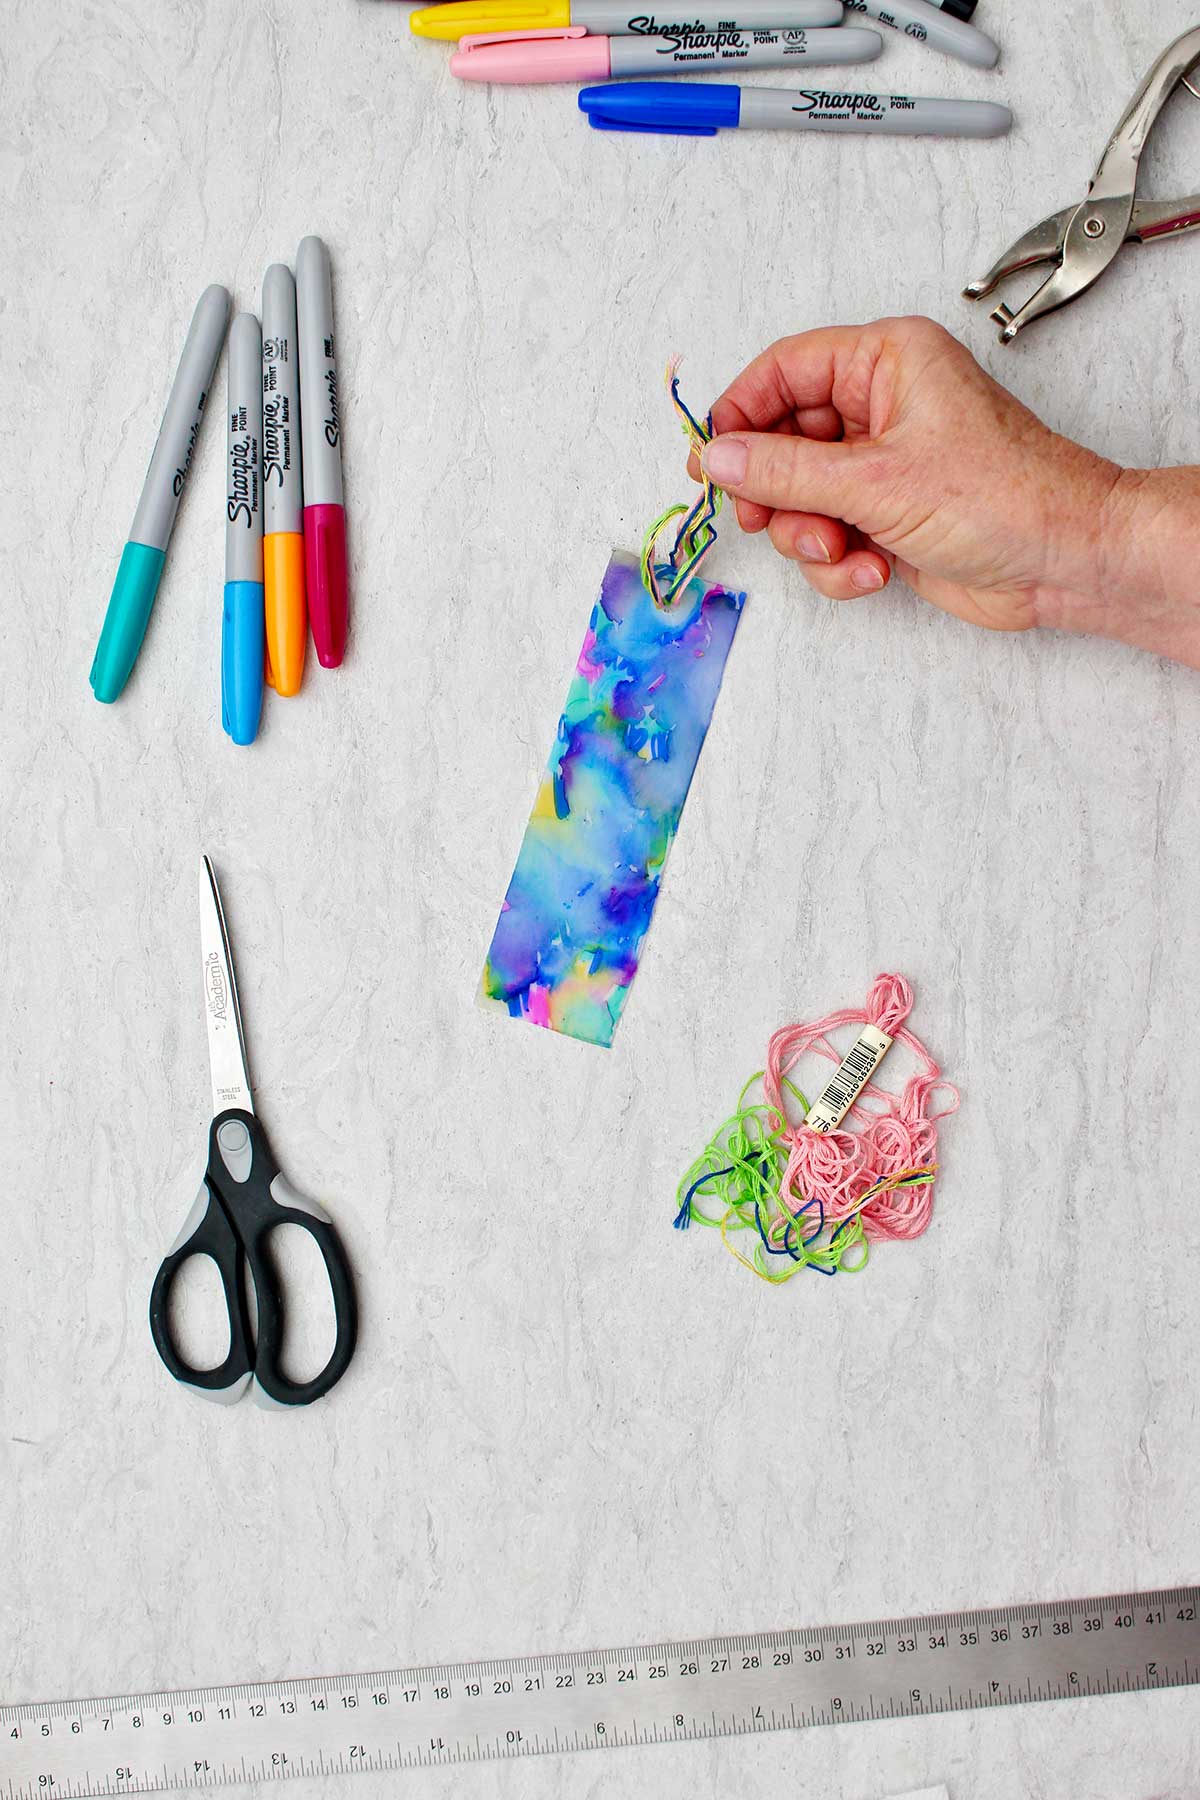
Cut several strands of embroidery floss about 7-8 inches long.
Take the floss as a group and double them over in half. Using the end that is doubled over, pull it through the hole leaving the cut ends on the other side of the bookmark. Pull the cut ends through the loop made by the folded end of the floss. Pull this up tight and there is your tassel! Cool, huh?
Tips to make the DIY Bookmarks even easier!
- Bookmark pattern: If you have a bookmark to use as a pattern that would be great. If not draw a rectangle shape that fits on the flat side of the milk jug. They could be made in other various shapes too!
- Cutting plastic with kids: Of course younger children will need help with this step. You may be able to start the cutting for them and then let them shift over and use a scissors.
- How to cut plastic: Use an up and down motion with your X-acto knife and it will make it easier. If you try to make a long slit it is harder to control and keep on the outline.
- Cover work surface: Be sure to put the bookmark on something like a newspaper with several layers. Also it need to be a flat surface or else the alcohol will just roll off the side or puddle on the side of the bookmark.
- Drops of alcohol: Only put on a few drops at a time. If bookmark is completely wet it becomes one murky color.
- Spray options: I think a polyurethane spray would work too. This has to be sprayed very lightly though.
How does the alcohol and sharpie technique work?
The alcohol dissolves and pulls up the sharpie marker ink. The ink swirls and puddles up in the alcohol making a beautiful, colorful, stained-glass look when it dries.
So for best results just drop a few drops of 91% alcohol at a time all over the bookmark and let it sit for a while. See what happens and then add a few more drops. Because if the whole surface gets wet at once it will make one large puddle and just make one murky color.
That's why it's important to place the bookmark on a flat surface covered by newspaper. Then the alcohol doesn't run off the sides of the bookmark (and doesn’t stain your table).
You are welcome to draw a picture but be ready for it to blur!! A simple picture with your own design works just fine.
A few variations on the DIY Bookmarks craft
Want to switch things up? Here are a few ways you can customize and play with this craft.
- Other plastic bottles: Use any plastic container that is opaque and has a flat side. Clear plastic may be too slick to work properly.
- Tassel: I used a little bit of embroidery floss as the tassel. Yarn would also work.
- Tassel colors: Use one color or various colors from the bookmark.
- Fabric: I’m going to try this technique on fabric to make fabric bookmarks and possibly shirts too. Let me know if you have tried this and if you have tips! I know it works on canvas (Sharpie & Alcohol Painting on Canvas craft).
Frequently Asked Questions- FAQ!
Milk jugs work so well because they are opaque- letting some light through the design. I'm thinking that a clear plastic bottle surface is too slick. I know that any opaque plastic bottle that has a flat surface will work- it must have a flat side to use or the alcohol will run off.
No, it must be 91% alcohol to dissolve the permanent marker ink.
Bookmarks are wonderful handmade gifts and tuck easily inside of a card (which can be mailed). Give homemade bookmarks as gifts for party favors, Mother's Day, Valentine's Day (as valentines for classmates), teacher's gifts, Christmas stocking stuffers, or any special occasions. Slip a handmade bookmark inside a book you are giving as a gift or to members of a book club. There are endless possibilities.
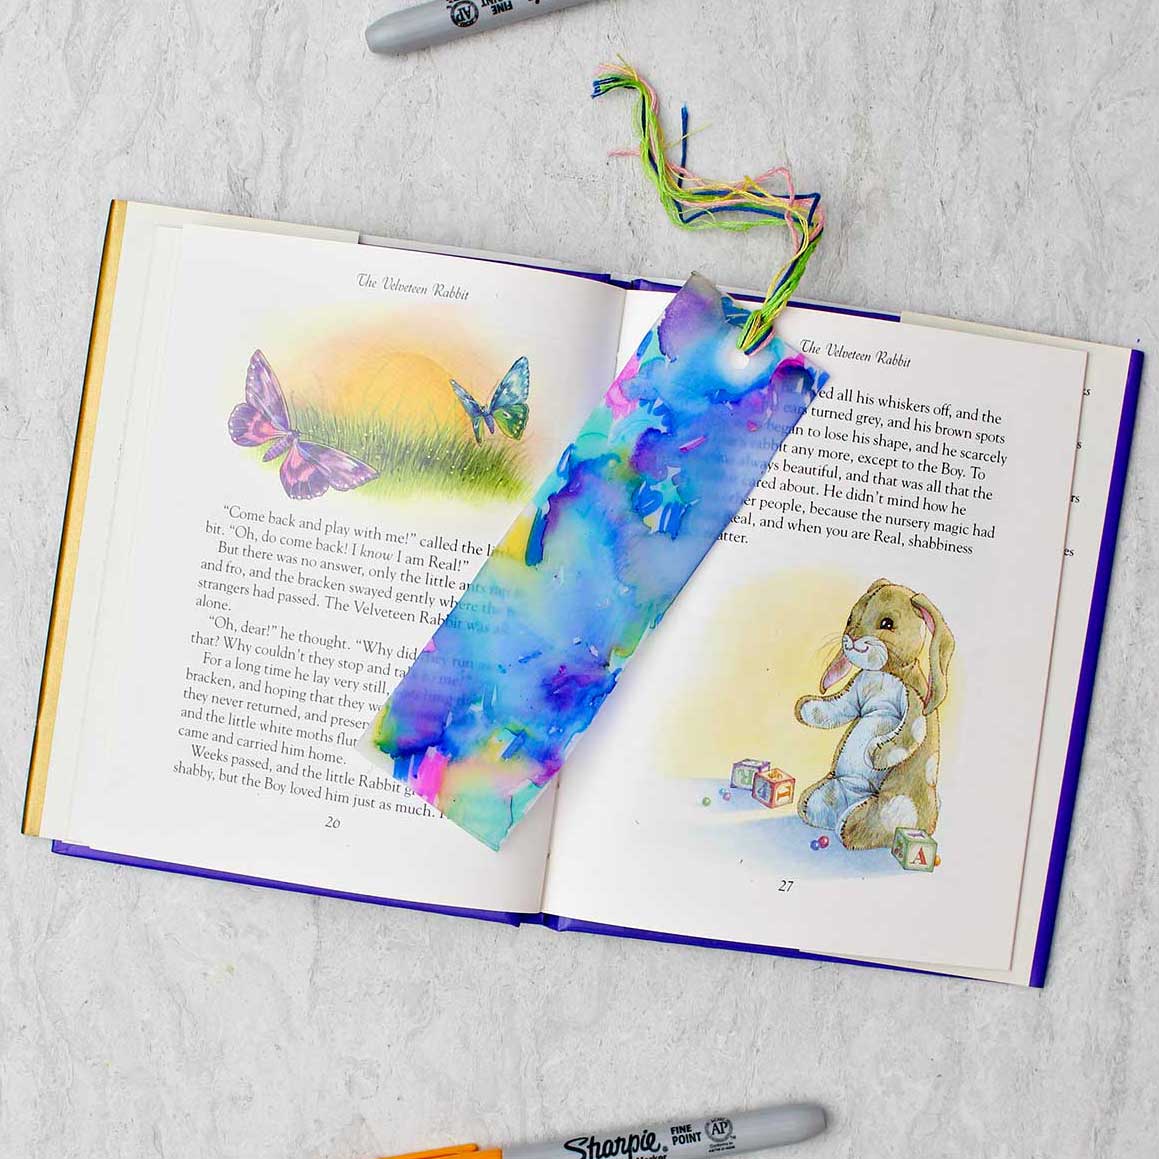
It has been fun making a cute bookmark with the sharpie and alcohol technique! And we recycled a milk jug! It’s going to make a great gift for a friend, a student, or for yourself.
More Easy Sharpie Crafts for Kids
Looking for more creative crafts for kids that use Sharpies? Here are a few of our favorites from around the blog:
- Cool Sharpie and Alcohol Painting on Canvas
- How to Decorate Canvas Shoes with Markers
- Discover Aluminum Foil Embossing Art
- Easy DIY Water Color Card
- Easy DIY Halloween Milk Jug Ghost Luminaries
Enjoy!
If you try this craft, let me know! Go ahead and leave a comment, rate it, and tag a photo with #WelcometoNanas wherever you post.
Come join the fun!
DIY Bookmarks Using Sharpie and Alcohol on Plastic
Equipment
- Scissors
- Ruler
- Small glass bowl
Items Required
- A milk jug- time to recycle, yea!
- Exacto knife
- 91% Isopropyl Alcohol
- Permanent markers
- Eyedropper
- Clear acrylic spray finish
- Hole punch
- Embroidery floss
- Newspaper
Instructions
- Draw the bookmark shape on the flat side of a milk jug with a colored sharpie, about 1.5 inches wide by 5.5 inches long.Cut out the bookmark with an Exacto knife or scissors. Of course younger children will need help with this step and you are reminded to keep your fingers away from the knife.
- Color the surface of the bookmark with permanent markers. Use a simple design.
- Use the 91% isopropyl alcohol and put some into a small glass container. Pick some up with an eyedropper and carefully drop it on the surface.Let this dry and then you can always add some more drops if you feel like it needs some more swirling of colors. Let the alcohol dry. Dispose of extra alcohol.
- When the alcohol is completely dry, spray the bookmark with a clear acrylic spray in two or three light coats. It goes on like a mist and dries almost instantly. This is so the marker/alcohol doesn’t rub off on the book pages.
- Punch a hole in the top to add a tassel. Cut several strands of embroidery floss about 7-8 inches long.Take the floss as a group and double them over in half. Using the end that is doubled over, pull it through the hole leaving the cut ends on the other side of the bookmark. Pull the cut ends through the loop made by the folded end of the floss. Pull this up tight and there is your tassel! Cool, huh?


Hmon says
Looks cute! Approx how long does it take for the alcohol to dry?