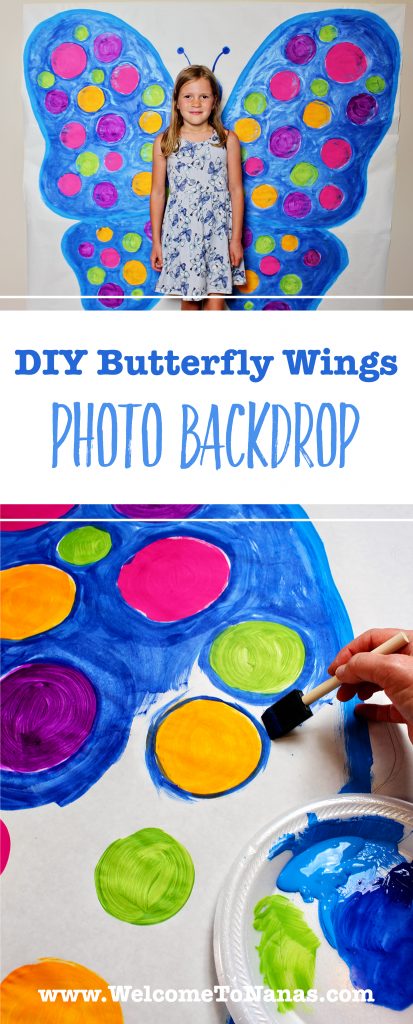
Kid's Birthday Party Backdrop
Is one of your grands having a birthday party soon? This DIY Butterfly Wings Photo Backdrop can be a fun project to do together and provides a fun photo opportunity at the party.
I thought of this idea when I saw a wall mural of angel wings in a friend's picture. People stand in front of the mural and have their picture taken. You know kind of what I’m talking about, right? Of course it looks like they have angel wings in the picture if they stand just right.
Wouldn’t that idea be cute for a kids birthday party?
So one of the grands came to town to celebrate a birthday earlier this month. Guess what she wanted as a theme for her party? Butterflies!
DIY Butterfly Wings Photo Backdrop, yes!
How about making butterfly wings to use for a party photo backdrop? When they liked the idea (I did ask first), the plan began to unfold.
I didn’t have time to do this project with the grands personally because they live out of town. So I went ahead and painted it myself. I’ll have to say that it was really fun to do.
Please don’t be intimidated by this project.
Free grid pattern makes you an artist!
You don’t have to have high painting skills to make it happen. And you don’t have to be skilled at drawing. I’ve provided an attachment with a free pattern that breaks the drawing down into squares. You can transfer the content of each square onto a grid on your paper to enlarge the design with ease. Of course, if you like to draw freehand, go for it!!
Prepare the paper
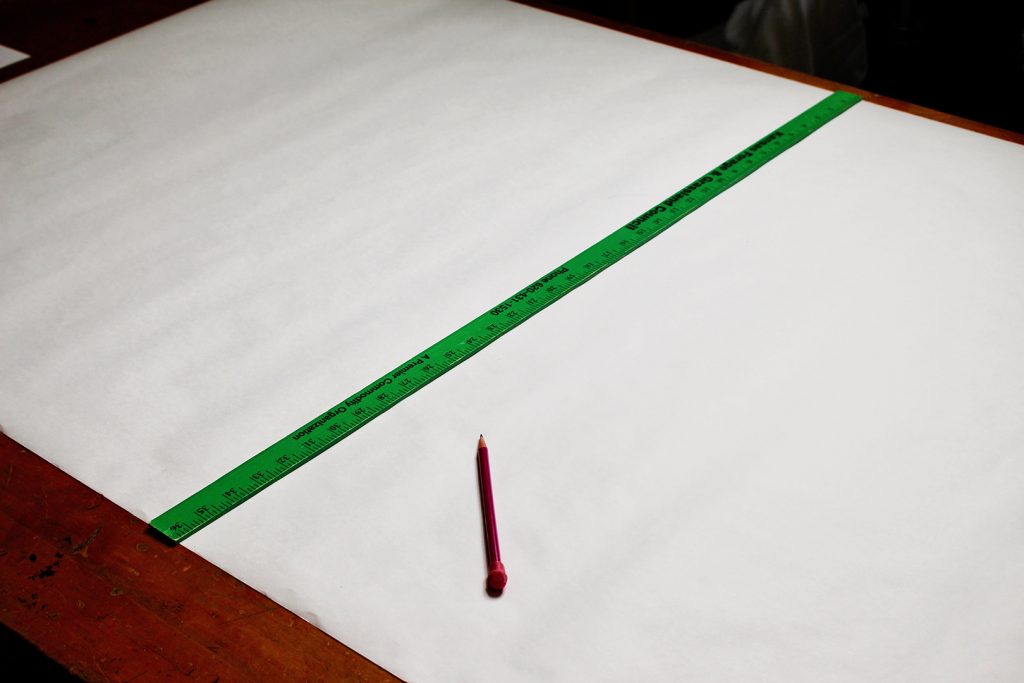
If you have a source of white paper like is used to make bulletin boards, that works well. If not, purchase a roll of white craft paper. The DIY butterfly wings photo backdrop that you see in these pictures is 5 feet by 5 feet. So roll the paper out and use packing tape on the back to tape it together to get the 5’ by 5’ size. Of course you can make this larger if you want to. The pattern provided enlarges to any size using the grid system. Just make your grid squares bigger.
This project is larger than my big craft table so I made it in two pieces then taped the paper together. You can tape your paper together first and turn it over so that the tape is on the back. Put it on your table with part of it draped over the backs of some chairs. Just scoot it back and forth as you draw and paint. It is a bit clumsy, but it will work. If you can find two tables to put together it would be even better.
Draw a grid on the paper
To transfer the drawing onto the paper, use a yardstick to draw a grid on the paper that creates 12 inch by 12 inch blocks. Draw very lightly with pencil so you can erase easily.
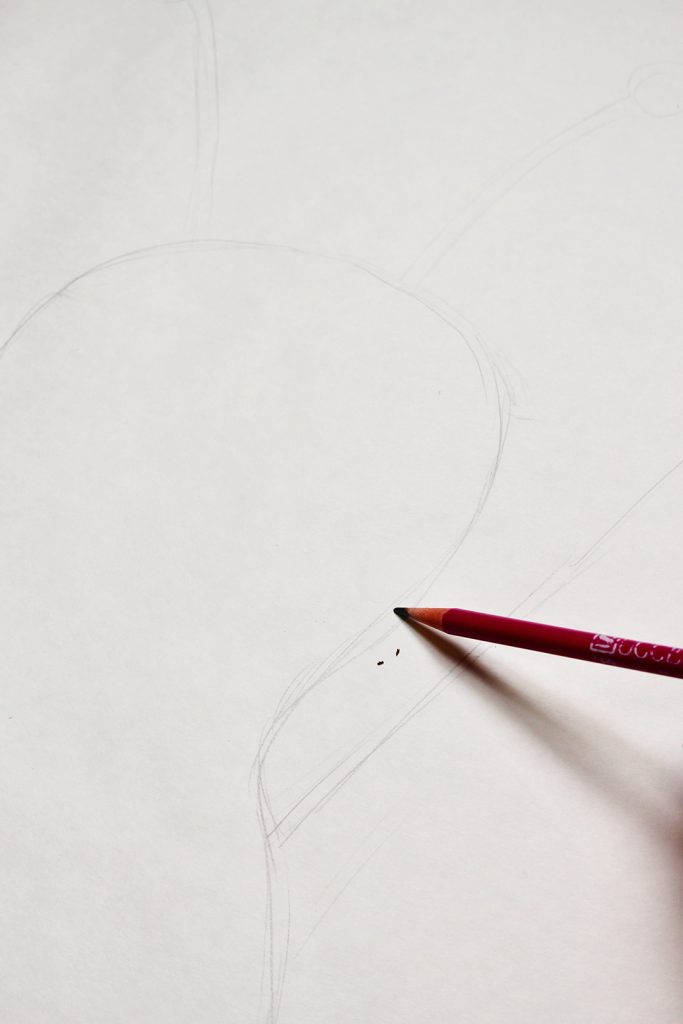
Copy the DIY Butterfly Wings Photo Backdrop pattern onto your grid-
Copy the free DIY Butterfly Wings Photo Backdrop pattern and use it for your guide.
Number each square on your mural paper in the same order that they are numbered on the pattern. You will end up with 25 numbered squares when you are finished.
A grid pattern is like a fun puzzle!
Carefully draw what you see in each square on the pattern in each square on your mural paper. You will see the drawing come together as you progress. It is really fun and is like working a puzzle. A fun side benefit is that this is a great brain exercise. It strengthens the brain and makes the left brain and the right brain work together! Woo-hoo! Who knew?

Painting your butterfly comes next.
Now remember- this is not hanging in an art gallery. This is for a child’s birthday party and needs to look good enough, not perfect. I am known for saying, “It needs to look good from a galloping horse.” Ha! Don’t stress about the painting and yet do the best you can to paint in the lines.
Paints and foam brushes
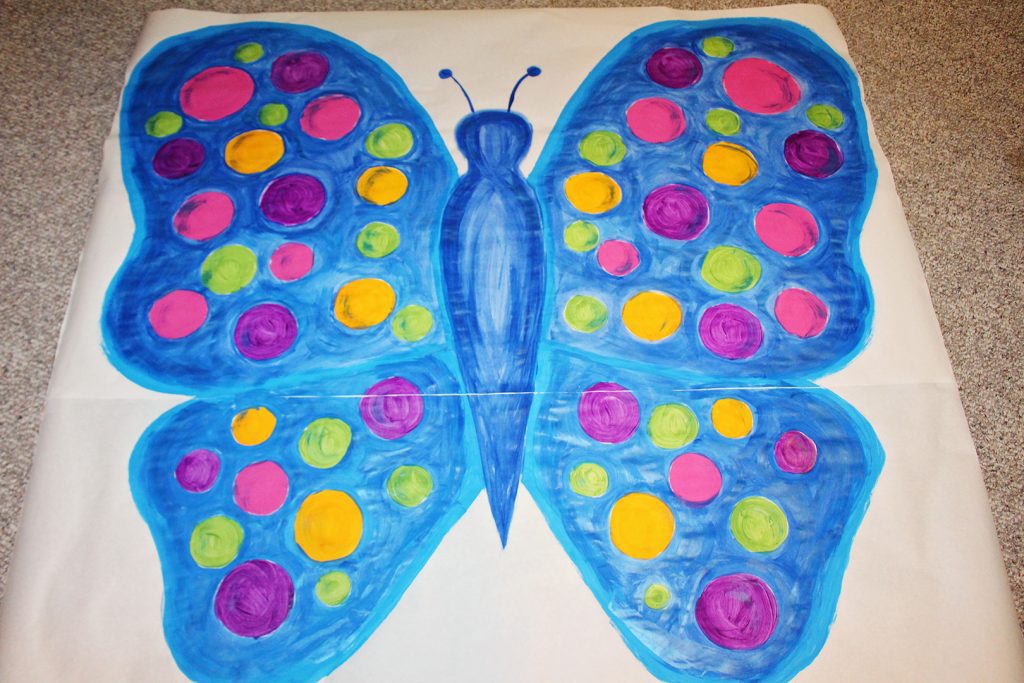
Use acrylic paint and 1 inch foam brushes to paint with. A foam plate makes a perfect paint pallet. You can see the colors that I chose to use for this mural. You can choose any colors you like, or ask your grand what they prefer. I do recommend brighter colors that will be vivid and photograph well. But with that being said I think a pastel group of colors could be pretty too.
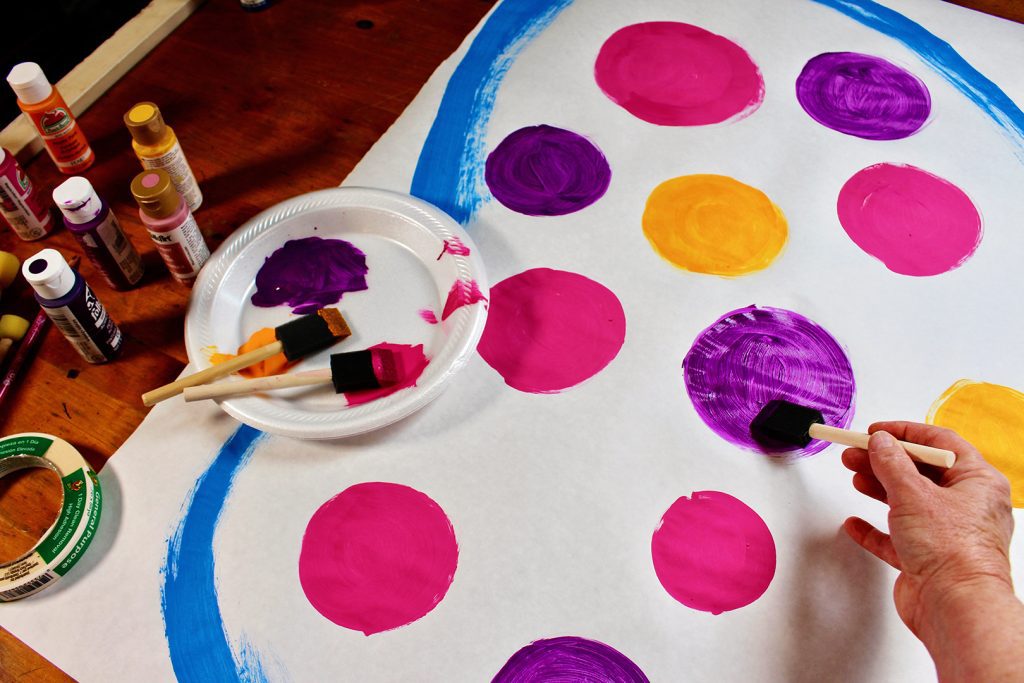
I'm seeing spots...painting spots
Start by painting the spots of color on the wings first. Typically the spots on a butterflies wings are a mirror image of one another so the colors would be the same on the spots in the same position on each wing. But hey, there are no spot police that will arrest you if you paint them however you want!!
I used a different brush for each paint color and then threw them away, but you could wash and use them again if you so choose. Let the paint dry on the spots before moving on to the background color.
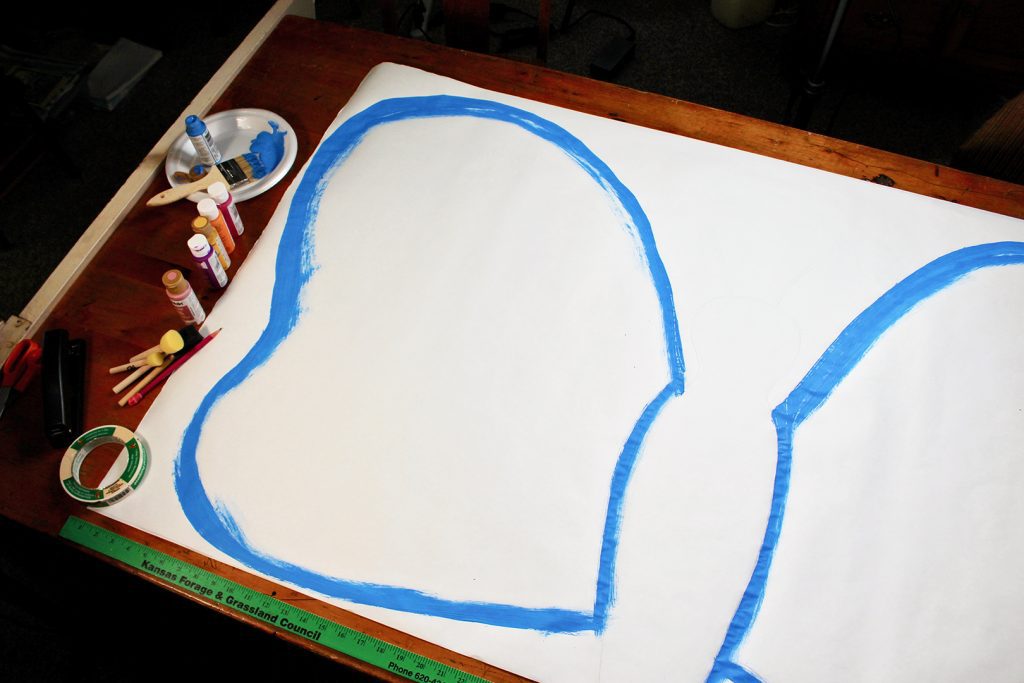
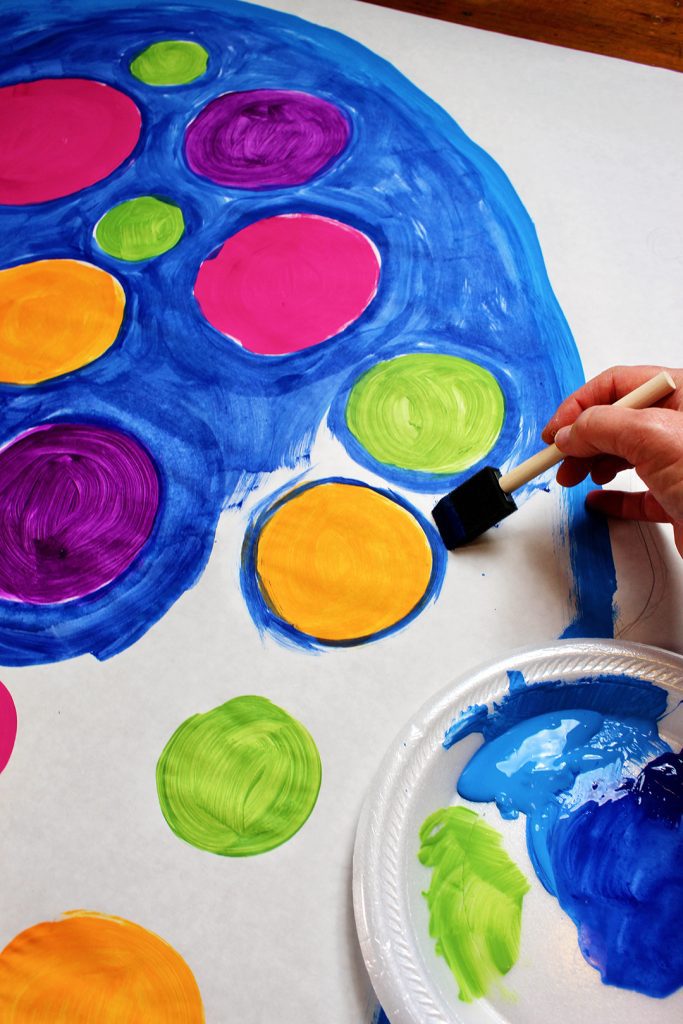
Paint the wings of the butterfly
To paint the background color of the butterfly wings you will not get an evenly coated color with no streaks. Don’t worry about that too much. I outlined the wings with a lighter color of blue paint that I had on hand. Then used the darker blue to fill in the wings and the body. The body was purposely left with a streaked look to differentiate it from the wings. The kids stand in front of the body when taking a picture.
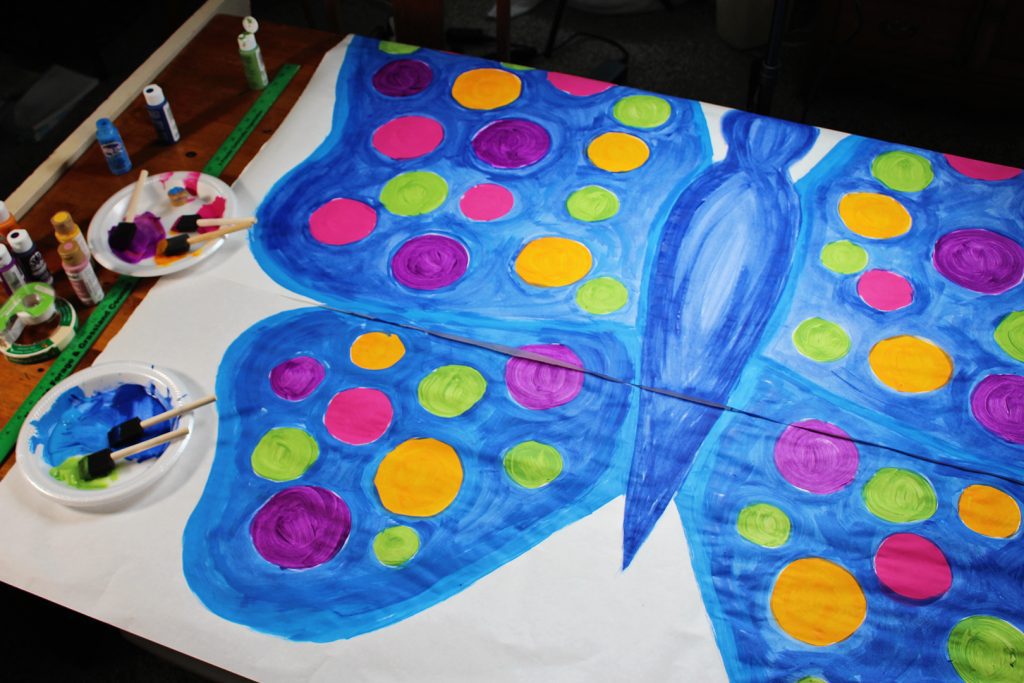
Despite the brush stroked look, the overall effect was delightful. I actually think that made it look more butterfly like.
Tip: I used a blue metallic paint to kind of whisk around the edges of the butterfly wings, and around the spots. This idea was a “happy accident” (as one of my art teachers used to say) because I had it from a previous project and happened onto it looking for paint in my stash. I really liked the effect. This was done without a lot of paint on the brush and with a fast movement of the foam brush. It just added a bit of dimension to the wings.
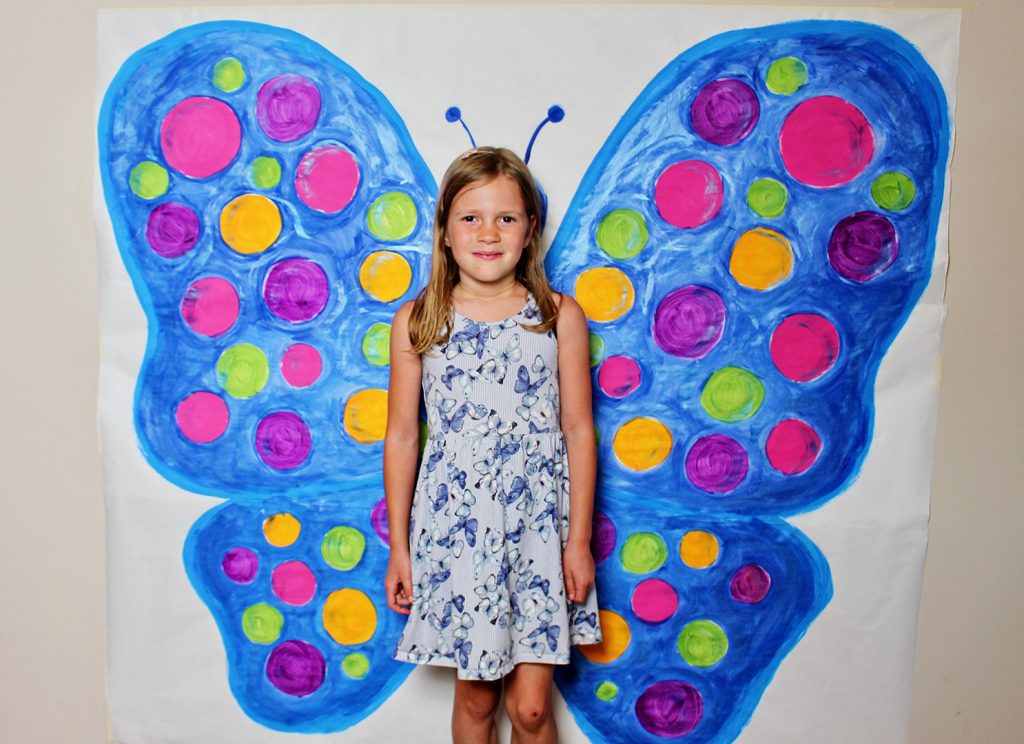
Picture taking time!
The kids enjoyed getting their picture taken. It was too hot to be outside so the DIY butterfly wings photo backdrop was hung on a basement wall. They took turns getting their photo taken and there were lots of giggles when they saw that it looked like the antennae were sticking out of their heads! We did need to use a step stool for some of the younger grands to position them correctly in the picture.
Give it a try
I am hoping that you will enjoy trying this project out for a grand’s birthday party. I have plans to create a winged dragon option sometime soon. Do you have any other backdrop suggestions that you would like to see??
More Butterfly Crafts and Activity Ideas
PS- We used this same butterfly at a baby shower the next weekend. Oh. My. Goodness. The pregnant mother looked darling with butterfly wings in her photo! This could be used for so many other events.
And if you are looking for more butterfly themed ideas, check out this list!
- Butterfly Birthday Party Theme Ideas
- Coffee Filter Butterfly Craft
- Paper Butterfly Cupcake Toppers
- Paper Butterfly Craft with Moving Wings
- Decorated Butterfly Pretzel Cookies
Make a Custom Pin The Tail Party Game for your party
Looking for a party game? You can use the same pattern to make a Butterfly Pin the Tail Party Game. Directions can be found by clicking here: Custom Pin the Tail Party Game directions
Supplies for DIY Butterfly Wings Photo Backdrop:
- White Craft Paper Roll

- Packaging Tape
- Acrylic craft paint- 4-5 “wing spot” colors; 1 background wing color
- Acrylic craft paint- 1 metallic color to use over wing background color (optional)
- 1-Inch Foam Brushes
Here's the free pattern for the DIY Butterfly Wings Photo Backdrop one more time!
Enjoy!
Welcome to Nana’s! Where there’s fun things to do with your “grand” kids!
Come join the fun at www.WelcomeToNanas.com


Leave a Reply