
Learn how to make a Concrete Pumpkin DIY with this step-by-step tutorial! This is a more advanced craft for kids, but with my tips and tricks you'll turn a back of cement into cute DIY fall decorations. And an extra bonus - these front porch pumpkins won't go bad over time!
Jump to:
- Let's Make a Concrete Pumpkin for Fall!
- DIY Concrete Pumpkins coming to a porch near you!
- Supplies for Concrete Halloween Pumpkins
- Steps to Make a DIY Concrete Pumpkins
- Craft Tips Concrete Pumpkin
- Craft Variations for Your Cement Pumpkin
- Frequently Asked Questions About Concrete Pumpkins DIY
- More DIY Pumpkin Crafts for Kids
- Come Join the Fun at WTN!
- More Crafts Please!
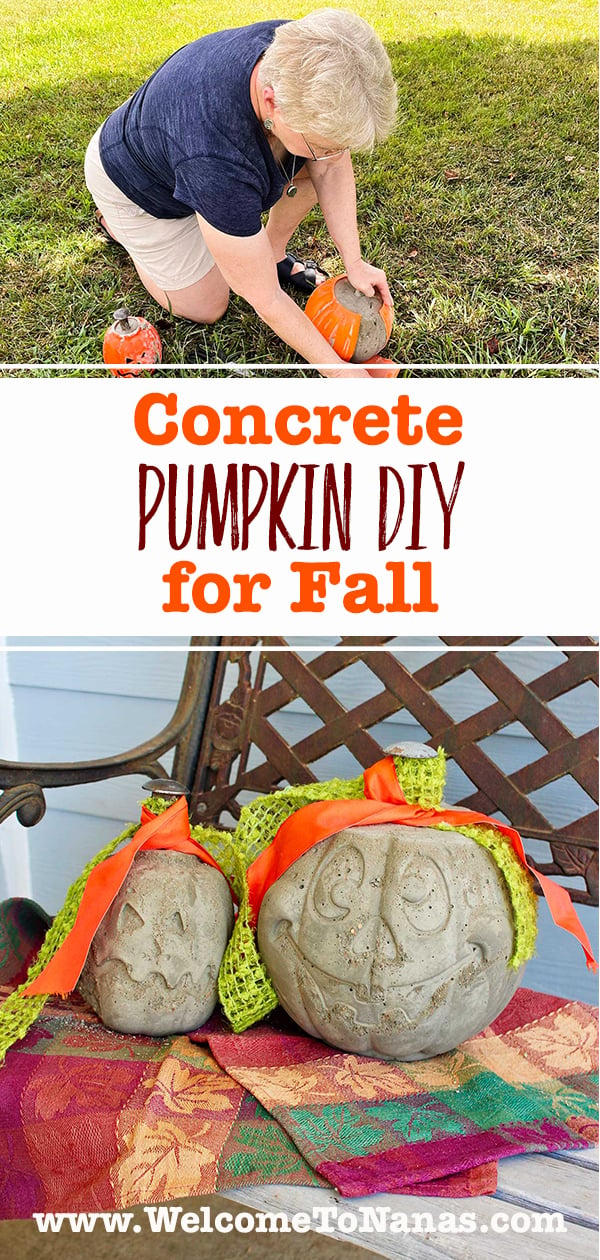
- Concrete Pumpkin DIY for Fall!
Let's Make a Concrete Pumpkin for Fall!
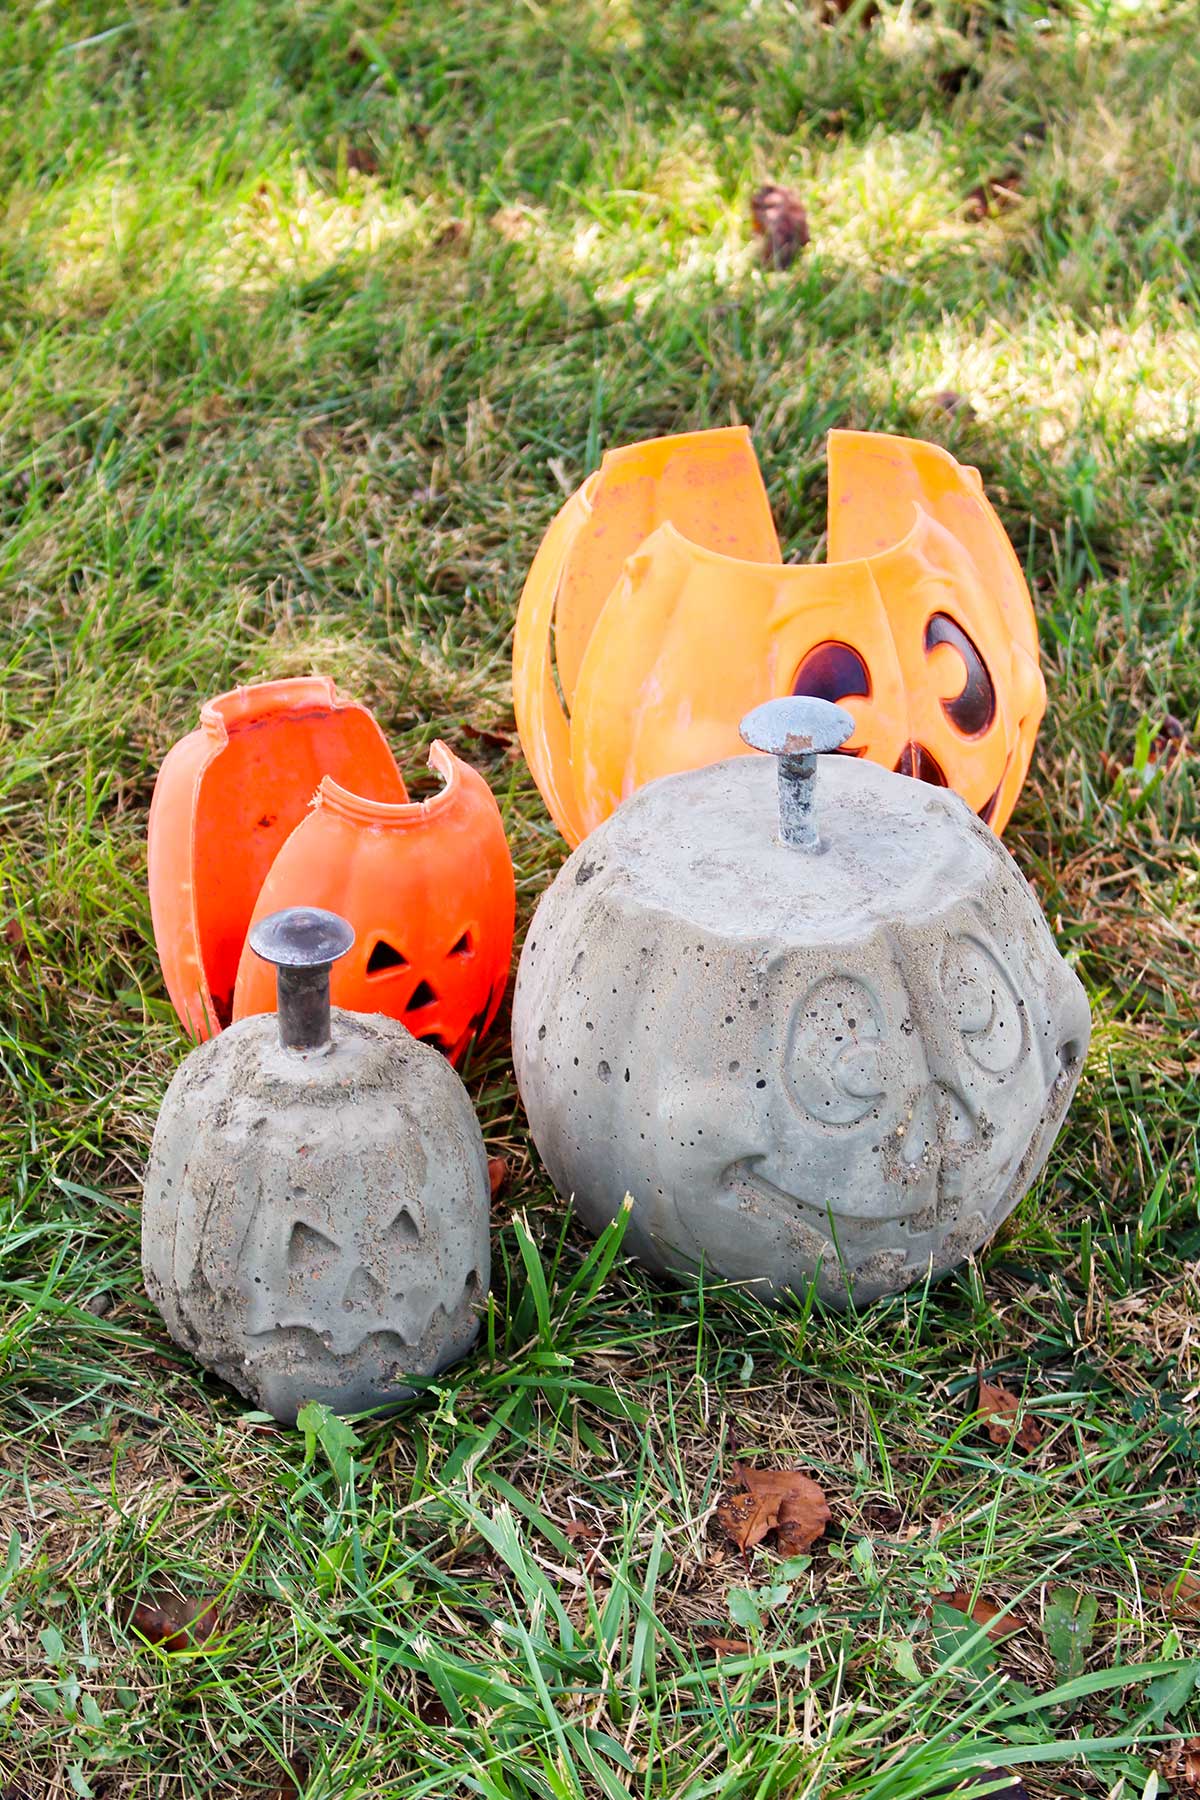
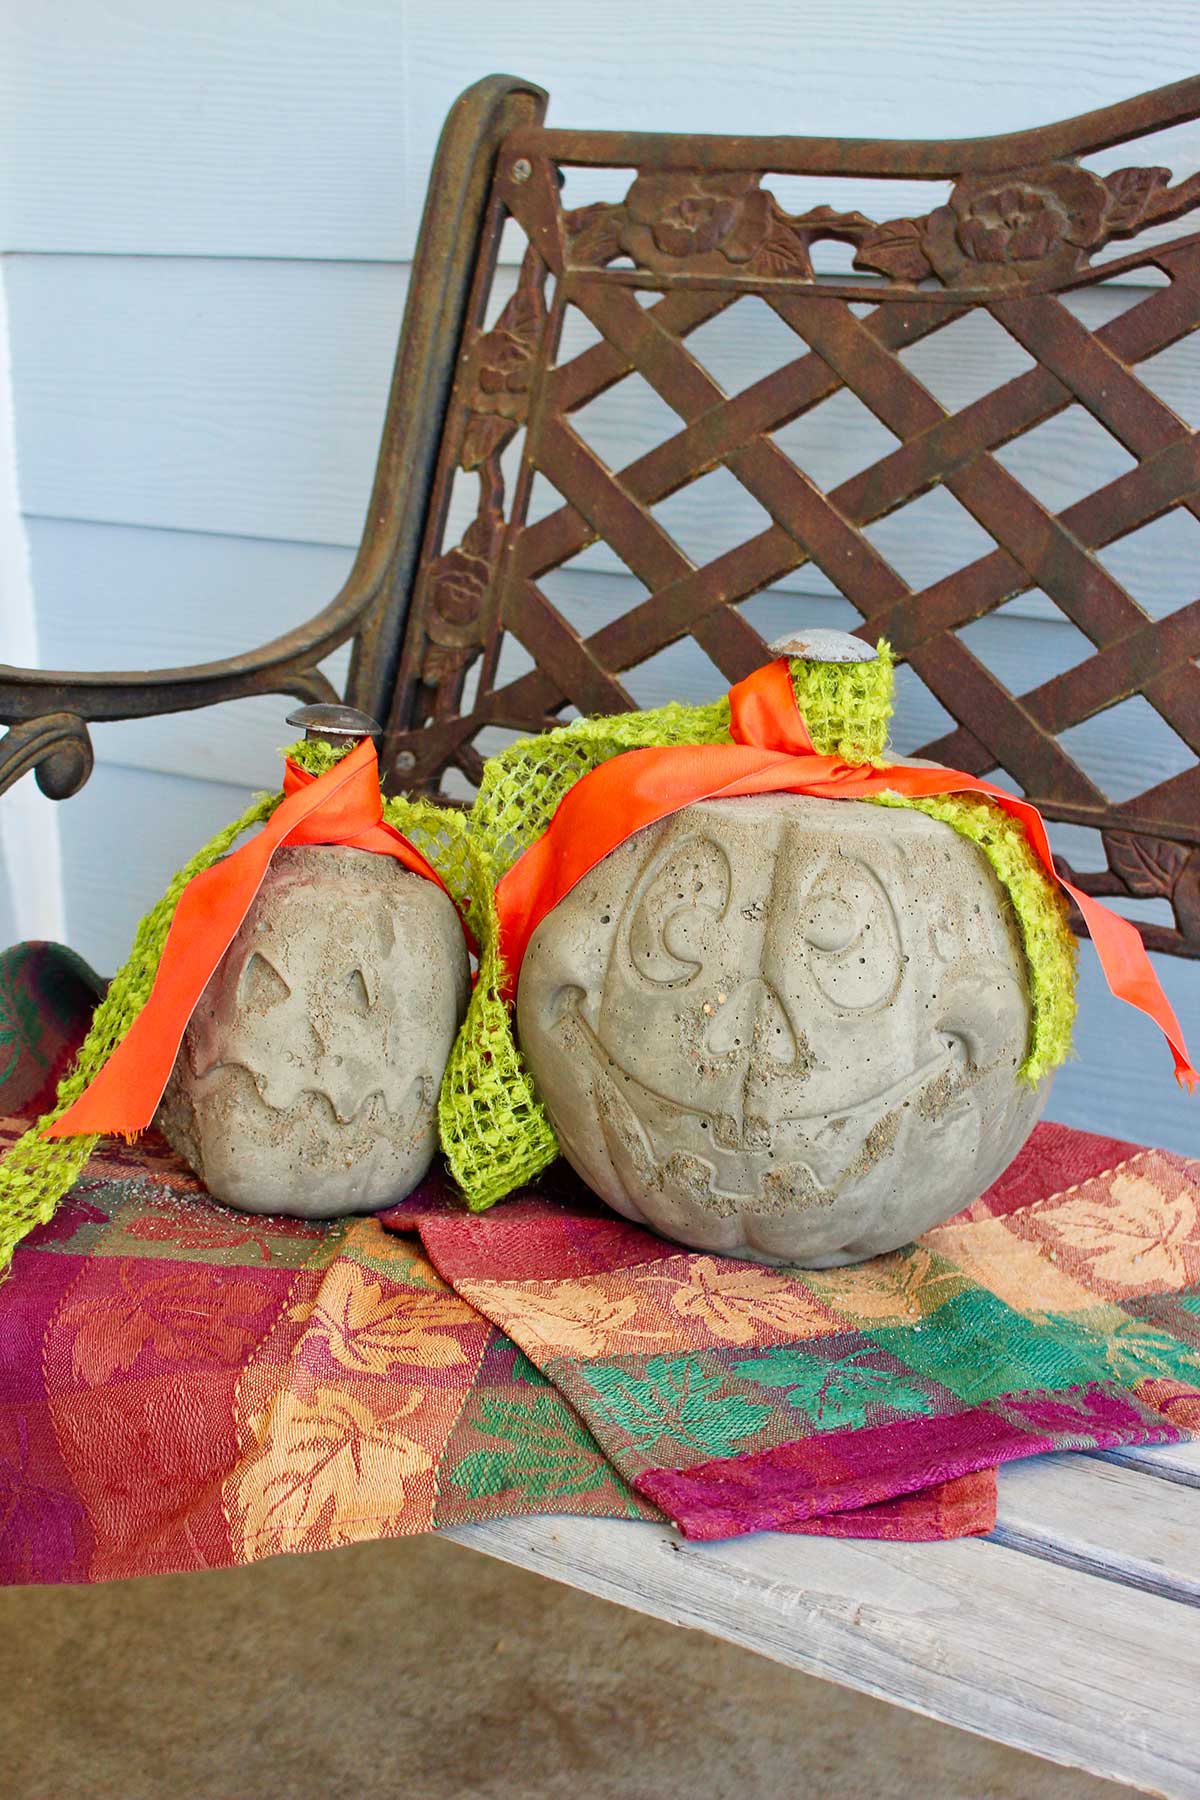
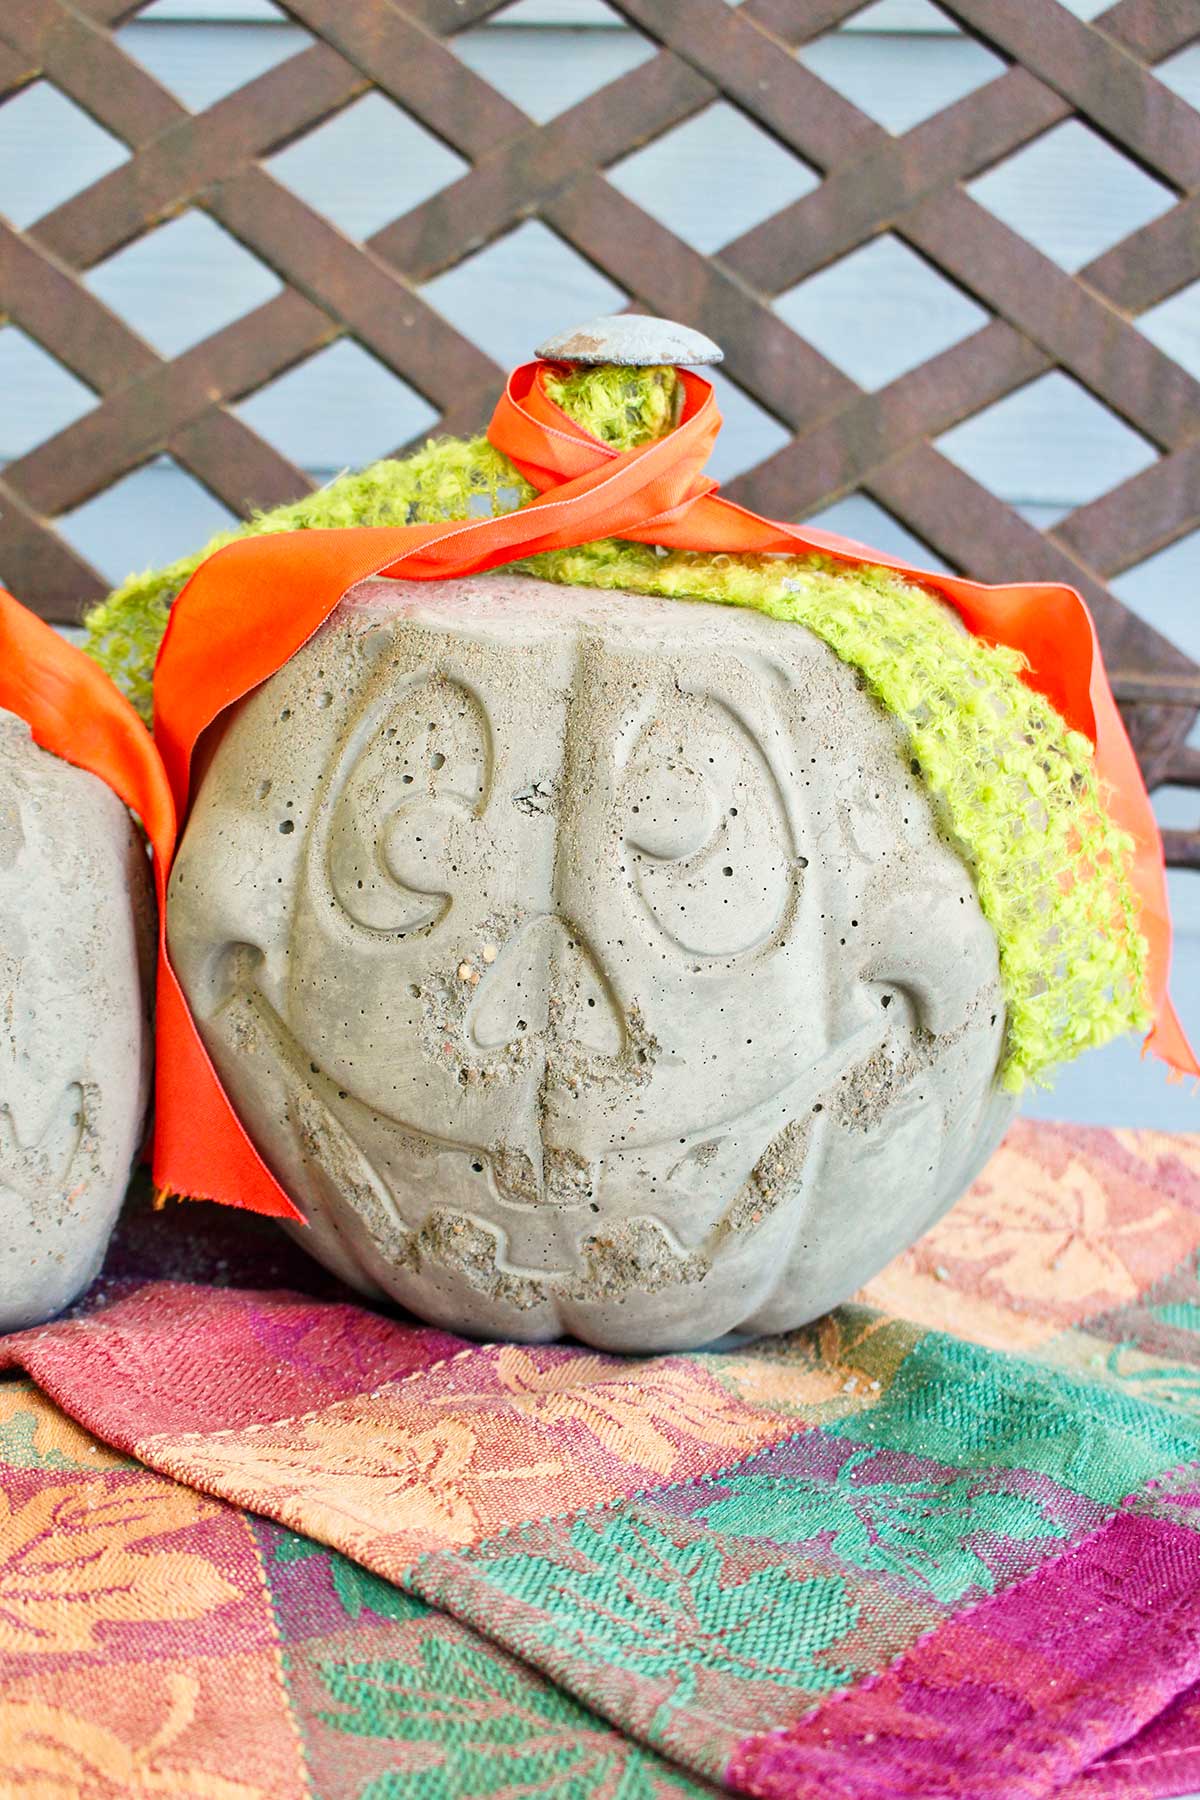
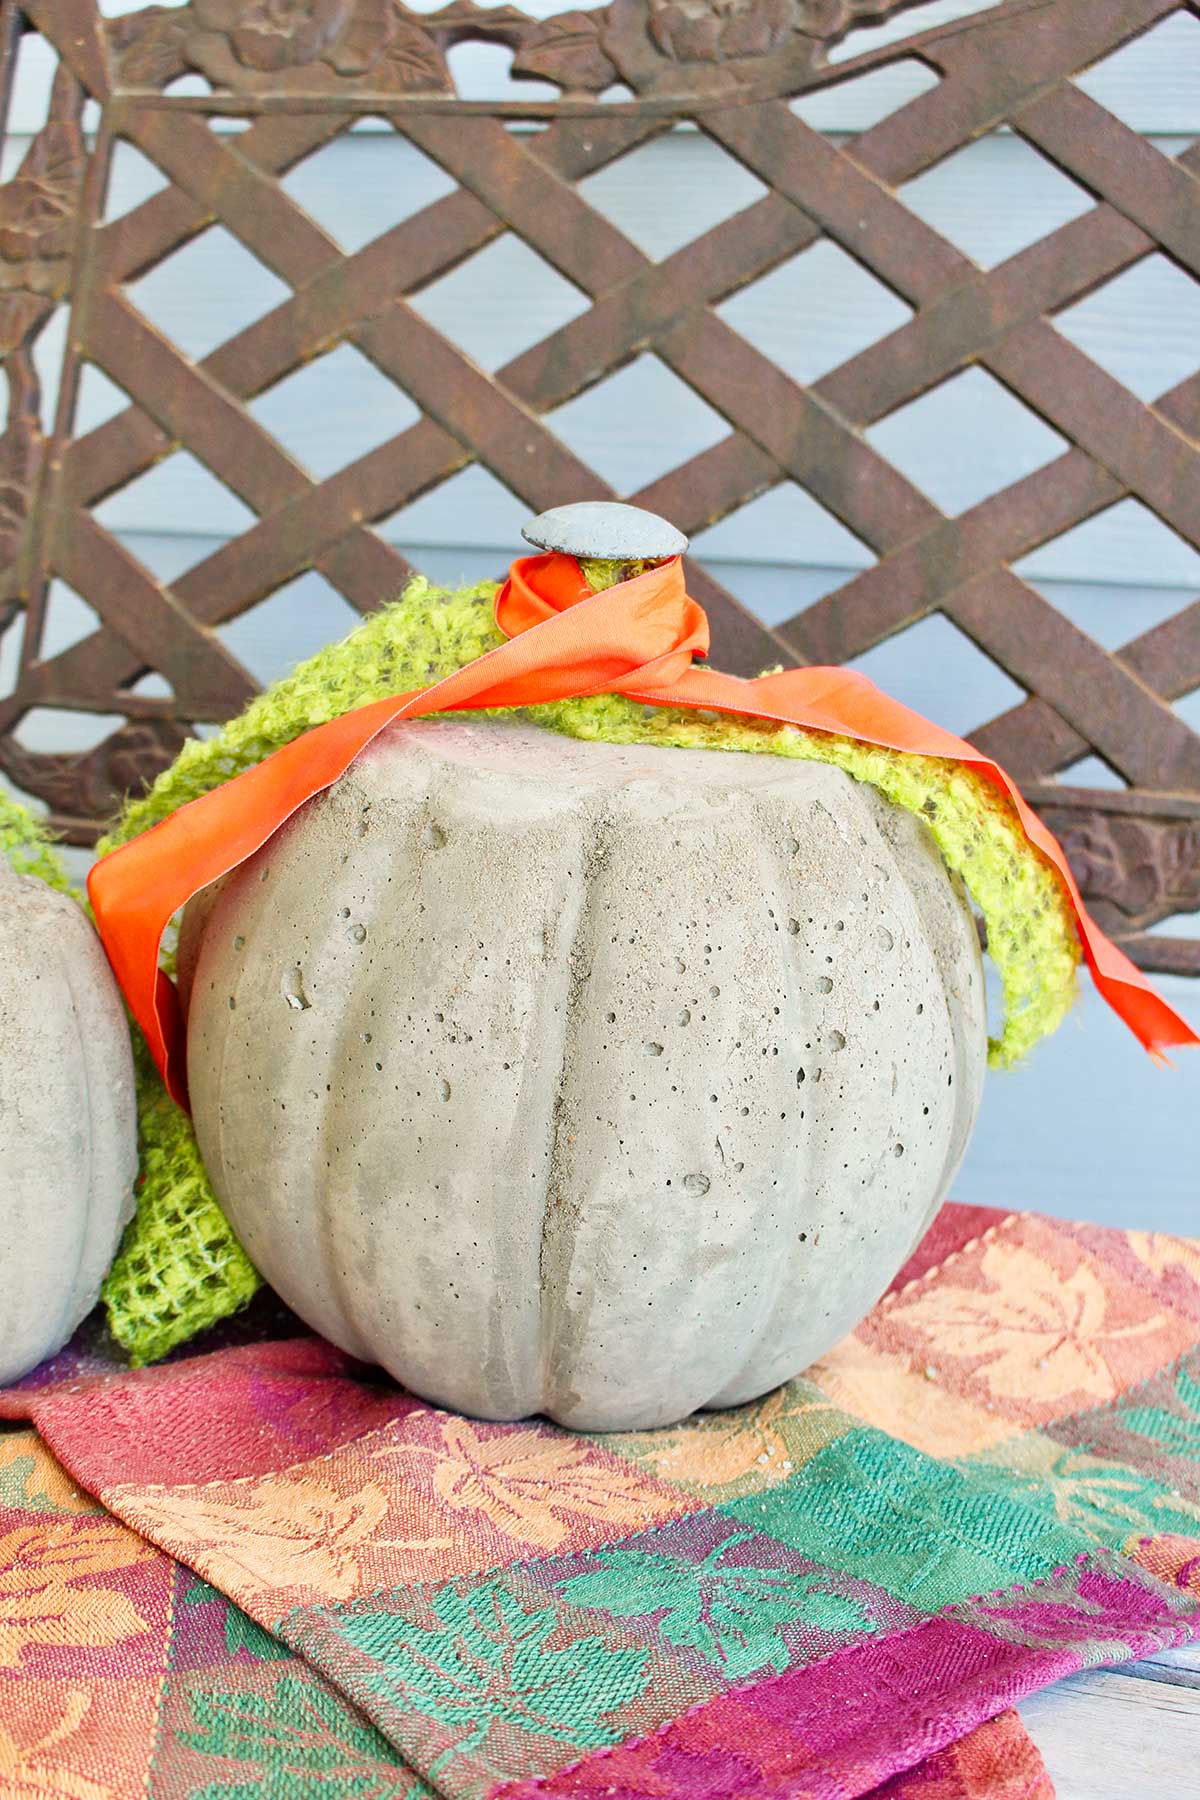
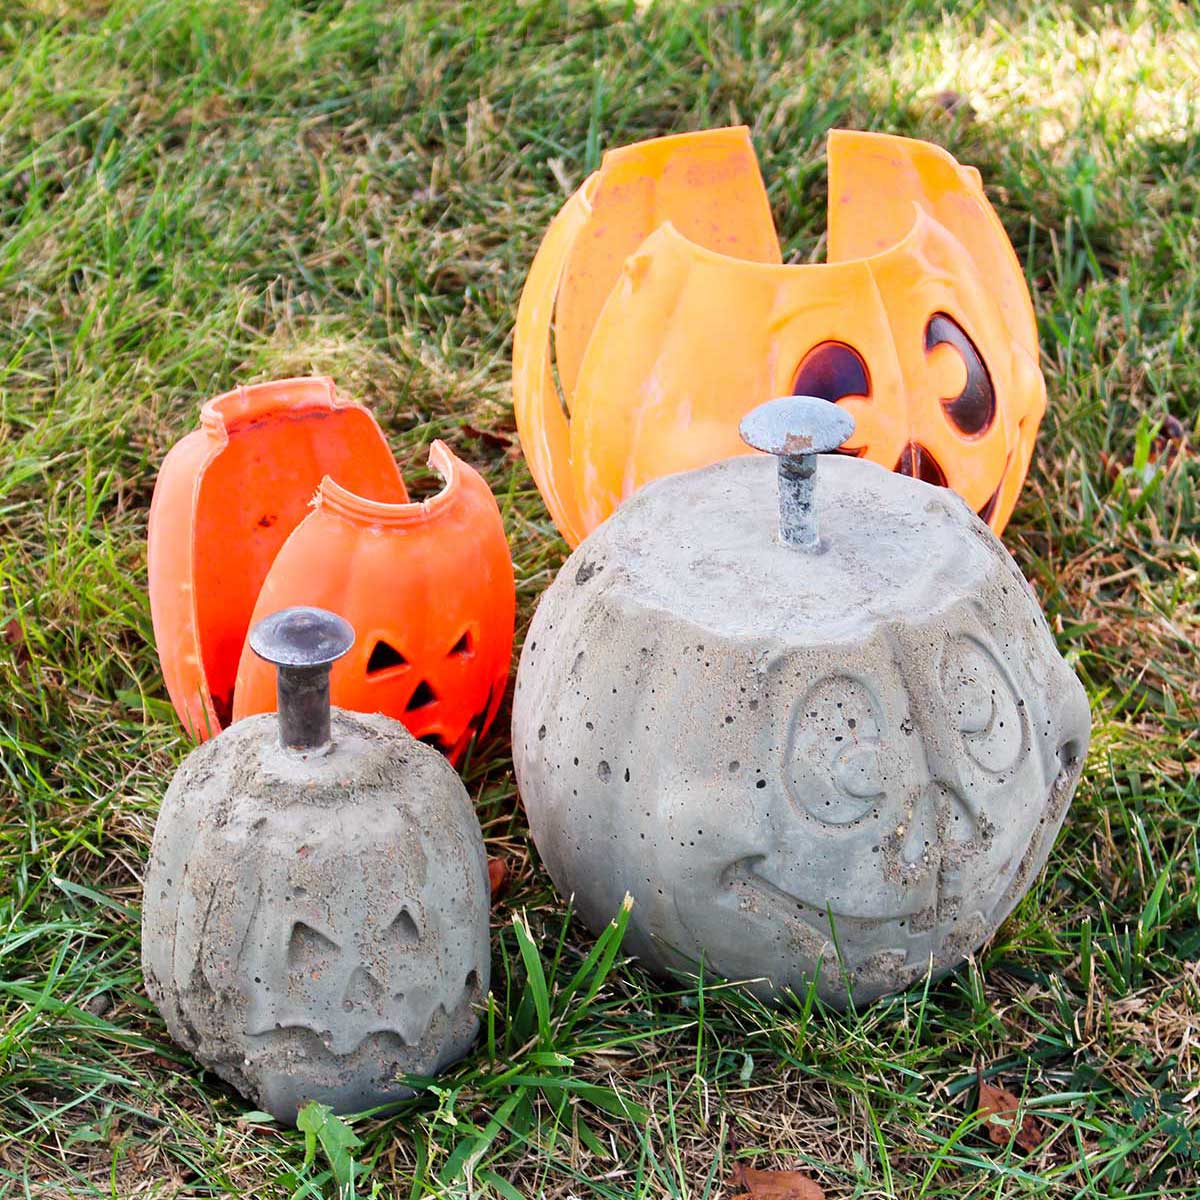
This fun fall Concrete Pumpkin DIY results in a really cute and sturdy front porch decoration. A simple Halloween jack-o'-lantern plastic trick or treat bucket serves as a form for the concrete pumpkin. The delightful surprise is that it has a Halloween Jack-o'-lantern face on one side and a plain pumpkin on the other!
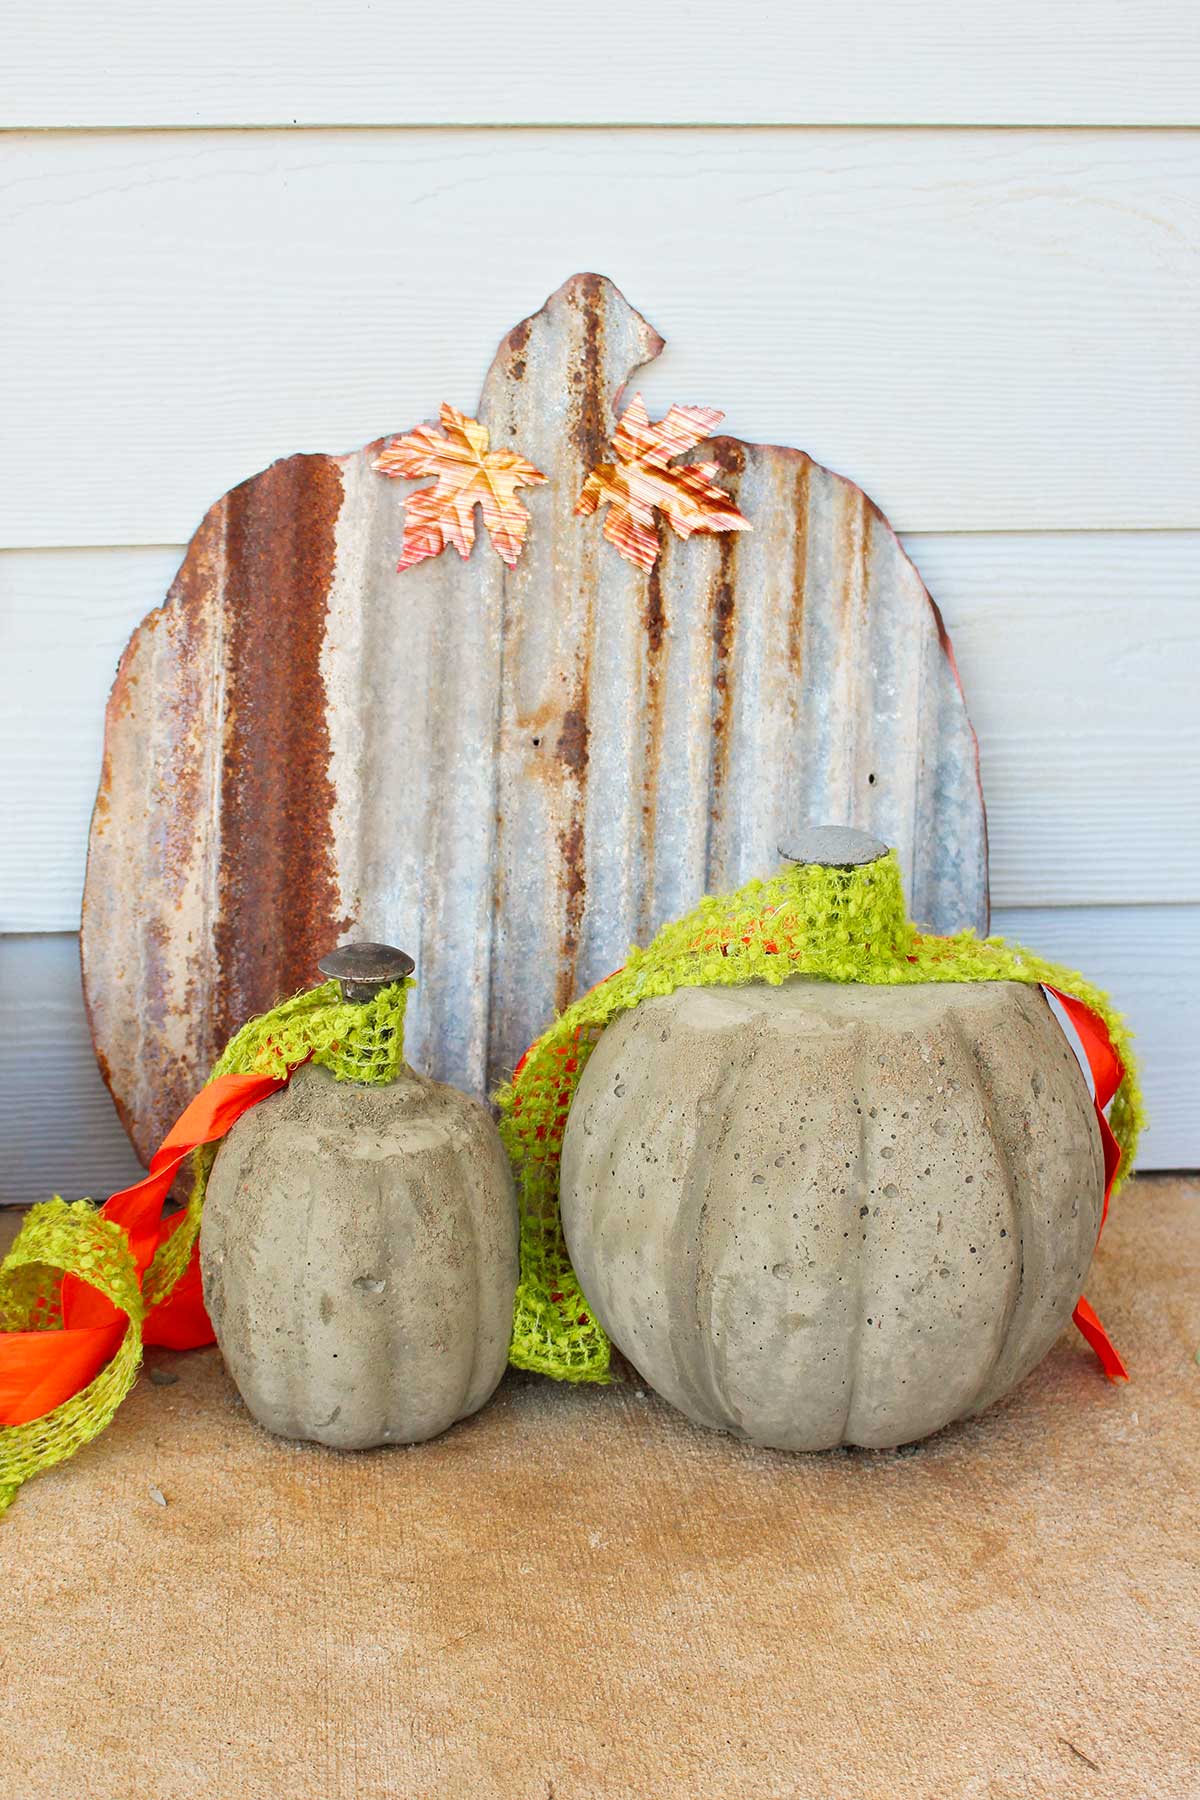
I am so pleased with how these concrete pumpkins turned out! I keep walking out on the porch to look at them and will turn them around to change the look come Halloween!
Heads Up- More Advanced Craft
Before we start I wanted to give you a heads-up.
This craft is more advanced, so it’s one that the older kids will do with you as you assist them with some of the steps. An adult will need to do the steps that are more difficult and potentially dangerous.
You will be mixing concrete, cutting the plastic pumpkin, and carrying a heavy cement sack and concrete pumpkin. I promise that the process will be a fun adventure together and the results are the prize.
DIY Concrete Pumpkins coming to a porch near you!
I had some leftover cement in a bag in my garage from making stepping stones and was looking for a way to use it. Before donating this jack-o'-lantern trick or treat bucket I had a creative “I wonder if this could work!” thought. Could this bucket work as a concrete pumpkin mold?
Well, it exceeded my expectations!
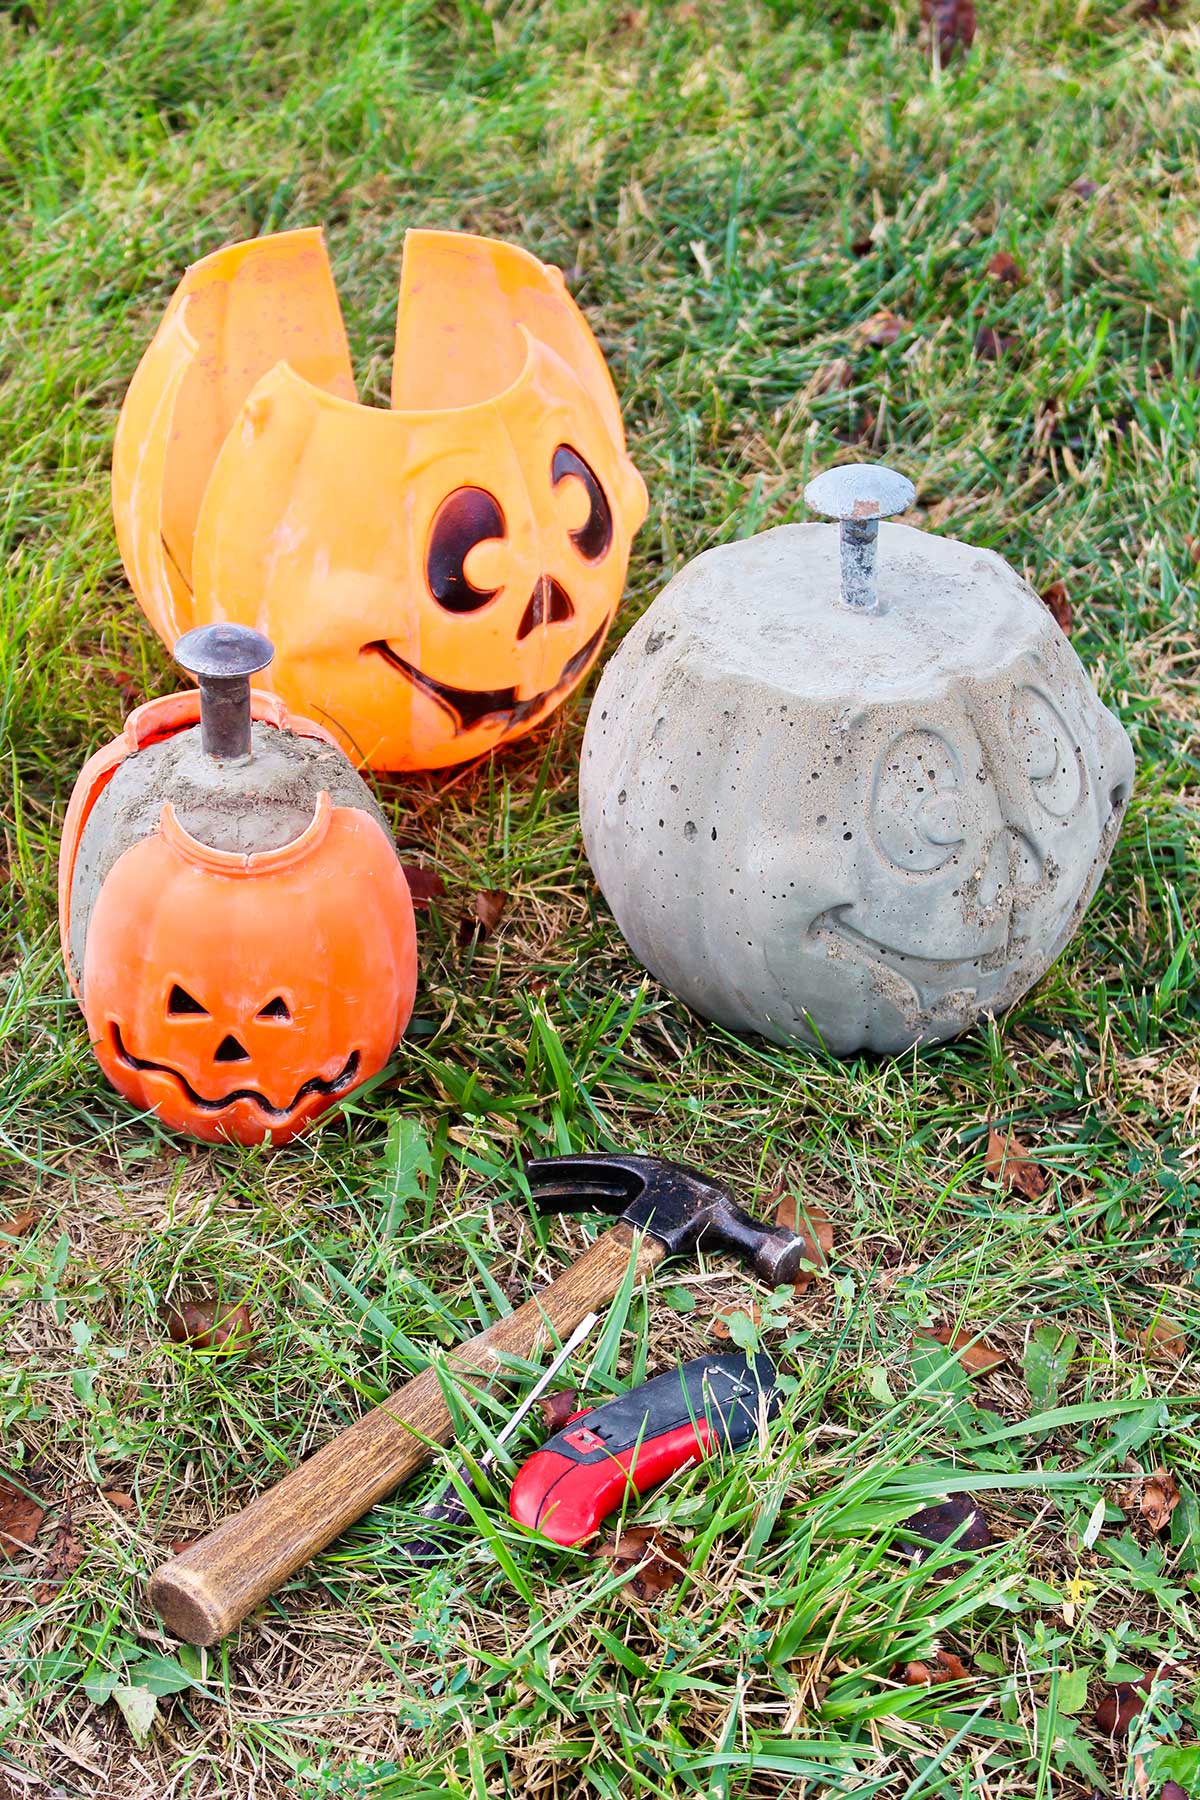
The bucket worked as a great mold for this cement pumpkin craft. The jack-o'-lantern face was a bonus. I can enjoy the plain pumpkin side all fall and then turn it around and use the face for Halloween!
You can find the concrete and a jack-o’-lantern trick or treat bucket at many hardware, craft, and discount stores.
Cement or Concrete—What's the Difference?
Before we start, I wanted to clear up something that can be a bit confusing. You will hear me use the words cement and concrete throughout this post, and sometimes I will use them interchangeably. That’s how we commonly talk about this type of craft.
Technically, though, they are not exactly the same thing.
Cement is the dry, gray powder that’s mainly made from ground limestone and clay. It acts as the binder or “glue” in concrete.
Concrete is the finished mixture made by combining cement with water and materials such as sand and gravel or small rocks (aggregate). The mixture sets into a hard and durable substance.
So, simply put:
- Cement = the dry powder that helps hold everything together.
- Concrete = the hard material that results when cement, water, and aggregate are combined and set up.
Concrete is the material we often see in sidewalks, driveways, stepping stones- and now, our concrete pumpkins!
And now you know the rest of the story! 😊
If you want to see the process and how to mix concrete check out the full length video on YouTube: YouTube Concrete Pumpkin DIY for Fall Full Length Video
Supplies for Concrete Halloween Pumpkins
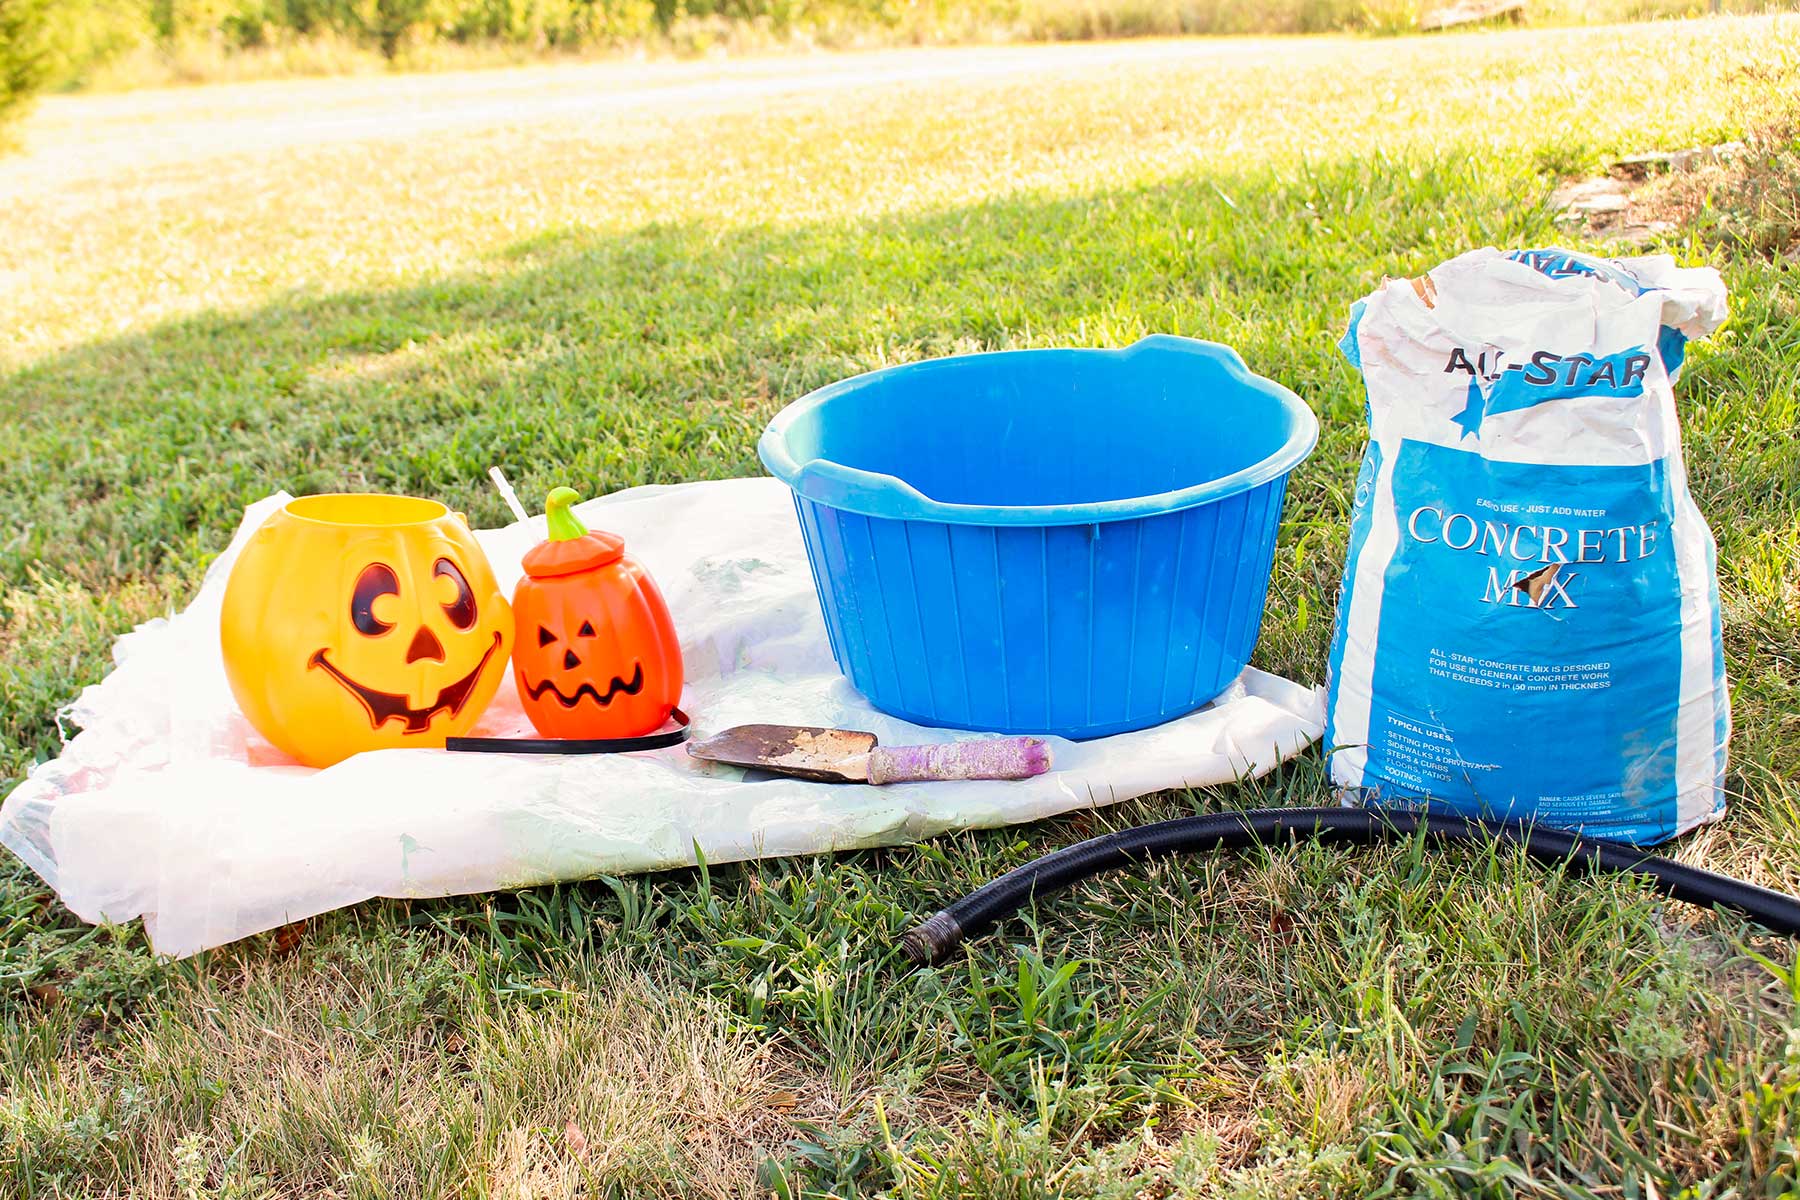
Here are the supplies you will need to make your diy cement pumpkin craft.
- A bag of concrete mix that is ready to mix with water
- A lightweight plastic jack-o'-lantern trick-or-treat bucket
- A bucket or plastic tub for mixing the concrete
- A garden trowel or small garden shovel for mixing and scooping
- A large bolt, railroad spike, stick, or short piece of dowel for the pumpkin stem
- Two short sticks or small boards to help hold the stem in place while the concrete hardens
- Utility knife
- Heavy-duty scissors, optional
- Work gloves
- Safety glasses
- Plastic sheeting or an old piece of cardboard to protect your work surface
A Quick Note About the Pumpkin Bucket
The type of plastic bucket you use makes a difference!
I tried using heavier plastic pumpkin shaped containers, and they were much more difficult to remove from the hardened concrete. The inexpensive, thin plastic Halloween trick-or-treat buckets worked much better because the plastic can be cut and pulled away from the pumpkin more easily.
So when you're shopping for your diy concrete pumpkins, don't look for the heavier plastic bucket, choose the one made from thinner plastic!
Steps to Make a DIY Concrete Pumpkins
1. Gather your supplies.
Gather and set out your supplies before you begin. I recommend working outside or in a well-ventilated area and putting down plastic sheeting or cardboard to protect your work surface.
Remember that concrete is heavy, wet or dry, so work on the ground or choose a sturdy work table.
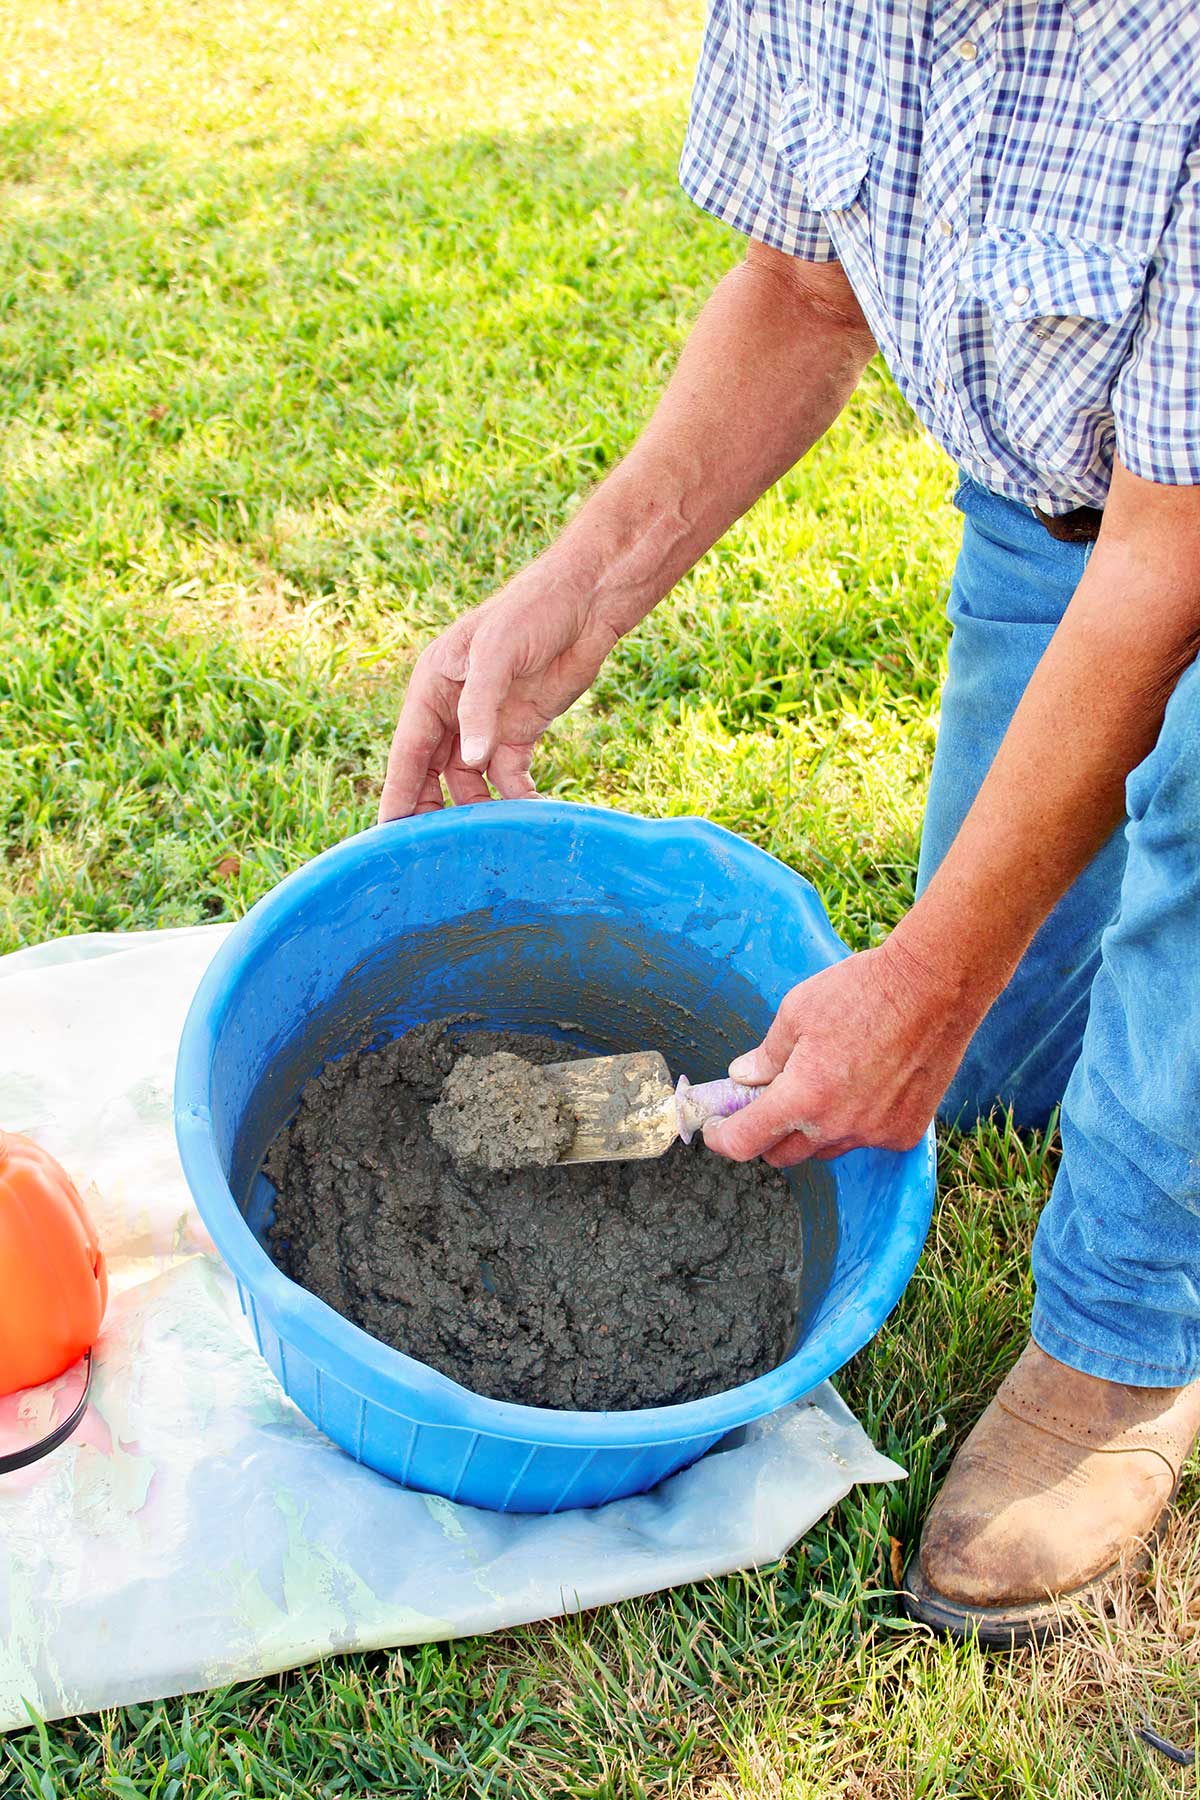
2. Prepare the concrete mix.
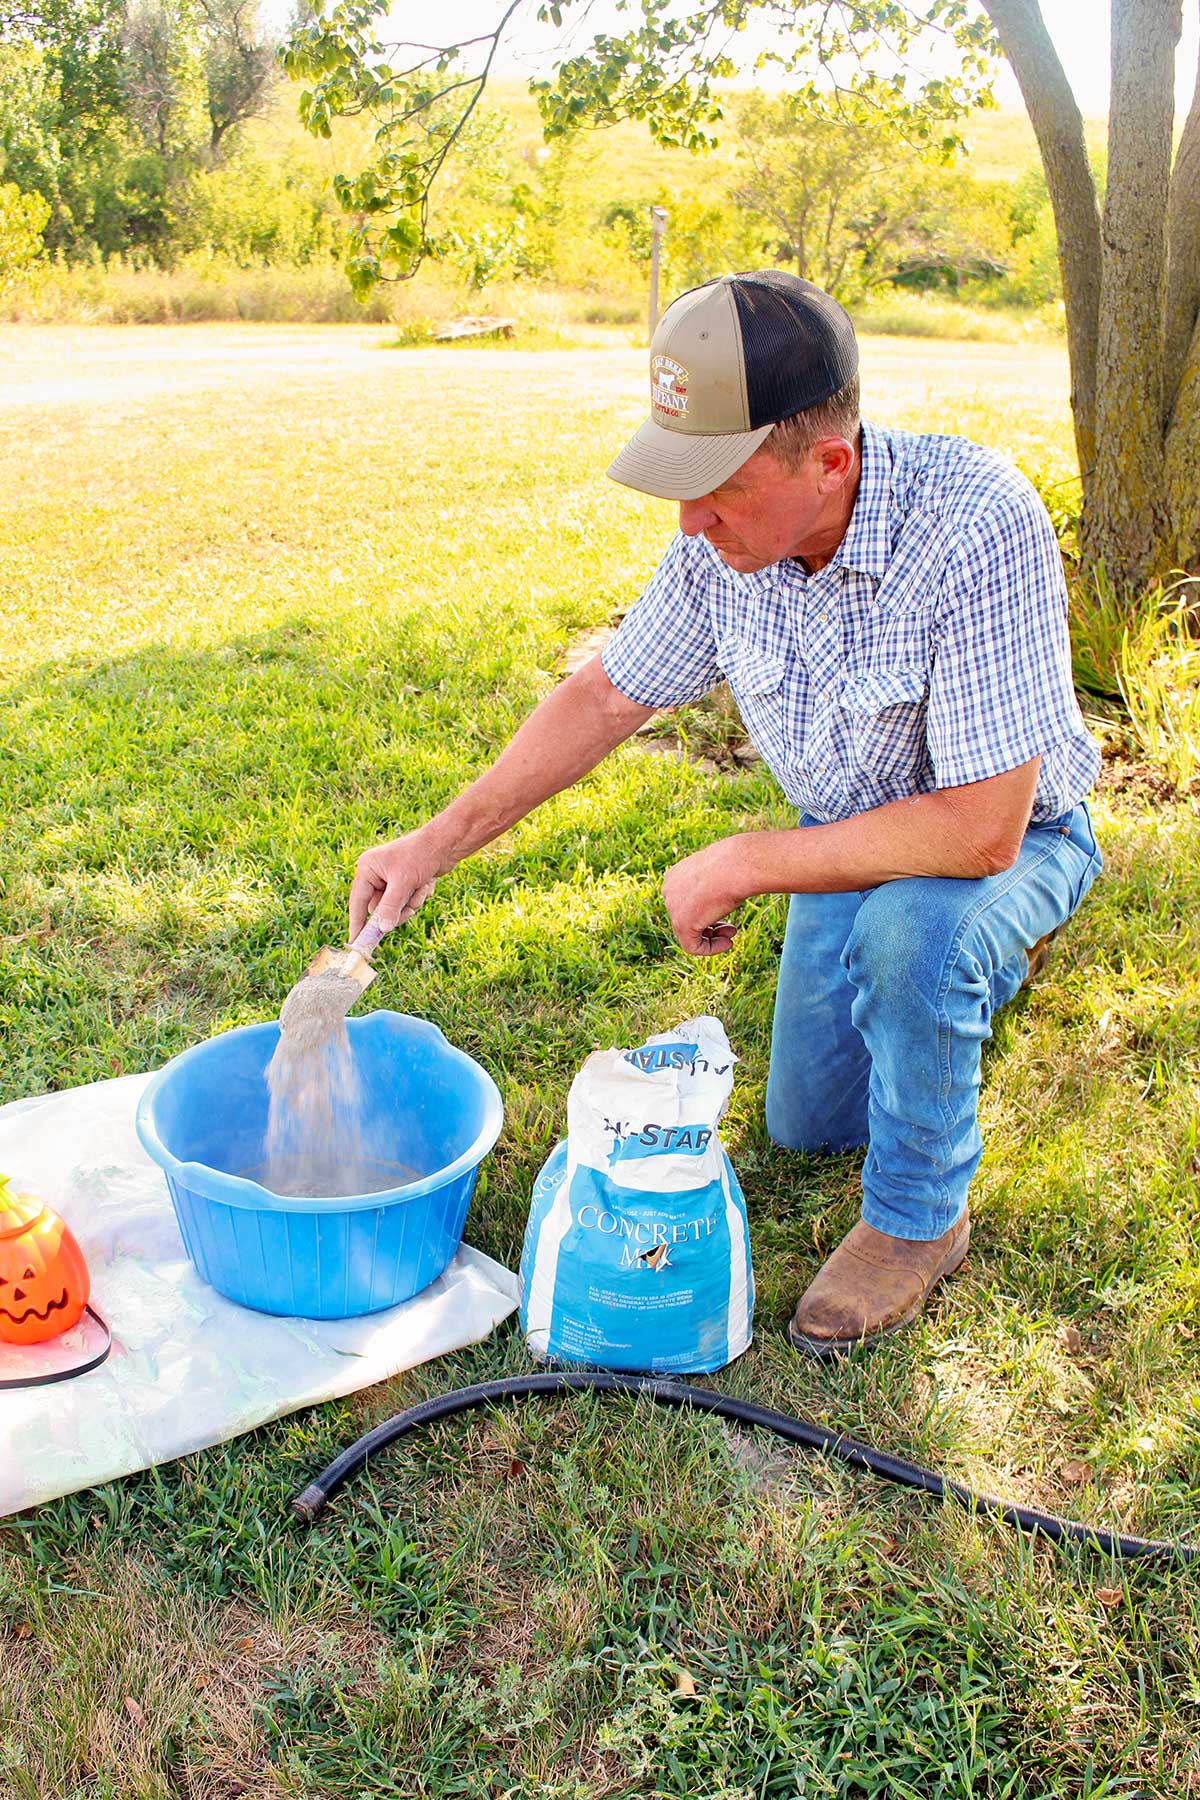
Pour about one-third of the bag of concrete mix into your mixing tub or bucket.
Slowly add water, a small amount at a time, mixing as you go. You want the concrete to be a thick mixture, not runny. If you accidentally add too much water, you can add a little more dry concrete mix to thicken it back up.
A thicker mixture will make this cement pumpkin easier to work with and will help keep the pumpkin from taking a longer time to harden.
Safety note: Wear gloves and safety glasses when working with concrete mix and follow the safety directions on the package. (Sorry, we were not a good example of this in the video!)
3. Prepare the jack-o'-lantern bucket.
Remove the handle from the trick-or-treat bucket using heavy-duty scissors.
Set the bucket where you want to fill it with concrete. Once the concrete is inside, the pumpkin will become quite heavy, so don't plan on moving it very far!
4. Fill the concrete pumpkin mold.
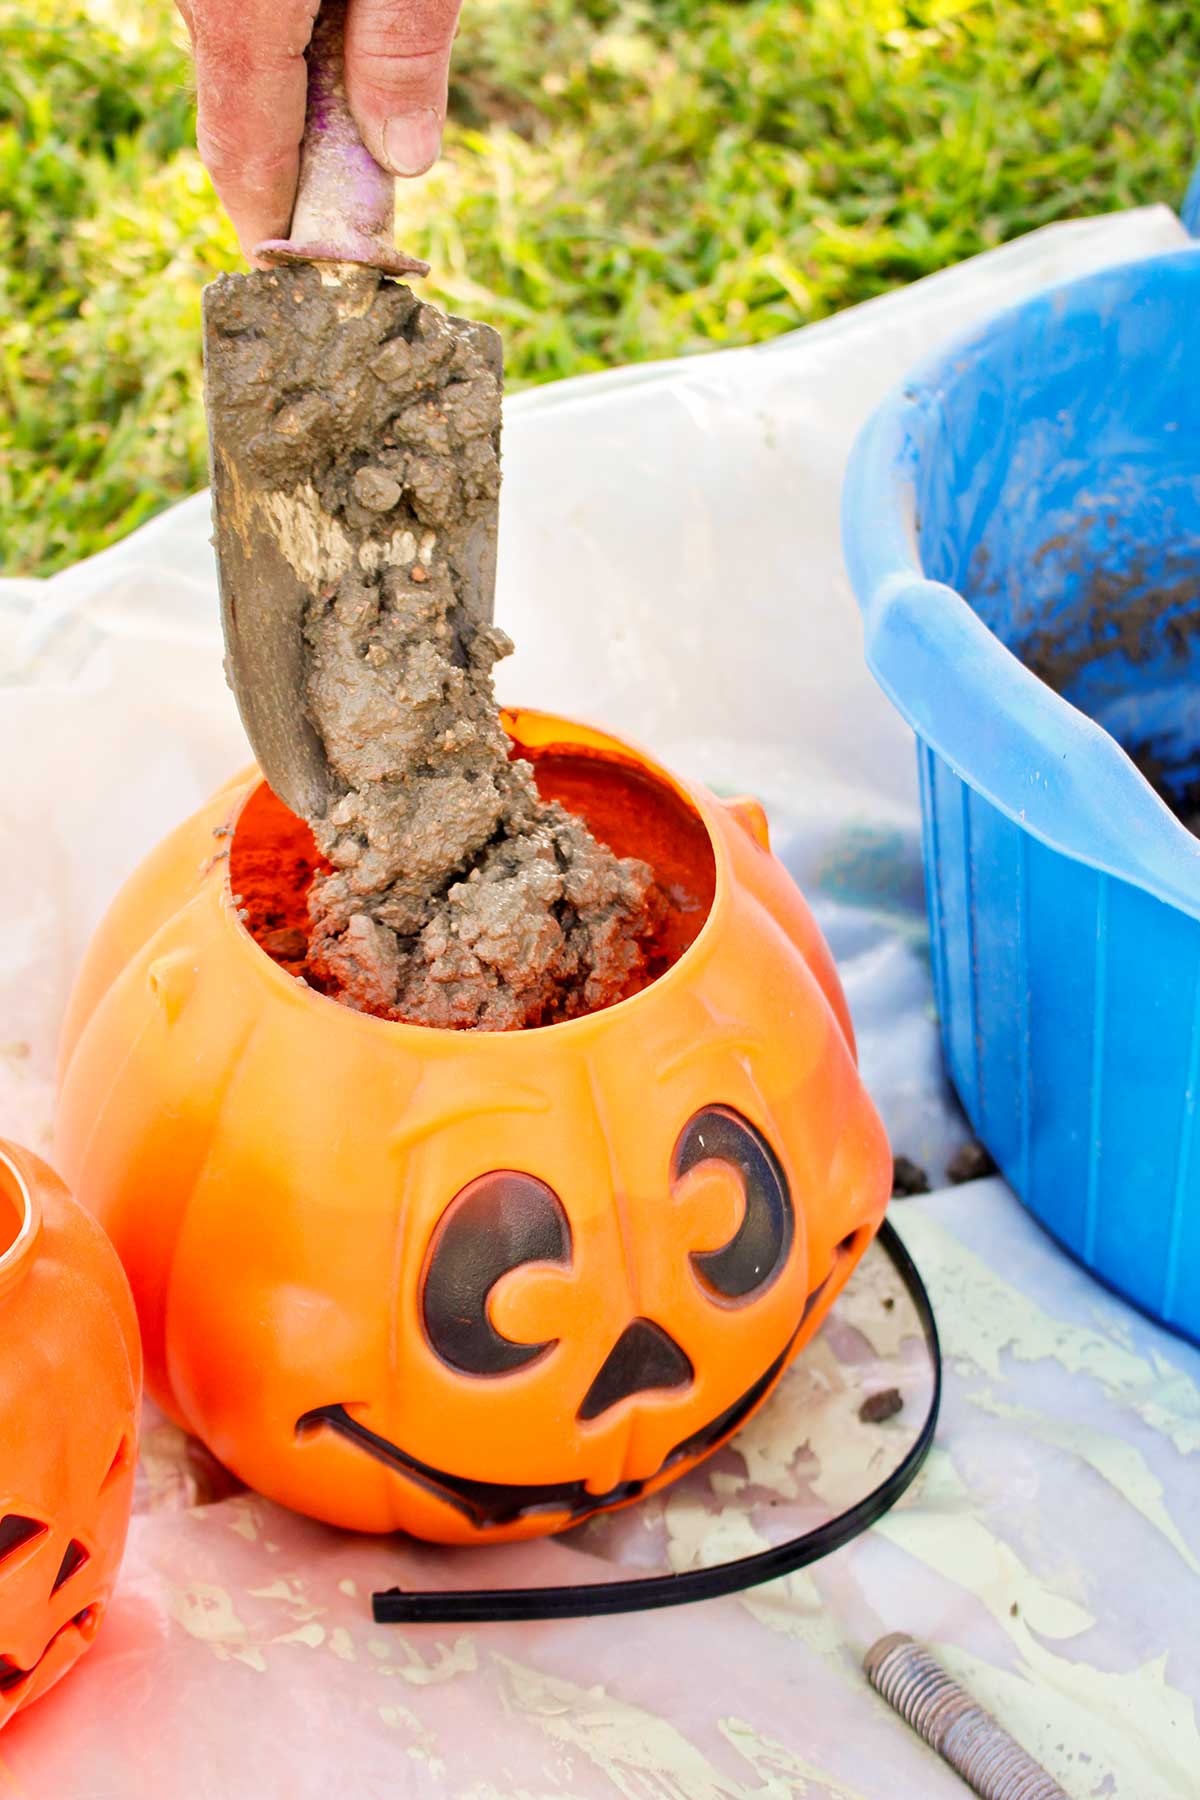
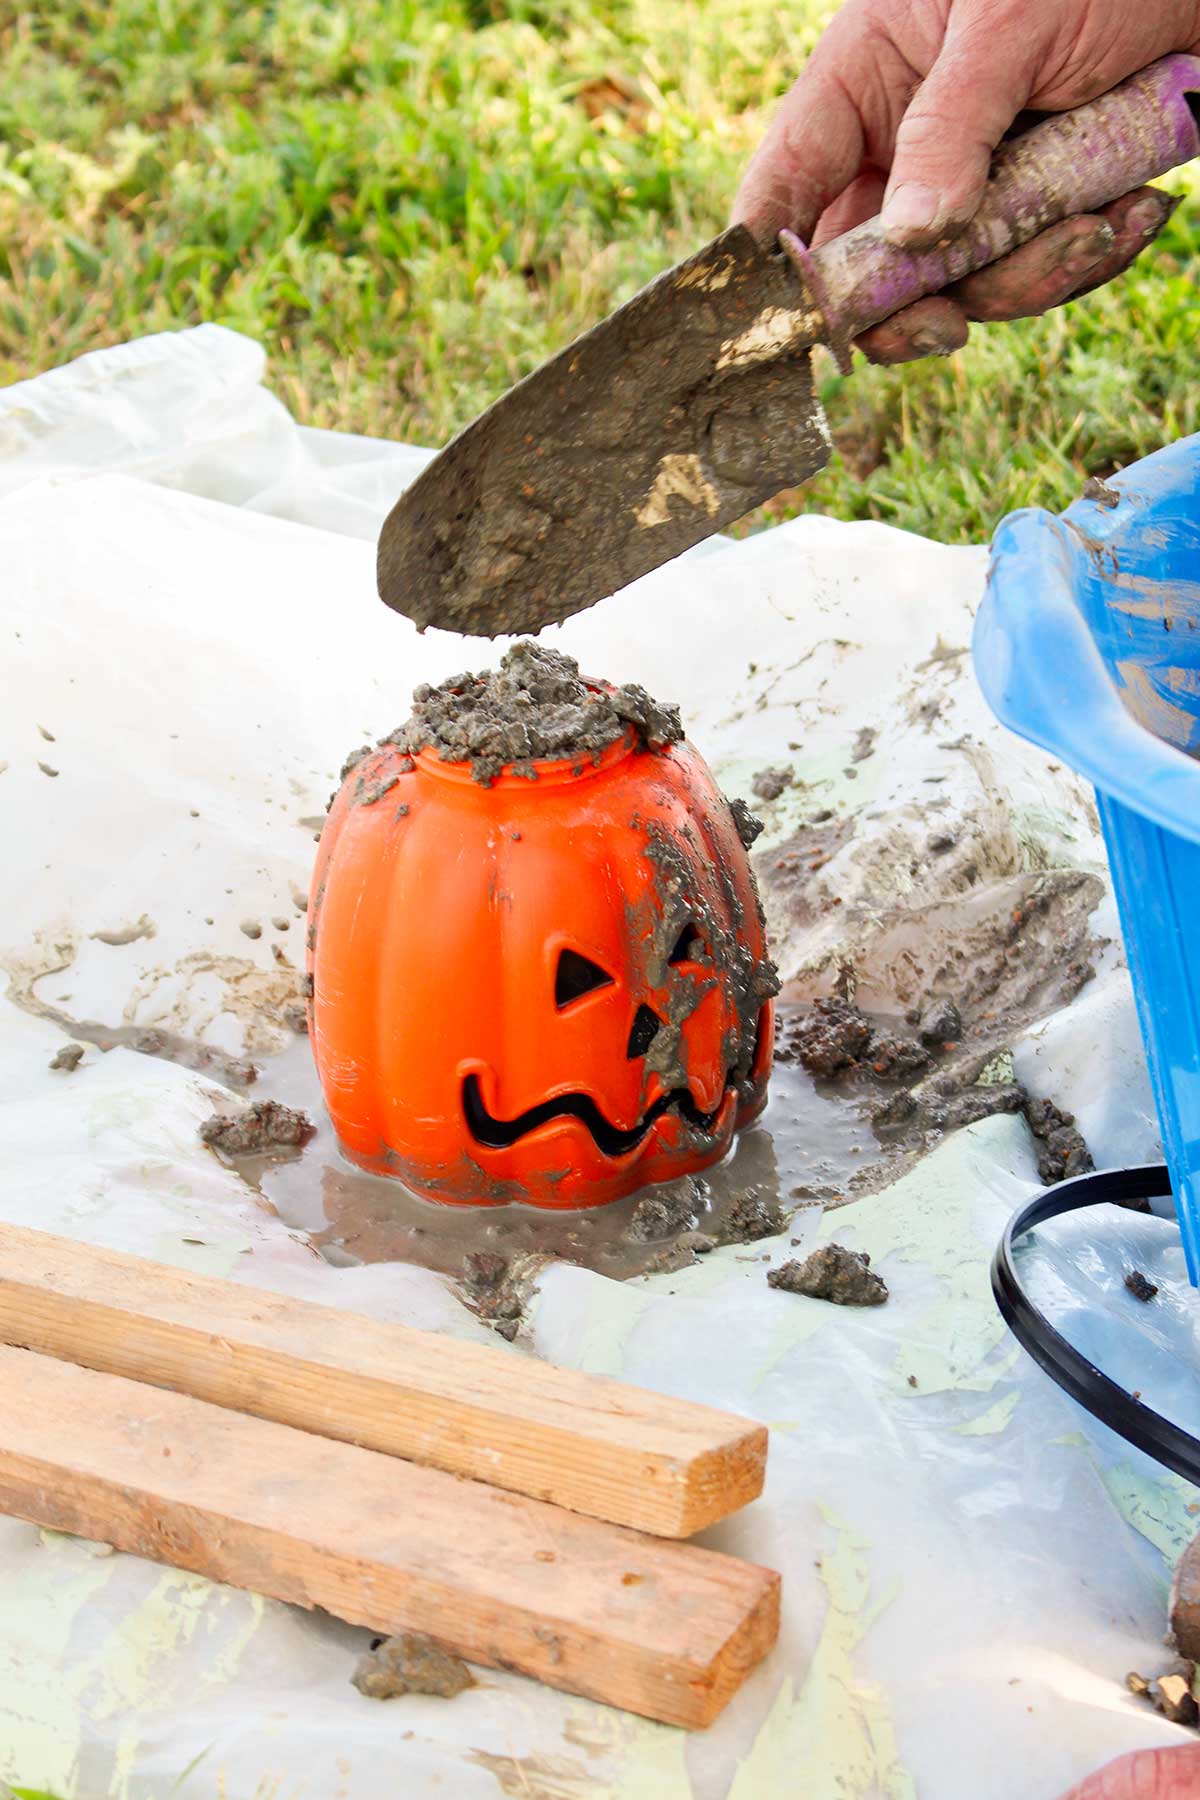
Use your garden trowel to scoop the concrete into the jack-o'-lantern trick-or-treat bucket.
Fill the trick or treat bucket all the way to the top.
Every so often, gently tap the sides of the bucket or lightly bounce the bucket against your work surface to help the concrete settle into the pumpkin shape and release some air bubbles.
If you don't have quite enough concrete to fill the bucket, mix a little more.
5. Add the pumpkin stem.
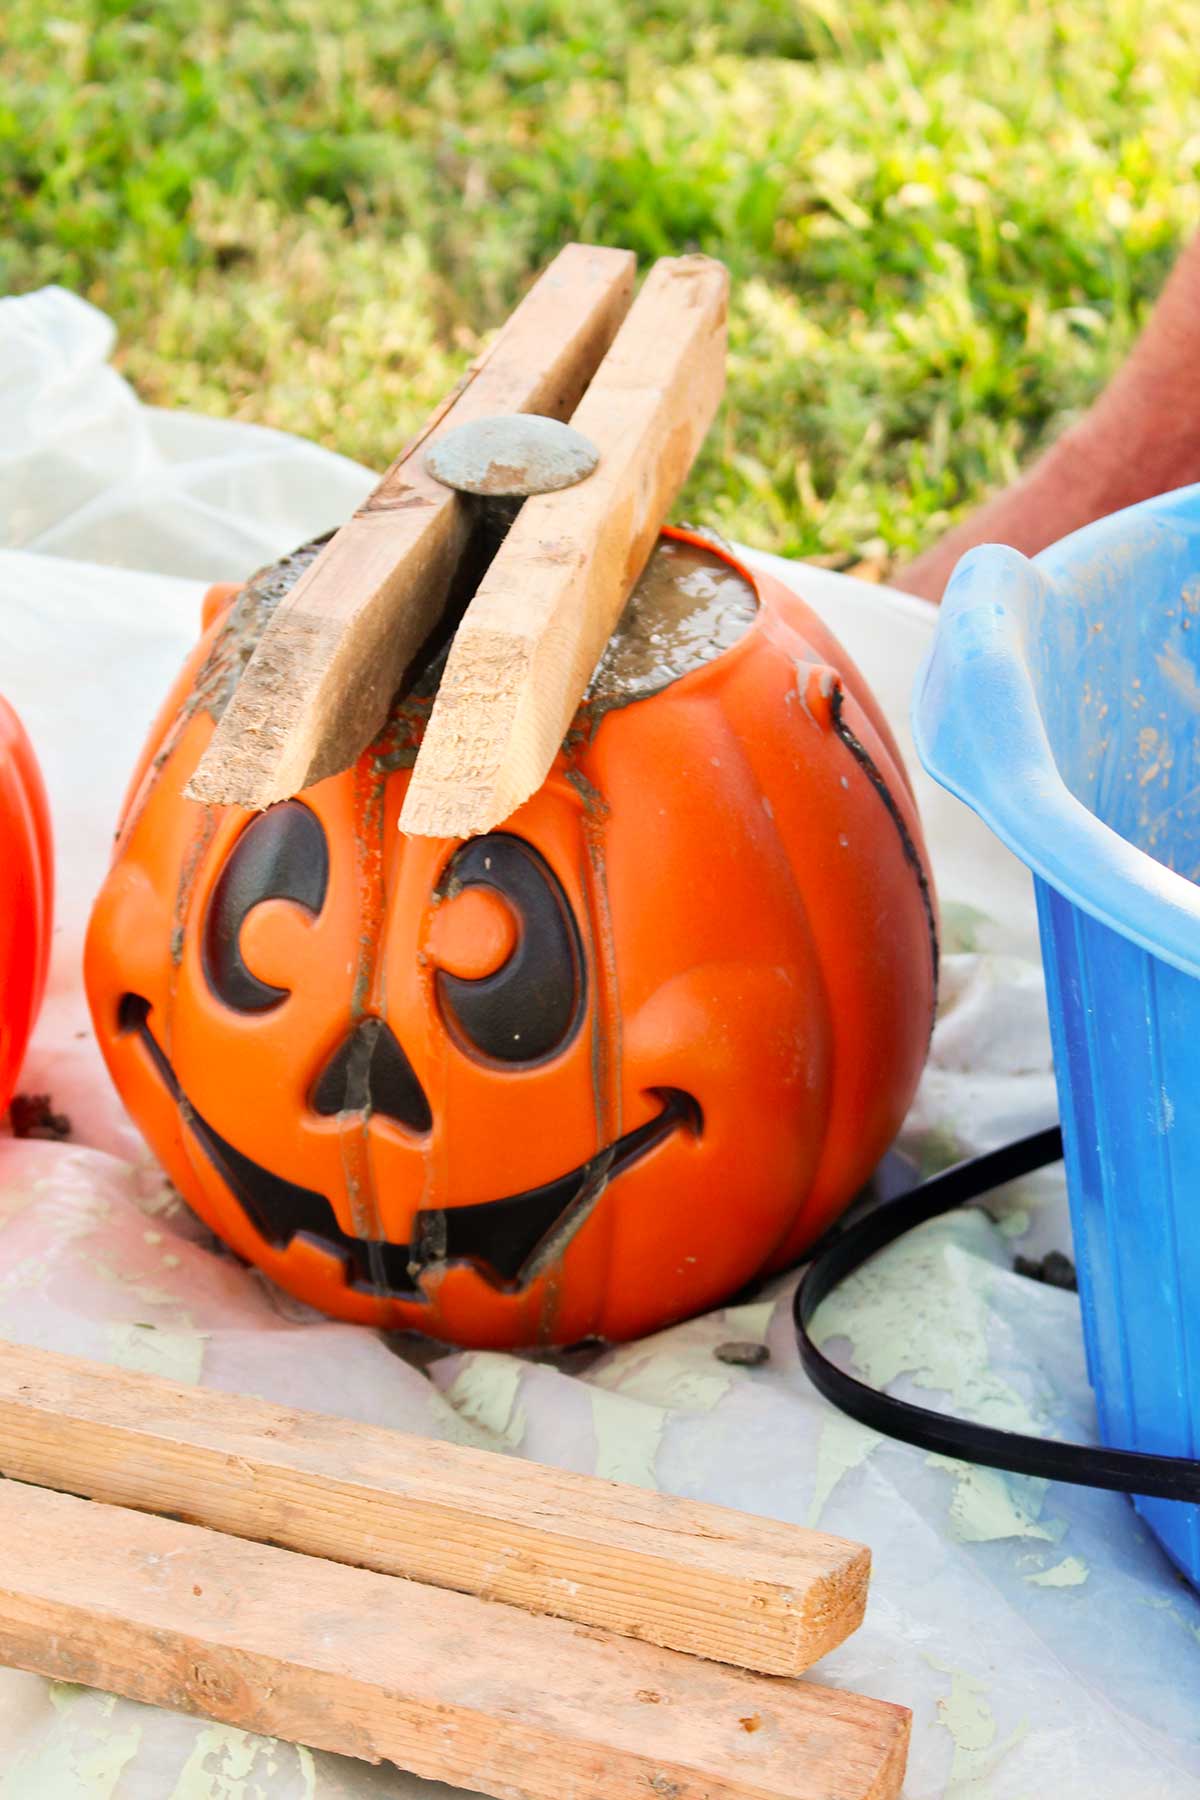
Place the item you have chosen for the stem into the top of the wet concrete.
I used a metal bolt for mine because it will hold up well outdoors.
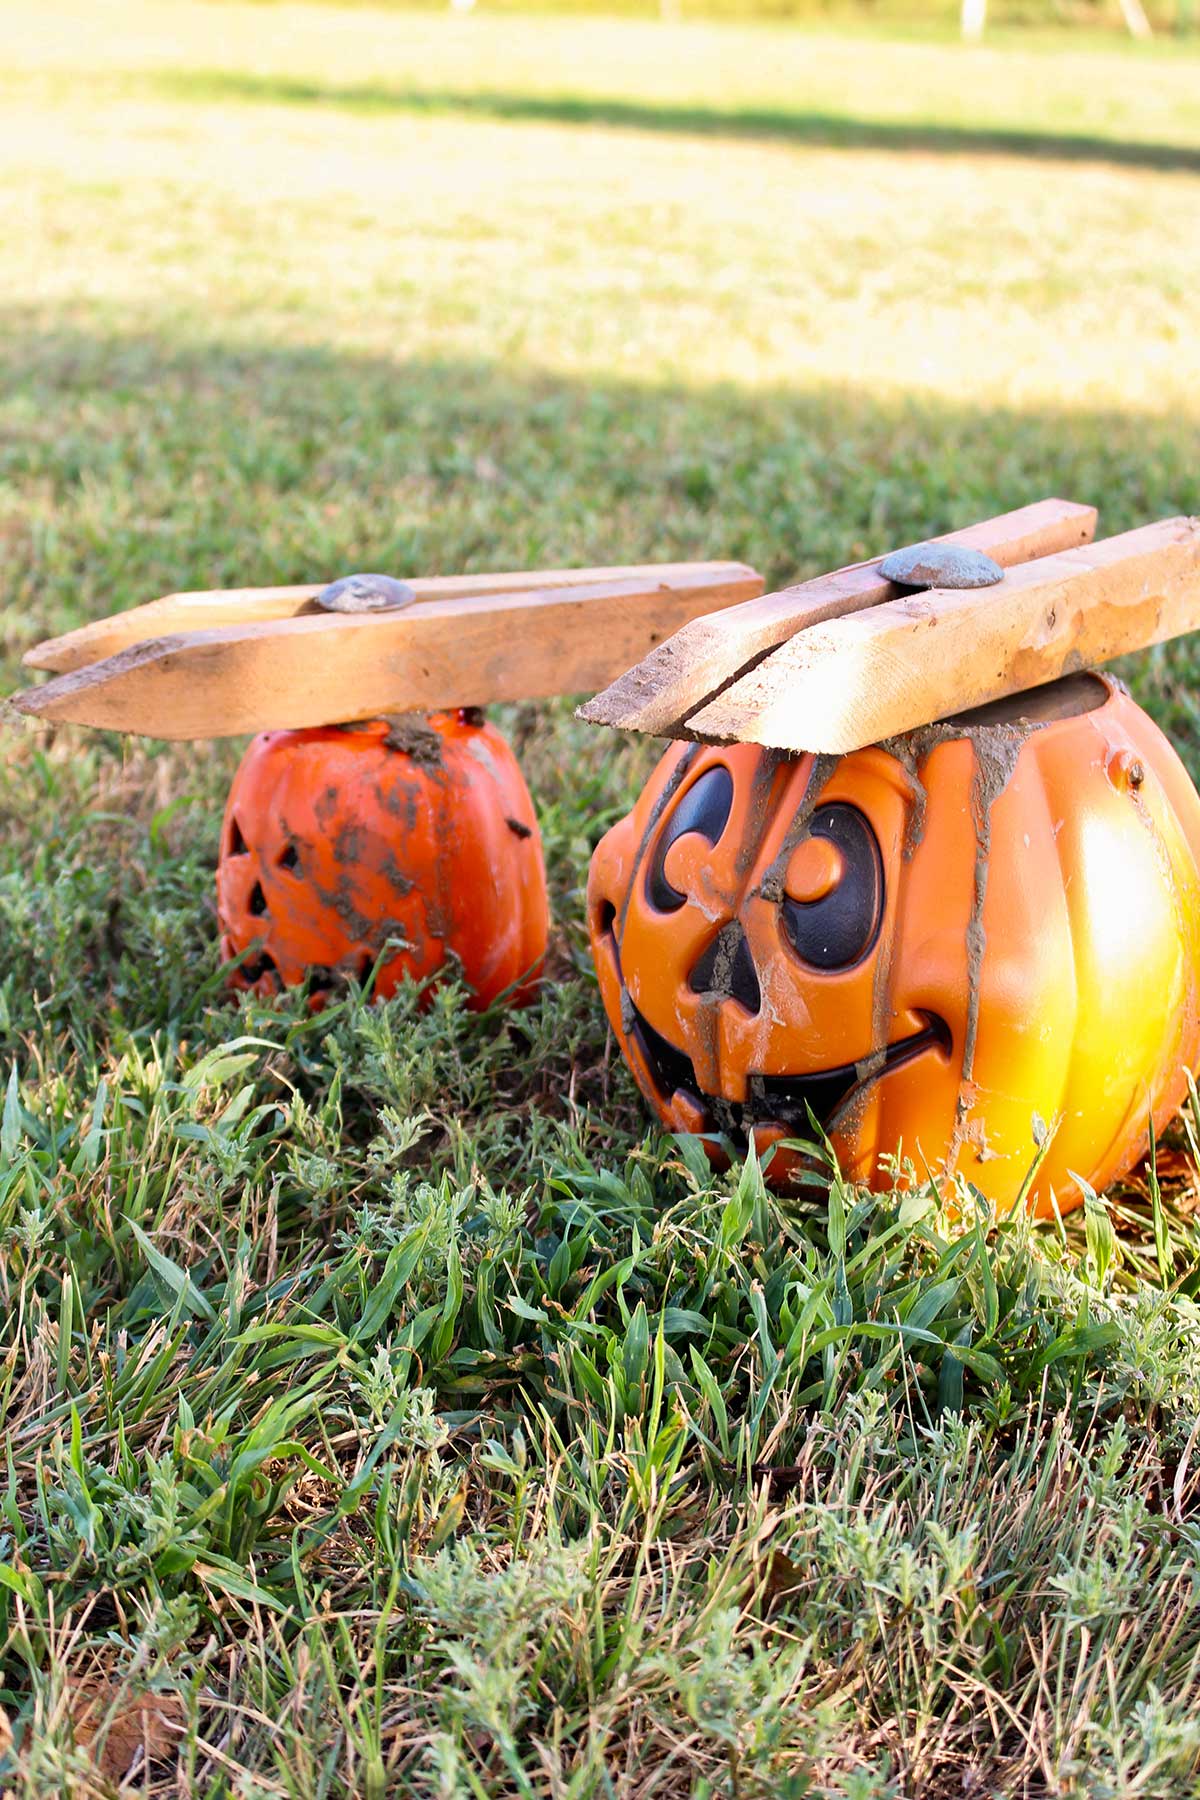
The stem will want to sink down into the wet concrete, so this is where the two little sticks or boards come in handy. Place them across the top of the bucket so they can hold the stem at the height you want while the concrete hardens.
Make sure the stem is sitting straight before you leave the pumpkin to harden.
6. Let the pumpkin harden.
Set the pumpkin somewhere safe where it won't be bumped or disturbed.
Allow it to harden for at least 48 hours before attempting to remove the plastic mold. Cooler or damp conditions may require additional time. It's hard to be patient, but important! That isn't always easy when you are anxious to see how your project turned out!
Clean your bucket or tub and tools.
7. Carefully cut away the plastic mold.
This is the step where an adult should take over.
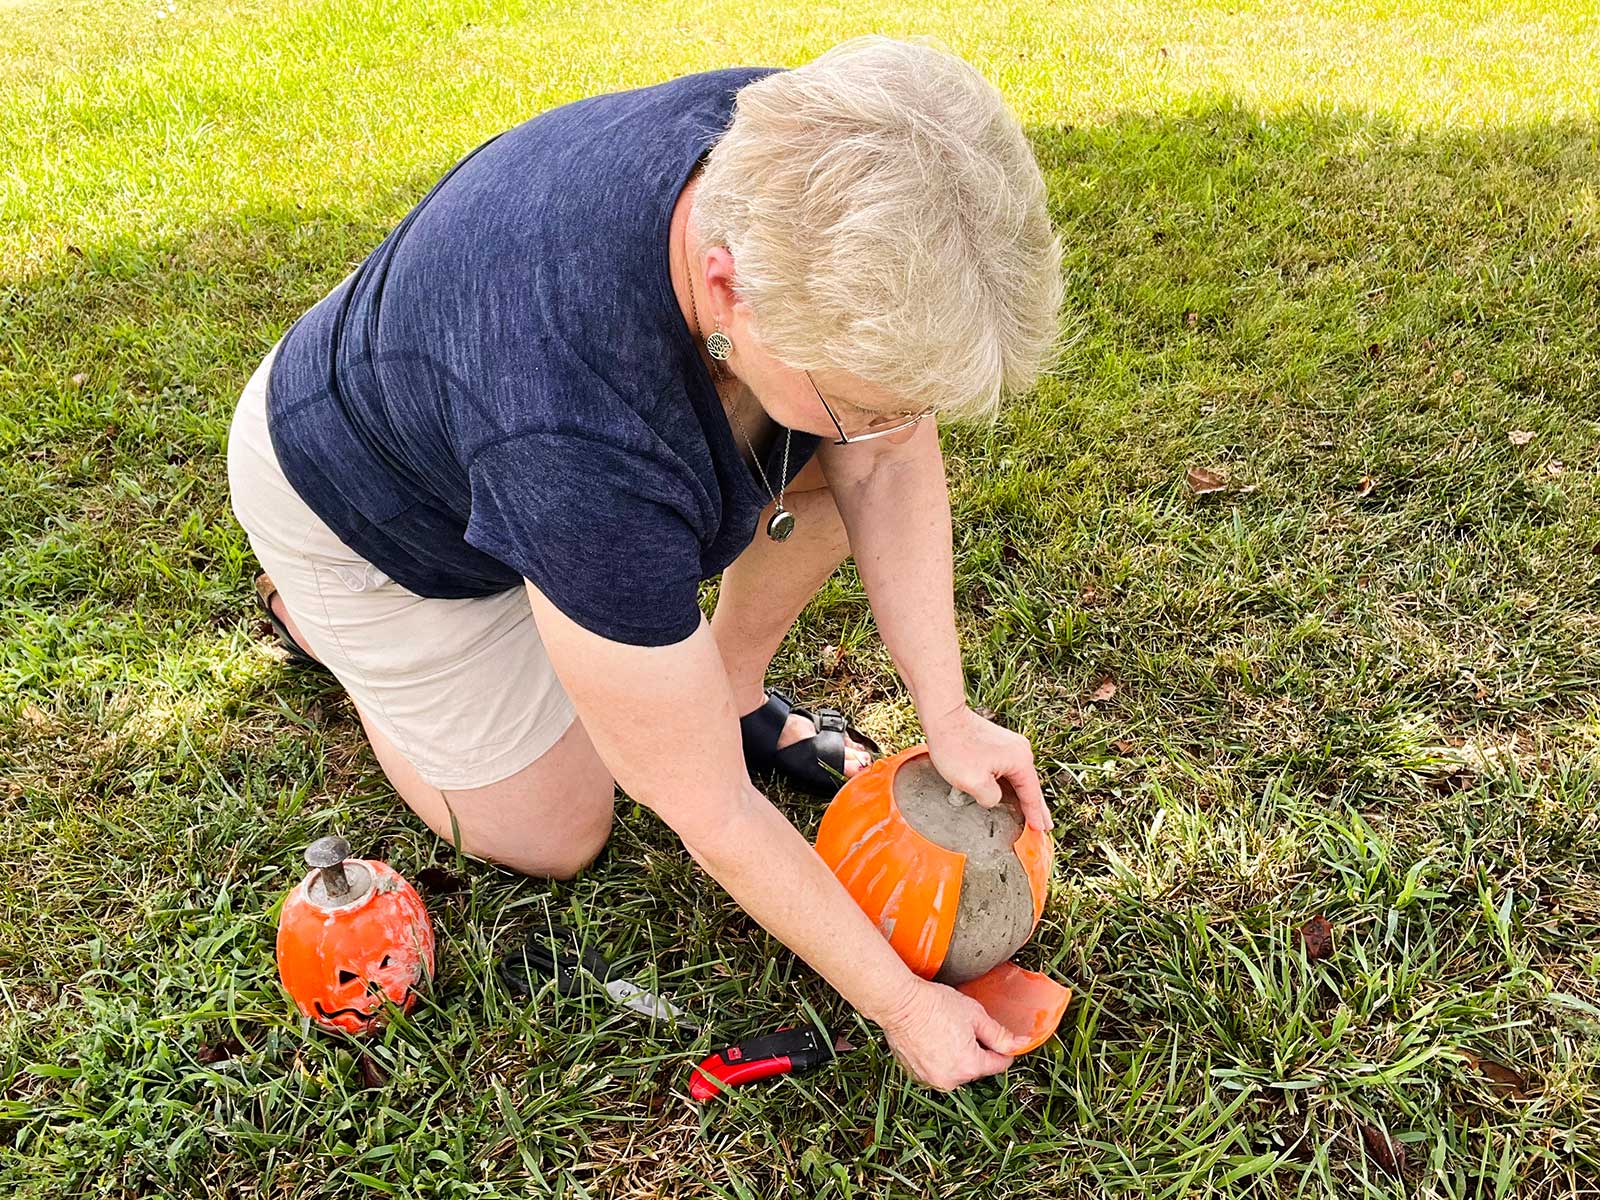
Use a utility knife to carefully cut slits down the sides of the plastic jack-o'-lantern bucket. I found that it works best to cut down one of the natural grooves or dips in the side of the pumpkin.
Start with a small slit and continue making small cuts in the same groove. Don't try to force the knife through the plastic with one large cut.
You can also start the cut at the top edge of the bucket and use heavy-duty scissors to help with that first section.
I found that about five cuts around the pumpkin were enough to allow the plastic pieces to be pulled away.
Always cut away from yourself and keep your other hand out of the path of the knife. I recommend that an adult do this entire step.
8. Remove the concrete pumpkin.
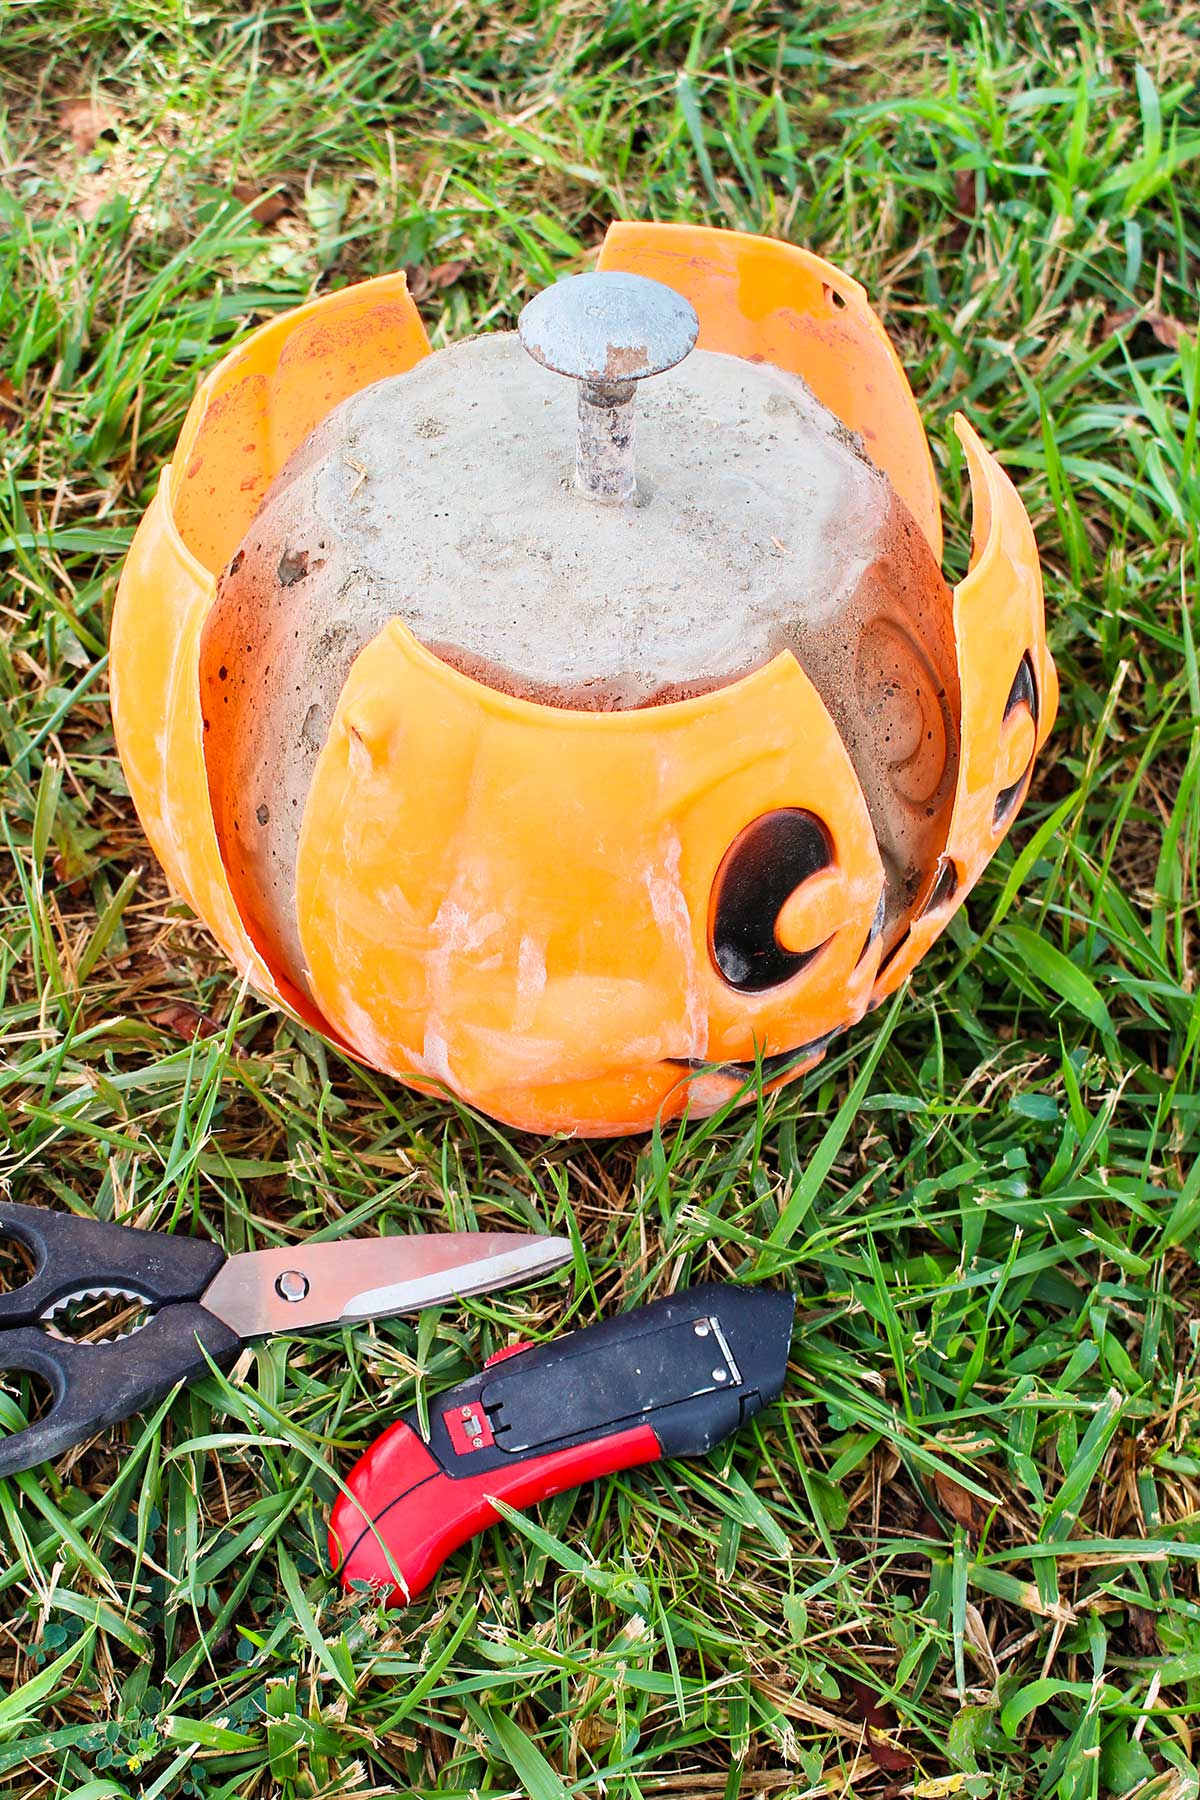
Once you have made the cuts, pull the plastic bucket sections down and away from the concrete pumpkin.
If it doesn't come out easily, don't force it. Make another slit or two in the plastic mold and try again. The pumpkin should come out pretty easily. It
And there it is- your very own concrete pumpkins diy project!
9. Let the pumpkin continue to cure.
Once the plastic mold has been removed, allow your pumpkin to sit for several more days so the concrete can continue to cure and harden. The exact curing time will depend on the concrete mix you used, so check the directions on the bag.
Once it has cured sufficiently, you can leave it in its natural concrete color or give it a personal touch with paint.
Craft Tips Concrete Pumpkin
These tips can help make your concrete pumpkin project a little easier!
- Use two small boards to hold the stem up and in place. Otherwise, the stem may slowly sink down into the wet concrete- and then you won't see much of it when your pumpkin is finished!
- Cut along the grooves in the plastic mold. The utility knife naturally follows the groove, making it easier to control the cut. This is definitely an adult job. Make many small cuts in the same place rather than trying to push the knife through the plastic.
- Choose a lightweight plastic Halloween bucket. The inexpensive jack-o'-lantern trick-or-treat buckets worked better for me than heavier plastic containers because they were easier to cut away from the hardened concrete.
- Add a little more dry cement mix to thicken the mixture back up if you accidentally add too much water to the cement powder.
- Clean the bucket or tub and trowel immediately after finishing this project.
- The concrete pumpkin mold should begin to fold down and release the pumpkin. If it doesn't come out easily, don't force it. Make another slit or two in the plastic mold and try again.
- Work close to where the pumpkin will live. Once filled with concrete, this little pumpkin can be surprisingly heavy!
- Protect your work surface. Concrete can be messy, so a piece of plastic or cardboard underneath your project will make cleanup much easier.
Craft Variations for Your Cement Pumpkin
Want to switch things up? Here are a few ways you can customize your cement pumpkin craft.
- Make a whole pumpkin patch! Find several different trick-or-treat buckets and make pumpkins in different shapes and sizes.
- Look for different jack-o'-lantern faces. Seasonal stores often carry several styles of Halloween buckets. Choose different faces to create your own collection of concrete jack o lantern pumpkins.
- Use the plain side for fall. Leave your pumpkin its natural concrete color for a simple, rustic fall decoration.
- Paint your pumpkins. Try traditional orange, white, sage green, or black for fall colors.
- Make several pumpkins with different stems. Try bolts, railroad spikes, sticks, or short dowels to give each pumpkin its own personality.
- Create a reversible porch display. Keep the plain side facing out during September and early October, then turn your pumpkins around to show the jack-o'-lantern faces for Halloween.
Frequently Asked Questions About Concrete Pumpkins DIY
Concrete mix can be purchased at many hardware stores, home improvement stores, and lumberyards. It usually comes in large bags, and those bags can be heavy!
You may need someone to help you get the bag home and move it around while you're making your pumpkins. Remember that the finished diy concrete pumpkins will also be heavy.
Always shop your home first!
Look for old large bolts, railroad spikes, pieces of metal, or other objects that would make an interesting pumpkin stem.
You can also use a stick or a piece of large dowel. Just remember that wood will eventually decay if the pumpkin is left outside in the weather. That's why I prefer a metal stem for an outdoor cement pumpkin.
Yes! Once the concrete has cured properly, you can paint your pumpkin.
If you plan to keep your pumpkin outdoors on the porch, I recommend using an outdoor house paint or an outdoor craft paint. You can paint the entire pumpkin or just add color to the jack-o'-lantern face.
Make several small cuts in the plastic bucket, preferably along the natural grooves in the pumpkin. Then gently pull the plastic away from the concrete.
If the pumpkin isn't releasing, be patient and don't try to pry it out forcefully. Make another cut in the plastic and try peeling the mold away again.
That's one reason I recommend those inexpensive, flexible Halloween trick-or-treat buckets for this concrete pumpkin diy.
Absolutely! Look for lightweight, flexible plastic containers that have the shape you want.
Just remember that you will need to be able to cut the container away from the hardened concrete. A rigid or very thick container will be much more difficult to remove.
More DIY Pumpkin Crafts for Kids
Looking for more fun DIY crafts to make with kids? Here are a few favorites to try:
- Upcycled Mason Jar Lid Pumpkin
- Painted Mini Pumpkin Halloween Decorations
- DIY Woodland Owl Pumpkin Carving (with pattern, deluxe pumpkin carving!)
- How to Sew a Pumpkin Pillow
Come Join the Fun at WTN!
I hope you give this cement pumpkin diy a try! It takes a little more time and effort than some of my usual kid-friendly crafts, but I think the finished pumpkin is worth it.
And I especially love that you can turn it around and enjoy a plain pumpkin for fall and then show off the jack-o'-lantern face for Halloween. That's a pretty fun decoration from one little trick-or-treat bucket!
If you try this craft, leave a comment, rate it, and tag a photo with #WelcomeToNanas wherever you post. I would love to see your pumpkins!
Happy crafting, friends!
More Crafts Please!
Love getting crafts straight to your inbox? Sign up to receive a weekly email and get a free gift!
Concrete Pumpkin DIY for Fall!
Equipment
- A bucket or plastic tub for mixing the concrete
- A garden trowel or small garden shovel for mixing and scooping
- Utility Knife
- Heavy-duty scissors, optional
- Work gloves
- Safety glasses
Items Required
- A bag of concrete mix that is ready to mix with water (smaller bag)
- A lightweight plastic jack-o'-lantern trick-or-treat bucket
- A bucket or plastic tub for mixing the concrete
- A garden trowel or small garden shovel for mixing and scooping
- A large bolt, railroad spike, stick, or short piece of dowel for the pumpkin stem
- Two short sticks or small boards to help hold the stem in place while the concrete hardens
- Utility knife
- Heavy-duty scissors, optional
- Work gloves
- Safety glasses
- Plastic sheeting or an old piece of cardboard to protect your work surface
Instructions
- Gather and set out your supplies before you begin. I recommend working outside or in a well-ventilated area and putting down plastic sheeting or cardboard to protect your work surface.
- Pour about one-third of the bag of concrete mix into your mixing tub or bucket.Slowly add water, a small amount at a time, mixing as you go. You want the concrete to be a thick mixture, not runny. A thicker mixture will make this cement pumpkin easier to work with and will help keep the pumpkin from taking a longer time to harden.Safety note: Wear gloves and safety glasses when working with concrete mix and follow the safety directions on the package. (Sorry, we were not a good example of this in the video!)
- Remove the handle from the trick-or-treat bucket using heavy-duty scissors.Use your garden trowel to scoop the concrete into the jack-o'-lantern trick-or-treat bucket. Fill the trick or treat bucket all the way to the top.Every so often, gently tap the sides of the bucket or lightly bounce the bucket against your work surface to help the concrete settle into the pumpkin shape and release some air bubbles.If you don't have quite enough concrete to fill the bucket, mix a little more.
- Place the item you have chosen for the stem into the top of the wet concrete.The stem will want to sink down into the wet concrete, so this is where the two little sticks or boards come in handy. Place them across the top of the bucket so they can hold the stem at the height you want while the concrete hardens.
- Set the pumpkin somewhere safe where it won't be bumped or disturbed.Allow it to harden for at least 48 hours before attempting to remove the plastic mold. Cooler or damp conditions may require additional time. Clean your bucket or tub and tools.
- This is the step where an adult should take over.Use a utility knife to carefully cut slits down the sides of the plastic jack-o'-lantern bucket. I found that it works best to cut down one of the natural grooves or dips in the side of the pumpkin.Start with a small slit and continue making small cuts in the same groove. Don't try to force the knife through the plastic with one large cut.You can also start the cut at the top edge of the bucket and use heavy-duty scissors to help with that first section.I found that about four cuts around the pumpkin were enough to allow the plastic pieces to be pulled away. Do more if needed.Always cut away from yourself and keep your other hand out of the path of the knife. If you're crafting with children, I recommend that an adult do this entire step.
- Once you have made enough cuts, gently pull the sections of plastic down and away from the hardened concrete.
- Once the plastic mold has been removed, allow your pumpkin to sit for several more days so the concrete can continue to cure and harden. The exact curing time will depend on the concrete mix you used, so check the directions on the bag.



Leave a Reply