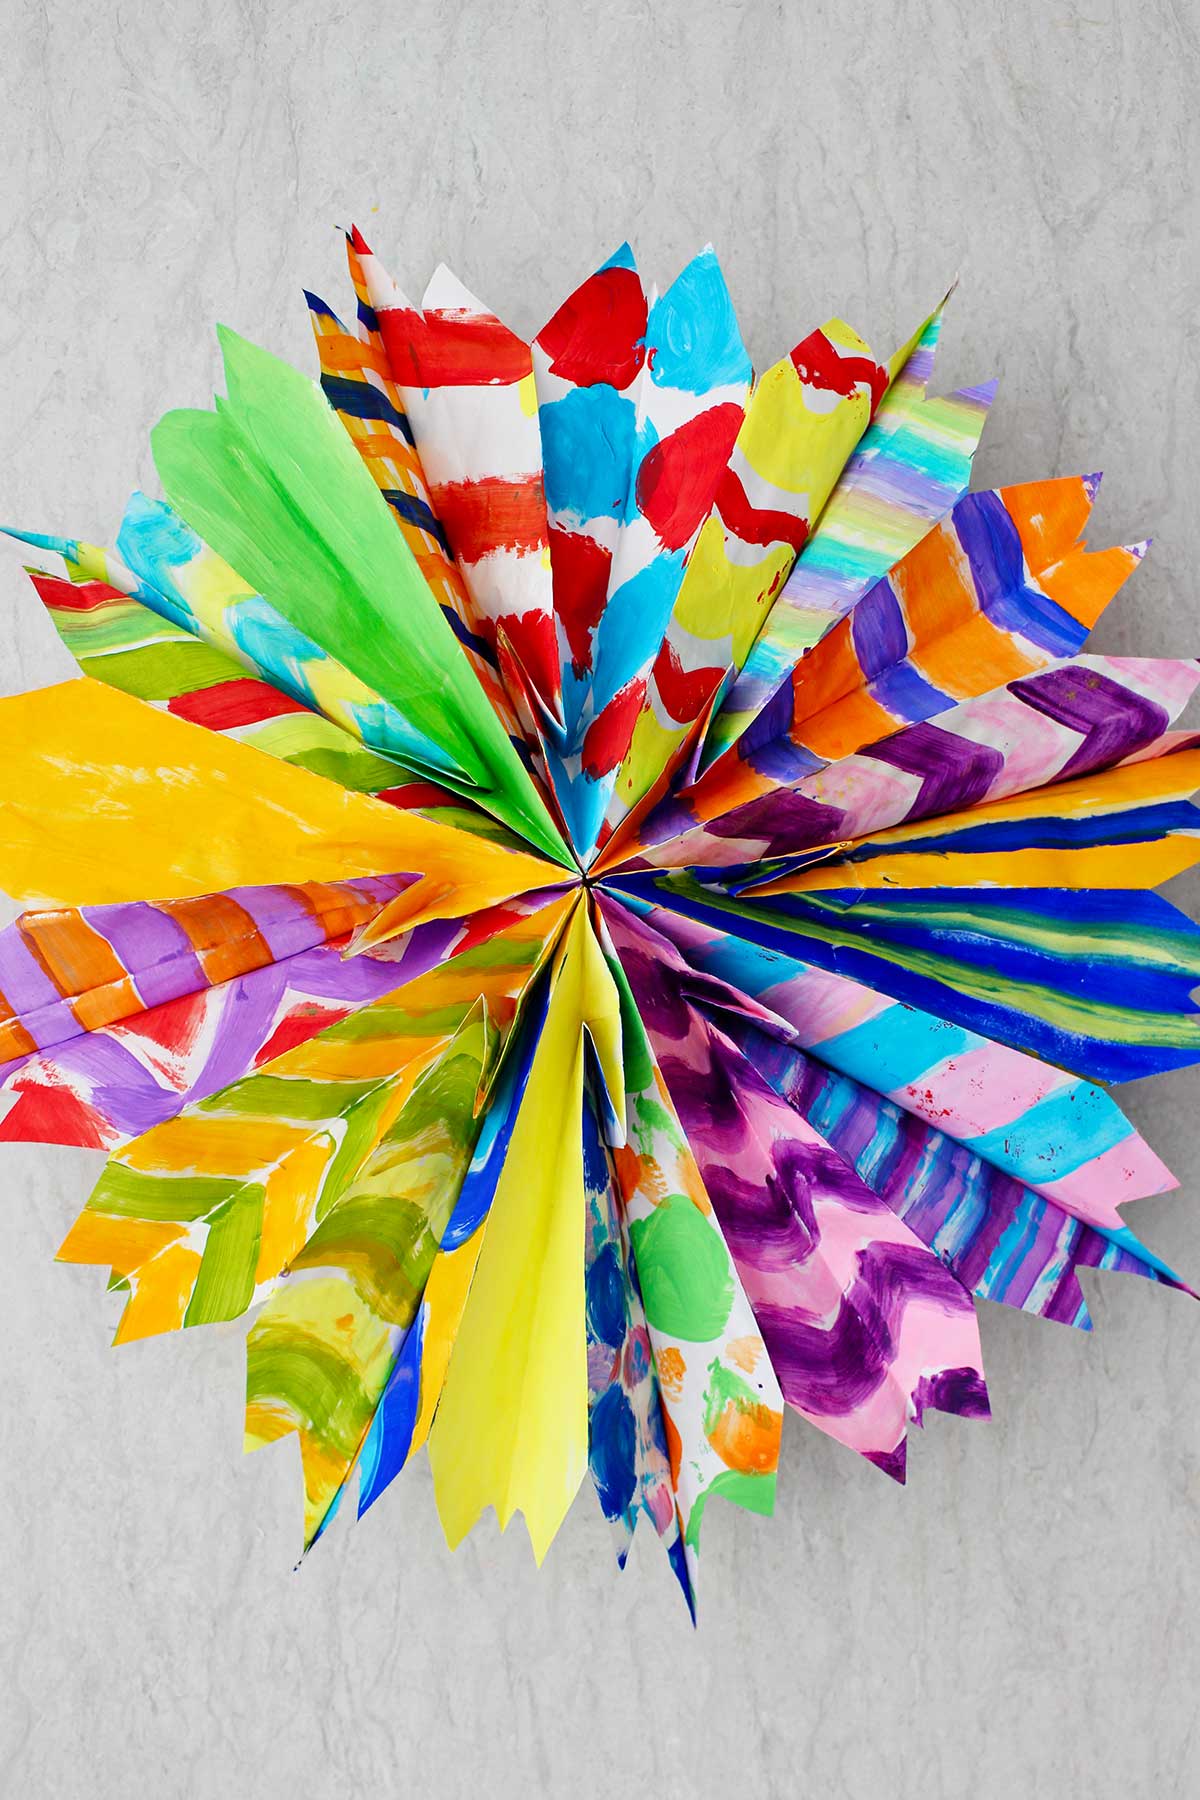
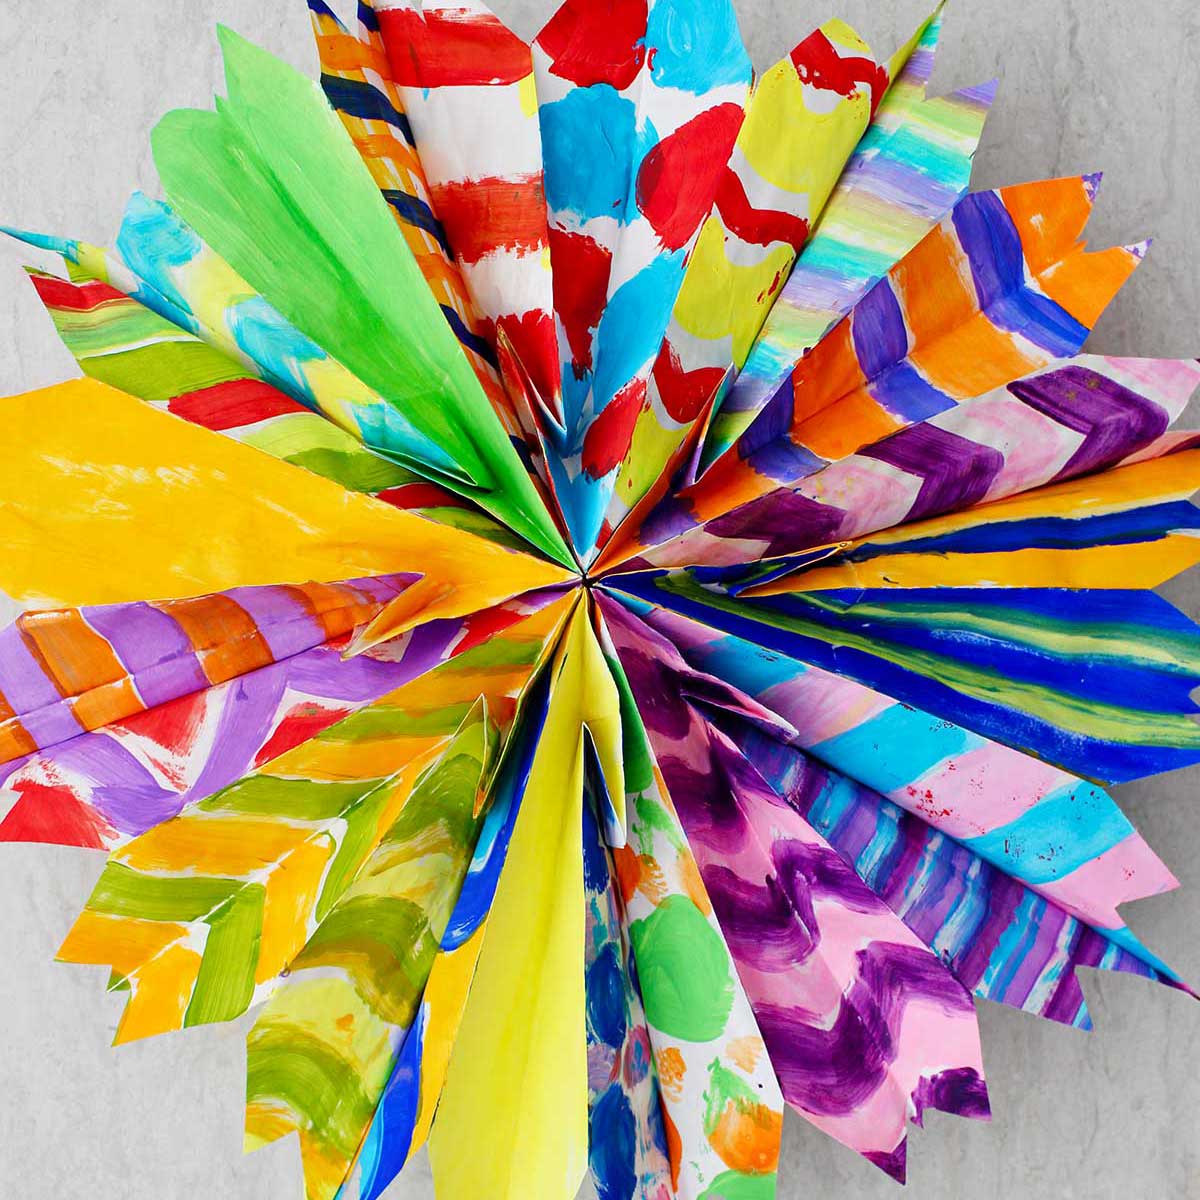
This Colorful DIY Paper Bag Star Craft for Party Décor makes decorating any event easy, inexpensive and a fun! Kids can create their own star variations by painting patterns and colors, then fill a space with a burst of color.
Jump to:
Colorful Paper Bag Stars Will Rock Your Party Décor!!
Could a Paper Bag Star Craft become even better? YES!! Try adding color all over the paper bags before assembling the star. You can use it for your party decorations on any occasion.
It fills a big space with amazing pattern and shape. It puts HAPPY in happy birthday or a happy day of any type!!
I have just been in love with the Paper Bag Snowflake Craft since making it some time ago. I have brown paper bag stars in my office even now. Often, I’ve pondered how else to use this craft.
Well, it got a makeover for a 70’s themed tie-dye birthday party and I’m twice as smitten as I was before.
Colorful paper bag stars for every holiday season or event.
Use the variation ideas below to make easy paper bag stars for every holiday season.
You will love using the paper bag star for your events where you want some fun, colorful, larger decorations that are easy to make and don’t break the bank. They fit the bill perfectly and are a fun DIY project to do with kids!!
Supplies to Make Paper Bag Stars for Kids
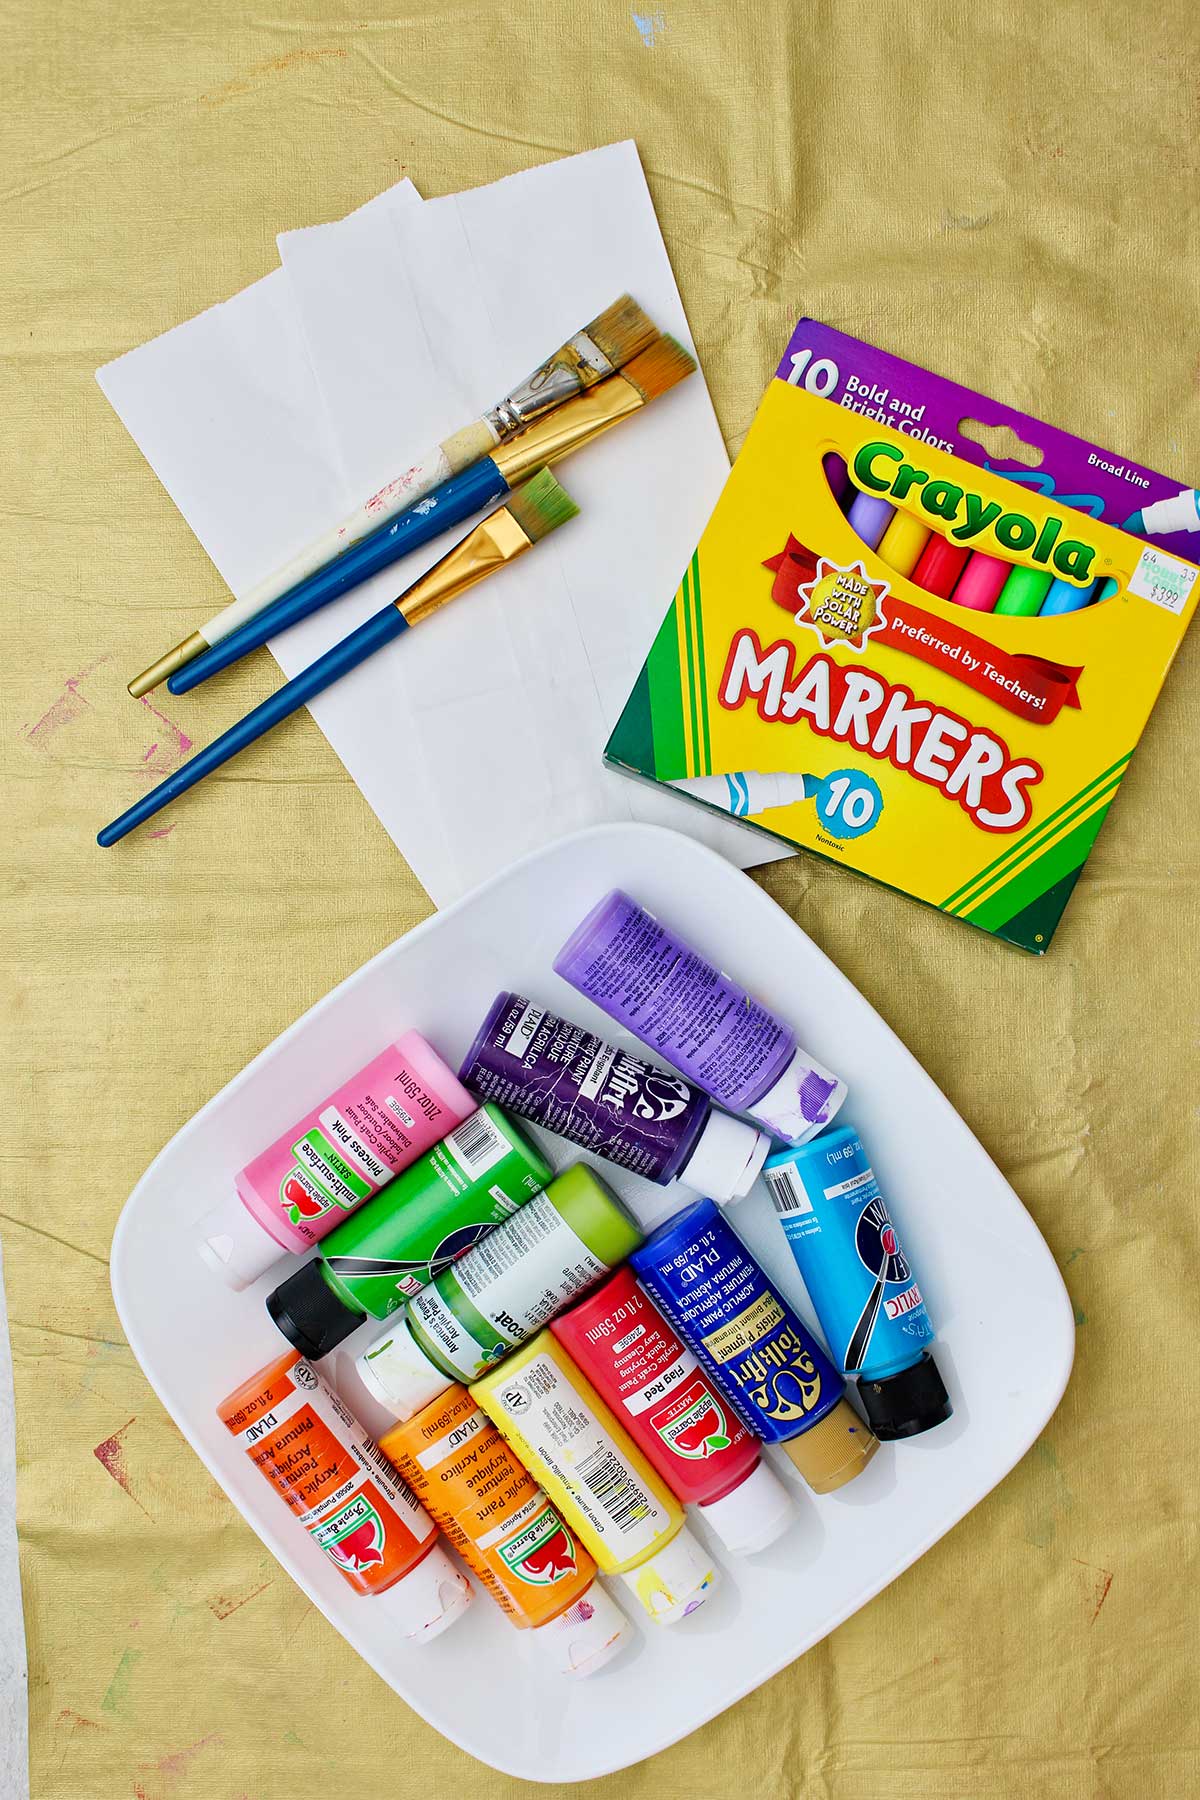
You don’t need much to bring this cute paper bag star craft to life!
- White paper bags: This is a time for the lowly lunch bag to shine like a star!! Sorry, that is a lame pun. White paper bags can be purchased at many grocery stores as well as online. They come in a variety of sizes which will make a difference as to the size of the stars. The height of the bag times two will be the approximate circumference (distance across) the star.
- Acrylic craft paints or colored markers or colored pencils: Acrylic craft paints are a supply I use on a very regular basis personally and with Welcome To Nana’s posts. They can be purchased separately or as a set from the store or online. Here is the link to a set that I often recommend. Store them in a large plastic storage shoe box and you will have them whenever needed! Colored markers or colored pencils are options to the acrylic craft paints.
- Fishing line: Fishing line works so well to hang the stars as it is clear and isn’t noticeable. You can rob some out of a fishing pole, purchase in a the sporting goods section of a local store, or purchase online.
Steps to Make a Colorful Paper Star Craft
Get out 8 paper lunch bags for this craft. There is the link to a full length video tutorial if you would like to watch or make colorful and beautiful paper bag stars with me step-by-step!
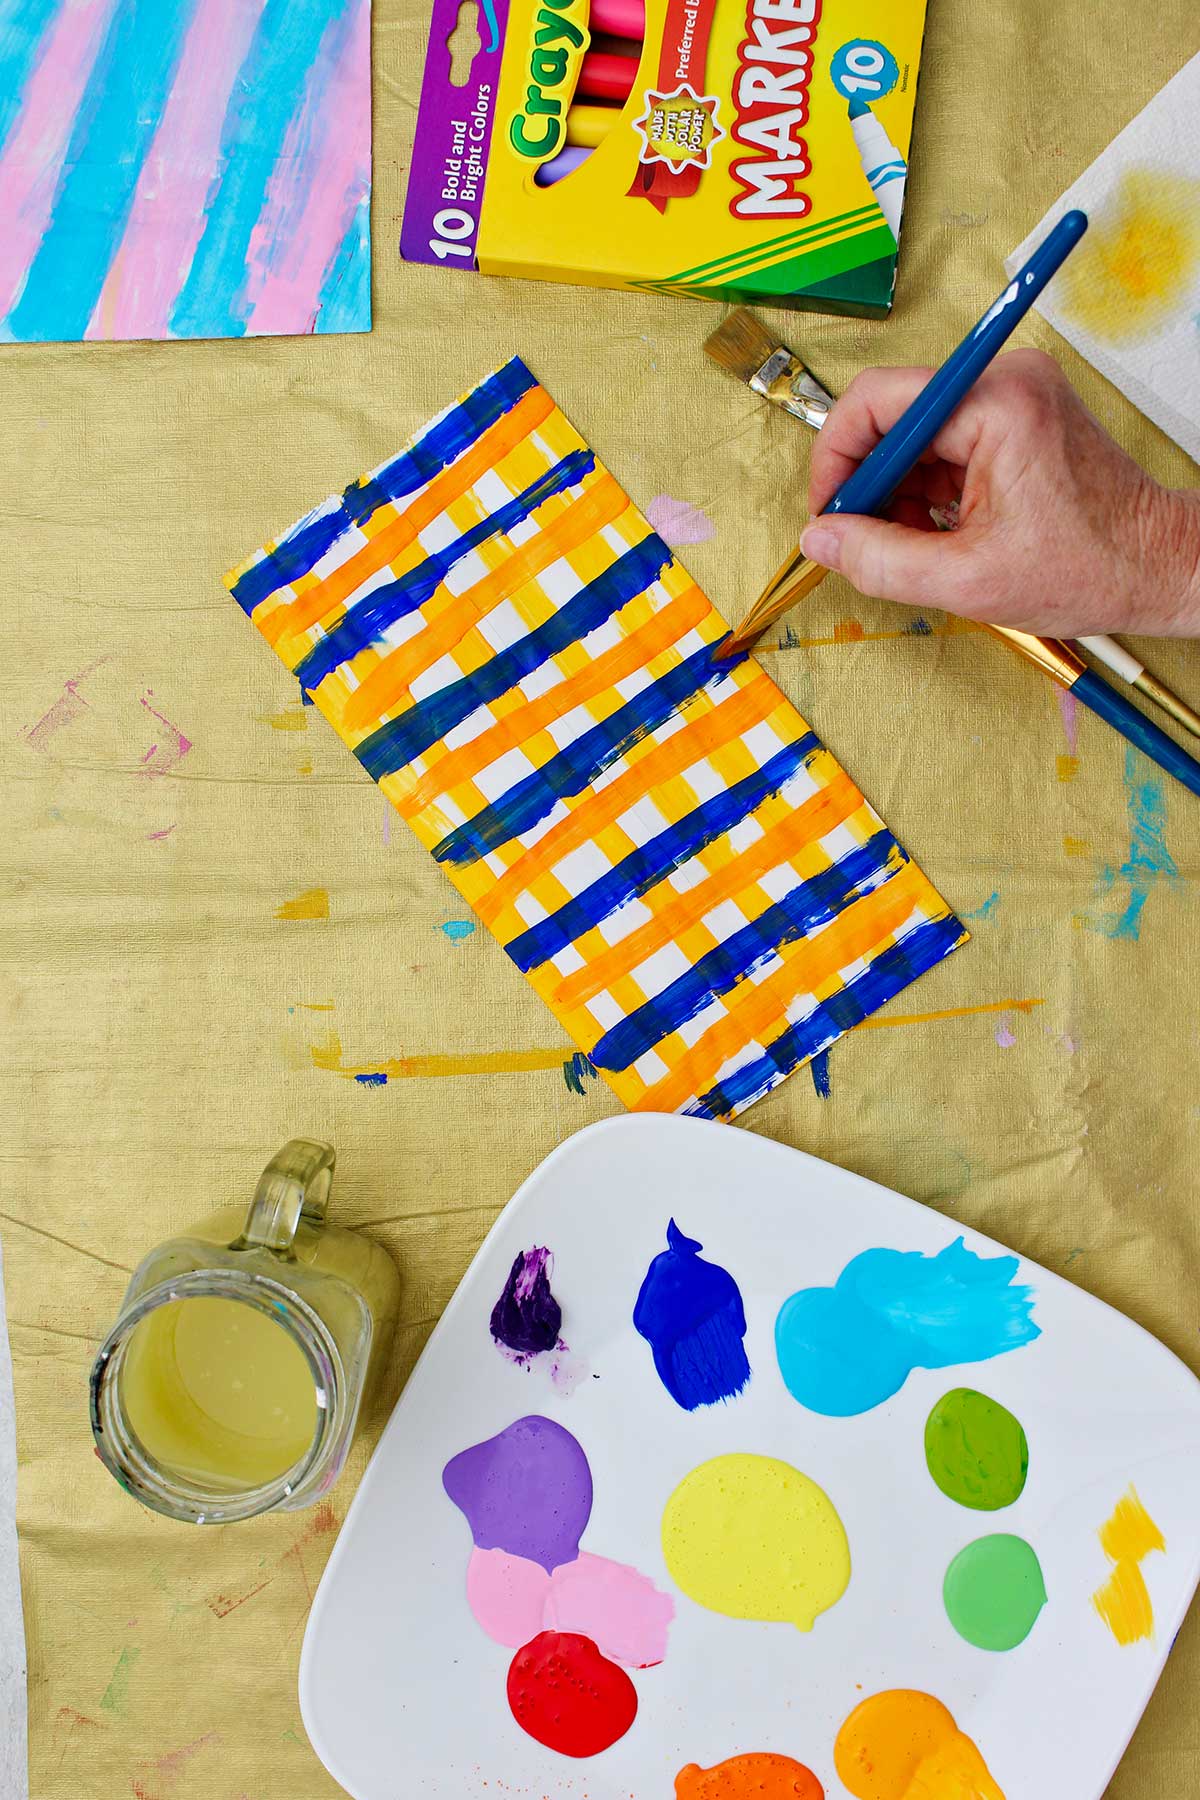
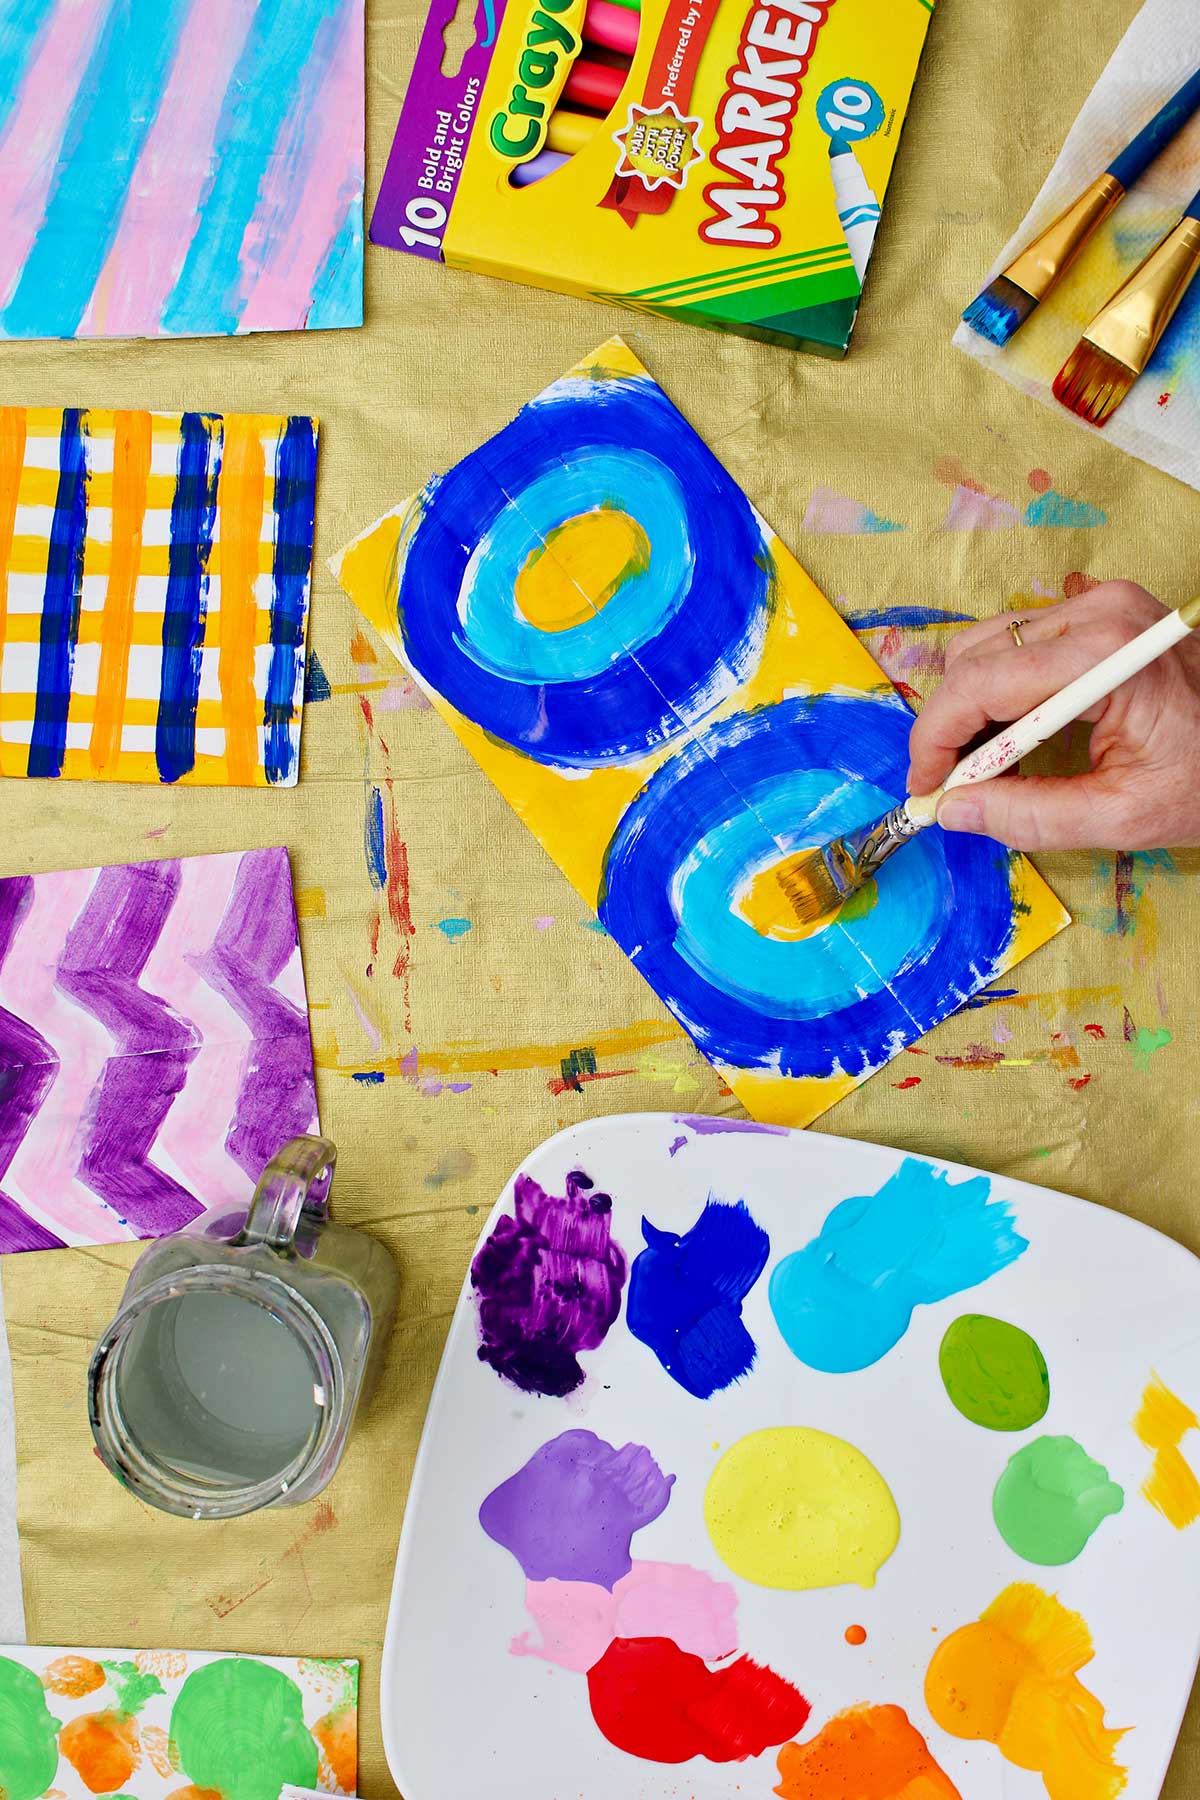
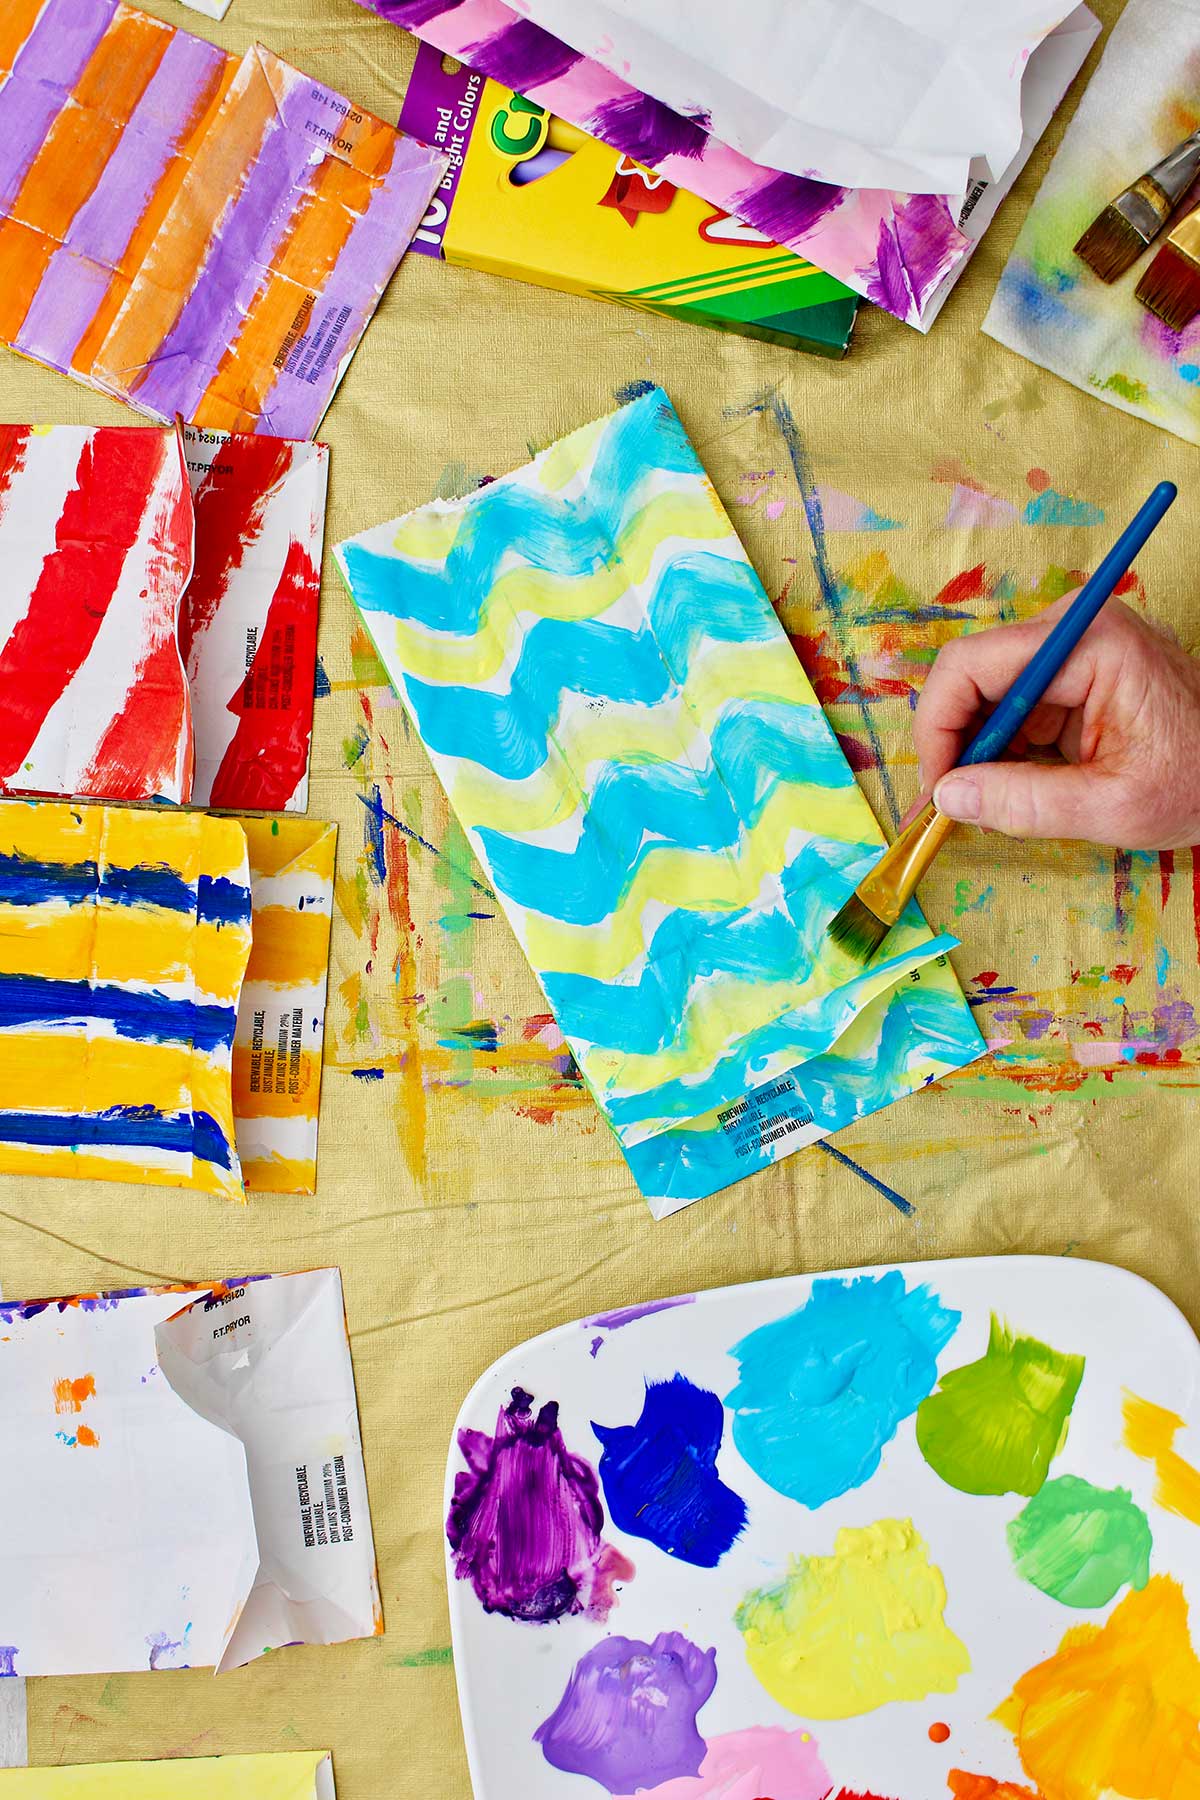
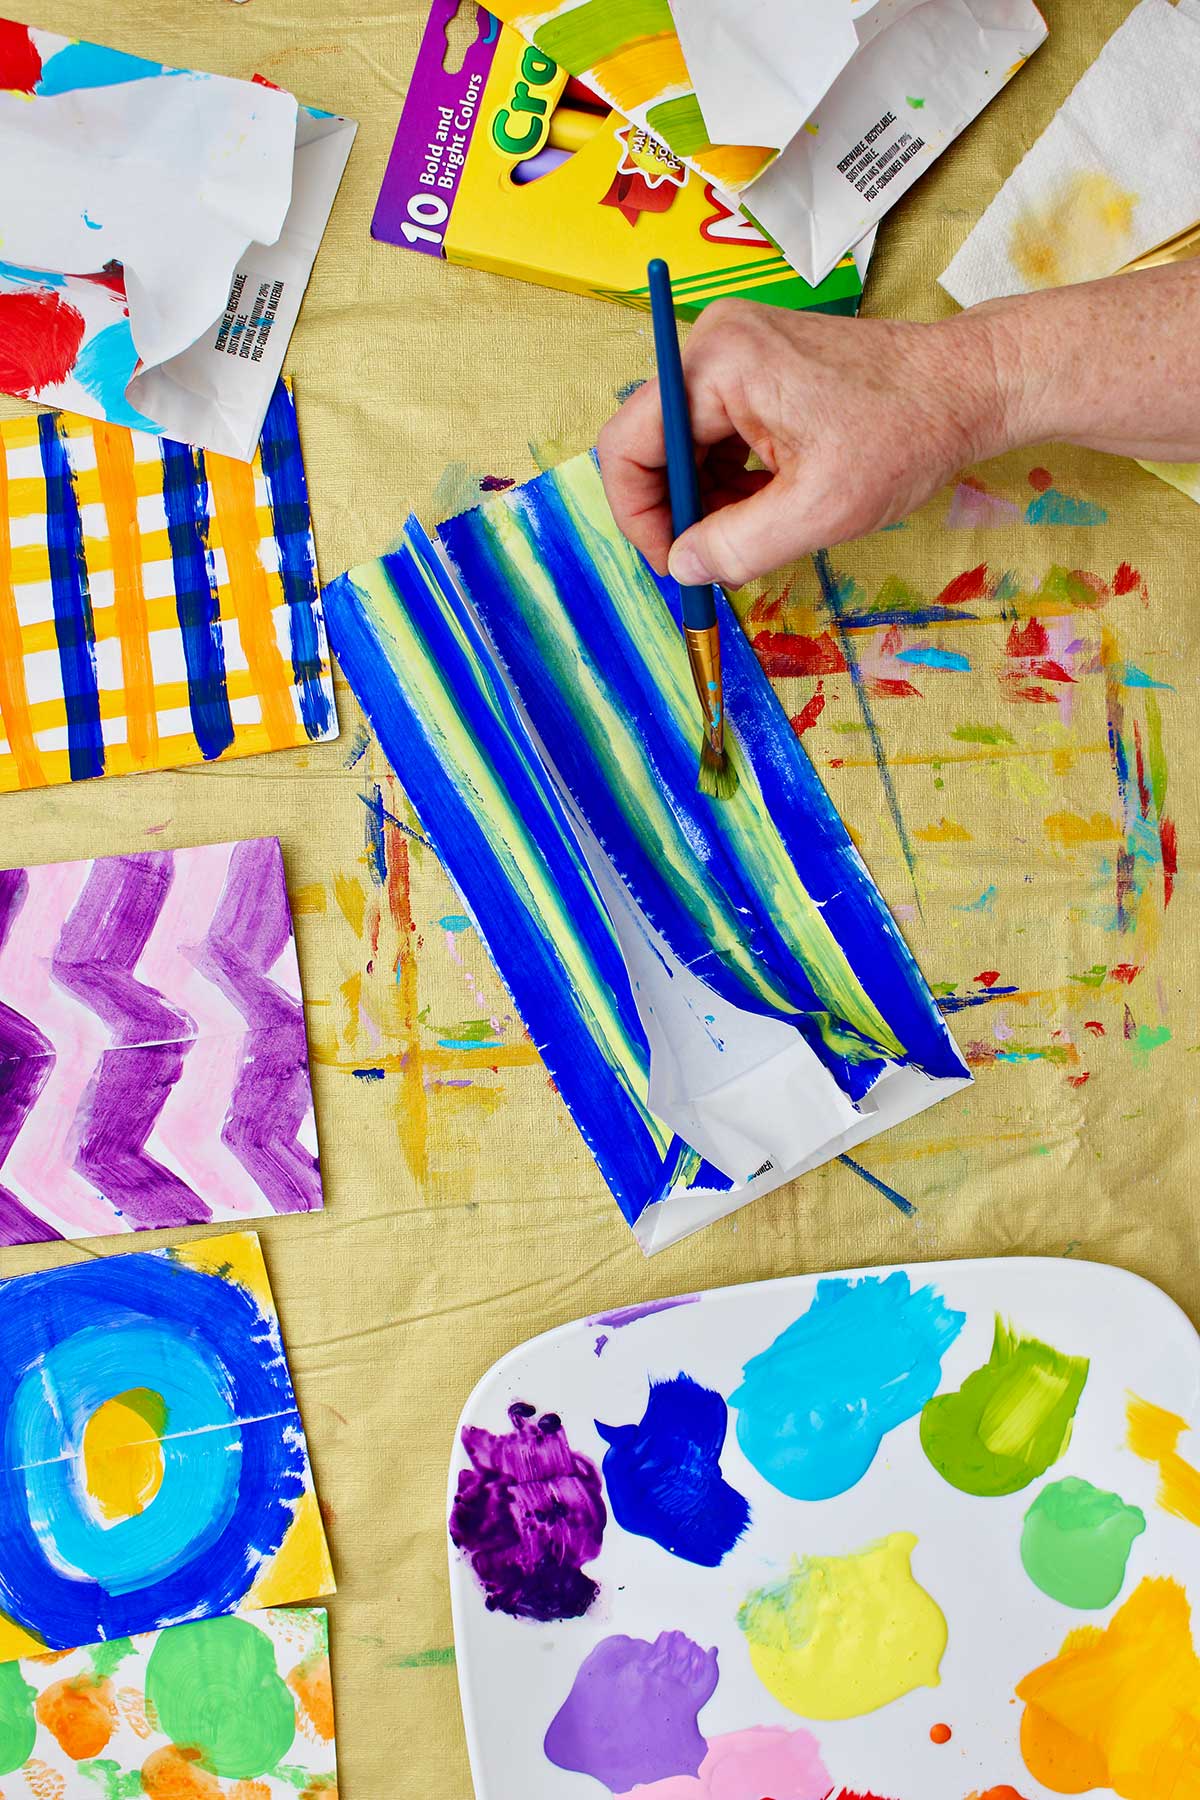
Paint the fronts of the bags with acrylic craft paints in various patterns and colors. Let dry. Repeat this on the sides of the bags, then the backs of the bags.
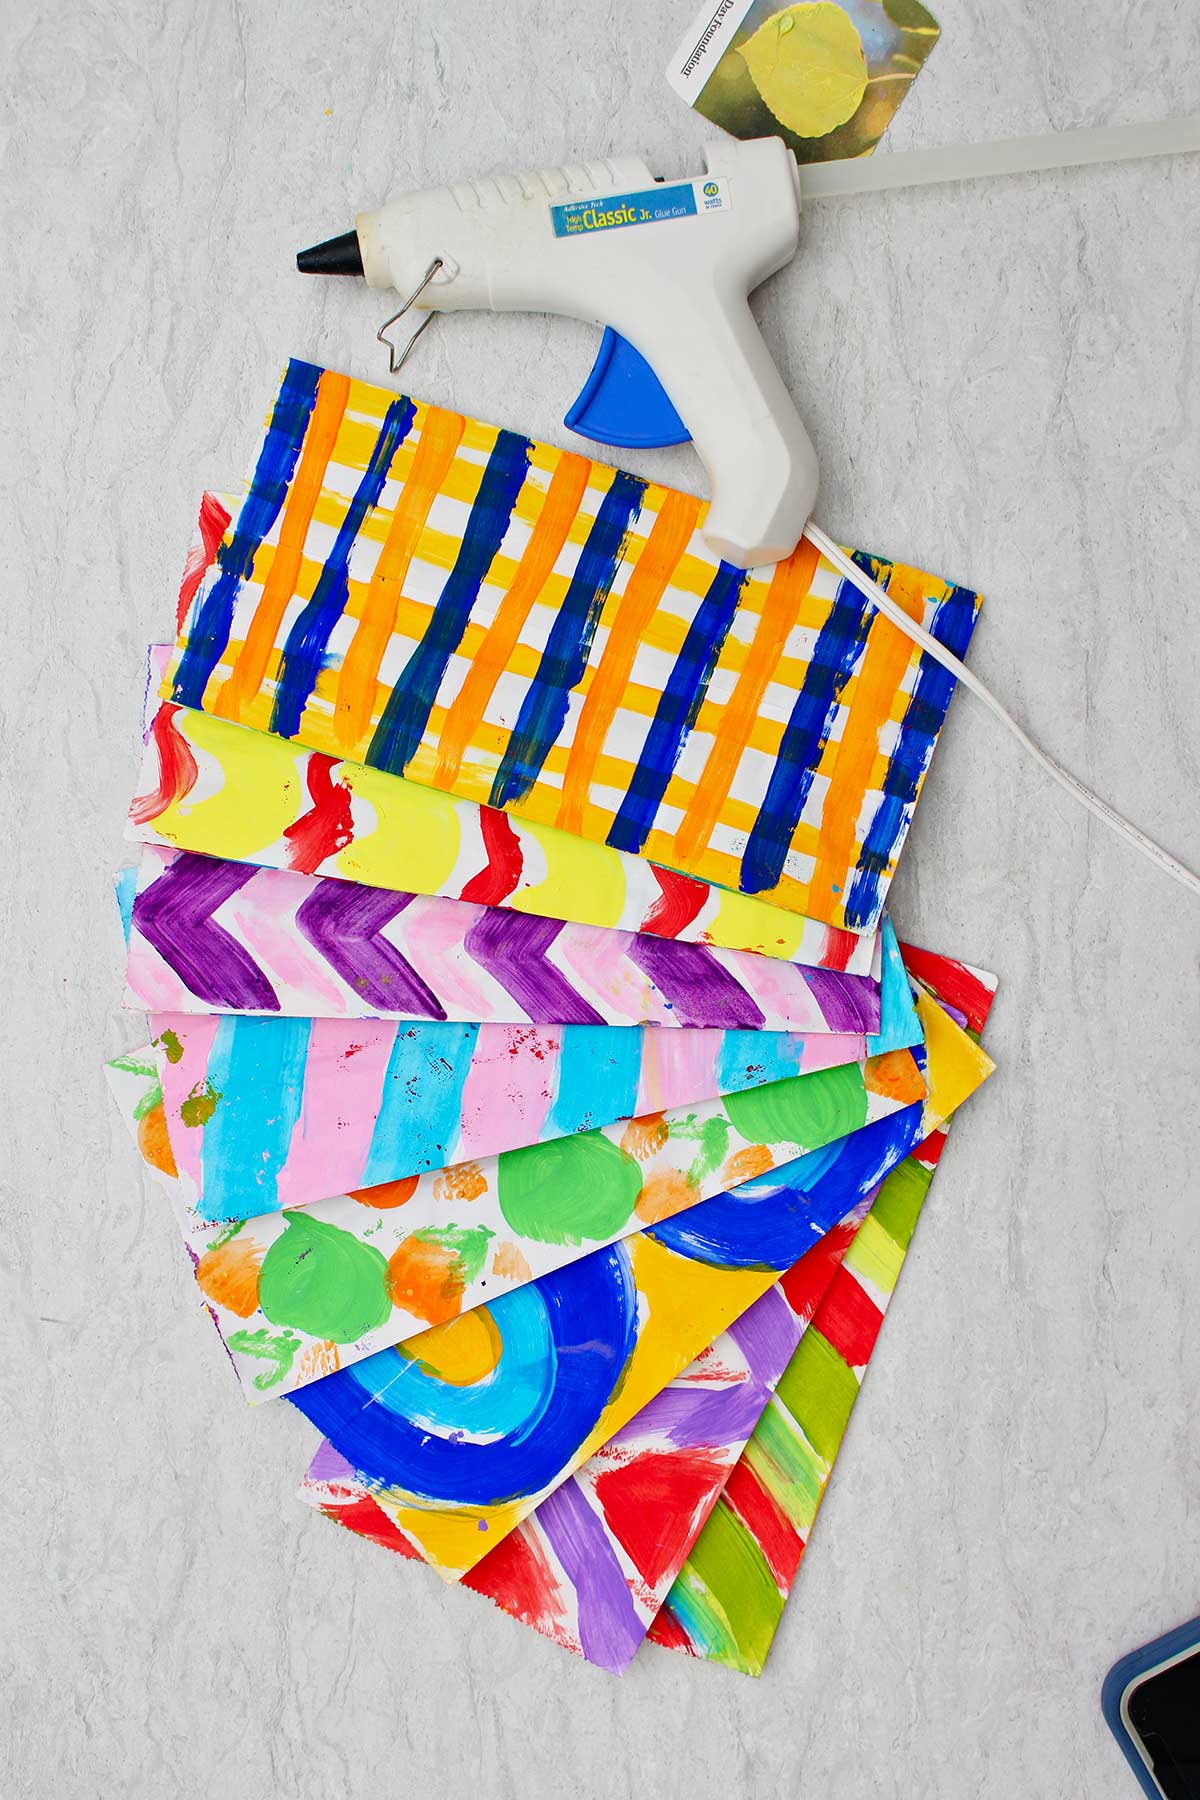
Lay the 8 decorated bags down in a stack with the folded ends towards you and the flat sides up (once dry). Take one bag from the stack and move the others to the side.
Assemble the paper bag star
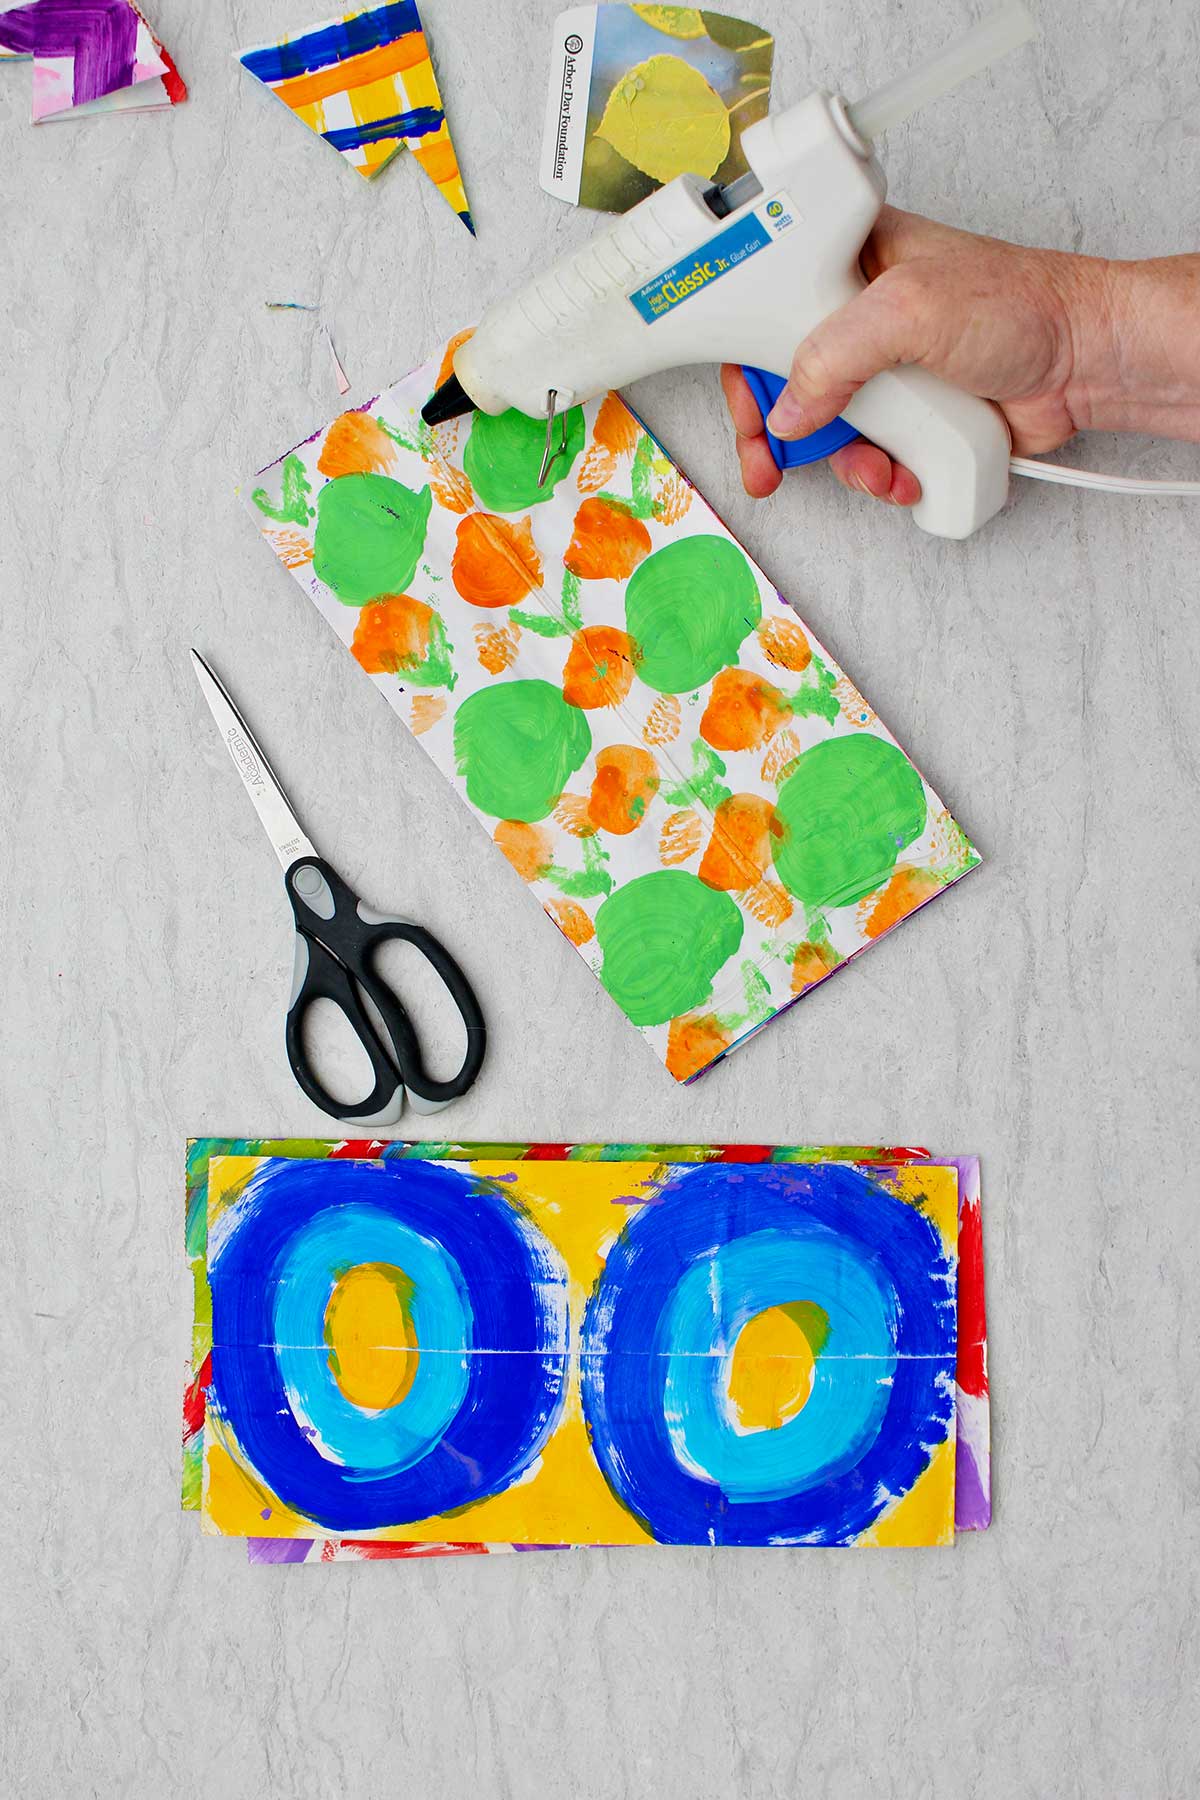
Use a hot glue gun to make an upside down “T” shape down the center of the bag and across the bottom.
Lay the second bag on top (flat side up, folded end to the bottom). Repeat and glue a third bag to this group.
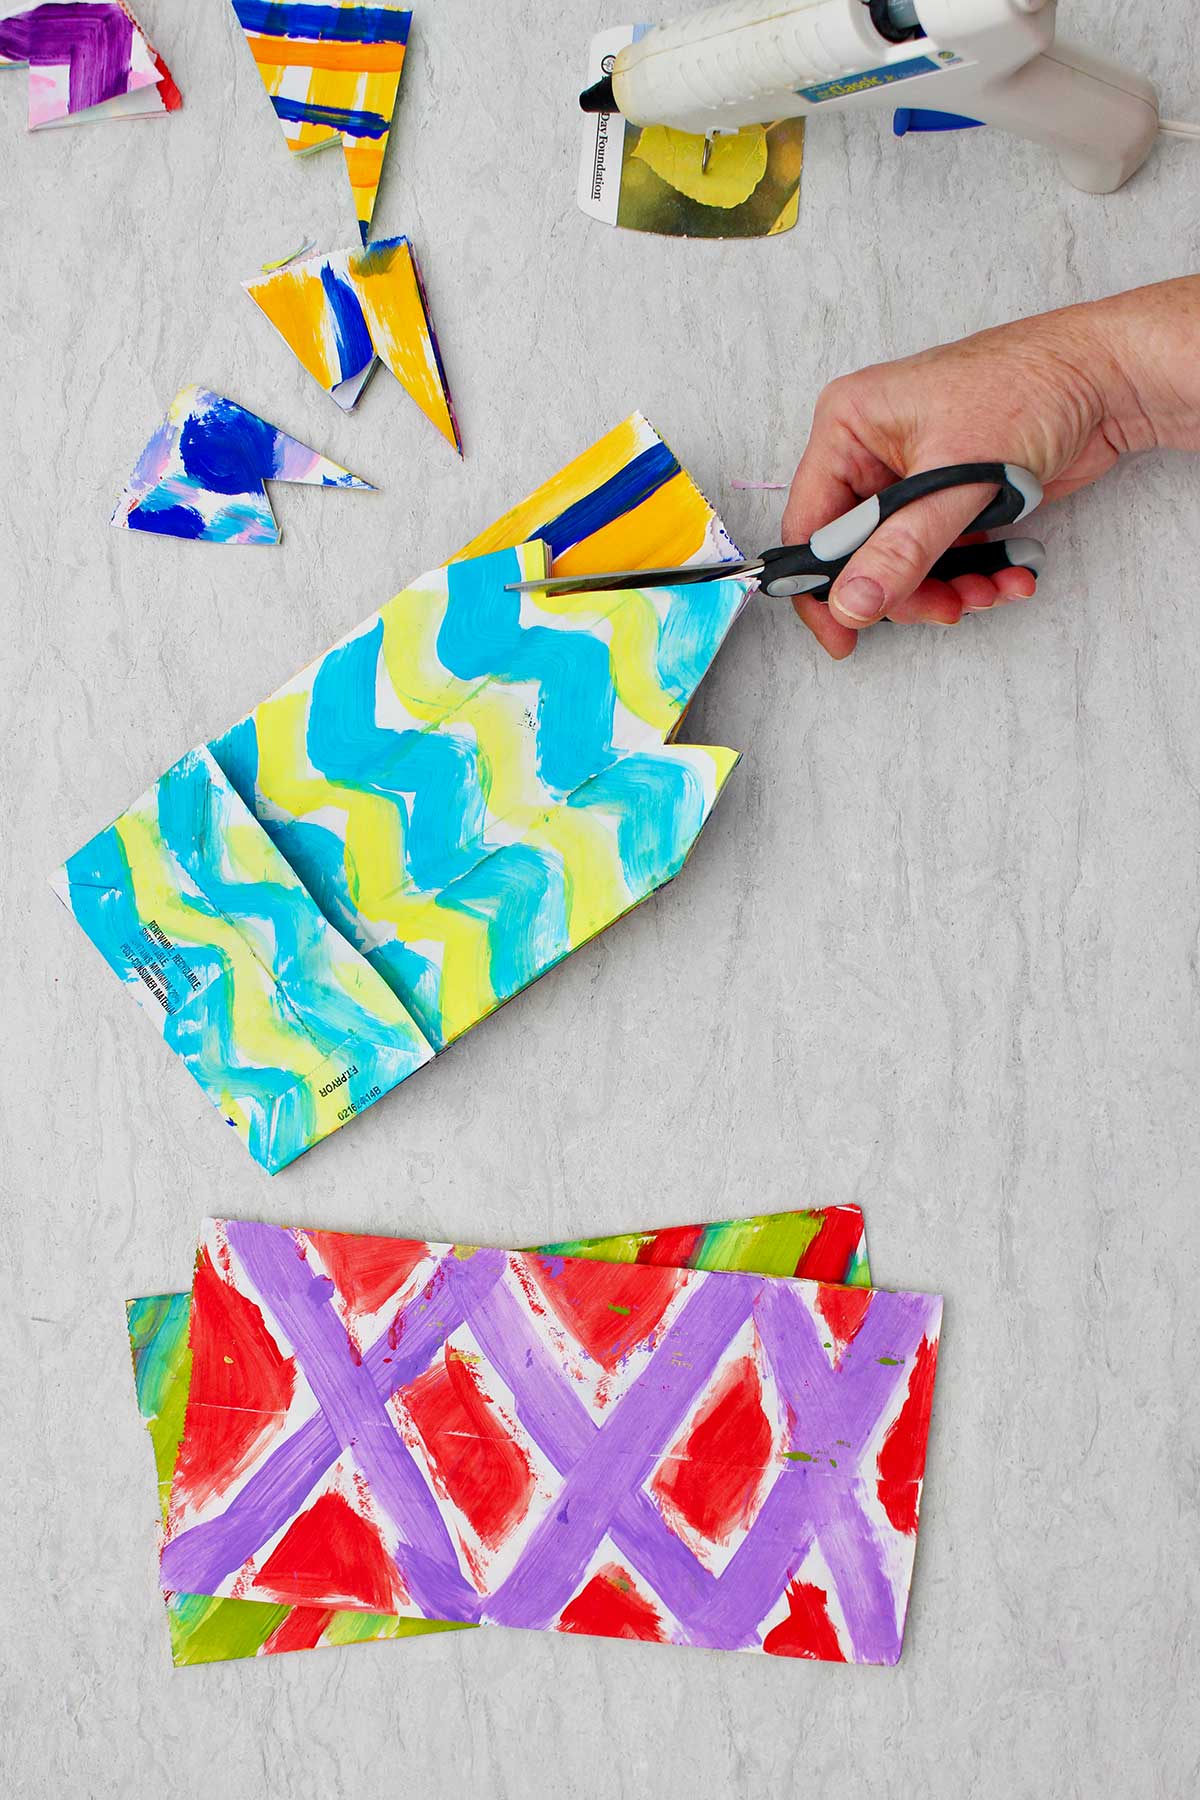
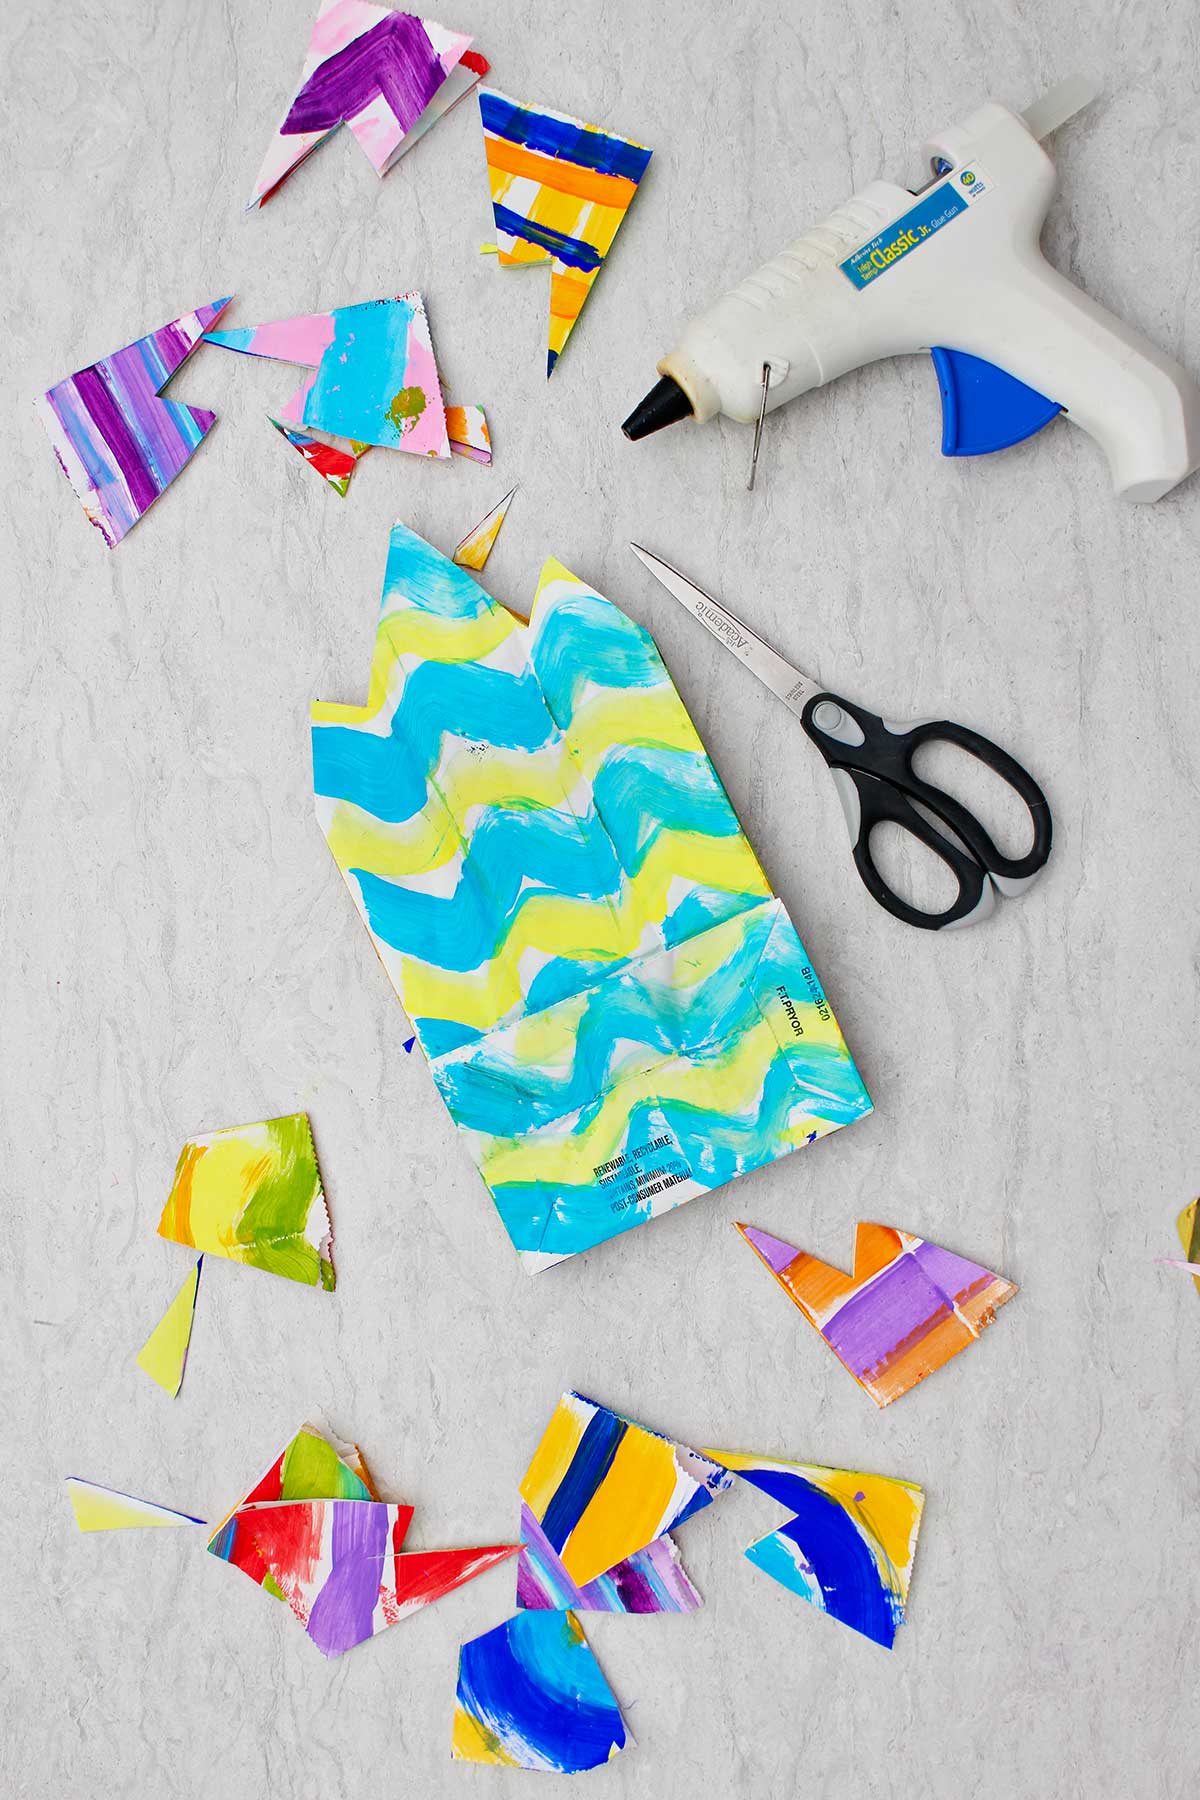
Draw the design you want to cut as star “tips” on the open end of the top bag in this group of three. For a star this can just be triangle shapes for a tip.
Cut the unfolded ends of the first 3 bags with this drawn design.
Glue on three more bags with the “T” of hot glue. Cut the open end of these three bags using the first cut as a guide. Repeat this with the last two bags.
"Pop up" the star! It's like magic!
Pull the first bag on the stack of bags around in a circle so it meets the back of the last bag, creating a 3-D star!
You can use a “T” of hot glue to attach these two end bags, staple them together, use double-sided tape, or use adhesive Velcro circles. This holds the bags in the star shape.
Punch a hole in the tip of one of the star points and hang the bag by fishing line or string.
Craft Tips
Number of bags: I recommend using 8 bags in your paper bag star. You can experiment with the number of bags of course. But I found that using more bags made the star heavy on the bottom so those bottom bags did not stay open fully. They kind of sagged.
Hot glue protection: The heat of the hot glue is felt through the second paper bag when you glue the bags together. Consider putting a piece of cardboard down on top of the bags before pressing down with your hands.
Reinforcing the hole punch: Use hole reinforcers around the punched hole made to hang the bag. This keeps the hole from easily tearing through.
Adhesive Velcro circles: When attaching the front and back bag to make the star, use adhesive Velcro circles on both bags. Then you can take them apart, fold up the bags and store them to use another time!! A reader gave me this idea and it is genius!!
Craft Variations
Want to switch things up? Here are a few ways you can customize and play with this craft.
Colored bags: Use colored bags instead of white bags and don’t decorate them. The star can be any color- pink, blue, yellow.
Variety of bag colors: Use a variety of different bag colors so the star is multi-colored solids.
Color bag sides only: Just color the side of the paper bags, let the solid color of the front and back show in between the decorated sides. This takes less time and makes a nice, variated effect with a solid and decorated pattern.
Different bag sizes in the star: Use different sizes of bags in the same star. Some points of the star will be shorter than others. You will need to cut the open ends of the bags to shape before gluing them together in this variation.
Different star size: Smaller paper bags or larger bags will change the size of your star of course. Use a variety of bag sizes for your decorations.
Decorate the star: Add decorations to the arms of the stars. Use mini lights, pom-poms, gemstones and such. The only thing is the decorations can’t be too heavy or the bags will sag. (That sounds funny!)
Cutting shapes into the bag: Cut more simple shapes into the sides of your bag to make a fancier star. Make a few simple cuts of triangular shapes and half circles but don't cut off the whole fold of the paper bag. You can use the snowflake patterns I made to cut the bags with designs if you want. Here is the link to the patterns: Paper Snowflake Patterns Link. The stars will look fancy!
FAQ
You are in luck!! The step by step instructions are in the recipe and the post and there are tips and variations here in this post!!!
This is a fast craft! Once your supplies are ready you can make a paper bag star in 5 minutes if you do not decorate the bags. If painting the bags, the paint takes time to dry, and this increases the crafting time to about 40 minutes. You could decorate with markers and cut the decorating time down to 20 minutes or so.
I have had the best luck using 8 paper bags to make a star or a snowflake from paper bags.
Punch a hole in the point of one bag and tie on fishing line, string, or yarn. They can be hung on available hooks, put up or using push pins in the ceiling.
More DIY Paper Craft Decorations for Kids
Looking for more great DIY paper decoration crafts for kids? Here are a few favorites for you to try:
- Easy Tissue Paper Flowers DIY
- DIY Easy Book Page Roses for Mom (Upcycle Old Paper)
- How to Make a Simple Chinese Paper Lanterns DIY
- How to Make a Paper Strip Pumpkin Craft
- How to Make Easy Origami Christmas Trees (3 Ways)
Necessary Equipment
Hot glue gun and hot glue: A hot glue gun it a must for this craft. I like that the hot glue gun at this link can be used with low heat or high heat. Always be very careful with hot glue guns and glue around children (and you too!).

Enjoy!
If you try this craft, let me know! Go ahead and leave a comment, rate it, and tag a photo with #WelcometoNanas wherever you post.
Come join the fun at https://welcometonanas.com
Colorful DIY Paper Bag Star Craft for Party Decor
Equipment
- Hot glue gun and hot glue
- Scissors
- Hole punch
- Stapler (optional)
Items Required
- White paper bags (8 per star)
- Acrylic craft paints or colored markers or colored pencils
- Hole reinforcers (optional)
- Fishing line or String to hang the star
- Adhesive Velcro circles (optional)
Instructions
- Get out 8 paper lunch bags for this craft. There is the link to a full length video tutorial if you would like to watch or make colorful and beautiful paper bag stars with me step-by-step!
- Paint the fronts of the bags with acrylic craft paints in various patterns and colors. Let dry. Repeat this on the sides of the bags, then the backs of the bags.
- Lay the 8 decorated bags down in a stack with the folded ends towards you and the flat sides up (once dry). Take one bag from the stack and move the others to the side.
- Use a hot glue gun to make an upside down “T” shape down the center of the bag and across the bottom.
- Lay the second bag on top (flat side up, folded end to the bottom).
- Repeat and glue a third bag to this group.
- Draw the design you want to cut as star “tips” on the open end of the top bag in this group of three. For a star this can just be triangle shapes for a tip.
- Cut the unfolded ends of the first 3 bags with this drawn design.
- Glue on three more bags with the “T” of hot glue.
- Cut the open end of these three bags using the first cut as a guide.
- Repeat this with the last two bags.
- Pull the first bag on the stack of bags around in a circle so it meets the back of the last bag, creating a 3-D star!
- You can use a “T” of hot glue to attach these two end bags, staple them together, use double-sided tape, or use adhesive Velcro circles. This holds the bags in the star shape.
- Punch a hole in the tip of one of the star points and hang the bag by fishing line or string.



Leave a Reply