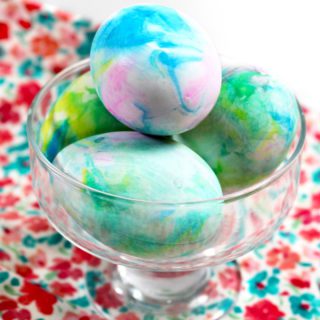
Tie-Dyed Easter eggs....groovy!!
Learning how to tie-dye Easter eggs with shaving cream was so easy and fun. The kids are going to love this one! It makes unique swirls and designs on each egg- they look tie-dyed.
Once you've got the materials out, try making Shaving Cream Marbling on Paper too! It's a fun variation on the idea and the results are AWESOME.
Hard boil your eggs
Before you get things set up, hard boil your eggs and let them cool down. I’ve been hearing about how easy this is to do in an Instapot. Have you tried this?
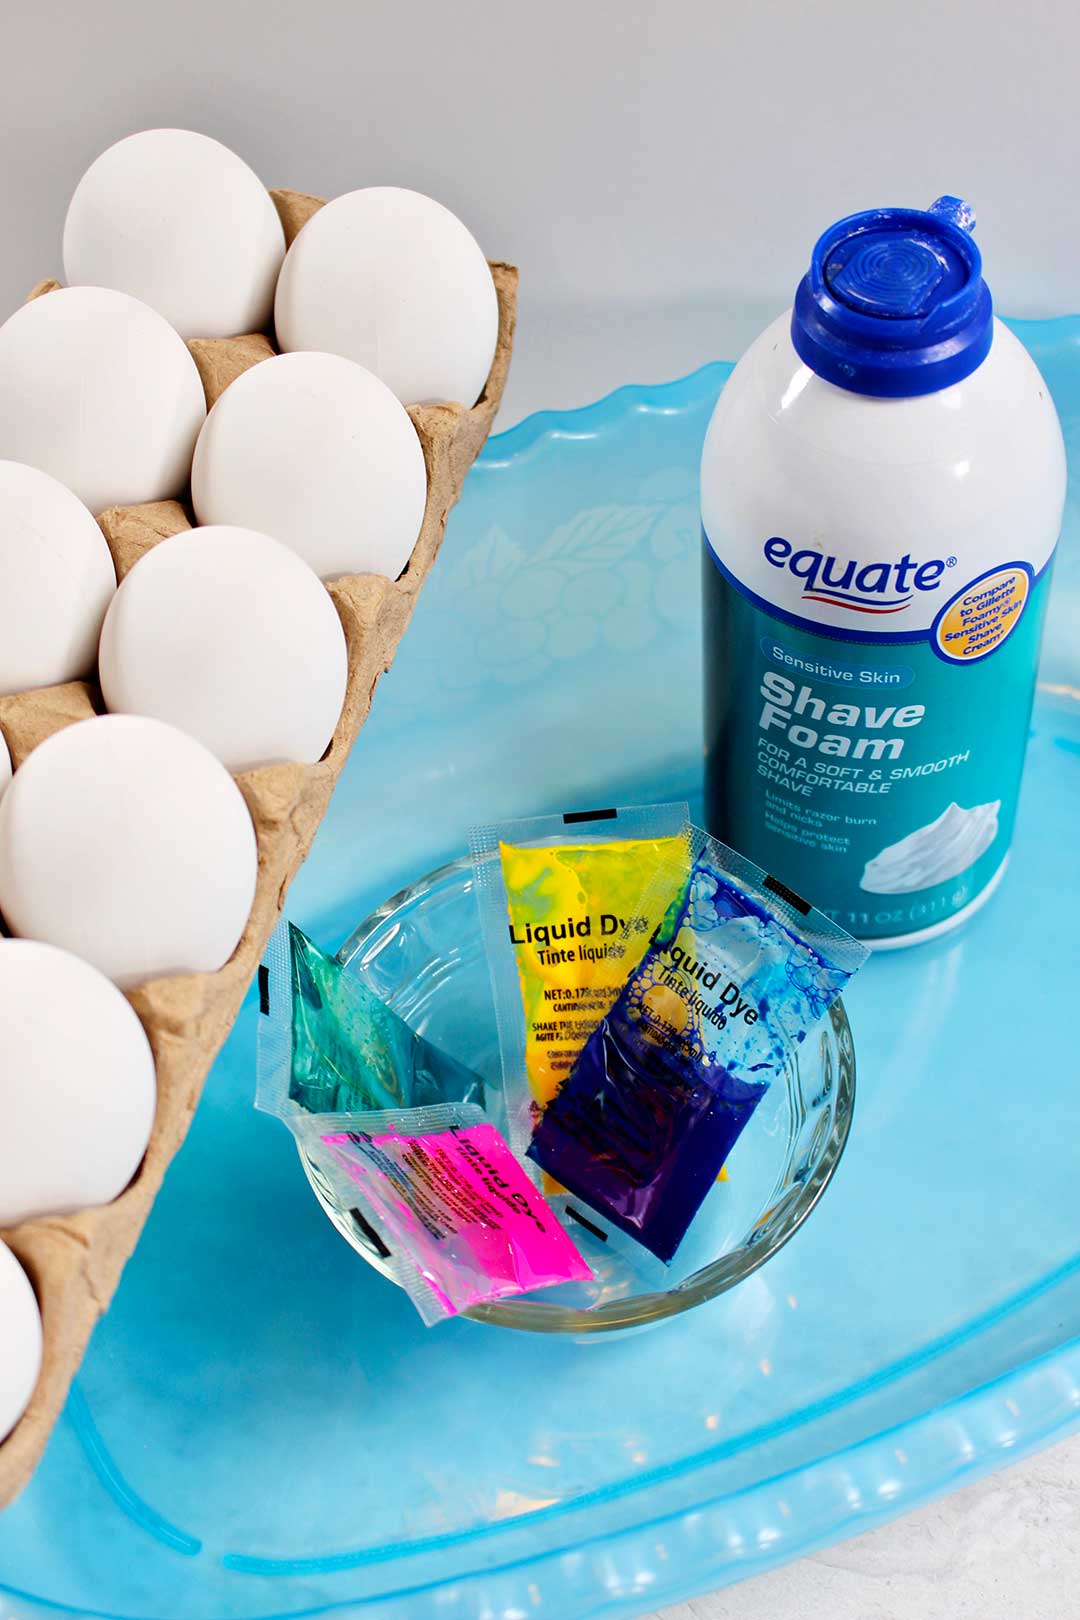
Let the eggs soak in some vinegar for a few minutes to get the dye to set well. Wipe them off so they are dry. I skipped the vinegar step and you can see that my egg colors are more pastel colored. Next time I’ll use the vinegar!
Spray the cream...mounds of fun!
Spray the shaving cream out into the shallow dish to about 1 ½ inches deep. I tell you what, it never gets old to spray shaving cream! Don’t you love seeing the foaming mounds of squirt out of the can?
Level off the shaving cream on top using a spoon or plastic scraper.
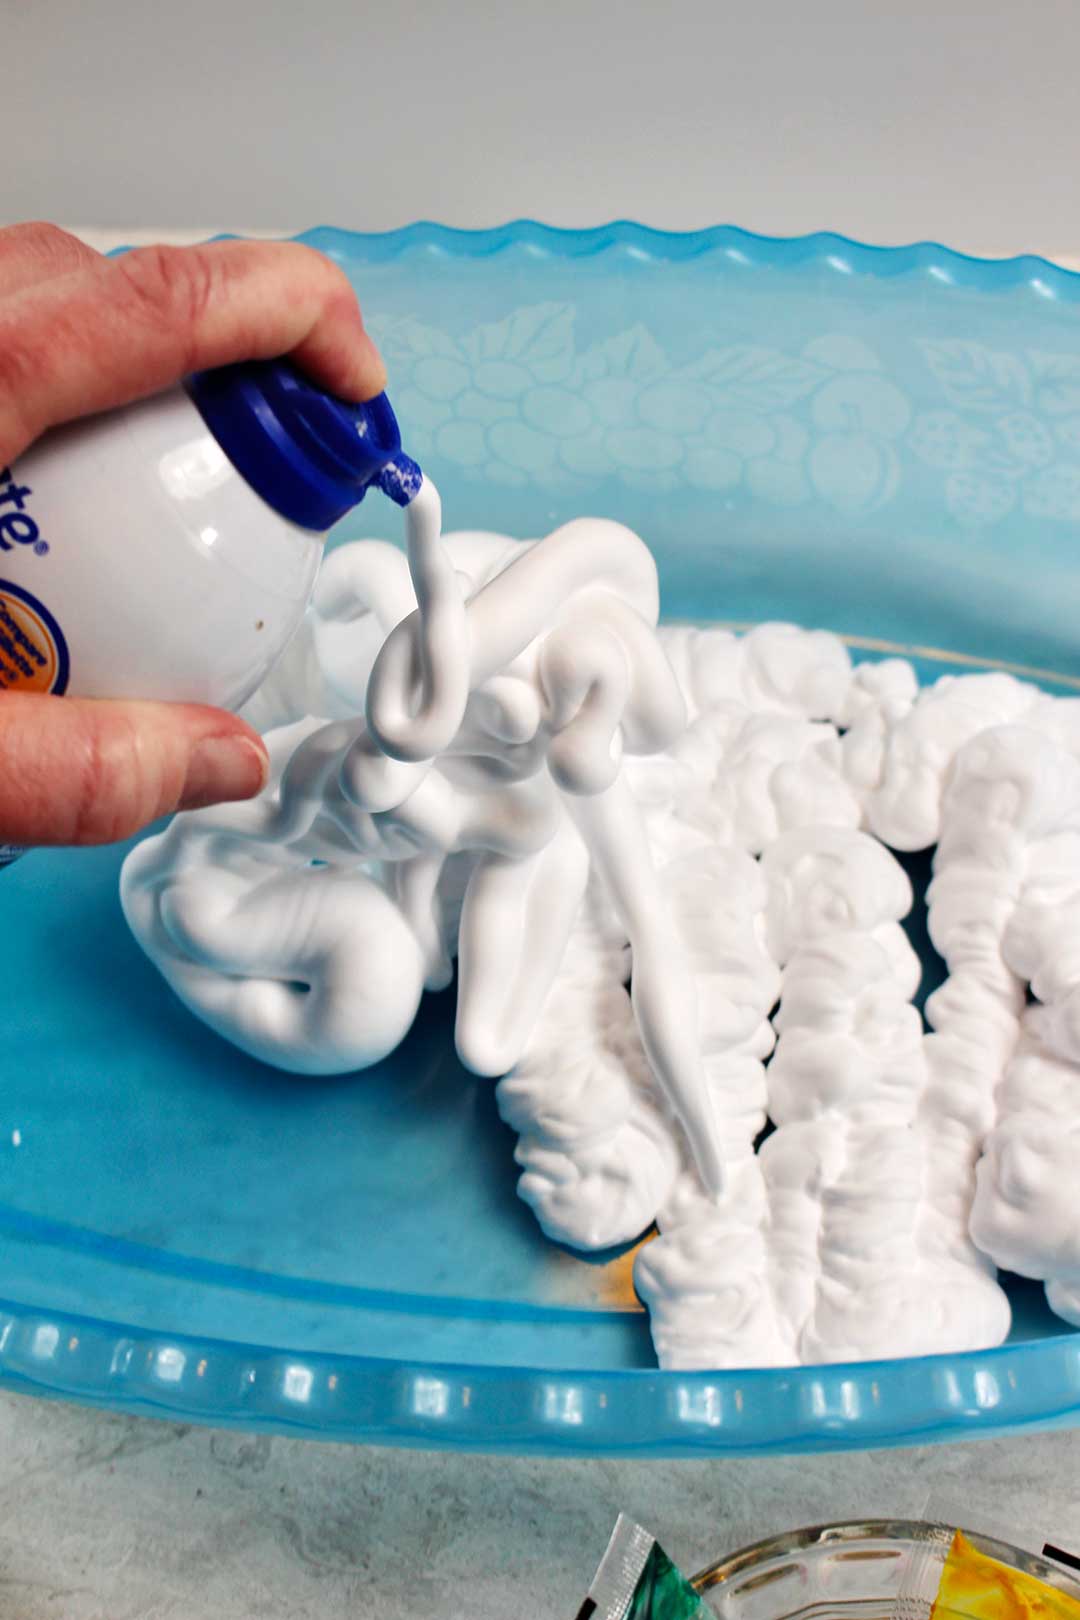
Note: Remember that shaving cream really hurts if it gets in the eyes. Don’t rub your eyes while working with shaving cream. I have been told that you can use whipped cream instead of shaving cream for this technique and I’m going to try that next time. Sounds like the answer to this problem. Plus, I don’t plan to eat eggs dyed with shaving cream. If you use whipped cream that will solve that problem too!
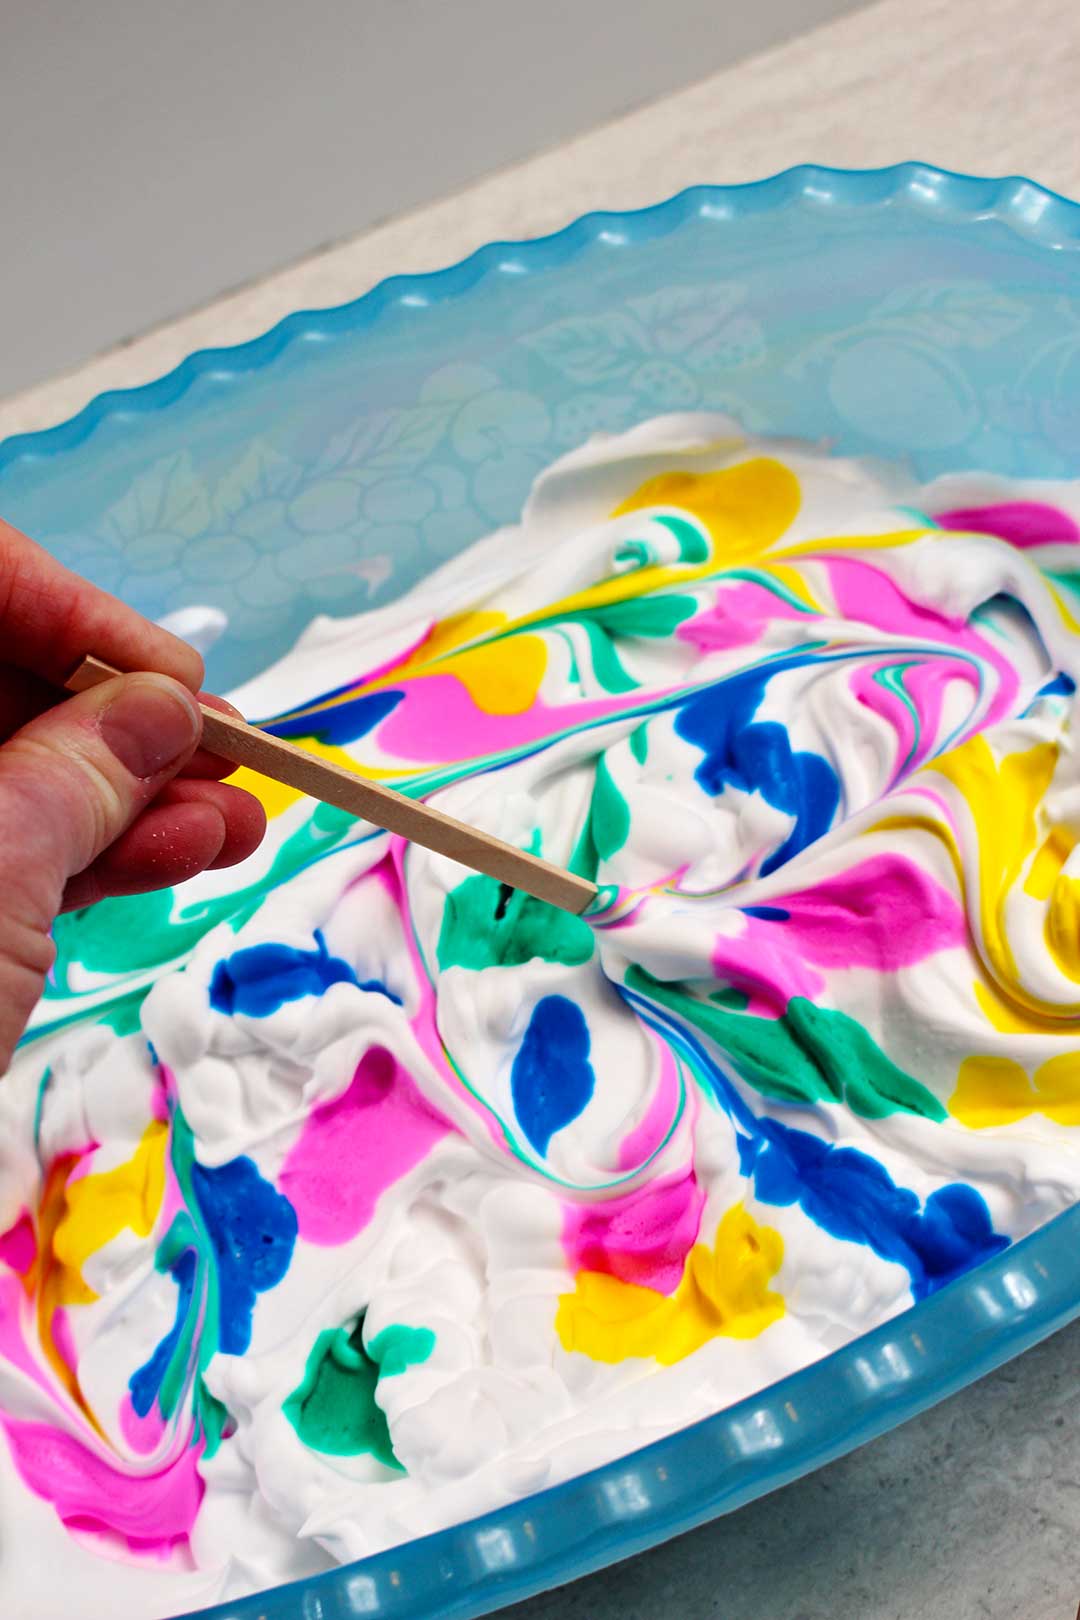
Drips and swirls of dye-
Lay down some paper to protect your table or counter from being tie dyed too.
I used some packaged easter egg dye that you see in the pictures but it works to use regular food dye as well. Use each color and drip the dye over the surface of the shaving cream. Keep the drops random and try to keep them from touching.
Stir the dye and shaving cream with a toothpick, popsicle stick or Q-Tip to make the colors swirl into the shaving cream. Don’t over stir or the colors will get muddy and not make swirls of color on the eggs.
I used plastic gloves on the next steps to keep from dying my hands colors. You may also want to consider a paint shirt or apron for the little artists as well as yourself.
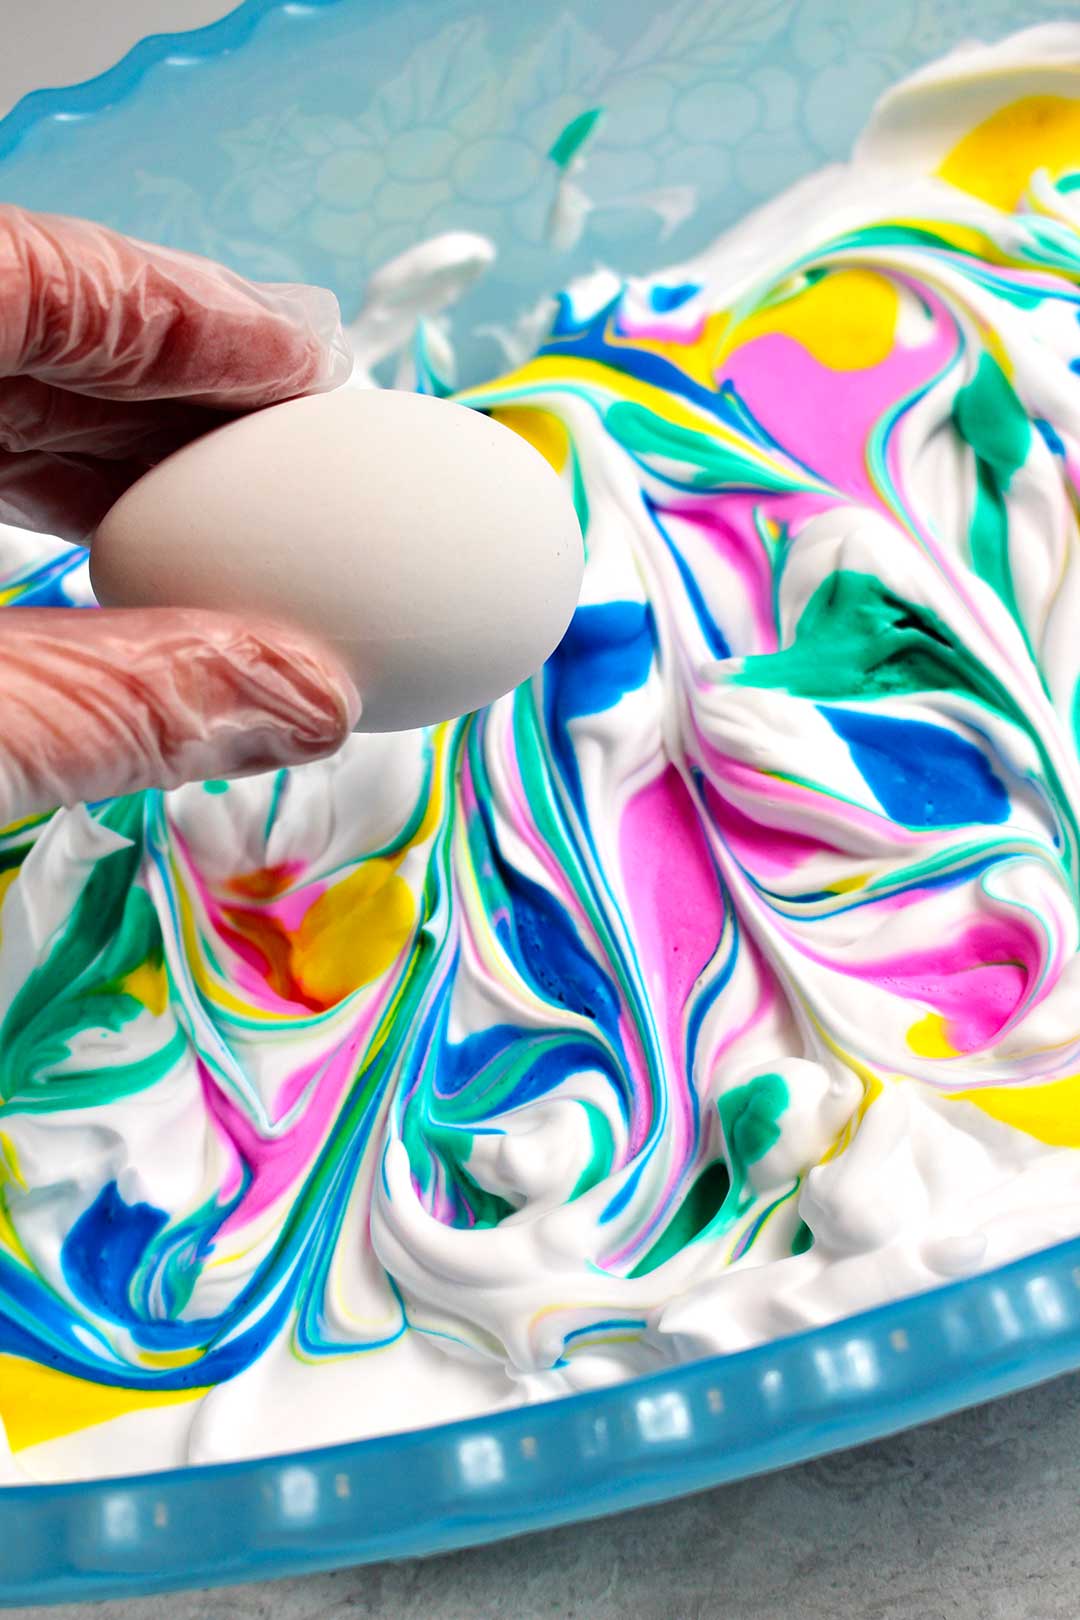
Dye the eggs
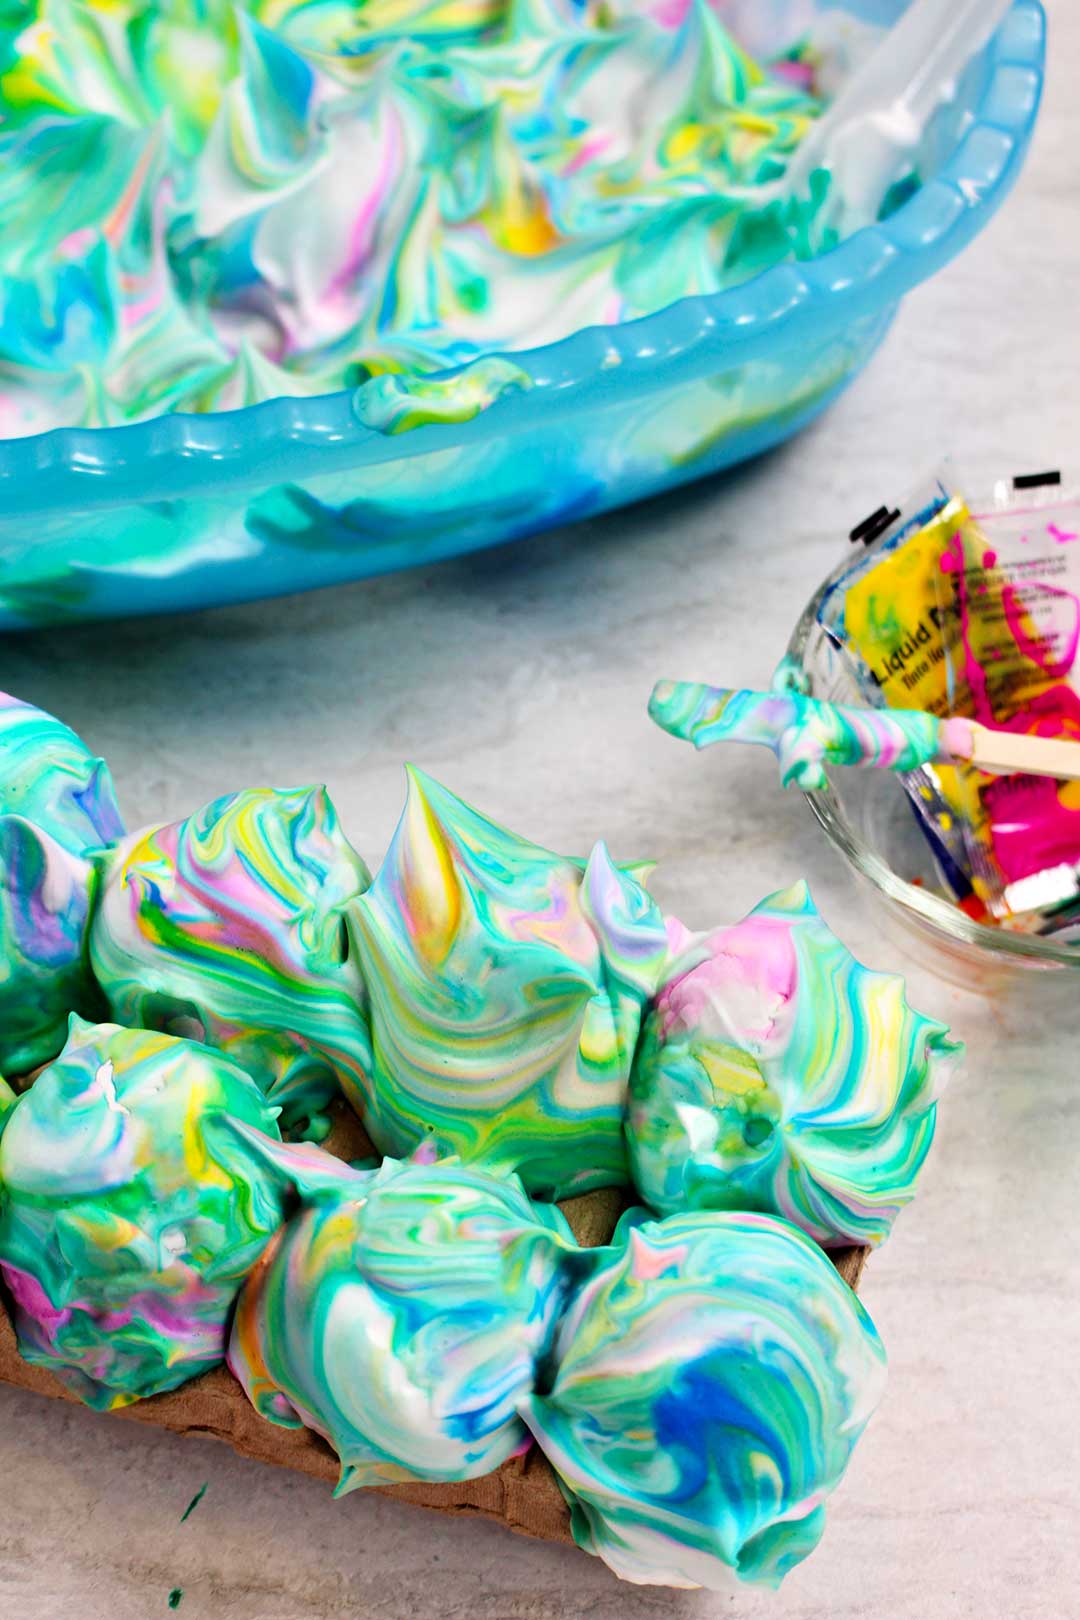
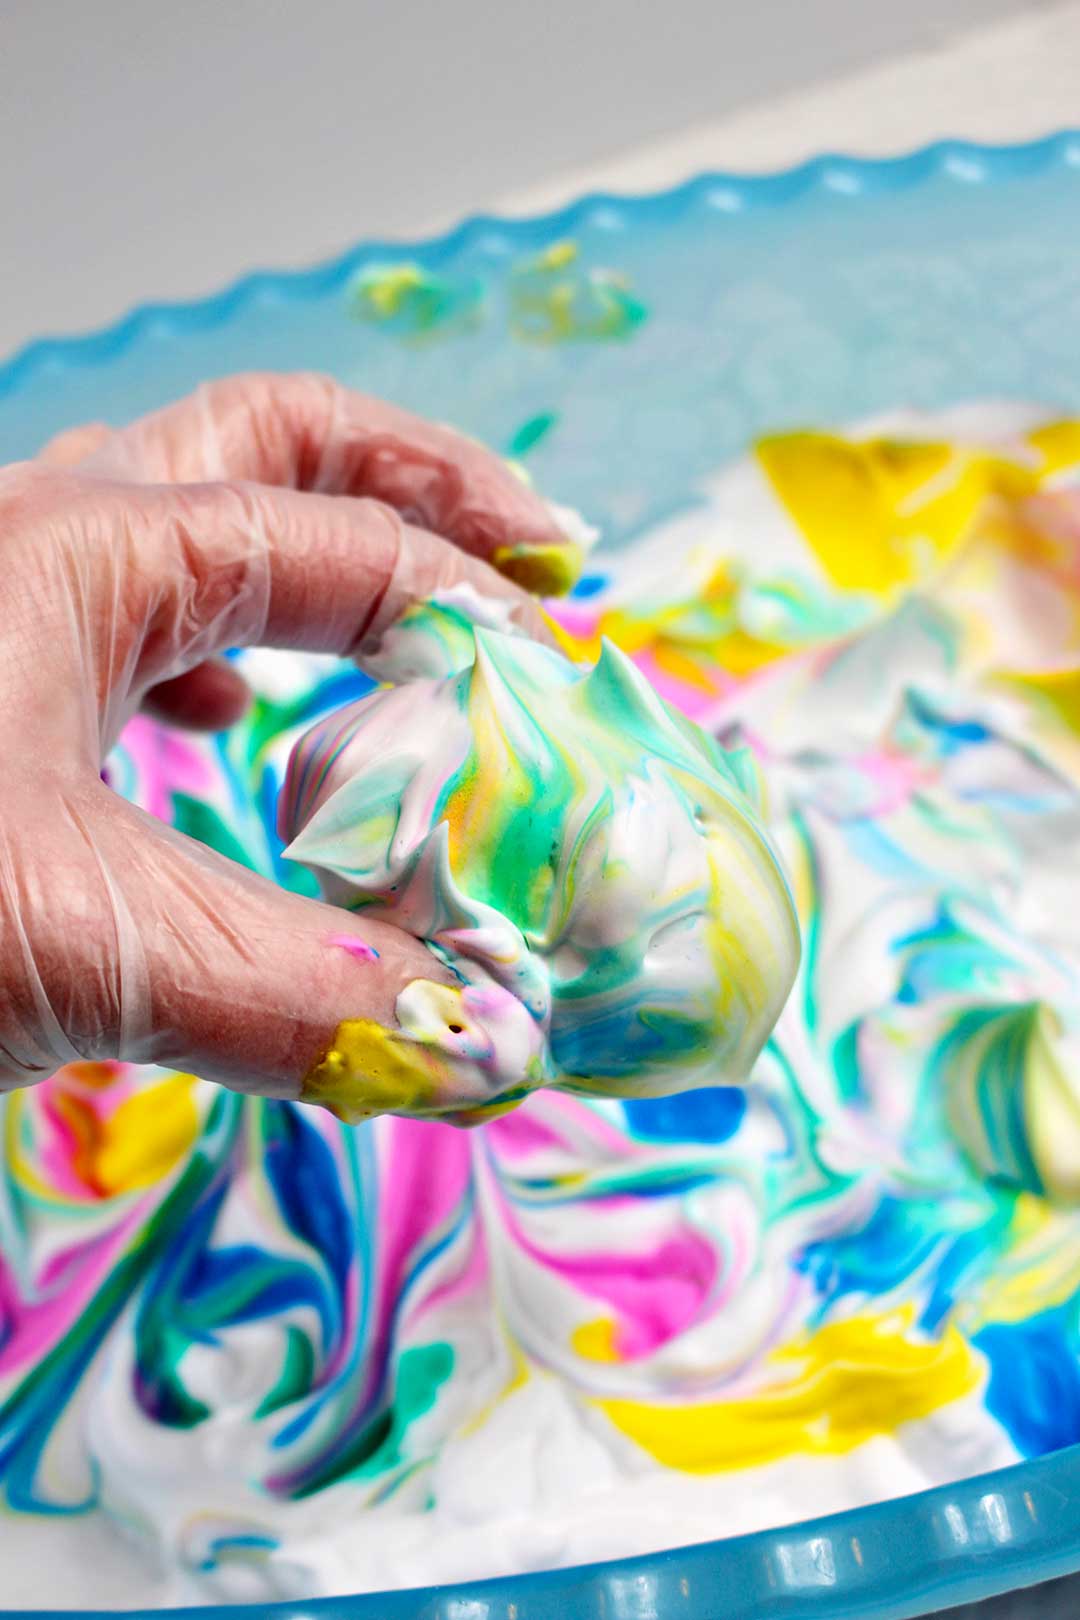
Place the egg down into the shaving cream and give it enough of a roll to cover it with cream and color. Don’t roll and roll it or it will muddy the colors in the pan.
Set the egg down on a paper or in the egg container to sit for a while and absorb the dye.
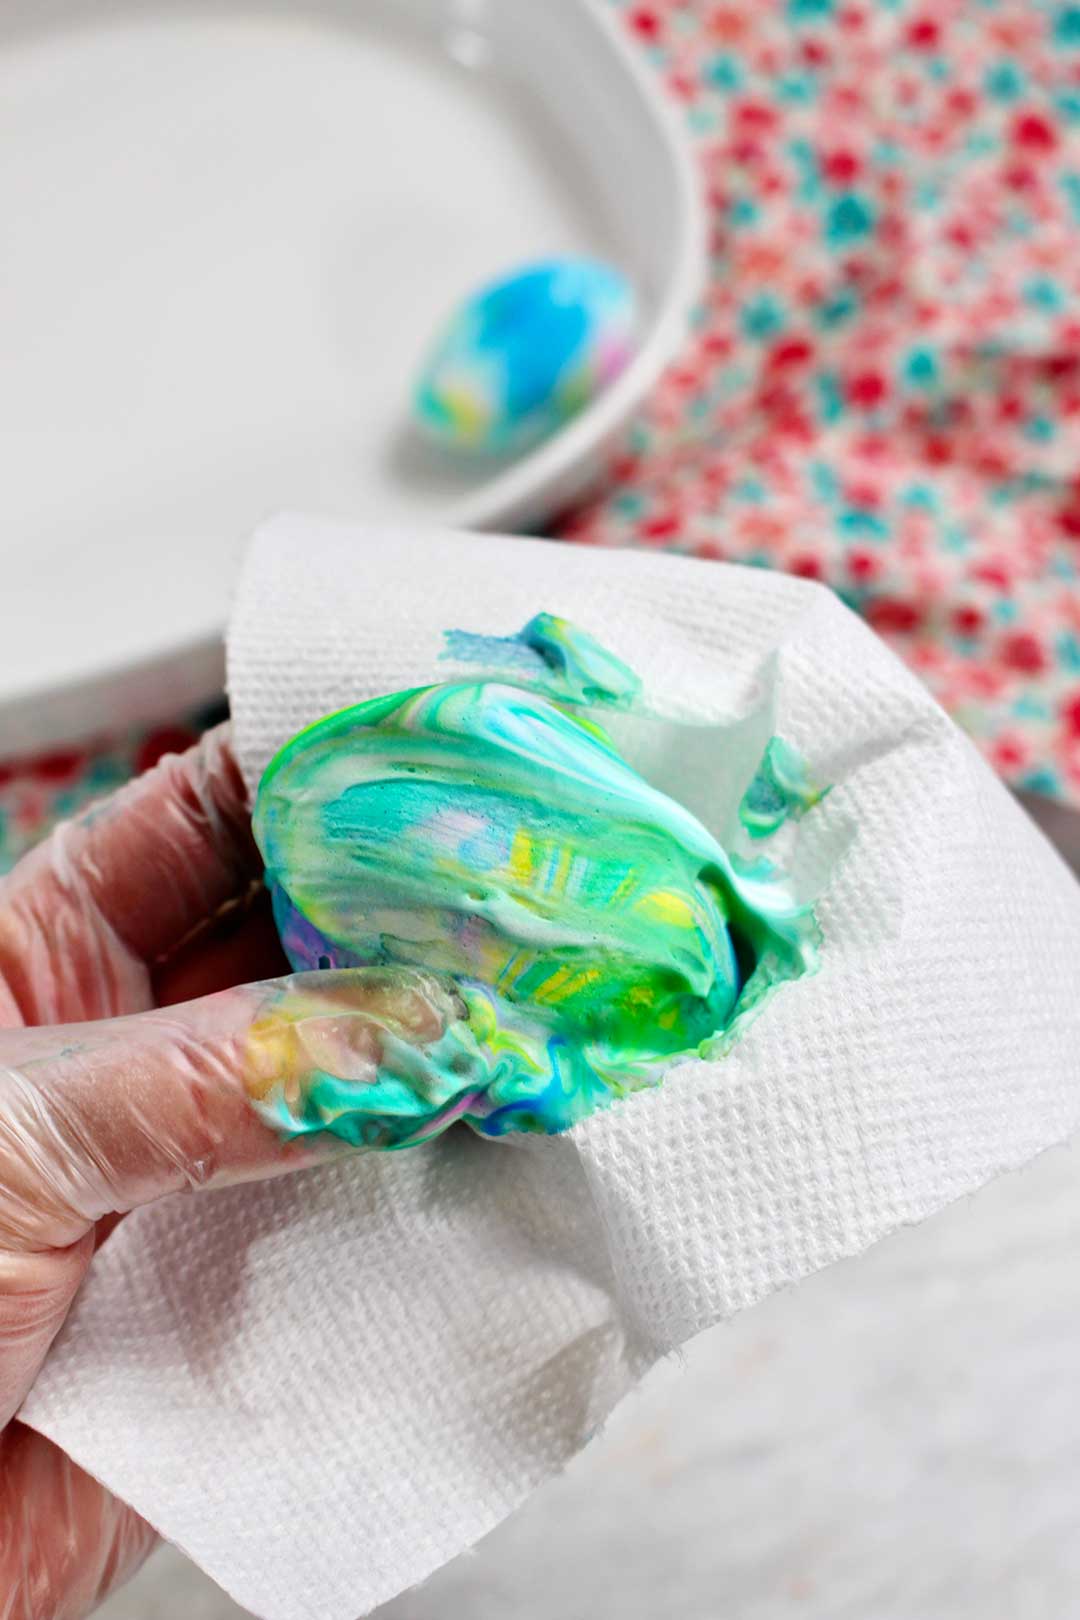
Wipe the shaving cream off the surface of the egg.

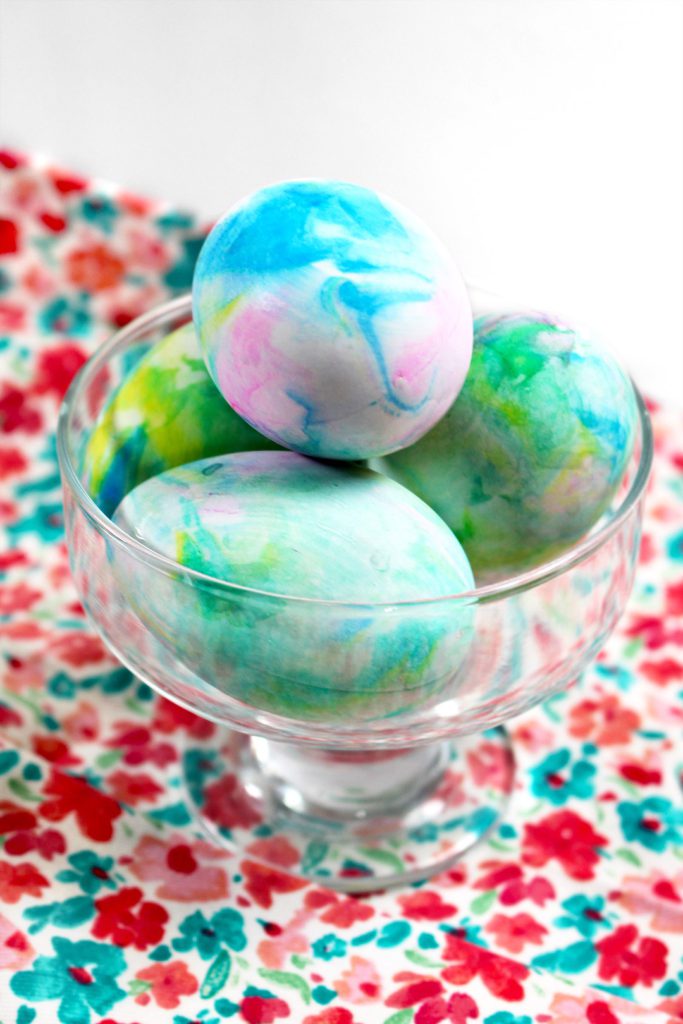
That's all there is to it! Easy peasy
That’s it!! Aren’t the patterns beautiful? Each one is different and unique, just like your grands. Don’t forget to tell them that when they ooh and aah over the eggs.
Tip: You can put stickers on the eggs or rubber bands around the egg to get patterns that show through the dye when they are removed. There are so many things I want to try, not enough time.
If you don't want the mess of shaving cream, you can also try painting wooden eggs! Or if you are on a roll with real eggs, try some of these other fun egg decorating ideas.
Happy Easter from Welcome to Nana's!
I wish you a very happy Easter and want you to know that I appreciate you, friend. Hoping it is a time of connection with family.
Enjoy!
Welcome to Nana’s! Where there’s fun things to do with your “grand” kids!
Come join the fun at www.WelcomeToNanas.com
How to Tie-Dye Easter Eggs with Shaving Cream
Equipment
- Shallow baking dish
- Apron or paint shirt (optional)
Items Required
- Shaving cream (not gel)
- OR Whipped topping
- Food dye or easter egg dye
- Vinegar (optional)
- Toothpick or popsicle stick
- Eggs- hard boiled
- Paper towels
- Plastic gloves (optional)
Instructions
- Let the eggs soak in some vinegar for a few minutes to get the dye to set well, then wipe them off
- Spray the shaving cream out into the shallow dish to about 1 ½ inches deep, level off.
- Use each color and drip the dye over the surface of the shaving cream.
- Stir the dye and shaving cream with a toothpick, popsicle stick or Q-Tip to make the colors swirl into the shaving cream.
- Place the egg down into the shaving cream and give it enough of a roll to cover it with cream and color.
- Wipe the shaving cream off the surface of the egg. Oooh and aaah, so pretty!!!
- Shaving cream (not gel)
- OR Whipped topping (I haven’t tried this one personally but it should work in a similar manner)
- Shallow baking dish
- Food dye or easter egg dye
- Vinegar (optional)
- Toothpick or popsicle stick
- Eggs- hard boiled
- Paper towels
- Plastic gloves (optional)
- Apron or paint shirt (optional)


Paula Edmunds says
Hi Shelly
I enjoy browsing through some of your ideas. I actually used this method with my residents in making note cards.
Shelly says
Great idea, Paula!!
Rachael says
so cool! how do you do that?
Rachael says
the note cards?
Shelly says
All of the instructions are in the post- are you meaning doing this technique on notecards? I've never tried that!!
nicole says
hi - do you thing this could word on plastic/styropor eggs?