What? No parade?
Our county schools all get a day off each spring for an all schools day parade. It is a pretty big deal for all the school bands, royalty and various other floats to have a grand parade. It was so disappointing to have it cancelled this year, it’s been going for over 110 years!
Let's have our own parade!!
Well that was a shame, but no virus can keep us from having our own parade, can it?! To get ready let's make musical instruments for kids.

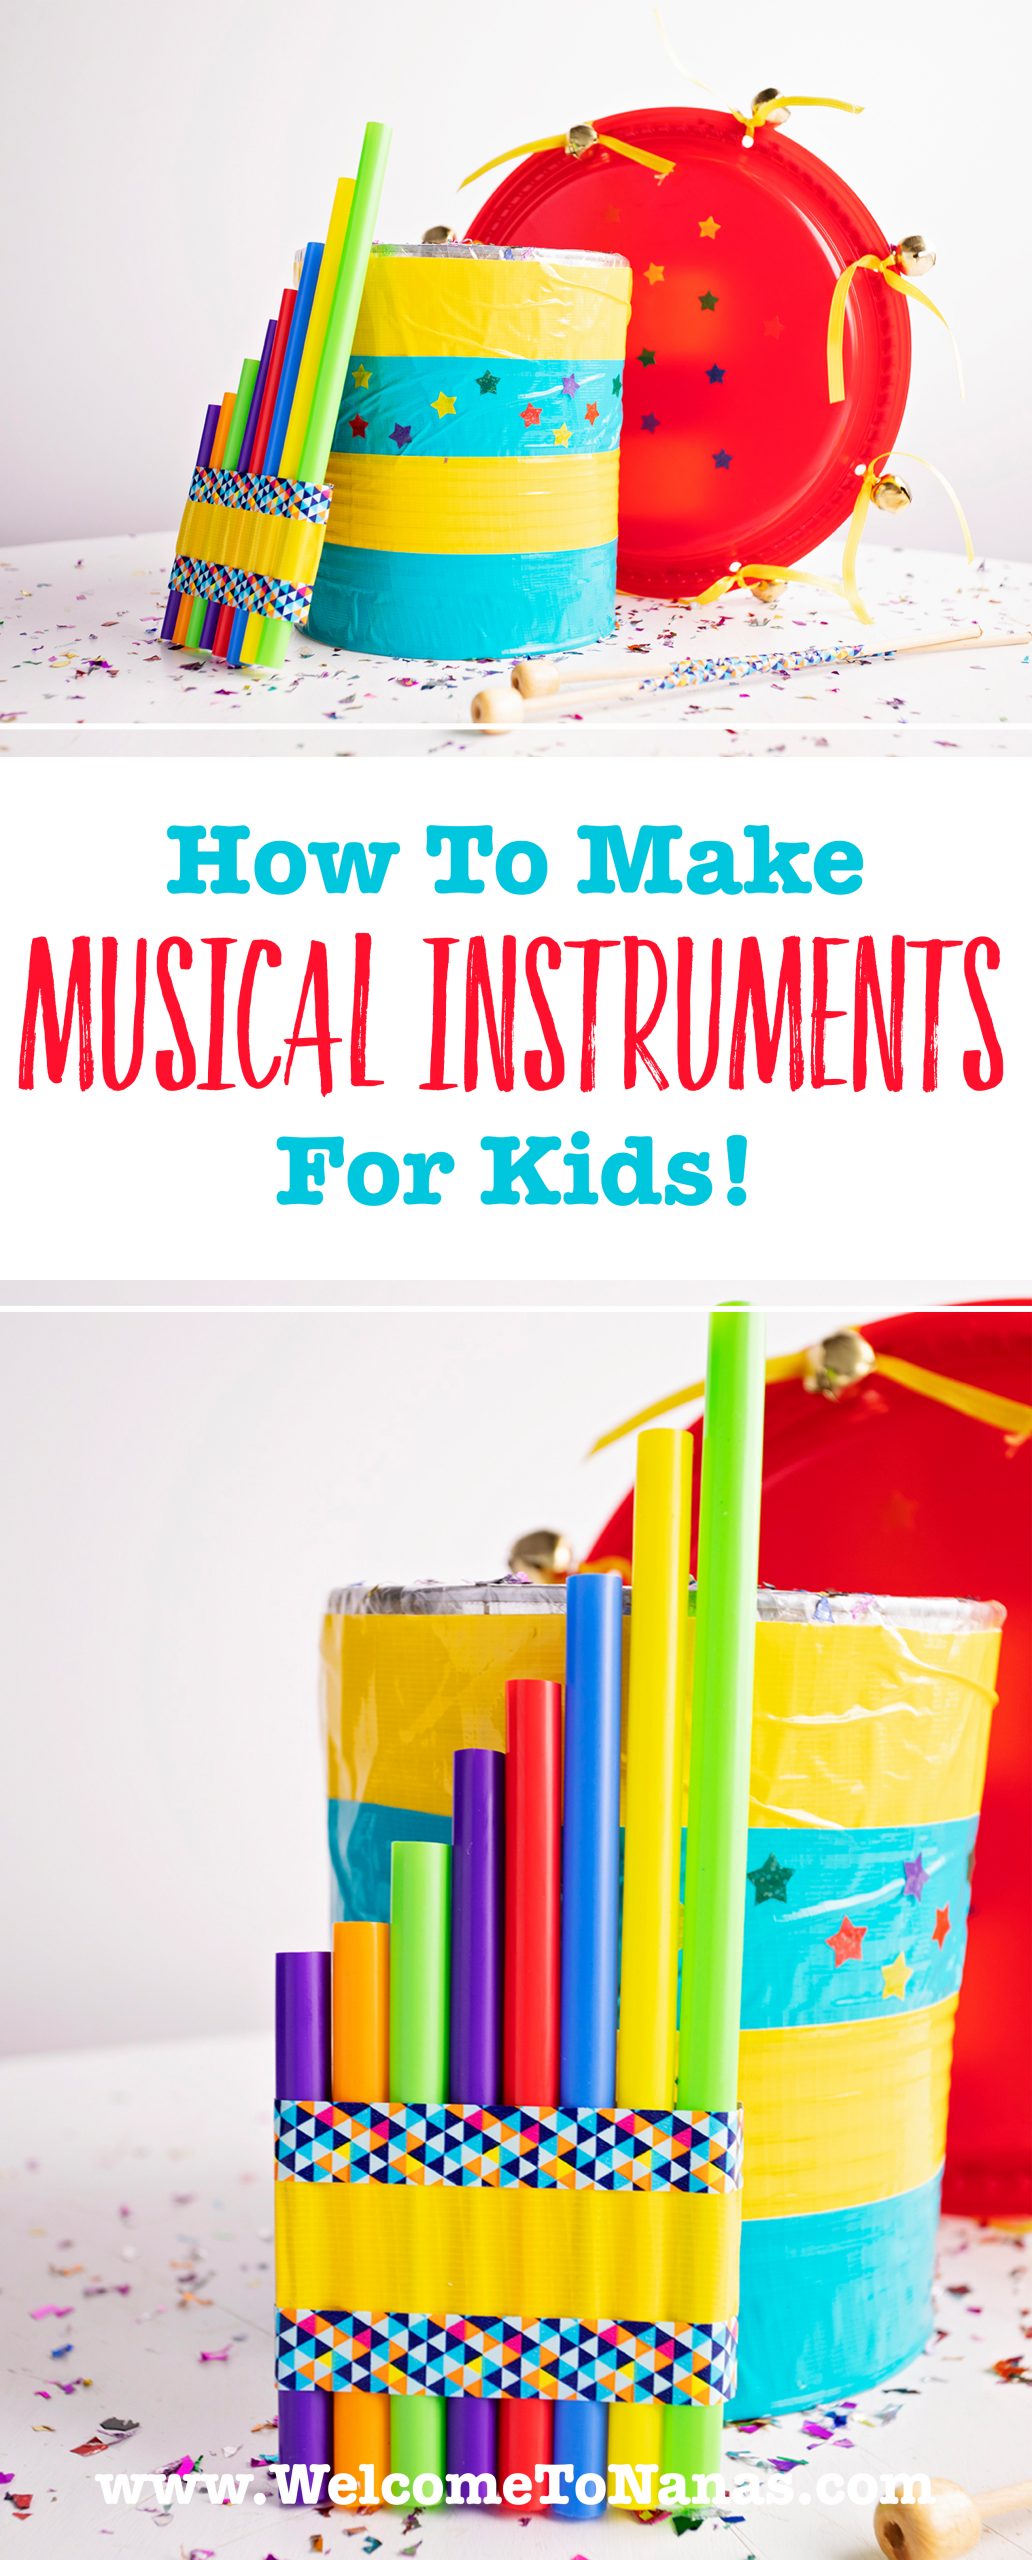
Make Three Musical Instruments for Kids
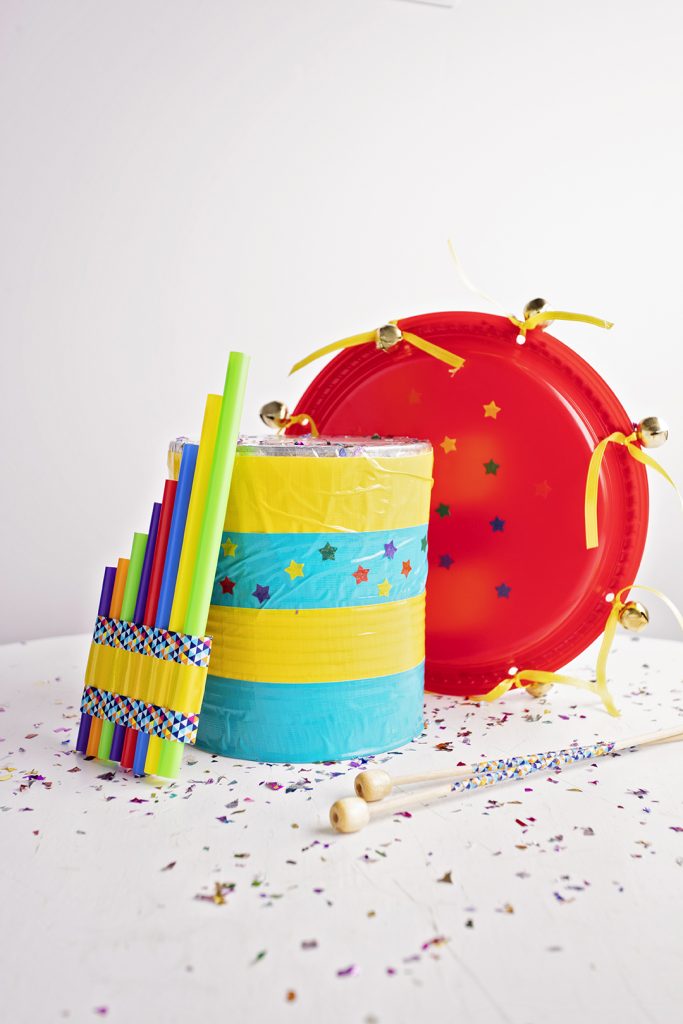
Here are three homemade musical instruments you and the grands can make yourself; a drum, a tambourine and a fife. Organize your own little parade and have some fun!!
Drum instructions:
Cut off the top of the container to be used. The container should be very stiff. A one gallon can works the really well. To get a can you could put out a plea on Facebook or purchase a gallon can of applesauce at the grocery store. Don’t laugh, the extra apple sauce can be put in the freezer to pull out when needed…like in a pandemic!
Puncture the bottom of the can with a “church key” can opener in order to have the sound resonate inside the drum.
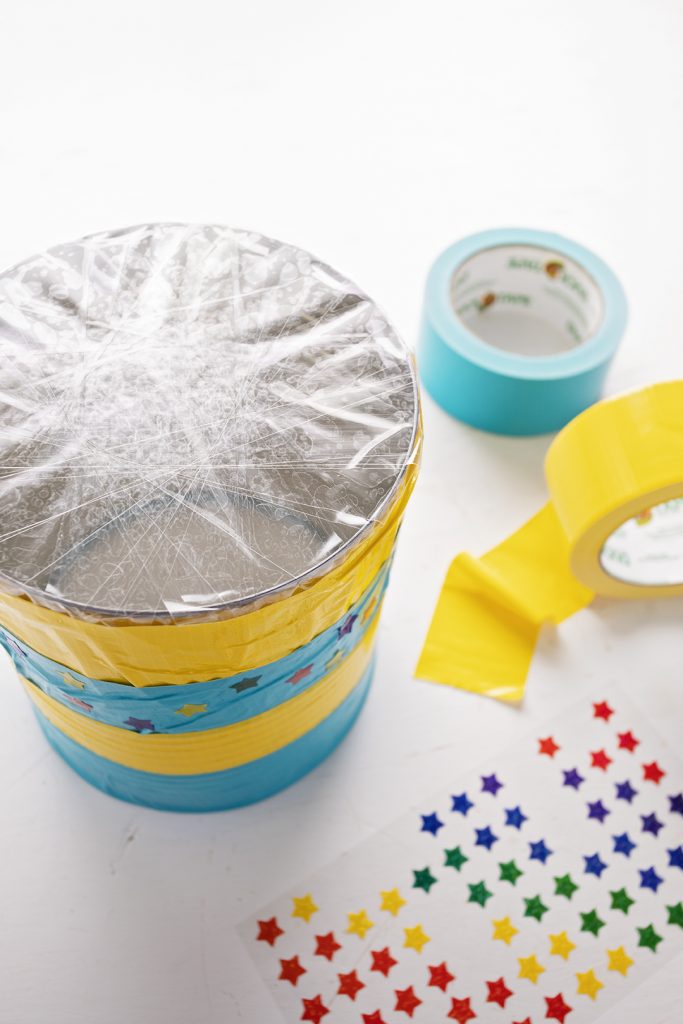
Stretch packing tape over the open end of the can, from one side to the other. Make an X at 90 degree angles, then another X at 45 degree angles. Continue making X’s until the top is covered with two layers of packing tape.
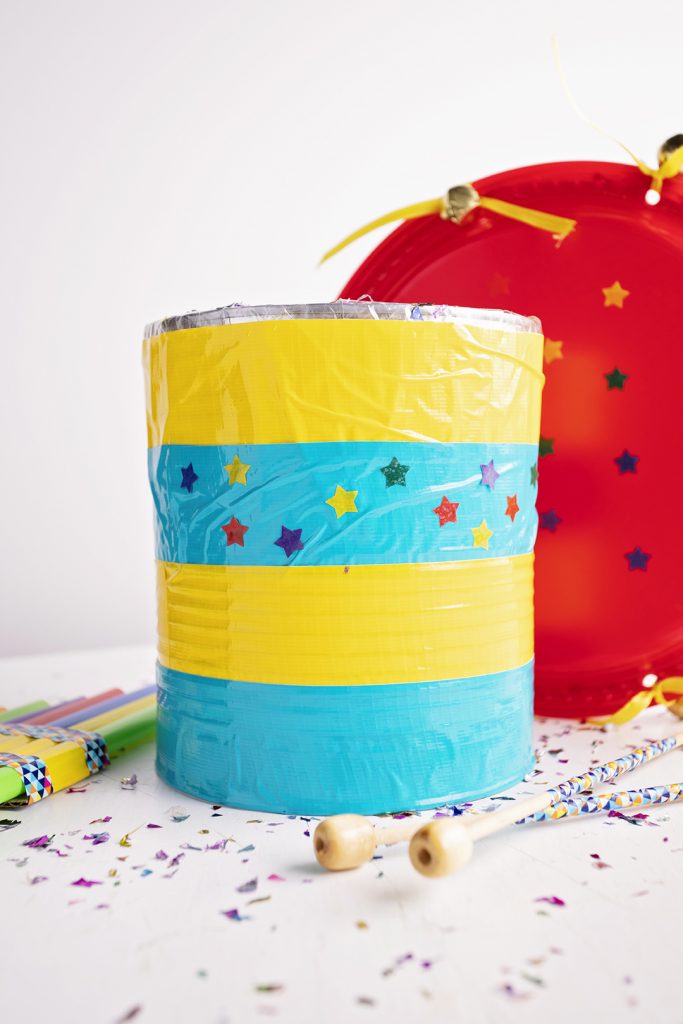
On the side of the can, wrap colored duct tape all the way around the top edge so that it covers the edges of the packing tape. Continue to wrap and decorate the side of the can with other colors of duct tape and decorative tapes and homemade stickers.
Drum sticks too, of course!
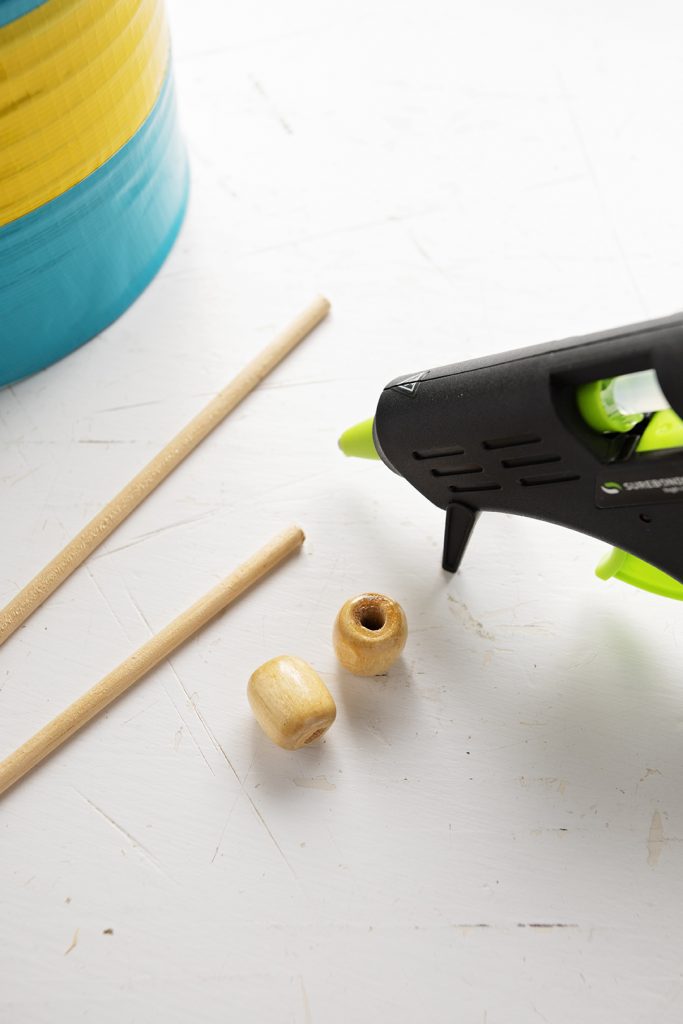
Drum sticks- Cut the ¼ inch dowel into two pieces that are about 10 inches long. Put some glue into the wooden beads and put one on the end of each dowel. You can paint the sticks and bead or wrap them in decorative tape if you want. OR, use two 10 inch pieces of ½ inch dowel and no beads, decorate if desired. Chop sticks could work as drum sticks as well.
That was the most complicated of our three homemade instruments for kids. How does it sound?
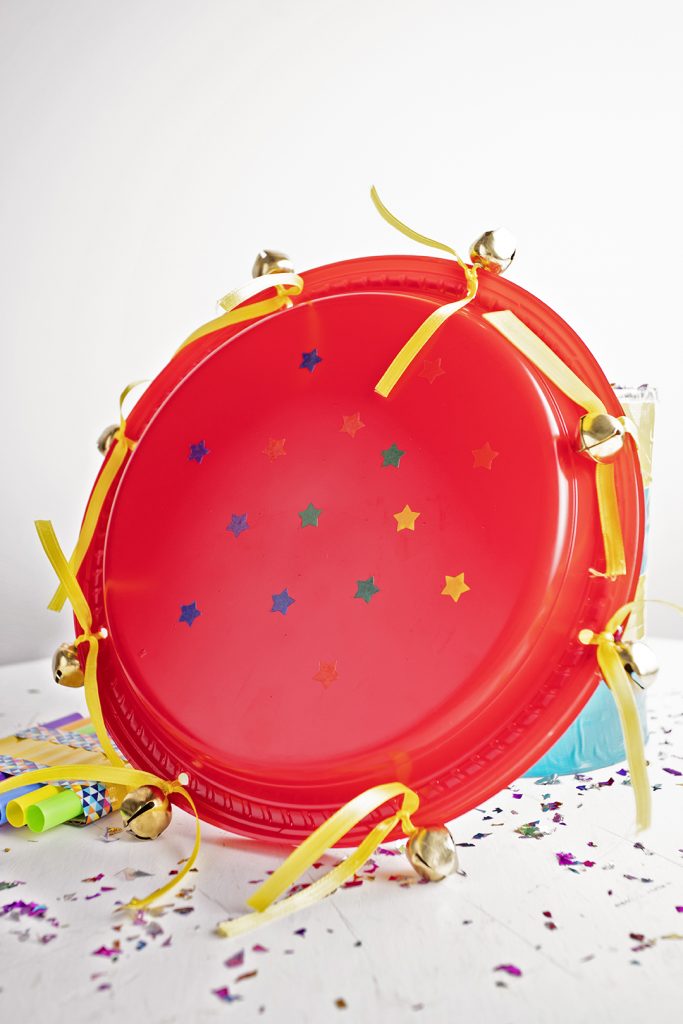
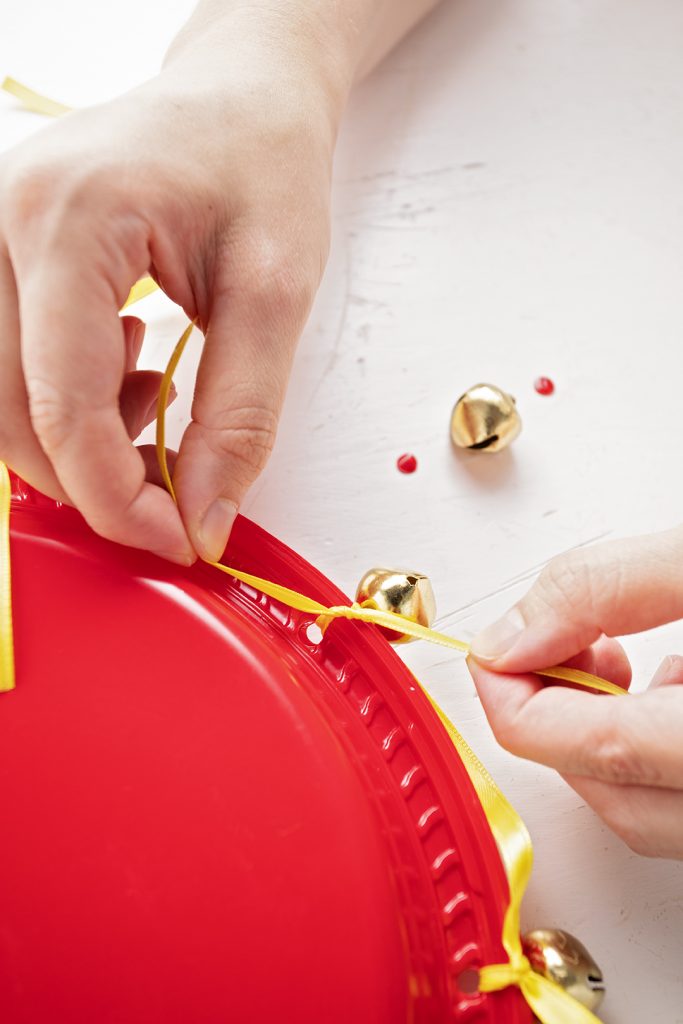
Tambourine instructions:
Place the two plates together with eating surfaces facing one another. Think of the plate as a clock. You will use the hole punch to punch holes at 12, 3, 6, and 9 o’clock first. Punch a set of holes through the edge of both plates. Thread an eight inch piece of ribbon through one set of holes and tie on one jingle bell as you tie the ribbon in a knot. Continue this same process for all four sets of holes. Then punch another set of 4 holes located half way between the first four sets of holes. Tie each set of holes with a ribbon and a bell.
That was easy!! Give it a shake. How does it sound??
Now for the last homemade instrument for kids.
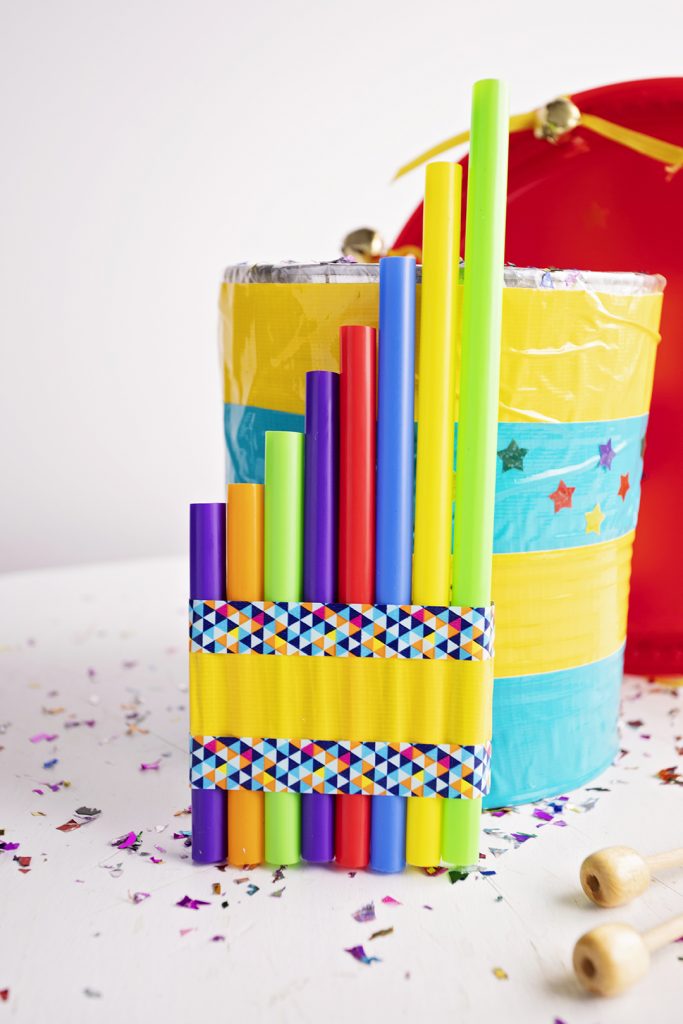
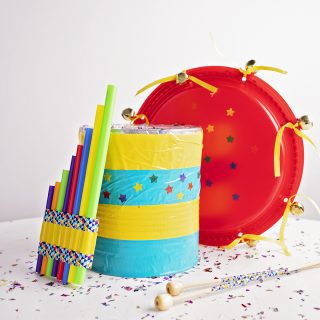
Fife instructions:
Cut 8 large circumference straws to the following lengths: 9, 8, 7, 6 ⅜, 5 ¾, 5, 4 ½, 4 ¼ inches long. This will make an octave!
Tip: For your info, cut off a bit more straw to make the note higher to “tune” the fife.
Cut a piece of cardboard two inches wide and the same length as the width of the 8 straws.

Place the straws on top of the cardboard. They should be in order, right to the left from the longest to the shortest. The tops of the straws should be even across the top and slightly higher than the cardboard.
Use duct tape to place over the straws and around the back of the cardboard to hold them in order.
Play your fife by blowing air into the straws. Can you play a tune?
Woo-hoo! You’re done. How does it sound?
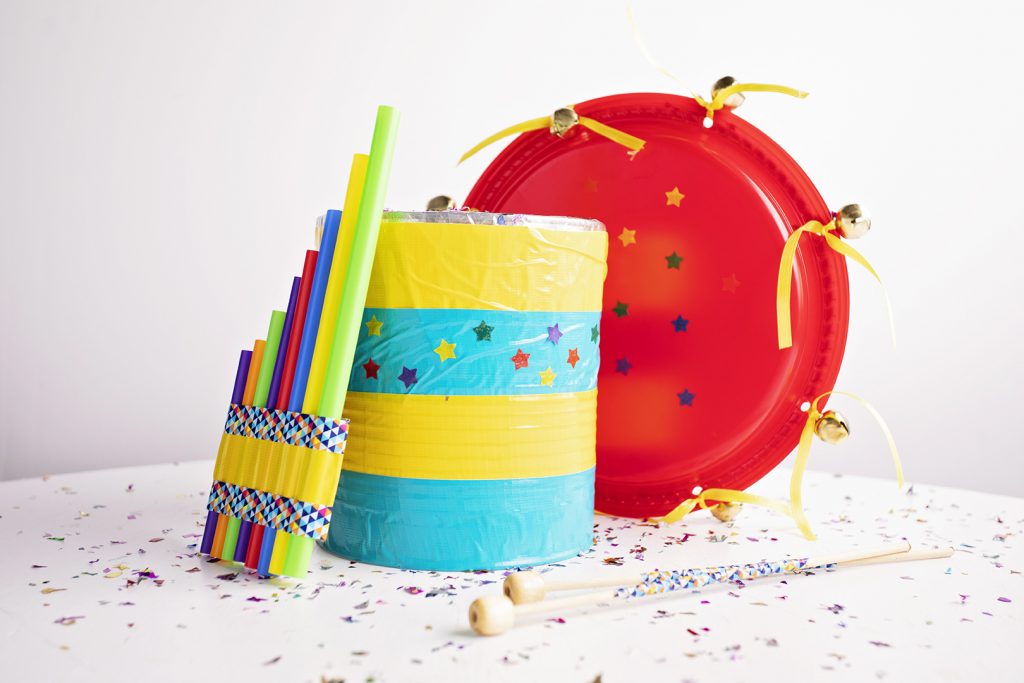
Now, have your own parade!
Grab your instruments and a couple friends and enjoy your parade!! Pots and pans and wooden spoons will fit right in too.
We will make more instruments in a future post!!
Enjoy!
Welcome to Nana’s! Where there’s fun things to do with your “grand” kids!
Come join the fun at www.WelcomeToNanas.com
How to Make Musical Instruments for Kids
Equipment
- Scissors
- "Church Key" can opener
- Round Hole Punch
Items Required
Drum Materials
- 1 Large can/container something with stiff sides works best
- Packaging Tape
- Colored Duct Tape for decorating
- Stickers for decorating
- ¼ inch dowel
- 2 wooden beads with large holes (¼ inch at least)
- OR ½ inch dowels
- Wood glue or hot glue
Tambourine Materials
- 2 Paper or plastic plates
- Jingle Bells, ¾-Inch
- Ribbon
Fife Materials
- 8 Large Diameter Smoothie Straws
- 1 Small piece of cardboard
- Colored Duct Tape
Instructions
Drum Instructions
- Cut off the top of the container to be used. Puncture the bottom of the can with a “church key” can opener in order to have the sound resonate inside the drum.
- Stretch packing tape over the open end of the can, from one side to the other. Make an X at 90 degree angles, then another X at 45 degree angles. Continue making X’s until the top is covered with two layers of packing tape.
- On the side of the can, wrap colored duct tape all the way around the top edge so that it covers the edges of the packing tape. Continue to wrap and decorate the side of the can with other colors of duct tape and decorative tapes and stickers.
- Drum sticks- Cut the ¼ inch dowel into two pieces that are about 10 inches long. Put some glue into the wooden beads and put one on the end of each dowel. You can paint the sticks and bead or wrap them in decorative tape if you want. OR, use two 10 inch pieces of ½ inch dowel and no beads, decorate if desired. Chop sticks could work as drum sticks as well.
- That's it! Ready to keep the beat?
Tambourine Instructions
- Place the two plates together with eating surfaces facing one another.
- Think of the plate as a clock. You will use the hole punch to punch holes at 12, 3, 6, and 9 o’clock first. Punch a set of holes through the edge of both plates.
- Thread an eight inch piece of ribbon through one set of holes and tie on one jingle bell as you tie the ribbon in a knot.
- Continue this same process for all four sets of holes. Then punch another set of 4 holes located half way between the first four sets of holes. Tie each set of holes with a ribbon and a bell.
- Decorate as you like, and give it a shake!
Fife Instructions
- Cut 8 large circumference straws to the following lengths: 9, 8, 7, 6 ⅜, 5 ¾, 5, 4 ½, 4 ¼ inches long. This will make an octave!
- Cut a piece of cardboard two inches wide and the same length as the width of the 8 straws.
- Place the straws on top of the cardboard. They should be in order, right to the left from the longest to the shortest. The tops of the straws should be even across the top and slightly higher than the cardboard.
- Use duct tape to place over the straws and around the back of the cardboard to hold them in order.
- Decorate away, and play your fife by blowing air into the straws!
Video


Leave a Reply